If you’ve ever looked at your dog’s treats and thought, “What’s actually in these?” you’re not alone. Homemade dog treats are a game changer, trust me. You can whip up tasty snacks like Peanut Butter Banana Bites or Pumpkin and Oatmeal Snacks with just a few simple ingredients. Your pup will love them, and you’ll love knowing what’s in each bite. Curious about some fun recipes? Well, let’s explore the kitchen together.
Why Homemade?
When you think about it, why buy expensive dog treats that might’ve funky ingredients when you can whip up something delicious and healthy at home?
Why spend money on pricey dog treats with questionable ingredients? Make tasty, healthy snacks for your pup right at home!
Making healthy dog treat recipes isn’t just practical; it’s downright fun. Imagine this: your pup wagging their tail, drooling in excitement as the heavenly smell of fresh peanut butter cookies fills the air. You get to control every ingredient, ensuring there’re no harmful additives.
Plus, it’s a great way to use up leftover, sad-looking fruits or veggies. Ever tried a carrot or pumpkin dog treat? Your dog will love the taste, and you won’t have to sweat about what’s really in them.
You’ll feel like a gourmet chef, even if you’re just mixing dough in your kitchen. So, roll up those sleeves and let’s get baking; your furry friend’s taste buds will thank you.
Homemade Dog Treat Selections
When you start thinking about homemade dog treats, the options are downright delicious for your furry friend.
Have you ever whipped up some Peanut Butter Banana Bites or Pumpkin and Oatmeal Snacks? Each treat isn’t just tempting; they’re packed with goodness that’ll make your pup wag their tail with delight.
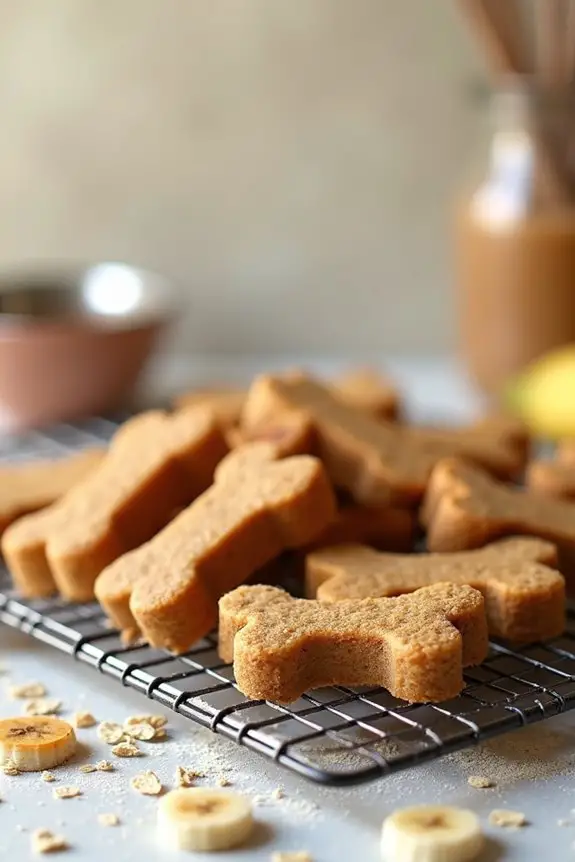
1. Peanut Butter Banana Bites
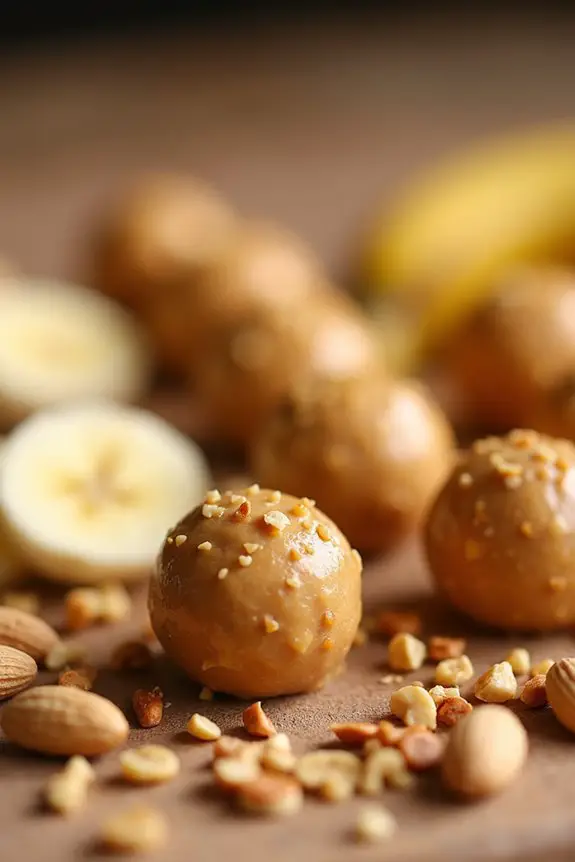
Let’s get ready to whip up some Peanut Butter Banana Bites that your pup will adore. You’ll need just a few simple ingredients, and I promise it’s super easy—no culinary degree required. Plus, we’ll throw in some optional add-ons to really jazz things up, because why not spoil your furry friend a little? With the right premium dog treat makers, you can easily create an array of delicious and healthy snacks for your dog. These machines help ensure that each treat is made with quality ingredients, providing both flavor and nutrition for your canine companion.
Ingredients
Making your own dog treats can be a fun way to show your furry friend just how much you care.
These Peanut Butter Banana Bites are super simple, and your pup will be begging for more. Plus, who can resist the sweet combo of peanut butter and banana?
Let’s get to the ingredients you’ll need to whip up these tail-wagging delights.
- 1 ripe banana, mashed (the riper, the better for flavor)
- 1/2 cup natural peanut butter (make sure it’s free of xylitol)
- 1 cup whole wheat flour (you can use oat flour for a gluten-free option)
- 1/4 cup rolled oats (because dogs need a bit of texture)
- 1/4 cup water (as needed to adjust the dough consistency)
- Optional: a few sprinkles of cinnamon (for an extra dash of goodness)
That’s it! With just these simple ingredients, you’re on your way to becoming a dog treat chef.
Just don’t let your pup see the bananas before you’re ready to mix—they might think it’s time for a snack break.
I mean, who can resist the charm of a dog looking up at you with those big, hopeful eyes?
Step by Step Instructions
Start by gathering all your ingredients and equipment, so you’re ready to go. It makes the whole process smoother, trust me. Now, let’s get to those tasty Peanut Butter Banana Bites your furry friend is going to love.
- Preheat your oven to 350°F (175°C). This gets things nice and toasty for the treats.
- In a mixing bowl, mash 1 ripe banana with a fork until it’s nice and smooth. A bit of texture is okay, but we don’t want any chunks big enough for your pup to avoid those bites.
- Whisk in 1/2 cup of peanut butter until well combined. Make sure it’s dog-safe peanut butter—this means no xylitol, okay?
- Add in 1 cup of whole wheat flour, and mix with a wooden spoon or spatula until a dough forms. It should be a bit sticky but come together nicely.
- Lightly flour your countertop or a cutting board, and turn out the dough. Knead it a bit just until it’s smooth—don’t overdo it, we’re not making a loaf of bread here.
- Roll out the dough to about 1/4 inch thick. If you’re feeling adventurous, you could even make it a little thicker for some bigger bites.
- Use a cookie cutter (or just a fun knife if you’re winging it) to cut out shapes. A bone-shaped cutter is always a hit, but let’s be real, any shape will do!
- Place the cutouts on a baking sheet lined with parchment paper, leaving a bit of space between each piece so they can spread out a touch.
- Bake in the preheated oven for 15–20 minutes or until they’re golden brown. Your kitchen is going to smell amazing at this point—hold on to that feeling.
- Once baked, remove the treats from the oven and let them cool on a wire rack. This part is essential—if they’re too hot, your excited pup might just burn their tongue.
Cool completely before serving to your dog. They’ll be wagging their tail in no time. Enjoy the happy dance when you treat them with these homemade goodies!
Optional Add-ons
Once your Peanut Butter Banana Bites are out of the oven and cooling, you might find yourself thinking—what else can I do to jazz these up?
Consider adding a sprinkle of cinnamon for cozy warmth.
Or, maybe a dash of oats for some crunch.
You could even toss in bits of dog-safe carob.
Your pup won’t know what hit ‘em. Exciting possibilities await!
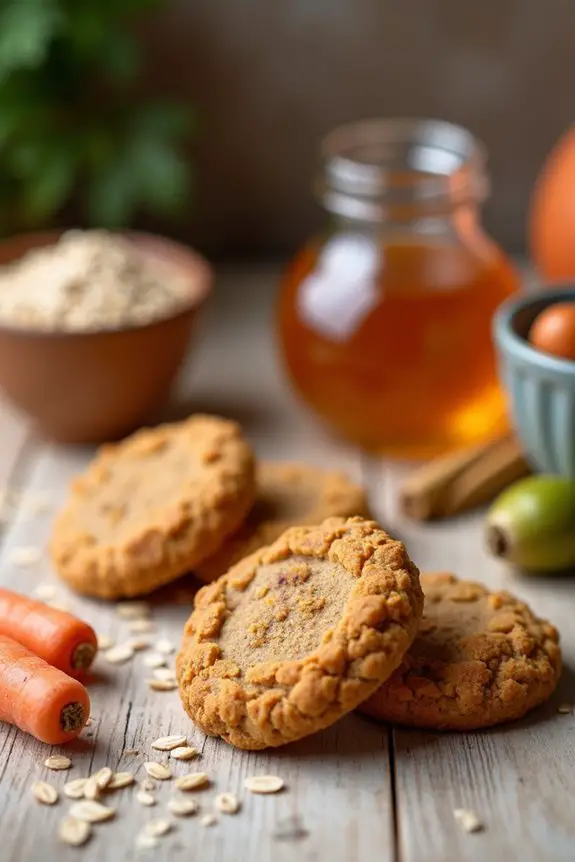
2. Pumpkin and Oatmeal Snacks
Alright, let’s talk about making those tasty pumpkin and oatmeal snacks for your pup. You’ll love how simple the ingredients are, plus I’ve got step-by-step instructions to keep things smooth. And hey, if you’re feeling adventurous, I’ll throw in some optional add-ons to really wow your furry friend. Using a dog treat dehydrator machine can help preserve the freshness and nutrients of your homemade treats! Plus, with premium dog baking supplies, you’ll have everything you need to elevate your cooking game for your dog!
Ingredients
If you’re ready to whip up some tails-wagging goodness for your furry friend, you’ll love this recipe. Just a few simple ingredients come together to create pumpkin and oatmeal treats that your dog will gobble up like they’re the best thing since, well, dog parks. We’re steering clear of any nasties, so you don’t have to worry about using anything harmful. Here’s what you’ll need:
- 1 cup canned pumpkin (not the spiced pie filling, just plain pumpkin)
- 2 cups rolled oats (the kind you usually make oatmeal with)
- 1/2 cup peanut butter (make sure it’s xylitol-free for the pups)
- 1/4 cup vegetable broth (low sodium works best)
- 1/2 cup whole wheat flour (or you could use another flour, like oat flour)
- 1/2 teaspoon cinnamon (just a little pinch for flavor)
Step by Step Instructions
- Preheat your oven to 350°F (175°C) while you gather your ingredients. Nothing’s worse than starting off with a cold oven—trust me, I’ve tried it.
- In a large mixing bowl, combine 1 cup of canned pumpkin and 2 cups of oats. Mix them together until they’re well blended (you want everything to unite like ol’ friends at a reunion).
- Add 1/2 cup of peanut butter to the bowl. Stir until it’s creamy and smooth. (Bonus points if you snag a little taste for yourself—just be ready to share the rest with your furry friend).
- If you want a dash of sweetness, toss in 1-2 tablespoons of honey. Mix until fully combined.
- If you’re feeling adventurous, throw in some optional extras like a sprinkle of cinnamon or 1/4 cup of shredded carrots. Fold them into the dough gently (no need to overdo it, we’re not making a cake here).
- Line a baking sheet with parchment paper to prevent any sticky situations. No one likes a stuck treat—especially when your dog is waiting enthusiastically.
- Scoop out small amounts of the mixture (about a tablespoon each) and form them into little balls or flatten them slightly into cookie shapes. Place them on the prepared baking sheet.
- Bake in the preheated oven for 25–30 minutes. Keep an eye on them; you want them to be golden brown and firm to the touch, not like sad little blobs.
- Once done, remove them from the oven and let them cool on a wire rack. This part’s important—let them cool completely before serving to your dog.
After all, we don’t want any burnt tongues in the house.
Optional Add-ons
When you’re whipping up those tasty pumpkin and oatmeal snacks, don’t forget the magic of optional add-ons.
Think about mixing in some peanut butter for that rich, nutty flavor your pup adores, or toss in dried blueberries for a fruity twist.
You might even try shredded carrots—who knows? Your furry friend could go wild for them.
Experiment and watch their tails wag with joy.
3. Apple Cinnamon Chews
Ready to treat your pup to something special?
Apple cinnamon chews are a tasty way to make them wag their tail in delight.
Let’s go over the easy ingredients, step-by-step instructions, and a few optional add-ons that’ll take these treats to the next level. Plus, these treats pair perfectly with a premium dog food subscription to enhance your dog’s diet!
Ingredients
Making dog treats at home can be a rewarding experience for both you and your furry friend. Plus, there’s something special about knowing exactly what goes into those yummy snacks. For these Apple Cinnamon Chews, you’ll need a few simple ingredients that you probably already have in your pantry. Let’s get your kitchen prepped for some tail-wagging goodness!
- 1 cup whole wheat flour
- 1/2 cup unsweetened applesauce
- 1/4 cup peanut butter (make sure it’s xylitol-free)
- 1/4 teaspoon cinnamon
- 1 egg
Just imagine your pup’s face when you bake these treats! They might even start doing little happy dances. Alright, no promises, but a little wiggle might happen. Let’s get baking so we can treat our pooches to something special.
Step by Step Instructions
1. Preheat your oven to 350°F (175°C). This will guarantee your treats bake evenly, and your home fills with a delightful aroma.
2. Line a baking sheet with parchment paper. This’ll save you from scrubbing stuck dough later—trust me, future you’ll be grateful.
3. In a mixing bowl, combine 1 cup of applesauce and 1/4 cup of peanut butter. Stir them together until smooth and creamy.
(Just think of it as a tasty smoothie for your pup. Minus the fancy blender.)
4. In another bowl, whisk together 1 1/2 cups whole wheat flour, 1 teaspoon cinnamon, and 1/2 teaspoon baking powder.
Confirm there are no clumps. Cinnamon is the secret superstar in these chews.
5. Gradually add the flour mix to the apple and peanut butter mixture. Mix until just combined—don’t overdo it!
The dough should be slightly sticky but hold its shape.
6. Sprinkle a little flour on your countertop and knead the dough for a minute or two.
This brings everything together nicely. Show that dough who’s boss.
7. Roll out the dough to about 1/4 inch thick. Use a cookie cutter or knife to cut it into fun shapes—stars, bones, hearts, you name it!
(No pressure on your artistic skills; dogs just care about the taste.)
8. Place the shapes on your prepared baking sheet. Space them out a bit because they’ll puff up a little.
9. Bake the treats for 25–30 minutes until they’re golden brown and firm to the touch.
(You want them crunchy, not doughy.)
10. Allow the treats to cool on a wire rack.
Be patient—you don’t want your excited pooch to burn their tongue.
Cool completely before serving to your dog. They’ll be wagging their tail in delight at snack time!
Optional Add-ons
Your dog’s taste buds are about to experience a flavor explosion with these optional add-ons.
Imagine their excitement when you mix in a little apple and cinnamon. Simply toss in some finely chopped apples, and a sprinkle of cinnamon with your dough. It’s like baking pie for your pup.
Trust me, they’ll wag their tails like crazy when they get a whiff.
4. Sweet Potato and Chicken Bites

Let’s talk about those tasty Sweet Potato and Chicken Bites. They’re not just scrumptious; they’re packed with nutrients that’ll have your dog wagging their tail in no time. You’ll need some simple ingredients, step-by-step instructions, and maybe a few optional add-ons to make these treats truly pawsome.
Ingredients
If you’re looking to whip up some delicious, tail-wagging treats for your furry friend, then these Sweet Potato and Chicken Bites are just the ticket. They’re simple to make, pack a nutritious punch, and believe me, your pup will think you’re a gourmet chef. Plus, there’s nothing quite like the joy of watching your dog gobble them up—it’s pure happiness, isn’t it? Let’s gather what we need for this tasty treat.
- 1 medium sweet potato, cooked and mashed (about 1 cup)
- 1 cup cooked chicken, shredded (plain, no seasoning)
- 1 cup whole wheat flour (you can also use oat flour for a gluten-free option)
- 1 large egg
- 2 tablespoons of chicken broth (low-sodium is best)
- 1 tablespoon olive oil (for a little healthy fat)
Step by Step Instructions
- Preheat your oven to 350°F (175°C) to get that perfect warmth for baking.
- Peel and chop 1 large sweet potato into small cubes.
- Boil water in a pot, then add the sweet potato cubes. Cook for about 15 minutes, or until they’re fork-tender.
- Drain the sweet potatoes and let them cool for a few minutes while you gather the rest of your ingredients.
- In a mixing bowl, combine 1 cup of shredded cooked chicken (the more tender, the better) and the cooled sweet potato.
- Use a fork to mash the sweet potato and chicken together until well combined. It doesn’t have to be perfectly smooth—some texture is okay!
- Stir in 1 egg and 1 cup of whole wheat flour to the mixture. Mix until everything is just combined (don’t overdo it).
- On a lightly floured surface, roll out the dough to about ½ inch thickness.
- Use your favorite dog-shaped cookie cutter (or any shape you have) to cut out treats. No judgment if they turn out a bit misshapen; your dog won’t mind at all.
- Place the cutouts on a lined baking sheet.
- Bake in the preheated oven for 20–25 minutes, or until the treats are golden brown. Your kitchen will soon smell like doggie heaven.
- Allow to cool completely before serving to your dog. They deserve the best, after all!
Optional Add-ons
When you’re whipping up those scrumptious sweet potato and chicken bites, think of them as a blank canvas for you and your pup’s culinary creativity.
Consider tossing in a sprinkle of parsley for a touch of freshness or a dash of turmeric for its health benefits.
You could even blend in some peanut butter—who doesn’t love that?
Get adventurous; your pup’s taste buds will thank you!
5. Peanut Butter Pumpkin Paws
Are you ready to whip up some Peanut Butter Pumpkin Paws for your furry friend? These tasty treats aren’t only packed with flavor but also super simple to make. Let’s check out the ingredients, step-by-step instructions, and a few fun add-ons that’ll keep your pup excited about snack time!
Ingredients
When it comes to making delicious dog treats, you really can’t go wrong with peanut butter and pumpkin. Both ingredients aren’t only tasty for our furry friends, but also packed with nutrients.
Seriously, who needs a fancy dog bakery when you can whip these up at home? Plus, your pup will think they’re the luckiest dog on the block! Here’s what you’ll need:
- 1 cup of whole wheat flour (or oat flour for gluten-free pups)
- ½ cup of pure pumpkin puree (not the spiced pie filling, please)
- 1/2 cup of natural peanut butter (make sure it’s xylitol-free)
- 1/4 cup of rolled oats
- 1 large egg
- Water as needed (to help adjust dough consistency)
With just these simple ingredients, you’ll be on your way to baking dog treats that will have tails wagging all around the house.
Step by Step Instructions
- Preheat your oven to 350°F (175°C) to get it nice and toasty. It’s like giving your kitchen a little sunbath.
- In a large bowl, mix together 2 ½ cups of whole wheat flour and ½ cup of rolled oats. This will form the dry base for our delicious treats.
- Whisk 1 cup of pumpkin puree (not pumpkin pie filling, trust me) and ½ cup of peanut butter together in a separate bowl until it’s smooth. Get in there and really mash it up—your arm might get a workout, but it’ll be worth it.
- Add 1 egg to the pumpkin and peanut butter mixture, and stir until everything is fully combined. No need to get fancy; just mix it until there are no visible egg-y swirls.
- Gradually fold the dry mixture into the wet mixture, adding a little at a time to avoid flour clouds. Don’t overmix; keep it somewhat shaggy—think cozy sweater vibe.
- Roll out the dough on a lightly floured surface until it’s about ½ inch thick. Use your elbow grease and roll it out, but remember, it doesn’t have to be perfect.
- Use a dog-shaped cookie cutter (or any shape you fancy) and cut out the treats. Place them on a lined baking sheet, leaving a little space in between, like they’re making new friends.
- Pop the baking sheet in the preheated oven and bake for 25–30 minutes. Keep an eye on them—they should turn golden brown around the edges.
- Once baked, remove them from the oven and let them cool on a wire rack. This is the moment when the aroma will have your dog sniffing around like a detective on a scent mission.
- Cool completely before serving to your dog, because nothing’s worse than giving them a treat that’s ‘too hot to handle’. Enjoy watching their reaction as they get their paws on these wholesome goodies.
Optional Add-ons
After whipping up those tasty dog treats, you might be wondering how to level up the goodness or just add a twist.
Consider mixing in some carob chips or dried fruit for a sweet kick. You could even sprinkle in flaxseed for a healthy crunch.
Your pup won’t know what hit ’em. Trust me, they’ll be begging for more!
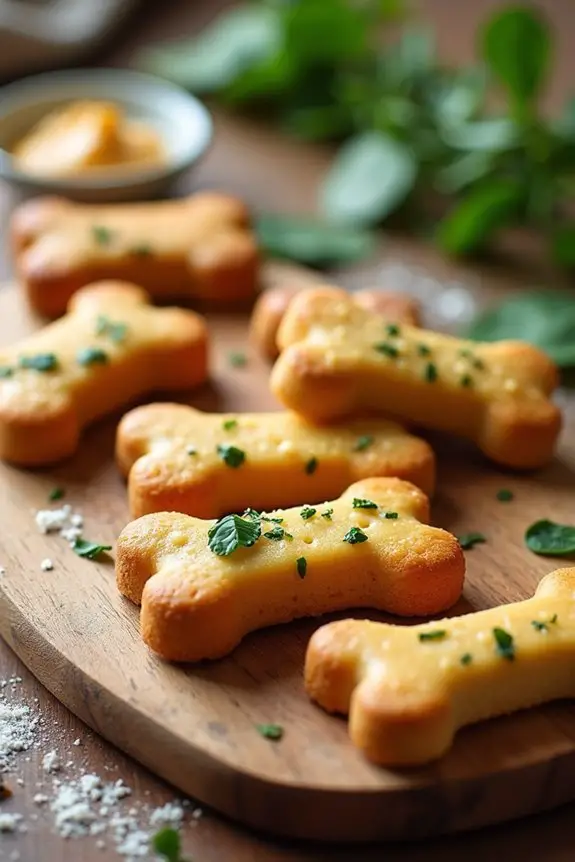
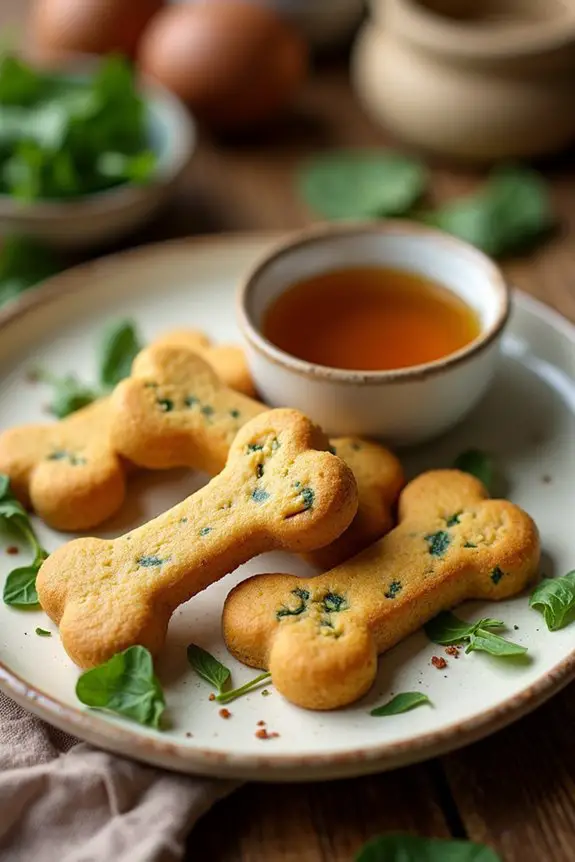
6. Cheesy Spinach Dog Treats
Ready to whip up some cheesy spinach dog treats? You’ll need just a handful of simple ingredients, but I promise your pup will think you’ve gone gourmet. And if you’re feeling adventurous, I’ll share some optional add-ons that’ll have tails wagging even more.
Ingredients
I absolutely love making homemade dog treats, especially ones that my furry friend can’t resist. Cheesy spinach dog treats? Yes, please.
They’re not just delicious—they’re healthy too. Plus, it gives you a chance to whip something up in your kitchen that you know is good for your pup.
Ready to jump in? Here’s what you’ll need to get started on these cheesy goodies.
- 1 cup of whole wheat flour (make sure it’s safe for your doggo!)
- ½ cup of shredded cheese (cheddar or mozzarella works great)
- 1 cup of fresh spinach, chopped finely (or frozen, just thaw it first)
- 1 egg (to hold it all together)
- ¼ cup of chicken broth (low sodium, please)
- 1 tablespoon of olive oil (for a little extra flavor)
See, that wasn’t too complicated, was it? Now that you’ve got your ingredients lined up, you’re just a step away from treating your pup to something special.
Just imagine their wagging tail as you bake—it’s like you’re the best chef in their eyes. Who knew you could be a superstar in the kitchen and make tails wag at the same time?
Step by Step Instructions
- Preheat your oven to 350°F (175°C) so it’s nice and toasty when your treats are ready to bake.
- In a medium saucepan, boil about 1 cup of water. Once boiling, add 1 cup of fresh spinach and cook for 2-3 minutes until wilted.
- Drain the spinach, squeezing out excess water (be careful, it’s hot!). Let it cool for a moment, then chop it finely.
- In a large bowl, mix together 1 cup of whole wheat flour and ½ cup of shredded cheese (any dog-friendly cheese works).
- Add the chopped spinach to the flour and cheese mixture.
- In a separate bowl, whisk together 1 egg and ¼ cup of low-sodium chicken broth or water.
- Pour the wet mixture into the dry ingredients, stirring until combined (don’t overmix; you want it just right).
- On a floured surface, roll out the dough to about ¼ inch thick.
- Use dog-shaped cookie cutters to cut out your treats. Place them on a parchment-lined baking sheet.
- Bake in the preheated oven for 25–30 minutes, or until they turn golden brown and your kitchen smells amazing.
- Remove treats from the oven and let them cool completely before serving to your dog (patience is key!).
Optional Add-ons
Ever wondered how to take your cheesy spinach dog treats to the next level?
Try adding a sprinkle of garlic powder for an enticing aroma, or some pumpkin puree for extra flavor. You might even toss in a few bits of shredded carrots.
It’s like dressing up your pup’s treat—totally fun, right?
Your furry friend won’t know what hit them.
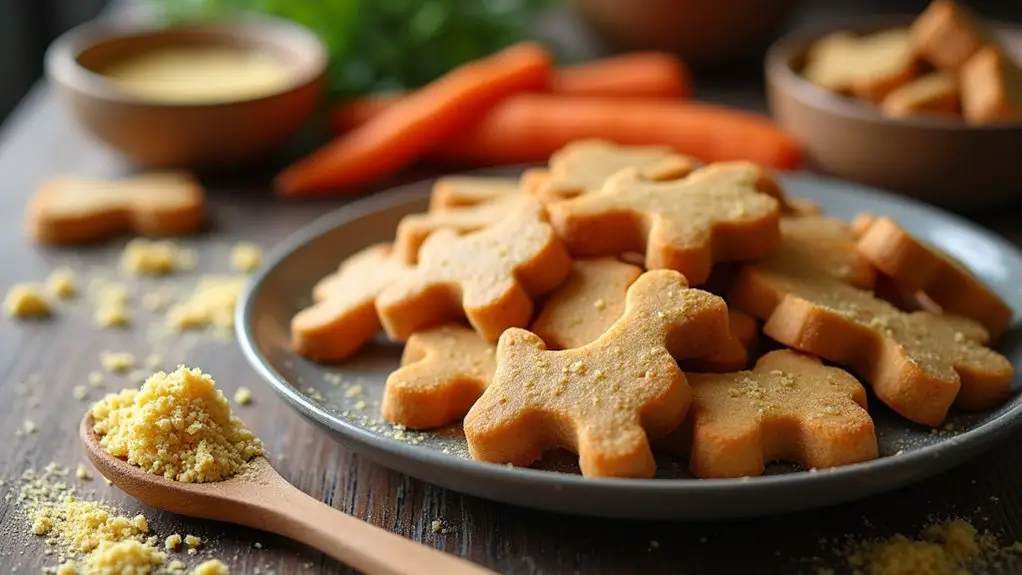
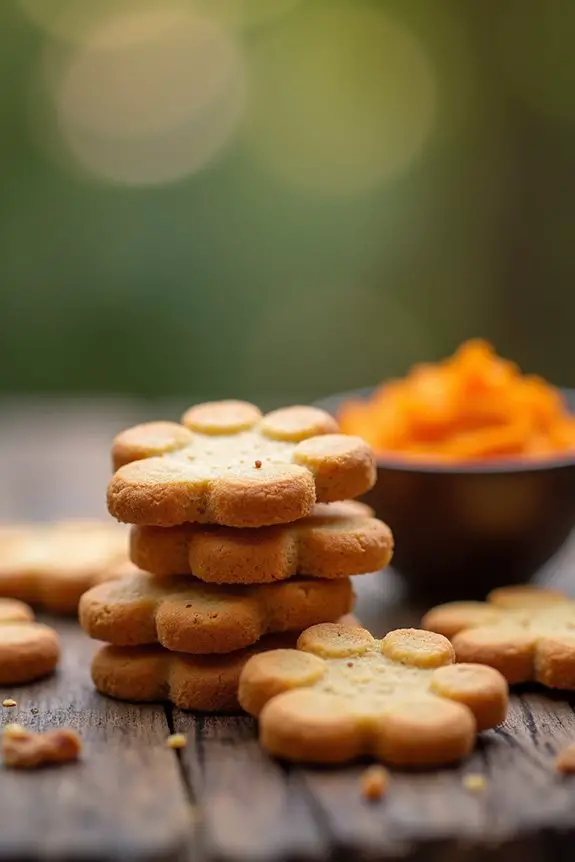
7. Carrot and Ginger Nibbles
Ready to whip up some tasty Carrot and Ginger Nibbles for your pup? You’ll need just a few simple ingredients and a straightforward process to impress your furry friend. Plus, I’ll share some optional add-ons to make these treats even more paw-some.
Ingredients
Alright, let’s whip up something special for your furry friend! Carrot and ginger nibbles aren’t only tasty but super healthy too. These little treats pack a punch of flavor, and your pup will be tail-waggingly excited for a nibble. Plus, who knew being a dog chef could be this fun? Now, let’s gather what we need!
- 1 cup grated carrots (fresh is best, and it’s so colorful)
- 1 tablespoon fresh ginger, finely grated (use just the right amount for that zing)
- 1 cup whole wheat flour (this adds a lovely texture)
- 1/2 cup oats (the wholesome goodness your dog will appreciate)
- 1/4 cup unsweetened applesauce (trust me, your dog will love this sweet touch)
- 1 egg (for binding everything together like a culinary hug)
Step by Step Instructions
These Carrot and Ginger Nibbles are a delightful treat for your furry friend, packed with healthy ingredients that your pup will love. Follow these easy steps to whip up a batch of homemade dog treats that will have them wagging their tails in excitement.
- Preheat the oven to 350°F (175°C). Getting the heat just right is essential for those tasty treats.
- Wash, peel, and chop 2 medium-sized carrots. Make sure they’re nice and fresh for maximum flavor.
- In a small pot, bring water to a boil and add the chopped carrots. Boil for about 10 minutes, or until they’re tender. This helps to soften them up and release their natural sweetness.
- Drain the carrots and let them cool for a few minutes. You don’t want to burn your dog’s tongue, do you?
- In a mixing bowl, mash the carrots with a fork. Aim for a chunky consistency—don’t go all the way to puree; it adds texture.
- Add 1 tablespoon of grated fresh ginger to the mashed carrots. Make sure it’s fresh; your pup deserves the best.
- Mix in 1 ½ cups of whole wheat flour and 1 egg until everything comes together. Don’t overmix the batter—it should be a bit sticky but manageable.
- If the dough feels too dry, add a splash of water, one tablespoon at a time. If it’s too wet, sprinkle in a bit more flour until it holds together nicely.
- On a floured surface, roll out the dough to about ¼ inch thick. Use dog-shaped cookie cutters or simply cut into squares if you’re feeling lazy—no judgment here.
- Place the shapes on a baking sheet lined with parchment paper. Make sure they’re spaced out; they need room to puff up a bit.
- Bake in the preheated oven for 25–30 minutes, or until they’re golden brown and firm to the touch. Keep an eye on them towards the end; we want chewy, not burnt.
- Once baked, remove from the oven and let the treats cool completely on a wire rack. Patience, right? Your dog can wait a bit longer for these delicious bites.
Cool completely before serving to your dog. Trust me, your furry friend will thank you with those adorable puppy eyes.
Optional Add-ons
While you’re whipping up those tasty Carrot and Ginger Nibbles, why not consider adding some optional ingredients that could take these treats to the next level?
A handful of oats can give them a hearty texture, while a touch of peanut butter adds flavor your pup won’t resist.
And if you’re feeling adventurous, a dash of cinnamon might surprise you—and your dog!
Bake Until Golden Brown
When you smell that tantalizing aroma wafting through your kitchen, you’ll know it’s almost time to pull your dog treats out of the oven.
But first, let’s talk about that perfect golden brown finish. This step is essential; it not only looks delicious but also means those treats are perfectly baked.
Keep an eye on them, because nobody wants a burnt pup-pleaser. If you’re going for crunchy, a nice golden hue is your goal; if soft is your style, bake them for just a tad shorter.
To check if they’re done, give one a gentle press; it should feel firm but still a bit soft if you’re heading for that chewy texture.
To test for doneness, gently press a treat; it should be firm yet slightly soft for that perfect chewy bite.
Trust me, your dog won’t judge you if they’re slightly underdone—probably. So, grab those treats, let them cool a bit, and prepare for your pup’s ecstatic reaction. It’s like they won the treat lottery.
Frequently Asked Questions
Can I Use Alternative Flours for Dog Treats?
Yes, you can use alternative flours for dog treats. Flours like oat, almond, or coconut are great options. Just be sure to watch for any allergies your pup might have to certain ingredients.
How Do I Store Homemade Dog Treats?
You can store homemade dog treats in an airtight container at room temperature for a week or refrigerate them for up to two weeks. For longer storage, freeze them in a suitable container for up to three months.
Are Any Fruits or Vegetables Toxic to Dogs?
Yes, some fruits and vegetables are toxic to dogs. Grapes, raisins, onions, garlic, and avocados can cause health issues. Always check before sharing any produce, and choose safe options to keep your pup healthy.
How Often Should I Give My Dog Treats?
You should give your dog treats in moderation, typically no more than 10% of their daily caloric intake. This way, you can guarantee they’re enjoying them while maintaining a healthy diet and weight.
Can I Freeze Homemade Dog Treats?
Yes, you can freeze homemade dog treats! Just place them in an airtight container or freezer bag, and they’ll stay fresh for up to three months. Thaw them before serving, and your pup will enjoy!

Hi, I’m Ali Tarek, the founder of Animalsman. I’ve always been passionate about pets, especially dogs and cats, and I created this website to share practical tips, easy recipes, and helpful care advice for fellow pet lovers. My goal is to make pet care simple, enjoyable, and accessible for everyone. When I’m not writing or curating content, you’ll usually find me spending time with my furry friends or learning new ways to keep them happy and healthy.