Ever thought about turning your home into a playground for your cat? It can be a fun project, and your furball will love you for it. Imagine vertical play structures, cozy hammocks, and maybe even climbing towers. You can get creative without a PhD in construction, trust me. But where do you even start? Let’s explore some simple setups that can keep your cat active and entertained, while you enjoy some DIY therapy along the way.
Engaging Vertical Play Structures
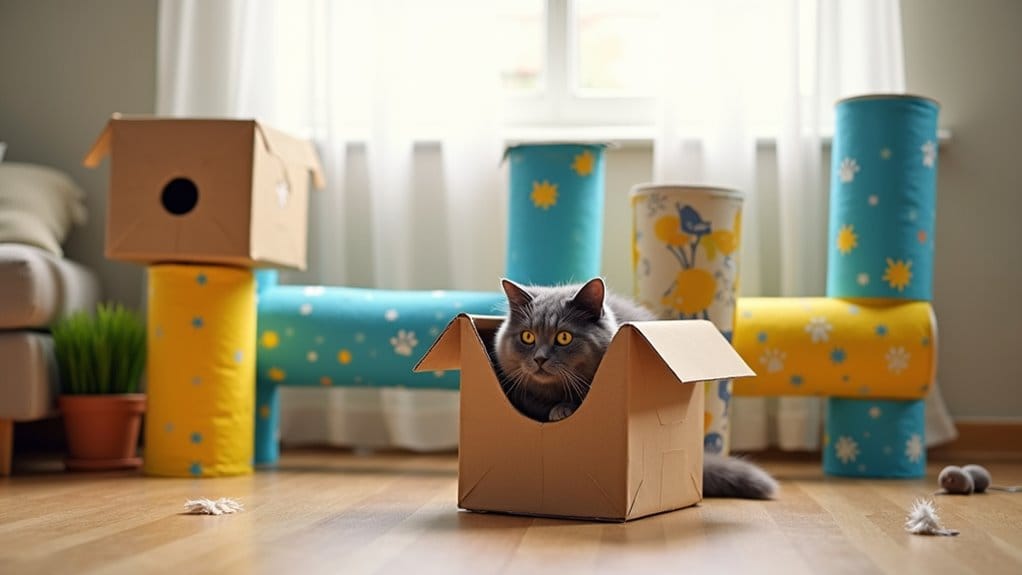
When you think about creating a fun space for your feline friend, consider this: cats love to climb. Picture a cat playground indoor DIY setup full of vertical play structures.
You could build shelves or use sturdy bookshelves, giving your kitty spots to leap between. Hang ropes or soft fabric over these surfaces for extra climbing fun.
Don’t forget to add some cozy hideaways; a cardboard box perched on a high shelf could be a hit. Trust me, seeing your cat prance around like they’re king or queen of the highlands is a joy.
Plus, it’s a great way to keep them entertained and active. Just remember, the higher, the better. Your kitty will appreciate your creativity, even if you trip over a box in the process.
Our Collection
Let’s check out our collection of awesome cat playground items to spark your kitty’s curiosity.
You’ve got cat wall shelves for climbing, hanging ropes that make them feel like acrobats, and scratching posts they’ll love to tear into.
Plus, with interactive climbing towers and puzzle feeders, your feline friend won’t just be playing—they’ll be working their little brains, too.
1. Cat Wall Shelves
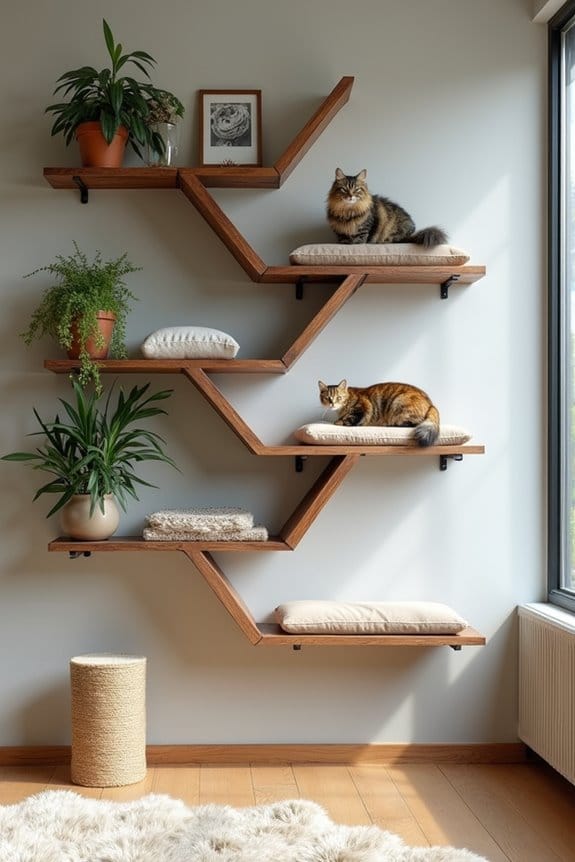
If you’ve ever watched a cat spring effortlessly from one piece of furniture to another, you know they were meant for heights. Not only does creating a cat wall shelf setup give your kitty the perfect perch to survey their kingdom, but it also saves floor space and adds a whimsical touch to your home décor.
Who wouldn’t want an artful array of feline shelves showcasing their beloved furball in action?
Materials Needed:
- Wooden boards (1″x10″x6′ or similar)
- L-brackets (4-6 per shelf)
- Heavy-duty screws
- Wall anchors (for drywall)
- Sandpaper
- Paint or wood stain (optional)
- Paintbrush (if coloring)
- Stud finder
- Drill or screwdriver
- Measuring tape
- Level
Step-by-Step Instructions:
- Choose the Location: Find a spot where your cat loves to hang out. Look for wall space that’s both accessible to kitty and visible from your usual lounging area.
- Measure and Plan: Decide how many shelves you want and how they’ll be spaced out. Typically, 24-30 inches apart works great! Use your measuring tape to mark where each shelf will go.
- Cut the Wood: If you’ve got shorter boards, go ahead and cut them to your chosen lengths. Use the sandpaper to smooth any rough edges. Trust me, you don’t want your cat getting a splinter while en route to their rooftop.
- Paint or Stain (Optional): If you want to jazz things up, now’s the time to paint or stain. Get creative! Maybe a rustic look or a pop of color that matches your home? Just don’t forget to let it dry fully.
- Install the Brackets: Using your stud finder, locate the studs in the wall. Attach the L-brackets where you marked earlier, making sure they’re level. If you’re drywalling, use anchors to make it more secure.
- Attach the Shelves: Place your wooden boards on the mounted brackets. Secure them with screws for a sturdy setup. A level helps facilitate everything is aligned. You don’t want your cat starting a tilt-a-whirl ride, do you?
- Final Touches: Add a few comfy touches like cat-friendly cushions or small toys to encourage your feline to use their new space.
Optional Add-ons/Variations:
- For a chic, modern look, try using reclaimed wood boards. They carry a unique character with each piece!
- Another fun idea is to adorn the shelves with decorations that match your home—think greenery or little framed photos of your furry friend. Who says shelves can’t be a little sassy?
Pro Tip:
Consider your cat’s weight when choosing the type of wood and brackets; opt for sturdier materials if you have a larger cat. Safety first! You want your shelves to be a playground, not a launching pad for flying felines.
With a simple setup like this, you’re not just giving your cat a playground; you’re also creating a stylish enhancement to your home.
Now, go grab those tools and let the DIY magic happen. Your kitty (and your interior design) will thank you.
2. Hanging Ropes and Scratching Posts
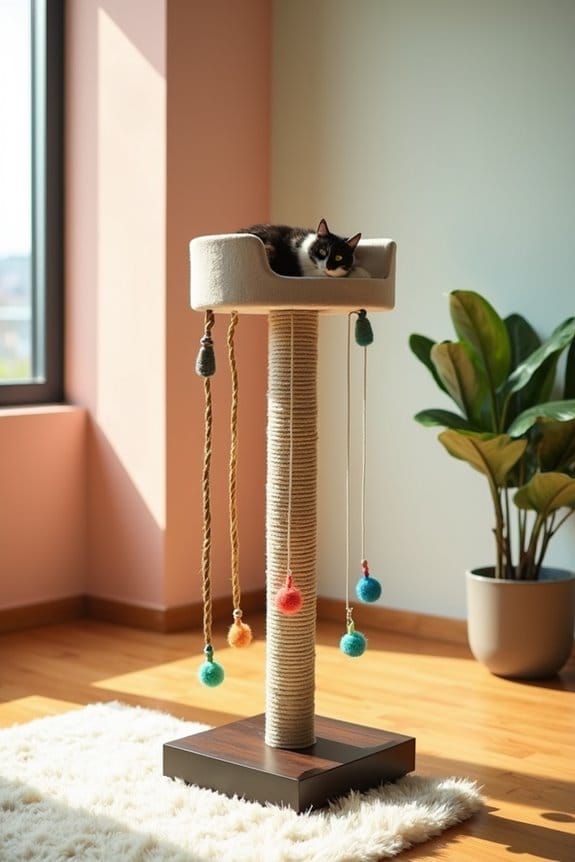
Creating a cozy haven for your cat doesn’t stop at shelves. Hanging ropes and scratching posts are fantastic DIY projects that give your kitty the chance to stretch, climb, and indulge their natural scratching instincts, all while spicing up your home’s interior.
Plus, you’ll save money by making your own and you can customize it to match your decor. Who says cat furniture can’t be both functional and fabulous?
Materials Needed:
- Heavy-duty rope (natural fiber is best)
- Wooden dowel (about 4-6 feet long)
- Thick carpet or sisal fabric (for wrapping)
- Strong adhesive or staple gun (for securing fabric)
- Screw eyes (for attaching rope)
- Utility knife (for cutting fabric and rope)
- Drill with bits
- Measuring tape
- Sandpaper (optional, for smoothing the dowel)
- Paint or stain (optional, if you want to finish the dowel)
Step-by-Step Instructions:
- Decide on the Setup: Determine where you want to hang your ropes. Look for a spot that gets some action, maybe near your cat’s favorite lounging area or even in a corner where they love to scratch.
- Prepare the Dowel: If you want a polished look, sand the wooden dowel to remove any rough spots. Feel free to paint or stain it to match your decor but remember to let it dry fully before proceeding.
- Wrap the Post: Cut the carpet or sisal to the length you want to wrap around the base of the dowel. Secure one end with adhesive or use a staple gun. Roll the fabric tightly around the dowel, overlapping slightly, and secure it at the end with more adhesive or staples.
- Attach the Rope: Measure and cut your rope into desired lengths, ideally around 4-6 feet each. Drill a small hole at the top of the dowel for your first piece of rope. Push the rope through, anchoring it with screw eyes so it doesn’t slip. You can loop the rope back down and tie knots for added fun and climbing challenge!
- Secure the Setup: Make sure the dowel is stable. You can either attach it to a wall or use a sturdy base to avoid it tipping over. If you’re going for a more permanent installation, consider drilling it directly into the wall or floor for extra stability.
- Final Touches: Add some fun elements like dangling toys at the end of the rope for extra engagement, or sprinkle some catnip around the scratching post to encourage your kitty to check it out.
Optional Add-ons/Variations:
- Consider customizing with different types of ropes. A colorful jute or softer cotton can add flair or comfort, depending on your kitty’s preference.
- Create a wall-mounted version using multiple dowels at different heights for an even more engaging setup.
Pro Tip:
Make sure your setup is stable—an unstable scratching post can lead to a disaster, and we don’t want your cat doing a spectacular tumble during their acrobatics. If you’re worried about tipping, go heavy on the base or install it securely.
And don’t forget to check for any loose ends on the rope; we wouldn’t want to risk a wardrobe malfunction during a wild play session.
3. Interactive Climbing Towers
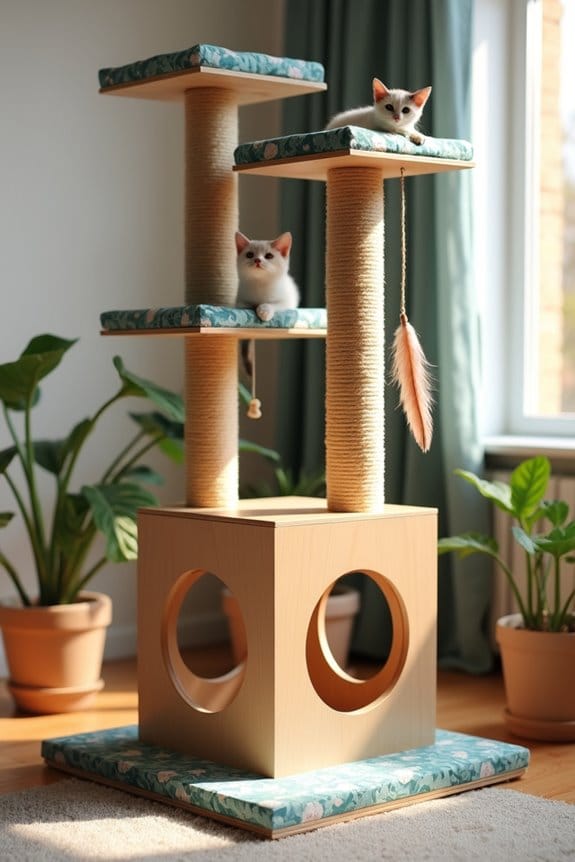
If you’re looking for a way to keep your cat entertained and active, an interactive climbing tower could be the perfect DIY project for you. Not only will it provide hours of fun, but it can also save you money and help keep your home organized.
Think about it—no more expensive cat trees cluttering up your living space. With a little creativity and some elbow grease, you can customize a climbing tower that fits your home and your cat’s personality perfectly.
Materials Needed:
- Plywood sheets (for the base and platforms)
- Wooden posts or 2x4s (for support)
- Carpet or faux fur fabric (for covering platforms)
- Sisal rope (for scratching areas)
- Heavy-duty glue or screws (for securing everything)
- Sandpaper (to smooth any rough edges)
- Paint or non-toxic wood stain (optional, for finishing)
- Drill with bits
- Measuring tape
- Utility knife (for cutting fabric)
Step-by-Step Instructions:
- Plan Your Design: First, sketch out your climbing tower. Think about how high you want it and the layout of the various platforms. Remember to leave space for your cat to jump and climb.
- Cut the Plywood and Posts: Use your utility knife to cut the plywood into platforms (about 2 feet by 2 feet is a good size) and the wooden posts to the height you need—ideally around 4-6 feet for a fun climbing experience.
- Sand and Finish the Wood: Give all the cut edges a good sanding so there are no splinters. If you want to paint or stain them, now is the time! Just make sure it’s safe for pets and let it dry completely.
- Assemble the Structure: Secure the posts into the base (the largest plywood piece) using heavy-duty glue or screws. Stand the posts upright and attach the platforms at varying heights by drilling into the posts and securing with screws.
- Add Scratch and Play Features: Wrap sections of the posts with sisal rope, securing it with glue to create scratching areas. You can also glue down carpet or fabric on the platforms to create comfy resting spots—your cat will appreciate a little luxury.
- Final Touches: Once it’s all assembled, consider dangling some toys from the platforms or adding tunnels made from cardboard to enhance the fun.
Don’t forget to give everything a once-over to verify it’s sturdy and safe.
Optional Add-ons/Variations:
– You can personalize your climbing tower by using brightly colored fabric or patterned materials for covering the platforms.
Maybe your cat would love a jungle theme, or a chic, modern look that complements your decor.
– Try adding removable hammock-style beds between levels for an extra touch of coziness.
Pro Tip:
When assembling your tower, make sure it’s securely anchored and stable. If you’re attaching it to a wall, use brackets for extra safety.
Cats love to leap, and you want to make sure their jungle gym doesn’t come crashing down during an acrobatic endeavor.
Feeling a bit more inspired now? Grab those materials, put on your crafty hat, and this DIY project might just end up being the coolest thing in your home—and your cat’s favorite hangout spot. Happy building!
4. Puzzle Feeders for Mental Stimulation
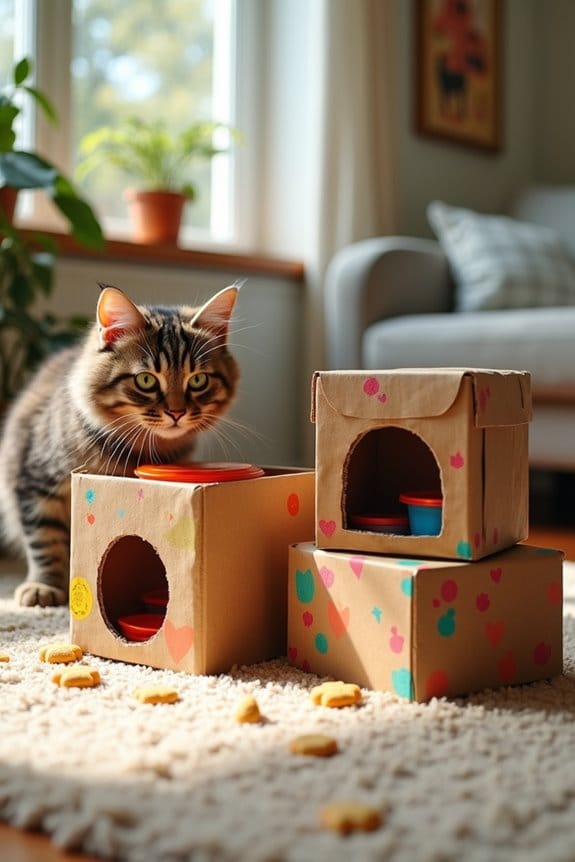
If you’re looking for a way to keep your feline friend entertained while adding some mental stimulation to their day, a DIY puzzle feeder might just be the solution. Not only does it engage your cat’s natural hunting instincts, but it also helps slow down their eating, promoting healthier digestion. Plus, making your own puzzle feeder saves money while allowing you to customize it to suit your home decor—and your cat’s tastes!
Materials Needed:
- Empty cardboard boxes (like shoeboxes or similar)
- Old plastic containers (like yogurt cups or similar)
- Scissors or a utility knife
- Non-toxic glue or tape
- Treats or dry food (to fill the feeder)
- Craft supplies (like markers, fabric scraps, or stickers for decoration)
Step-by-Step Instructions:
- Gather Your Boxes: Collect a few empty cardboard boxes. The size can vary; just verify they’re sturdy enough for some playful poking.
- Create Openings: Use scissors (or a utility knife, if you’re feeling brave) to cut holes in the sides of the boxes. The openings should be big enough for your cat to paw at but small enough to make retrieving treats a bit of a challenge. Think of it like a mobile kitty buffet.
- Add Containers Inside: Take your old plastic containers and glue or tape them inside the boxes. Cut small holes in the sides of these containers, allowing treats to flow out when your cat bats them around.
- Decorate Your Puzzle Feeder: Give your creation some pizzazz. Use markers, fabric scraps, or stickers to adorn the outside. Who says a puzzle feeder can’t be stylish? Plus, it’ll look great on your floor… or at least better than frantically searching for your cat’s long-lost toy.
- Fill ‘Er Up: Now it’s time to fill the feeder with your kitty’s favorite treats or dry food. Hide them in the containers and sprinkle a few around to encourage your cat to explore the entire setup.
- Introduce Your Cat: Place the puzzle feeder in a cozy, interactive spot—somewhere your cat likes to hang out. Watch as they curiously scratch, nudge, and paw at their new puzzle toy. One small warning: it might turn into a cat version of a game show, where they’re determined to sniff out every last treat.
Optional Add-ons/Variations:
- Customize the difficulty level by adjusting the size of the holes you cut. Bigger holes mean easier access to treats, while smaller holes will challenge their skills.
- Try assembling multiple puzzle feeders and connect them with tunnels or pathways made from cardboard to create a whole adventure zone for your kitty.
Pro Tip:
Always supervise your cat the first time they interact with the puzzle feeder. You want to ascertain they don’t chew off pieces that could become a choking hazard.
And, for those of us who forget to check how long we’ve had those treats in the pantry, be mindful of expiration dates—nothing spices up a DIY project quite like cleaning up a surprise cat-astrophe later on.
5. Cat Bridges and Walkways
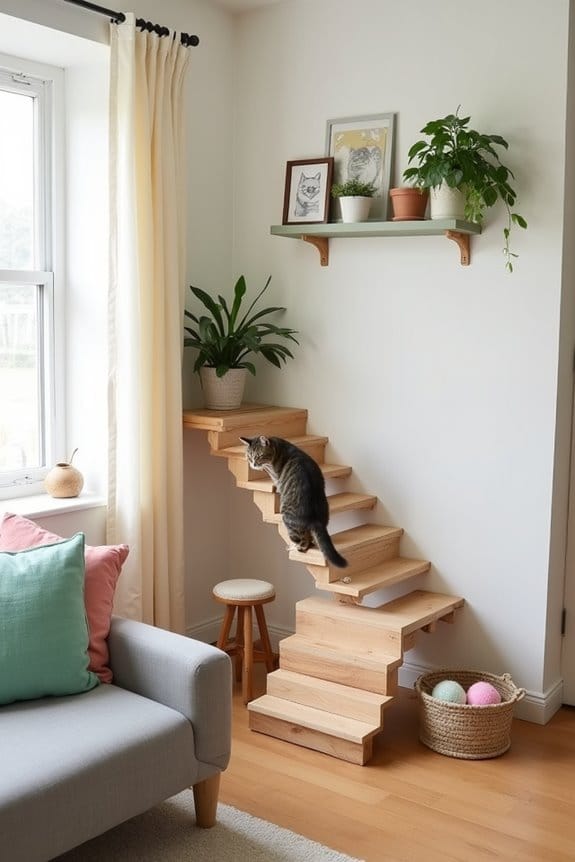
If you’ve ever watched your cat leap gracefully from the back of a couch to a high shelf, you know they crave vertical space. DIY cat bridges and walkways are a fantastic way to give your furball the thrill of climbing while also keeping them entertained. Plus, they can transform your living area into a stylish feline paradise—all while saving you money compared to store-bought options.
Let’s get that creative energy flowing and make your home a cat paradise.
Materials Needed:
- Wooden planks or sturdy shelving boards (choose a type that suits your decor)
- Brackets or wall mounts (to secure the bridges)
- L-brackets or corner braces (for added support)
- Sandpaper (to smooth edges)
- Paint or wood stain (optional, for decoration)
- Level (to guarantee everything is straight)
- Drill (for easy assembly)
- Screws (to fasten everything)
Step-by-Step Instructions:
- Choose the Location: Pick a spot in your home where you want to create your cat bridge. Keep in mind that cats love areas where they can survey their territory. A wall between rooms or even around windowsills can be great spots.
- Measure and Cut: Decide how long you want your bridge to be (around 3 to 6 feet is usually ideal). Using your wooden planks, measure and cut them to your desired length. Remember, your cat is a pro at jumping, so don’t go overboard on the length; a too-long bridge might make them rethink their choices.
- Smooth the Edges: Grab your sandpaper and smooth out any rough edges on your boards. You want your kitty’s paws to feel comfortable, not like they’re walking on a DIY cactus.
- Secure the Brackets: Attach your brackets or wall mounts to the wall at your chosen height. Use a level to guarantee everything is even. You’d want your cat to think of their bridge or walkway as their own personal feline highway, not an obstacle course.
- Mount the Bridge: Once the brackets are secure, carefully place the wooden planks onto them. Don’t forget to attach L-brackets underneath for extra support; a cat leaping onto a wobbly bridge could lead to some embarrassing moments for both of you.
- Decorate (If Desired): Feeling crafty? Give your bridge a splash of color or a natural wood stain. Just guarantee that whatever you use is non-toxic for your furry friend. You could even attach some faux grass or soft carpet for added grip—think of it as your cat’s sophisticated version of a luxurious walkway.
- Let Your Cat Explore: Now it’s time to show your cat their new playground! Be patient if they seem hesitant at first; some cats take time to warm up to new heights. Encourage exploration with some toys or treats along the way.
Optional Add-ons/Variations:
- Use Different Materials: Instead of wooden planks, why not try repurposed materials, like old ladder rungs, or even PVC pipes? This brings a new level of creativity, plus you get to show off your DIY prowess.
- Add Perches: Attach small shelves at intervals along the way. These can serve as resting spots for your little explorer and add more visual intrigue.
Pro Tip:
When mounting your bridges, always opt for wall studs when you can. Not only does this provide strength and durability, but it also saves you from the fear of an unexpected collapse when your cat does that epic leap from your bookcase.
No one wants a cat flying through the air like a furry missile, right? Stay safe, and happy building!
6. Cat Hammocks for Relaxation
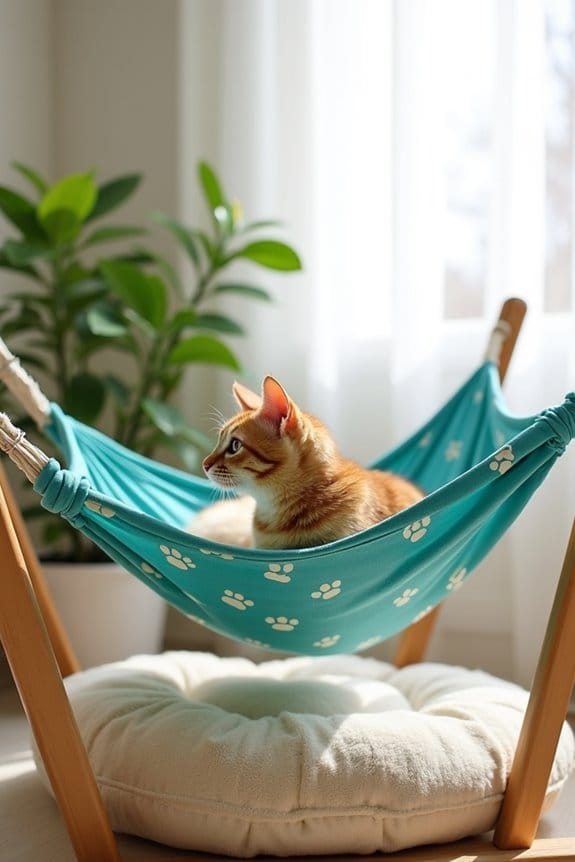
If your feline friend spends too much time lounging on the back of the couch or your favorite chair, it might just be the perfect time to create a DIY cat hammock. A cozy hammock not only gives your cat a comfy spot to chill, but it also adds an aesthetic touch to your home—plus, it’s way cheaper than buying a fancy one. Get ready to pamper your kitty without breaking the bank.
Materials Needed:
- A sturdy, flat piece of fabric (like canvas or an old blanket)
- Wooden dowels or a strong frame (PVC pipe works wonders too)
- Rope or strong twine
- Drill with drill bits (to create holes in the dowels or frame)
- Scissors (for cutting fabric and twine)
- A measuring tape (to make sure everything fits)
- Optional: fabric glue (to prevent fraying if you prefer a no-sew option)
Step-by-Step Instructions:
- Choose the Location: Find the perfect spot for your hammock. Cats love to observe from above, so consider a corner of a room, between two shelves, or even in a window nook.
- Cut the Fabric: Measure and cut your fabric into a rectangle that’s around 24 inches long and 18 inches wide (or bigger if your cat prefers more room). Just remember to leave some extra fabric for attaching the hammock to the frame.
- Prepare the Frame: If using wooden dowels, cut them to about the same length as the width of your fabric. For a frame, assemble your PVC pipes or wooden pieces into a rectangular shape that fits your fabric’s size. Drill holes in each end of the dowels or at the corners of your frame.
- Attach the Fabric: Fold over the edges of your fabric slightly and either sew them down or use fabric glue (a no-sew option) to avoid fraying. This gives it a nice finish. Then, thread the fabric through the holes in the dowels or attach it securely to the frame.
- Hang it Up: If you’re using dowels, tie strong rope or twine to the ends, ensuring it’s secure and can hold your furry buddy’s weight. Hang it between two sturdy supports—be sure to check that it’s at a comfortable height for your cat to leap onto.
- Test It Out: Before letting your little furball jump on it, give the hammock a gentle tug to make sure it’s sturdy enough. Better safe than sorry; we don’t want any surprises during their first test snooze.
- Relax and Enjoy: Once it’s all set and sturdy, it’s time for your cat to take its first nap. Not only will your kitty love it, but it’ll also add a charming décor piece to your home.
Optional Add-ons/Variations:
- Color It Up: Feeling creative? Choose colorful fabric or even add some cat-themed patterns to give it a personality that reflects your cat’s quirks (think polka dots for playful cats or stripes for the sophisticated).
- Cuddle Factor: Consider attaching soft pillows or a plush blanket inside the hammock for extra coziness.
Pro Tip:
Since cats love to scratch, choose a fabric that’s sturdy yet comfortable for their claws, like canvas or a heavy-duty cotton. Make sure to hang it securely; no one wants a surprise cat drop during a sleepy afternoon. Your cat could use the extra cuddle time, and you’ll appreciate the peace of mind knowing they’re safe and happy.
7. Cat Tunnels for Exploration
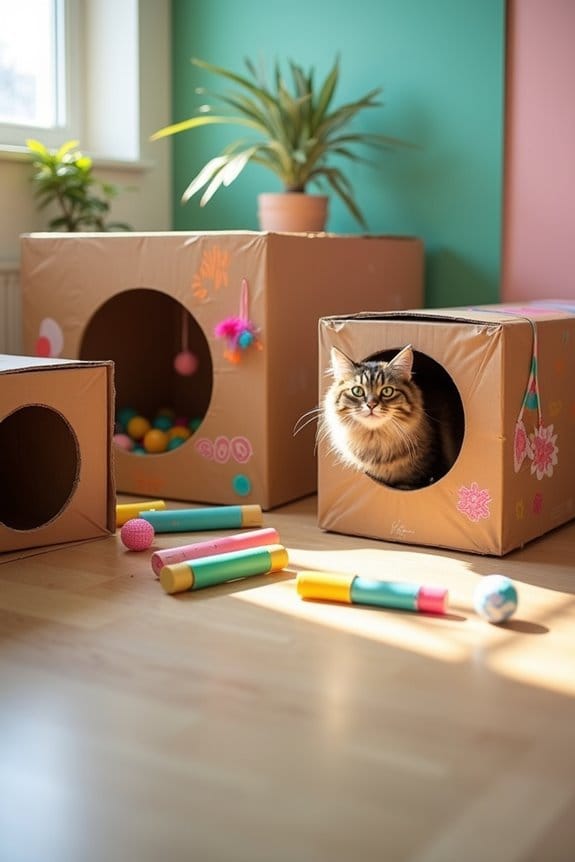
Looking to spice up your cat’s playtime? How about creating a DIY cat tunnel that sparks joy and satisfies their natural curiosity? This fun project not only provides your kitty with a space to explore and exercise but also saves money compared to those fancy store-bought versions.
Plus, it can transform any ordinary room into a whimsical playground that both you and your cat can enjoy—sounds like a win-win, right?
Materials Needed:
- Cardboard tubes (from paper towel or toilet paper rolls work well)
- Sturdy cardboard boxes (big enough for your cat to fit in)
- Scissors or box cutter
- Tape (packing tape or duct tape is ideal)
- Optional: fabric (to add soft lining or decoration), markers (to personalize your tunnel)
Step-by-Step Instructions:
1. Gather Your Tubes: Start scouting your home for cardboard tubes. Got an empty roll from the paper towels? Great, you’re halfway there. The more tubes you gather, the longer and more complex your tunnel can be.
2. Prep the Boxes: Grab a couple of sturdy cardboard boxes and cut out openings on the sides with your scissors or box cutter. Just make sure the holes are big enough for your cat to comfortably squeeze through.
Securely tape down any loose flaps that could be a tripping hazard for you or a pinching spot for kitty paws.
3. Connect the Tubes: It’s time to get crafty. Use tape to connect the cardboard tubes to your boxes. You can create a fun maze style by attaching multiple tubes to different boxes.
Make sure they’re snugly taped so they won’t wobble when your cat dives in.
4. Add a Cozy Touch****: Consider lining the inside of the boxes with soft fabric—this can be a cute touch that makes your tunnel feel even more inviting.
Just cut and place the fabric so it covers the base and insides; secure it with a dab of tape if necessary.
5. Test for Stability: Before your cat gets to enjoy this wonderland, gently shake the structure to verify everything feels secure.
Safety first; we don’t want a kitty avalanche during their first exploration.
6. Introduce the Tunnel: Show your cat their new playground. You might want to encourage them to explore using treats or toys.
Just be patient if they hesitate—sometimes it takes a little coaxing for our felines to trust the new addition.
7. Observe the Fun: Sit back, relax, and watch as your cat zips through their new tunnel with glee.
It’s amazing to see how something so simple can spark instant joy.
Optional Add-ons/Variations:
- Color it Up: Let your creativity shine by using markers or pet-safe paint to decorate the outside of the boxes and tubes. Add paw prints or colorful patterns for extra pizzazz, or even write their name to make it feel personalized.
- Modular Fun: If you’re feeling adventurous, why not create multiple sections? You can mix and match various tubes and boxes to create a more extensive maze, or even have several tunnels leading to different rooms.
Pro Tip:
Before finalizing your design, always verify that there are no sharp edges or loose flaps that could harm your furry explorer.
Cardboard is pretty durable, but a little extra checking can save you from a “torn furball” situation later on.
Also, keep in mind that while cardboard can take a good amount of kitty abuse, stay alert for signs of wear and tear. A cozy cat tunnel is only enjoyable if it’s safe to use.
Extra Tips & Ideas
While you might think creating an indoor cat playground means only stacking a few shelves and tossing in a couple of toys, there’s so much more you can do to elevate the experience for both you and your feline friend.
Why not build a cozy reading nook for you and a soft perch for your cat? Think about adding hanging bird feeders outside the window—it’s like reality TV for your kitty.
You could even create a mini treasure hunt with hidden treats or toys around the space; trust me, watching your cat search is pure joy.
And don’t forget—personal touches, like your cat’s favorite blanket or a soft scratcher, make it all the more special.
Happy building, and may your living room become the cat’s lair!
Frequently Asked Questions
What Materials Are Best for Building Indoor Cat Playgrounds?
Plywood, sisal rope, carpets, and cardboard make great materials for building indoor cat playgrounds. You’ll create sturdy structures, scratching posts, and cozy nooks, ensuring your feline friends stay active and entertained in their environment.
How Much Space Do I Need for a Cat Playground?
You’ll need at least 20 to 30 square feet for a cat playground, but more space allows for better vertical and horizontal structures. Cats love exploring, so the more space, the better for their playtime!
Can I Incorporate Outdoor Elements Indoors for My Cat?
You can weave outdoor magic indoors by adding plants, climbing trees, or nature-inspired decor. These elements create a vibrant oasis, making your cat’s environment feel alive, sparking curiosity, and encouraging playful adventures.
How Do I Encourage My Cat to Use the Playground?
To encourage your cat to use the playground, place their favorite toys and treats inside it. Use interactive play to engage them, and gradually introduce new elements, creating a fun and inviting environment.
Are There Specific Indoor Plants Safe for Cats?
Yes, several indoor plants are safe for cats. Consider spider plants, Boston ferns, or bamboo palms. Just imagine your feline exploring a green paradise, happily nibbling on leaves without any worries about toxicity.
Conclusion
Creating an indoor DIY cat playground is like building a tiny feline amusement park right in your living room. With vertical structures and cozy corners, your cat will have the time of their life—zooming, pouncing, and exploring every nook. Just imagine them conquering their kingdom like a furry superhero. So, grab some supplies and let your creativity run wild; your cat deserves this adventure, and you’ll enjoy watching their joy unfold, one leap at a time.

Amr Mohsen is a software engineer who traded his keyboard for a leash — at least on weekends. His love for dogs inspired him to share what he learns as a dog owner and enthusiast, bringing a detail-oriented, research-driven perspective to every article he writes. If it’s about dogs, he’s probably already looked it up twice.

