
Did you know that many cat trees on the market are just overpriced versions of simple DIY projects? It’s true. With a little creativity and some elbow grease, you can craft a stunning homemade cat tree that looks like a million bucks but won’t cost you half as much. Curious how to transform your living space with these unique designs? Stick around, and you might just find the perfect project for both you and your furry friend.
Unique Designs for Every Home
Have you ever looked at your living room and thought it could use a little more whimsy? Creating cat trees homemade can help with that.
Envision a quirky design that doubles as a conversation starter. Consider this: a multi-level tree sprawled across a corner, draped in colorful fabric, wood, and sisal. You can customize it with touches like your cat’s favorite toys or a cozy nook just for them.
Think about where to place it—maybe under a sun-drenched window? Seriously, no cat can resist a good nap in a sunny spot.
And you’ll save money, too. Plus, your friends might be jealous of your creative flair. With a little imagination, you can make your space and your feline friend happy.
Our Collection
Now that you’ve got some unique designs in mind, let’s take a peek at our collection of cat trees.
You’ll find everything from a sleek industrial cat tower to a cozy corner cat retreat, perfect for every feline’s taste.
Whether your cat’s a minimalist or a whimsical explorer, there’s something here that’ll have them purring in no time.
1. Modern Minimalist Cat Tree
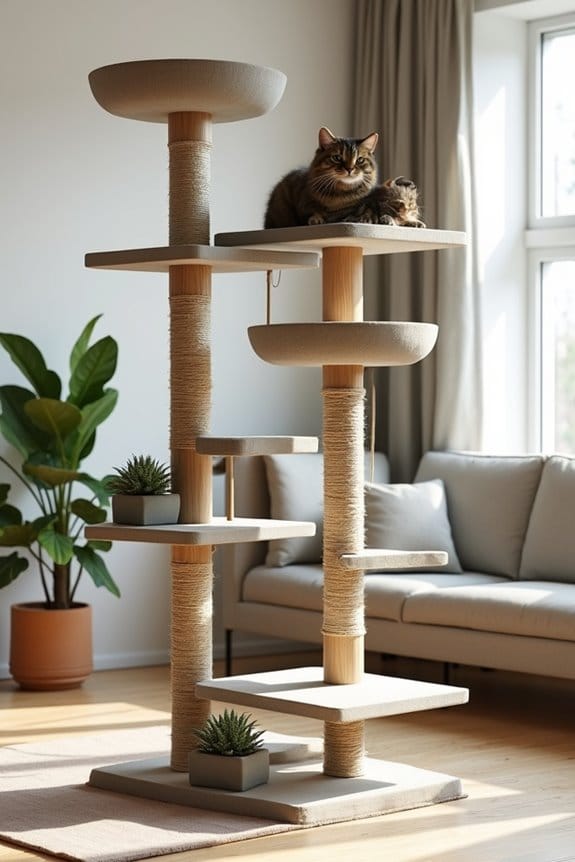
Creating a Modern Minimalist Cat Tree is a stylish way to enrich your feline’s life while blending seamlessly with your home décor. This DIY project not only saves you money compared to store-bought versions, but it also offers your kitty a cozy spot to play, lounge, and scratch.
Plus, you can personalize it to match your own aesthetic. After all, a happy cat makes for a happy owner, right?
Materials Needed:
- 1-2 pieces of plywood (1×3 feet for the base and levels)
- 1-2 wooden posts (about 3-4 feet tall)
- Carpet or soft fabric (enough to cover the surfaces)
- Carpet adhesive or heavy-duty glue
- Wood screws or nails
- Drill
- Saw (if cutting plywood or wood)
- Sandpaper
- Non-toxic wood stain or paint (optional)
- Paintbrush or roller (optional)
Step-by-Step Instructions:
- Choose Your Design: Before you start, sketch out your dream cat tree. Think about how many levels you want and where you want the posts. Remember, simplicity is key for that minimalist vibe.
- Cut Your Plywood: Using a saw, cut your plywood into your desired shapes for the base and levels. If you’re feeling adventurous, different shapes like circles or triangles can add a cool twist.
- Prepare the Wood Posts: Take the wooden posts and verify they’re smooth by sanding them down. Your kitty will appreciate a splinter-free environment.
- Attach the Levels: Securely attach the plywood levels to the wooden posts using wood screws or nails. Make sure they’re stable! You don’t want your kitty performing acrobatics on a wonky structure.
- Cover with Carpet: Cut your carpet or fabric to fit the levels and the base snugly. Apply carpet adhesive to the surfaces (or just be brave and go all out with heavy-duty glue). Press the carpet down firmly and let it dry according to the adhesive instructions.
- Paint or Stain (Optional): If you want to add a little flair, now is the time to paint or stain the exposed wood. Go for a color that complements your home—maybe a soft gray or a striking black.
- Final Assembly: Once everything is dry, put your cat tree together! Make sure all the parts are securely attached, and check for any loose ends. This will help keep your little pouncing pal safe.
Optional Add-ons/Variations:
Want to take your cat tree aesthetics to a whole new level? Try using different colors of carpet to create stripes or fun patterns.
You could even wrap the pillars in sisal rope for added scratching surfaces—your cat will thank you!
Pro Tip:
When constructing your cat tree, stability is paramount. If you’re using multiple levels, consider attaching everything to a sturdy base to prevent tipping. A little extra support goes a long way in guaranteeing your cat’s playground is durable and safe.
There you have it! A minimalist cat tree that not only serves as a playground for your feline companion but also doubles as a chic piece of furniture in your home.
Happy building!
2. Rustic Barn-Style Cat Tree
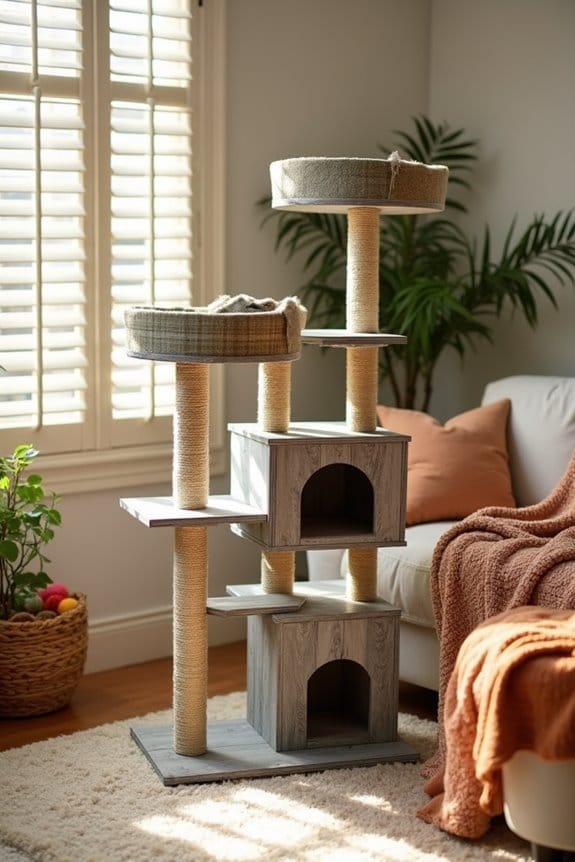
Get ready to bring a touch of rustic charm to your home with this DIY Rustic Barn-Style Cat Tree. Not only does it offer your furry friend a cozy space to play and relax, but it also adds a unique decorative piece to your living area.
Plus, who can resist the warmth of wood? Go ahead, save some cash and create a beautiful structure that complements your farmhouse-inspired decor.
Materials Needed:
- 1 large piece of plywood (1×3 feet for the base)
- 1-2 wooden posts (about 4-5 feet tall)
- 3-4 smaller pieces of plywood (for levels, varying shapes for a barn-like design)
- Natural sisal rope (for scratching posts)
- Carpet or soft fabric (for padding levels)
- Wood glue or heavy-duty adhesive
- Wood screws
- Drill
- Saw
- Sandpaper
- Non-toxic wood stain or paint (optional)
- Paintbrush or roller (optional)
Step-by-Step Instructions:
1. Design Your Barn-Style Tree: Grab some paper and sketch your vision.
Think about incorporating angles to mimic a barn roof or flat surfaces for lounging. Keep it rustic, but functional.
2. Cut the Plywood: Using a saw, cut your plywood into the shape of your base and levels.
You might try triangular or trapezoidal shapes for that barn roof feel.
3. Smooth the Wood: Sand down your wooden posts and cut edges.
Nobody wants splinters—this will leave your kitty scratching in bliss, not pain.
4. Attach Levels to Posts: With wood screws, secure the cut plywood pieces to your wooden posts in a staggered manner.
Consider the height and stability, as your cat will likely do some impressive leaping.
5. Wrap the Posts with Sisal Rope: Start from the bottom of each post and wrap the sisal rope tightly, securing it with glue.
This will provide excellent scratching opportunities for your kitty.
6. Cover with Carpet or Fabric: Measure and cut your carpet or fabric to fit the levels and base.
Use wood glue to attach it smoothly. The comfy texture will be a hit with your feline.
7. Finish Up: If you’re feeling creative, now’s the time to paint or stain the wood to achieve that rustic vibe—perhaps a weathered gray or light tan.
Let it dry completely before letting your cat explore.
Optional Add-ons/Variations:
To personalize your cat tree, consider distressing the wood for an even more rustic look.
Additionally, you can use colorful fabric for the levels to brighten it up, or add small wooden accents, like barn stars or names, to make it uniquely yours.
Pro Tip:
Make sure to check for any loose screws or rough edges after finishing.
A quick safety check can keep your adventurous kitty safe and sound while exploring their new domain. Plus, you can easily keep an eye on it for any wear and tear in the future.
3. Cozy Corner Cat Retreat
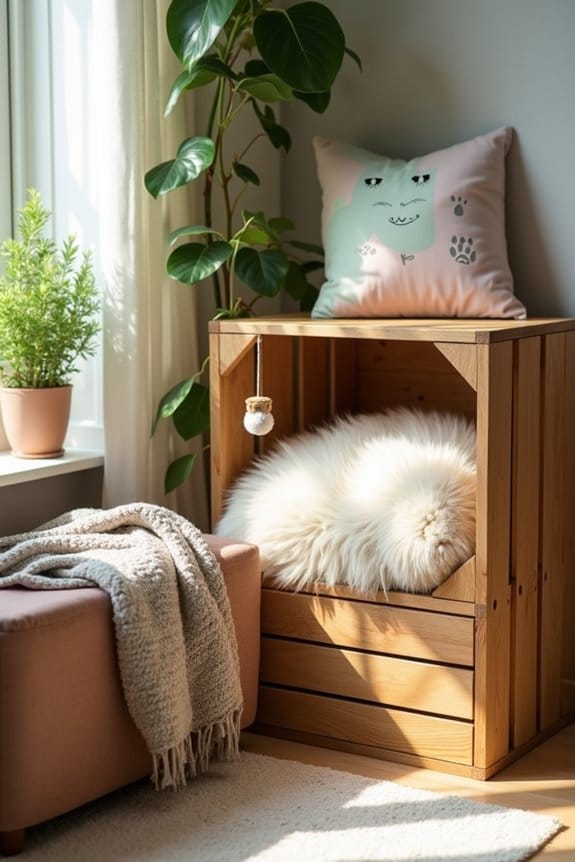
Is your cat seeking a snug hideaway to curl up and watch the world go by? This Cozy Corner Cat Retreat is the purr-fect DIY project for you. Not only will it provide your feline friend with a comfy spot to unwind, but it’ll also add a warm, inviting touch to your home décor. Plus, you’ll save some bucks on fancy pet furniture while giving your kitty their own little sanctuary – it’s a win-win.
Materials Needed:
- 1-2 wooden crates or boxes (with sturdy structure)
- Soft, cushy pillow or blanket
- Non-toxic wood sealant or paint (optional for finishing)
- Sandpaper
- Drill (if you need to join crates)
- Measuring tape
- Paintbrush (if painting)
Step-by-Step Instructions:
- Choose your Crates: Find one or two wooden crates (or sturdy boxes) that fit into your corner perfectly. Make sure they’re safe and splinter-free; we don’t want any cat casualties here.
- Sand down any rough edges: Give those crates a once-over with sandpaper. Your kitty deserves a luxurious lounging experience, free of any pesky splinters or rough spots. It’s nice to think they’re good with rough and tumble, but why risk it?
- Attach the Crates: If you opted for two crates, use the drill to securely attach them together. You could create a stacked look to add some vertical fun or go side-by-side for easy access. Just think about how your cat likes to strategize their sunbathing; we all know they’re part-time architects.
- Add Softness: Grab that cozy pillow or blanket and place it inside the crate. Go ahead and spoil them with the fluffiest fabric you can find. Cats are like royalty, after all; they deserve comfort fit for a king or queen.
- Seal or Paint (optional): If you want to go the extra mile, now’s your chance to paint or seal the wood. Choose a color that complements your decor. Maybe a soft gray or a calming cream? You want something elegant yet cat-appropriate… after all, we wouldn’t want to offend the sensibilities of our furry overlords.
- Place in the Perfect Spot: Finally, set your Cozy Corner Cat Retreat in a sunny spot where your kitty can keep an eye on their domain. You might find they’ll take up residency faster than you can say “catnip.”
Optional Add-ons/Variations:
Give your retreat a personalized touch by adding a small, hanging toy inside or attaching a cute nameplate on the outside. You could also incorporate some decorative cushions that feature cute cat designs—let’s be honest, everything is better with cats on it.
Pro Tip:
Ensure your materials are all pet-safe. If you’re unclear about a type of paint or wood sealant, it’s always best to check that it’s non-toxic before letting your kitty lounge about.
And don’t forget – this retreat becomes much more enticing when it’s placed next to a sunny window. Cats really live for those sunbeams, just like we do with coffee on a lazy Sunday morning.
4. Sleek Industrial Cat Tower
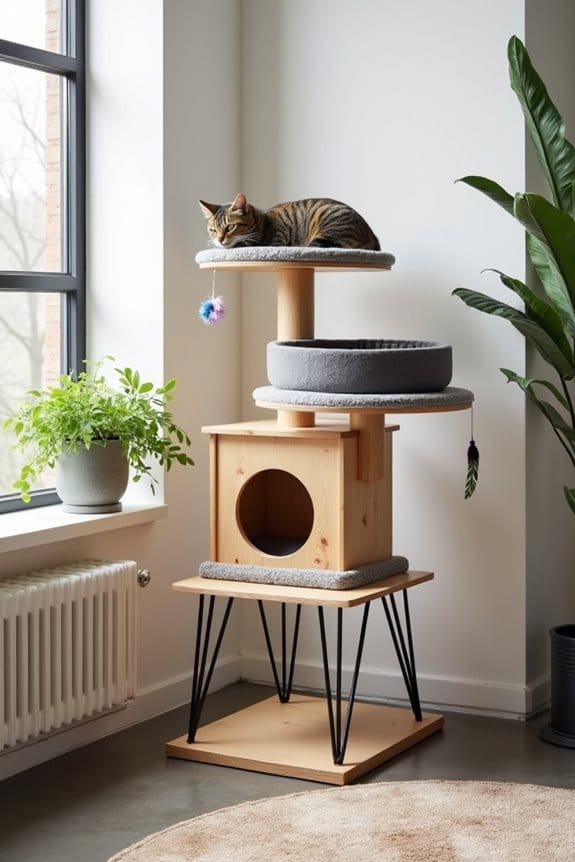
Are you looking to give your feline friend a stylish perch with an ultra-modern vibe? The Sleek Industrial Cat Tower is the ultimate DIY project that not only elevates your cat’s lounging experience but also adds a chic, contemporary touch to your home. You’ll save some cash on store-bought cat towers, and let’s face it, your cat deserves to live in style—even if it’s just lounging around all day.
Materials Needed:
- 3-4 wooden boards (preferably plywood or MDF for smoothness)
- 2-4 metal hairpin legs (adjust based on desired height)
- Cat-friendly carpet or faux fur fabric
- Wood screws
- Wood glue
- Saw (or pre-cut wood from a local hardware store)
- Drill
- Sandpaper
- Measuring tape
- Paint or wood finish (optional)
Step-by-Step Instructions:
- Decide on Dimensions: Measure a suitable space in your home where your cat can take advantage of their new tower. A typical size might be around 36 inches tall, but customize according to your room and your cat’s preferences.
- Cut the Wood: If you’re feeling adventurous, use a saw to cut your wooden boards into desired pieces. You’ll need a sturdy base, a mid-level platform, and a top perch. If cutting isn’t your thing, ask for help at your local store; they typically offer cutting services.
- Sand the Edges: Smooth out those cut edges with sandpaper to guarantee they’re splinter-free. A cat’s delicate paws deserve to be pampered, right? Plus, this makes everything look more polished.
- Assemble the Tower: Start with the base, securing the metal hairpin legs with wood screws. Once the legs are secure, add the mid-level platform, attaching it with screws or wood glue. Finish with the top perch. Make sure everything is stable and sturdy—cats aren’t known for their grace when they launch themselves.
- Add a Comfy Touch: Grab that luxurious cat-friendly carpet or faux fur fabric and staple it onto each platform for maximum comfort. Your cat will appreciate the added plushness while they plot their next napping spot.
- Seal or Paint (optional): Now’s your time to shine! If you want to add a splash of color or some wood finish, this is the final touch. Choose a bold color or a natural wood finish that complements your space. Just remember—cats are good judges of aesthetics.
- Set it Up: Place your new cat tower in a sunny spot or next to a window where your little furball can survey their domain. A well-placed tower leads to happy cats and a happier you.
Optional Add-ons/Variations:
For a unique look, try painting each level a different color to create a playful contrast, or even stencil some cute designs on the sides. You could also add hanging toys or a little scratching post to enhance the tower’s functionality.
Pro Tip:
Consider investing in a quality wood finish that’s also non-toxic. It keeps the tower safe for your kitty while protecting it from wear and tear, and helps keep it looking good. It’s not just a cat tower, it’s a work of art!
Your cat is sure to love their new sleek industrial tower, and who knows? Maybe it’ll even inspire them to finally stop knocking all your knick-knacks off the shelf. Here’s hoping, right?
5. Whimsical Treehouse Cat Tower
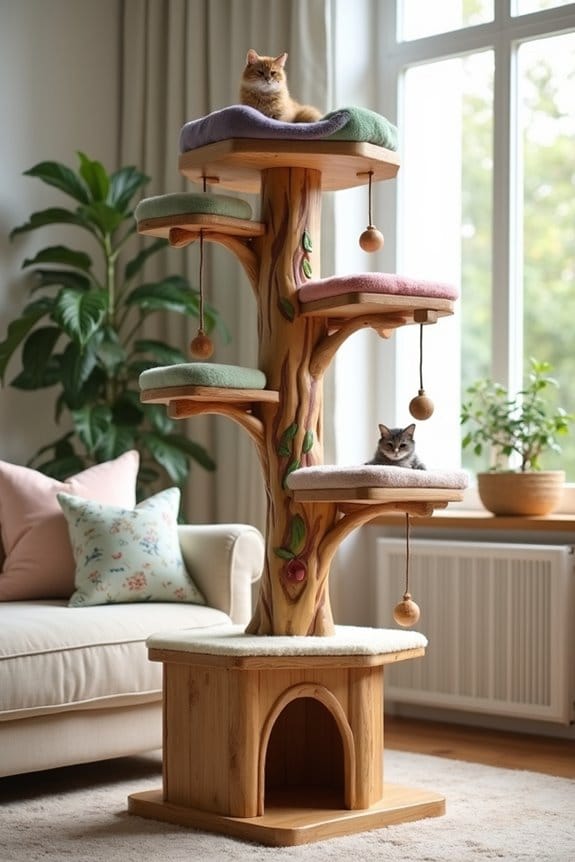
Are you ready to transform your living room into a feline-friendly wonderland? The Whimsical Treehouse Cat Tower isn’t just a comfy spot for your kitty to stretch out and nap; it’s also a heartwarming addition to your home decor.
Imagine your cat perched high up, feeling like the king or queen of their very own castle. Plus, crafting it yourself means you’ll save a few bucks for those crazy expensive cat treats—because we all know they’re worth it.
Materials Needed:
- 4 wooden boards (1x4s work well for this project)
- 1-2 wooden dowels (for the tree trunk effect)
- Cat-friendly carpet or fabric (think cozy here)
- Wood screws
- Wood glue
- Drill or screwdriver
- Paint or wood finish (optional for some pizzazz)
- Saw (or pre-cut wood from a local store)
- Measuring tape
- Sandpaper
- Non-toxic wood sealer (optional)
Step-by-Step Instructions:
1. Measure and Cut: Start by deciding how tall you want the tower, typically around 4-5 feet is perfect for giving your cat a good view. Cut your wooden boards into various lengths—two for the base platform, one for the tree trunk, and others for additional branches.
2. Create the Base: Using your larger pieces, create a sturdy base by screwing the two boards together in an L-shape. This is the foundation of your cat’s castle, so make certain it’s solid—cats can leap like they’re auditioning for the Olympics.
3. Attach the Tree Trunk: Secure the wooden dowels vertically to the base, spaced out evenly. These dowels will act as the tree trunk, creating a whimsical look. Use wood glue and screws to confirm these dowels aren’t going anywhere—your cat’s acrobatics have to be supported.
4. Add Platforms: Cut additional wooden boards for the treehouse platforms, varying the heights to create a fun climbing experience. Attach these platforms to the tree trunk using screws, making sure they’re stable enough to handle the weight of your cat.
Check that they’re spaced comfortably so your kitty can jump with ease.
5. Cushion it Up: Now for the good stuff. Cover each platform with that soft, cat-friendly carpet or fabric. Not only will this make your cat feel pampered, but it’ll also give a cozy look to your tower. Staple it down tight so there are no tripping hazards.
6. Finishing Touches: If you’re feeling artsy, now’s the time to paint or stain your creation. Choose a color that matches your decor or go wild with pastels. Just remember to use non-toxic materials, ‘cause cats can be curious little munchers.
7. Seal the Deal: If you used any wood finish, consider sealing it with a non-toxic sealer to protect the structure. This helps against those pesky paw prints or accidental spills—because let’s be honest, we all know cats can be a bit messy.
Optional Add-ons/Variations:
Want to get a bit creative? Consider using patterned fabric for the cushions to really make your cat tower pop, or add some hanging toys and scratch posts to entice your cat to explore every inch of their new space.
You could even paint the trunk to look like a real tree—let your imagination run wild here.
Pro Tip:
Before you start, make sure to wear proper safety gear like goggles and gloves when using tools. A little precaution goes a long way, and you want to keep those fingers intact for all the kitty scratches you’ll be giving later.
And remember, building this tower can be a fun project for you and the kids, especially if you let them help with the painting—just maybe skip the messy part and keep it to a designated area. It’s all about the fun and memories, right?
6. Multi-Level Jungle Gym Cat Tree
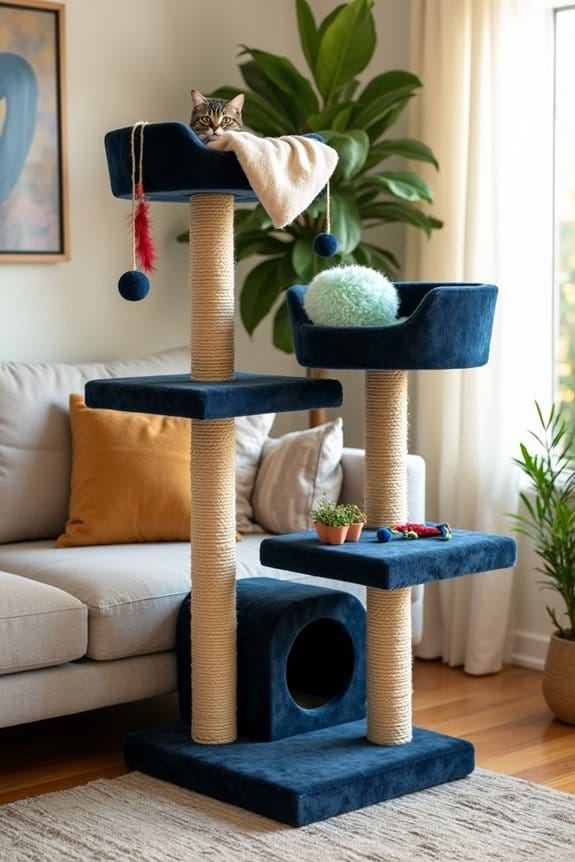
Are you ready to take your cat’s playtime to the next level? The Multi-Level Jungle Gym Cat Tree is an exciting DIY project that not only keeps your feline friend entertained for hours but also adds an eye-catching feature to your living space.
Think of it as a fun workout for your cat, encouraging them to climb, jump, and explore, all from the comfort of home. Plus, making it yourself means you’ll save money that you can use for the good stuff—like that fancy organic catnip they’ve been eyeing.
Materials Needed:
- 6 wooden boards (2x4s for a sturdy structure)
- 1 wooden round or square base (for stability)
- Cat-friendly carpet or fabric (preferably non-toxic)
- Rope (for scratching posts)
- Wood screws
- Wood glue
- Drill or screwdriver
- Saw (or pre-cut wood from a local store)
- Measuring tape
- Sandpaper
- Non-toxic wood sealer (optional)
- Optional: Cat toys or hanging balls for added fun
Step-by-Step Instructions:
1. Design Your Jungle Gym: Begin by sketching out your idea for the cat gym. Think of different levels for platforms and perches. Aim for around 3-4 levels, providing plenty of space for kitty adventures.
2. Cut the Wood: Measure and cut your wooden boards into varying lengths for the base, vertical posts, and platforms. A good height for each level is about 1-2 feet apart to allow easy access for your cat.
3. Assemble the Base: Start with the base by attaching the wooden square to the larger boards; this will hold the whole structure. Make sure it’s sturdy—cats don’t do gentle landings.
4. Attach Vertical Posts: Securely fasten the vertical boards to each corner of the base using screws. This will form the frame for your jungle gym. Verify everything is aligned and level; nobody wants a wobbly cat gym.
5. Add Platforms: Cut out additional wooden boards for the platforms, spacing them strategically along the vertical posts. Use wood screws to attach these platforms at different heights, creating a fun multi-level experience for your kitty.
6. Cushion and Decorate: Cover each platform with soft carpet or fabric. This not only creates a cozy surface for your cat but also helps with grip. Use wood glue or staples to secure the fabric in place.
For extra fun, consider wrapping some rope around the vertical posts to create scratching areas.
7. Final Touches: If you’re feeling inspired, you could paint or stain the wood to match your decor. Perhaps add some hanging toys or balls from each level for your cat’s amusement.
Optional Add-ons/Variations:
- Colorful Fabrics: Instead of plain carpet, go for vibrant colors or patterns that pop in your living room. You could mix and match different fabrics for each level to create a whimsical charm.
- Integrated Cat Towers: Consider stacking some boxes or creating little hideouts at each level for your cat to explore. You can personalize these spots with a comfy blanket or their favorite toy.
Pro Tip:
Always check that all screws and edges are well-hidden and sanded smoothly to prevent any splinters or injuries. A sturdy structure will confirm your cat can leap around confidently without any surprises.
Embrace your inner DIY enthusiast, and you’ll not only create a fantastic play space for your cat but also an attractive conversation piece for your home. Happy building!
7. Elegant Vintage Cat Stand
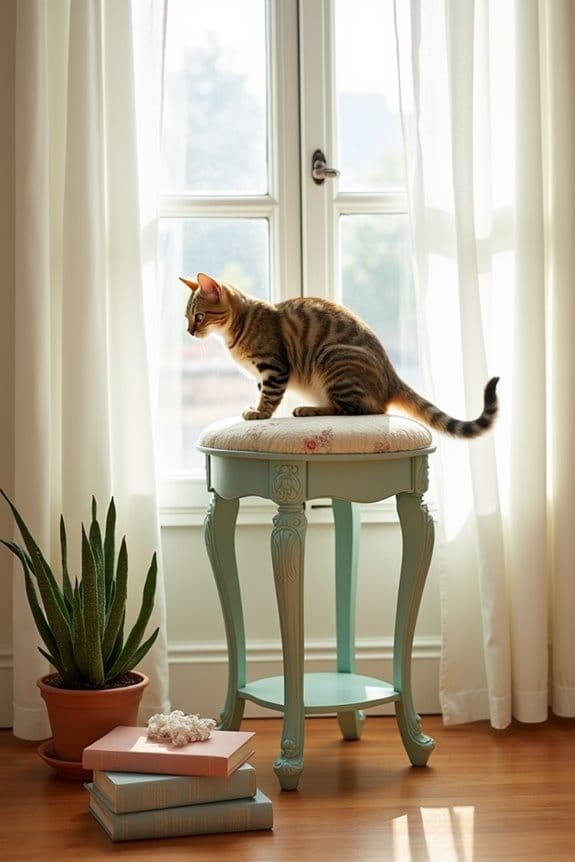
If you’re looking for a charming way to pamper your kitty while adding a touch of vintage elegance to your home, this Elegant Vintage Cat Stand is perfect for you. Not only does it provide a cozy perch for your feline friend to observe their kingdom, but it also elevates your decor game, saving you money on store-bought options that often lack character.
Let’s commence on this rewarding DIY journey together!
Materials Needed:
- 1 wooden stool or small end table (choose a style you love)
- Soft fabric or vintage upholstery (to add that classy touch)
- Cat-safe non-toxic adhesive or glue
- A couple of medium-sized wooden dowels (for stability)
- Sandpaper (for that smooth finish)
- Paint or wood stain (optional for color matching)
- Measuring tape
- Scissors
- Felt pads (to protect your floor)
Step-by-Step Instructions:
- Select Your Base: Start by picking a sturdy wooden stool or small end table. Make sure it’s tall enough for your cat to enjoy a good view but not so high that it scares them. Keep it stylish, though—you want this piece to shine!
- Prep Your Surface: Give the wood a good sanding to remove any splinters or rough patches. No one wants a cat with splinters in their paws. If you’re going for a stained or painted look, this is the time to get creative with color!
- Upholster for Comfort: Cut your fabric into a size that will cover the top of the stool or table. If you’re feeling fancy, you can add foam padding underneath the fabric for extra cushion. Use the adhesive to carefully secure the fabric, smoothing out any wrinkles as you go.
- Stabilize with Dowels: Measure where you want your dowels for extra support (this works great if your cat likes to leap!). Cut them to size, then glue them securely into place between the legs of the furniture and the seat. This guarantees the stand is extra sturdy for your little superhero.
- Finishing Touches: Once everything is dry, attach felt pads to the bottom of the legs for floor protection. This is especially handy if you have hardwood floors—no one wants their beloved cat stand scratching up the good stuff.
- Introduce It to Your Cat: Place the elegant cat stand in a cozy corner by a window where your feline can keep an eye on the world outside. Encourage your cat to explore their new throne with treats or their favorite toy.
Optional Add-ons/Variations:
- Fabric Choice: Use different fabric patterns—think floral, houndstooth, or even faux leather—to match your home decor or your cat’s personality. Who says cat furniture can’t be chic?
- Color Pop: Paint the legs of the stand in a fun, bold color to make a statement piece, or opt for a shabby chic distressed look that screams vintage charm.
Pro Tip:
Always verify that any materials you use, especially fabrics and adhesives, are non-toxic and safe for your feline friend. If it’s not safe for your munchkin, it doesn’t belong in your DIY project.
Plus, if you have leftover fabric, why not whip up a little matching cat blanket to spoil your furball even more? It’s a win-win!
Alright, now go create a stylish haven for your cat that both of you can enjoy! It’s time to let your creativity shine as you elevate your home while spoiling your cherished companion.
Extra Tips & Ideas
While you might think making a cat tree is straightforward, there are tons of creative touches that can take your feline friend’s playground to the next level.
Why not upcycle an old piece of furniture, adding a layer of twist or two? A small bookshelf can become a multi-level wonderland with just a bit of carpet and some sisal rope.
You could also make it cozy. Ever thought of placing a soft blanket on a perch? Instant luxury.
Don’t forget to sprinkle in some catnip, so your kitty feels like royalty.
And hey, if you mess up, just call it “art.” Cats appreciate the effort, and watching them explore your masterpiece will definitely make your day.
Frequently Asked Questions
How Much Does It Cost to Build a Homemade Cat Tree?
Building a homemade cat tree can cost between $50 and $150, depending on materials and size. You’ll save money by recycling wood or using inexpensive supplies, creating a unique design your cat will love.
What Materials Are Best for Making a Durable Cat Tree?
For a durable cat tree, you’ll want to use plywood, carpet, sisal rope, and sturdy wooden posts. These materials withstand wear and provide a safe, stable environment for your feline friend to play and relax.
How Do I Ensure My Cat’s Safety on the Tree?
To guarantee your cat’s safety on the tree, secure it to the wall, use sturdy materials, avoid sharp edges, and regularly check for wear. Keeping it stable and safe helps prevent accidents and injuries.
Can I Customize the Size of the Cat Tree?
Absolutely, you can customize the size of your cat tree! Measure your space and your cat’s needs, then adjust dimensions accordingly. It’ll guarantee your feline friend has the perfect, comfortable environment for play and rest.
How Long Does It Take to Build a Cat Tree?
On average, it takes about four to six hours to build a cat tree, depending on complexity. If you’re meticulous about design, you might spend even longer, ensuring every detail’s just right for your feline friend.
Conclusion
So, don’t let the idea of crafting a cat tree feel overwhelming—it’s actually fun and liberating. You might think you need a degree in woodworking or design, but trust me, a little creativity and some simple tools will do the trick. Your cats will adore their new playground, and you’ll love how it elevates your home decor. Plus, it’s way cheaper than those overpriced models. Why not give it a try? Your furry friends are waiting.

