Your couch corner is basically shredded at this point.
And honestly? That scratch mark on your linen sofa is the one thing ruining the whole vibe of your living room. I know that feeling — I came home one day to my sister’s cat destroying my brand new jute rug, and I just stood there, mouth open.
The worst part is that your cat doesn’t care. At all. She’ll hit that same spot tomorrow.
But here’s what actually works — a diy cat scratcher your cat will pick over your furniture every single time. I’ve rounded up 7 durable ideas that look good enough to sit right next to your gallery wall, not hide behind the couch.
These aren’t just scratching posts. They’re the thing standing between your sofa and total destruction.
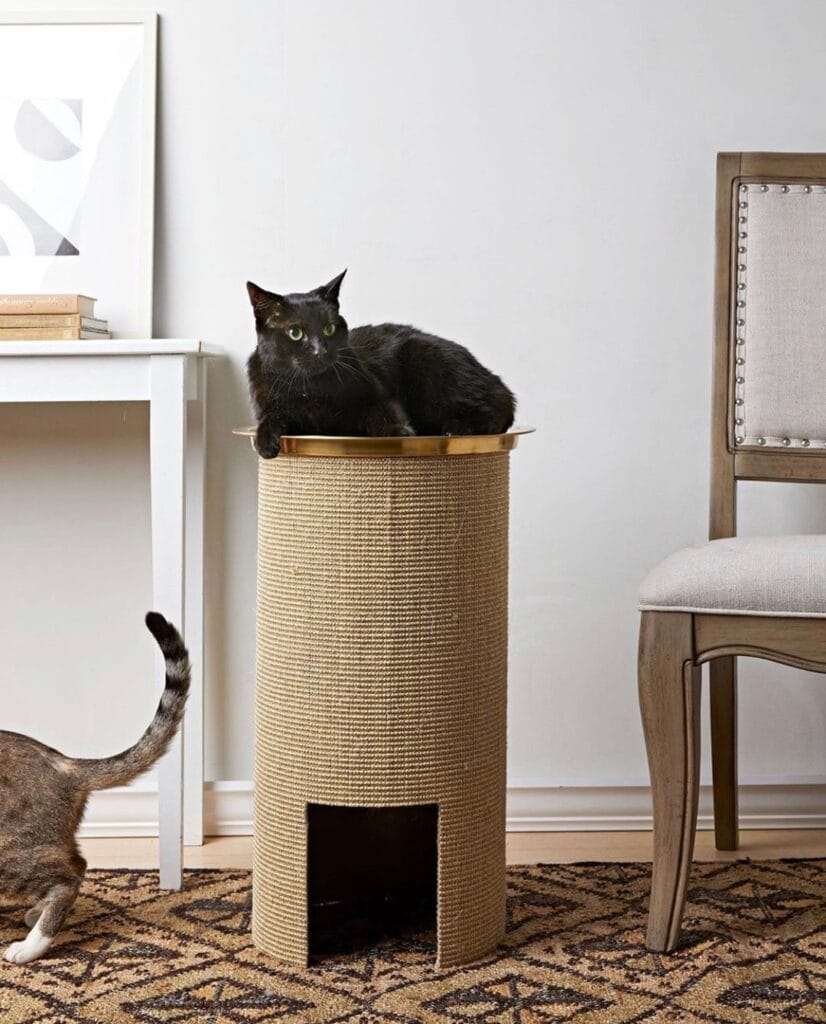
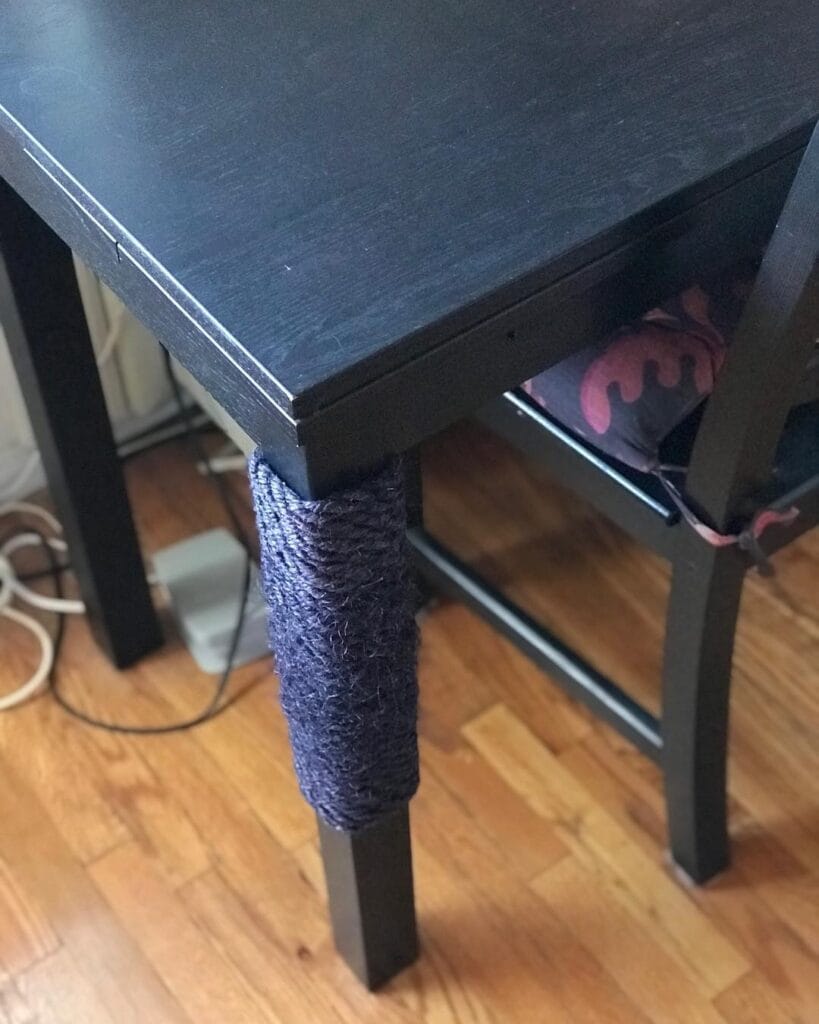
#1: Wrap a Table Leg Into a Cat Scratcher (And Save Your Furniture)
You know that feeling when your golden leaves a muddy paw print on your freshly cleaned rug and you just cannot deal with one more thing being destroyed? Yeah. Cat owners get that same panic when they walk in and see their table leg looking like it lost a fight with a shredder.
This one hit close to home for me. My cousin wrapped her IKEA HEMNES desk leg with dark navy jute rope after her cat demolished the corner down to raw wood. Took her one afternoon. Looked so good she did all four legs.
Materials & Tools
– Natural jute rope (3mm–4mm thickness), dyed navy or left natural
– Strong craft glue or hot glue gun
– Scissors
– Painter’s tape (to mark start/stop points)
Instructions
Start at the base of the leg, right where it meets the floor. Put a dab of hot glue on the wood and press the rope end flat against it. Hold it for a few seconds.
Wrap the rope upward in tight, touching coils — no gaps. Press each loop against the last one. Add a small dot of glue every 5–6 wraps to keep tension.
Stop wherever feels right. The image shows roughly 8–10 inches of coverage, which hits exactly where cats like to stretch and scratch.
Secure the final end with glue and tuck it underneath a coil.
The jute texture grabs claws naturally, so cats choose it over bare wood — which means your furniture actually survives, and you stop replacing table legs every six months.
Prep Time: 5 min | Active Project Time: 30–45 min | Difficulty Level: Beginner
The navy dye blends beautifully with dark-stained furniture, so it looks intentional, not patched.
📸 Photo credit: Instagram @judithsheltonhere
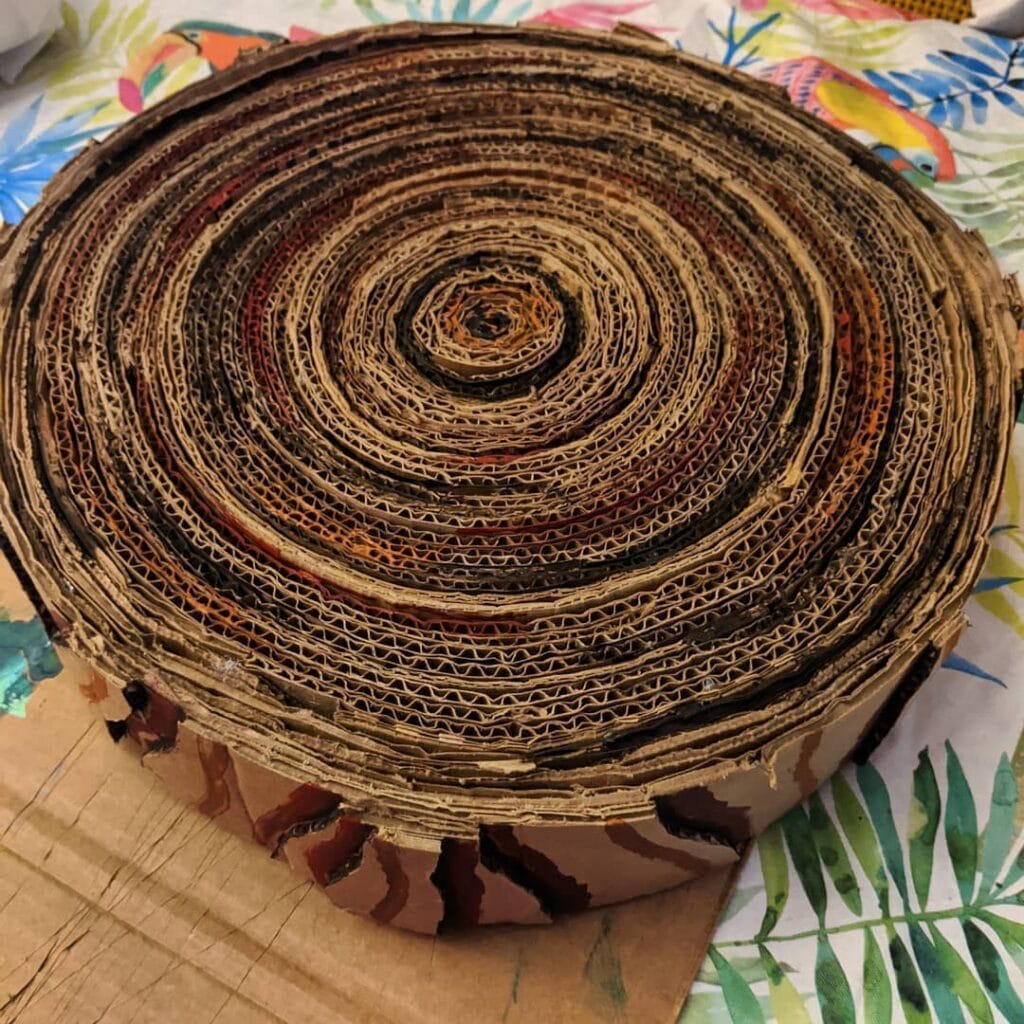
#2: Rolled Cardboard Cat Scratcher (The One That Looks Like a Tree Stump)
Okay so you know how your golden leaves muddy paw prints across every surface but somehow your cat is the one destroying the furniture? Like Riley has claimed your new linen sofa as her personal nail salon and you just… watch it happen.
This rolled cardboard scratcher is exactly the fix.
I made one of these last winter when my cat Sage shredded the arm of my favorite chair in like two days flat. Took me an afternoon, cost me nothing but some old boxes, and honestly? It looks cool enough to leave out without hiding it.
Materials & Tools:
– Corrugated cardboard boxes (at least 4-5 large ones)
– Strong craft glue or hot glue gun
– Rubber band or twine (for holding the roll while drying)
– Box cutter or scissors
– Ruler
– Optional: non-toxic paint for color accents
Instructions
Cut your cardboard into long strips, roughly 3–4 inches wide, keeping the corrugated flutes running parallel to the short edge — this exposes that wavy texture cats go wild for.
Start rolling one strip tightly from one end. And here’s where most people mess up: keep the tension even the whole time or the center collapses. Glue as you go.
When one strip ends, glue the next strip’s edge right onto it and keep rolling. The spiral builds naturally. Keep going until your scratcher reaches about 10–12 inches in diameter — wide enough that your cat has real real estate to dig into.
Stand it on its flat end and press down to flatten the top surface. Secure the outer edge with a generous line of hot glue.
Let it cure for at least 2 hours before introducing it to your cat.
The exposed corrugated layers — that’s the feature — give cats the exact drag resistance their claws crave, which means they choose this over your couch, and you stop holding your breath every time Riley walks past the furniture.
Tuck it near your cat’s favorite lounging spot. Cats scratch where they already hang out, not where you wish they would.
Prep Time: 10 min | Active Project Time: 45–60 min | Difficulty Level: Easy
If you want more ways to keep your cat entertained with things you already have, 7 Fun DIY Cat Projects Every Owner Needs has some solid ideas worth bookmarking.
📸 Photo credit: Instagram @blackbootsandneonlove
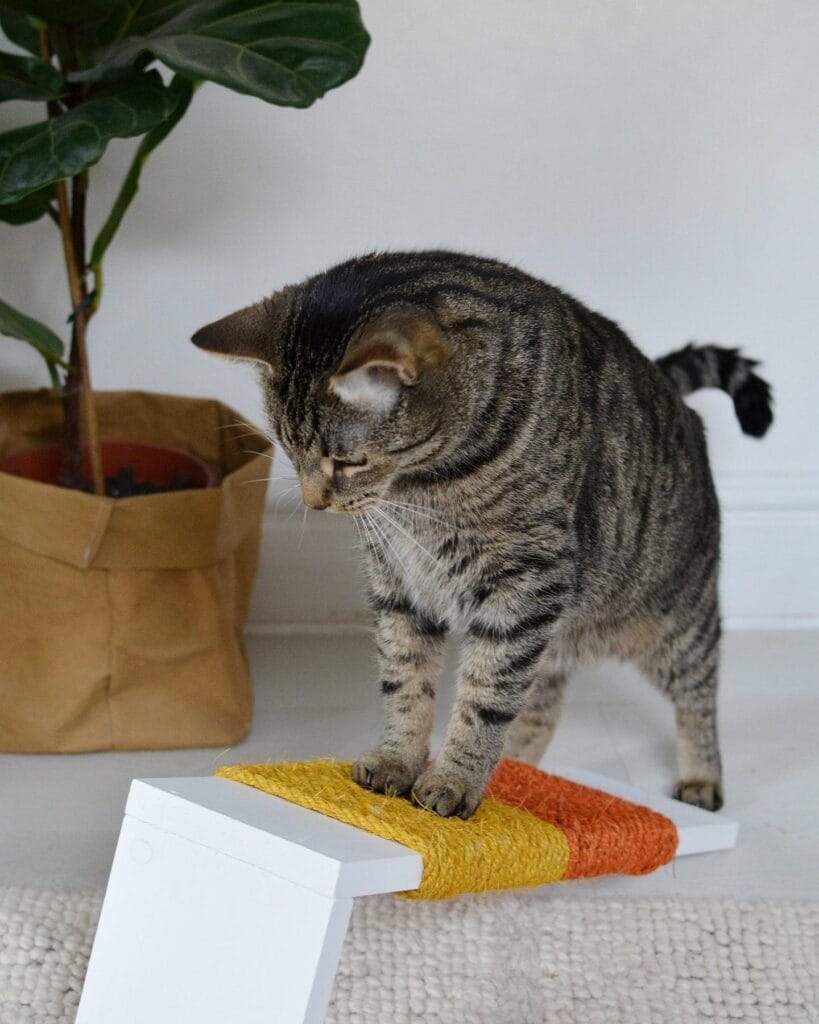
#3: DIY Sisal Rope Scratcher Board (The One That Actually Stays Put)
You know that moment when you walk into the living room and your golden has somehow dragged the throw blanket off the couch again — and you just stand there? Yeah. Cat owners get a version of that too, except it’s shredded armchair corners and carpet pulled up at the edges.
This scratcher? It fixes that.
Prep Time: 20 minutes | Active Project Time: 45 minutes | Difficulty Level: Beginner
Materials & Tools:
– 1 white-painted MDF board (approximately 12″ x 16″)
– Natural sisal rope in mustard yellow and burnt orange
– Strong craft adhesive or hot glue gun
– Sandpaper (120-grit)
– Scissors
– Painter’s tape
Instructions
Start by lightly sanding the MDF board so the glue grips better — skipping this step is the number one reason sisal peels off early. Once sanded, map out your color zones with painter’s tape. The image shows a diagonal split between mustard yellow and burnt orange, which honestly looks so good against a neutral rug.
Apply a generous bead of hot glue along the board, then press your sisal rope down row by row, keeping tension tight as you wrap. And don’t rush the corners — that’s where most DIY scratchers fall apart. The tight sisal wrapping gives cats real resistance to dig into, which means they leave your furniture alone, and that is the whole payoff.
Overlap your two rope colors right at the diagonal seam for a clean, intentional look.
Keep the board low and flat on the floor near furniture your cat already targets. Cats scratch to stretch, so flat placement actually works better than you’d think.
📸 Photo credit: Instagram @hunkerhome
#4: Sisal Rope Scratching Post With a Rug Base (The One That Actually Stays Put)
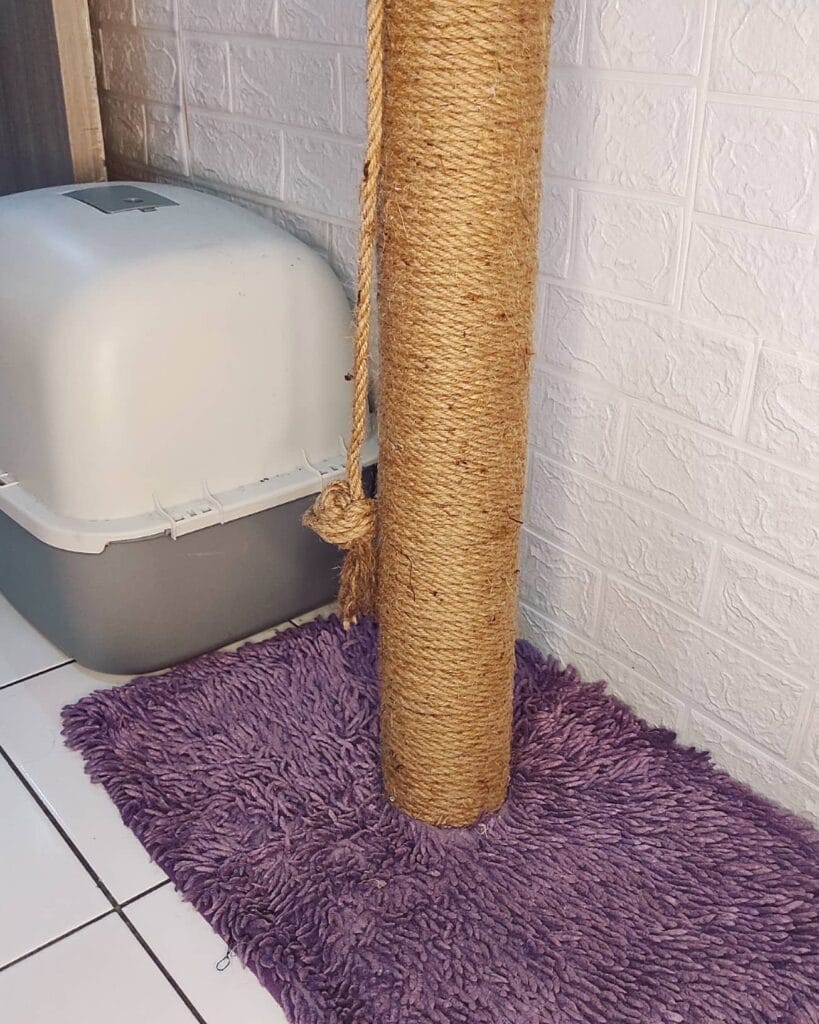
You know that moment when your golden has dragged her toy across the floor again and knocked over literally everything near the wall? Yeah. Cats do the same thing with flimsy scratchers — they tip, they slide, they become a hazard.
This one doesn’t.
Prep Time: 15 min | Active Project Time: 1.5 hours | Difficulty Level: Beginner-Friendly
Materials & Tools:
– 4-inch diameter PVC pipe (cut to your desired height, around 24–30 inches)
– Natural sisal rope (1/2-inch thick, approximately 100 feet)
– Purple shag bath rug (or any 16×24-inch carpet square)
– Strong adhesive or hot glue gun
– Zip ties or twine to secure rope ends
– Drill + screws to anchor pipe to rug base
### Instructions
Start by anchoring your PVC pipe dead center through the rug base — drill a hole, push it through, and secure it underneath with a washer and bolt. That bottom connection is everything. Without it, the whole post wobbles.
Now grab your sisal rope and start wrapping from the bottom up, pulling each coil tight against the last. I burned my fingers doing this the first time because I was rushing — don’t rush. Keep tension consistent the whole way up.
Here’s the trick: dab hot glue every 6–8 inches as you wrap. It keeps the coils from separating over time, which is exactly what happens with cheap store-bought posts after two weeks.
Tie off the rope at the top with a square knot and tuck the tail behind the last coil.
The sisal texture triggers a cat’s natural scratch instinct, which means they’ll choose this over your sofa — and the heavy rug base absorbs the pull so nothing slides across your tile floor.
You can actually tie a small jute rope loop mid-post as a dangling toy, just like the one in the image. My cat ignored it for a week then became obsessed.
If your rug base feels too light, stack two rugs and glue them together before drilling — double the weight, zero wobble. And if you want more ideas like this one, 7 Creative DIY Cat Crafts for Pet Lovers has some really fun builds worth bookmarking.
📸 Photo credit: Instagram @pawnyaww_
#5: The Tall Jute Scratching Post (That Actually Stays Put)
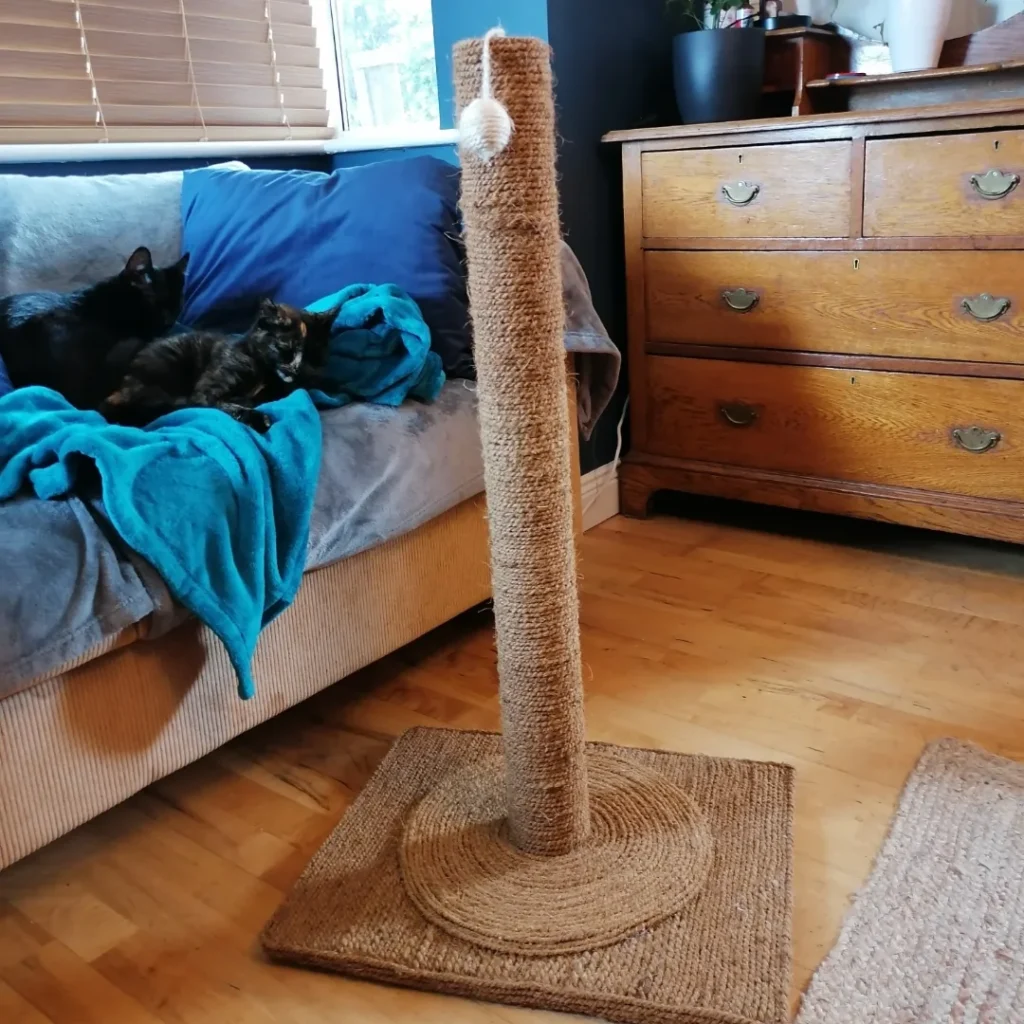
Okay so you know that moment when your golden has been finally calm for five minutes, and then the cat launches off the couch arm like a rocket? Yeah. Your furniture takes the hit every single time.
This jute rope scratching post is the fix. And honestly, it’s one of those builds that looks like you bought it from a boutique pet shop.
What You’ll Need:
– 4-inch diameter PVC pipe, cut to 36 inches
– Heavy jute twine (at least 200 feet)
– ¼-inch thick plywood square, cut to 18×18 inches
– Hot glue gun + extra glue sticks
– A small pompom toy (white, like in the photo)
– Sandpaper (120 grit)
– Drill + 2-inch wood screws
Instructions
Sand your plywood edges first so nothing snags. Drill your pipe dead center into the base and secure it with two screws from underneath.
Start wrapping your jute from the base upward, pulling tight with each loop. A small bead of hot glue every 10 rows keeps everything from sliding. The jute-wrapped surface gives cats something to genuinely dig into — which means your sofa stays intact.
Knot the pompom toy at the top once you reach the pipe’s end.
One thing to remember: the heavier your base, the less wobble during use. Add a second plywood layer if needed.
The tall 36-inch height lets cats stretch fully upright — that full-body scratch actually releases tension in their spine.
📸 Photo credit: Instagram @thatsonecraftykat
#6: DIY Sisal Rope Cat Scratcher Ramp (That Actually Looks Good in Your Living Room)
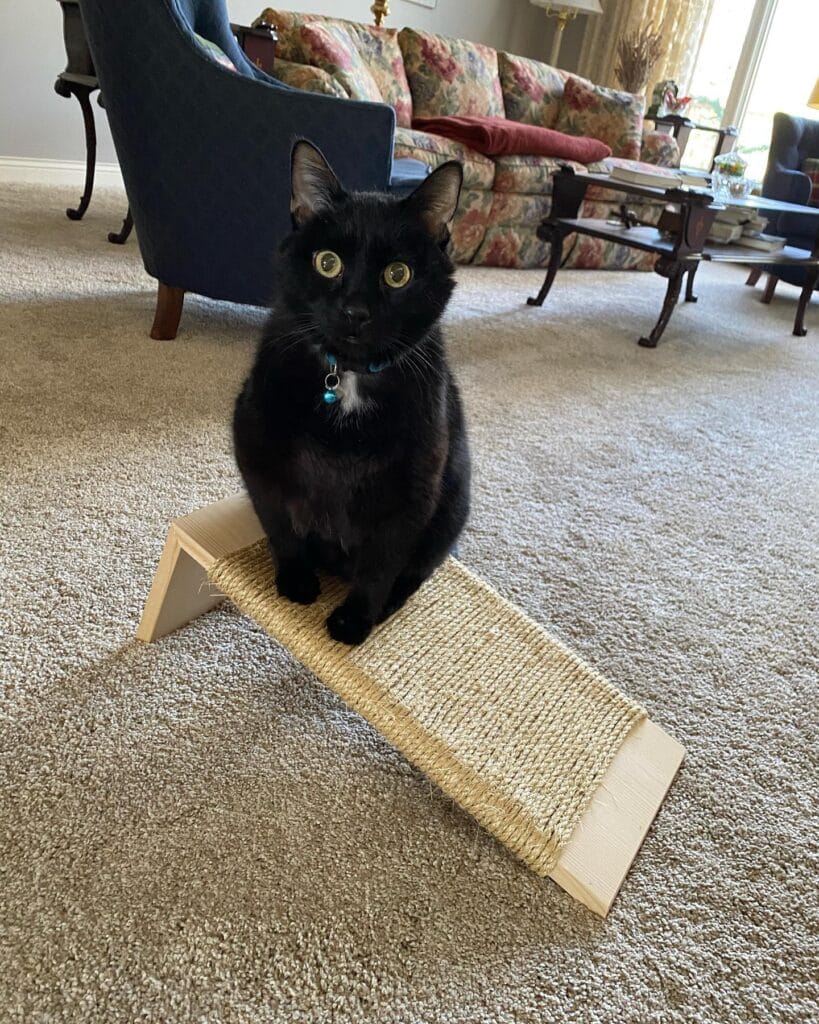
Okay so you know that feeling when your golden retriever flops onto the rug and you’re just surrounded by chaos? Cat owners get a version of that too — shredded furniture, scratched-up baseboards, fabric hanging off your couch in sad little strips.
This ramp scratcher is the fix.
Materials & Tools You’ll Need:
– 1 piece of pine wood board (approximately 24″ x 6″ x ¾”) for the ramp surface
– 2 triangular pine side supports (approximately 6″ tall)
– Natural sisal rope (⅜” diameter, roughly 50–60 feet)
– Wood glue and a staple gun
– Sandpaper (120-grit)
– Hot glue gun as backup
Instructions
Sand your pine board first — run the 120-grit sandpaper along every edge so there are no splinters catching on the rope later. Attach your two triangular supports to each short end of the board using wood glue, then reinforce with staples underneath. Let that dry for a full 30 minutes.
Starting at the lower end, apply a thin bead of hot glue and press your sisal rope firmly row by row, wrapping tight so zero gaps show between the rows. Keep tension consistent — loose rows unravel fast. Staple the rope ends on the underside to lock everything.
The sisal surface redirects scratching away from your furniture, which means your sofa actually survives the week.
Keep this in mind: tucking the finished ramp near a chair leg makes it blend right into your room instead of screaming “pet toy.”
Prep Time: 15 min | Active Project Time: 45 min | Difficulty Level: Beginner
📸 Photo credit: Instagram @emilylaurelk
#7: DIY Cactus Cat Scratcher (The One That’ll Make Your Whole Living Room Pop)
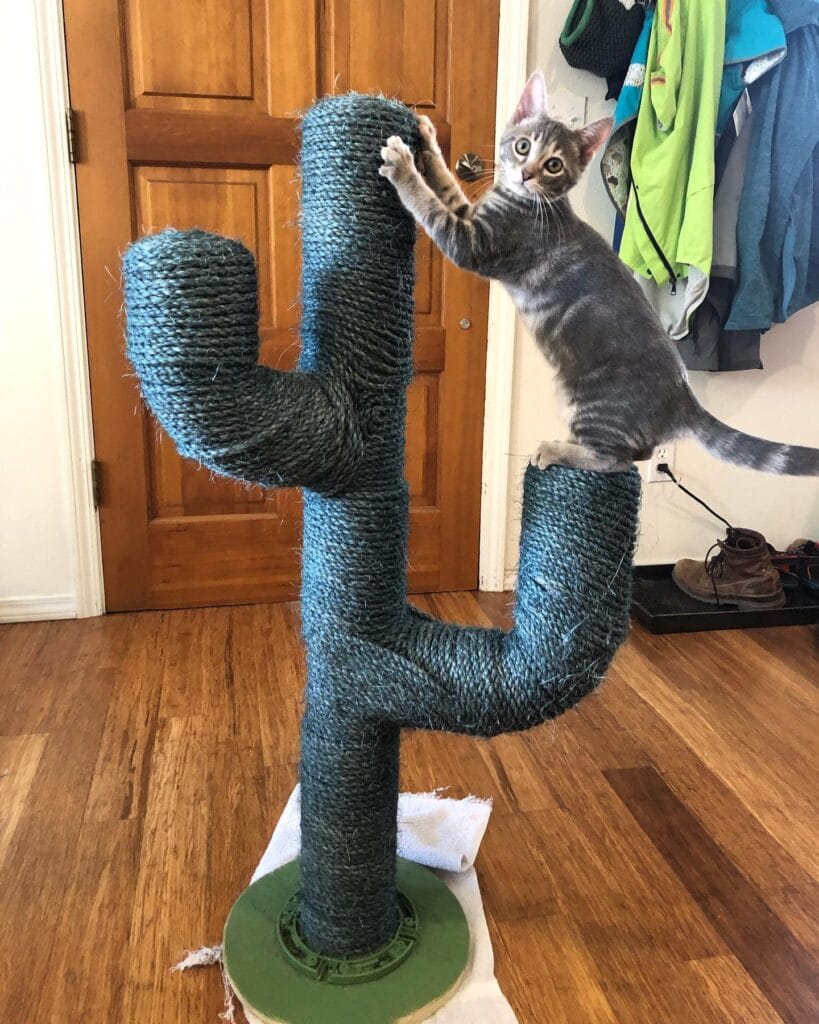
Okay so you know how your golden is always side-eyeing the cat’s stuff like she wants in on the fun too? Picture this — your cat has the most Pinterest-worthy scratcher in the room and honestly, even your dog will sniff around it out of pure curiosity.
This cactus scratcher is wrapped in teal-dyed sisal rope over a PVC pipe frame shaped into a classic three-arm saguaro cactus silhouette. The base is a green circular platform (roughly 12 inches in diameter) that keeps the whole thing steady. The arms curve outward using bent pipe fittings, and the whole structure stands about 3.5 feet tall.
Materials & Tools:
– 3-inch diameter PVC pipes (main trunk + two curved arms)
– 90-degree PVC elbow joints (x4)
– Teal sisal rope (approximately 200 feet)
– Hot glue gun + extra glue sticks
– Green spray paint for the base
– Circular wooden base board (12 inches wide)
– Sandpaper (medium grit)
– Strong adhesive/epoxy
– Scissors
Prep Time: 30 minutes | Active Project Time: 3–4 hours | Difficulty Level: Intermediate
Instructions
Start by cutting your PVC pipes — one 24-inch trunk piece, two 8-inch arm stubs, and four curved connector sections using the elbow joints. Sand every pipe end so the joints fit without gaps.
Connect the elbow joints to shape each arm. The lower arm curves down then back up (like the image shows), and the upper arm angles straight out to the left. Dry-fit everything before committing — this saves you from a headache mid-wrap.
Glue the trunk base to your wooden board using epoxy. Let it cure for a full 20 minutes before touching it again. Then spray the base forest green and let it dry.
Now the satisfying part. Start hot-gluing your teal sisal rope at the very bottom of the trunk, wrapping tight and close — no gaps. Each row needs a small dot of hot glue every 3–4 inches to hold. Work slowly upward, keeping the tension firm. This is the key: tight wrapping means your cat actually gets resistance when she scratches, which is what makes her use it over your sofa.
Wrap each arm separately before attaching — it’s easier. Once wrapped, glue the arms onto the connector joints and add extra rope wrapping over the seam to hide the joint. The sisal-over-joint method makes the whole thing look seamless and professionally made.
Sisal rope — scratching surface — means your cat sharpens her claws on this instead of your couch cushions. That payoff alone makes the four hours worth every minute.
Sand down any sharp rope ends at the tip of each arm. That little step keeps little paws safe.
📸 Photo credit: Instagram @stevie._.licks
The Sisal Rope Secret That Makes Your DIY Scratcher Actually Last
Okay, real talk — most DIY cat scratchers fall apart within weeks, and I know exactly why.
People wrap the sisal rope too loosely. Gaps between the rope coils look tiny, but your cat’s claws catch in those spaces and unravel the whole thing fast. Pull each wrap so tight your fingers ache a little. That tension is everything.
Here’s my other hard-won tip: skip the hot glue to hold the rope in place. It breaks down under repeated scratching and your cat will smell it. Use staples at the start and end, then let the tension do the rest of the work.
The best part: the base matters more than the post. A wobbly scratcher scares cats off after one bad experience, and they’ll go straight for your couch instead.
I learned this the messy way when my cousin’s tabby ignored a perfectly cute scratcher and destroyed an entire armchair corner.
Add a wide, heavy base — think 16 inches minimum — and your cat will actually choose the scratcher every single time.
Your Dog-Proof Home Starts Right Now
Pick one spot that’s driving you crazy — the sofa, the entryway rug, that one corner your golden claims as her personal spa. Start there.
Small wins add up fast. Once you nail one area, the rest of the house starts falling into place. And honestly? A home that works with your dog instead of against her just feels different — calmer, cleaner, way less stressful.
If you’re already thinking about your pup’s dedicated space, stylish DIY dog crate furniture ideas can keep things looking Pinterest-worthy without the chaos.
So — what’s the one room you’re tackling first?

Amr Mohsen is a software engineer who traded his keyboard for a leash — at least on weekends. His love for dogs inspired him to share what he learns as a dog owner and enthusiast, bringing a detail-oriented, research-driven perspective to every article he writes. If it’s about dogs, he’s probably already looked it up twice.

