Picture your dog’s crate as their own little fortress, a cozy space where they can retreat from the chaos of everyday life. But let’s be honest, that plain metal box isn’t winning any style awards. Why not turn it into a stylish retreat with some creative DIY covers? From vibrant geometric prints to charming floral designs, there’s so much you can do. Ready to transform your pup’s space into something they—and you—will love?
Fabric Patterns for Personalization
When you think about making your dog’s crate feel cozy and stylish, fabric patterns can really make a difference.
Imagine wrapping your crate in a fun, vibrant fabric that reflects your personality and matches your home decor. You can easily create a DIY dog crate cover with wood framing, giving it a custom look.
Choose patterns like stripes, polka dots, or even floral designs—whatever tickles your fancy. Just measure your crate and cut the fabric accordingly; a little sewing or even fabric glue can hold it all together.
You’ll be amazed at how a simple cover transforms an ordinary crate into a cozy retreat for your pup. They’ll love it, and you’ll get the style points. It’s a win-win!
Our Collection
When it comes to picking the perfect cover for your pup’s crate, our collection has something for everyone.
You’ll find colorful geometric prints that pop, floral designs that feel fresh, and even animal-themed options that’ll make your dog feel like royalty.
Plus, whether you’re into classic plaid or prefer solid colors, there’s a fabric to match your home decor and your furry friend’s personality.
1. Colorful Geometric Prints
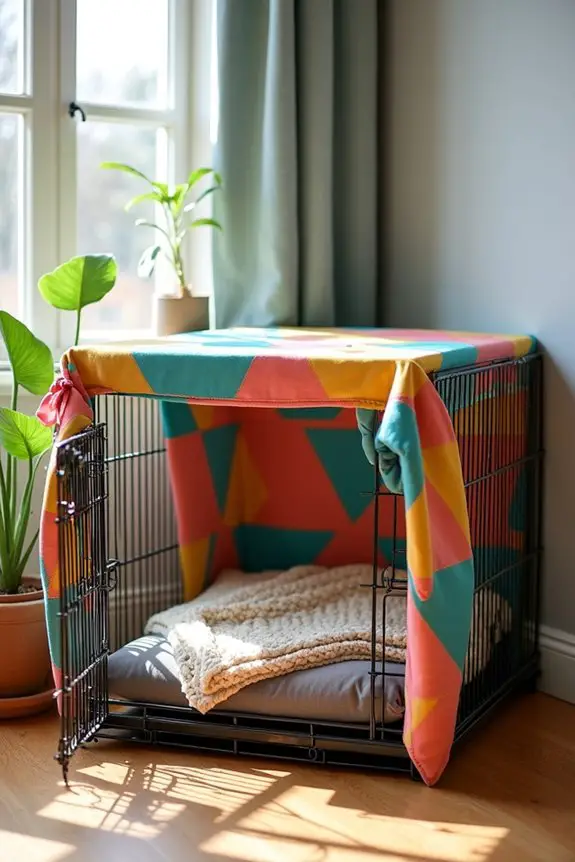
Transforming your dog’s crate into a cozy, stylish retreat is easier than you think! This DIY dog crate cover project not only adds a pop of color to your home but also provides your furry friend with a sense of security and comfort. Plus, you’ll save a few bucks compared to store-bought options. So, let’s get crafty and give your pup a fashionable hideaway!
Additionally, consider pairing your DIY cover with luxury dog beds to elevate your pup’s comfort even further.
Materials Needed:
- 1 large piece of colorful, geometric fabric (enough to cover the sides of your crate)
- Measuring tape
- Scissors
- Sewing machine (or needle and thread if you prefer a hand-sewn touch)
- Pins or fabric clips
- Iron and ironing board (for a polished finish)
- Optional: Velcro strips or fabric ties for securing the cover
Step-by-Step Instructions:
- Measure the Crate: Start by measuring the height, width, and depth of your dog’s crate. Make sure to note these numbers down. It’s a little like measuring for new pants, but trust me, your dog’s comfort is way more important than a fashion faux pas.
- Cut the Fabric: Using your measurements, cut the fabric into four pieces for the sides and one larger piece for the top. Don’t worry about being perfect; a little wonkiness adds character. Just make sure the pieces are big enough to cover the crate completely.
- Pin the Pieces Together: Lay the fabric pieces out on a flat surface. Pin or clip the edges together, making sure to align them neatly. This step is like assembling a puzzle, but instead of a picture, you get a cozy home for your pup.
- Sew the Sides: Using your sewing machine, sew along the pinned edges to attach the fabric pieces. If you’re sewing by hand, use a straight stitch to keep things simple. Remember, it doesn’t have to be perfect; it just has to hold together (like my New Year’s resolutions).
- Attach the Top: Once the sides are sewn, attach the larger piece to the top. You can sew it on or use Velcro strips for a removable option. If your dog has a tendency to redecorate, Velcro might save you some time in the future.
- Iron the Cover: Give your new crate cover a good press with an iron to smooth out any wrinkles. This step is optional, but it does help the cover look sharp and ready for its close-up.
- Dress the Crate: Slip the cover over the crate, adjusting it to fit snugly. If you used fabric ties or Velcro, secure them now. Take a moment to admire your handiwork. Isn’t it beautiful? Your dog will love it, even if they can’t appreciate the artistic choices you made.
Optional Add-ons/Variations:
- Different Fabrics: Try using canvas for a sturdier option or soft fleece for extra coziness. If you’re feeling extra creative, mix and match patterns for a fun, eclectic look.
- Personalized Touches: Add your dog’s name or a cute phrase with fabric paint or embroidery. Your pup mightn’t care, but you’ll definitely feel like a proud parent showing off their new digs.
Pro Tip:
If your dog is a bit of a chewer, consider using a fabric with a tighter weave or a water-resistant option. It’ll hold up better over time, and let’s face it, you want this cover to last longer than your latest attempt at a plant that didn’t make it past a week.
Now you’re ready to create a dog crate cover that not only looks fabulous but also gives your furry friend a safe space to chill. Happy crafting!
2. Floral Fabric Designs
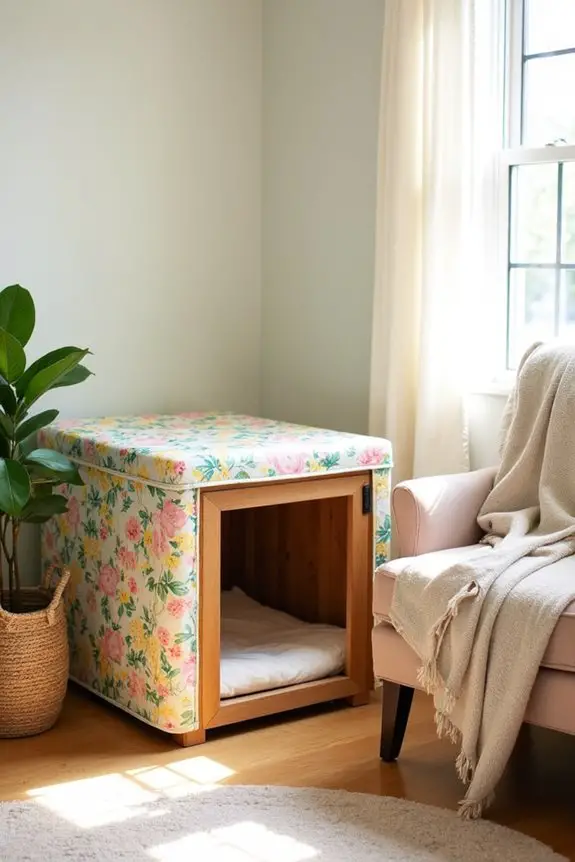
Creating a floral dog crate cover not only adds a touch of nature to your home but also provides your pup with a cozy space that feels safe and welcoming. This DIY project is perfect for dog owners who want to enhance their living space while saving some money. Plus, your furry friend will surely appreciate the added warmth and charm! Additionally, investing in luxury dog collars can elevate your pup’s overall style and comfort.
Materials Needed:
- 1 large piece of floral fabric (enough to cover the sides of your crate)
- Measuring tape
- Scissors
- Sewing machine (or needle and thread for a hand-sewn option)
- Pins or fabric clips
- Iron and ironing board (for a crisp finish)
- Optional: Velcro strips or fabric ties for easy securing
Step-by-Step Instructions:
- Measure the Crate: Grab your measuring tape and jot down the height, width, and depth of your dog’s crate. This is the essential first step—like checking if your favorite jeans still fit, but way more important for your pup’s comfort.
- Cut the Fabric: Using your measurements, cut the fabric into four pieces for the sides and one larger piece for the top. Remember, a little extra fabric is better than not enough. Your dog won’t judge you for a few rough edges.
- Pin the Pieces Together: Lay the fabric pieces flat. Pin or clip the edges together to align them nicely. Think of it as putting together a puzzle—except this one is for your furry companion’s enjoyment.
- Sew the Sides: Sew along the pinned edges using your sewing machine or a simple hand stitch. Don’t stress if it’s not perfect; it’s the love you put into it that counts. After all, we all have that one friend who can’t sew a straight line either.
- Attach the Top: Now, take that larger piece for the top and attach it. You can sew it down or use Velcro strips if you want to make it removable for easy cleaning. If your dog is a master of escape, Velcro might just save you a few headaches.
- Iron the Cover: Give your cover a quick press with an iron to smooth out any wrinkles. This step is optional, but trust me, it’ll look more polished and ready for its Instagram debut.
- Dress the Crate: Slip the cover over the crate, adjusting it to fit snugly. If you opted for fabric ties or Velcro, secure them now. Step back and admire your handiwork. It looks great, doesn’t it? And your dog will definitely appreciate the cozy vibes.
Optional Add-ons/Variations:
- Mix and Match Fabrics: Use different floral patterns for each side of the crate to create a unique patchwork effect. It’ll be like a bouquet of styles that reflects your personality.
- Personalized Touch: Consider adding your dog’s name or a cute design with fabric paint or embroidery to make it truly one-of-a-kind.
Pro Tip:
When choosing fabric, look for machine-washable options. Dogs can be messy, and trust me, you’ll want to be able to toss that cover in the wash without a second thought. Keeping it clean means a happy dog and a happy home.
3. Animal-Themed Prints
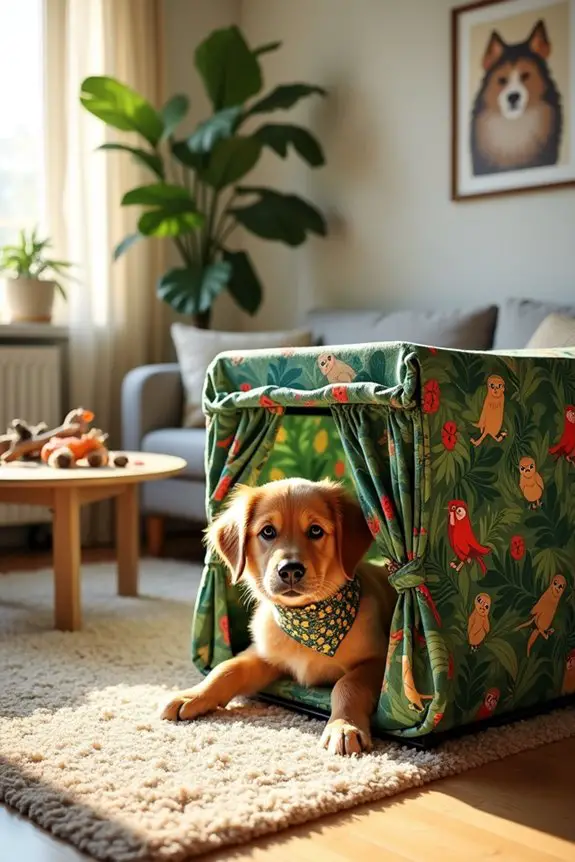
If you’re looking for a fun and functional way to jazz up your dog’s crate, then this DIY project is just the ticket. Not only does an animal-themed crate cover add a splash of personality to your home, but it also creates a cozy den for your pup, making them feel secure and comfortable.
Plus, it’s a budget-friendly way to spruce things up—because who says you can’t have style and save money at the same time? By adding a premium dog supplies element to your dog’s crate setup, you can enhance both comfort and aesthetics.
Materials Needed:
- 1 large piece of animal-themed fabric (enough to cover the sides of your crate)
- Measuring tape
- Scissors
- Sewing machine (or a needle and thread if you’re feeling adventurous)
- Pins or fabric clips
- Iron and ironing board (for that polished look)
- Optional: Velcro strips or fabric ties for easy securing
Step-by-Step Instructions:
1. Measure the Crate: Grab your measuring tape and measure the height, width, and depth of your dog’s crate. This might feel tedious, but trust me, it’s essential. We want your pup to have the perfect fit, not a wardrobe malfunction.
2. Cut the Fabric: Based on your measurements, cut your animal-themed fabric into four pieces for the sides and one larger piece for the top. Remember, it’s always better to have too much fabric than too little. Your dog won’t mind if you have a few extra inches hanging around.
3. Pin the Pieces Together: Lay out your fabric pieces on a flat surface. Pin or clip the edges together so they align nicely. Think of it as assembling a jigsaw puzzle, but one that your dog will actually appreciate.
4. Sew the Sides: Time to sew! Use your sewing machine or hand stitch the pinned edges together. If it’s not perfect, don’t worry. It’s the love that counts, right?
Besides, we all have that one friend who can’t sew a straight line, and they turned out just fine.
5. Attach the Top: Now, take that larger piece for the top and attach it to the sides. You can sew it down for a secure fit or use Velcro strips if you want the option of easy cleaning. If your pup is a crate Houdini, Velcro might just save your sanity.
6. Iron the Cover: Give your cover a quick iron to smooth out any wrinkles. This is optional, but it’ll make your cover look so much more put together—like putting on a nice shirt before going out, even if you’re just hanging around the house.
7. Dress the Crate: Slip the cover over the crate, adjusting it to fit snugly. If you went with fabric ties or Velcro, now’s the time to secure everything. Take a step back, admire your handiwork, and don’t forget to snap a pic for the ‘gram. Your dog will love the cozy vibes.
Optional Add-ons/Variations:
- Mix and Match Prints: Use different animal-themed patterns for each side of the cover to create a unique look. Imagine a zebra print on one side and cute puppy faces on the other. Talk about personality!
- Personalized Touch: Consider adding your dog’s name or a fun phrase with fabric paint to make it extra special. It’s like giving your pup their own little throne.
Pro Tip:
When choosing your fabric, opt for something washable and durable. Dogs can be messy, and you want your crate cover to withstand the occasional drool or muddy paw print.
And hey, a little extra fabric can also be used for matching accessories—like a cute bandana for your pup. Because why not?
4. Plaid Fabric Options
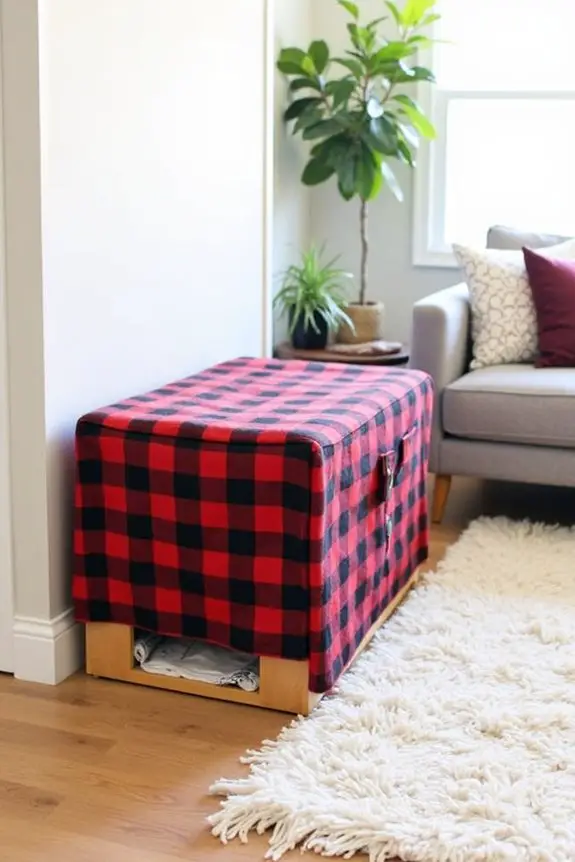
If you’re on the lookout for a stylish way to elevate your dog’s crate, this DIY plaid dog crate cover is a fantastic project. Not only does it add a rustic charm to your home, but it also creates a snug space where your furry friend can feel safe and secure. Plus, making your own crate cover can save you some serious cash while giving your living area a fresh, homey vibe. Let’s explore this fun DIY project!
Materials Needed:
- 1 large piece of plaid fabric (enough to cover the sides of your crate)
- Measuring tape
- Scissors
- Sewing machine (or needle and thread for the brave-hearted)
- Pins or fabric clips
- Iron and ironing board (to make it look sharp)
- Optional: Velcro strips or fabric ties for easy setup and cleaning
Step-by-Step Instructions:
- Measure the Crate: Start by measuring your dog’s crate—height, width, and depth. This step is essential for a perfect fit. Think of it as taking your pup’s measurements for a tailored suit, but a lot less formal.
- Cut the Fabric: With those measurements in hand, cut your plaid fabric into four pieces for the sides and one larger piece for the top. If you accidentally cut too much, don’t fret; your pup won’t mind a little extra fabric.
- Pin the Pieces Together: Lay the fabric flat and pin or clip the edges of the side pieces together. It should look like a fabric box, ready to be sealed up. Picture assembling a cute little plaid fort for your dog.
- Sew the Sides: Time to get sewing! Use your sewing machine or hand stitch the pinned edges together. Remember, even if it’s not perfect, it’s the love that counts. And let’s be honest, no one’s judging your sewing skills here.
- Attach the Top: Now, grab that larger piece for the top and attach it to the sides. You can securely sew it down or use Velcro if you want to make it easy to take off for cleaning. If your pup has a talent for escaping, Velcro is your best friend.
- Iron the Cover: Give your completed cover a quick iron to remove any wrinkles. This step is optional, but a crisp look can really elevate the overall vibe—like putting on your best outfit before company arrives.
- Dress the Crate: Slip the cover over the crate, adjusting it until it fits snugly. If you decided to use fabric ties or Velcro, secure those now. Your pup’s new cozy den is ready for use!
Optional Add-ons/Variations:
- Mix and Match: Try using multiple plaid patterns or complementary colors for a more eclectic look. You could even add a pop of color with a bright top piece while keeping the sides classic plaid.
- Personal Touch: Consider adding your dog’s name or a fun saying with fabric paint or embroidery on one of the sides. It’s like giving your pup a personalized, stylish upgrade.
Pro Tip:
When sewing, always backstitch at the beginning and end of your seams to reinforce them. This little extra step helps guarantee the durability of your cover, especially since your playful pup might be putting it through its paces. Plus, using heavier fabric can enhance longevity, making it a smart choice for those active dogs.
Additionally, incorporating luxury dog gear into your home decor can further elevate the overall aesthetic and comfort for your pup.
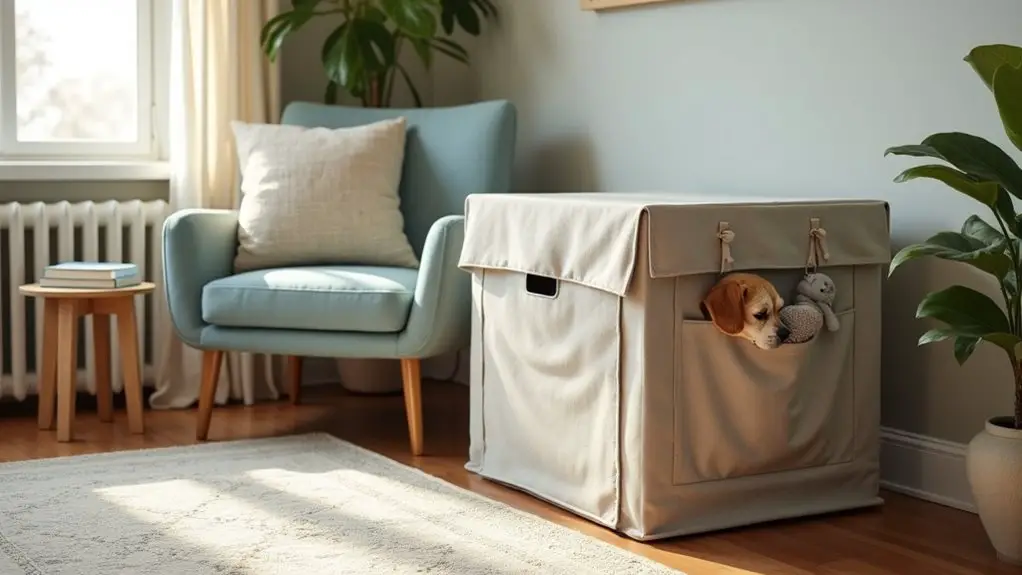
5. Solid Color Fabrics
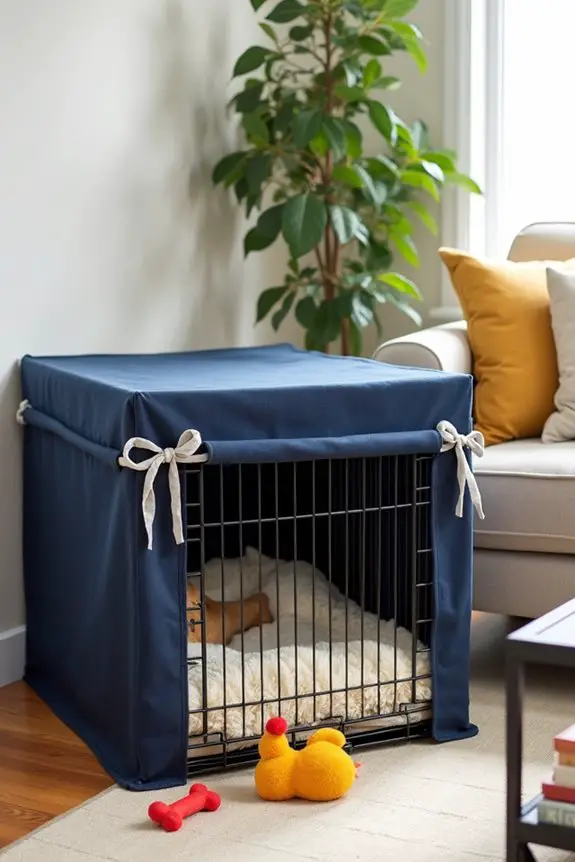
If you want to give your dog’s crate a fresh look while also saving some money, this DIY solid color dog crate cover is just what you need. It not only enhances the aesthetic of your home but also provides a cozy, private space for your furry friend. Plus, creating your own cover is a fun project that allows you to choose colors that match your décor—so let’s get started! Additionally, consider adding emotional support dog accessories to complement your pup’s new cozy den.
Materials Needed:
- 1 large piece of solid color fabric (enough to cover the sides and top of the crate)
- Measuring tape
- Scissors
- Sewing machine (or needle and thread for those who prefer the old-school method)
- Pins or fabric clips
- Iron and ironing board (to make it look sharp)
- Optional: Velcro strips or fabric ties for easy setup and cleaning
Step-by-Step Instructions:
- Measure the Crate: Grab your measuring tape and measure the height, width, and depth of your dog’s crate. Think of this as giving your pup’s home a custom fit—because every dog deserves a little luxury.
- Cut the Fabric: Using your measurements, cut the fabric into four pieces for the sides and one larger piece for the top. If you cut a little too much, don’t sweat it; it’s fabric, not a life-or-death situation.
- Pin the Pieces Together: Lay your fabric flat and pin or clip the edges of the side pieces together. You’re effectively building a fabric box. Just imagine your dog peeking out from their new solid color fortress.
- Sew the Sides: Time to get your sewing machine or needle ready. Sew the pinned edges together, ensuring you keep it neat. Even if your stitches look like a toddler’s crayon drawing, it’s the thought that counts—your pup won’t mind a bit.
- Attach the Top: Take your larger piece for the top and attach it to the sides. You can sew it down for a sturdy hold, or use Velcro for easy removal when it’s time to clean. If your dog has a flair for the dramatic and likes to escape, Velcro might be your best bet.
- Iron the Cover: Give your cover a quick iron to smooth out any wrinkles. This step isn’t mandatory, but a wrinkle-free look can really make your creation pop. It’s like putting on your best outfit before heading out.
- Dress the Crate: Slip the cover over the crate and adjust it until it fits just right. If you opted for fabric ties or Velcro, secure those now. Voilà—your pup’s new cozy den is ready for some serious napping.
Optional Add-ons/Variations:
- Play with Colors: Choose a bold color that stands out or a soft pastel for a calming effect. You could even mix different solid colors for a fun, vibrant look.
- Add Personal Touches: Consider using fabric paint to add your dog’s name or a cute design. This little touch can make the cover feel even more special—like a custom piece of art just for your furry friend.
Pro Tip:
When choosing your fabric, opt for something durable and easy to clean, like canvas or cotton blends. This way, your cover can withstand the wear and tear of dog life while still looking great.
And if you’re feeling extra crafty, you can even use waterproof fabric for those unexpected spills. Your pup will thank you, and you’ll save on laundry time.
6. Customizable Photo Collage Fabric
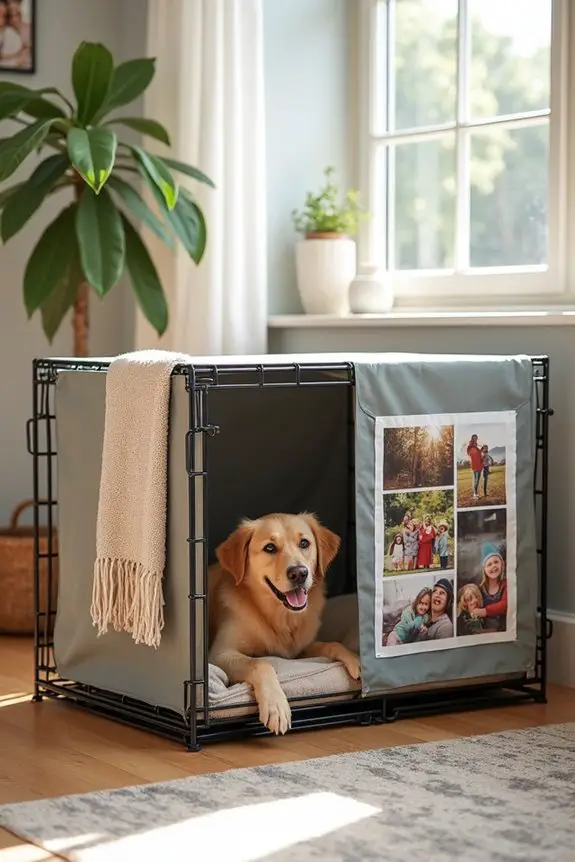
Want to give your dog’s crate a personal touch while showcasing your favorite memories? This DIY customizable photo collage fabric cover is the perfect project for you. Not only does it make your pup’s space more inviting, but it also adds a unique flair to your home décor. Plus, it’s a fantastic way to use those cherished photos that have been sitting on your phone. Let’s plunge into it!
Materials Needed:
- A large piece of fabric (preferably a canvas or cotton blend for durability)
- Photos printed on fabric or transfer paper
- Measuring tape
- Scissors
- Sewing machine (or needle and thread if you’re feeling traditional)
- Pins or fabric clips
- Iron and ironing board
- Optional: Fabric adhesive for those who want to skip sewing
Step-by-Step Instructions:
- Measure Your Crate: Start by measuring the height, width, and depth of your dog’s crate. This is essential for guaranteeing a perfect fit. Remember, nobody wants a cover that’s too snug or too loose. Your pup deserves better.
- Prepare Your Photos: Select your favorite photos and print them on fabric or transfer paper. If you’re using transfer paper, follow the instructions to make sure they come out just right. It’s like crafting a mini-gallery that your dog can enjoy—who knew they’d such sophisticated taste?
- Cut the Fabric: Using your measurements, cut your fabric into four side pieces and one larger piece for the top. Don’t worry if you cut a little extra; it’s just fabric, and you can always trim it later.
- Arrange the Photos: Before sewing, lay out your printed photos on the fabric to find a layout you love. This is your chance to get creative! Mix and match sizes and orientations to create a stunning collage that reflects your dog’s personality (and yours).
- Secure the Photos: If you’re using fabric adhesive, apply it to the back of each photo and press it onto the fabric. If you’re sewing, you can pin the photos in place and sew around the edges for a more permanent hold. Just think of it as a little art project—who knew DIY could be so rewarding?
- Sew the Sides: Once the photos are secured, sew the sides together, making sure to keep your stitches neat. You can do a simple straight stitch, or get fancy with a zigzag stitch if you’re feeling adventurous. Your dog will appreciate the effort, and it might even bring a tear to your eye.
- Attach the Top: Finally, attach the larger piece for the top using either sewing or Velcro for easy removal and cleaning. This way, you can whip it off for a wash when your pup inevitably brings in some dirt.
- Iron the Cover: Give your new cover a quick iron to smooth out any wrinkles. This isn’t just for looks—it helps your masterpiece shine bright.
- Dress the Crate: Slip the cover over the crate and adjust it until it fits perfectly. If you used Velcro or fabric ties, secure those now. And there you have it—your dog’s new stylish sanctuary is ready for some serious relaxation and maybe a little photo shoot.
Optional Add-ons/Variations:
- Mix and Match Patterns: Instead of a solid background, consider using patterned fabric as the base for your collage. Stripes, polka dots, or florals can add a splash of fun to your design.
- Add Text: Personalize your cover further by adding your dog’s name or a favorite quote using fabric paint or stencils. It’s a great way to make it truly one-of-a-kind.
Pro Tip:
When printing photos, make sure to use high-resolution images to make certain they come out clear and vibrant. And for the sake of your sanity, check that your fabric is washable—because muddy paws can be a reality.
Creating a customizable photo collage fabric cover isn’t just a way to beautify your dog’s crate; it’s a wonderful opportunity to showcase your memories and add a personal touch to your home. Happy crafting!
7. Textured Linen Selections
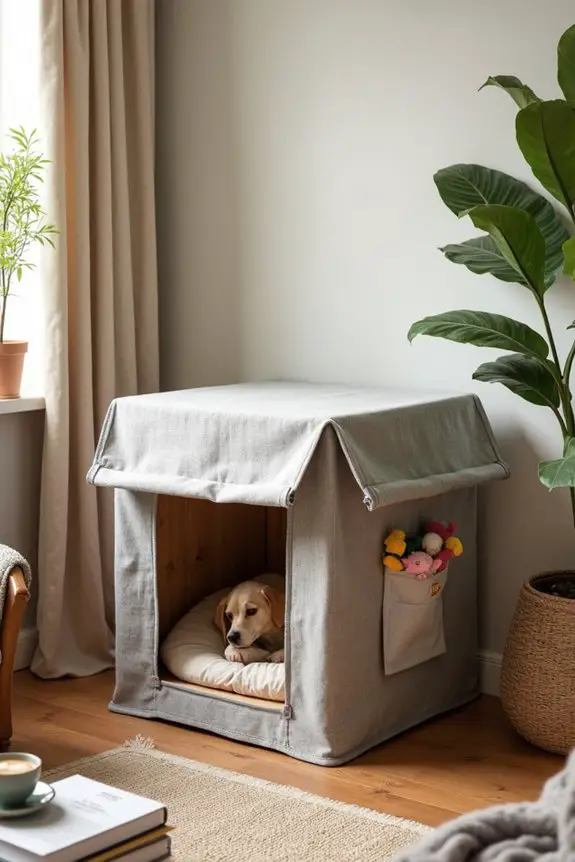
Ready to elevate your dog’s crate game? A textured linen cover is a fantastic DIY project that’s not only stylish but also practical. It adds a cozy atmosphere to your pup’s space while blending seamlessly with your home décor. Plus, making one can save you money compared to buying a pre-made cover.
Let’s get started on this easy and fun project that your furry friend will love!
Materials Needed:
- Textured linen fabric (enough to cover your dog’s crate)
- Measuring tape
- Scissors
- Sewing machine (or needle and thread)
- Pins or fabric clips
- Iron and ironing board
- Optional: Velcro strips for a removable cover
Step-by-Step Instructions:
- Measure Your Crate: Grab that measuring tape and note down the height, width, and depth of your dog’s crate. Trust me, precise measurements are key—no one wants a cover that doesn’t fit!
- Cut the Fabric: Using your measurements, cut four rectangular pieces for the sides and one larger piece for the top. Don’t stress if your cuts aren’t perfect; linen has a way of forgiving our little mishaps.
- Iron the Fabric: Give your fabric a good press with the iron. A wrinkle-free cover not only looks better but also makes it easier to sew. It’s like giving your project a mini spa day—who doesn’t love that?
- Sew the Sides: Pin or clip the side pieces together, right sides facing in. Sew along the edges, leaving one side open. This will create a sleeve for the crate. If you’re feeling fancy, a zigzag stitch can add a nice touch.
- Attach the Top: Once the sides are sewn, attach the larger piece for the top. Make sure it lines up well and sew it on securely. You’re almost there. Just think about how comfy your dog is going to be in their stylish new den.
- Finish the Edges: To prevent fraying, you can finish the edges with a zigzag stitch or fold them under and sew a straight stitch. It’s like putting a pretty bow on your project—so satisfying.
- Optional Velcro: If you want to make the cover removable for easy washing, sew Velcro strips along the edges. Just think of it as the cherry on top of your DIY sundae.
Optional Add-ons/Variations:
Feeling creative? Try experimenting with different patterns or colors of linen. You could even add pockets on the sides for storing your dog’s favorite toys or treats. How fun would that be? It’s all about making this cover uniquely yours.
Pro Tip:
Always pre-wash your fabric before starting. It can help prevent shrinking later on, which means your beautifully crafted cover will stay looking sharp. Plus, it gets rid of any chemicals from the manufacturing process. Your pup deserves the best, after all.
Now grab your materials and get crafty! Your dog will love snuggling up in their newly styled crate, and you’ll enjoy the cozy aesthetic it brings to your home.
Extra Tips & Ideas
When it comes to dog crate covers, there are countless ways to personalize your pup’s space—think of it as creating a cozy little den just for them.
How about adding some fun decals or fabric patches? You could even sew on their name for that personal touch.
If you’re feeling adventurous, try experimenting with different fabrics—perhaps a soft fleece for winter and a breathable cotton for summer.
And don’t forget about the lighting! A cute string of fairy lights can make their crate feel extra special, like a little hideaway.
Just remember, your pup’s crate is their sanctuary, so keep it comfy and stylish.
Honestly, it’s like an Instagram moment for your furry friend—minus the filters!
Frequently Asked Questions
How Do I Measure My Dog Crate for a Cover?
To measure your dog crate for a cover, you’ll want to measure the length, width, and height. Note these dimensions, and consider adding a few inches for a comfortable fit. Then, you’re ready to create!
Can I Use Old Blankets for a DIY Crate Cover?
Yes, you can definitely use old blankets for a DIY crate cover! They’re soft, warm, and can easily be draped over the crate to provide your dog with a cozy, private space.
What Materials Are Best for a Durable Crate Cover?
You might think you need fancy fabrics, but sturdy canvas or heavy-duty upholstery materials work best for a durable crate cover. They resist wear and tear, ensuring your pup’s space stays cozy and stylish.
How Often Should I Wash My Dog Crate Cover?
You should wash your dog crate cover every two to three weeks, or more frequently if it gets dirty. Regular cleaning keeps it fresh and comfortable for your pup, ensuring a healthy environment.
Are There Safety Concerns With Crate Covers?
Yes, there are safety concerns with crate covers. Guarantee proper ventilation, avoid loose materials that could cause choking, and monitor your dog to prevent overheating. Always prioritize your pet’s safety when using a crate cover.
Conclusion
So, whether you’re going for a chic modern vibe or a cozy cottage feel, you can totally transform your dog’s crate into their favorite hangout spot. With all these fun fabric options, it’s like giving your pup a mini home makeover. Just remember, your dog might not care about the style, but you sure will. And let’s be honest, a cute crate cover can make you feel like a design genius, even if you’re still figuring out how to fold a fitted sheet.

Amr Mohsen is a software engineer who traded his keyboard for a leash — at least on weekends. His love for dogs inspired him to share what he learns as a dog owner and enthusiast, bringing a detail-oriented, research-driven perspective to every article he writes. If it’s about dogs, he’s probably already looked it up twice.

