Thinking about unique gifts for your pup can feel like chasing your tail, right? You want something special, something that shows just how much you care—without breaking the bank or spending hours searching. Whether you’re in the mood for a personalized bowl or a dog-themed tee for yourself, there’s a treasure trove of ideas waiting for you. Stick around, and let’s explore some heartwarming gifts that celebrate your furry friend in all the right ways.
Creative Dog-Themed Gift Ideas
When it comes to finding the perfect gift for a dog lover in your life, you might think it’s a walk in the park, but then you’re hit with the reality: what if they already have every squeaky toy known to mankind?
Instead of giving up, why not explore the world of DIY dog gifts? You could create a personalized dog bowl by painting it with their pup’s name.
Or, how about some homemade dog treats? Just mix peanut butter, pumpkin puree, and whole wheat flour, roll them out, and cut them into fun shapes.
They’ll love the thought, and their dog will think you’re a culinary genius. Plus, nothing says “I care” quite like something made from scratch!
Our Collection
You’re in for a treat as we explore our collection of dog-themed goodies. From personalized mugs featuring your pup’s breed to custom portraits that’ll make you smile every time you walk by, we’ve got something for every dog lover.
Plus, who wouldn’t want some dog quote wall art or a baking kit for those tail-wagging homemade treats?
1. Personalized Dog Breed Mugs
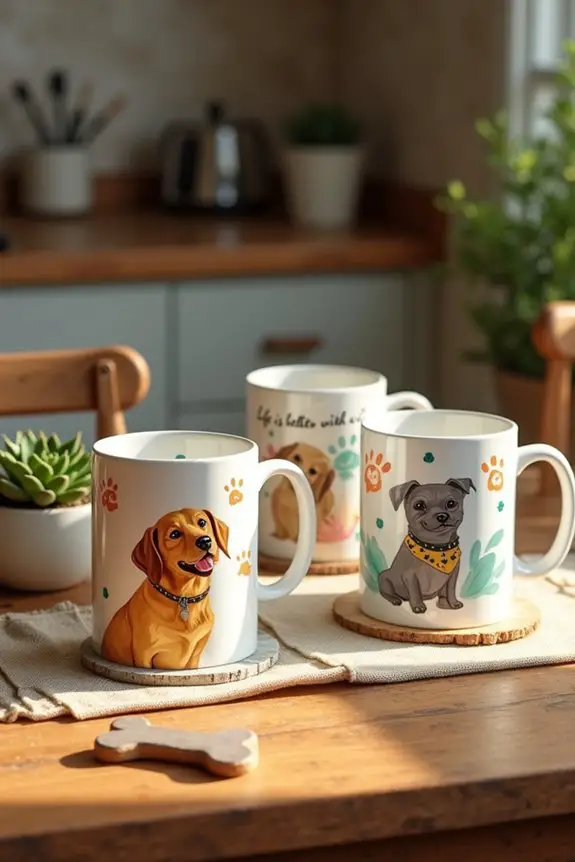
If you’re a dog lover—let’s be honest, if you have a pup, you love them above all else—this DIY project is a fantastic way to celebrate your furry friend. Personalized dog breed mugs not only add a touch of charm to your kitchen, but they also make for impressive gifts for fellow dog lovers or a fun treat for yourself.
Plus, it’s a cost-effective way to create something special that you can’t find in stores!
Materials Needed:
- Plain white ceramic mugs (available at craft stores)
- Ceramic paint markers or acrylic paint (non-toxic)
- Paintbrushes (for acrylic)
- Stencils of dog breeds (you can print them from online templates)
- Clear sealant spray (for durability, optional)
- Rubbing alcohol (to clean the mugs before painting)
- Paper towels
- Oven (for setting the paint, if using ceramic paint)
Step-by-Step Instructions:
- Prep the Mugs: Start off by cleaning each mug with rubbing alcohol. This removes any grease or fingerprints so the paint sticks better. Just a quick wipe down will do—easy peasy.
- Choose Your Dog Breed: Pick your favorite dog breed or the breed of your beloved pooch. Print out or create stencils if you’d like; they help keep things neat. Now’s the fun part—imagine your mug in all its glory.
- Outline Your Design: If you’re using a stencil, position it on the mug and trace around it lightly with a pencil or a light paint marker. Don’t stress if you mess up; it’s just part of the creative process. Remember, art isn’t perfect.
- Color It In: Now get your ceramic paint markers or acrylic paint and fill in your design! You can experiment with colors; make it vibrant or keep it classy and monochrome. If you’re feeling extra adventurous, why not add some paw prints around the mug’s rim?
- Let It Dry: Allow your masterpiece to dry for about 24 hours. Patience is a virtue, right? If you used ceramic paint markers, make sure to let it sit overnight to make certain everything sets nicely.
- Set the Paint (if using ceramic paint): Preheat your oven to 350°F (180°C), place your mugs inside, and bake them for 30 minutes. This helps the paint stay on during washing. Just don’t forget to use an oven mitt since you don’t want a hot mug and cold hands!
- Seal the Deal: If you’re using acrylic paint, consider spraying a clear sealant over the surface after it dries. This will help keep the design bright and fresh for many coffee dates to come.
Optional Add-ons/Variations:
- Color Variations: Try using pastels for a softer look or bold neons for something eye-catching. Let your imagination run wild.
- Personal Touch: Add your dog’s name or a sweet little quote about dog love beneath the breed design.
Pro Tip:
Always give your mugs a hand wash instead of tossing them in the dishwasher to prolong the life of your unique design. Dogs mightn’t care about such things, but you know your artistry deserves to last!
Creating personalized dog breed mugs isn’t just an enjoyable craft; it makes for heartwarming gifts that carry a special meaning! So grab those supplies, release your creativity, and let those mugs reflect the love you feel for your furry friends.
Happy crafting!
2. Custom Dog Portraits

Creating custom dog portraits is a delightful DIY project that showcases your love for your furry friend in a beautiful, artistic way. Whether you want to decorate your home or give a heartfelt gift to a fellow dog lover, these portraits add a personal touch to any space. Plus, you get to channel your inner artist without breaking the bank, which is always a win. Additionally, consider adorning your artwork with a luxury dog pool theme to emphasize your dog’s playful nature and enhance the overall design. It’s important to remember that a healthy diet, like premium dog food for Goldendoodles, contributes to your dog’s coat quality, which can inspire your artistic choices. Moreover, using premium dog fashion accessories can elevate your pup’s overall look and add flair to your portraits. Enriching their diet with quality protein sources from premium dog food options can positively affect their coat, making your portraits even more striking.
Materials Needed:
- Canvas or high-quality art paper
- Acrylic paints or colored pencils
- Paintbrushes (various sizes)
- A reference photo of your dog (smartphone or printed)
- Pencil and eraser
- Palette for mixing colors
- Optional: Frame for displaying your artwork
Step-by-Step Instructions:
- Choose Your Photo: Start by selecting a clear and cute photo of your dog. Make sure it captures their personality—the cuter, the better. You’ll be amazed at how much inspiration you can get from a goofy face.
- Sketch Your Dog: Lightly sketch the basic shape of your dog on the canvas or paper using a pencil. Focus on getting the proportions right. Don’t worry too much about details; it’s just a base to guide you.
- Pick A Color Palette: Before you start painting, decide on the colors you need. Look closely at your dog’s fur and try to mix shades that closely match. If you have a chocolate lab, no need to paint them green—unless you want a psychedelic pup!
- Begin Painting: Start with the larger areas of your dog’s body. Use a larger brush to fill in base colors for the fur. Then, gradually work towards the smaller details like eyes, nose, and any unique markings. Keep it fun; splash a little paint—it’s your masterpiece.
- Add Details: After painting in the basic colors, grab a smaller brush and add shadows and highlights to create depth. Don’t forget about the soulful eyes; they’re often the most expressive features. You want anyone looking at your portrait to say, “Aww, look at that face!”
- Let It Dry: Once you’re satisfied with your painting, step back and admire your work. Let it dry completely before handling it; acrylics can take a bit to set. You might want to open a window or play your best dog-themed playlist while waiting.
- Frame It: If you want to take your art up a notch, pop it in a stylish frame. Not only will it look polished, but you’ll also be able to show off your dog’s portrait to all your guests, leading to inevitable conversations and maybe some doggy chuckles.
Optional Add-ons/Variations:
- If you’re feeling extra creative, you can try a watercolor technique for a softer look. Just remember to use thicker paper to avoid warping.
- Consider combining a few photos into a collage-style portrait showcasing different angles and expressions of your pup in one frame.
Pro Tip:
When it comes to painting fur, layering is key. Start with a base color, and then gradually build up with lighter and darker shades. It creates a more realistic texture.
And don’t forget—if things get messy, just embrace it; after all, art is about the journey, not just the final piece!
3. Dog-Themed Jewelry for Owners
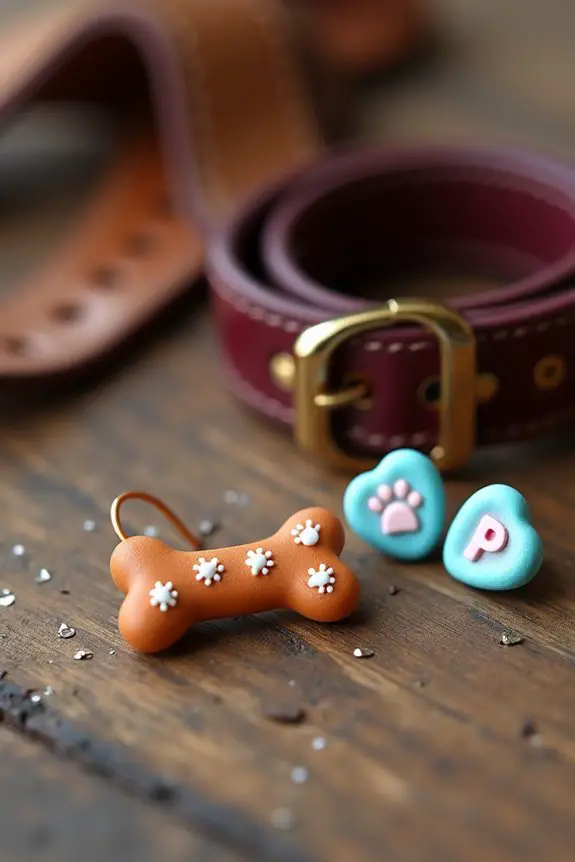
If you’re a dog lover, then you know how enriching the bond with your furry friend can be. What better way to showcase that love than with some dazzling dog-themed jewelry? This DIY project lets you create personalized accessories that keep your pup close to your heart, all while saving you some bucks and adding a unique flair to your style. Plus, your pup will appreciate your creativity when you pair your jewelry with luxury dog accessories that elevate their style too.
Materials Needed:
- Polymer clay (in your choice of colors)
- Dog-themed cookie cutters or molds
- Jewelry-making supplies (e.g., jump rings, chains, and earring hooks)
- Baking sheet
- Oven
- Rolling pin or smooth surface for shaping clay
- Sculpting tools or a simple toothpick
- Glossy sealant (optional)
- Pliers (for assembling the jewelry)
Step-by-Step Instructions:
- Choose Your Design: Start by deciding what kind of jewelry you want to make—pendants for a necklace, cute earrings, or perhaps a charm bracelet. A dog bone? A paw print? The limit is your imagination.
- Prepare Your Clay: Take the polymer clay and knead it until it’s soft and pliable. If you’re like me, this is also a great excuse to pretend you’re a skilled artisan with fancy clay-sculpting techniques.
- Shape Your Pieces: Roll out the clay to your desired thickness. Use cookie cutters or molds to cut out your chosen shape. If you’re feeling really adventurous, sculpt different elements like a tiny dog, paws, or even a heart surrounding your dog’s initial.
- Add Details: Use your sculpting tools or toothpick to add texture or details to your designs. Maybe your clay dog could use some realism with a defined tail or be a cartoonish delight—it’s entirely up to you.
- Bake Your Creations: Place your shaped clay pieces on a baking sheet lined with parchment paper. Pop them in the oven according to the package instructions, usually around 275°F for 15 minutes. Make sure to keep an eye on them; we don’t want our paw prints turning into crispy critters.
- Assemble the Jewelry: Once your pieces have cooled, it’s time to add the bling. Use pliers to attach jump rings to your clay pieces and then attach them to chains or earring hooks. Voila! You now have fabulous dog-themed jewelry that’s bound to get conversation rolling at the dog park.
- Seal It (Optional): If you want your creations to shine or be extra durable, you can apply a glossy sealant. Just let it dry, and you’re ready to flaunt your love for your dog.
Optional Add-ons/Variations:
- Experiment with colors. If your pup has a unique fur color, why not match it with your clay? You could have a whole collection of different breeds or styles.
- Play with different textures by adding glitter or using stamps to make impressions. Who says your jewelry can’t sparkle a bit?
Pro Tip:
Remember, polymer clay pieces can be brittle if they’re too thin. When crafting your designs, keep them at least a quarter-inch thick for durability. Plus, always make sure your oven is set to the right temperature—no one wants their love for dogs to melt into a gooey disaster.
Let’s not kid ourselves, creating dog-themed jewelry isn’t only a fun project but a lovely way to keep your furry friend close to you, wherever you go. Give it a try, and strut that dog love with flair!
4. Dog Quote Wall Art
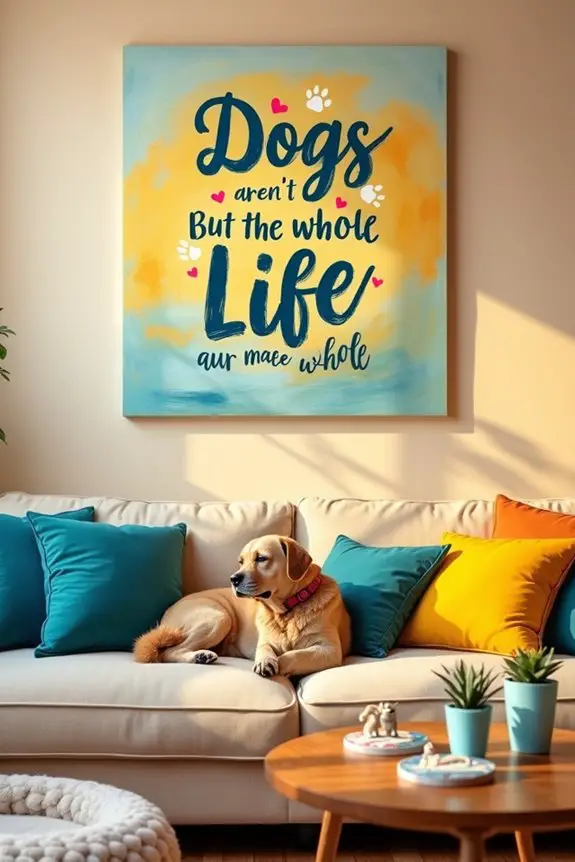
If you’re looking for a heartwarming way to celebrate your love for dogs, creating a dog quote wall art piece isn’t only fun but also a delightful addition to your home décor. This DIY project allows you to express your feelings about your furry friend while adding a personal touch to your living space. Plus, it’s a wonderful outlet for your creativity and can save you some cash compared to pricey ready-made art.
Materials Needed:
- Canvas or thick cardboard (your choice of size)
- Acrylic paints (various colors)
- Paintbrushes (small for detail and larger for backgrounds)
- A pencil
- Paper for sketched designs or quotes
- Mod Podge (for sealing)
- Decorative items (like washi tape, stickers, or embellishments)
- An easel to hold your canvas (optional)
- A cup of water (for rinsing brushes)
Step-by-Step Instructions:
- Choose Your Quote: Start by finding a quote about dogs that resonates with you. Whether it’s “Dogs aren’t our whole life, but they make our lives whole” or something silly like “If my dog doesn’t like you, I probably won’t either,” the options are endless. Write it down or print it out as a reference.
- Sketch It Out: Lightly pencil in the quote on your canvas. This is where you can play around with the layout. Consider adding some decorative touches like paw prints or hearts around the text. Remember, it doesn’t have to be perfect—this is your art.
- Paint the Background: Use your larger brush and acrylic paint to fill in the background color of your canvas. Choose a color that complements your quote, maybe a calming blue or a sunny yellow. Allow it to dry completely; a hairdryer can speed things up if you’re feeling impatient.
- Add Your Quote: Now, grab the small paintbrush and carefully paint over your sketched quote. Take your time. If you mess up, no worries—just paint over it and try again. This is where the fun really begins!
- Decorate: Once the quote is painted and dry, let your creative juices flow. Use washi tape, stickers, or embellishments to add flair to your piece. Maybe a cute bow around one of the letters or a small dog silhouette in the corner?
- Seal It: After everything is dry (and looking fabulous), brush on a layer of Mod Podge to seal your artwork. This gives it that professional finish and protects it for years to come. Let it dry completely.
- Hang & Show Off: Find the perfect place in your home to display your masterpiece. Whether it’s in the living room, near your dog’s bed, or even in a hallway, let everyone admire your creativity and, of course, the love you have for your pup.
Optional Add-ons/Variations:
– Try using stencils for cleaner letters, or paint directly onto wood for a rustic look. You can even incorporate fabric pieces or photos of your dog for a mixed-media twist. It’s all about making it uniquely yours.
Pro Tip:
When painting, make sure to wear old clothes. Trust me—nothing says “I love dogs” quite like accidentally having paint splattered across your favorite shirt. Plus, if you drop paint on the floor, it adds character, right? Just kidding, maybe have some paper towels handy.
5. Dog Treat Baking Kits

Baking treats for your furry friend isn’t just a fun activity; it’s a heartwarming way to show your love while ensuring your pup gets healthy, tasty snacks.
Plus, making your own dog treats can save you money and allows you to control what goes into the goodies. Imagine your dog’s wagging tail as they enjoy a homemade treat—it’s priceless.
Materials Needed:
- Dog treat baking kit (which usually includes a dog cookie cutter and a recipe booklet)
- Flour (whole wheat or oat is often recommended)
- Peanut butter (make sure it’s xylitol-free)
- Egg
- Water or low-sodium chicken broth
- Rolling pin (if not included in your kit)
- Baking sheet
- Parchment paper
- Mixing bowls
- Measuring cups and spoons
- An apron (don’t want to get flour everywhere, right?)
Step-by-Step Instructions:
- Preheat Your Oven: Start by preheating your oven to 350°F (175°C). This step is simple but essential. If you forget this part, you might accidentally end up with doughy blobs instead of treats, and no one wants to feed their pup that.
- Mix the Ingredients: In a mixing bowl, combine the flour, peanut butter, egg, and enough water or chicken broth to create a dough. It should be firm but pliable. Channel your inner baker—get in there and mix it up with your hands if you need to. Don’t worry if it gets messy; that’s half the fun.
- Roll It Out: On a floured surface (use some of that flour you just measured out), roll your dough to about ½ inch thick. It doesn’t have to look perfect—remember, dogs don’t care about aesthetics, only flavors.
- Cut the Treats: Grab your dog cookie cutter from the kit and start stamping out shapes. If you don’t have one, a knife could work too—just make sure the pieces aren’t too small. We want these treats to really feel like treats, not crunchy little confetti.
- Bake: Line your baking sheet with parchment paper, then place your cut-out shapes on it. Bake in the oven for 25-30 minutes, or until they’re golden brown. Keep an eye on them—you don’t want to accidentally create a doggie version of charcoal bricks.
- Cool Down: Once they’re out of the oven, let the treats cool on a wire rack. Patience is a virtue, and your pup will appreciate letting the treats cool instead of getting a mouthful of scalding goodness.
- Enjoy: Store the treats in an airtight container, or if your pup has a particularly greedy spirit, consider giving them one (or two) right away. You’ll be amazed at how much they’ll beg for seconds.
Optional Add-ons/Variations:
- Flavor Boost: Experiment with adding mashed bananas or shredded carrots for extra flavor and nutrients. Your dog will be in treat heaven.
- Shape Shift: If you want to get fancy, try using different cookie cutters to match your dog’s personality—think bones, paws, or even their favorite toy shapes. It’s all about making it fun.
Pro Tip:
To make less mess in the kitchen, prep your workstation before you start—lay out all your ingredients and tools in advance. It helps the process flow smoothly and can save you from a flour explosion that rivals a snowstorm.
6. Dog-Scented Candles for Homes
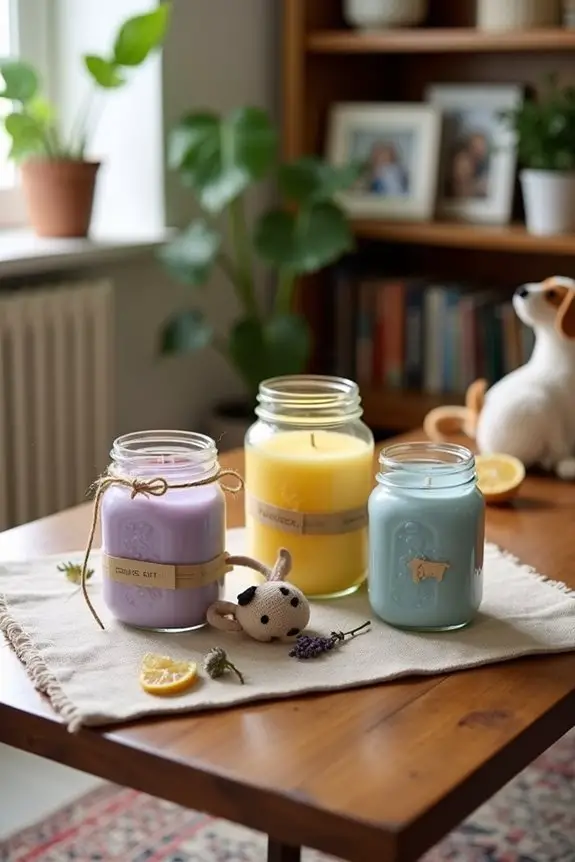
Have you ever wished you could fill your home with comforting scents inspired by your pup? Making dog-scented candles isn’t only a fun and crafty project, but it also helps create a cozy atmosphere that celebrates your love for your four-legged friend.
These candles can ward off unpleasant doggy odors while saving you money on expensive store-bought options. Plus, there’s something special about lighting a candle that smells like your beloved pet—it’s a warm reminder of all the joy they bring into your life.
Materials Needed:
- Soy wax (available at craft stores)
- Essential oils (look for pet-safe options like lavender or chamomile)
- Candle wicks (with a wick holder)
- Heat-resistant candle containers (like mason jars or tins)
- Double boiler or microwave-safe bowl
- Stirring utensil (like a spatula)
- Thermometer
- Scissors
- Optional: decorative elements (like dog-themed stickers, ribbons, or paint for containers)
Step-by-Step Instructions:
1. Prepare Your Workspace: Before you get started with candle making, set up your workspace. Lay down some old newspapers or a craft mat to catch any spills.
Get everything within reach because once the wax melts, you’ll want to move quickly.
2. Melt the Wax: Using a double boiler or a microwave, melt your soy wax. If you’re using a microwave, start with 30-second intervals, stirring in between, until fully melted.
The wax should reach about 185°F (85°C)—an essential step for proper scent throw.
3. Add the Scent: Once your wax is melted, remove it from heat and let it cool slightly to around 140°F (60°C) before adding in your pet-safe essential oils.
Start with about 1 ounce of oil for every pound of wax; you can adjust according to your preference. Stir gently but thoroughly to confirm the oil is well incorporated.
4. Prepare the Wicks: While the wax cools, secure your candle wicks to the bottom of your containers. You can do this by dipping the metal end of the wick in the melted wax and then sticking it to the bottom of the jar.
Use a wick holder or a pencil to keep the wick centered while the wax sets.
5. Pour the Wax: Carefully pour the scented wax into your containers, leaving a small amount of space at the top. Don’t rush; let it flow steady.
If you’re feeling particularly crafty, you could even layer different colors or scents for a unique effect.
6. Secure the Wicks and Let Cool: Confirm the wicks are centered as the wax begins to cool. Allow the candles to cool completely—this can take several hours.
Once cooled, trim the wicks to about 1/4 inch above the surface.
7. Customize and Enjoy: Now comes the fun part—decorating! You can paint your containers with dog-themed designs, wrap them in ribbons, or add stickers.
When you light these candles, they’ll not only smell delightful but look fantastic, too.
Optional Add-ons/Variations:
– Experiment with different essential oils for various comforting scents such as lemon or eucalyptus.
Just remember to research which oils are safe for pets.
– Try using different colors of wax to match your home décor. It can be super fun to mix and swirl various colored waxes!
Pro Tip:
Always check that the essential oils you use are pet-safe. Just because an oil is pleasant for us doesn’t mean it’s good for our furry buddies.
Also, using soy wax can help your candles burn cleaner and longer, giving you more time to enjoy those delightful scents together.
Creating these candles is a great way to fill your space with warmth and love, plus, they make wonderful gifts for fellow dog lovers.
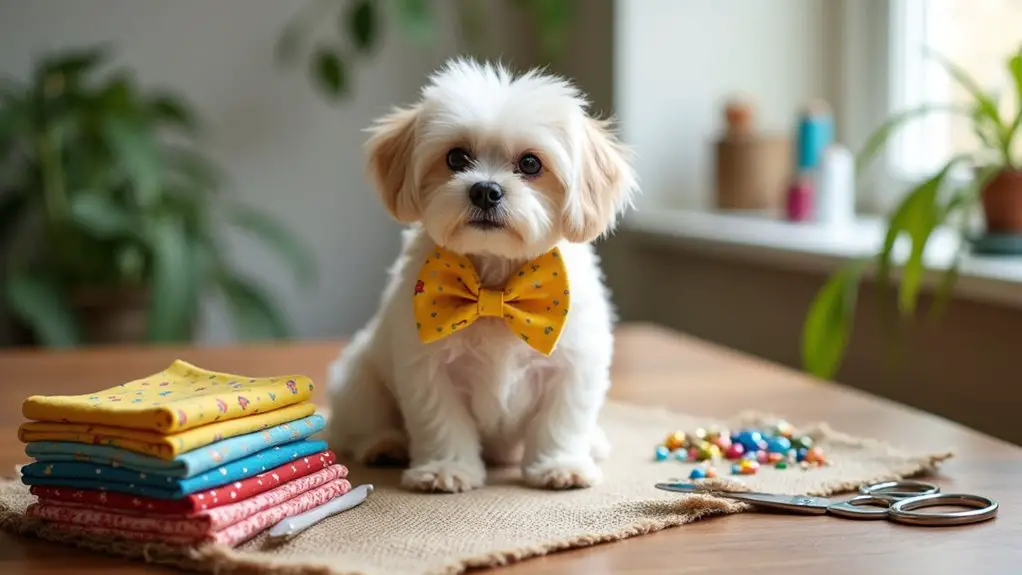
7. Dog Bowtie Gift Set
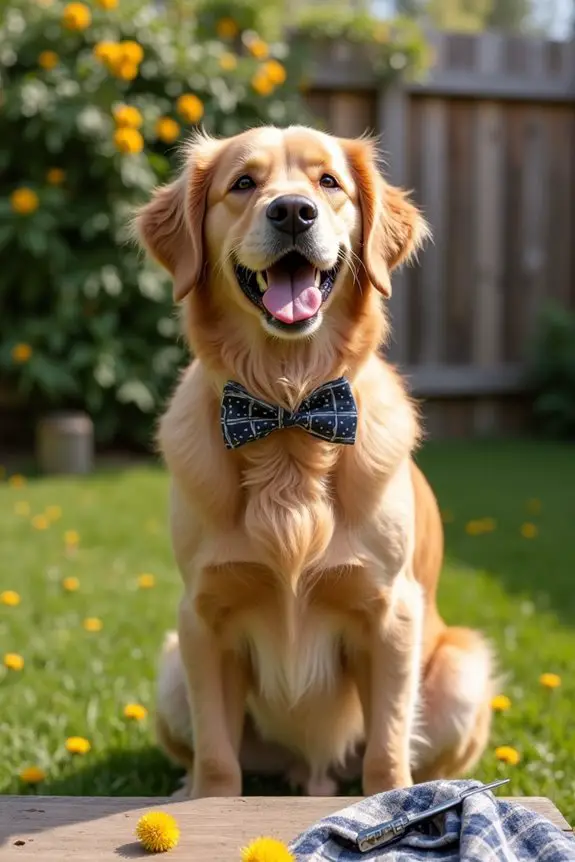
If you’re looking for a fun and stylish way to show off your pup’s personality, this DIY Dog Bowtie Gift Set is the perfect project. Not only does it save you the hassle (and money) of buying pricey pet accessories, but it also gives you the chance to add a personal touch to your dog’s wardrobe. Plus, who doesn’t love the sight of a dapper dog prancing around in a charming bowtie?
Materials Needed:
- Fabric (cotton, felt, or any dog-safe material)
- Scissors
- Sewing kit or hot glue gun (for non-sewers)
- Bowtie pattern (you can find these online or create your own)
- Adjustable dog collar or elastic band (to attach the bowtie)
- Iron (optional, for smoothing fabric)
- Ruler or measuring tape
- Chalk or fabric marker (for outlining your bowtie shape)
Step-by-Step Instructions:
- Choose Your Fabric: Pick a fabric that suits your pup’s personality. Is your dog a wild spirit or a sophisticated snuggler? For a classic look, opt for plaid or polka dots; for something quirky, maybe a pattern with tacos or aliens.
- Create Your Bowtie Pattern: If you’re feeling adventurous, sketch your own bowtie shape on paper. Otherwise, grab a printable pattern online. Just remember, size matters. Make it fitting for your dog’s neck!
- Cut the Fabric: Using your ruler, measure and mark your fabric according to your pattern. Cut it out and don’t worry if it’s not perfect—your pup will still look adorable.
- Sew or Glue: If you’re sewing, fold the edges inward and stitch them to prevent fraying. If you’re using a hot glue gun (my personal favorite for quick fixes), just glue the sides—easy peasy.
- Attach the Bowtie to the Collar: Fold the bowtie in the middle and secure it using additional fabric or a band. You want it to stay put during your dog’s adventures. If you’re using an adjustable collar, verify that it’s snug but not too tight. A wiggly dog is a happy dog.
- Accessorize if You Wish: Feel free to embellish your bowtie with beads, sequins, or even a jingle bell (for those festive occasions). Just make sure everything’s safe and there are no small pieces to chew off.
- Final Fit Test: Once you have your bowtie all assembled, have a little fashion show! Gently place it around your dog’s neck and adjust as needed. Snap a pic—believe me, you’ll want to remember this moment.
Optional Add-ons/Variations:
Want to spice things up? Use two different fabrics and create a reversible bowtie. Or try different shapes—like part of a Halloween costume or themed bowtie for holidays. The options are endless, just like the love we’ve for our furry friends.
Pro Tip:
Before you start crafting, measure your dog’s neck with a soft measuring tape and add a couple of inches for comfort. This way, your bowtie won’t become a fashion faux pas—nobody wants a wardrobe malfunction at the dog park.
This project is fun, practical, and lets your dog strut their stuff in style, one bowtie at a time. After all, every pup deserves to look their best, don’t you think?
Extra Tips & Ideas
While you’re plotting the perfect gifts for your pup, don’t forget that some of the best dog gifts can be more personal than product-based.
Why not whip up some homemade dog treats? It’s way easier than baking cookies for humans, trust me. Just grab some peanut butter, oats, and a splash of pumpkin. Mix it up, roll it out, and cut it into fun shapes. Your dog will appreciate the love in every bite.
Another idea? Create a photo book filled with your pup’s best moments. You know, that shy smile when they see their favorite toy or the goofy splash after a bath.
They mightn’t know what a photo book is, but they’ll feel all the affection poured into those memories.
Frequently Asked Questions
Do You Offer Gift Wrapping Services for Dog Gifts?
Yes, we offer gift wrapping services for your dog gifts! When you place your order, just select the gift wrap option at checkout, and we’ll make it look special for your furry friend’s celebration.
Can I Return a Personalized Dog Gift?
You can’t return personalized dog gifts since they’re customized for you. However, if there’s an issue, contact customer service and they’ll help resolve it. Always verify you double-check details before finalizing your order!
Are Your Dog Gifts Eco-Friendly?
Yes, your dog gifts are eco-friendly! We use sustainable materials and production methods. You’ll feel good knowing you’re choosing gifts that not only delight your furry friends but also help protect the environment.
Do You Ship Internationally for Dog Gift Orders?
Yes, we ship internationally for dog gift orders! Just select your country during checkout, and we’ll take care of the rest. Your furry friend will soon receive something special, no matter where you are!
How Can I Track My Dog Gift Order?
You can track your dog gift order by checking the shipping confirmation email. It’ll include a tracking number you can use on the carrier’s website to see your package’s status and estimated delivery date.
Conclusion
In the end, these thoughtful gifts can truly make tails wag and hearts swell. So, whether you’re picking out a personalized mug or whipping up some homemade treats, remember that it’s the little things that matter. You’re not just giving a gift; you’re celebrating the bond you share with your furry friend. After all, it’s the thought that counts, right? So why not let your creativity shine and create some unforgettable moments?

Hi, I’m Ali Tarek, the founder of Animalsman. I’ve always been passionate about pets, especially dogs and cats, and I created this website to share practical tips, easy recipes, and helpful care advice for fellow pet lovers. My goal is to make pet care simple, enjoyable, and accessible for everyone. When I’m not writing or curating content, you’ll usually find me spending time with my furry friends or learning new ways to keep them happy and healthy.

