Okay so can we talk about golden retrievers for a second? Because I know your pup is getting older — and watching him struggle to hop onto the couch is honestly the saddest thing.
Mine started doing this thing where he’d just… stand there and stare at the bed. Like, buddy, I want you up here. It broke my heart every single time.
And yeah, you could buy a ramp — but have you seen those prices? Hard pass.
Here’s the thing though: a DIY dog ramp doesn’t have to look like a sad wooden plank sitting in your living room. It can actually fit your whole aesthetic. Pinterest-worthy? Absolutely.
So I pulled together 7 ideas that are genuinely cute, weekend-doable, and won’t make your decor cry. Your floors AND your pup will thank you.
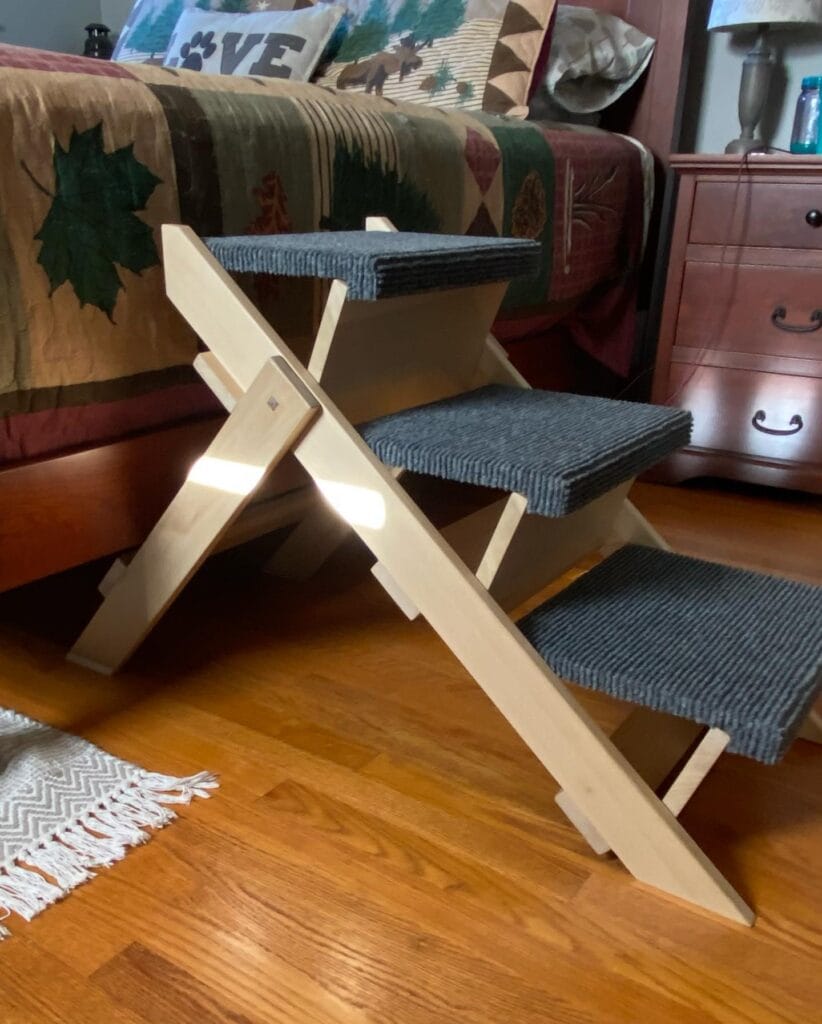
#1: Foldable Carpet-Top Dog Stairs That Actually Look Good in Your Bedroom
Your golden is finally old enough to need a little help getting up on the bed — and you’ve watched her try to jump and slide back down on the hardwood like three times this morning. It’s not cute anymore. It’s just sad.
This DIY hits different.
Materials & Tools:
– ¾-inch birch plywood (natural/blonde tone)
– Gray berber carpet remnants (cut to stair width)
– Carpet adhesive or staple gun
– Wood screws + drill
– Sandpaper (120-grit)
– Hinges (x2) for folding mechanism
Instructions
Cut two X-frame side panels from your plywood — these cross-brace pieces are what give this ramp its folding magic. Sand every edge smooth before your dog ever touches it.
Attach three carpet-covered stair treads between the panels, spacing them evenly. Carpet grips her paws — no slipping, no panicking, no vet visits.
The X-frame folds flat for storage. That’s the feature, but the benefit is it slides right under your bed. And the payoff? Your bedroom stays Pinterest-worthy.
Tuck a small furniture pad under each leg to protect those hardwood floors.
Prep Time: 20 min | Active Project Time: 2–3 hours | Difficulty Level: Intermediate
Want more builds like this? 13 Genius DIY Dog Stuff Every Pet Parent Needs to Try Today! has some seriously good ones.
📸 Photo credit: Instagram @firstdueconstruction
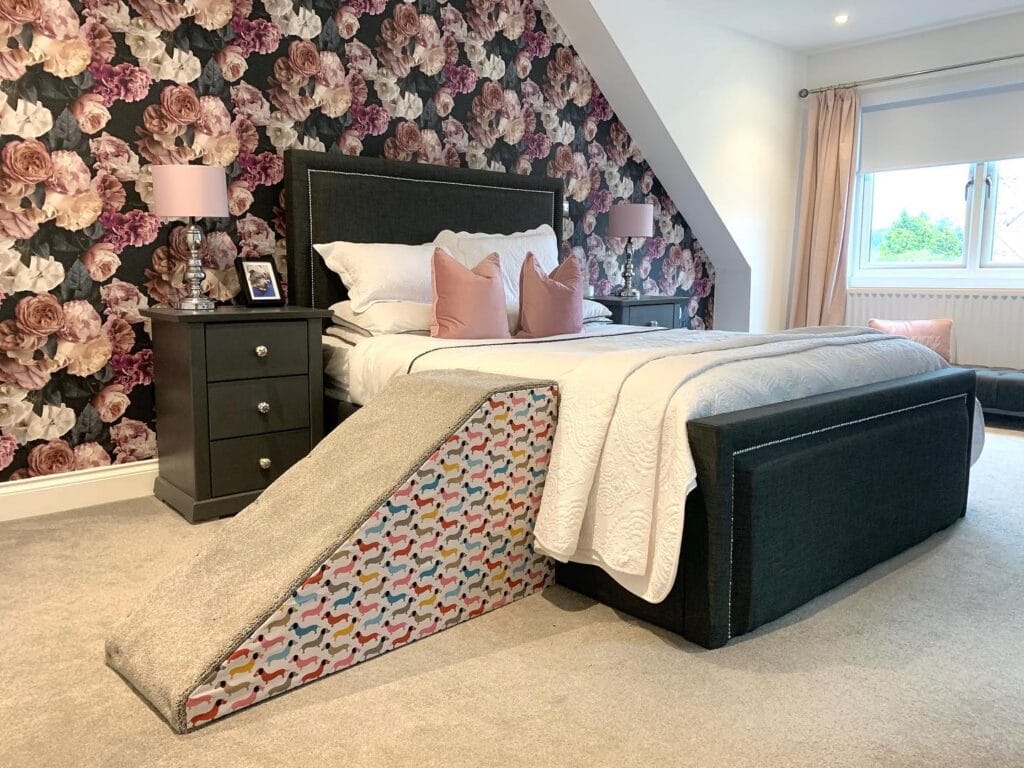
#2: DIY Dachshund Ramp With a Cozy Carpet Top (That Actually Matches Your Bedroom!)
Okay, so you know that moment your golden is standing at the foot of the bed, giving you those eyes because she just can’t jump up anymore? Yeah. My heart breaks every single time.
This ramp is exactly what she needs.
Prep Time: 20 min | Active Project Time: 2–3 hrs | Difficulty: Beginner-Friendly
Materials & Tools:
– ¾-inch plywood (cut to 16″ wide x 36″ long)
– Gray carpet remnant (top surface)
– Dachshund-print cotton fabric (side panels — this detail is chef’s kiss)
– Staple gun + staples
– Wood glue + sandpaper
– 2-inch foam padding
### Instructions
Sand your plywood edges first — splinters are nobody’s friend. Wrap the foam over the top, then pull the gray carpet tight and staple underneath. For the side panels, cut your dachshund fabric to fit and staple it snug against the wood.
And here’s the part that makes this ramp worth every minute — the carpet surface gives your dog real grip, which protects her joints on the way up, so she stops hesitating at bedtime.
Common mistake: skipping the foam layer. That padding absorbs impact and makes the climb genuinely comfortable for older dogs.
If you love personalized pet projects, 12 Heartfelt Designs for DIY Dog Accessories has more ideas worth saving.
📸 Photo credit: Instagram @hazels_teds_adventures
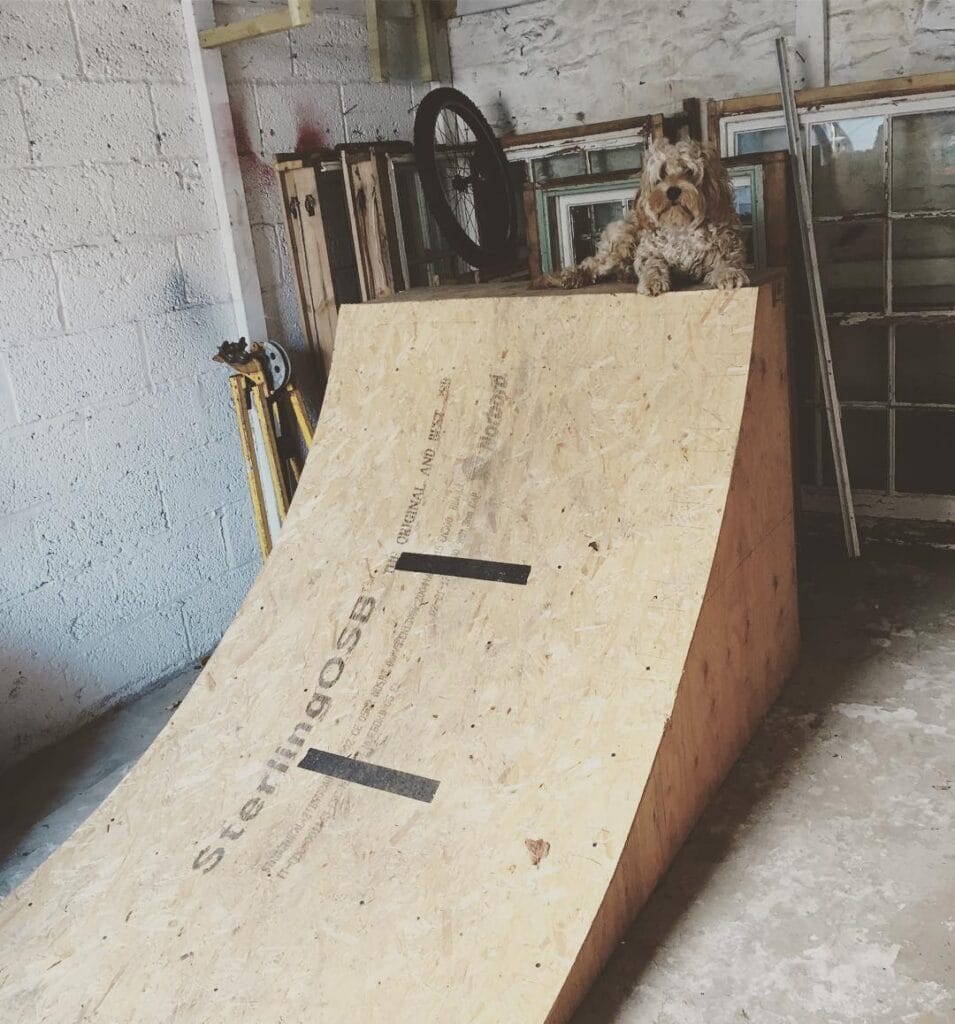
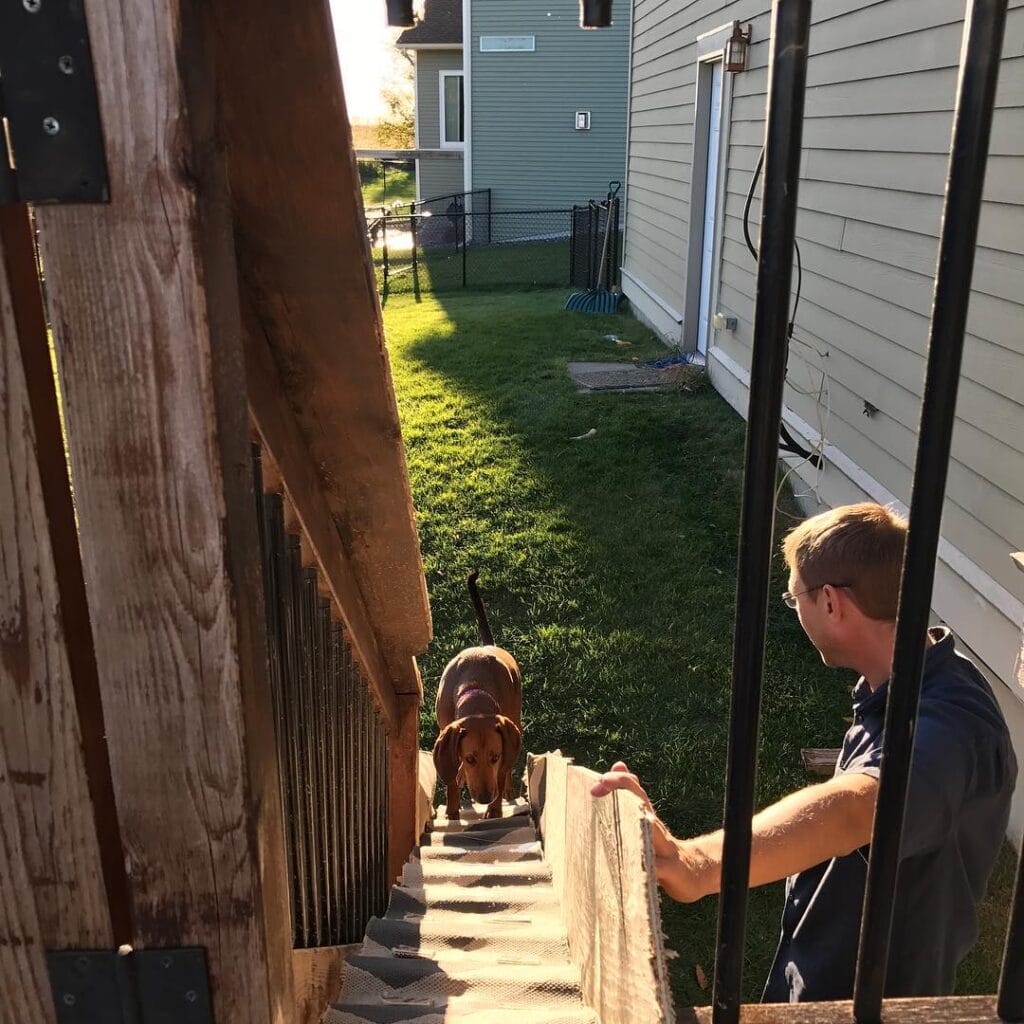
#3: Outdoor Deck Stair Ramp for Dogs Who Hate Steps
Prep Time: 30 min | Active Project Time: 2–3 hours | Difficulty Level: Intermediate
You know that moment your pup just freezes at the bottom of the deck stairs, staring up at you like you’ve personally betrayed them? Yeah. My cousin’s redbone coonhound did that every single day until they built this.
Materials & Tools:
– 2×6 pine boards (cut to stair width)
– Non-slip carpet runner (gray or neutral)
– Black metal railing (matches existing deck hardware)
– Wood screws, drill, sandpaper
– Staple gun + carpet staples
Instructions
Sand your boards smooth first — splinters are zero fun for paw pads. Attach the ramp frame flush against the existing stair stringers using 3-inch wood screws so the structure carries real weight. Lay the carpet runner over the surface and staple every 6 inches along both edges. This carpet-over-wood combo gives grip on the ramp surface, protects joints long-term, and means your dog actually uses it without hesitating.
Keep this in mind: a ramp width of at least 16 inches lets bigger dogs walk confidently without wobbling.
Cut the ramp angle to match your existing stair pitch — around 30–35 degrees works best for most dogs.
If you love building functional outdoor pet structures, 12 Creative DIY Dog Gate Ideas for Your Home might be your next weekend project.
📸 Photo credit: Instagram @jvictory_speed
#4: DIY Wooden Dog Ramp With a Built-In Elevated Bed Platform
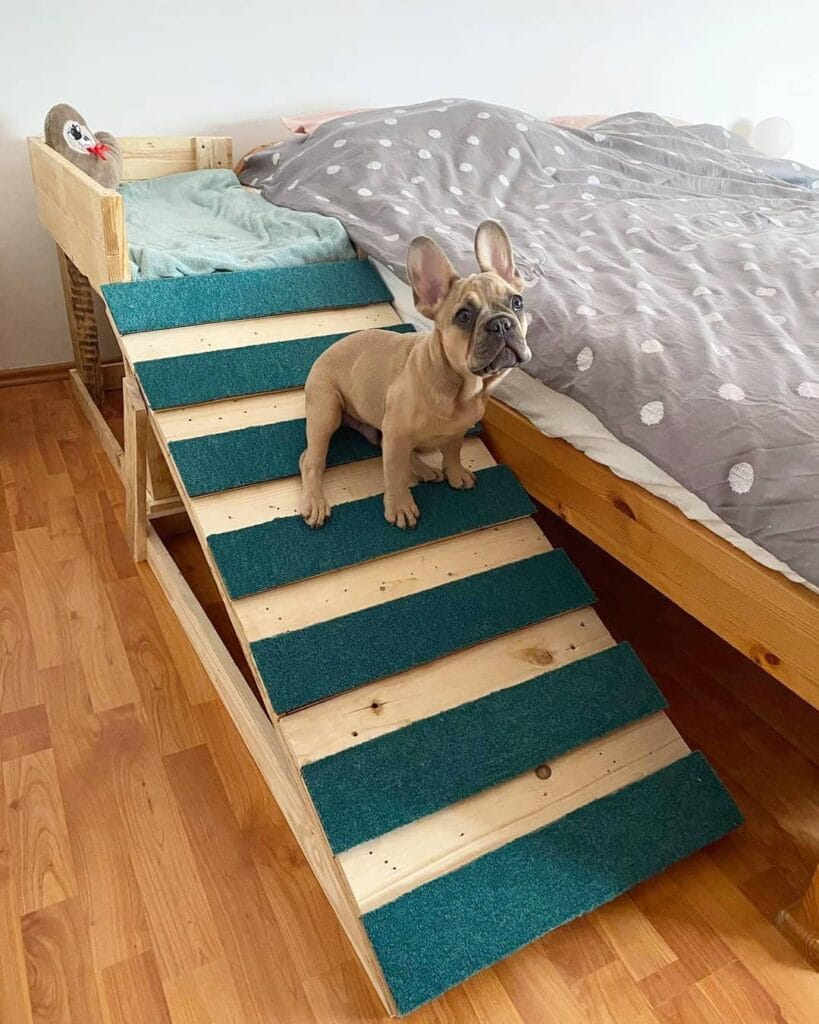
Girl, picture this — your golden decides the bed is her throne, and the jump down wrecks her joints every single morning.
Materials & Tools:
– Natural pine wood planks (main frame + steps)
– Teal carpet stair treads (traction strips)
– Wood screws + drill
– Sandpaper (medium grit)
– Measuring tape + pencil
Instructions
Sand every pine plank before assembly — rough edges catch paws wrong. Build a angled rectangular frame first, then attach horizontal step boards spaced evenly across the slope. Screw the teal carpet strips directly onto each step; carpet grips better than bare wood and protects your dog’s paw pads on the way down. The elevated side platform — framed with low wooden rails — gives her her own sleep spot right beside you.
Traction strips mean confident footing, which means no more hesitating at the edge.
Keep the ramp angle below 35 degrees. Steeper than that and most dogs refuse to use it entirely.
Prep Time: 20 min | Active Project Time: 3–4 hours | Difficulty Level: Intermediate
📸 Photo credit: Instagram @raklap.sziget
#5: DIY Stair Carpet Runner Ramp for Dogs
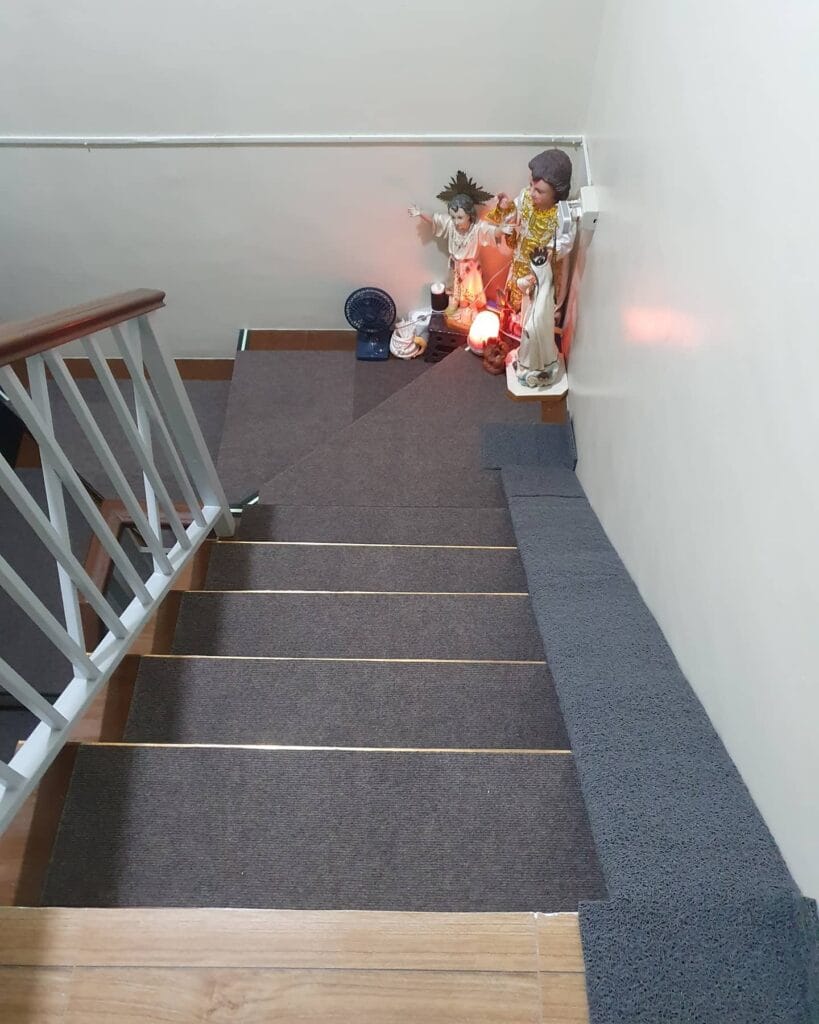
Okay, you know that moment when your golden retriever tries to launch herself down the stairs and your heart just stops? Yeah. That’s exactly what this build fixes.
Materials & Tools:
– Brown berber carpet strips (stair treads)
– Gray foam/rubber carpet for the side landing zone
– Brass carpet rods (stair edge trim)
– Wood adhesive or staple gun
– Measuring tape, scissors, utility knife
Instructions
Start by measuring each stair tread width — these look standard 36-inch treads. Cut your berber carpet strips to fit, leaving zero overhang on edges. Press each strip flat, secure with brass rods at the front lip. This keeps carpet locked and gives paws real grip.
Layer the gray foam carpet along the side wall edge — it creates a soft bumper barrier. Your dog gets traction and a guided path down.
Prep Time: 20 min | Active Time: 1.5 hrs | Difficulty: Beginner
The carpet-over-wood combo means paws grip instead of slide, joints stay protected, and your staircase actually looks Pinterest-worthy doing it.
Seal edges with a thin bead of wood adhesive to prevent curling — golden retrievers will test every loose corner.
📸 Photo credit: Instagram @matcha_gwapita
#6: Carpeted Dog Ramp With a Built-In Grip Surface (The “Low-Back Hero” Ramp)
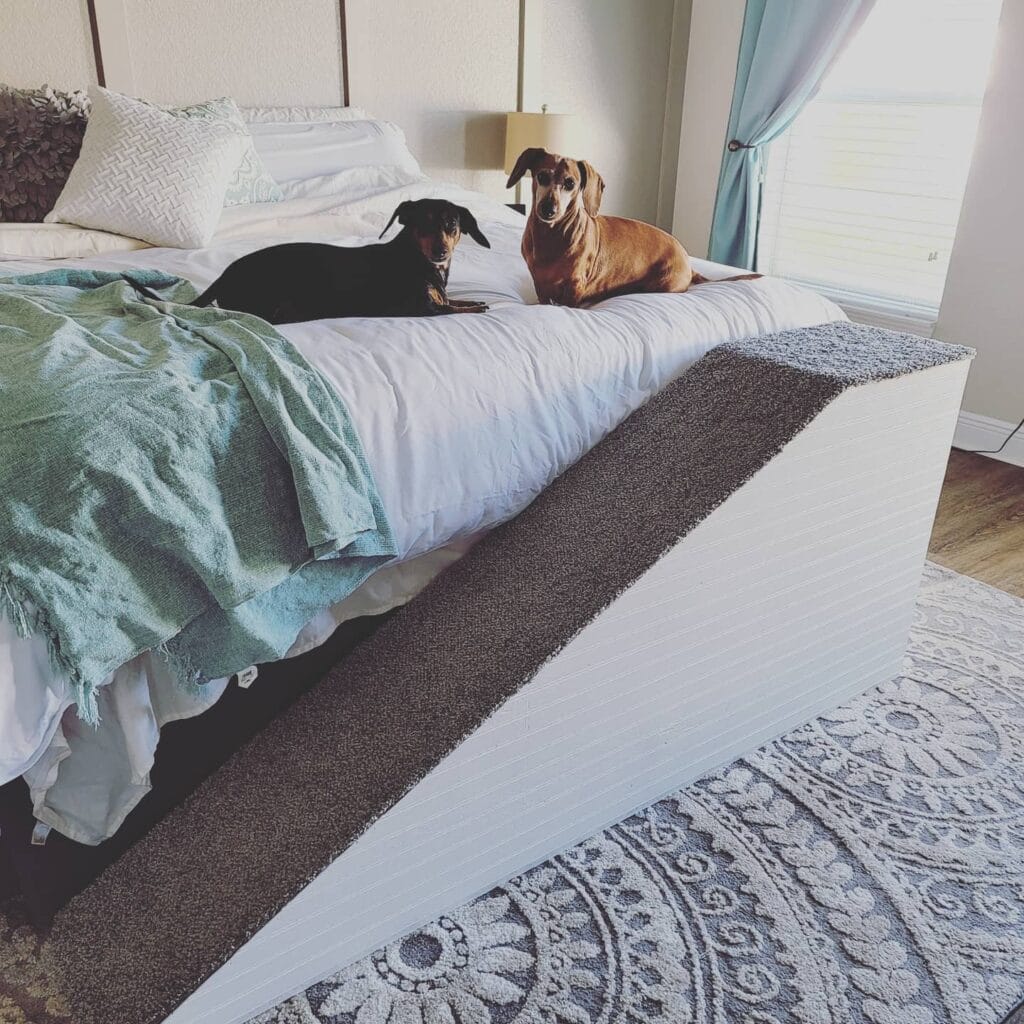
My older dachshund started hesitating at the bed edge last spring. That little pause broke me.
Prep Time: 20 min | Active Project Time: 2–3 hours | Difficulty: Beginner
Materials & Tools:
– 1-inch thick plywood (cut to 16″ wide x 48″ long)
– Gray low-pile carpet remnant (enough to cover the ramp surface)
– White paint or white contact paper for the sides
– Carpet adhesive or staple gun
– Sandpaper, measuring tape, pencil
Instructions
Cut your plywood to your desired angle — this ramp hits roughly 18 inches high at its peak, perfect for a standard bed frame. Sand all edges so your pup’s paws never catch a splinter. Paint or wrap the side panels white — that crisp finish keeps it looking like actual furniture. Lay your gray carpet flat, apply adhesive, press firm, then staple the edges underneath.
Now for the easy part: angle it against the bed frame and let gravity hold it steady. No brackets needed.
The carpet grip means your dog climbs confidently instead of scrambling — and that confidence protects their spine long-term.
Snip the carpet corners clean for a tailored look. And if your dog’s nervous at first, toss a treat halfway up.
📸 Photo credit: Instagram @b_inspir3d_home
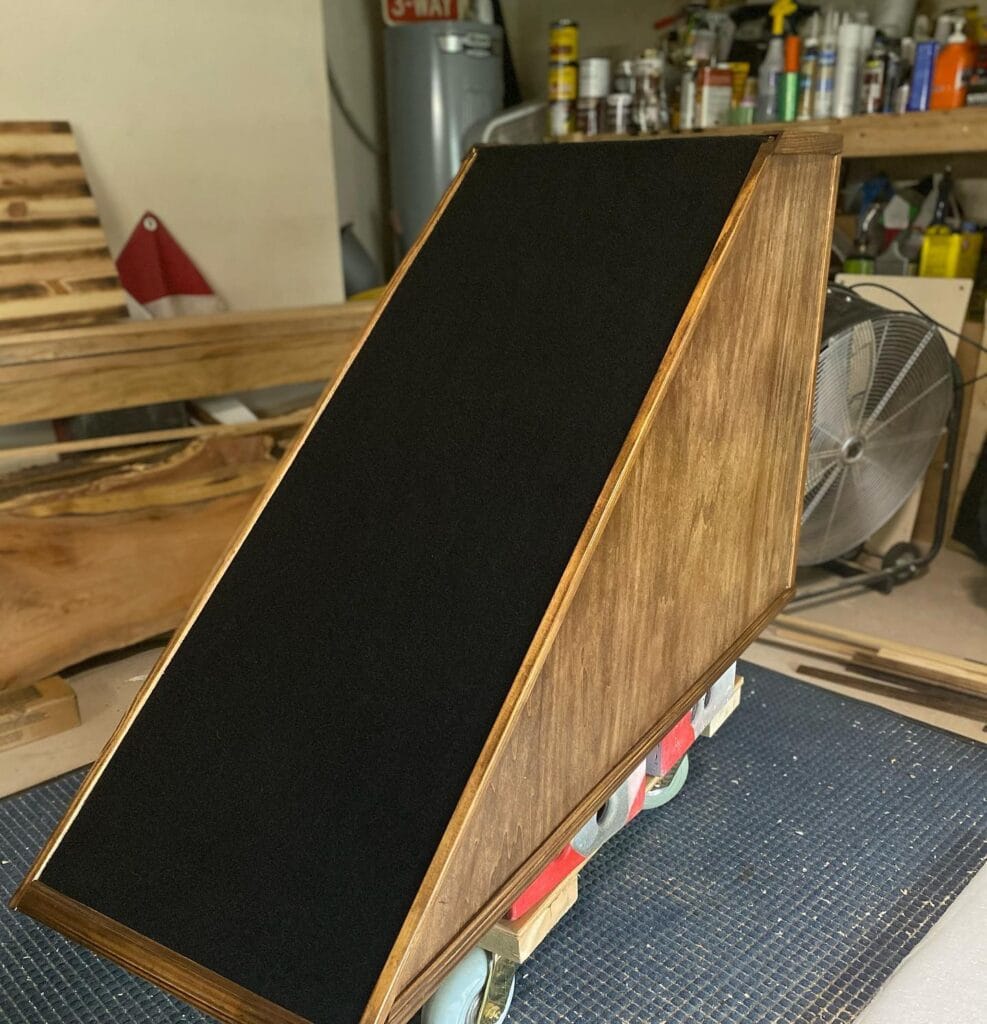
#7: The Rolling Wood Dog Ramp With Carpet Surface — DIY Style
Prep Time: 30 min | Active Project Time: 3–4 hours | Difficulty Level: Intermediate
You know that moment your golden girl tries to leap onto the bed and just… doesn’t make it? My heart breaks every time.
This ramp is built from ¾-inch plywood side panels stained in warm walnut, with pine trim framing the edges. The surface? Black carpet runner glued right onto the incline. And the base rolls on swivel caster wheels so you can move it room to room.
Materials & Tools:
– ¾-inch plywood (sides + ramp surface)
– Pine trim strips
– Black carpet runner + adhesive
– Walnut wood stain + sealant
– 4 swivel caster wheels
– Circular saw, drill, sandpaper
Instructions
Cut two triangular side panels from plywood. Sand edges smooth — your dog’s paws will thank you. Attach the ramp surface across both panels using wood screws. Glue carpet runner directly onto the incline — carpet grip means zero slipping for anxious pups. Frame all edges with pine trim, then stain everything walnut. Mount casters underneath.
Real talk: seal the wood before adding carpet or moisture warps the whole thing fast.
📸 Photo credit: Instagram @woodenwhiskerstrading
The One Measurement Most DIY Dog Ramps Get Wrong (And It’s Costly)
Okay, so here’s the thing nobody talks about — the angle of your ramp matters WAY more than the length.
Most people measure their couch height and just… build. But a ramp that’s too steep is basically useless for a golden retriever, especially as she gets older and her joints get achier. The sweet spot is a rise-to-run ratio of 1:4 — meaning for every one inch of height, you want four inches of ramp length.
My neighbor built her pup a gorgeous ramp (total Pinterest moment, honestly) but made it too short. Her dog refused to use it. She had to rebuild the whole thing. Don’t be her.
The pro secret? Test the angle with a cardboard mock-up first. Lean it against the furniture, call your girl over, and watch how she approaches it. Her body language tells you everything before you cut a single piece of wood.
The best part: this five-minute test saves you from wasting a full weekend.
And while you’re building out your space, 15 DIY Dog Playground Ideas for Your Backyard pairs with this project so well.
Your Floors Will Thank You (And So Will Your Sanity)
Grab one of these rugs and stop fighting your house every single day.
Seriously — you deserve a home that looks good and survives golden retriever chaos. The right rug handles the muddy paws, the wet-dog smell, the zoomies after bath time. No more holding your breath every time your girl sprints in from the backyard.
Pick the style that made you stop scrolling. Order it. Done.
And hey — if bath days are still a whole production at your place, these natural DIY dog shampoos for a soft coat have genuinely changed my routine.
Which rug style felt most “you” — the cozy washable ones or the bold statement rugs?

Amr Mohsen is a software engineer who traded his keyboard for a leash — at least on weekends. His love for dogs inspired him to share what he learns as a dog owner and enthusiast, bringing a detail-oriented, research-driven perspective to every article he writes. If it’s about dogs, he’s probably already looked it up twice.

