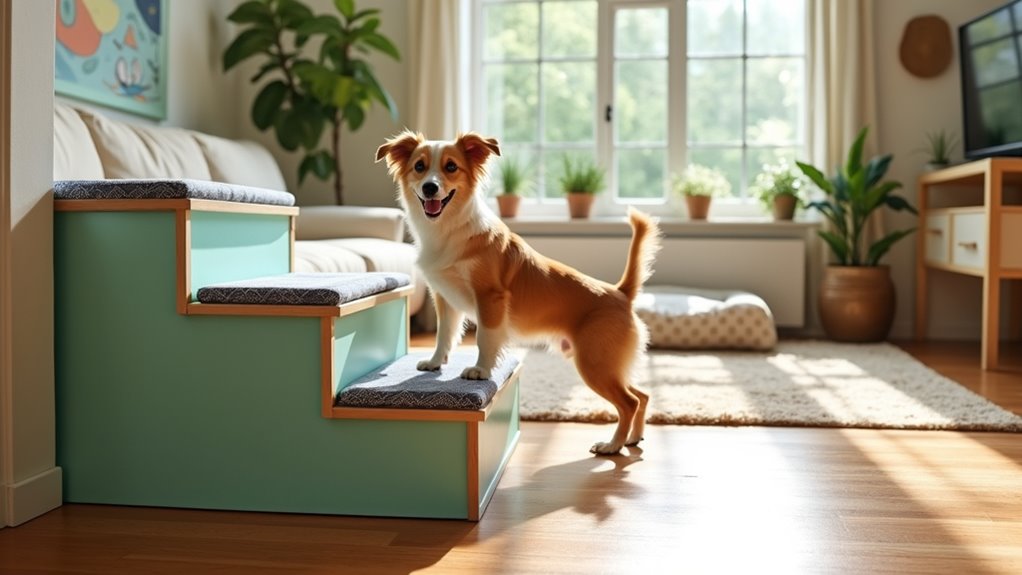
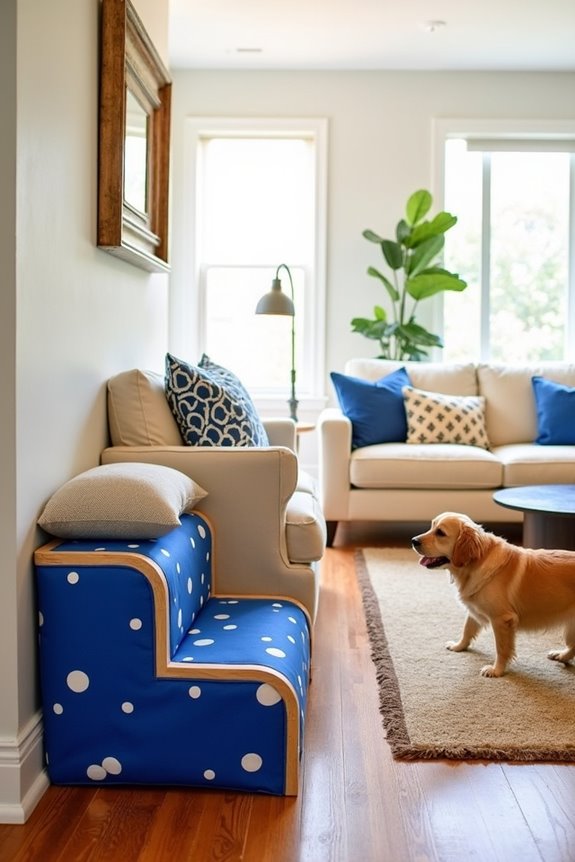
Think of your dog’s little paws as stepping stones providing access to a world just out of reach. Crafting DIY dog steps not only helps your furry friend reach those lofty spots, but it also adds a personal touch to your home. With a mix of cozy fabrics, unique designs, and thoughtful safety features, you can create something that’s both functional and full of character. So, what are some adorable materials and designs you can use for this heartfelt project?
Cute Fabric Choices Available
When you’re crafting DIY dog steps, one of the fun parts is picking out cute fabric.
Think about your dog’s personality—will they thrive in bright, playful prints or something a bit more sophisticated? You could go for polka dots, stripes, or maybe a cozy fleece that screams, “nap time!”
Just imagine your pup strutting up those steps, wrapped in fabric that matches your decor. Don’t forget to feel the fabric too; it should be durable but soft enough for your furry friend.
When you choose wisely, those DIY dog steps both look fabulous and keep your dog comfy.
And let’s be honest, if you choose something with paw prints, you’ll win Best Dog Parent of the Year award—no contest.
Our Collection
Let’s talk about our collection of dog step materials that’ll make your DIY project shine.
You’ve got everything from adorable personalized paw print patterns to snuggly fleece options and tough canvas selections.
And don’t forget the stylish quilted fabrics and bright multicolored stripes—because your pup’s steps should be as fabulous as they’re functional, right?
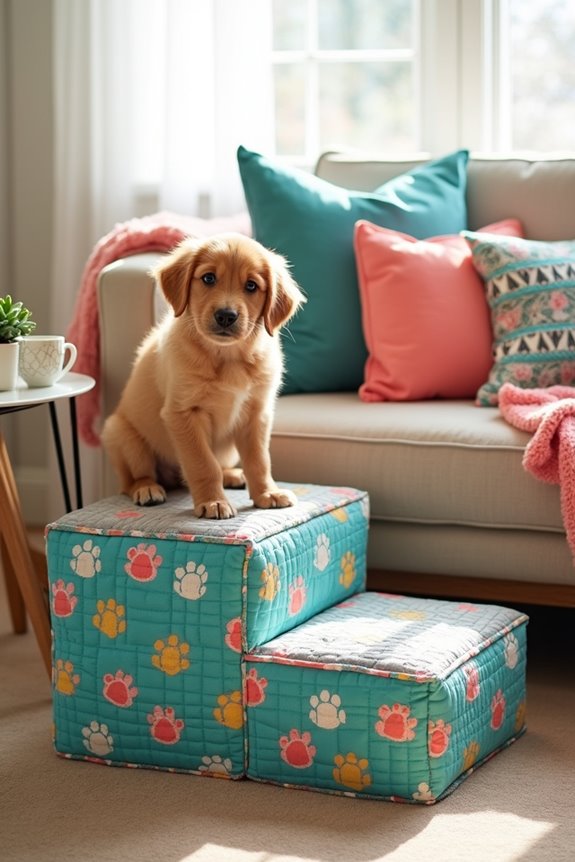
1. Personalized Paw Print Patterns
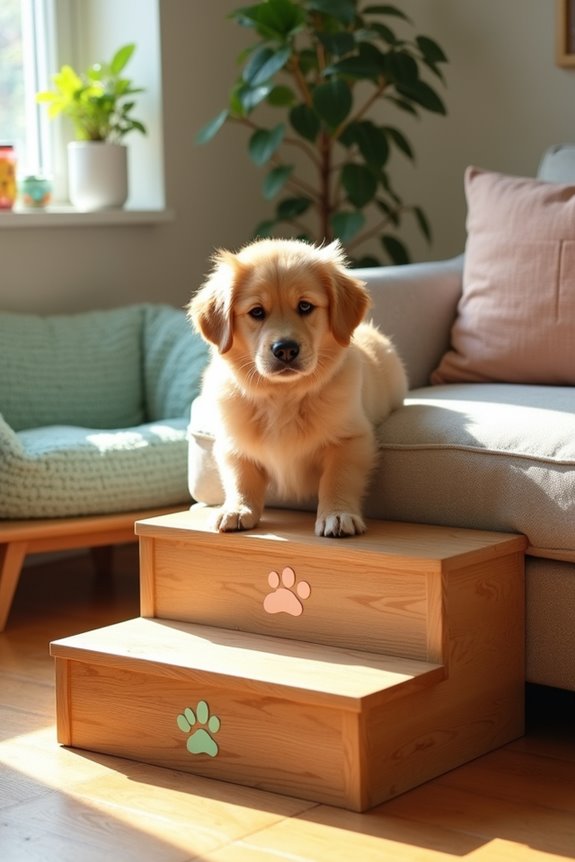
Creating DIY dog steps with personalized paw print patterns is a fun and creative way to help your furry friend reach their favorite spots more easily. Imagine your pup gently trotting up steps that aren’t just functional but also a reflection of their unique personality. Dog ramps specifically designed for premium comfort and support can also enhance your pet’s mobility and ease of access.
By making custom paw print patterns, you’ll turn a practical project into a charming addition to your home that saves money and keeps your pet comfortable. Additionally, using an elevated dog bath tub can make bath time easier for both you and your pet.
Materials Needed:
- Wooden boards (1-inch thick is ideal)
- Sandpaper (medium and fine grit)
- Wood glue
- Paint or wood stain in your choice of colors
- Paintbrush or foam brush
- Paw print stencil (you can make your own or buy one)
- Clear sealant (optional for extra durability)
- Measuring tape
- Jigsaw or hand saw
- Screwdriver and screws (if you want to attach pieces together)
- Safety goggles
Step-by-Step Instructions:
- Measure Your Dog: First, measure how high your dog needs to step up. This helps determine the height of your steps. Keep it comfortable – we want your pup to sparkle with joy, not grunt like they just ran a marathon.
- Cut the Wood: Using your saw, cut the wooden boards into the desired size for the steps. You can make them as wide and long as you want.
Think about your furry friend and what
2. Cozy Fleece Options
If you’re looking to add some warmth and comfort to your pup’s new DIY dog steps, consider a cozy fleece covering. Not only does it give your furry friend a soft surface to step onto, but it also enhances the overall look of your project. Plus, these cozy additions can definitely complement luxury dog costumes, making your pup’s entire style on point. To ensure your pup enjoys the best in comfort, consider opting for luxury dog accessories that match the elegance of your fleece design. Additionally, using premium dog food can help keep your Goldendoodle healthy and active for all their stylish endeavors.
Imagine your dog strutting their stuff on steps that aren’t only functional but fabulously stylish. Let’s get started on how you can easily incorporate fleece into your dog steps.
Materials Needed:
- Fleece fabric (choose a color or pattern that matches your home)
- Measuring tape
- Scissors
- Fabric adhesive or hot glue gun
- Velcro strips (optional for removable covers)
- Sewing machine or needle and thread (if you want to sew for extra durability)
- Pencil or fabric chalk
Step-by-Step Instructions:
1. Measure Step Dimensions: Begin by measuring the size of your dog steps. You want the fleece to be just right, covering each step perfectly without any overhang that could trip your pup.
2. Cut the Fleece: Lay your fleece fabric flat and cut it according to the measurements you took. If you’re feeling adventurous, you can make each step a different color or pattern.
Just imagine the fashion statement your pooch will make!
3. Secure the Fleece: Using fabric adhesive or a hot glue gun, start applying the fleece to the top of your steps. Make sure to smooth out wrinkles as you go; nobody likes a bumpy ride.
The adhesive should hold well, but feel free to use Velcro strips for removable covers if you think it might need washing later on.
4. Finishing Touches: For a neat finish, you might want to trim off any excess fleece or tuck it in along the edges.
If you’re crafty with a needle and thread, sew down the edges for a polished look, but hey, no pressure if you just want to stick with glue.
5. Allow to Dry: Give everything some time to dry (especially if you used glue), so the fleece stays firmly in place when your dog starts using the steps.
Make a cup of coffee, sit back, and take a breather—you’ve earned it.
6. Test It Out: Let your pup try it out! Encourage them to go up and down the steps a few times.
Watch them bask in comfort, and enjoy that tail wagging—it’s like you’re a home-decorating rock star and your dog is the biggest fan.
Optional Add-ons/Variations:
If you want to jazz things up, consider using different themed fleece designs based on the seasons.
Halloween pumpkins, winter snowflakes, or cartoon characters can make your steps pop with personality. You could also add a little faux fur trim for a luxurious touch.
After all, why shouldn’t your dog step in style?
Pro Tip:
Always pre-wash your fleece fabric before cutting and gluing.
This way, you’ll avoid any surprises like shrinkage later on, and your steps will look as good as new, even after a wash. Plus, you’ll save money by avoiding clingy, post-wash cuddles—because let’s be honest, we don’t need any extra fluff sticking around.
3. Durable Canvas Selections
If you’re a dog owner who wants to combine functionality with a touch of style, creating DIY dog steps with durable canvas is your answer. These steps not only make it easier for your furry friend to hop onto the couch or bed but also bring a neat, chic touch to your home decor. Plus, you save those hard-earned dollars from buying store-made options that can be pricey. Let’s dive right into this fun project!
Materials Needed:
- Heavy-duty canvas fabric (pick a color that suits your place)
- Measuring tape
- Scissors
- Fabric adhesive or a hot glue gun
- Wooden boards or strong cardboard (for the steps)
- Staple gun (optional for extra attachment)
- Pencil or fabric chalk
- Sandpaper (if using wood)
Step-by-Step Instructions:
- Measure Your Space: Start by measuring the height and width of the area where the steps will go. This gives you a solid idea of how large your canvas steps need to be. Your dog’s size matters too; make sure the steps are comfortably reachable.
- Cut the Canvas: Lay your canvas flat and cut it to fit the dimensions of your steps, making sure to leave an extra inch on each side to fold over. You’ll feel like a canvas Picasso, designing the perfect fit for your pup’s climb.
- Prepare the Steps: If you’re using wood, sand down any rough edges to prevent splinters. Then, assemble your steps using the boards or cardboard. If you’re feeling extra crafty, make a few different tier heights to give it some flair.
- Attach the Canvas: Use fabric adhesive to stick the canvas onto each step. Smooth it out as you go to avoid any pesky bubbles. If you’re using a staple gun, make sure the fabric is taut and secure on the underside of the steps.
- Add Some Extras: If you want your steps to have a bit of personality, consider using fabric — like a bright pattern — for the sides or underneath the steps. This way, each time your dog goes up, they get a little surprise of fun colors.
- Let it Settle: Allow the fabric adhesive to dry for a bit before introducing your pup to their new ascent. Pour yourself a cup of coffee and bask in the glory of your handiwork.
- Test It Out: Encourage your dog to explore their new steps. It’s always a delight to watch them figure it out. And don’t be surprised if they stop halfway for a stretch or a playful roll — dogs have their way of making everything a game.
Optional Add-ons/Variations:
Feeling a bit bold? Try using patterned or themed canvas — like colors that match your favorite sports team or even fun animal prints. Or, consider adding a non-slip grip on the steps if your dog is a bit wobbly on their feet. A simple rubber mat on top of the canvas can do wonders for those extra energetic moments.
Pro Tip:
Before starting, verify that the canvas is machine washable. Dogs are great at tracking mud through the house, after all. Having a removable and washable cover keeps your steps looking fresh without too much fuss.
And remember to check the weight capacity; strong boards will support larger breeds like a champ, ensuring safety alongside style.
4. Stylish Quilted Fabrics
Transforming your home and making life easier for your furry friend can happen with just a simple DIY project: stylish quilted dog steps. These beauties not only provide a safe way for your pup to jump up on the couch or bed but also add a splash of personality to your space. Plus, you can skip the high price tag of store-bought versions, allowing extra cash for those occasional treats. Let’s get crafting, shall we?
Materials Needed:
- Quilted fabric (choose a fun pattern that fits your decor)
- Measuring tape
- Scissors
- Fabric adhesive or a hot glue gun
- Wooden boards or heavy cardboard (for the steps)
- Craft foam (optional for added comfort)
- Pencil or fabric chalk
- Sandpaper (if using wood)
Step-by-Step Instructions:
- Measure Your Area: Start by measuring the height you want your dog to reach and the width of the space. This guarantees your steps are practical for your pup and fit nicely in your home.
- Cut Your Fabric: Lay your quilted fabric flat and cut it to match the dimensions of your steps. Don’t forget to leave an extra inch around the edges for folding — it’ll make for a totally tidy finish.
- Prepare Your Steps: If using wooden boards, make sure to sand down any splinters. Assemble the steps with wood or cardboard, and think about mixing heights for a playful look that adds character.
- Attach the Fabric: Use fabric adhesive to attach the quilted fabric to each step. Smooth everything out as you go, preventing any bubbles from popping up. If you’re using a hot glue gun, keep your fingers clear — trust me, the glue is hotter than you think.
- Add Comfort: If you want to pamper your pup even further, consider gluing craft foam to the top of each step before covering with the quilted fabric. This extra padding can be a cozy surprise for those paws.
- Let it Dry: Allow everything to dry completely before inviting your dog over for their new staircase debut. This is the perfect time to admire your handiwork—think of it as a mini personal art exhibit.
- Encourage Exploration: Gently coax your pup to check out the new steps. Feel free to cheer them on; after all, every little achievement deserves some applause, even if it’s just going up a few steps.
Optional Add-ons/Variations:
Want to take your quilted dog steps up a notch? Try using a mix of different quilt patterns or even a panel of bright colors on one side for an unexpected twist. You could even sew on a cute pocket for dog treats, turning those steps into a mini treasure trove.
Pro Tip:
When cutting your quilted fabric, take care to use sharp scissors. A clean cut not only makes for a better finish but also guarantees a neat look. And if you’re using wood, make sure the edges are smooth and safe for your pup, because we definitely don’t want any ouchies on our DIY adventure.
Now, armed with a little creativity and some fabric, your dog can strut with style up to their favorite spot, and you? You can sit back, sip your coffee, and bask in the glow of your frugal, fab dog steps.
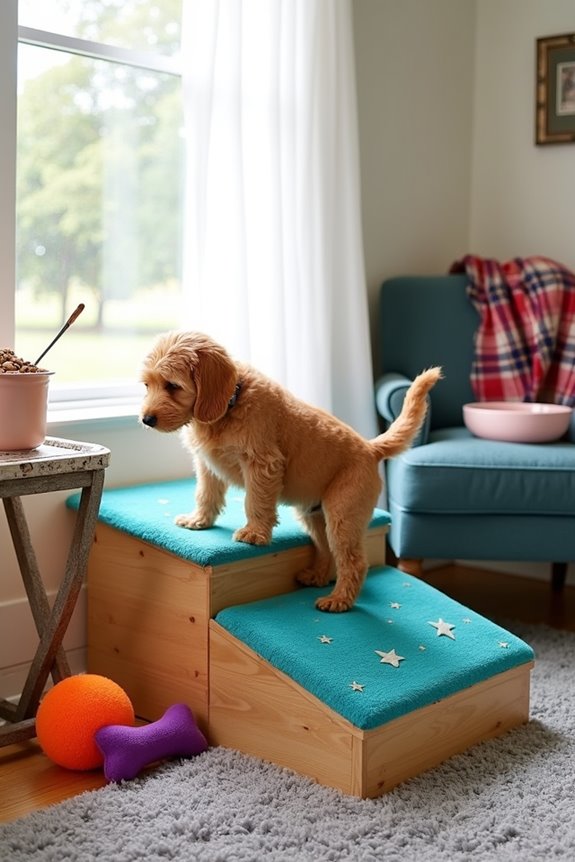
5. Bright Multicolored Stripes
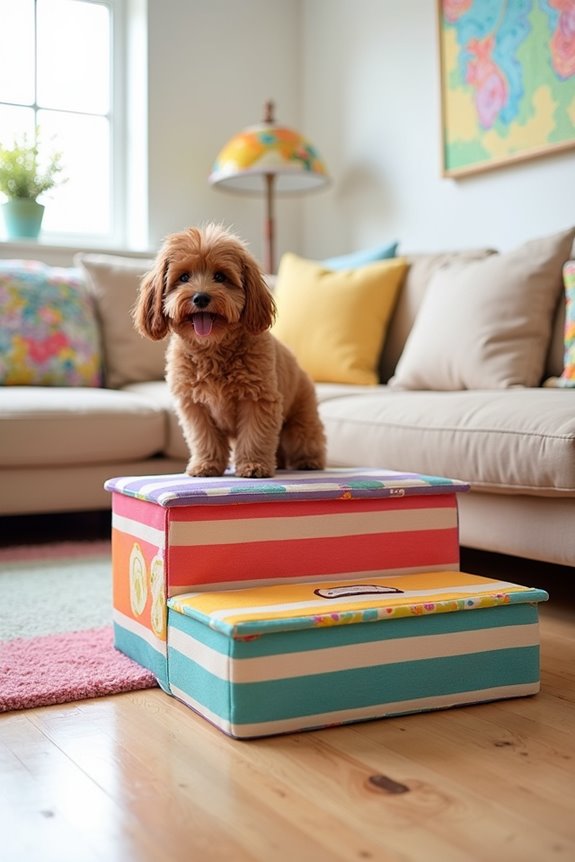
DIY dog steps don’t just make your pup’s life easier — they can also add a burst of color and fun to your home! By incorporating bright multicolored stripes, you can create a playful look that’s both stylish and functional.
You’ll be thrilled to save money while making your furry friend’s jumping experience a whole lot safer and more comfortable. Let’s get started on this delightful DIY project!
Materials Needed:
- Brightly colored striped fabric (go wild with patterns)
- Measuring tape
- Sharp scissors
- Fabric adhesive or hot glue gun
- Wooden boards or sturdy cardboard (for the steps)
- Craft foam (to boost comfort)
- Pencil or fabric chalk
- Sandpaper (if you choose wood)
Step-by-Step Instructions:
1. Measure Your Space: Grab your measuring tape and determine how high your pup needs to go. This guarantees the steps are just right for their little legs.
2. Cut Your Fabric: Spread out your vibrant striped fabric and cut it to match the size of your steps, making sure to leave an extra inch around the edges for a clean fold.
3. Prep Your Steps: If you’re using wooden boards, don’t skip the sanding. You want those edges smooth to avoid any ouchies.
Assemble the steps with your boards or cardboard. Mixing heights can make it visually interesting — think of it as a miniature dog staircase theme park.
4. Attach the Fabric: Using your fabric adhesive, carefully attach the bright striped fabric to each step. Take your time. Smooth out any bumps as you go, because nobody wants a lumpy dog step — it’s not a roller coaster, after all.
5. Add a Layer of Comfort: For an upgrade, glue on some craft foam to the tops of the steps before adding the fabric. Your pup will appreciate the extra cushion when they take their leap of faith.
6. Drying Time: Allow all the glue to dry completely before revealing the masterpiece to your pup. This is the ideal moment to give yourself a pat on the back — art is subjective and this is your proud moment.
7. Introduce the Steps: When the moment has arrived, coax your dog to explore the new steps. Use encouraging words; even if it’s just climbing a few steps, let them know they’re superstar athletes.
Optional Add-ons/Variations:
Feeling extra creative? Mix and match different striped fabrics for each step for a whimsical staircase that pops with personality.
Or, you could swap out the stripes for polka dots and see if your pup jumps for joy in a whole new style.
Pro Tip:
For a lovely, non-slip experience, consider adding some fabric grips onto the bottom of your steps. This little hack will keep your pup safe and sound, stopping any potential sliding on hardwood floors.
Plus, it’s a smart way to guarantee your elegant creation lasts even through playful puppy moments. Now, that’s a win-win.
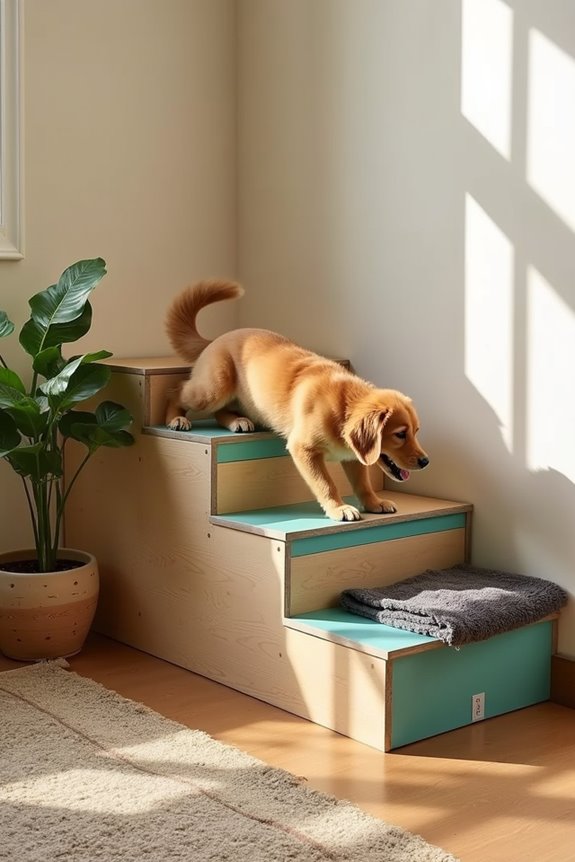
6. Non-slip Backing Options
Have you ever watched your furry friend attempt a daring leap only to slide back down like a cartoon character on a banana peel? We’ve all been there. That’s why adding a non-slip backing to your DIY dog steps isn’t just a luxury; it’s a requirement for safety and comfort.
Not only will it help your pup feel secure, but it also adds value by minimizing the risk of injuries… and the dreaded vet visit. Let’s explore some fantastic non-slip backing options that will keep those paws securely planted.
Materials Needed:
- Rubber non-slip mat (available at most craft or home improvement stores)
- Scissors (for trimming)
- Measuring tape
- Strong adhesive or double-sided tape
- Optional: fabric or foam (to cover the top for extra comfort)
Step-by-Step Instructions:
- Measure the Steps: Start by measuring the bottoms of your dog steps. You want to confirm that your non-slip backing fits snugly without hanging over the edges. A little extra is fine, but too much can cause a tripping hazard.
- Cut the Non-slip Mat: Lay your rubber non-slip mat flat and use your scissors to cut it according to your measurements. Remember, cutting straight lines is key, but don’t worry if it’s not perfect. We’re going for function over form here.
- Prepare the Surface: Clean the bottom of your dog steps so that the adhesive sticks well. It’s just like cleaning your plates before dinner—nobody wants a slippery situation.
- Attach the Non-slip Mat: Apply your strong adhesive or double-sided tape to the back of the cut non-slip mat. Then, firmly press it onto the bottom of each step. Make sure it’s on there nice and tight, just like that one friend who hugs a little too hard.
- Let it Set: Give the adhesive some time to cure. You don’t want your dog to knock it loose the first time they hop up. While waiting, you can sip a cup of coffee and contemplate life’s mysteries, like why dogs smell so weird after bath time.
- Test It Out: Before letting your pooch venture up, give it a little shake to confirm it’s secure. Then, coax them to try it out while you cheer them on like a proud parent at a graduation; we all know how brave stepping onto new surfaces can be for our furry pals.
Optional Add-ons/Variations:
If you want to add a splash of creativity, think about covering that non-slip mat with a fun fabric that matches your vibrant dog steps.
Or why not glue on some colorful foam pads to enhance comfort even more? Your pup will appreciate the extra love and style.
Pro Tip:
Always double-check that your non-slip material has been securely adhered before your dog gives it a test run. A little time spent on this step could save a lot of heartache later, and it confirms the steps remain an enjoyable and safe feature in your home.
Plus, a little extra grip benefits your own slippery socks. Safety first, fancy steps second!
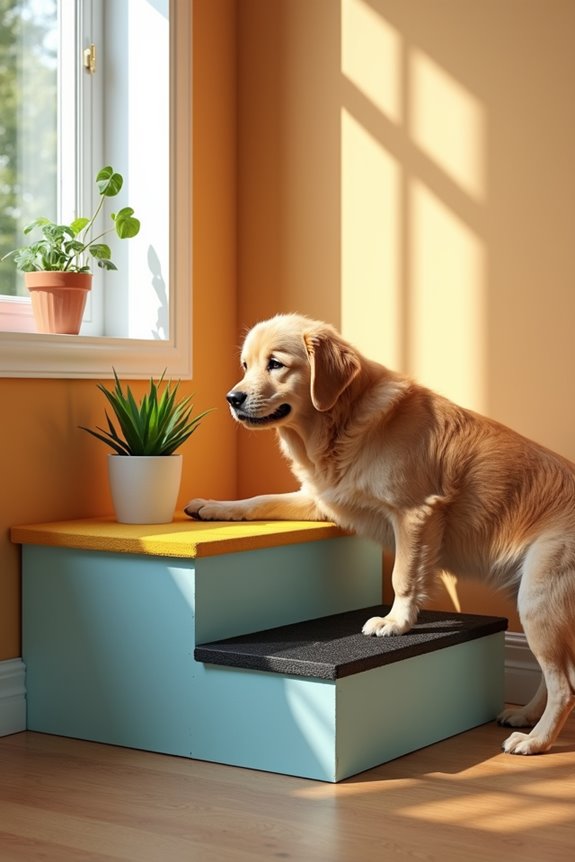
7. Reinforced Edges for Durability
Let’s face it: dogs are strong, playful, and sometimes a little clumsy. That’s why adding reinforced edges to your DIY dog steps isn’t just a smart move, it’s practically a necessity if you want to avoid any unplanned visits to the vet.
These sturdy edges not only enhance the durability of your steps but also provide extra stability for your furry friend as they trot up and down. Plus, this project is a great way to save money while keeping your home looking nice and inviting. Let’s jump in!
Materials Needed:
- Plywood or sturdy wooden boards
- Wood glue or screws for secure attachment
- Sandpaper (medium and fine grit)
- Non-slip paint or adhesive strips (optional)
- Measuring tape
- Saw (hand saw or circular saw)
- Safety goggles (protect those peepers)
Step-by-Step Instructions:
1. Measure Your Steps: Start by measuring the edges of your dog steps. You’ll want to make sure your wooden boards match the length of the steps, plus a little extra is always good to account for thickness.
2. Cut the Boards: Using your saw, cut your plywood or wooden boards to size. Try to make those cuts straight and even. If you find yourself frowning at the saw like it’s a trick question, just remember it doesn’t have to be perfect; it just needs to hold up the weight.
3. Sand the Edges: Grab your sandpaper and smooth down the edges of your cut boards. This step helps eliminate any sharp edges that could be dangerous for your pup.
Think of it as giving your boards a spa treatment; nobody likes a splinter, including dogs.
4. Attach the Boards: Use wood glue or screws to securely attach the cut boards along the edges of your steps. If you’re going the glue route, hold it in place for a few minutes (or until you can’t feel your fingers anymore) to create a solid bond.
If you’re using screws, make sure to keep an eye on the screws’ length so they’re not poking out.
5. Optional Non-Slip Finish: If you want to take it a step further (pun totally intended), consider painting your new edges with non-slip paint or adding adhesive strips to enhance grip. The more secure your pup feels, the more likely they’re to tackle those steps confidently.
6. Let It Cure: Give the glue or paint ample drying time according to the manufacturer’s instructions. You really don’t want to rush this part; after all, who wants their dog playing slip and slide on the steps?
7. Final Inspection: Once everything is securely in place and dry, give the steps a good ol’ shake (not too hard, though—no need to impersonate a mini earthquake).
Make sure everything feels sturdy before letting your dog give them a whirl.
Optional Add-ons/Variations:
For a splash of color, why not paint your reinforced edges in a fun color that matches your decor?
Or, use patterned fabric over the edges for a cozy look. It feels nice to put in a little personal touch that makes your dog space feel special—or at least a little less like a dog’s home.
Pro Tip:
Always make sure to check for stability and wear and tear periodically. Dogs can get a little rambunctious, and regular inspections will help you catch any issues before they become a problem. Safety first, right?
And who knows, it could become a regular bonding activity with your pet—how about a “step check” day?
Extra Tips & Ideas
Dog steps can be a total game-changer for your furry friend, especially if they’re on the shorter side or just getting a bit older.
When building, consider adding non-slip treads—trust me, your pup will appreciate that extra grip. You might even personalize the steps with paint or fabric that matches your home’s vibe.
What about adding a cozy blanket on top? It’ll make for a comfy spot when they’re tired after a long day of barking.
And hey, don’t forget to measure your dog before you start; I once made steps too tall, and let’s just say my dog didn’t find it amusing.
A few creative touches can make your DIY project functional and a stylish addition to your home.
Frequently Asked Questions
What Materials Are Best for Building DIY Dog Steps?
For DIY dog steps, use sturdy plywood, non-slip carpet for traction, and wood glue or screws for stability. Consider adding a finish sealant for durability, ensuring your furry friend can safely navigate the stairs.
How Do I Measure My Dog for Custom Steps?
Imagine your furry friend as a king needing a throne. To measure, have your dog stand up straight, then measure the height from the ground to their belly. This guarantees their ascent is royal and comfortable!
Can I Modify Existing Furniture for Dog Steps?
Yes, you can modify existing furniture for dog steps! Just make certain that it’s sturdy and safe. Adding ramps or platforms can give your dog easier access while enhancing the furniture’s functionality. Get creative and have fun!
What Safety Features Should I Consider for Dog Steps?
When designing dog steps, consider non-slip surfaces, sturdy handrails, and proper height for your pet. These features help guarantee safety and prevent accidents, making it easier for your furry friend to navigate.
How Do I Clean and Maintain DIY Dog Steps?
You can clean your DIY dog steps by wiping them with a damp cloth and mild detergent. Regularly check for wear and tear, and tighten any loose screws to maintain safety and stability for your furry friend.
Conclusion
Creating DIY dog steps is like building a cozy little bridge to your furry friend’s happiness. With your choice of vibrant fabrics, non-slip features, and a sprinkle of creativity, these steps can bring joy and functionality to your home. Remember, it’s not just about getting them up to their favorite napping spots; it’s about showing your love in every stitch. So roll up your sleeves, let your imagination run wild, and give your pup the gift of easy access.

Hi, I’m Ali Tarek, the founder of Animalsman. I’ve always been passionate about pets, especially dogs and cats, and I created this website to share practical tips, easy recipes, and helpful care advice for fellow pet lovers. My goal is to make pet care simple, enjoyable, and accessible for everyone. When I’m not writing or curating content, you’ll usually find me spending time with my furry friends or learning new ways to keep them happy and healthy.

