So, you’re thinking about sprucing up your dog’s outdoor living space, huh? It can feel overwhelming with all the styles, materials, and comforts to contemplate. You want a kennel that looks good and keeps your pup safe and cozy. Trust me, I’ve been there, staring at countless Pinterest boards while my dog gives me that “Is this really necessary?” look. Let’s explore some stylish designs that’ll make your backyard the envy of the neighborhood, and your furry friend might just thank you for it.
Stylish Kennel Designs Showcased
When it comes to stylish kennel designs, you might think they’re all big boxes with rickety roofs, but oh, how wrong that is!
Imagine a chic, cozy cabin vibe for your pup, or a bright, open space that blends perfectly with your yard. You could even craft a DIY outdoor dog kennel that rivals your home’s aesthetics.
Picture yourself hammering away, painting it in lovely colors, and adding decorative touches like plants or a mini porch. This way, your dog has their own retreat while you get the satisfaction of creating something beautiful.
Plus, it keeps your pooch safe and happy. It’s all about making it functional and fabulous—because why shouldn’t our furry friends live in style?
Our Collection
Now, let’s take a peek at our collection, shall we?
You’ll find everything from a sleek modern wooden kennel design to an insulated dog house that keeps your pup cozy even on the chilliest nights.
Want something special? Explore our customizable modular kennels—perfect for those of us who struggle to assemble Ikea furniture without crying.
1. Modern Wooden Kennel Design
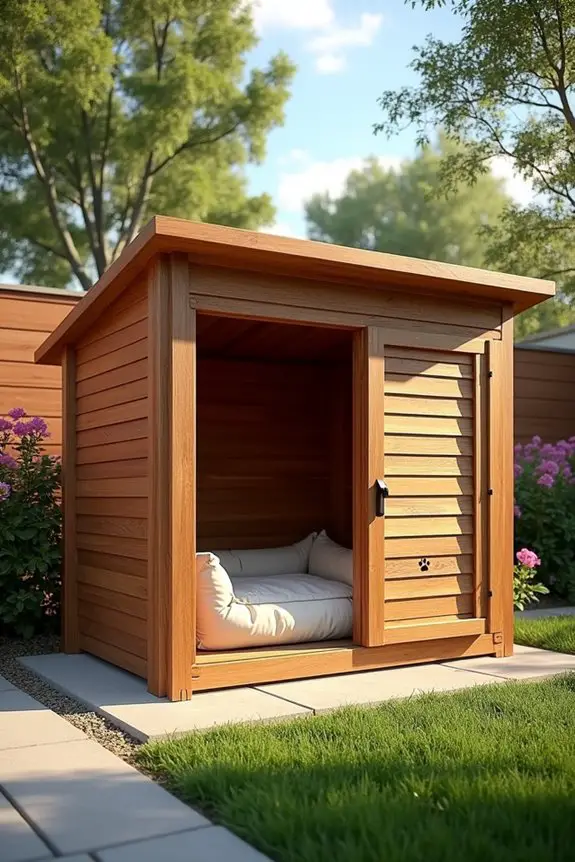
If you’re looking to create a cozy haven for your furry friend without breaking the bank, this modern wooden kennel project is for you. Not only does it offer your pup a stylish shelter in your backyard, but it also showcases your DIY skills.
Plus, who wouldn’t want a beautiful kennel that adds charm to their home and yard?
Materials Needed:
- Plywood sheets (1/2 inch thick)
- Wood screws (2 inches)
- Wood glue
- Wood stain or outdoor paint (your choice of color)
- Sandpaper (medium and fine grit)
- Hinges (for the door)
- Outdoor sealant
- Measuring tape
- Saw (circular saw or jigsaw)
- Drill
- Paintbrush or roller
- Safety goggles (don’t skip this)
- Gloves (optional, but recommended)
Step-by-Step Instructions:
1. Measure and Cut: Start by measuring the space you want for your kennel. A good size for a medium dog is about 3 feet long by 2 feet wide and 2.5 feet tall. Cut the plywood into pieces: four walls, a floor, and a roof.
2. Sand the Edges: Smooth out all cut edges with medium grit sandpaper first, followed by fine grit. This will prevent splinters—not fun for you or your pup.
3. Assemble the Walls: Using wood glue and screws, attach the wall pieces to the floor. Make sure they’re secure and corners are straight.
If you were as clumsy as I was during my first build, don’t worry; you can always use an extra screw to hold things in place.
4. Add the Roof: Attach the roof piece securely. If you want a sloped roof (which keeps rain out), let it hang slightly over the walls. Secure it with screws or hinges if you want access for cleaning.
5. Create the Door: Cut a door opening in one wall. Attach a door piece using hinges, making sure it swings easily so your pup can go in and out without a fuss.
(Bonus: it gives them a dramatic way to enhance their entrance.)
6. Stain/Paint: Now comes the fun part. Choose a color that complements your yard. Apply wood stain or outdoor paint with a brush or roller.
It’ll protect the wood and make it look nice. Don’t forget to let it dry completely; your pup might be too curious and try to sneak a taste.
7. Seal It Up: Finish with an outdoor sealant to protect it from the elements. I’ll never forget the time I forgot this part—my poor dog had a soggy kennel after just one rainstorm.
Optional Add-ons/Variations:
- Create a Custom Design: Add a fun twist by painting your dog’s name on the front or using stencils for decorative patterns. How about paw prints or a cute dog silhouette?
- Put in a Soft Bed: Line the inside with a comfy dog bed or some nice straw for added comfort. Consider covering the bed with a waterproof cover—you know, just in case.
Pro Tip:
Be sure to elevate your kennel slightly off the ground with wooden blocks or legs. This helps keep it dry during rain and adds insulation from chilly nights.
And hey, your dog might actually feel like royalty in their little castle.
2. Insulated Dog House Design
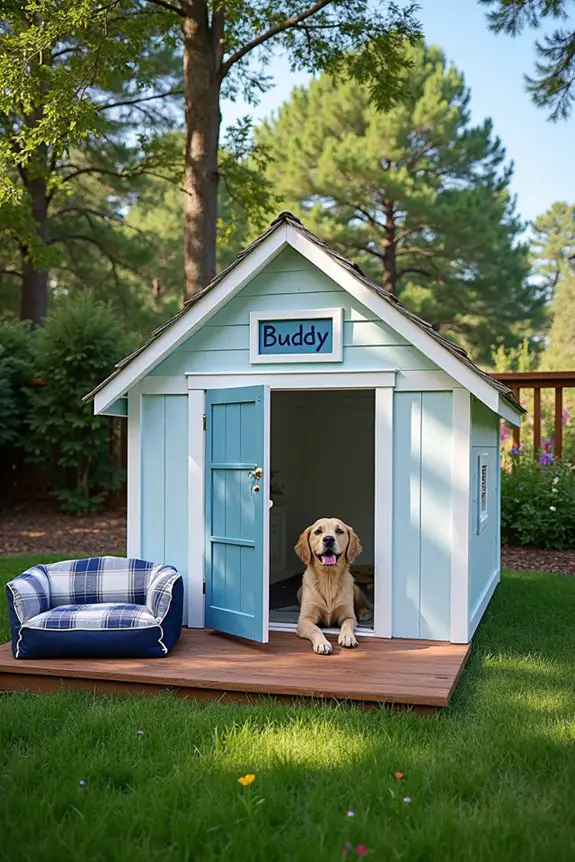
If your pup deserves a comfy place to snuggle up, consider building an insulated dog house. This DIY project provides warmth during those chilly winter nights and protects against the harsh elements. Not only will your dog love it, but you’ll save money on store-bought options while adding a charming touch to your yard. Plus, for those who want to elevate their pup’s experience even further, consider adding luxury dog stairs for bed to make access easier and more comfortable. Furthermore, luxury dog collar kits can complement your pup’s stylish look while they relax. Additionally, installing luxury dog doors can further enhance their comfort and ease of access. Also, building a quality structure can help ensure that your pet enjoys a safe and secure environment year-round.
Materials Needed
- Plywood sheets (1 inch thick for walls, 1/2 inch thick for floor and roof)
- Wood screws (2 inches)
- Foam insulation boards
- Wood glue
- Outdoor paint or wood stain (water-resistant)
- Sandpaper (medium and fine grit)
- Hinges (for the door)
- Measuring tape
- Saw (circular saw or jigsaw)
- Drill
- Paintbrush or roller
- Safety goggles (always wear these)
- Gloves (recommended, especially for cutting)
Step-by-Step Instructions
1. Measure and Cut: Start by measuring the space for your dog house. A good size for a medium dog is about 4 feet long by 3 feet wide and 3 feet tall. Cut the plywood into pieces for the walls, floor, and roof.
Don’t worry if your cuts aren’t perfect; no one’s judging here, and your pup will think it’s a palace regardless.
2. Prepare the Insulation: Cut the foam insulation boards to fit snugly between the wall pieces. This step is key; it’ll keep the heat in when the temperatures drop.
Just think: no more cold nose on your elbow during winter snuggles.
3. Sand the Edges: Smooth out all cut edges with medium grit sandpaper, then follow up with fine grit. This step might seem tedious, but trust me, those splinter-free edges are worth it for both of you.
4. Assemble the Walls: Attach the wall pieces together on the floor using wood glue and screws.
Make sure everything is nice and tight; we want a fort that can withstand any playful antics or rambunctious weather.
5. Add the Insulation: Before securing the roof, place your foam insulation inside the walls. This creates a warm haven—think of it as your dog’s cozy blanket but with walls.
Secure it in with some wood glue for a snug fit.
6. Attach the Roof: Secure the roof piece, preferably sloped to allow rain runoff.
You might even want to use hinges on one side for easy access during cleaning. If you’re feeling fancy, you can add a little overhang to keep rain away from the walls.
7. Create a Door: Cut a door opening on one wall, and attach a door piece using hinges.
Confirm it swings open easily; your dog must have a grand entrance to show off when they exit.
8. Paint and Seal: Now the fun part—decorate! Choose a color that matches your style and apply outdoor paint or wood stain.
Don’t forget to seal it afterward; a good sealer will keep your dog house looking vibrant and protect it from the elements.
Optional Add-ons/Variations
- Add a Doggy Deck: Create a little wooden deck at the entrance for an elevated look. It gives your pup a special lounge area right outside the house.
- Personalize with Decor: Paint your dog’s name on the side of the house or use fun stencils. This makes it feel even more like home.
Pro Tip
Make sure to place the dog house in a spot that gets some sunlight during the day and is shielded from wind.
Trust me; no one likes a drafty house. Plus, placing the door away from the prevailing winds ensures your pup always has a cozy hideaway, even when Mother Nature throws a tantrum.
It’s all about keeping your best friend cozy.
3. Eco-Friendly Kennel Materials
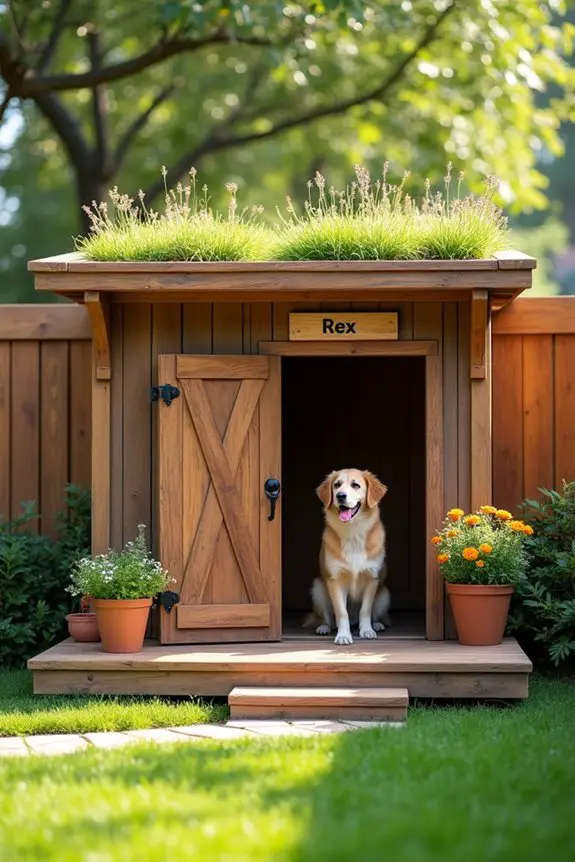
If you’re looking to provide your furry friend with a cozy and eco-friendly living space, building a dog kennel with sustainable materials is a fantastic DIY project. Not only will you be saving money compared to buying a pre-made kennel, but you’ll also be doing your part for the environment. Plus, your pup will appreciate having a comfortable and stylish spot to hang out in the yard. For the best care of your dog’s food, consider using premium dog food storage solutions to keep their meals fresh and safe.
Let’s get those creative juices flowing while we immerse ourselves in this rewarding project!
Materials Needed
- Reclaimed wood (or plywood slices)
- Outdoor, non-toxic paint/stain (to weatherproof)
- Wood screws (1.5 inches)
- Natural insulation material (such as straw or recycled denim)
- Hinges (for the kennel door)
- Measuring tape
- Saw (hand saw or power saw)
- Drill
- Sandpaper (medium and fine grit)
- Safety goggles (always wear these)
- Work gloves (a must for keeping those hands safe)
Step-by-Step Instructions
1. Measure Your Space: Start by choosing a sunny spot in your yard for the kennel. Measure out a space that’s big enough for your dog. A cozy cabin for a medium-sized dog might be about 3.5 feet long, 3 feet wide, and 2.5 feet tall.
Think about it—dogs love a little room to stretch out.
2. Cut the Wood: Using your saw, Cut the Wood into pieces for the four walls, floor, and roof. Don’t sweat it if your cuts aren’t perfect; your dog won’t mind. If anything, they’ll just appreciate having their own hangout.
3. Sand it Smooth: Nobody likes a splinter. So take that medium grit sandpaper and smooth out all the edges. Follow up with the fine grit for ultimate smoothness.
Trust me, both you and your pup will thank me later when there are no sharp edges.
4. Assemble the Walls: Take the wall pieces and fasten them together using the wood screws and a little wood glue for strength. Verify everything is snug—this kennel should stand up to any playful nudging.
5. Insulate with Natural Materials****: Once your walls are up, it’s time to insulate! Fill the space in the walls with your natural insulation (like straw). It’s simple, effective, and environmentally friendly.
Plus, who doesn’t love the smell of fresh straw?
6. Secure the Roof: Now, add the roof, ideally slanted to help rainwater run off. If you’re feeling adventurous, you can make one side hinged for easy access.
You’ll want to check in on your pup from time to time, right?
7. Create the Door: Cut out an opening for your dog’s door. Use hinges to attach a door that swings open. Go ahead and make it just big enough for your pup to squeeze in.
They’ll love having their own private entrance!
Optional Add-ons/Variations
- Consider adding a green roof by planting grass or small plants on the roof, giving your kennel a little extra charm and helping with insulation.
- Paint the kennel your dog’s favorite color (let’s be real, you can totally pick it, too) or add cute stencils that reflect their personality.
After all, a personal touch makes it feel like home.
Pro Tip
Use leftover materials to create a small porch or steps leading up to the kennel. Not only does this add a nice touch, but it also gives your dog a safe and inviting entryway.
Oh, and don’t forget to regularly check the floor for any signs of wear—keeping your pup’s space comfy is super important.
And there you have it! With just a handful of materials and a little bit of effort, you can create a beautiful and eco-friendly kennel that will keep your dog cozy and happy for years to come.
Happy building!
4. Luxury Raised Kennel Platform
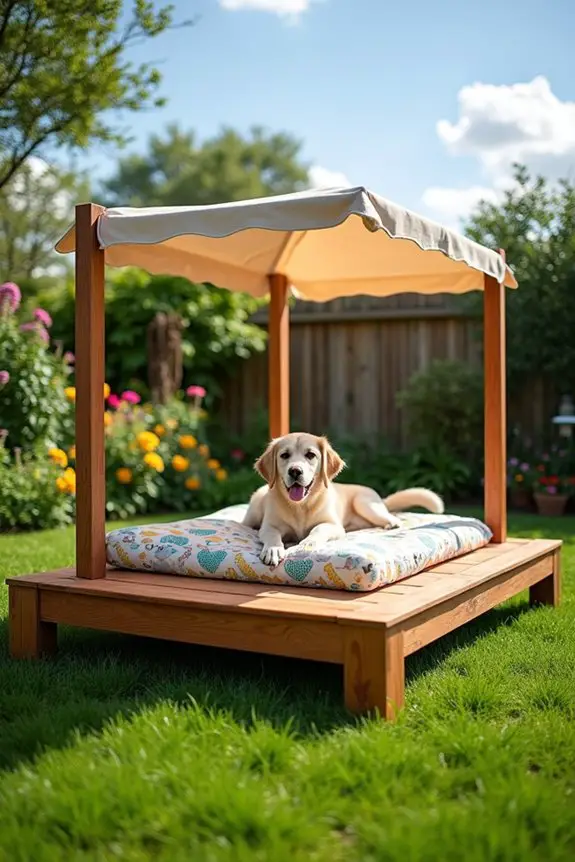
Nothing says “I love you” to your pooch quite like a luxury raised kennel platform. This DIY project is a win-win for dog owners and their four-legged companions. Not only does it elevate your furry friend to keep them off the cold ground during chilly nights, but it also adds a touch of stylish comfort to your backyard.
Your pup will enjoy lounging in a comfy space, while you’ll feel proud of your DIY handiwork—and feel good about saving some cash, too.
Materials Needed
- Wood planks (for the frame and platform)
- Cedar wood boards (for added durability and odor resistance)
- Non-toxic wood sealant (to protect from elements)
- Wood screws (1.5 inches)
- Sandpaper (medium and fine grit)
- Drill
- Saw (hand or power saw)
- Measuring tape
- Level (for ensuring a balanced build)
- Paintbrush (for sealant application)
- Safety goggles (because your eyes matter)
- Work gloves (no one likes splinters)
Step-by-Step Instructions
1. Measure and Cut: First things first, figure out how big you want your elevated platform—with a medium dog in mind, a size of about 4 feet long, 3 feet wide, and 1.5 feet off the ground works great. After deciding, cut your wood planks accordingly.
Remember, if your angles aren’t perfect, don’t worry! Dogs are naturally forgiving when it comes to aesthetics.
2. Smooth the Edges: Grab that sandpaper and go to town on all the cut edges. Seriously, no one wants to deal with splinters—trust me, I’ve learned this the hard way.
Use medium grit for the rough spots and finish up with fine grit for that extra smooth touch.
3. Build the Frame: Assemble the frame of the platform by nailing together the wood planks, ensuring you’re using wood screws securely.
I use a drill to make it faster, but hey, a screwdriver works too. Just don’t take too long; the pooch is waiting for their new hangout.
4. Add the Platform: Once your frame is looking solid, it’s time to attach the cedar boards on top. This will create the comfy and sturdy space for your pup.
Make sure everything is nice and even using a level—no doggo wants to feel like they’re on a funhouse ride.
5. Seal It Up: Give your new creation a good coat of non-toxic wood sealant. Not only does this help protect it from the weather, but it also gives it a beautiful finish.
Use that paintbrush generously—just don’t forget those corners.
6. Let It Dry and Paint It: Let everything dry per the instructions on the sealant. If you’re feeling creative, now’s the time to personalize it—maybe a splash of color or neat patterns that match your home décor might work nicely.
Optional Add-ons/Variations
- Consider adding a cozy, removable cushion for extra comfort. Choose a fun fabric that suits your style, and you’ll have a plush paradise on that stylish platform.
- For the adventurous, incorporate a small roof or canopy above the platform—just think how much fun it would be for your pup to chill in the shade.
Pro Tip
Before you start, double-check your dimensions. An extra inch here or there can lead to headaches, especially when you consider the lumber mightn’t fit as planned.
Also, for added durability, choose wood that can withstand the weather in your area—nobody wants their fancy platform to warp in the rain.
5. Customizable Modular Kennel Design
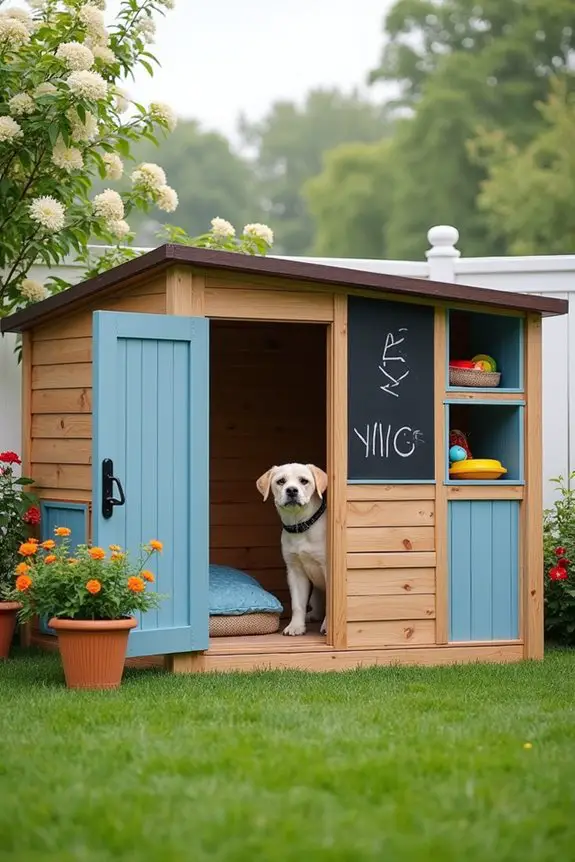
When it comes to pampering our pups, nothing quite beats the creativity of a customizable modular kennel design. This DIY project not only guarantees your furry friend has a cozy and spacious abode, but it also shows off your personal touch— and let’s be honest, who doesn’t love a project that combines style with function?
Plus, it saves you money compared to buying a commercial kennel, which means more treats for your pup and less stress for your wallet. Let’s get to work on this fun, attractive, and highly customizable kennel.
Materials Needed
- Wood panels or planks (for walls and support)
- Wood screws (1.5 to 2 inches)
- Non-toxic wood glue (for added stability)
- Drill and drill bits
- Saw (hand saw or power saw)
- Measuring tape
- Sandpaper (medium and fine grit)
- Paint or stain (optional, for customization)
- Paintbrush (for applying stain or paint)
- Pencil or marker (for measurements)
- Safety goggles (to protect those peepers)
- Work gloves (to keep splinters at bay)
Step-by-Step Instructions
- Plan Your Design: Before the fun begins, sketch out your kennel layout. Think about size, compartments, and any special features. A rectangular shape is simple to start with, but why not add a fun twist with an L-shape if your space allows?
- Measure and Cut Panels: Using your measuring tape, decide how large the kennel should be. For a medium-sized dog, a good size is about 4 feet by 3 feet. Carefully cut your wood panels according to your measurements. No pressure, just go slow and steady—much like your pup when they’re contemplating a jump into your lap.
- Smooth the Edges: Now, grab that sandpaper and smooth out all those freshly cut edges. Trust me, your dog will appreciate not snagging their fur on rough wood. Don’t skip this step, or you may end up with a grumpy pup and a trip to the vet for accidental scratches.
- Assemble the Walls: Start piecing the panels together using wood screws to secure the walls. If you want additional strength, apply wood glue before screwing them together. A drill can speed up this process. Just remember, it’s a kennel, not a rocket ship—no need for perfection, just a solid build.
- Create a Modular Design: This is where it gets fun! You can make individual compartments or even a two-story setup by adding additional panels as you see fit. Need a place for toys or food? Simply add small dividers. Be creative and think about what your dog would love.
- Finish with Stain or Paint: Once the structure is complete, give it a smooth coat of non-toxic stain or paint. This not only adds style but protects the wood from the elements. Choose colors that pop or match your outdoor décor; the choice is yours!
- Let It Dry: While you clean your workspace, place the kennel in a well-ventilated area and let the stain or paint dry completely before introducing it to your pup. Your dog will need time to explore the new space—on their terms.
Optional Add-ons/Variations
For a personalized touch, consider using a chalkboard paint section to create a fun nameplate for your pup or customize the paint colors based on your home’s design.
You could even hang a few decorative elements, like dog-friendly plants or a stylish roof to shade them from the sun.
Pro Tip
Always make sure to use sanded and safe materials, especially if your pup is a chewer. Consider using bamboo or other durable, chew-proof woods—your dog’s health is worth that extra effort.
Also, keep each compartment roomy enough for your dog’s comfort because a happy pup is a happy home.
Embark on this DIY kennel adventure knowing you’re creating a safe, stylish space for your precious pet. In the end, it’s not just a kennel; it’s their new favorite hangout spot. What color will be the masterpiece on this excited canvas?
6. Outdoor Steel Kennel Enclosure
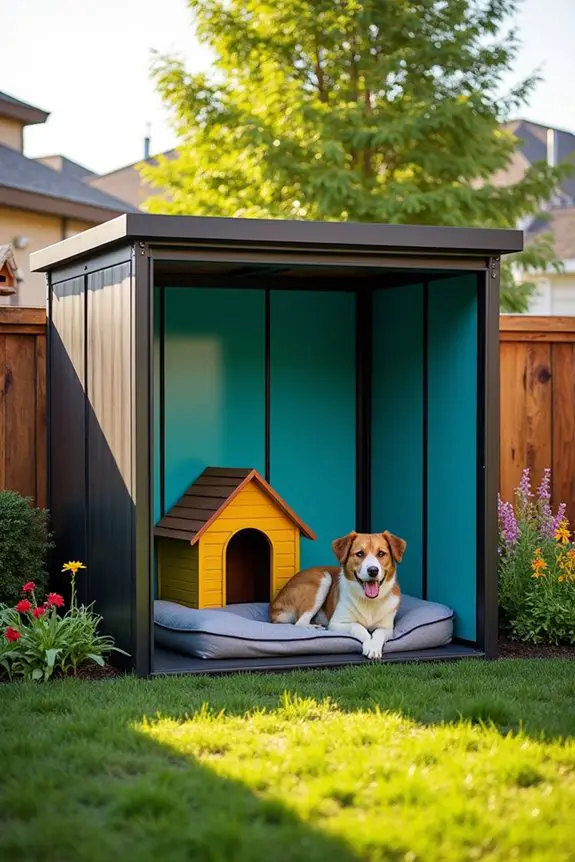
If you’re looking for a durable and secure space for your furry friend, an outdoor steel kennel enclosure is a fantastic DIY project that combines strength and style. Not only does it provide a safe haven for your pup to play and explore, but it also enhances your outdoor aesthetic.
And let’s face it—buying a ready-made kennel can be expensive. With this DIY steel kennel, you can save some bucks while giving your dog a cozy retreat they’ll appreciate.
Materials Needed
- Steel panels (for walls and roof)
- Steel frame (for support)
- Heavy-duty screws or bolts
- Welding equipment (or a friend who knows how to weld)
- Measuring tape
- Angle grinder (for smooth edges)
- Safety gloves (to keep those fingers safe)
- Safety goggles (to protect those peepers from sparks)
- Concrete blocks or anchoring material (to secure the structure)
Step-by-Step Instructions
1. Design Your Enclosure: Think about your dog’s size and needs as you plan your steel kennel. A good rule of thumb for medium to large dogs is about 6 feet by 10 feet. Also, consider including a shaded area for comfort, maybe even a little hangout nook.
2. Measure and Cut Steel Panels**: Using your measuring tape, mark where to cut your steel panels. After that, carefully cut the panels to size with the angle grinder**.
If you’ve never used one before, maybe take a moment to practice on scrap metal—it’s a bit like riding a bike, only with more sparks.
3. Smooth the Edges: You don’t want your pup to get a nasty scratch, so take the time to smooth out all sharp edges. The angle grinder can do the job, but be sure to wear your safety gear—seriously, protect those beautiful eyes and hands.
4. Assemble the Frame: Begin by setting up your steel frame, securing it with heavy-duty screws or bolts. If you’re feeling adventurous (or have welding skills), you can weld the connections for extra strength.
Just think about it: you could be the proud owner of a steel fortress for your pup.
5. Install the Walls and Roof: Attach the steel panels to your frame, ensuring they’re tightly secured. If your dog decides they want to impress you with their gymnastics skills, you’ll want a tight fit on those panels.
6. Secure the Kennel: Use concrete blocks or other anchoring material to hold your kennel in place. This way, even if your dog has superhero aspirations, they won’t blow the whole thing over during their next zoomie session.
Optional Add-ons/Variations
- Paint or coat the steel: Give your kennel a pop of color or a fresh coat of rust-resistant paint for personalized flair. You can choose trendy colors that match your home or go wild with patterns—polka dots anyone?
- Add a doghouse inside: Put a cozy doghouse within the enclosure for extra comfort. Trust me, your pup will thank you for the luxury.
Pro Tip
Make sure to check your local regulations before building the kennel—you want to be the proud parent of your pooch, not the subject of a neighborhood complaint.
And don’t forget to forage around for coupons or sales on the materials—steel can be pricey, but a little tactical shopping can go a long way.
With just a bit of effort and creativity, you can create a safe haven for your dog that complements your yard.
Happy building!
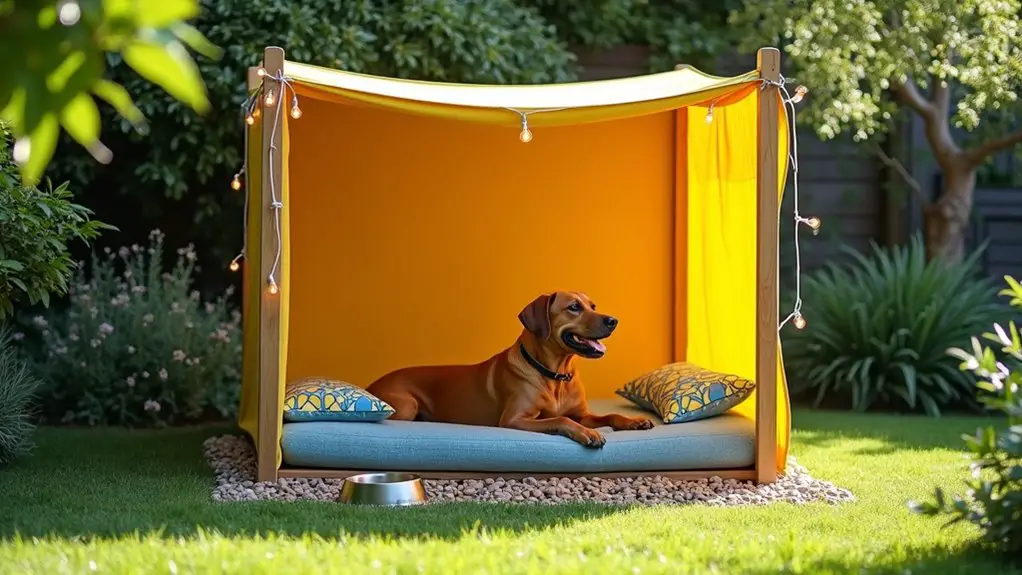
7. Cozy Canopy Dog Shelter
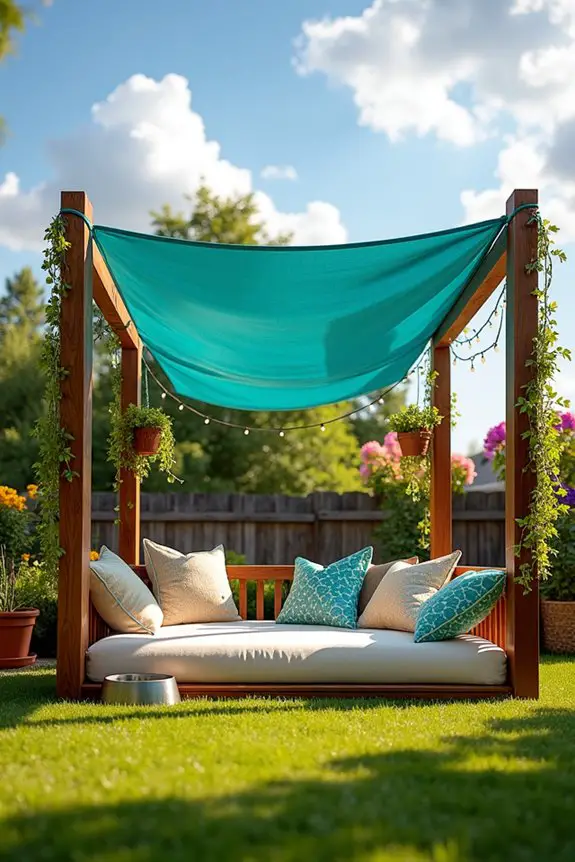
If your pup loves the great outdoors but could use a little shade, a cozy canopy dog shelter might just be the perfect DIY project for you. This shelter not only provides a comfy and protective space for your dog to chill out, but it’s also a budget-friendly solution that enhances your yard’s overall appeal.
Plus, there’s something immensely satisfying about creating a cozy nook for your furry friend with your own two hands.
Materials Needed
- 4 wooden posts (or steel poles for added strength)
- Outdoor fabric tarp or heavy-duty canvas (for the canopy)
- Rope or bungee cords (to secure the tarp)
- Wood screws (if you’re using wood)
- Drill (or a trusty screwdriver)
- Measuring tape
- Saw (if cutting wood to size)
- Outdoor cushions (for comfy lounging)
- Paint or sealant (for weatherproofing, optional)
- Safety gloves (to protect those hands)
Step-by-Step Instructions
1. Plan Your Canopy Size: Decide how big you want the shelter to be. A good size for small to medium dogs is around 4 feet by 4 feet, while larger breeds might require a bit more space.
2. Prepare the Posts: Cut your wooden posts to the desired height—about 5 to 6 feet is usually good. If you’re using pre-cut posts, just make sure they’re sturdy enough to support the canopy.
3. Install the Posts: Dig holes for your posts, about two feet deep, and place them in the ground. Use concrete for extra stability if you live in a windy area.
Make sure they’re securely planted—think of your dog’s safety.
4. Attach the Tarp: Once the posts are in place, drape your tarp or heavy-duty canvas over the frame. Secure it tightly to the posts using rope or bungee cords, guaranteeing it’s snug enough to withstand the elements.
5. Add Comfort: Toss a couple of outdoor cushions into the shelter for your dog’s lounging pleasure. You know, so they can feel like they’re at a five-star resort rather than just the backyard.
6. Optional Weatherproofing: If you’re feeling crafty, apply weatherproof paint or sealant to the posts to give them extra protection against the rain and sun. It’ll assure your canopy lasts through all the seasons.
7. Final Touches: Stand back and admire your handiwork. Make any adjustments necessary to the tarp or cushions. Maybe even add a little bowl of fresh water for those hot days—your dog deserves the best.
Optional Add-ons/Variations
- Color Splash: Use bright weather-resistant fabric for the canopy; this way, your shelter pops and becomes a cheerful spot in your backyard.
- Decorate: Consider adding some hanging plants or string lights around the posts for a whimsical touch. Just make sure anything you add is safe and won’t endanger your curious pup.
Pro Tip
Make sure the canopy is at an angle to allow rainwater to run off, rather than pool in the middle. Trust me, a soggy dog isn’t a happy dog, and your backyard will thank you for keeping the umbrella off the ground!
Now, get ready to create a delightful retreat for your dog—because let’s face it, they deserve only the coziest spots to soak up the sun or seek solace from the heat. Happy building!
Extra Tips & Ideas
Creating the perfect outdoor dog kennel isn’t just about the structure itself; it’s also about the little touches that make a big difference. Start by adding some cozy bedding—think soft blankets your pup will love.
Ever tried a cooling mat during summer? It’s a game-changer. You could even hang some toys; they keep your furry friend entertained and away from the dreaded boredom.
And hey, don’t forget about shade! Trees, canopies, or even a simple tarp can keep it cool.
You could also install a small water fountain, which is way more fun than a bowl. Trust me, your dog’s gonna feel like royalty.
Frequently Asked Questions
What Materials Are Best for Building an Outdoor Dog Kennel?
For building an outdoor dog kennel, choose durable materials like galvanized steel, treated wood, or heavy-duty plastic. These materials guarantee safety, withstand weather conditions, and require minimal maintenance, giving your dog a secure and comfortable space.
How Much Space Does My Dog Need in the Kennel?
Your dog needs at least 10 square feet for smaller breeds and 20 to 30 square feet for larger ones. Make sure they have enough room to stand, turn, and lie down comfortably.
Can I Customize a Kennel to Match My Home’s Exterior?
Absolutely, you can customize your kennel’s color and materials to match your home’s exterior. Consider coordinating hues and textures, crafting a cohesive aesthetic that creates charm and character while ensuring your dog’s comfort and safety.
Are There Any Safety Features I Should Include in the Design?
Yes, you should include secure locks, chew-resistant materials, good ventilation, and a shaded area. Also, make certain it has non-toxic finishes and smooth edges to protect your dog from accidents and injuries.
How Do I Maintain the Kennel for Longevity?
To maintain the kennel for longevity, regularly inspect for damage, clean it thoroughly, apply weatherproofing treatments, and guarantee proper drainage. Keeping the kennel safe and comfortable for your dog enhances its lifespan and functionality.
Conclusion
Creating the perfect outdoor dog kennel isn’t just about style; it’s about making your furry friend feel like the king or queen of the backyard. With these ten inspiring designs, you’re bound to find something that speaks to you and your pup’s flair. From modular options to cozy canopies, a kennel can truly be the doggy dream palace you didn’t know you needed. So grab those tools and get ready to build—your dog’s royal residence awaits.

Hi, I’m Ali Tarek, the founder of Animalsman. I’ve always been passionate about pets, especially dogs and cats, and I created this website to share practical tips, easy recipes, and helpful care advice for fellow pet lovers. My goal is to make pet care simple, enjoyable, and accessible for everyone. When I’m not writing or curating content, you’ll usually find me spending time with my furry friends or learning new ways to keep them happy and healthy.

