Creating art that honors your furry friend is like capturing a piece of their spirit in your home—it’s both heartwarming and fun. Have you ever thought about how to turn those adorable paw prints into something beautiful? Or maybe you want to showcase your pup’s personality in a unique way. Stick around, because I’m about to share seven heartfelt DIY dog art ideas that’ll inspire you to get crafty while celebrating your beloved companion.
Paw Print Canvas Art
Creating paw print canvas art isn’t only a fun project, but it also captures a piece of your furry friend’s personality—who wouldn’t want to immortalize those adorable little paws?
Gather your materials: a blank canvas, non-toxic paint, and some treats to bribe your pup. First, choose a color that matches your decor (or your dog’s mood). Spread the paint on a plate, then carefully dip your dog’s paw in it. Press it firmly onto the canvas, and voilà—paw print magic!
If your pup’s wiggle-waggles turn into a splatter-fest, don’t stress. It’s all part of the charm. Add a cute phrase or date for that extra touch. Trust me, this dog art DIY will warm your heart every time you see it.
Our Collection
Now that you’ve made some adorable paw print canvas art, let’s explore our collection of dog-themed creations.
You’ll find everything from a charming dog silhouette wall hanging to a cozy dog toy memory quilt that captures all those squeaky toys your pup once loved.
Each piece adds a personal touch, making your space feel even more like home—for you and your furry friend.
1. Dog Silhouette Wall Hanging
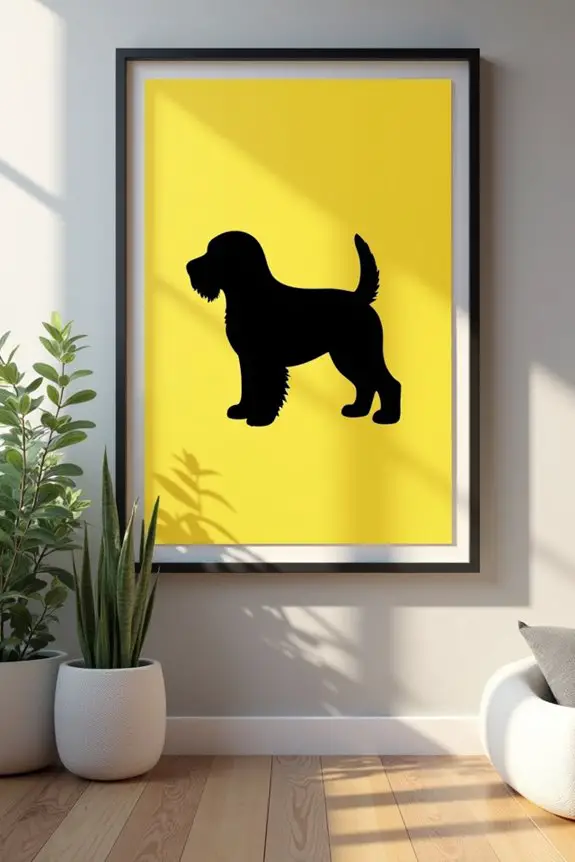
If you’re a dog owner looking to add a personal touch to your home decor, a DIY dog silhouette wall hanging is the perfect project for you. Not only does it celebrate your furry friend, but it also transforms your space into a cozy, dog-loving haven. Plus, it’s a budget-friendly way to showcase your pup’s personality without splurging on expensive art. Who knew a little silhouette could bring so much joy? Additionally, consider treating your dog to premium dog food brands to keep their health and happiness in check while you craft.
Materials Needed:
- Black poster board or craft foam
- Pencil
- Scissors
- Frame (optional, for a polished look)
- Tape or glue
- A photo of your dog (for reference)
- Ruler (if going for precision)
- Decorative elements (like washi tape or paint, if desired)
Step-by-Step Instructions:
- Select a Photo: Start by picking a cute photo of your dog that captures their personality. Is it a playful stance or a regal pose? Whatever it is, this will be your guide.
- Trace the Silhouette: Using your pencil, lightly outline the shape of your dog from the photo onto the black poster board or craft foam. Don’t stress about perfection; a little character adds charm.
- Cut it Out: Carefully cut along the outline you traced. Take your time—this is where you want your silhouette to shine. If you’re feeling particularly artistic, you can even add some fun details like a wagging tail or floppy ears.
- Prepare the Background: If you want to add a splash of color, consider painting or decorating the background. A bright color can make the silhouette pop, or you could use a patterned paper for a whimsical touch.
- Assemble the Art Piece: Position your cut-out silhouette onto your decorated background. Use tape or glue to secure it in place. If you’re using a frame, now’s the time to place everything neatly inside.
- Display Your Masterpiece: Find the perfect spot to hang your silhouette. Eye-level is usually best, so it captures attention without stretching too far up or down.
- Admire Your Work: Step back and appreciate your new artwork. Maybe even take a selfie with your pup beside their new art piece.
Optional Add-ons/Variations:
- Color Play: Instead of classic black, try using colored foam or poster board that matches your home decor. Think sunny yellow for a playful vibe or calming blue for a serene touch.
- Seasonal Themes: You could switch out silhouettes to reflect holidays or seasons. A silhouette of your pup with a Santa hat can bring festive cheer, while a beach scene might feel perfect for summer.
Pro Tip:
When cutting out your silhouette, use a sharp pair of scissors for cleaner lines. If you’re feeling unsure, practice on scrap paper first. And remember, if your silhouette doesn’t look exactly like your dog, it’s okay. Art is subjective, after all. Just think of it as your pup’s stylish doppelgänger.
Now, roll up your sleeves and get crafting. Your pooch deserves a place of honor on your wall!
2. Dog Photo Collage Frame
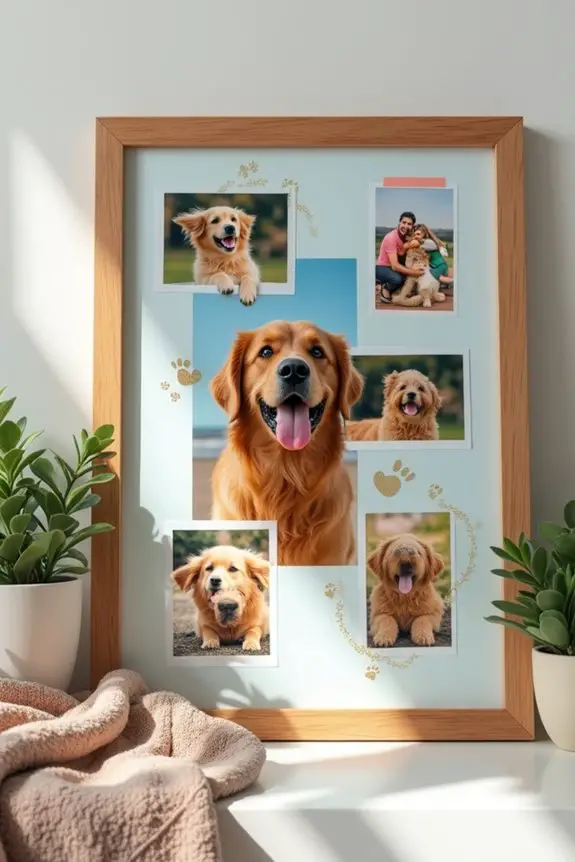
If you’re looking to celebrate your furry friend in a creative way, a dog photo collage frame is the perfect DIY project for you. Not only does it allow you to showcase your favorite moments with your pup, but it also adds a personal touch to your home decor. Plus, it’s a cost-effective way to create an adorable gallery wall that tells the story of your adventures together. Additionally, using premium dog supplies can enhance your dog’s comfort and well-being, making your memories even more special.
Materials Needed:
- A large picture frame (or multiple smaller frames)
- Cardstock or scrapbook paper
- Photos of your dog (printed)
- Scissors
- Glue or double-sided tape
- Decorative elements (stickers, markers, washi tape)
- Ruler (for precision)
- Pencil
Step-by-Step Instructions:
- Gather Your Photos: Start by selecting a handful of your favorite photos of your dog. Think about those candid moments when they’re being their silly selves or those sweet snuggles.
- Choose Your Frame: Decide whether you want a single large frame or a collection of smaller frames. If you go with multiple frames, lay them out on the floor first to find the perfect arrangement.
- Cut Your Backgrounds: If you’re using cardstock or scrapbook paper, cut them to fit the frame. This will be the background for your photos. Choose colors that complement your home decor or reflect your dog’s personality.
- Arrange the Photos: Before gluing anything down, play with the arrangement of your photos on the background. Mix and match sizes and orientations until you find a layout you love. Maybe your pup deserves a center spot, right?
- Secure Everything: Once you’re happy with the arrangement, use glue or double-sided tape to attach each photo to the background. Make sure to press down firmly so they stay put.
- Decorate (Optional): If you want to add a little flair, use stickers or washi tape around the edges of the photos or frame. You could even write little captions or dates with a marker to remember those special moments.
- Display Your Collage: Place your finished collage frame on a wall or shelf where it can shine. You might want to hang it near your dog’s favorite spot, so they can admire their own stardom.
Optional Add-ons/Variations:
- Themed Collages: Create seasonal collages that reflect holidays or your dog’s birthday. Use festive paper or decorations that match the theme.
- Texture Play: Instead of flat photos, try using fabric swatches or textured paper to add depth to your collage. A bit of fur from your pup’s favorite toy could even make a fun addition.
Pro Tip:
When printing photos, consider using a photo printing service that offers quality prints at a lower price. Also, remember to keep your collage out of direct sunlight to prevent fading. Your dog mightn’t care about the art, but you’ll want those memories to last forever.
3. Dog-themed Painted Rocks
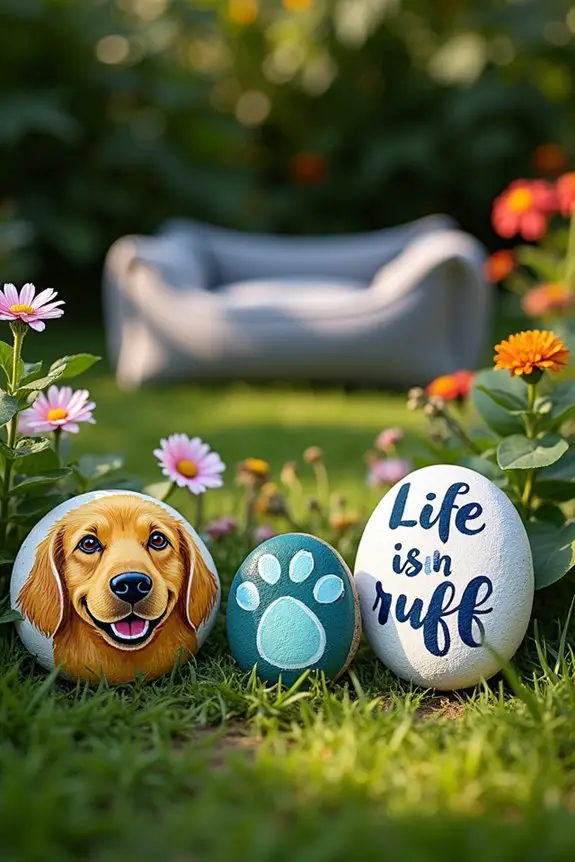
If you’re looking for a fun and unique way to celebrate your dog, painted rocks are a delightful DIY project that can bring a smile to your face and brighten up your garden or home. Not only do they allow you to express your love for your furry friend, but they also serve as whimsical decorations that are easy to make and can save you some cash on store-bought art. Plus, after creating your beautiful rock art, your pup will appreciate having a cozy place to relax, such as luxurious large dog beds that can enhance their comfort.
Materials Needed:
- Smooth, clean rocks (any size works, but medium is best)
- Acrylic paints (various colors)
- Paintbrushes (a couple of sizes)
- Palette or paper plate (for mixing paints)
- Sealer spray or mod podge (to protect your artwork)
- Cup of water (for rinsing brushes)
- Paper towels or rags (for cleanup)
- Optional: Stencils or paint pens for detailed designs
Step-by-Step Instructions:
- Pick Your Rocks: Start by gathering a collection of smooth rocks. You can find these in your backyard, at the park, or even buy some at a craft store. Remember, the flatter and smoother, the better for painting.
- Clean Your Rocks: Rinse off the rocks to remove any dirt or debris. Let them dry completely. You want a clean canvas for your masterpiece, right?
- Plan Your Design: Think about what you’d like to paint. Maybe a paw print, your dog’s name, or an adorable dog face? You can sketch it out on paper first if that helps, or just go with the flow. Don’t worry; it’s all about having fun!
- Start Painting: Grab your brushes and start painting your design on the rock. If you’re feeling adventurous, use multiple colors or even some glitter for a little sparkle. Don’t stress about perfection; it’s the charm that counts.
- Let It Dry: Allow your painted rocks to dry completely. This might take a few hours, so take a break, maybe cuddle your pup or grab a snack.
- Seal the Deal: Once your rocks are dry, spray them with a clear sealer or apply mod podge to protect your artwork from the elements. This step is essential if you plan to display them outdoors.
- Show Off Your Creations: Find a sunny spot in your garden or a cute corner in your home to display your painted rocks. You could even create a small rock garden dedicated to your dog.
Optional Add-ons/Variations:
- Color Themes: Choose a color palette that matches your home decor or your dog’s leash and collar. It’s a fun way to make your rocks blend seamlessly into your space.
- Personal Touches: Use paint pens for detailed work or write funny quotes about dogs on the rocks, like “Life is ruff” or “Pawsitively adorable.”
Pro Tip:
To save money, look for rocks at construction sites or landscaping businesses—just be sure to ask for permission first.
And if you’re feeling a bit shaky with the paintbrush, don’t fret! You can always dabble in dot painting for a fun, abstract look that doesn’t require steady hands.
4. Dog Portrait Embroidery Hoop

Creating a dog portrait embroidery hoop is a charming way to showcase your beloved pup. Not only does it serve as a beautiful piece of art for your home, but it also adds a personal touch that celebrates the special bond you share with your furry friend. Plus, it’s a budget-friendly alternative to store-bought wall art, allowing you to express your creativity while keeping the memories of your dog alive. Additionally, incorporating premium dog toys into your dog’s playtime can enhance their overall happiness and well-being.
Materials Needed:
- Embroidery hoop (any size you prefer)
- Fabric (light-colored cotton or linen works best)
- Embroidery thread (various colors)
- Embroidery needle
- Scissors
- Water-soluble fabric marker or pencil
- Reference photo of your dog
- Optional: Iron (for smoothing fabric)
Step-by-Step Instructions:
- Choose Your Fabric: Cut a piece of fabric larger than your embroidery hoop. This gives you some wiggle room while stitching, so don’t stress about getting it perfect right away.
- Prepare Your Design: Take a moment to pick a cute reference photo of your dog. Use the water-soluble fabric marker to lightly sketch an outline of your dog’s face or silhouette directly onto the fabric. If you’re not confident in your drawing skills, don’t hesitate to print out a template and trace it.
- Set Up Your Hoop: Place the fabric in the embroidery hoop, pulling it taut. Make sure the fabric is smooth and secure. Tighten the screw on the hoop to keep everything in place.
- Start Stitching: Thread your needle with embroidery thread and tie a knot at the end. Begin stitching your design using a simple backstitch or satin stitch to fill in areas. Don’t worry if it’s not perfect; the beauty is in the handmade charm. Feel free to mix colors for shading or to add fun elements like a collar.
- Finish Up: Once you’re happy with your design, tie off your thread on the back of the fabric. Trim any excess fabric around the hoop, leaving a little margin. If you want to display it, you can add a cute ribbon for hanging.
- Iron It Out (Optional): If your fabric is wrinkled, give it a gentle press with an iron on a low setting to make it look crisp and fresh.
- Display Your Art: Hang your dog portrait hoop on the wall, or place it on a shelf. It’s a lovely way to show off your pup’s personality and brighten up your space.
Optional Add-ons/Variations:
- Color Palette: Choose a color scheme that complements your home decor—think warm earth tones or vibrant colors that reflect your dog’s personality.
- Additional Embellishments: Add some flowers, hearts, or even your dog’s name stitched around the portrait to personalize it even more.
Pro Tip:
Use a thicker embroidery thread or even multiple strands for a bolder look. This not only enhances the visual appeal but also makes your artwork stand out on the wall.
If you’re worried about stitching precision, remember that it’s okay to embrace the quirks of your handiwork—after all, isn’t that what makes it special?
5. Dog Toy Memory Quilt
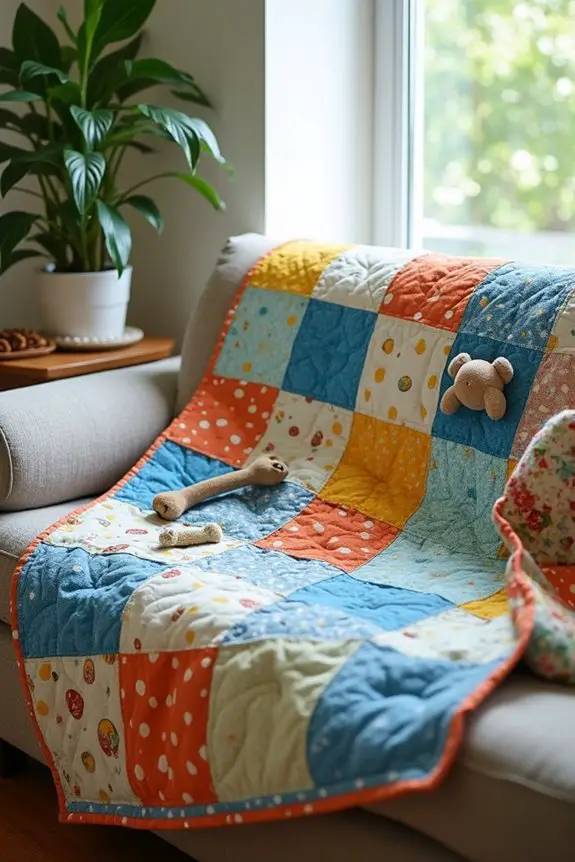
Have you ever thought about how many squeaky toys your dog has chewed through over the years? Instead of tossing those beloved toys into the trash, why not turn them into a heartfelt dog toy memory quilt? This DIY project is a fantastic way to preserve memories of your furry friend’s favorite playthings while creating a cozy blanket that can add warmth and character to your home. Plus, it’s a budget-friendly way to keep those cherished moments alive, and your dog will love snuggling up in something made just for them. Additionally, using a sewing machine dog clothing can make the process even easier and more efficient.
Materials Needed:
- Old dog toys (preferably soft ones or those with sentimental value)
- Fabric (cotton, fleece, or any fabric you prefer for the quilt)
- Fabric scissors
- Sewing machine (or needle and thread for hand sewing)
- Quilting batting (to add warmth and softness)
- Measuring tape or ruler
- Fabric pins or clips
- Optional: Iron (to smooth out the fabric)
Step-by-Step Instructions:
- Gather Your Toys: Start by collecting all the dog toys you’d like to include in your quilt. Don’t worry if they’re a bit worn—those battle scars tell a story.
- Cut Fabric Squares: Measure and cut out squares of fabric for your quilt. A common size is 8×8 inches, but you can go larger or smaller depending on your preference. Make sure to have enough squares to create a nice layout.
- Prepare the Toys: Carefully cut the toys open to remove the stuffing (if applicable) and any plastic parts. You want to keep the fabric that your pup has loved so dearly.
- Sew the Squares Together: Lay out your fabric squares and toy pieces in a pattern you like. Pin them in place, and then sew them together using a sewing machine or by hand. Don’t stress about perfection; a little unevenness can add to the charm.
- Add the Batting: Once you have your quilt top sewn together, cut a piece of quilting batting the same size. Layer it between your quilt top and the backing fabric, which should also be cut to size.
- Secure the Layers: Pin or clip the layers together to keep them from shifting. Sew around the edges, leaving a small opening for turning it inside out. Turn the quilt right side out, and then sew the opening closed.
- Finishing Touches: For a finished look, you might want to quilt the layers together by sewing crisscross patterns or simple straight lines across the quilt. This step is optional, but it helps keep everything secure.
Optional Add-ons/Variations:
- Colorful Fabrics: Consider using fabric that matches your dog’s personality—think bright colors for a playful pup or softer tones for a calm companion. You could even add patches of your dog’s favorite colors.
- Personalized Embroidery: Add your dog’s name or a special message to the quilt using embroidery or fabric paint. It’s a lovely way to make the quilt truly one-of-a-kind.
Pro Tip:
When cutting old toys, be mindful of any small parts or squeakers that could be harmful if your dog accidentally gets a hold of them. Always check for safety!
For a cost-saving hack, check your local thrift store for fabric scraps or old blankets you can repurpose.
6. Custom Dog Breed Pillow
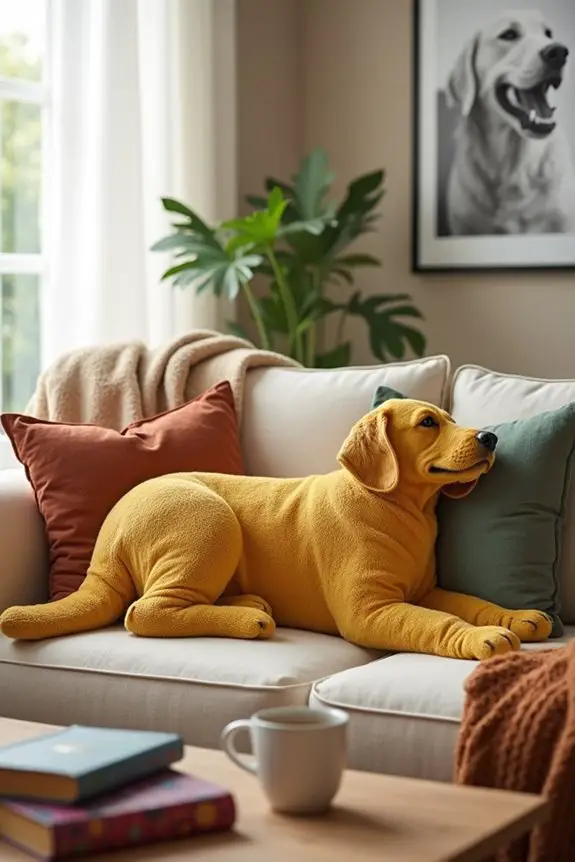
Is there anything better than curling up with your dog on the couch? How about doing it while snuggling a pillow that looks just like them? This DIY Custom Dog Breed Pillow project isn’t just a fun way to decorate your home; it’s also a sweet reminder of your furry friend that adds a personal touch to your space.
Plus, it’s a great way to use your sewing skills to create something unique and sentimental, saving you from spending money on store-bought decor that doesn’t quite capture your pup’s essence.
Materials Needed:
- Fabric (choose a color or pattern that matches your decor)
- Fabric scissors
- Sewing machine (or needle and thread for hand sewing)
- Pillow stuffing (polyester fiberfill or an old pillow to repurpose)
- Printable dog breed silhouette or template
- Fabric transfer paper (if using printed designs)
- Measuring tape or ruler
- Fabric pins or clips
- Optional: Iron (to smooth out the fabric)
Step-by-Step Instructions:
- Choose Your Dog’s Silhouette: Start by selecting a silhouette or template of your dog’s breed. You can find many free designs online. Print it out in the size you want for your pillow.
- Cut the Fabric: Lay your fabric flat and use the silhouette as a guide to cut out two pieces of fabric—one for the front and one for the back. Remember to leave extra fabric around the edges for sewing, about a half-inch should do.
- Transfer the Design: If you’re using fabric transfer paper, print the silhouette onto the paper and follow the instructions to transfer it onto the front piece of fabric. If you’re hand-painting or stitching, you can skip this step and go straight to decorating.
- Pin the Fabric Together: With the right sides of the fabric facing each other, pin the two pieces together. This will help prevent any shifting while you sew.
- Sew the Edges: Using your sewing machine (or needle and thread), sew around the edges, leaving a small opening (about 4-5 inches) on one side for turning and stuffing. Don’t be afraid to take it slow; it’s okay if your stitches aren’t perfect.
- Turn It Right Side Out: After sewing, carefully turn the pillowcase right side out through the opening. Use a pencil or a chopstick to poke out the corners gently.
- Stuff Your Pillow: Fill your pillowcase with stuffing until it reaches your preferred fluffiness. Once it’s to your liking, sew the opening closed, either by hand or with your machine.
Optional Add-ons/Variations:
- Fabric Choices: Use different fabrics like fleece for a cozy feel or canvas for a more structured look. You could even use patterned fabric for a fun twist.
- Personalized Details: Add your dog’s name or a cute saying around the silhouette using fabric paint or by stitching it on. This makes it even more personal.
Pro Tip:
If you’re repurposing an old pillow for stuffing, make sure to give it a good wash first. Clean pillows not only feel better but also keep your new pillow fresh and comfy.
Plus, it’s a great way to give that old pillow a new life, just like your dog gives you endless love.
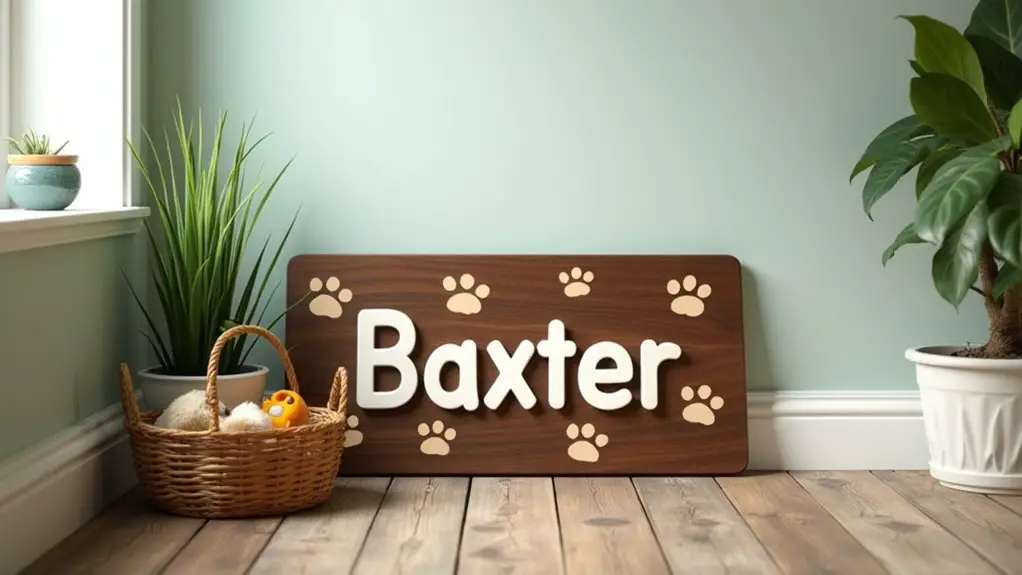
7. Personalized Dog Name Sign
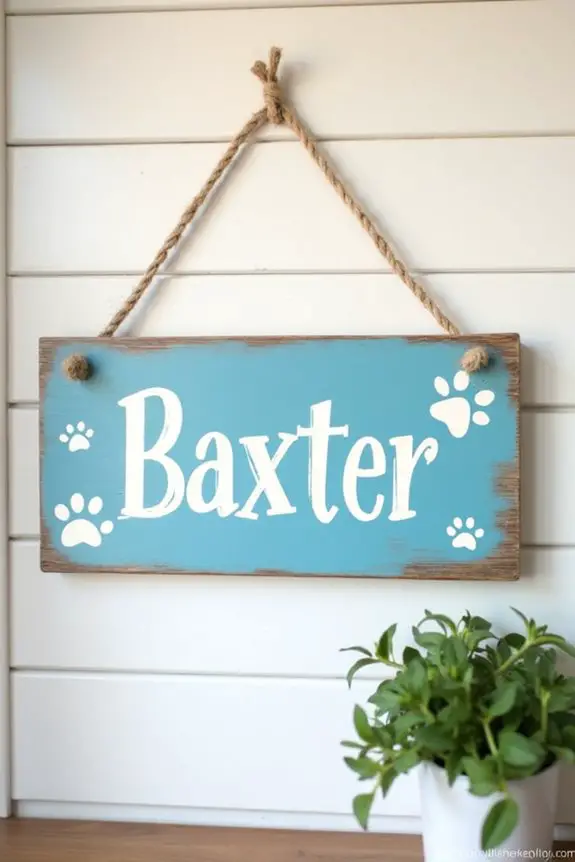
What better way to welcome guests to your home than with a charming Personalized Dog Name Sign? This DIY project not only adds a personal touch to your decor, but it also serves as a playful statement about your furry family member. It’s a great way to showcase your pup’s personality while saving money compared to store-bought signs that mightn’t capture their unique spirit.
Materials Needed:
- Wooden board or canvas (size depends on preference)
- Acrylic paint or wood stain (choose colors that fit your style)
- Paintbrushes or foam brushes
- Painter’s tape (for clean lines)
- Letter stencils or a vinyl cutter (if you have one)
- Pencil (for sketching out the design)
- Sealer (optional, for outdoor signs)
- Hanging hardware (if you plan to mount it)
Step-by-Step Instructions:
- Choose Your Base: Start by selecting your wooden board or canvas. Make sure it’s the right size for where you want to display it. A larger sign can make a bold statement, while a smaller one is perfect for a cozy nook.
- Prep the Surface: If you’re using a wooden board, sand it lightly to create a smooth surface. Wipe it down to remove dust. If you’re using a canvas, you can skip this step.
- Paint the Background: Take your acrylic paint or wood stain and apply it to the board or canvas. Use a brush or foam brush to get even coverage. Let it dry completely before moving on. This is a great time to catch up on your favorite show or maybe take a quick nap.
- Sketch the Design: Using a pencil, lightly sketch out where you want your dog’s name to go. If you’re using stencils, position them on the board and secure them with painter’s tape. Make sure everything is straight—unless you’re going for a quirky look.
- Add the Name: If you’re using paint, carefully fill in the letters with your brush, or use a vinyl cutter for a crisp look. Don’t forget to breathe—painting can be a little nerve-wracking, especially when it comes to lettering.
- Seal It (Optional): If your sign is going outdoors or you want extra durability, apply a sealer once the paint is dry. This will protect it from the elements and keep it looking fresh.
- Hang It Up: Attach your hanging hardware if needed, and find the perfect spot to display your personalized masterpiece. Step back and admire your handiwork—you’ve just created something special.
Optional Add-ons/Variations:
- Creative Colors: Play around with different paint colors or patterns. Perhaps your dog has a favorite color, or you want to match your home aesthetic.
- Add Paw Prints: For an extra touch, consider painting little paw prints around the name or using a stencil to add some fun designs.
Pro Tip:
When painting, take your time with the letters. If you make a mistake, don’t panic—just let it dry and paint over it. Trust me, I’ve had my fair share of “happy accidents” and they often turn out better than the original idea. Plus, it adds character, right?
Now you’re ready to create a beautiful Personalized Dog Name Sign that not only looks great but also celebrates your beloved pup in your home. Enjoy the process, and let your creativity shine!
Extra Tips & Ideas
While you might think creating dog art is all about paint and brushes, there’s a whole world of possibilities waiting for you beyond the canvas.
Ever tried paw print art? Just dip your pup’s paw in non-toxic paint and press it onto paper. The result? A masterpiece that captures their personality.
Or how about using old dog toys? String ’em together for a colorful wall hanging that tells a story.
If you’re feeling crafty, print photos of your furry friend and make a fun scrapbook. You can even add little notes about your favorite memories. It’s like a love letter in art form.
Trust me, your dog won’t judge your artistic skills—just their treats. Who knew dog art could be this fun?
Frequently Asked Questions
What Materials Do I Need for DIY Dog Art Projects?
You’ll need canvas or paper, non-toxic paints, brushes, and perhaps some paw-friendly stamps. Gather dog-safe materials like fabric or clay, and don’t forget to have treats handy for your furry friend’s cooperation!
How Can I Safely Get My Dog’s Paw Print?
To safely get your dog’s paw print, use non-toxic, washable paint or ink. Gently press their paw onto paper, ensuring they’re comfortable. Clean their paw immediately afterward to avoid any mess. Enjoy creating!
Can I Use Non-Toxic Paint for My Dog Art?
Yes, you can use non-toxic paint for your dog art. Just make certain to choose paints labeled as safe for pets, and always supervise your dog during the process to guarantee their safety and comfort.
How Do I Frame My DIY Dog Art?
You can frame your DIY dog art by measuring it first, selecting a suitable frame, and carefully placing the artwork inside. Make certain it’s secure, then find a perfect spot to display your creative masterpiece.
What Are Some Gift Ideas for Dog Art Lovers?
What’s better than a custom portrait of their furry friend? Consider personalized dog-themed prints, art supplies, or even a subscription to an art box. They’ll love expressing their passion for pups through creativity!
Conclusion
So, whether you’re rolling up your sleeves for some paw print art or stitching together a cozy quilt, these DIY projects are a great way to celebrate your furry friend. Remember, each creation is like a little piece of your dog’s personality shining through your home. Don’t worry if it’s not perfect—after all, they say every dog has its day. So grab those supplies, release your creativity, and make something special that you both will cherish.

Amr Mohsen is a software engineer who traded his keyboard for a leash — at least on weekends. His love for dogs inspired him to share what he learns as a dog owner and enthusiast, bringing a detail-oriented, research-driven perspective to every article he writes. If it’s about dogs, he’s probably already looked it up twice.

