Imagine your dog’s bathing area transforming into a spa-like retreat, where bubbles dance, and tail wags abound. You’ve probably faced the splash zone of soapy paws and furry chaos, right? Well, it doesn’t have to be a battle. From whimsical wash stations to eco-friendly accessories, there are plenty of creative dog bathroom design ideas waiting for you. So, why not give your pup’s bath time a makeover that makes both of you happy? Let’s explore some options.
Whimsical Wash Station Designs
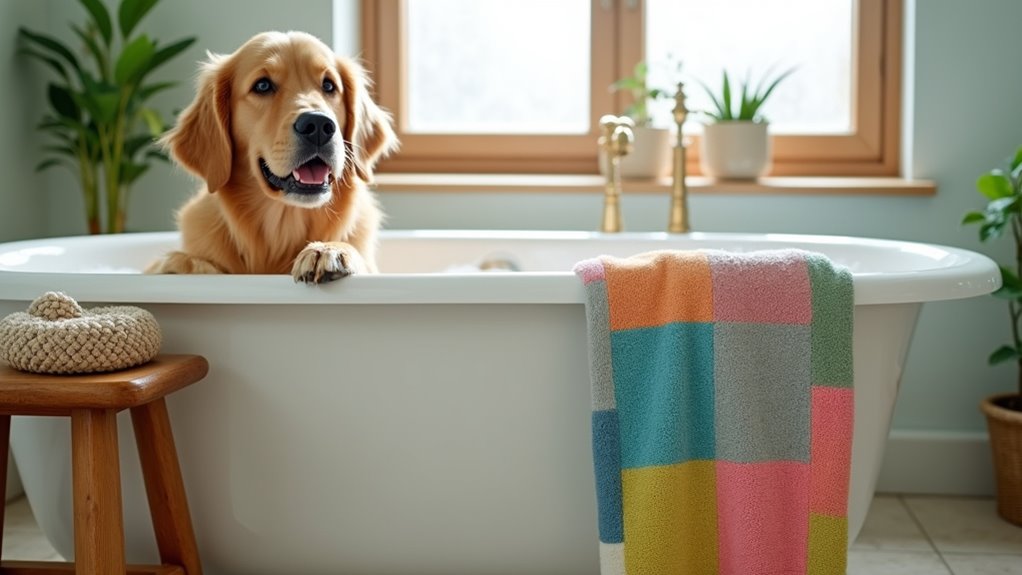
Have you ever thought about how much fun a dog wash station could actually be? Envision this: splashes of water, a happy pooch, and a space that feels just right.
You can bring your vision to life with some creative dog bathroom pictures DIY. Why not add some colorful tiles or quirky wall art? Maybe a fun rubber ducky soap dispenser?
Or what about a funky showerhead, just to keep things interesting? You could even create a paw-some height adjustment for your pup, making it easy for every dog to hop in.
Seriously, keep it playful. Add a non-slip mat, just in case your furry friend gets a little enthusiastic.
It’s your dog wash station—let your imagination run wild.
Our Collection
Let’s check out our collection of dog bathroom designs that make bath time a breeze.
You’ll find everything from a portable bathing station for those impromptu mini-spas to a customizable shower system that’ll cater to your pup’s every whim.
Who knew bath time could be so functional and fun?
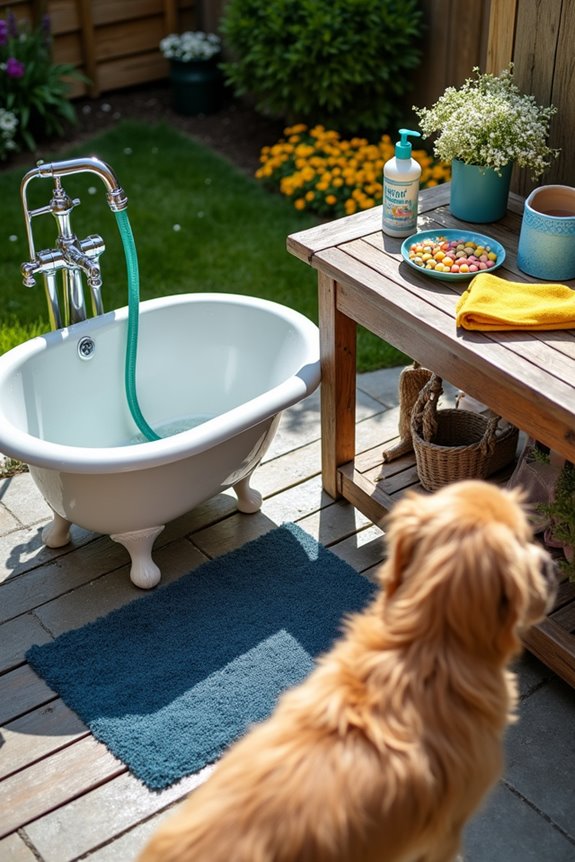
1. Portable Dog Bathing Station
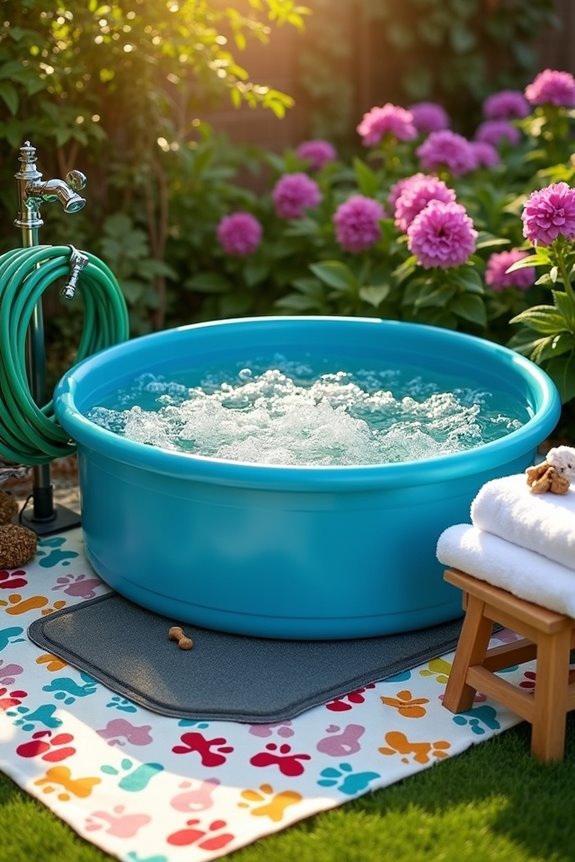
If you’ve ever tried to give your pup a bath in the bath tub or shower, you know it can be quite the messy adventure. Enter the Portable Dog Bathing Station. This handy DIY project will save you time, make bath days easier, and keep your dog feeling fresh and clean—all in their favorite outdoor space. Plus, it’s a fun project that adds a bit of custom flair to your backyard. Additionally, having a dedicated dog grooming tub station can streamline your dog’s bathing routine.
Materials Needed:
- A large plastic tub (a kiddie pool works great!)
- A portable garden hose or showerhead attachment
- Outdoor dog-friendly shampoo
- Non-slip bath mat (to prevent slipping)
- A bucket (for rinsing)
- Towels (lots of them)
- Optional: Dog treats for positive reinforcement
Step-by-Step Instructions:
- Choose Your Spot: Find a nice, flat area in your yard where splashes won’t bother your neighbors. You might even want to set up a cute outdoor rug to catch any stray water.
- Set Up the Tub: Place your plastic tub where you want it to live. If you’re using a kiddie pool, make sure it’s filled with water. Aim for just the right height so your pooch can easily hop in.
- Attach the Hose: Connect your garden hose or showerhead attachment to a nearby water source. Making sure it’s long enough to reach your bathing station is key.
- Prep the Bathing Area: Lay down your non-slip mat at the bottom of the tub to make sure your furry friend won’t slip and take an unexpected dive. You want them to feel safe and secure.
- Gather Supplies: Have your dog-friendly shampoo and towels within arm’s reach. And don’t forget the treats! We all know those furry pals love a little reward for being brave.
- Bring in Your Pooch: Start with some comforting words. Maybe even grab their favorite toy. Encourage them to jump in, and before you know it, they should be ready for their bath.
- Wash and Rinse: Lather up your pup with shampoo, using the bucket to rinse. Keep the pace relaxed and if your dog seems anxious, take breaks and give them love. Once they’re all scrubbed and squeaky clean, dry them off gently with towels.
Optional Add-ons/Variations:
- Color Flair: Paint the outside of the tub with waterproof paint that suits your dog’s personality. Bright colors or fun patterns can make bath time feel special.
- Extra Comfort: Add removable cushions or towels in the bottom for added comfort when they’re getting cleaned.
Pro Tip:
Make sure to check the water temperature before jumping in! Just like us, our dogs prefer a nice warm bath, not boiling water.
Bonus tip—if you own a particularly fluffy dog, brush them before their bath to reduce shedding in the tub. It will save you some elbow grease later!
There you have it! This Portable Dog Bathing Station can be easily set up for a relaxing and clean bath experience. Plus, it’s a fun way to bond with your pup while keeping your house mud-free. Happy bathing! While your pup is enjoying their bath, consider dressing them in designer dog clothes to make the experience even more stylish and fun!
2. Customizable Shower System
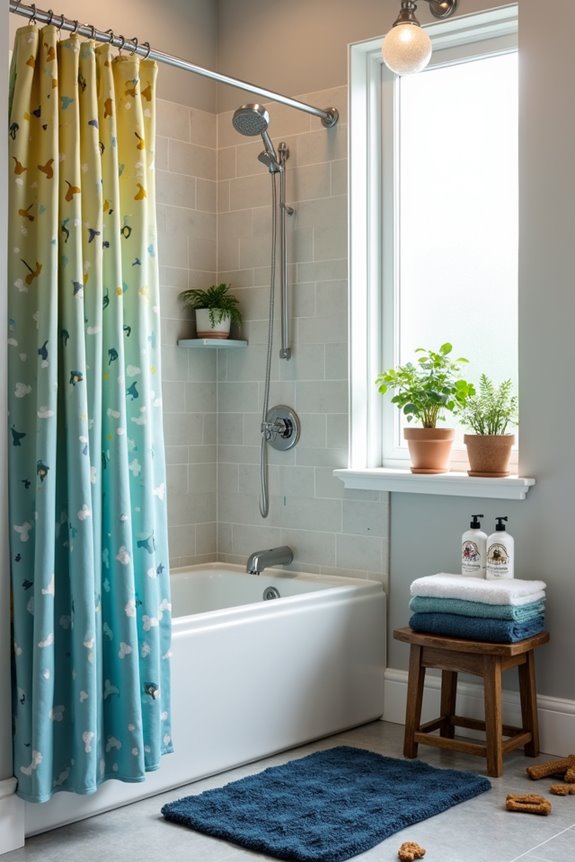
Creating a Customizable Shower System for your dog can be a game changer, especially on those days when your pup seems to find every mud puddle in the neighborhood. This DIY project not only makes bath time easier, but it can also inject a bit of style into your bathroom or outdoor space. Plus, it saves you money in the long run by reducing the need for expensive dog grooming services. Who doesn’t want a happy, clean pooch and a convenient washing station at home?
An added bonus is that you can set a routine for feeding your dog with a automatic smart pet feeder, ensuring your pup is well-rested and ready for bath time!
Materials Needed:
- Shower base or a sturdy plastic tub
- Waterproof shower curtain or shower screen (for splash control)
- Wall-mounted showerhead or handheld showerhead
- Hose connectors (in case of a detachable hose)
- Dog-friendly shampoo
- Non-slip mat
- Towels (because, let’s face it, you’ll need them)
- Optional: Colorful shower curtain or decorative tiles for personal flair
Step-by-Step Instructions:
- Choose Your Location: Decide where you want to set up your dog’s shower. It can be in your yard or in a special corner of your bathroom. Make certain it’s an area that’s easy to clean afterward.
- Set Up the Base: If you’re using a shower base, install it according to the instructions. For a tub, guarantee it’s stable and won’t tip over during a bath. Level it if necessary to avoid water pooling where it shouldn’t.
- Install Showerhead: If you’re placing a fixed showerhead, mount it securely to the wall at a height that works for your dog. For a handheld showerhead, connect it to a compatible holder that allows easy access. Make sure it’s tight so it doesn’t leak.
- Add Splash Control: Hang the waterproof shower curtain or set up a shower screen around your shower area. This helps contain splashes – unless your dog decides to shake off like a wet noodle, then all bets are off.
- Create a Non-slip Surface: Place your non-slip mat at the base of the shower area to give your dog firm footing. Nobody wants a slippery shower, right?
- Gather Supplies: Have your dog-friendly shampoo and towels within reach. You might also want to keep some treats handy, just to remind your pup that baths can be rewarding.
- Introduce Bath Time: Gently coax your dog into the shower area with treats and soothing words. Show them the showerhead; let them sniff around. This way, they’ll associate the shower system with something positive.
Optional Add-ons/Variations:
- Color Your World: Go wild with colorful shower curtains or tiles. Maybe even grab some vinyl stickers – fun paw prints or bone designs could brighten things up and make bath time more inviting.
- Personalized Sprays: Consider adding a second shower head that you can use for quick rinses or gentle sprays. This can help make bath time feel less intimidating for nervous pups.
Pro Tip:
Before each bath, check the water temperature. You want it to be just right—not too hot, not too cold. Using lukewarm water will keep your dog comfortable and happy, making them more inclined to accept bath time as part of their routine.
Creating a Customizable Shower System might just be one of the best DIY gifts you can give to yourself and your furry friend.
3. Dog-Friendly Tiled Shower Area
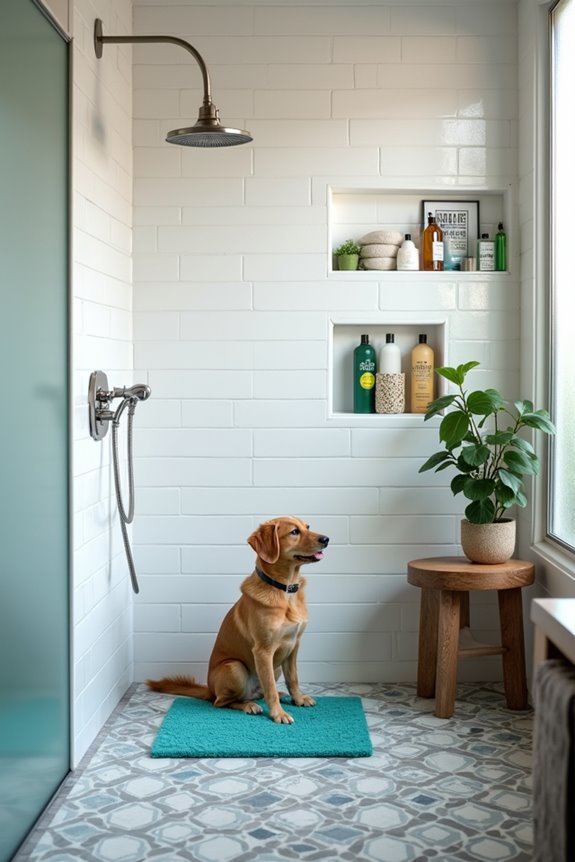
If you’re a dog parent, you know that bath time can be less than delightful—especially for your pooch. But fear not, turning a boring bathroom into a dog-friendly tiled shower area can transform the entire experience! Not only will it make baths easier (and more fun), but it will seriously elevate your home’s aesthetic game too.
Believe me, having a designated space for your furry friend means less mud around the house and more tail wags. Who doesn’t want that?
Materials Needed:
- Waterproof tiles (ceramic, porcelain, or vinyl)
- Thin-set mortar (for tile adherence)
- Grout (choose a color that goes with your decor)
- Trowel (for spreading mortar)
- Tile cutter or wet saw (if needed)
- Sponge (for cleaning excess grout)
- Waterproof sealant
- Non-slip bath mat (for when it’s time to dry off)
- Knee pads (trust me, your knees will thank you)
- Bucket (for mixing mortar and grout)
Step-by-Step Instructions:
- Pick Your Layout: Before you start, plan out how you want your tiled shower area to look. Sketch it out if that helps. Remember, it’s like a blank canvas—be creative!
- Prepare the Area: Remove any old fixtures or materials from your chosen space, and clean the surface thoroughly. If you’re working on a floor, verify it’s level for the best results. (Imagine the horror of your lovely tiles turning into a slip-and-slide.)
- Mix the Mortar: In your bucket, mix the thin-set mortar according to the manufacturer’s instructions. You want a peanut butter-like consistency, not too runny, not too thick.
- Lay the Tiles: Apply a generous amount of mortar to the back of the first tile, then press it onto the wall or floor, twisting slightly to confirm it sticks. Use spacers between tiles for even grout lines; trust me, your future self will thank you when it’s time to grout.
- Cut Tiles as Needed: When you reach edges or corners, you may need to cut tiles to fit. Use a tile cutter or wet saw, but always wear safety goggles—nobody wants unexpected shrapnel to the eyeball.
- Let It Set: Allow your tiles to set for at least 24 hours. Go ahead and pamper your pup with belly rubs while you wait. It’s the least you can do after this labor of love.
- Apply Grout: Once your tiles are secure, mix the grout and apply it over the tile seams using your trowel. Make sure to pack it into all the gaps, and then use a damp sponge to wipe away any excess—don’t worry, it’ll come off like a charm.
- Seal It Up: After the grout has dried (give it a day or so), apply a waterproof sealant to keep everything in tip-top shape. This step is vital, especially since you’ll be dealing with the joys of water and dog shampoo.
Optional Add-ons/Variations:
- Color Play: Opt for colorful tiles to match your dog’s personality—or perhaps your favorite shade. A playful pattern can add tons of charm and personality to the shower area.
- Tile Trim: Consider adding decorative trim tiles to the edges for a polished look. It’s like giving your tiled shower a little outfit change—think of it as the cherry on top of a well-decorated cake.
Pro Tip:
Always check that your tiles and grout are non-toxic and pet-friendly. You’ll want to keep your fur baby safe no matter how stylish the bathroom looks.
And if you accidentally make a mess (who hasn’t?), just remember, that chaos is all part of the DIY adventure. Happy tiling!
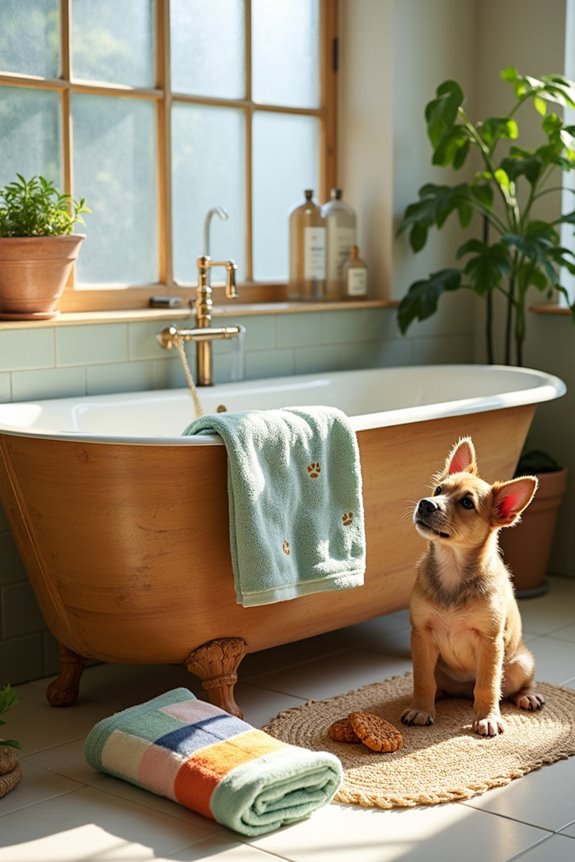
4. Outdoor Dog Bathing Station
If you’re looking for a practical yet stylish way to keep your furry friend clean without turning your home into a mud pit, an outdoor dog bathing station is the answer. This project not only saves you from cleaning up after messy baths inside, but it also gives your pup a revitalizing place to cool off on hot days. Plus, it can add value to your home by increasing its outdoor functionality. An elevated dog bath tub can make this process even more comfortable for both you and your pet. Let’s plunge into how you can create your own outdoor dog bathing haven.
Materials Needed:
- Plastic tub or old bathtub (for the bathing area)
- Concrete blocks or pavers (for a stable base)
- Outdoor faucet/hose attachment
- PVC or flexible hose (to connect faucet)
- Non-slip mat (to keep your pup safe)
- Yard space or deck area (for installation)
- Waterproof sealant (if necessary, to water-proof your tub)
- Grill or utility table (for holding dog supplies)
- Cat litter scoop or similar tool (for quick rinsing)
Step-by-Step Instructions:
- Choose the Right Spot: Find a convenient location in your yard or by your deck that’s easily accessible for bathing and cleanup. Make sure there’s a water source nearby; trust me, it’ll save you from sprinting back and forth.
- Prepare Your Base: Lay down concrete blocks or pavers to create a sturdy base for your tub. This helps keep everything secure and elevated, making it easier to wash your pup without straining your back. Plus, it looks great—bonus!
- Position the Tub: Place your tub on the prepared base. If you’re using an old bathtub, make sure it’s clean, and check for any leaks that need sealing—nobody wants a slip slide into a soggy mess.
- Connect the Water Source: Attach your outdoor faucet or hose to the tub. Verify the connection is tight to prevent leaks. You might need some extra hose or PVC if the angle doesn’t quite reach your tub. A fun challenge isn’t it?
- Add Non-Slip Features: Lay the non-slip mat inside the tub. This is key for keeping your dog steady while you wash away the dirt. Remember, nobody wants to chase a soapy furball around the yard, right?
- Set Up Storage: Use a small utility table or a grill table to organize your dog bathing supplies—shampoos, towels, brushes, treats—all within easy reach. Even furry friends love a well-organized space.
- Rinse and Test: Give it a test run with a gentle rinse. Make sure everything works smoothly and there are no hiccups in your setup. If your dog isn’t ready, feel free to bribe him with some treats—who can resist a yummy morsel?
Optional Add-ons/Variations:
- Personalize the Space: Consider painting or even decorating the tub with fun colors or dog-themed designs. It’s an opportunity to show off your personality while making bath time a bit more cheerful.
- Add a Showerhead Attachment: If you want a more spa-like experience for your pup, you can install a handheld showerhead with varying pressures. You might even find they enjoy the added luxury.
Pro Tip:
Confirm you have a stash of towels nearby to dry your pup off after their bath; it can prevent a mad dash through the house—plus, who wants to chase a wet dog with muddy paws? It’s a sure way for everyone to end up in the bath… again.
Additionally, consider investing in an outdoor dog washing station to simplify cleanup and enhance your backyard’s functionality.
5. Grooming Sink With Storage
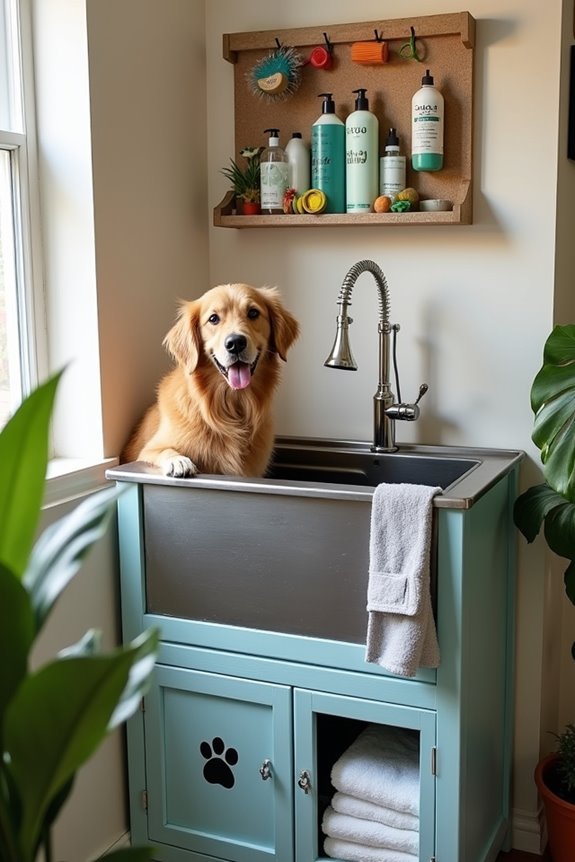
If you’re tired of the chaos that comes with dog grooming at home, a DIY grooming sink can be a game-changer. This setup not only provides a dedicated space for washing, brushing, and pampering your furry friend but also keeps your grooming supplies organized and within reach.
Think about it: less mess to clean up, a more comfortable experience for your pup, and a style that enhances your home. Let’s explore creating a functional and lovely grooming sink.
Materials Needed:
- A vintage or new sink (utility or deep sink works best)
- Cabinet or shelf unit (for storage beneath the sink)
- Stainless steel or plastic water sprayer (super handy!)
- Plumbing supplies (pipes, connectors, if necessary)
- Non-slip mat (for safety)
- Dog shampoo/conditioner (because why not aim for shiny fur)
- Towels & brushes (get ready for some serious cuteness)
- Drill and screws (for mounting shelves)
- Paint or wood finish (optional, for a stylish touch)
Step-by-Step Instructions:
1. Pick the Perfect Spot: Choose an area in your home that can handle water splashes and is close to a plumbing line—possibly a laundry room or a mudroom. You want it to be spacious enough for both you and your pup.
2. Choose Your Sink: Whether you find a vintage beauty at a flea market or buy a sleek new utility sink, make sure it’s deep enough to prevent any messy overspills.
A deep sink also means your pup feels secure—no doggy drama while you scrub!
3. Install the Sink: If you aren’t plumbing-savvy, call in a pro to hook it up. This isn’t the time to experiment with the pipes!
Once it’s in, make sure to level it out; you don’t want soap suds rolling everywhere.
4. Add Storage Beneath: Position your shelf or cabinet unit below the sink. This is where you’ll keep your grooming essentials organized and easily accessible.
If your pup has a favorite brush or toy, make sure it’s within reach—you know how they get with those squeaky toys.
5. Set Up the Sprayer: Attach your sprayer or hose to the sink. A sprayer makes rinsing a breeze, and it helps you avoid puddles on the floor—unless your dog decides to do a happy dance mid-shampoo, then all bets are off.
6. Place the Non-Slip Mat: Make sure to have non-slip mats both inside the sink and on the floor where your dog will stand.
A slip could lead to an unplanned doggy escape, and trust me, you don’t want that kind of drama during bath time.
7. Test It Out: Before calling your furry friend over, run some water through the sink to make sure everything’s working as it should.
You don’t want surprises while you’re knee-deep in fur and bubbles.
Optional Add-ons/Variations:
Feeling creative? You can paint the cabinet or sink in bright, cheerful colors to make the grooming station pop.
Or, if you’re into crafty things, add some cute decals or stencils featuring paw prints or bones to give it that personal touch.
Pro Tip:
Invest in a good quality dog shampoo that’s gentle on their skin.
You might think, “Why does this matter?”—Because a happy dog means a smooth grooming session, and who doesn’t want to enjoy a little less fur flying everywhere?
6. Non-slip Bathing Mat
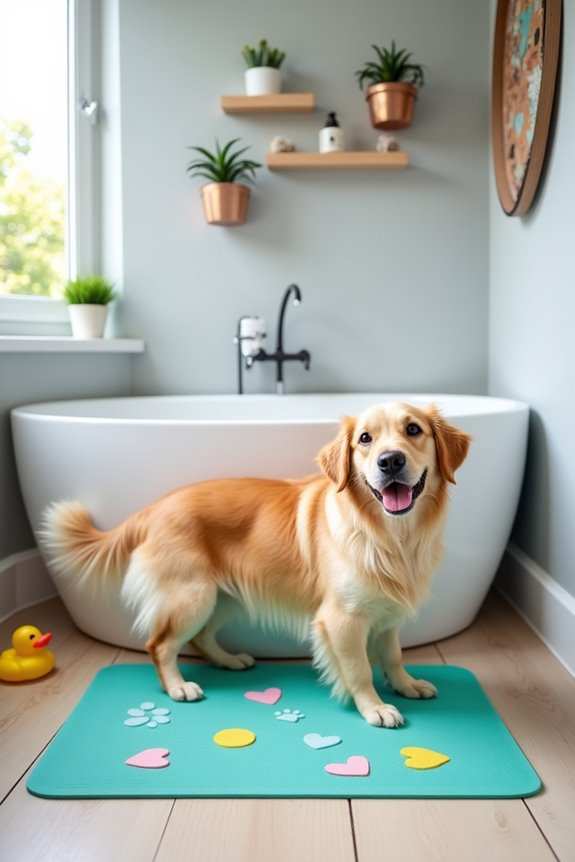
If you’ve ever tried to give your pup a bath only to end up wrestling with a wet, slippery dog, you know the struggle is real. A non-slip bathing mat is a fantastic solution that enhances safety and comfort during bath time for both you and your furry sidekick. Plus, it can keep your bathroom looking sharp and tidy, cutting down on that wet, soggy mess. So, why not whip one up yourself?
Materials Needed:
- Rubber or silicone mat (to guarantee a strong grip)
- Scissors (for cutting to size, if necessary)
- Non-toxic spray adhesive (for extra hold, if needed)
- Fun foam sheets or fabric (to customize your mat)
- Optional: Waterproof spray (to protect your design)
Step-by-Step Instructions:
- Choose Your Mat Size: Determine the area where you want your non-slip mat to go. Measure it out so your pup has plenty of space to stand comfortably. Remember, it should be a bright, happy place, not a wrestling ring in the shower.
- Cut the Mat: If your rubber or silicone mat isn’t the perfect size, grab some scissors and carefully cut it down to your desired dimensions. Just take your time—no need for a DIY haircut here!
- Add a Personal Touch: Want to jazz it up? Now’s the time! If you’re feeling crafty, use your fun foam sheets or fabric to add color or even a cute design. You could make paw prints, hearts, or a funky pattern—just whatever matches your vibe. Use non-toxic spray adhesive to secure them, making sure everything stays put while your pup gets all squeaky clean.
- Spray for Protection: When you’re done decorating, consider using a waterproof spray on top. It will help keep moisture from ruining your design and extends the life of your mat. Plus, it’ll make it a breeze to clean afterward when mud and fur inevitably go flying!
- Place the Mat: Find the perfect spot in your bathing area and lay down your new mat. Guarantee it’s flat and secure to prevent any slips or slides while your dog is enjoying their spa day.
- Test It Out: Call over your pup and give it a whirl! Observe how your dog interacts with the mat during bath time—if they seem happier or more stable, you’ve done great.
Optional Add-ons/Variations:
- Consider using fabric remnants from old projects or even pet bandanas to make your mat uniquely yours. It’s all about personalization—make it a fun project that reflects your style (and your dog’s personality).
- Create smaller mats for use in other areas of your home, such as near the dog bowl or entryway, to add cohesion and style throughout your space.
Pro Tip:
Try to choose a mat that’s machine washable or can easily be wiped clean to save you lots of time (and elbow grease) later on. After all, who needs extra scrubbing when you’re just trying to get your dog clean?
Creating a non-slip bathing mat is a simple DIY project that brings tons of value, making bath time safer and a little more enjoyable for both you and your dog. So grab those materials and get to work—your pup will thank you!
7. Eco-friendly Bathing Accessories
Looking for a way to pamper your pup while also being kind to Mother Earth? Let’s plunge into a fantastic DIY project: creating your own eco-friendly dog bath accessories! Not only will you save a few bucks while spiffing up bath time for your fur baby, but you’ll also make a positive impact on the environment.
It’s a win-win—your dog gets a stylish soak, and you get to feel good about your choices.
Materials Needed:
- Old towels or cotton fabric (think recycled t-shirts or bed sheets)
- Non-toxic fabric paint (optional, for added flair)
- Sewing kit (or fabric glue if you prefer no-sew)
- Scissors
- Measuring tape
- Optional: Natural hemp rope for making a dog scrubber
Step-by-Step Instructions:
1. Gather Your Materials: Collect those old towels or any cotton fabric you have lying around. You know, the ones with the cute dog prints or that revolutionary superhero design that never gets used—time for them to shine.
2. Measure and Cut: Decide how big you want your dog bath accessories to be, like a grooming mitt or drying towel. For a washing mitt, cut a piece about 12×12 inches; for a drying towel, 24×24 inches should do the trick.
Pro tip: If you’re unsure, just wing it. Dogs aren’t picky; they’ll appreciate anything soft and fuzzy.
3. Personalize Your Length: Want your towel to have a little extra pizzazz? Grab the fabric paint and let’s get artsy! You can create fun designs, such as paw prints, bones, or just some swirls.
Remember to let it dry thoroughly before using—that cute little paw print can’t go on a wet dog, can it?
4. Sew or Glue Edges: If you’re feeling crafty and want to avoid fraying, fold the raw edges in about half an inch and sew them down (or use fabric glue for a no-sew option).
That’s it—your eco-friendly towel is ready to soak up all that bath-time goodness.
5. Make a Scrubber (Optional): For an added touch, you can make a dog scrubber using leftover fabric and a little piece of natural hemp rope. Just stick the rope in between two pieces of fabric, tie it off, and you’ve got a fantastic way to scrub your dog down while keeping it all eco-friendly.
6. Test It Out: Finally, it’s time for the real moment of truth. Call your dog over, grab your new towel or scrubber, and see how they react.
If they give you those big, happy eyes and waggle their tails while you dry them off, congratulations—you are now officially an eco-friendly bathing accessory guru.
Optional Add-ons/Variations:
- If you have a stash of fabric remnants with different patterns, consider making a patchwork-style drying towel. It’s colorful and unique!
- Want something softer? Use an old fleece blanket instead. Just try to resist taking a nap with it yourself…
Pro Tip:
When washing your DIY accessories, always use cold water and hang them to dry. This not only saves energy but also keeps your creations looking fabulous for longer.
Plus, your dog doesn’t need a superhero cape—they just want to be fluffy and dry.
Enjoy your eco-friendly projects, and happy bathing! Your dog will thank you (though they mightn’t say it in words).
Extra Tips & Ideas
While designing a dog bathroom can feel overwhelming, you can make it both functional and stylish with a few creative touches.
Start with a fun color scheme. Bright towels or quirky rugs can aim to make you smile. Consider using a dog showerhead—trust me, it’ll save you from wrestling with your pup during bath time.
Don’t forget storage; baskets for toys and shampoo keep it tidy. You might even create a “paw wash” section to rinse off muddy paws before they invade your home.
And hey, if you can hang some cute dog art, why not? It makes the space more inviting.
Ultimately, it should reflect your personality—like a mini dog spa where you and Fido enjoy time together.
Frequently Asked Questions
How Do I Choose the Right Materials for a Dog Bathroom?
To choose the right materials for a dog bathroom, focus on durability, water resistance, and easy maintenance. Look for non-slip surfaces, stain-resistant finishes, and comfortable textures that’ll keep both you and your dog safe.
What Are the Best Dog Breeds for Small Bathroom Spaces?
If you seek a Napoleon of compact companions, consider breeds like French Bulldogs or Dachshunds. Their playful spirit and small size fit perfectly in tight spaces, ensuring both comfort and companionship in your snug bathroom oasis.
How Can I Integrate Storage in a Dog Bathroom Design?
You can integrate storage by utilizing vertical space with wall shelves, adding under-sink cabinets, and using baskets or bins. Hooks for leashes and towels keep essentials organized and easily accessible, creating a functional dog bathroom.
What Colors Are Best for a Dog-Friendly Bathroom?
Bright, cheerful colors like soft blues or greens work best for a dog-friendly bathroom. They create a calm environment while hiding dirt. You could also consider durable neutrals for a timeless, easy-to-maintain look.
Are There Pet-Safe Cleaning Products I Can Use?
Yes, there are pet-safe cleaning products you can use. Opt for natural ingredients, like vinegar and baking soda, or choose brands that specifically label their products as non-toxic, biodegradable, and free from harmful chemicals, ensuring your pet’s safety.
Conclusion
So, whether you’ve got a tiny pup or a giant fluff ball, transforming your dog’s bathing experience doesn’t have to be a chore. Imagine how much fun it’ll be splashing around in a colorful, playful space. After all, isn’t bath time supposed to be a joy, not a wrestling match? With these design ideas, you’ll create a doggie spa that’ll make your furry friend wag their tail in delight. So, what are you waiting for? Get started today!

Amr Mohsen is a software engineer who traded his keyboard for a leash — at least on weekends. His love for dogs inspired him to share what he learns as a dog owner and enthusiast, bringing a detail-oriented, research-driven perspective to every article he writes. If it’s about dogs, he’s probably already looked it up twice.

