So, you’ve got a furry friend who deserves a stylish upgrade, huh? Crafting a personalized dog collar isn’t just fun; it’s a great way to show off your pup’s personality. Think unique fabric patterns or maybe something with a little flair, like beaded designs. Ever tried making a glow-in-the-dark collar? Trust me, your dog will be the star of the night. Stick around, and let’s explore some creative ideas that’ll make both you and your pup wag with joy.
Unique Fabric Patterns
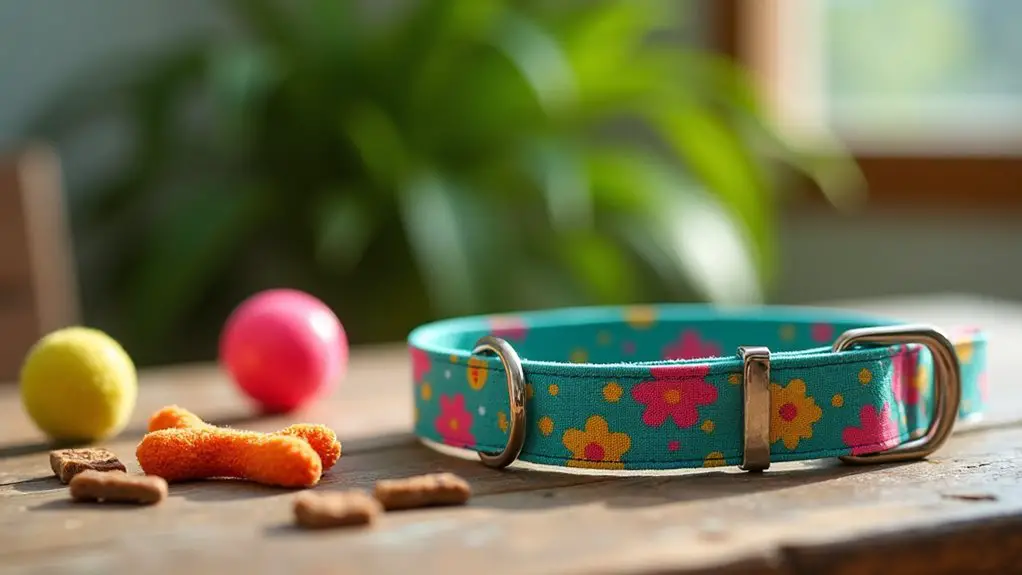
When it comes to dog collars, unique fabric patterns can turn an everyday accessory into a fashion statement.
Picture your pup strutting down the street in a collar that screams personality. You can craft one yourself with some fun dog collar DIY tutorials. Start by choosing a fabric that reflects your dog’s vibe—maybe florals for the sweet pup or bold stripes for the spunky one.
Measure your dog’s neck, cut the fabric, and sew it together, or use fabric glue if you’re feeling lazy—no judgment here. Add a buckle and voilà! You’ve got a collar that’s as unique as your furry friend.
Just remember, if it looks like a cat chewed it up, you might need a little more practice.
Our Collection
Now that you’ve explored unique fabric patterns, let’s chat about our collection of dog collars that’ll make your pup the talk of the park.
From personalized embroidered collars that showcase your dog’s name to reflective safety collars for those late-night walks, there’s something for every furry friend.
And who can resist a floral print or a vintage leather collar that screams style?
1. Personalized Embroidered Collars

Have you ever wished for a collar that truly represents your dog’s unique personality? Personalized embroidered collars aren’t just stylish; they also serve a practical purpose by guaranteeing that your pup’s information is always close at hand. Plus, creating your own collar can save you money while adding a personal touch that store-bought options just can’t match. So, let’s get creative together! Not to mention, you can elevate your pup’s style with premium dog fashion accessories that complement your custom creation.
Materials Needed:
- A plain dog collar (nylon or fabric works best)
- Embroidery thread (choose your dog’s favorite colors)
- Embroidery needle
- Scissors
- Fabric marker or chalk
- Embroidery hoop (optional, but helpful)
- Iron-on stabilizer (for added durability)
- A sewing machine (if you’re feeling ambitious) or a simple needle and thread
Step-by-Step Instructions:
1. Choose Your Collar: Start with a basic nylon or fabric dog collar. Make sure it fits your dog comfortably; you don’t want them to feel like they’re wearing a medieval torture device.
2. Plan Your Design: Think about what you want to embroider. A name? A cute saying? Maybe even your dog’s Instagram handle? Use a fabric marker or chalk to lightly sketch your design on the collar.
3. Prepare the Collar: If you’re using an embroidery hoop, place the collar inside it to keep the fabric taut. If not, just hold it steady with one hand as you work.
4. Get Stitching: Thread your needle with the embroidery thread. Start from the back of the collar and pull it through to the front, then follow your sketch. Simple stitches like backstitch or satin stitch work well.
Don’t worry if it’s not perfect; your dog will think it’s fabulous no matter what!
5. Secure Your Threads: When you’ve finished your design, make sure to tie off your threads securely at the back. You don’t want your pup to be wearing a collar that unravels like a poorly knitted sweater.
6. Add Stabilizer: If you want your embroidery to last longer, consider ironing on some stabilizer to the back of the collar. This adds durability and helps keep your stitches looking sharp.
7. Final Touches: Give your collar a quick press with an iron to smooth it out, and voila! You’ve created a one-of-a-kind accessory for your beloved pet.
Optional Add-ons/Variations:
- Color Combinations: Experiment with different thread colors for the text and the collar. A bright orange thread on a navy blue collar? Bold and beautiful!
- Pattern Play: Instead of just a name, consider adding paw prints or hearts around the text. You can even use fabric paint to add some flair.
Pro Tip:
If your dog is a little rough and tumble, opt for a collar made from durable materials and use a strong embroidery thread. This way, even after those muddy adventures in the park, your collar will still look good.
And always remember to check the collar regularly to verify it’s not too tight; comfort is key for our furry friends.
Now, roll up those sleeves and get stitching. Your dog is going to love their new collar, and you’ll have the satisfaction of knowing you made it with your own hands. Happy crafting!
2. Reflective Safety Collars
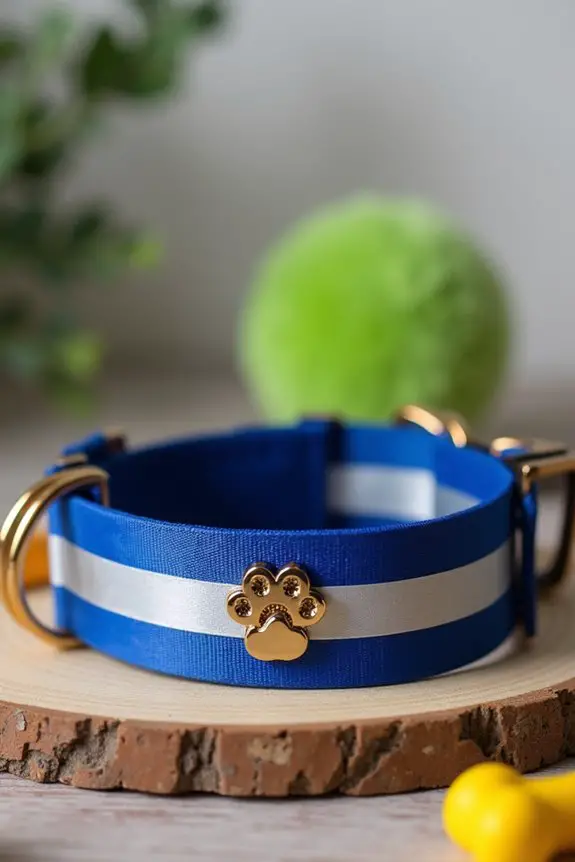
As a dog owner, guaranteeing your furry friend’s safety during evening walks is paramount. Reflective safety collars not only make your dog visible at night, but they also add a stylish touch to their ensemble. Plus, making your own collar can save you some bucks while giving you the satisfaction of creating something special for your beloved pet. Luxury dog collars offer a wide variety of styles and materials to choose from, ensuring your pup stays fashionable while staying safe.
Materials Needed:
- A plain nylon or fabric dog collar (make sure it fits your dog!)
- Reflective fabric tape or reflective ribbon (available at craft stores)
- Scissors
- Fabric glue or a hot glue gun
- Measuring tape
- Iron (optional, for smooth surfaces)
- A ruler (to measure the tape)
- An old cloth or towel (to protect your surfaces)
Step-by-Step Instructions:
- Measure and Cut: First, measure the length of your collar. Then, cut a piece of reflective tape or ribbon that’s slightly shorter than the collar to guarantee it fits well and doesn’t touch your dog’s neck directly.
- Prep Your Collar: Lay the collar flat on a clean surface. If you want it to look extra nice, give it a quick press with an iron to smooth out any wrinkles. Just be careful not to burn the fabric—trust me, melted nylon isn’t a good look.
- Apply the Reflective Tape: Take your reflective tape and start at one end of the collar. Apply a bead of fabric glue or use a hot glue gun to stick the tape down. Press it firmly to make sure it adheres well. Take your time; this is where you want it to be perfect.
- Secure the Ends: Once you reach the other end of the collar, trim any excess tape. Make sure both ends are securely glued down. You don’t want your masterpiece falling apart during a midnight romp in the park.
- Dry and Set: Allow the glue to dry completely. It’s like waiting for cookie dough to chill before baking—hard, but necessary. You want to make sure everything sets properly so it holds up against your dog’s playful antics.
- Final Check: Once everything is dry, give your collar a good once-over. Guarantee there are no rough edges or loose ends that could snag on anything. Safety first, right?
Optional Add-ons/Variations:
- Color Coordination: Choose reflective tape that matches your dog’s favorite collar color. A bright red collar with silver reflective tape? Now that’s a striking look.
- Personalization: You could also attach a small charm or tag that jingles when your pup walks, adding a bit of flair to their new reflective collar. Just make sure it doesn’t get caught in anything.
Pro Tip:
When working with glue, always use it in a well-ventilated area. And if you’re using a hot glue gun, keep it out of reach of curious paws—those little furballs can be surprisingly sneaky.
Also, reflective collars can be a bit stiff at first, so let your dog wear it around the house for a while to get used to it.
With this DIY project, you’re not only enhancing your dog’s safety but also adding a personal touch to their style. Who knew saving money and looking fabulous could go paw in paw?
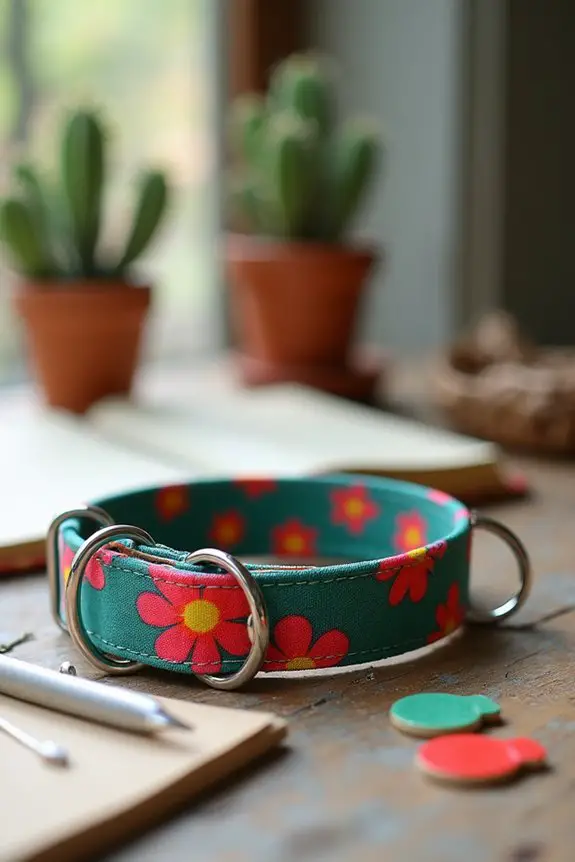
3. Floral Print Collars
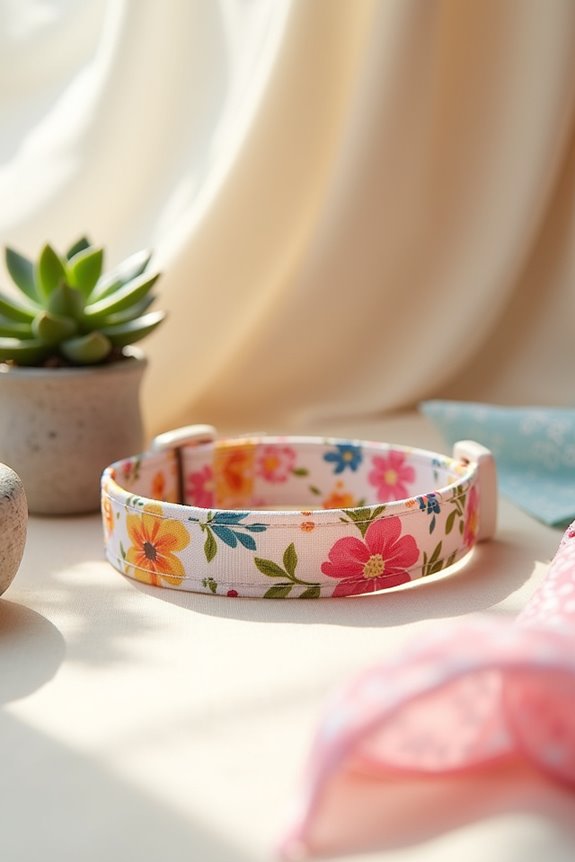
If you want to add a touch of personality to your dog’s wardrobe, a floral print collar is a fantastic DIY project. Not only does it showcase your pup’s unique style, but it’s also a budget-friendly way to keep them looking fabulous during walks. Plus, it’s a fun and creative way to show off your crafting skills. Let’s explore creating a beautiful floral collar that will make your furry friend the talk of the dog park. Additionally, consider pairing your stylish collar with high-quality premium dog food brands to ensure your pup stays healthy and happy.
Materials Needed:
- A plain nylon or fabric dog collar (make certain it fits your dog!)
- Floral fabric (cotton works great)
- Scissors
- Fabric glue or a hot glue gun
- Measuring tape
- Iron (optional, for smoothing)
- A ruler (to measure the fabric)
- An old cloth or towel (to protect your surfaces)
Step-by-Step Instructions:
- Measure Your Collar: Start by measuring the length of your collar. You want to cut your floral fabric to a size that will wrap around the collar with a little overlap—about an inch or so will do.
- Cut the Floral Fabric: Using your scissors, cut the floral fabric according to your measurements. Remember, a little extra fabric is better than not enough, so err on the side of caution.
- Prep Your Collar: Lay your collar flat on a clean surface. If the collar is wrinkled, a quick press with an iron will help it look its best. Just be careful not to burn it—trust me, you don’t want to explain that to your dog.
- Attach the Floral Fabric: Start at one end of the collar. Apply a line of fabric glue or use a hot glue gun to attach the floral fabric. Wrap it around the collar, smoothing it down as you go to avoid bubbles. It’s like wrapping a present, but for your pup.
- Secure the Edges: Once you reach the other end, trim any excess fabric. Make sure both ends are glued down securely. You want this collar to hold up, especially during those enthusiastic tail-wagging moments.
- Let It Dry: Give your collar some time to dry completely. It’s like waiting for paint to dry—hard, but necessary. You want to confirm everything sticks well before letting your furry friend try it on.
- Final Touches: Once dry, inspect your collar for any rough edges or loose bits. Smooth out any areas that might snag on your dog’s fur. Safety and comfort are key, after all.
Optional Add-ons/Variations:
- Mix and Match: Use different floral patterns for a patchwork effect. This will give your collar a unique, bohemian vibe that will stand out.
- Add a Bow: Attach a small bow made from the same floral fabric for an extra touch of charm. This can turn your collar into a fashion statement, perfect for any special occasion.
Pro Tip:
When choosing your fabric, opt for washable materials. Dogs are adventurous creatures, and let’s face it, they can get a bit dirty. A washable collar means you can keep it looking fresh and fabulous without too much hassle.
4. Vintage Leather Collars
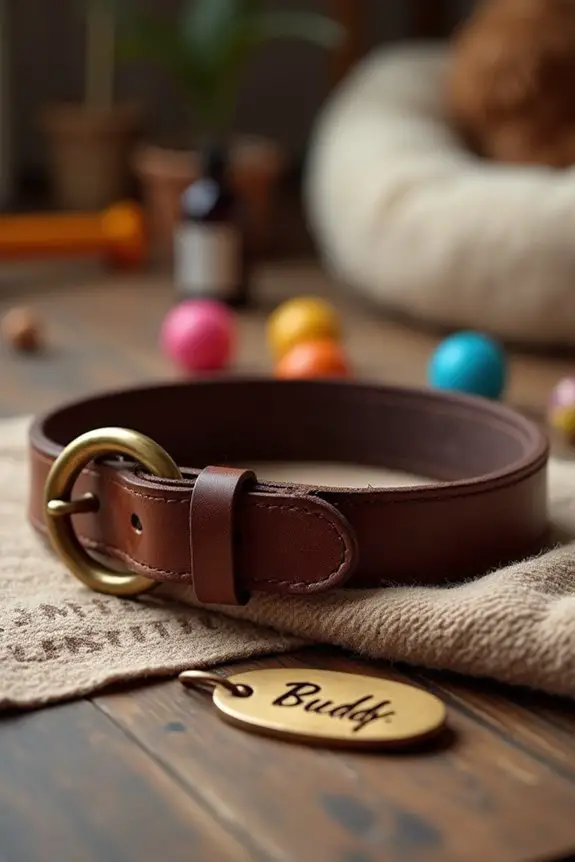
If you’re looking to give your furry friend a touch of timeless elegance, creating a vintage leather collar is a perfect DIY project. Not only does it provide durability and comfort, but it also adds a beautiful, rustic charm to your dog’s style. Plus, making it yourself can save you money while guaranteeing it fits perfectly. Let’s get crafting!
Materials Needed:
- Leather strips or an old leather belt (make sure it’s thick and durable)
- Scissors
- Ruler or measuring tape
- Hole punch (or a hammer and nail)
- Metal D-ring (for attaching a leash)
- Buckle (optional, depending on design)
- Leather conditioner (for finishing touches)
- Old cloth or towel (to protect your surfaces)
Step-by-Step Instructions:
- Measure Your Dog’s Neck: Use the measuring tape to determine your dog’s neck size. Add a couple of inches for comfort and adjustments. Remember, you want it snug but not too tight—think of it like a hug, not a chokehold.
- Cut the Leather: If using a leather strip, cut it to your desired length based on your measurement. If using an old belt, simply cut it to size, making sure you have enough length for the buckle if you decide to use one. The width can vary, but a 1-inch strip is usually a safe bet.
- Create Holes for Adjustment: Use the hole punch to make holes along one end of the leather strip. Space them about an inch apart—this gives you some room to adjust as needed. If you’re feeling adventurous and don’t have a hole punch, you could gently tap a nail into the leather for similar results, although it mightn’t be as pretty.
- Attach the D-ring: About an inch from the other end of the leather strip, create another hole for the D-ring. This will be where you attach your dog’s leash. Thread the D-ring through the hole and fold the leather over it, securing it with a bit of glue or stitching if you’re feeling crafty.
- Add the Buckle (optional): If you want a buckle closure, attach it to the end of the leather strip opposite the D-ring. Make sure it’s secure enough to handle your enthusiastic pup.
- Condition the Leather: Once your collar is assembled, take a bit of leather conditioner and rub it into the collar. This not only nourishes the leather but also gives it that vintage look. Plus, it’ll feel softer against your dog’s neck—no one wants to wear something scratchy, right?
- Final Fit Check: Before letting your dog strut their stuff, do a final fit check. Slip it on your pup and adjust as necessary. You want it to be comfortable, yet secure.
Optional Add-ons/Variations:
- Engraved Tags: For a personal touch, consider adding an engraved name tag. It adds a charming vintage flair and guarantees your pup can be identified if they decide to undertake a little adventure.
- Color Options: Experiment with different leather colors or even dye it for a unique twist. Think deep browns, classic blacks, or even a bold red for a pop of personality.
Pro Tip:
Always remember to check the collar regularly for wear and tear. A worn collar can be uncomfortable for your dog and may not hold up on those spirited walks. Regular conditioning can prolong the life of your collar, keeping it looking sharp and feeling great.
With this vintage leather collar, your dog won’t only look fabulous but also feel comfy while strutting their stuff at the park. Who knew DIY could be this rewarding? Plus, you can reward your pup with a luxury treat dispenser for a job well done. Happy crafting!
5. Custom Beaded Collars
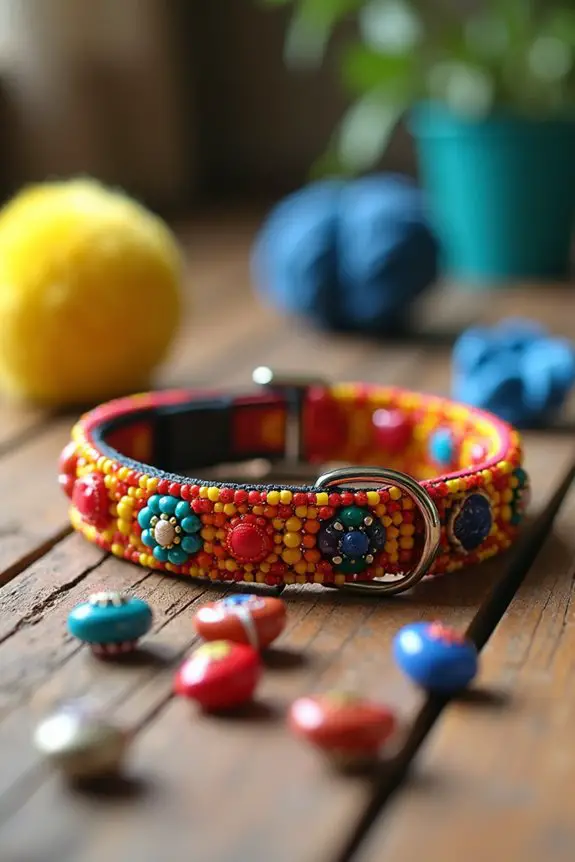
If you’re looking to add a splash of color and personality to your pup’s wardrobe, making a custom beaded collar is a fantastic DIY project. Not only does it allow you to express your creativity, but it also results in a unique accessory that your dog will love to wear—plus, it saves you money compared to store-bought options. Plus, you can easily coordinate your collar with other stylish outfits for your pooch, including designer dog clothes.
Let’s plunge into the fun of crafting a collar that’s as vibrant as your dog’s personality!
Materials Needed:
- Nylon or cotton webbing (sturdy and flexible)
- Variety of colorful beads (make sure they’ve large holes for easy threading)
- Scissors
- Needle and strong thread (or heavy-duty glue)
- Measuring tape
- Lighter or fray check solution (to seal the ends of the webbing)
- Optional: charms or pendants for extra flair
Step-by-Step Instructions:
- Measure Your Dog’s Neck: Grab your measuring tape and wrap it gently around your dog’s neck. Add a couple of inches for comfort and wiggle room. This is vital—no one wants a collar that’s too tight, right?
- Cut the Webbing: Based on your measurement, cut a length of webbing that will fit your dog’s neck, plus a bit extra for the buckle and beads. A good rule of thumb is to add about 4 inches to make sure you have enough to work with.
- Seal the Edges: Take your lighter or fray check solution and seal the ends of the webbing. This prevents it from fraying and keeps your collar looking neat. Just a quick pass over the edges is all you need, so be careful not to burn your fingers—trust me, I’ve learned that the hard way.
- Thread the Beads: Start threading beads onto the webbing in your desired pattern. You can mix and match colors, shapes, and sizes to create something truly one-of-a-kind. Don’t worry about getting it perfect; the beauty of DIY is in the imperfections.
- Secure the Beads: Once you’re happy with how it looks, tie off the ends of the thread or use a dab of heavy-duty glue to keep the beads in place. Make sure everything is secure—those beads should stay put, even during a game of fetch.
- Attach the Buckle: If you’re using a buckle, attach it to one end of the webbing. Make sure it’s secure and can handle your pup’s playful antics.
- Final Fit Check: Before letting your dog wear their new collar, do a final fit check. It should be snug but not too tight—aim for about two fingers’ worth of space between the collar and your dog’s neck.
Optional Add-ons/Variations:
- Personal Touch: Try using beads that reflect your dog’s personality—like paw print beads for playful pups or calming colors for anxious dogs. You can also incorporate charms that represent your favorite activities together, like a little bone or a heart.
- Seasonal Themes: Change it up with seasonal colors or holiday-themed beads. Who wouldn’t love a festive collar during the holidays?
Pro Tip:
When selecting beads, make sure they’re pet-safe—avoid anything that could easily break or pose a choking hazard.
And if you’re feeling extra crafty, think about adding a matching leash for a stylish set. It’s a little more work, but your dog will look paw-sitively dapper when they step out in style.
6. Glow-in-the-dark Collars
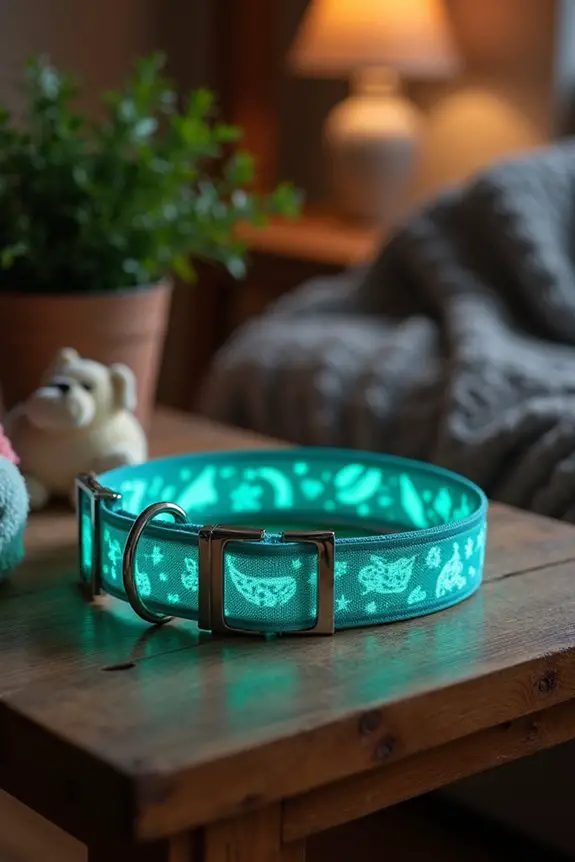
When it comes to keeping your furry friend safe during evening strolls, a glow-in-the-dark collar is an absolute game-changer. Not only does it increase visibility, but it also adds a fun twist to your dog’s style. Plus, it’s a practical DIY project that won’t break the bank. Ready to light up your pup’s night? Let’s get crafting!
Materials Needed:
- Nylon or cotton webbing (for durability)
- Glow-in-the-dark paint (non-toxic and pet-safe)
- Paintbrush or sponge applicator
- Buckle and D-ring (for attaching tags)
- Scissors
- Measuring tape
- Lighter or fray check solution (to seal edges)
- Optional: decorative stickers or stencils for added flair
Step-by-Step Instructions:
- Measure Your Dog’s Neck: Use your measuring tape to find out your dog’s neck size. Make sure to add a couple of inches for comfort—nobody wants a collar that feels like a choke hold.
- Cut the Webbing: Cut the nylon or cotton webbing to the length you measured, plus a little extra for the buckle and D-ring. Think about adding about 4 inches to give yourself some wiggle room.
- Seal the Edges: Take your lighter or fray check solution and carefully seal the ends of the webbing. This step is essential; you don’t want your collar to unravel while your pup is busy chasing squirrels.
- Apply Glow-in-the-Dark Paint: Grab your paintbrush or sponge and start applying the glow-in-the-dark paint to the webbing. You can create cool patterns or simply coat the entire surface. Just remember, the more coats you apply, the brighter it will glow. Let it dry completely before moving on.
- Attach the Buckle and D-ring: Once the paint is fully dry, attach the buckle and D-ring to one end of the webbing. Make sure they’re secure; you want to be able to attach tags without worrying about anything falling off during a romp in the park.
- Final Fit Check: Slip the collar onto your dog and do a final fit check. There should be enough room for two fingers to fit comfortably between the collar and your pup’s neck.
Optional Add-ons/Variations
Feeling extra creative? You can mix in some colorful stickers or stencils before applying the glow-in-the-dark paint for a unique design.
Or, try using different colors of glow paint to create a dazzling rainbow collar that glows bright at night.
Pro Tip
For added durability, consider using fabric paint or a spray sealant once the glow paint is dry. This not only protects your design but also enhances its glow.
And remember, always choose non-toxic materials to keep your furry friend safe—no one wants a glow-in-the-dark disaster.
7. Patterned Canvas Collars
If you’re looking to add a splash of personality to your pup’s wardrobe, a patterned canvas collar is the perfect DIY project. Not only does it save money compared to store-bought options, but it also guarantees your furry friend is sporting a unique accessory that reflects their style.
Plus, making it yourself means you can customize it to fit your dog’s personality and your home decor—talk about a win-win!
Materials Needed:
- Canvas fabric (choose a fun pattern or color)
- Webbing (nylon or cotton for strength)
- Buckle and D-ring (for attaching tags)
- Scissors
- Measuring tape
- Sewing machine or needle and thread
- Fabric glue (optional, for those who prefer no-sew)
- Fray check solution (to seal edges)
- Iron (for smoothing out fabric)
Step-by-Step Instructions:
- Measure Your Dog’s Neck: Use the measuring tape to find out your dog’s neck size. Remember to add an extra couple of inches for comfort. We don’t want a collar that’s too tight—nobody likes a constricted pooch.
- Cut the Canvas and Webbing: Cut a strip of canvas fabric that’s about 2 inches wide and long enough to go around your dog’s neck plus a few inches for the buckle and D-ring. Then, cut the webbing to the same length.
- Seal the Edges: To avoid any fraying, use fray check solution on the edges of both the canvas and webbing. If you’re feeling fancy, a quick iron can also help flatten those edges for a clean look.
- Attach the Canvas to the Webbing: If you’re sewing, place the webbing in the center of the canvas strip, fold the edges over, and sew along the sides to secure. If you prefer a no-sew method, fabric glue works wonders—just be sure to let it dry completely before moving on.
- Add the Buckle and D-ring: Attach the buckle and D-ring to one end of the webbing. Make sure everything is secure; you want to know your dog’s tags are safe while they’re out gallivanting.
- Final Fit Check: Slide the collar onto your dog and do a fit check. You should be able to fit two fingers snugly between the collar and their neck. If it’s too tight or too loose, now’s the time to adjust.
- Show Off Your Creation: Snap a picture of your pup in their new collar and share it with friends. They’ll be impressed and maybe even a little jealous of your crafty skills.
Optional Add-ons/Variations
Want to take your collar to the next level? Try mixing and matching different patterned fabrics for a collar that’s truly one-of-a-kind.
You can even add a pop of color by sewing on some coordinating ribbon or fabric flowers for a bit of flair.
Pro Tip
When choosing your fabric, opt for canvas that’s machine washable. Trust me, your dog will get into some messy situations (hello, mud puddles), and you’ll thank yourself later when cleanup is a breeze.
Plus, a well-washed collar will last longer, keeping your pup looking fresh and stylish.
Now go ahead, release your creativity, and make a collar that will have tails wagging and heads turning!
Extra Tips & Ideas
While you might think that making a dog collar is all about the basics, there’s so much more you can do to make it truly unique.
Ever thought about adding charms or tags? You could personalize it with your dog’s name or a cute saying.
Maybe you want to try fabric paints—who doesn’t love a little splatter of color?
And don’t forget about adjusting sizes; dogs grow, and so should their collars.
Oh, and if you’re feeling adventurous, why not whip up matching leashes? It’s like a fashion statement for your pup.
Just be careful when sewing—trust me, I’ve had my fair share of tangled threads.
Frequently Asked Questions
What Materials Are Best for Making a DIY Dog Collar?
For making a DIY dog collar, you’ve got options like durable nylon, soft cotton, or sturdy leather. Don’t forget to contemplate hardware like D-rings and buckles for secure and functional designs that suit your pup’s style.
Can I Personalize My Dog Collar With My Pet’s Name?
Yes, you can absolutely personalize your dog collar with your pet’s name! Use fabric markers, embroidery, or charms to add that special touch. It’ll make your dog feel unique and stylish while keeping them safe.
How Do I Measure My Dog for a Custom Collar?
To measure your dog for a custom collar, use a soft tape measure around their neck. If it fits snugly yet comfortably, you’re good to go; don’t forget to account for growth or seasonal changes!
Are There Any Safety Concerns With DIY Dog Collars?
Yes, there are safety concerns with DIY dog collars. Guarantee materials are durable, non-toxic, and comfortable. Avoid sharp edges or loose parts that might cause choking. Regularly check for wear and tear to keep your dog safe.
How Can I Clean My Homemade Dog Collar?
To clean your homemade dog collar, soak it in warm, soapy water, gently scrubbing away dirt. Rinse it under cool water, then let it air dry, watching it shine like new under the sun.
Conclusion
So, there you have it—seven fun DIY dog collar ideas that’ll let your pup strut their stuff in style. Remember the time you tried to bake a cake and ended up with a pancake? Crafting collars can be just as unpredictable, but that’s part of the fun. Each collar reflects your dog’s personality and your creativity. So grab some fabric, beads, or whatever speaks to you, and get to work. Your furry friend will thank you with wagging tails.

Hi, I’m Ali Tarek, the founder of Animalsman. I’ve always been passionate about pets, especially dogs and cats, and I created this website to share practical tips, easy recipes, and helpful care advice for fellow pet lovers. My goal is to make pet care simple, enjoyable, and accessible for everyone. When I’m not writing or curating content, you’ll usually find me spending time with my furry friends or learning new ways to keep them happy and healthy.

