Did you know that a well-designed dog ramp can actually improve your pup’s joints and overall mobility? It’s true. If you’ve ever watched your dog struggle to hop onto the couch, you know it can be a bit heartbreaking. But don’t worry, I’ve got some creative DIY ideas that will not only help your furry friend but also fit your style and needs. Curious about how to get started? Let’s explore some pawsitively fantastic options together.
Paw-Friendly Ramp Designs
When it comes to creating a dog ramp, you want something that’s not just functional but also friendly for those furry paws. Think about the materials you’re using—smooth surfaces are key. For a dog ramp DIY project, try using carpet or rubber mats to prevent slipping. You wouldn’t want your pup to feel like they’re on an amusement park ride, right?
Also, consider the incline. A gentle slope is easier for your dog to navigate, especially if they’re small or older. Measure it out carefully; too steep, and it’s a no-go.
And hey, if you mess up, don’t sweat it. Just think of it as a creative brainstorming session. Your pup will appreciate your efforts, even if it’s a little wobbly at first.
Our Collection
Now that you’ve got some great ramp designs in mind, let’s check out our collection.
You’ll find everything from adjustable height wooden ramps to foldable aluminum options that are perfect for travel.
Need a little extra storage for treats or toys? We’ve got a ramp for that too.
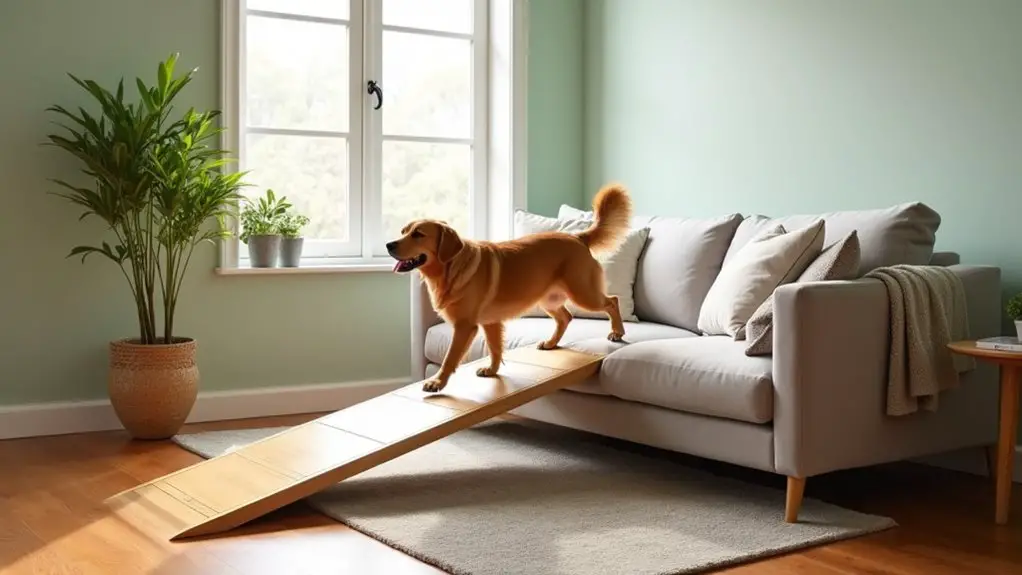
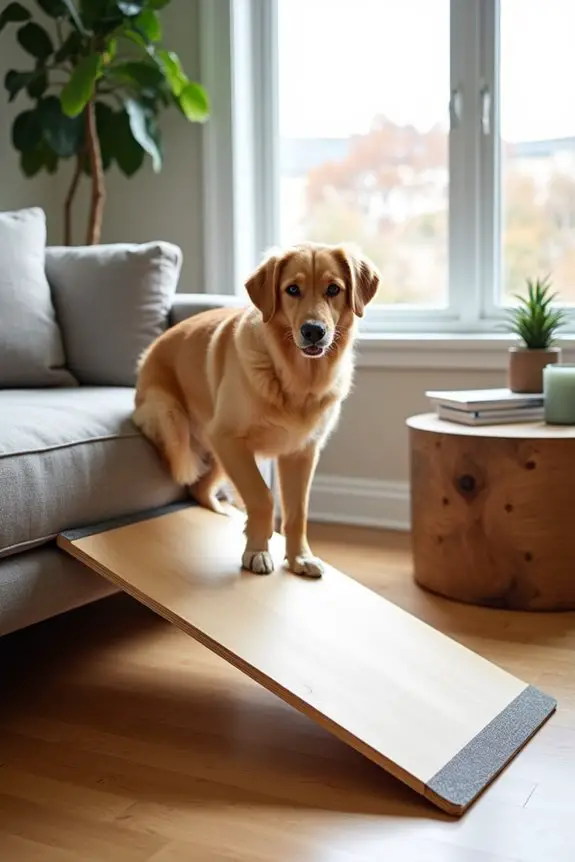
1. Adjustable Height Wooden Ramp
Are you tired of watching your furry friend struggle to hop onto the couch or get in and out of your car? An adjustable height wooden ramp might just be the perfect solution for you and your pup. Not only does it provide easier access for your dog, but it also saves you money compared to buying a pre-made ramp. Plus, it adds a touch of charm to your home, making it look a little more “pawsitively” inviting. Additionally, investing in premium dog training equipment can enhance your dog’s overall training and mobility experience.
Materials Needed:
- Plywood (1-inch thick)
- 2×4 lumber (for support)
- Wood screws
- Sandpaper
- Wood glue
- Hinges (for adjustable height)
- Non-slip mat or tape
- Wood stain/paint (optional)
- Measuring tape
- Saw (hand saw or circular saw)
- Screwdriver
- Level
Step-by-Step Instructions:
- Measure and Cut the Plywood: Decide how long and wide you want your ramp to be. A good size for most dogs is about 24 inches wide and 36 to 48 inches long. Use your measuring tape to mark your cuts, then carefully cut the plywood to size.
- Create the Support Frame: Cut two 2×4 pieces to match the length of your plywood ramp. These will serve as the side supports. Then, cut additional pieces for cross supports, placing them every 12 inches along the length.
- Attach the Supports: Using wood screws and wood glue, attach the support frame to the bottom of your plywood. Make sure everything is secure and level. If it looks like my kitchen after I’ve baked a cake—chaotic but somehow functional—don’t worry; just keep adjusting until it’s right.
- Add Hinges for Adjustability: Attach the hinges to one end of the ramp so it can be adjusted in height. You can mount a second piece of 2×4 to a wall or a sturdy piece of furniture, allowing the ramp to pivot. This way, you can change the angle easily depending on where you need it.
- Sand and Finish: Sand down any rough edges to keep Fido safe from splinters. If you want to give your ramp a little flair, now’s the time to paint or stain it. Just remember, dogs don’t care about aesthetics, but you might want something that goes with your living room decor.
- Add Non-Slip Material: To prevent your dog from slipping, attach a non-slip mat or tape along the ramp surface. Think of it as giving your pup a cozy carpeted runway.
- Test It Out: Before letting your dog take their first stroll up the ramp, give it a good shake (carefully, please) to verify everything is secure. Then, coax your dog up the ramp with treats or their favorite toy. Just imagine the look of pride on their face when they realize they can join you on the couch like a champ.
Optional Add-ons/Variations:
- Colorful Paint: Want to jazz it up? Try painting the ramp in vibrant colors or patterns. Maybe a fun polka dot design or even a solid color that matches your other furniture.
- Decorative Stencils: Use stencils to add your dog’s name or cute paw prints along the sides. It’s like a personalized doggie ramp, and who wouldn’t want that?
Pro Tip:
Always keep safety in mind. Make sure the ramp is sturdy and tested before letting your pup use it. And if you’re using wood stain or paint, opt for pet-safe products to guarantee your furry friend stays healthy.
Plus, consider adding a rubber stop at the bottom of the ramp to prevent slipping—safety first, right?
With a little effort, you’ll haven’t just a practical solution for your dog but a stylish addition to your home. Happy building!
2. Non-Slip Carpeted Ramp
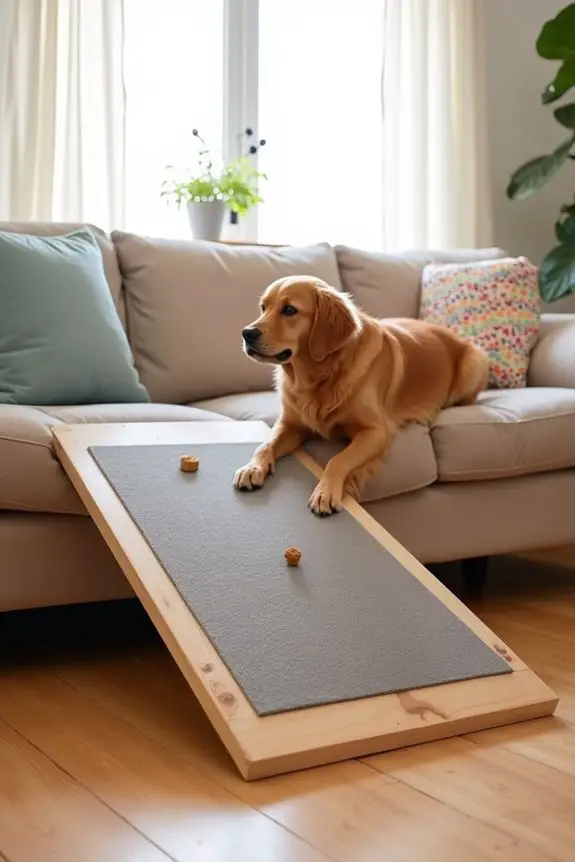
If you’ve ever watched your dog struggle to get on the couch or into the car, you know how heart-wrenching it can be. A non-slip carpeted ramp is a fantastic DIY project that not only helps your furry friend reach their favorite spots with ease but also adds a cozy touch to your home. Plus, it’s a budget-friendly option that keeps your pup comfortable and safe. Premium dog ramps for elderly dogs are also available for those looking for a ready-made solution. Let’s get started!
Materials Needed:
- Plywood (1-inch thick)
- 2×4 lumber (for supports)
- Wood screws
- Sandpaper
- Non-slip carpet or carpet tiles
- Carpet adhesive or glue
- Measuring tape
- Saw (hand saw or circular saw)
- Screwdriver
- Level
Step-by-Step Instructions:
- Measure and Cut the Plywood: Decide on the ramp’s dimensions based on your dog’s size. A width of about 24 inches and a length of 36 to 48 inches is usually best. Use your measuring tape to mark the cuts and cut the plywood carefully.
- Build the Support Frame: Cut two pieces of 2×4 to match the length of the plywood. These will be your side supports. Then, cut additional pieces for cross supports and place them every 12 inches along the length for stability.
- Attach the Supports: Using wood screws and glue, attach the support frame to the underside of the plywood. Make sure everything is secure and level. If you’re feeling a bit like a mad scientist, don’t worry—the beauty of DIY is in the journey.
- Sand the Edges: Sand down any rough edges to guarantee your dog doesn’t get splinters. Trust me; you don’t want to be the reason Fido is wary of ramps for life.
- Attach the Carpet: Cut the non-slip carpet or carpet tiles to fit the ramp surface. Apply carpet adhesive to the plywood, then lay the carpet down smoothly. Make sure there are no wrinkles or bumps—this isn’t a doggy obstacle course, after all.
- Let It Dry: Allow the adhesive to dry completely before testing the ramp. This is the perfect time to reward yourself with a treat (hey, you deserve it).
- Test It Out: Once everything is dry, give the ramp a gentle shake to make sure it’s secure. Then, encourage your dog to try it out with some treats. It’s okay if they hesitate at first—dogs can be a little dramatic sometimes.
Optional Add-ons/Variations:
- Colorful Carpeting: Use different colored carpets or fun patterns to match your home decor or add a pop of personality. Who says ramps can’t be stylish?
- Personalized Touches: Consider adding your dog’s name or a fun quote about dogs on the side of the ramp using stencils or wood burning techniques.
Pro Tip:
Always verify the ramp is at a gentle incline to make it easier for your dog to navigate. A steep ramp can be intimidating and uncomfortable.
For added durability, consider sealing the wood with a waterproof finish to help it withstand wear and tear.
Building a non-slip carpeted ramp isn’t just about functionality; it’s about enhancing your pet’s quality of life and making your home a little more welcoming.
3. Foldable Aluminum Dog Ramp
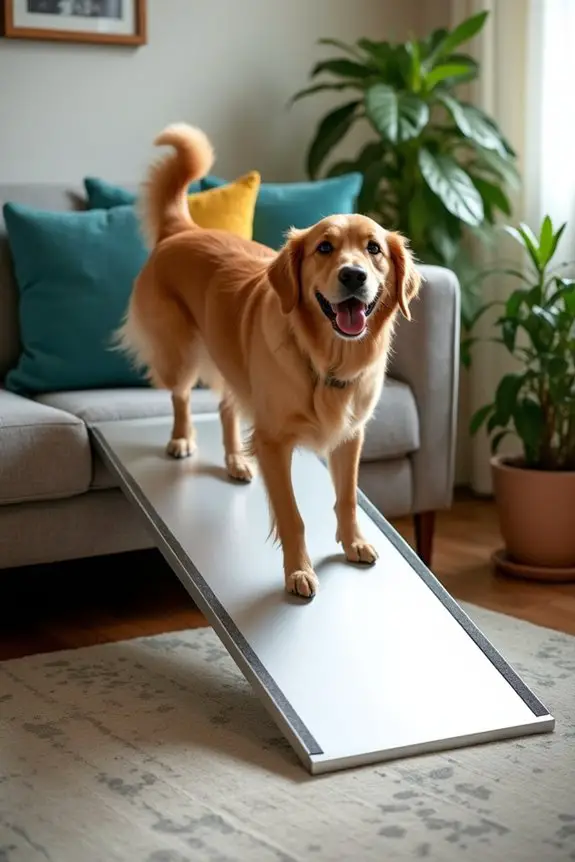
If you’re on the hunt for a practical and versatile solution to help your furry friend reach high places, a foldable aluminum dog ramp might just be the answer! This DIY project isn’t only lightweight and portable but also incredibly sturdy, making it a great investment for dog owners. Plus, you’ll save money by creating your own instead of buying a ready-made one. So, let’s get those paws up where they belong! Additionally, this ramp can complement high end dog supplies to enhance your pet’s style and safety while accessing elevated areas.
Materials Needed:
- Aluminum sheets (1/8-inch thick)
- Aluminum angle brackets
- Hinges (heavy-duty)
- Non-slip grip tape
- Measuring tape
- Metal saw or tin snips
- Drill with metal bits
- Screws for metal
- Sandpaper
- Safety goggles
- Work gloves
Step-by-Step Instructions:
- Measure and Cut the Aluminum Sheets: Start by measuring the height of the area your dog needs to reach (like the couch or car). You’ll want the ramp to be long enough to create a gentle incline—aim for about 36 to 48 inches in length. Cut the aluminum sheets to the desired size using a metal saw or tin snips.
- Create the Ramp Base: Take one of the aluminum sheets and fold it in half lengthwise to create a sturdy base. Use the hinges to connect the two halves, allowing it to fold for easy storage. Secure the hinges with metal screws.
- Add Support with Angle Brackets: Attach aluminum angle brackets to the underside of the ramp for added sturdiness. Position them every 12 inches along the length to prevent sagging. Use your drill to secure them in place.
- Smooth the Edges: Use sandpaper to smooth any sharp edges on the ramp. This step is essential to keep your pup safe from any accidental scrapes or cuts. Trust me, a happy dog is a safe dog.
- Apply Non-Slip Grip Tape: To prevent slips and give your dog extra traction, apply non-slip grip tape along the ramp’s surface. Make sure to cover the entire area so your pup can confidently trot up and down.
- Test the Ramp: Once everything is assembled, give the ramp a good shake to verify it’s stable. Then, set it up and encourage your dog to try it out. Use treats or their favorite toy to coax them up the ramp. It might take a moment for them to trust it, but they’ll get there!
Optional Add-ons/Variations:
- Personalized Colors: Consider painting the aluminum with a non-toxic metal paint to match your home decor or your dog’s personality. Bright colors or fun designs can make the ramp a fun feature in your living space.
- Decorative Elements: Add a few decals or stickers to the ramp to give it a unique touch. Think of it as a doggy art project that doubles as a functional piece!
Pro Tip:
When working with metal, always wear safety goggles and gloves. Metal edges can be sharp, and you want to avoid any accidental nicks.
And, if you’re worried about the ramp being too lightweight, consider adding a few rubber feet at the bottom to keep it sturdy on slippery surfaces. Your dog will feel more secure, and you’ll have peace of mind.
Creating your own foldable aluminum dog ramp can be a fun and rewarding project. Not only does it help your pup gain access to their favorite spots, but it also adds a touch of practicality to your home. Happy crafting!
4. Portable PVC Dog Ramp
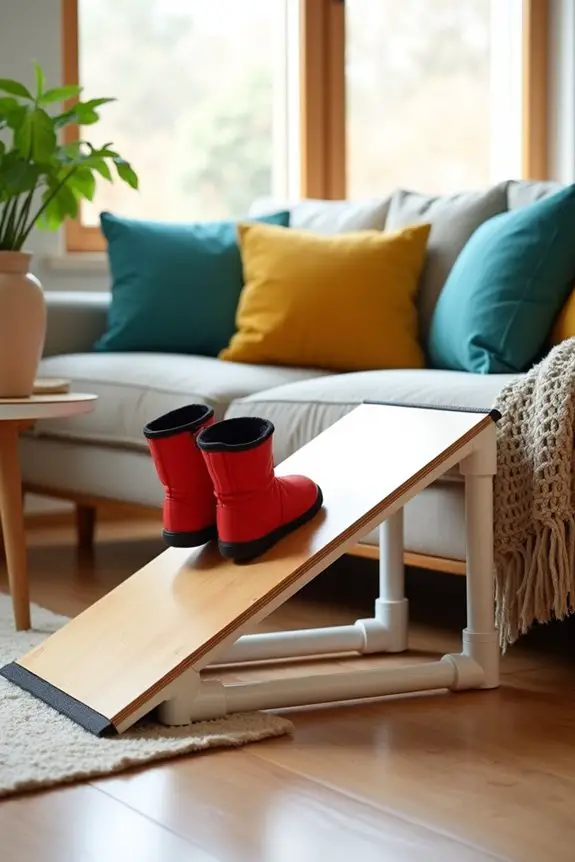
If you’re looking for a lightweight and budget-friendly solution to help your dog reach those high places, a portable PVC dog ramp could be just what you need. This DIY project isn’t only functional but also easy to build, making it a perfect weekend project for dog owners. Your furry companion will appreciate the extra comfort, and you’ll love saving money while enhancing your home! Additionally, consider investing in premium dog boots for added protection during outdoor adventures.
Materials Needed:
- PVC pipes (1-inch diameter)
- PVC pipe connectors (elbows and T-joints)
- PVC cement
- Non-slip grip tape
- Measuring tape
- Hacksaw or PVC pipe cutter
- Sandpaper
- Safety goggles
- Work gloves
Step-by-Step Instructions:
- Measure and Cut Your PVC Pipes: Decide how long and wide you want your ramp to be. A good size for most dogs is about 36 inches long and 16 inches wide. Use a measuring tape to mark your cuts, and then cut the PVC pipes to your desired lengths with a hacksaw or PVC pipe cutter.
- Assemble the Frame: Start by creating the rectangular frame for your ramp. Use the T-joints to connect the lengths of PVC pipes for the sides and the ends. Make sure everything is snug, and then apply PVC cement to secure the joints. This will provide a solid base for your ramp.
- Add Support Beams: Cut additional pieces of PVC pipe to create cross beams along the length of the ramp. Space them about 12 inches apart to guarantee your ramp is sturdy. Attach these using the elbow connectors, gluing them in place.
- Create the Ramp Surface: For the ramp surface, use a long piece of plywood or a sturdy board that fits the frame you built. Secure the board to the frame using screws. This will be where your dog walks up and down.
- Smooth the Edges: Use sandpaper to smooth any rough edges on the ramp surface and PVC pipes. You want to make sure your dog won’t get scratched while using it.
- Add Non-Slip Grip Tape: To give your dog better traction, apply non-slip grip tape across the ramp surface. Make sure to cover the entire area so your furry friend can confidently trot up and down without slipping.
- Test the Ramp: Once you’ve finished assembling everything, give it a good shake to check stability. Set it up in your desired location and encourage your dog to try it out. Maybe tempt them with a treat or their favorite toy to help them feel secure on their new ramp.
Optional Add-ons/Variations:
- Colorful Designs: Consider painting the PVC pipes with non-toxic spray paint for a fun pop of color. You could even create patterns or stripes to match your dog’s personality or your home decor.
- Decorative Fabric: If you’re feeling crafty, add a decorative fabric cover to the ramp. This can make it more visually appealing and even give your pup a cozy feel while using it.
Pro Tip:
Always verify the ramp is stable and secure before letting your dog use it. Adding rubber feet or grips to the bottom can help prevent slipping on hard surfaces.
And remember, using lightweight materials like PVC means that you can easily move the ramp around your home or take it with you on trips. A little effort goes a long way in making your dog’s life easier and more comfortable. Happy building!
5. Dog Ramp With Storage Compartment
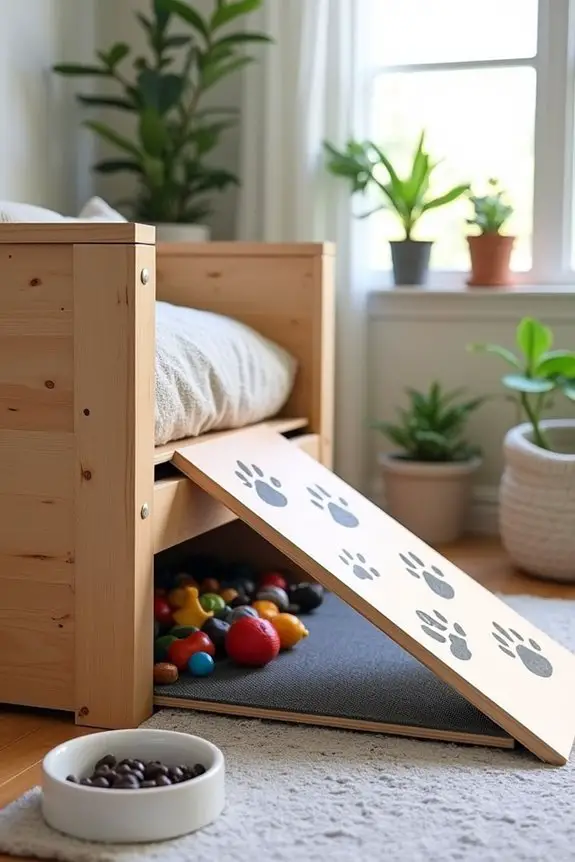
If you’re looking for a way to help your furry friend reach higher spots while also keeping your home organized, a dog ramp with a storage compartment is a fantastic DIY project. Not only does it provide your pup with a safe way to access beds or vehicles, but it also doubles as a stylish storage solution for toys, leashes, and treats. This project won’t only save you money but also add an extra layer of comfort and functionality to your home. Additionally, you can enhance mealtime experiences with a premium puppy feeding station that complements your pup’s needs.
Materials Needed:
- 1 sheet of plywood (3/4 inch thick, for the ramp surface and storage compartment)
- 2 wooden boards (2×4 inches, for the frame)
- Wood screws
- Wood glue
- Hinges (for the storage compartment lid)
- Non-slip grip tape or carpet (for the ramp surface)
- Measuring tape
- Circular saw or jigsaw
- Drill
- Sandpaper
- Safety goggles
- Work gloves
Step-by-Step Instructions:
- Measure and Cut the Wood: Start by measuring the dimensions for your ramp and storage compartment. A good size for the ramp might be around 36 inches long and 16 inches wide. Cut your plywood and wooden boards accordingly. Remember, measure twice, cut once. It’s a classic rule for a reason.
- Build the Frame: Using the 2×4 wooden boards, create a rectangular frame that will support your ramp. Attach the boards together with wood screws and wood glue for extra stability. This frame will hold the ramp in place and form the base for your storage compartment.
- Create the Storage Compartment: Cut a section of plywood to serve as the lid for your storage compartment. You can decide how deep you want this compartment to be—just make sure it’s big enough to hold your dog’s favorite toys and treats. Attach the lid to the frame using hinges, so it opens easily.
- Attach the Ramp Surface: Next, take your remaining plywood and attach it to the frame to create the ramp surface. Use wood screws to secure it well. This is where your dog will walk, so make sure it’s firmly in place.
- Smooth Everything Out: Grab your sandpaper and smooth out any rough edges on both the ramp and the storage compartment. You want it to be safe and comfortable for your pup, right?
- Add Non-Slip Grip Tape: To guarantee your dog has a secure footing while using the ramp, apply non-slip grip tape or carpet to the ramp surface. Cover the entire area so your furry friend can confidently trot up and down without any slips.
- Test It Out: Once everything is put together, give the ramp a gentle shake to make sure it’s stable. Set it up in a location where your dog can easily access it, and encourage them to try it out. Maybe dangle a treat above the ramp—dogs can’t resist a good snack.
Optional Add-ons/Variations:
- Paint or Stain: Give your ramp a personal touch by painting it in your dog’s favorite color or staining the wood for a more rustic look. You could even add fun patterns or designs with stencils to make it uniquely yours.
- Cushioning: Consider adding a cushioned layer on top of the ramp surface using foam and fabric, which could make it even more comfortable for your dog.
Pro Tip:
Always verify the ramp is at a gentle incline for easy access. A steep ramp can be tough on your dog’s joints, especially if they’re older or have mobility issues.
Plus, don’t hesitate to decorate the storage compartment with some cute stickers or dog-themed art. You know, because why not add a little flair to your pet’s corner?
Now, roll up your sleeves, gather your materials, and get ready to create a fantastic dog ramp with storage that your furry friend will love. Happy building!
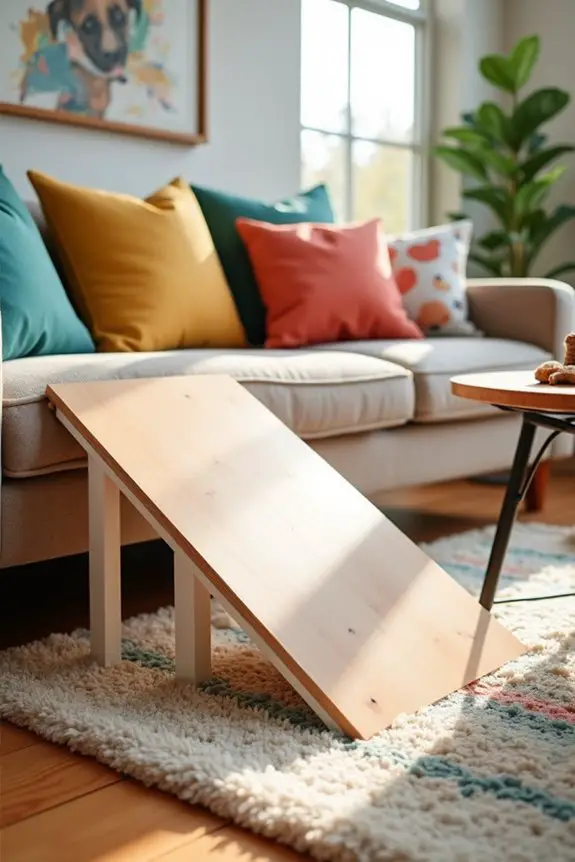
6. Curved Wooden Dog Ramp
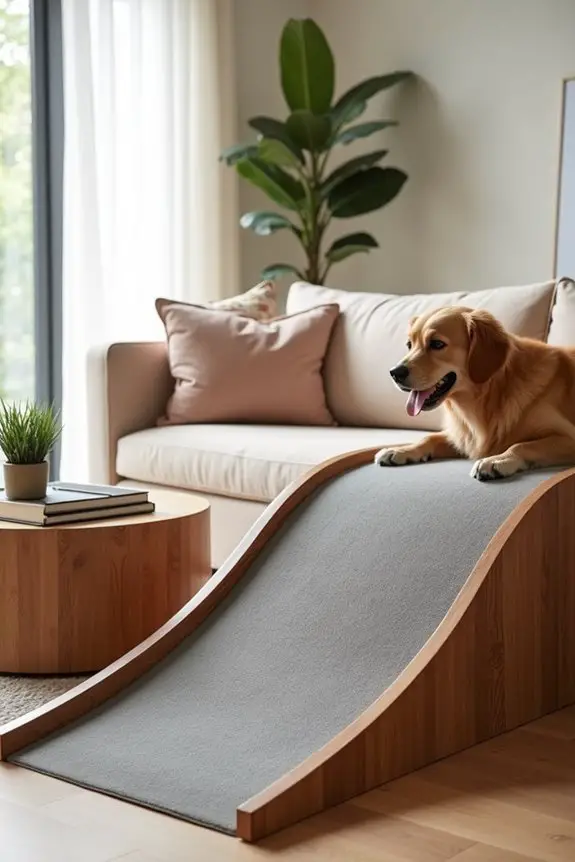
If your pup loves to leap onto the couch or snuggle on the bed but struggles to get there, a curved wooden dog ramp is the perfect DIY solution. Not only does it provide easy access for your furry friend, but the sleek curve adds a touch of elegance to your home décor.
Plus, with this project, you can save some money while making your space more dog-friendly. Who doesn’t love a good two-for-one deal?
Materials Needed:
- 1 sheet of plywood (3/4 inch thick)
- 1 wooden board (1×4 inches, for the ramp’s frame)
- Wood screws
- Wood glue
- Sandpaper
- Non-slip grip tape or carpet (for traction)
- Measuring tape
- Jigsaw
- Drill
- Safety goggles
- Work gloves
Step-by-Step Instructions:
- Measure and Sketch: Start by measuring the height of the couch or bed your dog needs to reach. Sketch a design for your ramp, keeping the curve in mind. A gentle slope is best for your pup’s comfort.
- Cut the Wood: Using a jigsaw, cut your plywood into a long strip that’s about 30 inches wide and matches your length requirements. For the curve, you can use a compass or round object to trace a gentle arc on one end before cutting.
- Create the Frame: Take the wooden board and cut it into two lengths that will form the sides of the ramp. Attach these to the bottom of your plywood ramp using wood screws and wood glue for added stability. The ends should be flush with the ramp’s edges.
- Smooth It Out: Grab that sandpaper and get to work. Smooth down all edges and surfaces of the ramp. Trust me, you don’t want your dog getting splinters.
- Add Non-Slip Surface: To keep your furry friend safe while they scamper up and down, apply non-slip grip tape or carpet to the ramp’s surface. Make sure to cover it well, giving your dog plenty of traction.
- Test the Ramp: Once everything is assembled, place the ramp where it’s needed and encourage your pup to use it. You might need to entice them with treats at first.
- Enjoy the View: Sit back and watch your dog use their new ramp. It’s satisfying to see them navigate it with ease, and you’ll appreciate how it enhances your space.
Optional Add-ons/Variations:
- Paint or Stain: Give your ramp a personal touch by painting it in a color that matches your home décor or staining it for a more rustic look.
- Add a Fun Design: Consider adding paw prints or other dog-themed designs with stencils. It’s a great way to show off your love for your four-legged friend.
Pro Tip:
Before you start, double-check your measurements. A ramp that’s too steep can be risky for your dog. Ideally, aim for an incline that’s gradual, so your pup can use it safely and comfortably—because we all want our dogs to feel like the royalty they are, right?
7. Stylish Bamboo Dog Ramp
If your pooch is a little on the older side or just needs a helping paw to reach their favorite spots, a stylish bamboo dog ramp could be the perfect DIY project for you. Not only does this ramp provide a safe way for your furry friend to access higher surfaces, but it also adds a chic, modern look to your home.
Plus, bamboo is a sustainable choice that won’t break the bank. Who knew aiding your dog could also help the planet?
Materials Needed:
- 1 sheet of bamboo plywood (1/2 inch thick)
- 2 wooden boards (1×3 inches, for the ramp’s frame)
- Wood screws
- Wood glue
- Sandpaper
- Non-slip grip tape or rubber matting (for traction)
- Measuring tape
- Jigsaw
- Drill
- Safety goggles
- Work gloves
Step-by-Step Instructions:
- Measure and Plan: Begin by measuring the height of the furniture your dog needs to reach. Sketch a simple design for your ramp, keeping the slope gentle—your pup will appreciate it.
- Cut the Bamboo: Use a jigsaw to cut the bamboo plywood into a long strip, about 24 inches wide. For the curve, you can trace a gentle arc on one end using a round object and cut carefully along the line.
- Build the Frame: Cut the wooden boards to create two side supports for the ramp. Attach these to the bottom edges of the bamboo plywood using wood screws and wood glue. Verify they’re even and secure—this is where your ramp gets its strength.
- Smooth the Edges: Time to get your sandpaper out! Smooth down all the edges and surfaces of the ramp so your dog doesn’t snag a paw or get any splinters. A little extra effort here goes a long way.
- Add Traction: For safety, apply non-slip grip tape or a rubber matting to the ramp’s surface. Dogs can be a bit clumsy, and this will help them feel secure while they navigate their new ramp.
- Test It Out: Place the ramp where your dog will use it, and coax them up with treats. Expect a bit of hesitation at first—new things can be a little scary. But once they get the hang of it, you’ll both be thrilled.
- Admire Your Work: After all that hard work, kick back and enjoy watching your dog use their new ramp. It’s heartwarming to see them move around comfortably, and it’ll definitely be a conversation starter when guests come over.
Optional Add-ons/Variations:
- Finish It Up: You could stain your bamboo ramp to enhance its natural beauty or even paint it in a fun color that matches your home. Why not go bold with a bright pop of color?
- Personalize It: Add your dog’s name or cute paw prints using stencils and paint. It’s a fun way to make it uniquely theirs.
Pro Tip:
Before starting, verify the ramp’s slope isn’t too steep. A gentle incline is better for your dog’s joints, especially for older pups. If you’re feeling adventurous, consider reinforcing the ramp with a few extra supports underneath for added durability. You want this ramp to last through all of your dog’s adventures.
Extra Tips & Ideas
Creating a dog ramp is just the beginning of your DIY adventure. Once you’ve built your masterpiece, consider adding a non-slip surface. Trust me, watching your pup slide down isn’t as cute as it sounds.
You might also think about personalizing it with paint or decals. Go wild with colors—your dog won’t judge!
If you’re feeling crafty, try incorporating storage for toys or treats underneath. It’s like a secret stash for your furry friend.
And don’t forget to test it out. I once built a ramp that was more wobbly than my first attempt at rollerblading. So, check stability frequently. A happy pup means a happy you, right?
Enjoy the process and laugh at your mistakes; they’re part of the fun!
Frequently Asked Questions
What Materials Are Best for Building a Dog Ramp?
For building a dog ramp, use sturdy plywood or hardwood for the surface, non-slip vinyl for traction, and strong brackets for support. Don’t forget to sand edges and finish with a pet-safe sealant for durability.
How Steep Should a Dog Ramp Be for Safety?
A dog ramp should have a slope of 18 to 25 degrees for safety. This angle guarantees your pup can easily navigate it without strain, reducing the risk of injury and promoting their well-being.
Can I Use Recycled Materials for a DIY Dog Ramp?
Absolutely, you can use recycled materials for a DIY dog ramp! Just like turning an old piece of furniture into a stunning new addition, you’ll create something functional and eco-friendly that your pup will love.
How Do I Measure My Dog’s Height for Ramp Design?
To measure your dog’s height for ramp design, have them stand against a wall. Mark the highest point of their shoulder, then measure from the floor to that mark. This gives you the height needed for the ramp.
Are There Specific Weight Limits for Dog Ramps?
Yes, most dog ramps have specific weight limits, typically ranging from 150 to 300 pounds. It’s essential to check the manufacturer’s specifications to guarantee your ramp safely supports your dog’s weight during use.
Conclusion
So, there you have it—your pup’s new ramp is just a DIY project away. Who knew making a dog ramp could be so fulfilling? You might even find yourself feeling like a master carpenter, only to realize you’re just trying to keep your dog from using your couch as a launch pad. But hey, any excuse to showcase your creativity while keeping your furry friend safe is a win, right? Now, grab those tools and get building.

Hi, I’m Ali Tarek, the founder of Animalsman. I’ve always been passionate about pets, especially dogs and cats, and I created this website to share practical tips, easy recipes, and helpful care advice for fellow pet lovers. My goal is to make pet care simple, enjoyable, and accessible for everyone. When I’m not writing or curating content, you’ll usually find me spending time with my furry friends or learning new ways to keep them happy and healthy.

