Have you ever watched your pup struggle at mealtime, bending awkwardly to reach their food? It’s kind of sad, right? Luckily, elevated dog bowls are here to save the day with style and function. Envision this: classy wooden stands, fancy ceramic bowls, or even adjustable heights that cater to your furry friend. Intrigued? Stick around, because we’re just getting started on how to make mealtime a little more posh for your pooch.
Stylish Steel and Wood Options
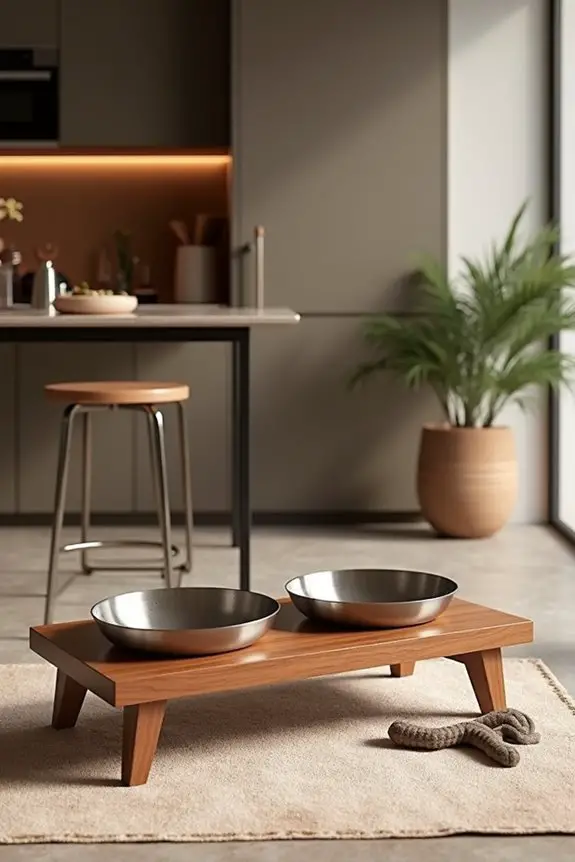
When you think about elevating your dog’s dining experience, why not consider stylish steel and wood options? These materials not only look great but are super durable too.
You could try your hand at elevated dog bowls DIY projects, turning your home into a trendy bistro for your pup. Imagine this: a sleek steel bowl set atop a beautiful wooden stand, the perfect height for your furry friend. It’s like a fancy restaurant vibe without breaking the bank.
Plus, when you make it yourself, it’s a fun conversation starter. Just be sure to sand those edges well—nobody wants splinters in their dog’s dining experience.
With a little creativity, you can create a dining setup that’s both functional and stylish.
Our Collection
You’re going to love exploring our collection of elevated dog bowls.
Imagine this: modern ceramic bowls that scream style, adjustable height stands to guarantee your pup eats comfortably, and even customizable sets that let you show off your furry friend’s personality.
Plus, let’s not forget the pet-friendly bamboo options and those luxury glass bowls that’ll make your dog feel like royalty—because why shouldn’t they, right?
1. Modern Ceramic Elevated Bowls
If you’re looking for a fun and practical project that will elevate your pup’s dining experience, you’ve come to the right place! Creating your own elevated dog bowl stand not only saves money but also adds a touch of style to your home. Plus, it helps your four-legged friend eat comfortably without straining their neck. Adding a stylish luxury dog collar can enhance your pet’s appearance even further. Not to mention, luxury dog bunk beds can also offer your furry friend a comfortable resting spot after their meals. Additionally, incorporating dog luxury beds furniture can elevate both comfort and aesthetics in your pet’s space. Sounds great, right? Let’s get started! A dog house building kit can also complement your pet’s dining area by providing a cozy shelter.
Materials Needed:
- Wood (1×4 inch boards work well)
- Wood glue or screws
- Saw (handsaw or circular saw)
- Sandpaper (medium and fine grit)
- Finish (paint or wood stain, optional)
- Two stainless steel bowls (or whichever bowls fit your dog’s size)
- Measuring tape
- Paintbrush (if applying a finish)
- Clamps (optional but helpful)
- Safety goggles
Step-by-Step Instructions:
- Measure the Bowls: Start by measuring the diameter of the dog bowls you’ve selected. This will help you determine how large the holes will need to be in your stand.
- Cut the Wood: Cut two long pieces for the base and two shorter pieces for the side supports. A common height for elevated dog stands is about 10 to 15 inches, but adjust based on your dog’s size. Remember, measure twice so you cut once.
- Create Bowl Holes (Optional): If you want to make a snug fit for the bowls, trace the outline of your bowls on the top board, then cut out the circle using a jigsaw. This will keep the bowls from sliding around while your pup eats.
- Assemble the Frame: Now, using your wood glue or screws, attach the side supports to the base pieces—forming a rectangular frame. Make sure it’s sturdy. It should feel like it could hold a hefty stack of dog food!
- Sand It Down: Nobody wants splinters while enjoying dinner, right? Grab your sandpaper and smooth out all edges and surfaces to avoid any snagging paws.
- Finish It Up (Optional): If you want your dog’s dining buddy to have a little personality, apply a coat of paint or wood stain. Wait for it to dry completely before placing the bowls.
- Insert Bowls: Finally, place your bowls in the stand (give them a jiggle to confirm they fit correctly). Now you’re ready to watch your pup enjoy meals at a whole new level of comfort and style.
Optional Add-ons/Variations:
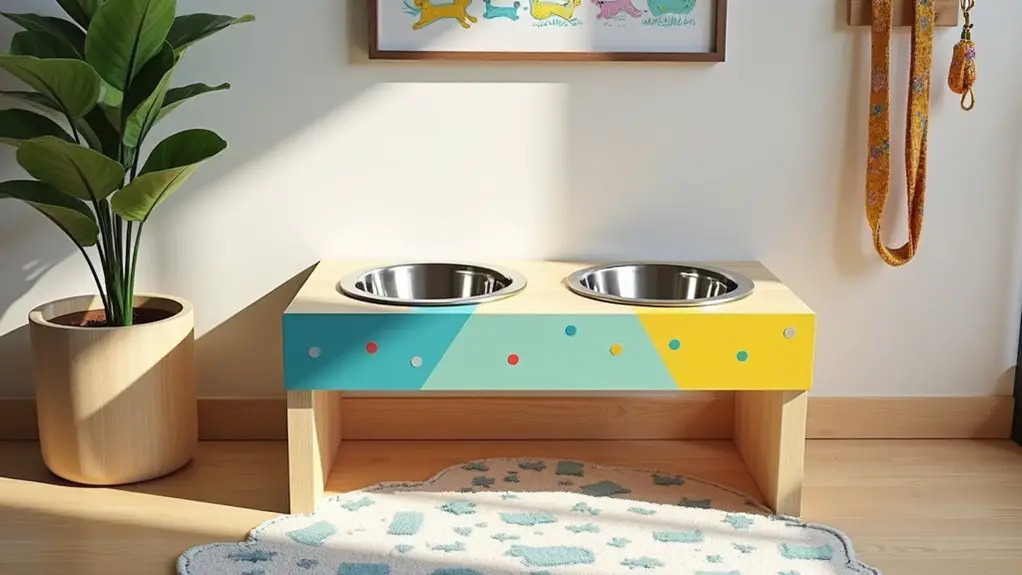
- Colorful Paint: Feel free to get creative with paint colors that match your home décor. Maybe a bright turquoise or a sophisticated walnut stain? The dog bowl stand can be as unique as your pup.
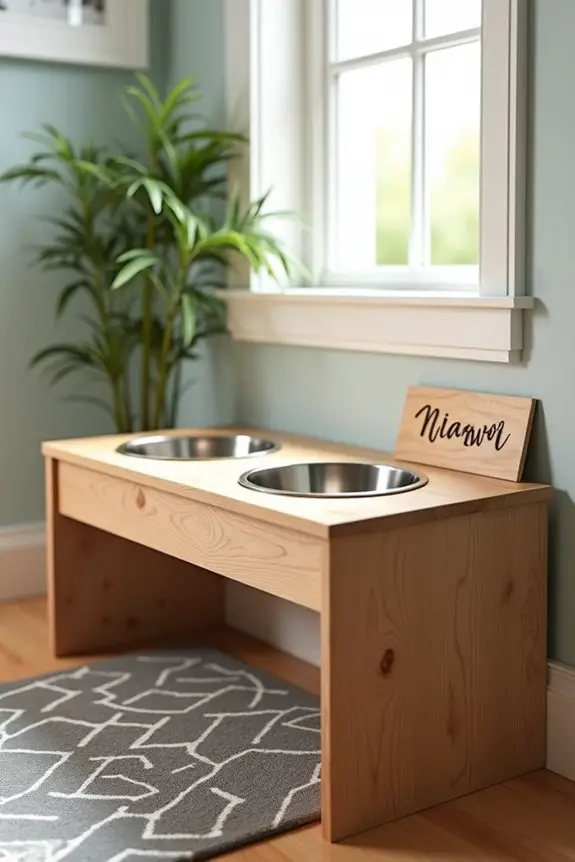
- Personalized Name Plaque: Adding a small engraved plaque with your dog’s name makes it even more special. It’s like giving your furry friend their own fancy restaurant setting!
Pro Tip:
Before placing any finished piece, verify it’s stable and won’t tip over when your hungry pup gets all excited at mealtime. You don’t want a bowl of kibble flying across the room during dinner—you never know when you’ll need that last piece.
And there you have it! You’ve crafted an elevated dog bowl stand that’s affordable, practical, and stylish. Who knew enhancing your dog’s dining experience could be this enjoyable? Happy building!
2. Adjustable Height Wooden Stand
Isn’t it adorable when your pup can eat comfortably without needing to crouch all the way to the floor? An adjustable height wooden dog bowl stand is a game changer for both you and your furry friend. Not only does it enhance their dining experience, but it also saves you some bucks by letting you modify the height as your dog grows. Moreover, choosing the right premium dog food can significantly improve your Goldendoodle’s overall health and vitality. Plus, who wouldn’t want a stylish addition to their home that compliments their decor? Let’s explore this fun DIY project that combines functionality with flair.
Materials Needed:
- Wood (1×4 inch boards or similar)
- Wood glue or screws
- Saw (a miter saw works best, but a handsaw will do)
- Sandpaper (medium and fine grit)
- Two stainless steel bowls (choose ones that fit your dog’s size)
- Adjustable leg brackets (for height customization)
- Measuring tape
- Wood finish (paint, stain, or sealant, optional)
- Paintbrush (if applying a finish)
- Clamps (to hold things sturdy while drying, if you have them)
- Safety goggles
Step-by-Step Instructions:
- Measure Your Bowls: Begin by measuring the diameter of the bowls you’re using. This will guide you in creating a snug fit later.
- Cut the Wood: Cut two long pieces for the base and four shorter pieces for the legs. Keep in mind that the adjustable height should ideally range from 10 to 15 inches, but feel free to customize depending on your pup’s size.
- Create Bowl Holes (Optional): If you want a snug fit for your bowls, trace their outlines onto the top board. Using a jigsaw, carefully cut out circles to accommodate the bowls.
- Assemble the Frame: Attach the four leg pieces to each corner of the base using wood glue or screws. Use clamps if you have them to keep everything secure. The frame should feel very sturdy—like it could hold a whole buffet of kibble.
- Install Adjustable Brackets: Attach the leg brackets to the underside of the base. This will enable you to change the height of the stand as needed, keeping your pup comfortable through all stages of their growth.
- Sand It Down: Grab that sandpaper and give everything a smooth finish. Nobody wants splinters during dinner, right?
- Finish It Up (Optional): If you want to jazz up your dog’s dining setup, go ahead and paint or stain the wood. Make certain it dries completely before the next step.
- Insert Bowls: Finally, place the bowls into the stand and give them a slight shake. Make sure they fit snugly, and voilà! You’re all set to watch your pup dine in style.
Optional Add-ons/Variations:
- Stickers or Decals: After you finish painting or staining, add some fun stickers or decals to the stand for a personalized touch. Maybe a fun bone shape or your dog’s name?
- Different Wood Types: Consider using different types of wood, like pine or oak, for unique textures. The variety can really boost the aesthetics of your home.
Pro Tip:
When working with wood, always remember to wear safety goggles to protect your eyes. It’s easy to get a splinter or have wood fly when you’re sawing, and we don’t want your DIY adventure to end in a trip to the vet—or worse, the emergency room. Trust me; you’ll thank yourself later.
Now grab your tools and get ready to give your pup a dining spot that’s trendy, comfy, and adjustable to their ever-changing needs. Happy crafting!
3. Customized Elevated Bowl Sets

If you’re looking for a way to elevate your dog’s dining experience—quite literally—this DIY elevated bowl set is just what you need. Not only does it keep your pup comfortable while they chow down, but it also adds a touch of personal style to your home.
Plus, creating a customized bowl set can save you money in the long run, as you won’t need to keep buying new stands as your dog grows. Let’s explore this fun project that’s both practical and creative.
Materials Needed:
- Wood (your choice, like pine or oak)
- Wood screws
- Drill with a screwdriver bit
- Saw (a circular saw or handsaw works too)
- Measuring tape
- Sandpaper (medium and fine grit)
- Two stainless steel bowls (sized for your dog)
- Wood stain or paint (for personalization)
- Paintbrush
- Clamps (helpful but optional)
- Safety goggles
Step-by-Step Instructions:
- Choose Your Design: Before you cut anything, decide how high you want the bowls to be. A good rule of thumb is to have them sit around chest height when your pup is standing.
- Measure and Cut the Wood: Cut two larger pieces for the top shelf where the bowls will rest, and four legs to reach your desired height. Make sure they’re sturdy and equal in size.
- Drill Bowl Holders (Optional): For a snug fit, you can drill holes into the top shelf where the bowls will go. Measure the bowl diameter and use a hole saw to make the holes if you prefer a snug fit.
- Assemble the Frame: Attach the legs to the top using wood screws. Confirm things are flush and steady. Take your time here; wobbly access to food can lead to a very confused dog.
- Sand Everything Down: This step is super essential. Use sandpaper to smooth out any rough edges. Trust us; no pup wants to have a rough time at dinner.
- Add Your Personal Touch: Paint or stain the wood as you like it. You could even throw in some colorful designs! Let it dry completely; you want those colors to pop without sticking to the bowls.
- Insert Bowls and Admire: Finally, set the stainless steel bowls into the prepared holes or their designated spots on the top shelf. Take a moment to admire your handiwork—your dog is going to love this.
Optional Add-ons/Variations:
- Consider using patterned contact paper to cover the stand for a fun pop of color and a unique touch.
- Try different wood finishes for a rustic vibe or a sleek modern look.
Pro Tip:
When choosing your wood finish, make sure it’s non-toxic and pet-friendly to keep your furry friend safe while they eat.
Also, if you’re unsure about the height, start a bit lower; you can always add a small riser later. Trust me, it’s easier to raise a bowl than to convince a pup they don’t need to bend down for dinner anymore.
With this customized elevated bowl set, your pup won’t only dine in comfort but also make your home feel even more like home. Enjoy the process, and don’t forget to snap a pic when your furry friend takes that first bite. You’ll be so proud of your handy work!
4. Pet-Friendly Raised Bamboo Bowls
Elevating your dog’s dining experience is a simple DIY project that brings both practicality and charm into your home. Not only does it make mealtime more comfortable for your furry friend, but creating a customized bowl stand can be a fun and cost-effective solution as your pup grows.
Say goodbye to back-breaking bending and hello to a stylish feeding station; let’s get started!
Materials Needed:
- Wood (pine or oak are great choices)
- Wood screws
- Drill with screwdriver bit
- Saw (circular or handsaw works)
- Measuring tape
- Sandpaper (medium and fine grit)
- Two stainless steel bowls (sized for your dog)
- Wood stain or paint for personalization
- Paintbrush
- Clamps (helpful but optional)
- Safety goggles
Step-by-Step Instructions:
1. Choose Your Design: Measure your dog from paw to shoulder. Aim for the top of the bowls to be around that height, so they can eat comfortably without straining their neck.
2. Measure and Cut the Wood: Cut two pieces for the top shelf where the bowls will sit, and four equal-length pieces for the legs. The sturdier, the better—these will hold your pup’s hearty meals.
3. Drill Bowl Holders (Optional): If you want those bowls to sit just right, you can drill holes into the top shelf. Measure the bowl diameter and use a hole saw to make the holes for a cozy fit.
4. Assemble the Frame: Attach the legs to the top shelf using wood screws. Make sure everything is steady; a wobbly bowl can lead to a confused and frustrated dog.
We don’t want that chaos at dinner time.
5. Sand Everything Down: Seriously, don’t skip this step. Use sandpaper to smooth out rough edges. No pup wants splinters when they’re just trying to enjoy a meal.
6. Add Your Personal Touch: Time to get creative. Paint or stain the wood in your favorite colors or patterns. Even if you’re not an artist, splashing on some color can make this bowl stand uniquely yours.
Just let it dry completely.
7. Insert Bowls and Celebrate: Finally, place the stainless steel bowls in their spots. Step back and admire your handiwork. Your dog is going to love this new setup, and you can take pride in knowing you made it!
Optional Add-ons/Variations:
Feeling creative? Use patterned contact paper to cover the stand for a whimsical look or try different wood finishes to match your home’s décor.
Maybe even throw in a personal design or your dog’s name for that extra special touch.
Pro Tip:
Get a cheap mat to place under the bowl stand. It not only keeps the area clean but also prevents any sliding around while your pup is chowing down.
Plus, it provides a cozy spot for their paws.
There you have it—a straightforward and fun DIY elevated bowl project that adds value, style, and comfort for your dog. You could even say it’s the canine equivalent of a dining upgrade.
Happy building!
5. Luxury Glass Elevated Bowls
Elevating your dog’s dining experience doesn’t have to mean sacrificing style. If you’re looking to bring a touch of elegance to mealtime, our Luxury Glass Elevated Bowls provide that perfect solution. Not only do these bowls enhance your dog’s comfort by promoting better posture during feeding, but they also add a chic flair to your home décor. Plus, they’re a breeze to clean!
Let’s get into the details of this delightful DIY project that will have your pup dining in style.
Materials Needed:
- Glass Bowls (2 sturdy options)
- Wood (for the base; walnut or maple adds a nice touch)
- Wood screws
- Drill with a screwdriver bit
- Saw (circular or handsaw is fine)
- Measuring tape
- Sandpaper (medium and fine grit)
- Wood stain or food-safe finish (for the base)
- Paintbrush
- Non-slip mat (to keep everything in place)
- Safety goggles
Step-by-Step Instructions:
- Measure Your Dog’s Height: To create an elevated dining station, measure from the ground to your dog’s shoulder. Aim for a height that keeps those glass bowls at a comfortable level—no more awkward bending at mealtimes.
- Cut the Wood for the Base: Cut one large rectangle for the base and four smaller pieces for the legs. If you want your project to have a bit more flair, consider cutting the legs at an angle for a stylish look.
- Drill Bowl Holders: If you want those glass bowls to sit snugly, measure the diameter of the bowl, and drill holes into the top of the base. A good fit means no pesky slipping and sliding during dinner.
- Assemble the Base: Attach the legs to the large rectangle using wood screws. Make sure everything is stable and secure; a shaky setup can lead to spirit-crushing doggy messes when your pup tries to dig in.
- Sand It Down: Grab that sandpaper and smooth out any rough edges or splinters. Just think—your dog deserves an excellent dining experience; splinters aren’t part of that.
- Finishing Touches: Apply your wood stain or food-safe finish to the base. It’s not just about looks; sealing the wood helps it stand up to the wear and tear of daily use. Plus, this can also protect against any adorable, but potentially messy, slobber.
- Set Up Your Bowls and Non-Slip Mat: Place a non-slip mat underneath for extra stability and set the glass bowls right in their holes. Voilà, you’ve created an elevated dining experience that’s easy on the eyes and the neck!
Optional Add-ons/Variations:
Feeling adventurous? You can decorate the wooden base with patterned contact paper or even stencil your dog’s name for a personalized touch. Try mixing and matching colors to suit your home’s style, or even add some decorative feet for an upscale look.
Pro Tip:
When working with glass bowls, be extra careful during setup—they’re beautiful but can be a bit fragile. Using a rubber mat underneath will help keep everything in place, preventing any accidents.
And here’s a money-saving tip: check your local thrift store for unique glass bowls—sometimes, you can scoop up a treasure for half the price. A little creativity goes a long way!
Your furry friend deserves the best, and with this luxury glass elevated bowl setup, every meal becomes a celebration. Happy crafting!
6. Collapsible Travel Dog Bowl
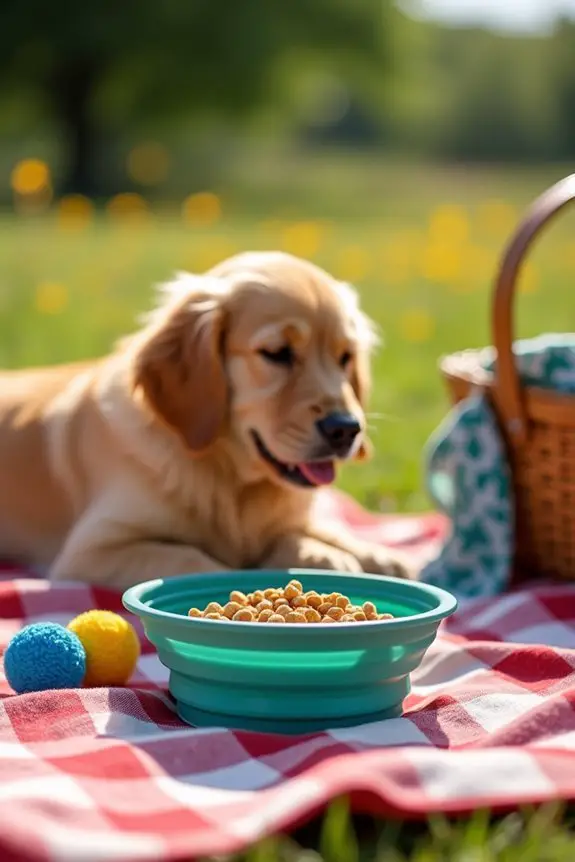
If you’re a dog owner who loves to travel, then a collapsible travel dog bowl will quickly become your best friend. This DIY project makes mealtime easy wherever you go, helping you save money by avoiding overpriced travel pet supplies.
Plus, it guarantees your pup is eating comfortably—whether you’re on a road trip, at the beach, or enjoying a picnic in the park. Who says dogs can’t dine in style on the move?
Materials Needed:
- Silicone baking mat (food-safe, flexible, and easy to clean)
- Scissors
- Measuring tape
- Dog-safe fabric (optional, for added style)
- Velcro strips or snaps (for closure)
- Marker or fabric chalk (if using fabric)
Step-by-Step Instructions:
1. Measure for Size: Decide how big you want your travel bowl to be. A good rule of thumb is about 6-8 inches in diameter for small to medium dogs. A napkin-sized bowl should do for tiny pups; for larger dogs, you might want to go bigger!
2. Cut the Silicone: Use scissors to snip your silicone mat down to your desired size. Remember, a round or square shape works well—neat edges can make for a fancy bowl.
3. Create the Fold: You’ll want to fold one inch around the edges. It’s like giving your bowl a little lip so food and water don’t go flying everywhere.
Don’t worry if it’s a bit messy; you’re crafting, not auditioning for Project Runway.
4. Secure the Edges: Attach Velcro strips or snaps along the folded edges, securing them firmly. This will let you easily collapse the bowl when it’s not in use, saving space in your bag.
No one enjoys a dog bowl taking up precious snack real estate on a road trip.
5. Optional Fabric Touch: If you want to be a bit more festive, cut a piece of dog-safe fabric and glue it on top of your silicone bowl for extra flair.
Just make sure it’s securely attached—no one wants to find dog hair on their fabric fresh out of the washing machine.
6. Test It Out: Fill your new collapsible bowl with water or kibble, and see how it holds up. If things start sliding around, you might want to revisit your fold and fastening choice.
Make sure it’s truly travel-ready.
7. Pack It Up: When you’re ready to leave, just unhook the Velcro or snaps, flatten it out, and tuck it away in your bag. Now, you’re good to go!
Optional Add-ons/Variations:
Feel free to customize your bowl with fun designs. Want polka dots or stripes? Use fabric scraps in your dog’s favorite colors.
If you’re feeling creative, you could even paint the silicone with pet-safe paint for a one-of-a-kind bowl that showcases your pooch’s personality.
Pro Tip:
Always check if your materials are dog-safe—there’s nothing worse than finding out your clever DIY could be harmful.
And if you want to save on costs, check your kitchen for any silicone mats or baking sheets you might already have. It’s like getting a bonus dog bowl without the extra spend.
With this fun and easy project, you’ll be ready for any adventure.
After all, a happy pup makes for a happy journey, and who doesn’t want that?
7. Unique Colorful Elevated Designs
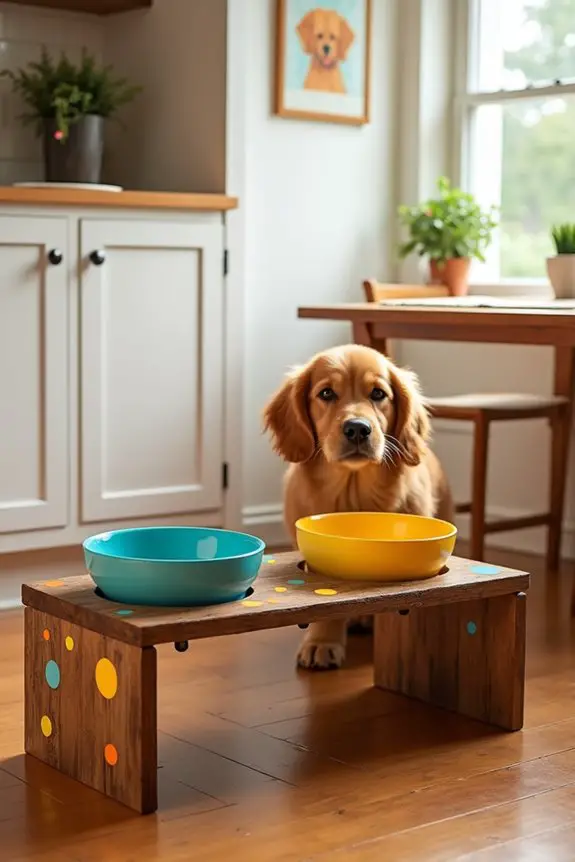
If you’ve ever watched your beloved pup eat on the floor and thought, “This could use a little pizzazz,” then creating unique colorful elevated dog bowls is the perfect DIY project for you. Not only does it improve your dog’s comfort by providing a more ergonomically friendly feeding height, but it also adds a splash of color to your home decor.
Plus, let’s be honest—your dog deserves a dining setup that reflects their fabulous personality. Why not treat them?
Materials Needed:
- Wooden boards (sturdy enough to support the bowls, you can upcycle old furniture)
- Dog-safe paint or wood stain (in fun colors)
- Dog bowls (slip-resistant and appropriate size)
- Saw (if you’re cutting the wood yourself)
- Sandpaper (for smoothing rough edges)
- Wood glue (or screws, for extra stability)
- Paintbrushes
- Measuring tape
- Pencil
Step-by-Step Instructions:
1. Measure and Cut the Wood: Decide the height of your elevated bowl stand—usually about 8-12 inches is suitable for most dogs. Measure out and cut your wooden boards accordingly.
Two rectangles or a single piece with legs will work well. Don’t worry about being a pro; it’s the love that counts, right?
2. Smooth the Edges: After cutting your wood, use sandpaper to smooth out any rough edges. You don’t want your pooch getting a splinter while reaching for their kibble.
3. Paint It Pretty: Grab your dog-safe paint or wood stain and get creative. Let your artistic side shine as you coat your wood in vibrant colors or fun patterns.
Polka dots or stripes? The world is your oyster. Allow the paint to dry completely before moving on to the next step.
4. Attach the Bowl Holders: If you didn’t cut a bowl-sized hole in your wood, place the bowls on top to see where they sit best. Securely attach your bowls to the wooden base with wood glue or screws, making sure they won’t budge when your pup digs in.
This is where you can give yourself a high-five for creating a neat feeding station.
5. Final Touches: After everything has dried and settled, give your elevated bowl stand a final look. You can add decorative elements like stickers or stencils if you want to jazz it up a little more.
Just confirm they’re safe for your furry friend.
6. Show It Off: Place your new elevated dog bowl set in your designated feeding nook and watch your pup shift from floor-level dining to perched elegance.
Just wait for the look on their face—like they’re royalty at a fabulous banquet.
Optional Add-ons/Variations:
Want to really make it one-of-a-kind? Consider painting the stand with a mix of colors instead of one solid shade.
You could also try using different textures, like attaching a rustic wooden base paired with shiny, bright bowls for a contrast that makes tails wag. The choice is yours!
Pro Tip:
Make sure to periodically check if the elevated bowls are stable, especially after some enthusiastic dining sessions.
You don’t want to return to find bowls toppled over and kibble scattered everywhere—unless you want an impromptu clean-up party with your pup. Consider using non-slip feet for the stand to prevent any accidental slides or spills as your furry friend enjoys their meal.
There you have it! Your very own colorful elevated dog bowl design can’t only pamper your pup but also grace your home with a burst of personality. Happy crafting!
Extra Tips & Ideas
While you might think a raised dog bowl is just about making mealtime easier for your furry friend, there’s a whole world of extra tips and ideas to elevate that experience even further.
Have you considered adding non-slip mats underneath? Those bowls can get a bit wild during dinner time.
And when it comes to aesthetics, you could match the bowl’s color to your dog’s fur for a fun twist.
Ever tried using a plant stand as a bowl holder? Talk about turning mealtime into a fancy feast.
Also, why not personalize the bowls with your pup’s name? Nothing like a bowl that screams “this is mine!” to make your pet feel special.
Little touches can make a big difference.
Frequently Asked Questions
What Are the Health Benefits of Elevated Dog Bowls?
Elevated dog bowls can improve your pet’s posture, reduce strain on their joints, and minimize neck discomfort. They promote better digestion by encouraging an upright eating position, helping to prevent issues like bloating and reflux.
How Do I Choose the Right Height for My Dog?
To choose the right height for your dog, measure from the ground to their elbow. The bowl should sit just below that point for comfort. Ascertain it’s easily accessible while keeping their posture aligned during meals.
Are Elevated Bowls Suitable for All Dog Breeds?
Elevated bowls aren’t suitable for all dog breeds. Larger breeds may benefit from them, but smaller dogs could struggle. Consider your dog’s size and unique needs when deciding if elevated bowls are the right choice for them.
Can Elevated Dog Bowls Help With Digestion?
Elevated dog bowls can be a game-changer for digestion! They help your pup eat comfortably, promoting better posture and reducing bloating. You’ll notice a happier dog, wagging their tail after mealtime bliss. It’s a win-win!
How Should I Clean and Maintain Elevated Bowls?
To clean and maintain elevated bowls, wash them weekly with mild soap and warm water. Rinse thoroughly, and dry completely to prevent bacteria growth. Inspect regularly for cracks, and replace if needed for your pet’s health.
Conclusion
In the world of pet dining, elevated bowls are the cherry on top of a sundae—sweetening every mealtime. You’ve got options galore, from chic ceramic to adjustable stands, all designed with style and function in mind. So, why not spoil your furry friend a little? It can be a game changer, keeping them comfy and adding flair to your home. After all, if your dog’s dining setup isn’t as stylish as yours, what are you even doing?

Hi, I’m Ali Tarek, the founder of Animalsman. I’ve always been passionate about pets, especially dogs and cats, and I created this website to share practical tips, easy recipes, and helpful care advice for fellow pet lovers. My goal is to make pet care simple, enjoyable, and accessible for everyone. When I’m not writing or curating content, you’ll usually find me spending time with my furry friends or learning new ways to keep them happy and healthy.

