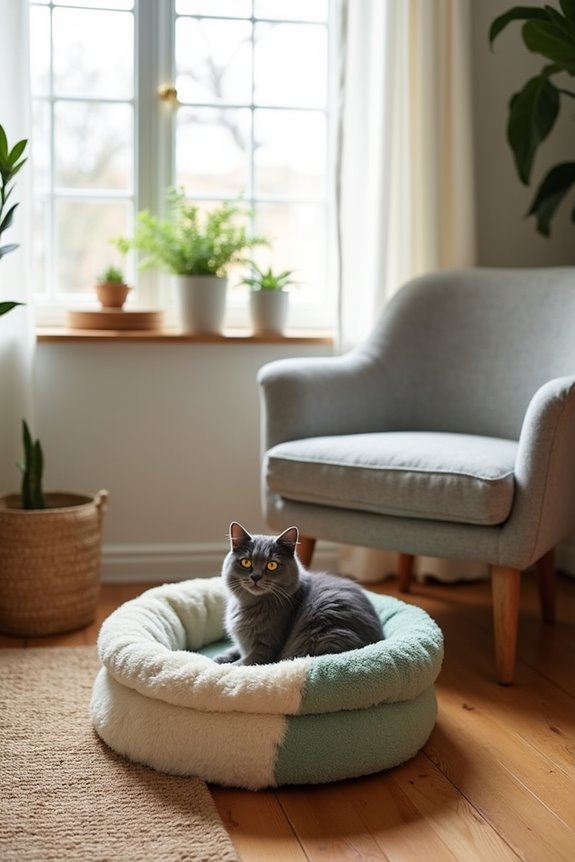
Like the catnip dream of every feline, the perfect cozy bed is just a few crafty steps away. You’ve probably seen those fancy cat beds in stores, but let’s be real—they’re often overpriced and don’t even match your décor. Why not whip up something unique and snug right at home? From soft fleece nests to elegant velvet lounges, there’s a world of options waiting. So, what’s the best fit for your furry friend?
Padded Fleece for Ultimate Comfort
When it comes to crafting the perfect cat bed, nothing beats the cozy embrace of padded fleece—especially if you’re trying to lure your furry friend away from the laundry pile (seriously, how do they always know where the clean clothes are?).
Padded fleece offers that delightful softness cats can’t resist, creating a warm haven just for them. You can easily stitch together some fleece pieces, stuff them with cotton batting, or repurpose an old pillow, making these homemade cat beds a fun project.
Does your cat prefer curling up in a snuggly nook or sprawling out? Customize your design to fit their quirky habits.
Trust me, it’s pure joy to watch them bounce into their new cozy spot, leaving the laundry untouched.
Our Collection
Now that you’ve got your padded fleece ready, let’s check out our collection of cozy cat beds that’ll have your furry friend purring in no time.
From a handmade crochet cat bed that’s as stylish as it’s comfy, to a plush microfiber nest that’s practically a cloud, there’s something for every kitty.
Which one do you think your cat will love most?
1. Handmade Crochet Cat Bed
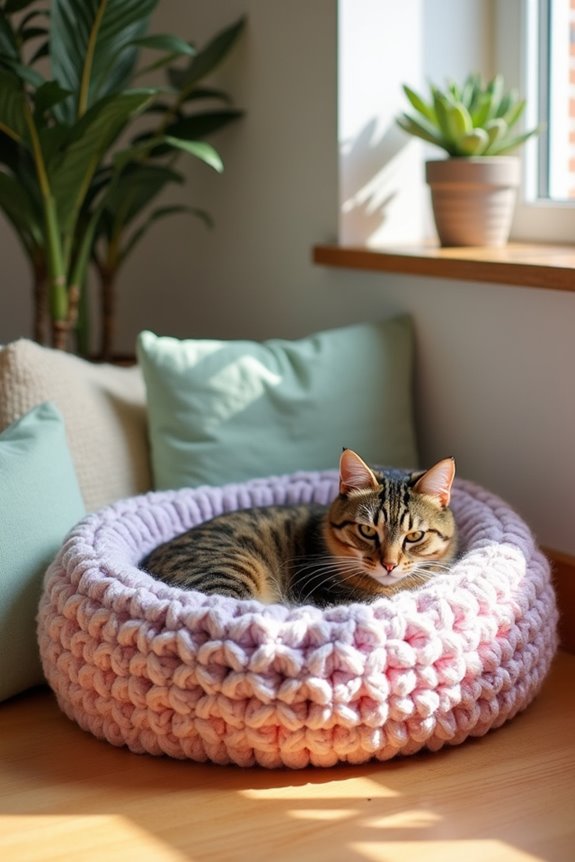
If you’re looking for a cozy spot for your feline friend, this DIY Homemade Crochet Cat Bed is sure to do the trick! Not only is it a budget-friendly way to pamper your kitty, but it also adds a lovely touch to your home decor.
Plus, you get the satisfaction of saying, “I made that!” every time your cat snuggles up.
Materials Needed:
- Yarn: Choose a soft, durable yarn (acrylic or cotton works great)
- Crochet hook: Size G (4.0 mm) or size suitable for your yarn
- Scissors: Just in case the yarn tries to escape
- Measuring tape: For measuring your cat’s favorite lounging spot
- Tapestry needle: For weaving in those pesky yarn ends
- Optional: Non-slip mat, if you’re worried about it sliding around
Step-by-Step Instructions:
1. Start with a Magic Circle: Create a magic circle with your yarn to form the center of the bed. If you’re not a fan of circles, you can start with a chain and join it into a loop. No judgment here.
2. Crochet the Base: Make 10 single crochets into the magic circle, then pull the tail to tighten it. Just like magic, right?
3. Increase Rows: In the next round, work 2 single crochets into each stitch (20 total). Continue adding one additional single crochet between increases every other round until you reach about 40 single crochets.
Check against your cat—if they can fit comfortably, you’re good to go.
4. Build the Sides: Now, simply crochet in rounds without increasing until it reaches your desired height. This may take a little while, but that’s fine.
Get comfy, your cat’s morning nap is about to get fancier.
5. Finish Off: When it’s tall enough, fasten off your yarn and weave in the ends using the tapestry needle. Give yourself a pat on the back.
Alternatively, give your cat a fist bump.
6. Clean Up: Trim any extra yarn strands and make sure everything’s nice and tidy. A clean cat bed means a happy cat, or so they say.
Optional Add-ons/Variations:
- Color Play: Experiment with multiple colors and create stripes, or use a variegated yarn that changes color as you go for a mesmerizing effect.
- Personal Touch: Add a lining or cushion in the center for extra comfort, or even stick on a cute patch with your cat’s name. Because, why not?
Pro Tip:
For a more durable cat bed, consider adding a non-slip bottom. Either crochet another round using tougher yarn or simply affix a small non-slip mat to the bottom.
It’ll keep it from sliding around as your cat curls, stretches, and plots world domination from their new throne.
A crocheted cat bed isn’t just a project; it’s a labor of love that your kitty will enjoy for years.
2. Woven Straw Cat Basket
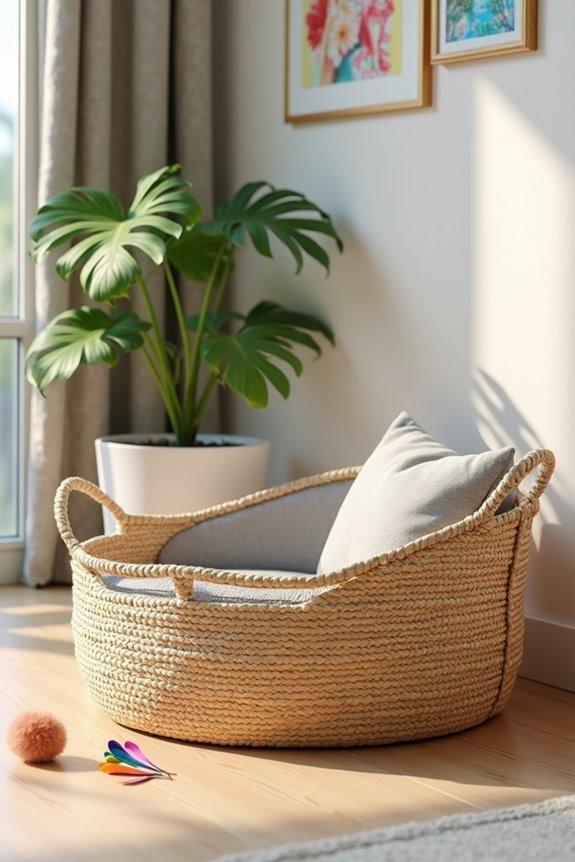
Looking for a stylish and functional resting spot for your furry friend? A Woven Straw Cat Basket isn’t only a beautiful addition to your home but also provides a cozy retreat for your cat.
Handmade with natural materials, this DIY project is easy on the wallet and an excellent way to keep your home looking chic while giving your kitty a comfy place to relax. Let’s get started on crafting this delightful basket that your cat will love to curl up in.
Materials Needed:
- Straw or Seagrass Rope: Enough to wrap the basket; you can find this at craft or home improvement stores.
- Basket Base: A round wooden base or a sturdy cardboard circle to build upon.
- Hot Glue Gun: For securely attaching the rope to the base.
- Scissors: To trim the rope as needed.
- Measuring Tape: To keep track of your basket’s dimensions.
- Optional: Decorative fabric or paint to jazz up the base, or a cushion for added comfort.
Step-by-Step Instructions:
- Prepare the Base: Start with your chosen base—wooden or cardboard. If you’re using cardboard, consider reinforcing it with a layer of clear tape to make it sturdier.
- Start Wrapping: Take the end of the straw rope, apply a bead of hot glue to the edge of the base, and press the rope into the glue. Hold for a few seconds until it feels secure.
- Build Up the Sides: Continue wrapping the straw rope around the base, adding a line of hot glue every few inches. As you go, lean the straw upward to form the sides of the basket. Don’t worry about perfection; rustic charm is part of the look.
- Create the Height: Keep wrapping the rope until you reach your desired height. If you want a higher basket, be patient and keep adding layers. It’s like giving your cat a multi-story cat condo, minus the construction fees.
- Finish the Top: Once you’ve reached your desired height, cut the rope and glue it down securely. You can add a decorative touch by painting or covering the base of the basket with fabric, creating a nice contrast.
- Add Comfort: Place a small cushion or a soft blanket inside the basket for extra coziness. Your cat will appreciate the thoughtfulness, and you might just be rewarded with an adorable kitty photo op.
- Let It Bond: Allow the glue to dry completely (usually about 30 minutes), ensuring everything is sturdy and ready for your cat’s inspection.
Optional Add-ons/Variations:
- Design Options: Get creative with color by painting the base of the basket before wrapping or integrating multi-colored ropes for a fun visual twist.
- Cushion Fun: Consider making a removable cushion cover from an old t-shirt or scrap fabric. This adds personality and is super easy to clean.
Pro Tip:
For safety, avoid using any harsh chemical glues. Hot glue is generally cat-safe, but verify that your materials are non-toxic. Keeping costs in check also means looking for straps in your attic or garage—repurposing is both eco-friendly and wallet-friendly.
Now, roll up your sleeves and let those crafty juices flow, because your kitty deserves the best cozy spot in the house. And hey, if it turns out fabulously, don’t forget to brag a little—just don’t let your cat catch you gloating.
3. Felted Wool Cat Cave
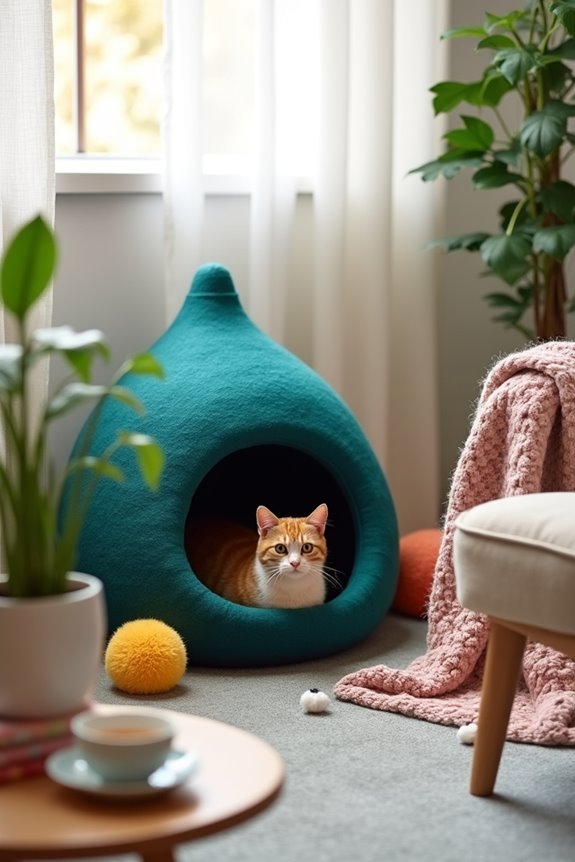
If your feline friend loves to hide away and feel snug, why not create a cozy home for them with a Felted Wool Cat Cave? This charming DIY project not only provides a warm retreat for your kitty but also adds a splash of style to your home decor.
Plus, you’ll save money compared to buying commercial options, and it’s a fun way to exercise your creativity. So let’s plunge into making a unique space where your cat will love to curl up and take those infamous cat naps.
Materials Needed:
- 100% Wool Roving: Choose your favorite color (enough to create a decent size cave).
- Bubble Wrap or Towel: To aid the felting process and protect surfaces.
- Soap (Dish Soap Works): For creating the felt during the process.
- Hot Water: To activate the felting process.
- Rubber Gloves: To keep your hands dry and clean.
- Scissors: For trimming, if necessary.
- Balloon (Optional): For shaping the cave during the process.
Step-by-Step Instructions:
1. Prep Your Area: Lay out the bubble wrap or towel on a flat surface to protect your workspace. Trust me; you’ll want to keep things tidy.
2. Create the Base Layer: Grab your wool roving and pull apart a handful. Lay the fibers down in a circular shape, overlapping them slightly. Aim for about 10-12 inches in diameter to start with.
3. Add Layers: Continue adding layers of wool roving, building up the sides until you have a thick enough base. You can even use contrasting colors to create a fun design. Just remember, more layers mean a cozier cave.
4. Wet the Wool: Put on your rubber gloves and gently wet the wool with hot water. Add a few drops of soap to help the fibers mesh together. Don’t soak it; just make it damp enough to work with.
5. Start Felting: Now comes the fun part — massaging the wool with your hands! Start pressing and rolling the damp roving in circular motions. You’ll want to apply firm pressure, but stay gentle; this isn’t a wrestling match.
Keep at it until the wool starts to felt together. It may take some time, but patience is key here.
6. Shape Your Cave: If you’re using a balloon, you can inflate it to create a nice round shape for the cave. Simply wrap the felted wool around the balloon, then keep felting until the wool is secure.
For a more organic look, you can skip the balloon and shape it by hand directly.
7. Rinse and Dry: Once you’re happy with your cave’s shape and feel, rinse it in cold water to remove soap. Then, gently squeeze out excess water (no twisting, please). Leave it to dry in a warm area.
And voilà, your cat cave is ready for inspection!
Optional Add-ons/Variations:
- Personalize with Colors: Try dyeing your wool roving in funky colors or patterns before starting. This way, you can have a bright purple cave or a tie-dyed masterpiece that reflects your cat’s purr-sonality.
- Embellishments: Sew on some cute cat-themed patches or attach a small pom-pom to the entrance for a whimsical touch.
Pro Tip:
If your wool is feeling a bit floppy, don’t panic. Just give it a second round of felting. More friction and agitation can help it become more durable and bushy, making it a long-lasting hideaway for your kitty.
Creating this Felted Wool Cat Cave can be a delightful bonding experience for both you and your furry friend. Plus, once complete, just wait until you see how much your cat might love discovering their new throne.
Who knows, it may even become their favorite spot in the whole house.
4. Reversible Cotton Cat Sleeping Bag

Looking for a cozy, comfortable, and stylish way for your cat to snooze? Well, how about whipping up a Reversible Cotton Cat Sleeping Bag? This DIY project isn’t only a practical solution for giving your furry friend a comfy place to nap, but it’s also a delightful addition to your home decor that you can make with your own two hands. Plus, it’s an economical way to pamper your pet without breaking the bank.
Materials Needed:
- Cotton Fabric (2 pieces): Choose fun patterns or colors for both sides. You’ll need about 1 yard of each.
- Batting or Soft Filling: To provide cushioning. You’ll need about 1 yard as well.
- Sewing Machine: Don’t worry; it’s easier than it looks.
- Thread: Match the color of your fabric or go with classic white.
- Scissors: For cutting your fabric, of course.
- Measuring Tape: To guarantee everything is just right.
- Pins: To hold fabric in place while sewing.
- Iron (Optional): For crisp edges.
Step-by-Step Instructions:
- Measure and Cut: Start by measuring out two rectangles from your cotton fabric. Aim for about 24” x 30” for a cat-sized bag. Cut them out and give yourself a mini high five — you’re off to a great start.
- Cut the Batting: Lay the two fabric pieces on top of the batting and cut the batting to the same size. This will be your cozy middle layer. Picture it like the cat-friendly version of a sandwich.
- Pin the Layers: Layer your cotton fabric with the batting in the middle. Place the right sides of the fabric facing together (so the patterns don’t peek out just yet). Use pins to secure all three layers in place.
- Sew It Up: With your sewing machine set up, start sewing around the edges. Leave about a half-inch seam allowance and make sure to leave a gap of about 6 inches on one side. That’s how your kitty will be able to enter and exit their new domain.
- Turn it Inside Out: Once you sew all around, flip the whole thing inside out. It’s like putting on a sock inside-out; just a little reverse magic. Use the gap you left open.
- Stuff the Sleeping Bag: Now it’s time to grab that snuggly batting and stuff it into the sleeping bag, pushing it into the corners to fill out nicely.
- Sew the Gap Shut: Fold in the edges of the opening you left and sew that shut, too. There you have it, your Reversible Cotton Cat Sleeping Bag!
Optional Add-ons/Variations:
- Personal Touch: Play with patterns and textures. For a pop of flair, mix polka dots with stripes or even add a monogram of your cat’s name to make it totally unique.
- Fleece Lining: If you want to make it extra cozy, consider using fleece as your batting instead of regular stuffing. Your cat will feel like they’re napping on a cloud.
Pro Tip:
For durability, use a zig-zag stitch along the edges when sewing to prevent fraying. And, if you’re feeling extra crafty, throw in a few catnip sachets inside for an aromatic bonus that’s sure to entice your kitty. Your sleeping bag isn’t just for snoozing; it’s a full-on retreat.
5. Plush Microfiber Cat Nest
Are you ready to give your feline friend a soft and snuggly space to curl up? The Plush Microfiber Cat Nest is just the project you need.
This DIY cat bed is perfect for providing a comfy spot where your cat can feel safe and warm, while also making your home look chic. Best part?
It’s super budget-friendly and gives your cat a personalized lounge that they’ll adore.
Materials Needed:
- Microfiber Fabric (1 yard): Pick a color or pattern that matches your décor.
- Batting or Soft Filling (1 yard): For that cushy comfort your kitty will crave.
- Sewing Machine: Trust me, it’s simpler than it seems.
- Thread: Choose a color that blends in with your fabric.
- Scissors: Essential for cutting.
- Measuring Tape: To cut accurate shapes.
- Pins: To hold everything together.
- Iron (Optional): For crisp fabric edges should you desire.
Step-by-Step Instructions:
- Cut Your Fabric: Grab your measuring tape and cut a circle about 30 inches in diameter from the microfiber fabric. This will be the base of the nest, giving your feline a perfect spot to curl up.
- Cut the Batting: Cut a matching circle from the batting. This layer will provide the plush comfort underneath your cat.
- Layer and Pin: Place the batting circle on top of the fabric circle. If you’re feeling fancy, pin around the edge to keep it together while you sew.
- Sew the Edge: Using your sewing machine, sew around the edge of the circles, leaving about a half-inch seam allowance. Make sure to leave a small gap of about 8 inches so you can flip it inside out.
- Flip It Inside Out: Now for the fun part—turn the whole nest right-side out, using the gap you left. You might want to use a chopstick or a pencil to poke out the rounded edges; just be gentle so you don’t tear the fabric.
- Fill It Up: Stuff the nest with your soft filling. You can customize the nesting depth depending on your cat’s preferences. Some cats love a deep nest, while others prefer something flatter.
- Sew the Gap Closed: Once it’s filled to your cat’s liking, fold in the edges of your opening and sew it shut. Ta-da! Your Cozy Plush Microfiber Cat Nest is ready for naptime.
Optional Add-ons/Variations:
- Color Combo: Consider using two different colors of microfiber fabric and sewing them together for a two-toned look. This adds a fun twist and can complement different areas of your home.
- Personal Touch: Embroider your cat’s name onto the fabric before you sew it together. How cute would that be?
Pro Tip:
To keep your cat’s nest clean and looking fresh, opt for microfiber fabric, which isn’t only soft but also easy to clean — a quick machine wash on a gentle cycle should do the trick.
Plus, check for cat-approved durable fabric, because we all know those little furballs can be surprisingly destructive during playtime.
6. Luxury Velvet Cat Lounge
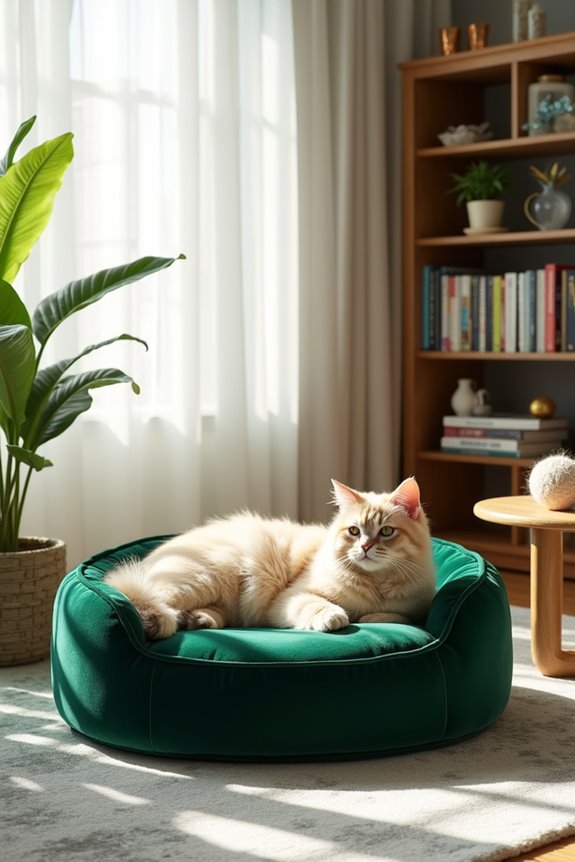
Want to pamper your feline friend without breaking the bank? This DIY Luxury Velvet Cat Lounge project is perfect for creating a stylish, cozy haven just for your kitty.
Not only does it elevate your home decor, but it also gives your cat a classy spot to lounge, proving they deserve a bit of luxury too.
Materials Needed:
- Velvet Fabric (1 yard): Choose a rich color that makes a statement.
- Soft Foam Padding (1 yard): For that plush comfort every cat dreams of.
- Sewing Machine: Don’t worry, it’s easier than wrestling your cat during bath time.
- Thread: Pick a shade that matches or contrasts nicely with your fabric.
- Scissors: Essential for cutting—kind of like trying to trim your cat’s nails, but less difficult.
- Measuring Tape: For accurate cutting—like measuring cat treats, but with a sewing twist.
- Pins: These will hold everything in place while you sew.
- Iron (Optional): If you want those fabric edges to look crisp and tidy.
Step-by-Step Instructions:
1. Cut Your Fabric: Measure and cut two rectangles about 24 inches by 30 inches from the velvet fabric. These will be the top and bottom of your lounge, providing a stylish look.
2. Cut the Foam Padding: Cut a matching rectangle from the soft foam padding, the same size as your fabric pieces. This will guarantee your cat has a comfy spot to rest.
3. Layer and Pin: Place one piece of velvet fabric down, right side up. Lay the foam pad on top of this, then carefully place the second piece of fabric, right side down, on top of the foam.
Pin the edges together to keep everything in place.
4. Sew the Edges: Using your sewing machine, sew around the edges of the layers. Leave a gap about 8 inches wide to flip everything inside out.
Make sure to leave about a half-inch seam allowance; it’ll help make your corners crisp.
5. Flip It Inside Out: Turn your lounge right-side out through the gap you left. Use a chopstick or a pencil to poke out those corners gently—take your time so you don’t tear the velvet.
6. Finish Up: Once everything is flipped, fold the edges of your opening inward and sew it closed. Voilà! Your Luxury Velvet Cat Lounge is complete and ready for the royal treatment.
Optional Add-ons/Variations:
- Pattern Play: Try mixing and matching different velvet colors or even patterns. A bold floral design could pair beautifully with a solid color, making it pop in your living space.
- Personalized Touch: Add a monogram or your cat’s name to the top using embroidery or fabric paint to make it uniquely theirs.
Pro Tip:
To keep the lounge looking fresh longer, consider using a fabric protector spray. It’ll help repel cat hair and resist stains, so your cat’s throne remains in pristine condition.
And if you happen to spill something—or if your cat decides to use it as a scratching post—you’ll be happy you took that extra step.
Happy sewing, and may your cat enjoy their new lounge as much as mine enjoys pretending she’s royalty!
7. Heated Cat Bed Option
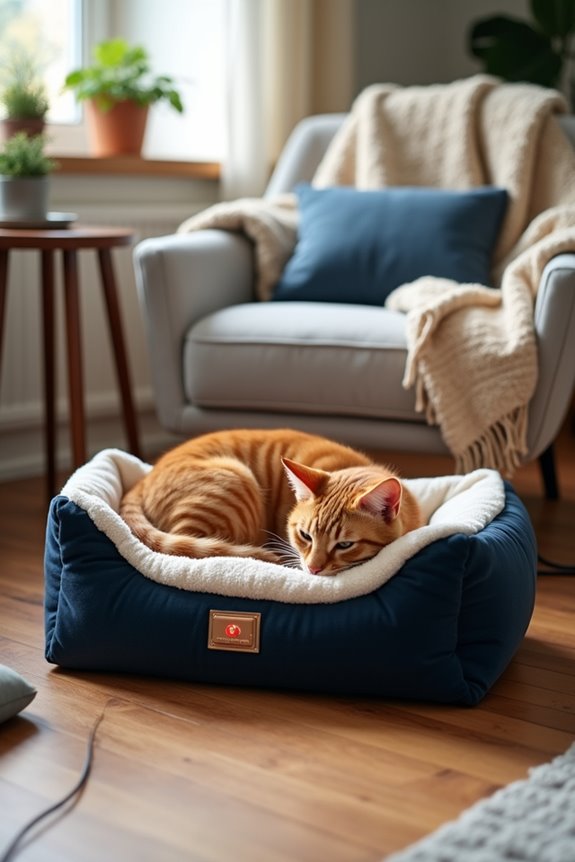
As the temperatures drop, you might notice your kitty seeking out warm spots sunbathing like a seasoned professional, with no regard for your perfectly placed throw blankets. Why not create a cozy, heated cat bed that caters to their need for warmth?
This DIY project isn’t only a great way to keep your feline friend toasty during the chilly months, but it’s also a fantastic money-saver compared to store-bought options. Plus, it adds an extra layer of comfort to your home, giving your cat a special retreat that’ll be the envy of all their furry friends.
Materials Needed:
- Small Heating Pad: Choose one with multiple heat settings for customizable comfort.
- Fleece Fabric (1 yard): Soft, warm, and oh-so-snuggly for your cat.
- Sewing Machine: It’s less intimidating than your cat’s judgmental stare.
- Thread: Pick a color that goes well with your fleece.
- Scissors: A sharp pair to cut your fabric—just make sure they’re not as dull as your cat’s favorite toy.
- Measuring Tape: Accurate measurements are key, especially if your cat prefers a snug fit.
- Safety Pins: To secure your layers while you sew—kind of like holding onto your sanity when your cat decides it’s playtime at 3 AM.
- Iron (Optional): For smoothing fabric edges, but hey, no pressure if you want that “lived-in” look.
Step-by-Step Instructions:
- Measure and Cut: Cut two rectangles from the fleece fabric, measuring 24 inches by 30 inches. These will be the top and bottom of your heated cat bed. Think of it as a warm little sandwich for your cat.
- Layer the Fabric: Place one piece of fleece down, right side up. Then, lay the heating pad on top, making sure the cord hangs out so it can be plugged in later. Finally, put the second piece of fleece on top, right side down.
- Pin it Down: Use safety pins to secure the layers together around the edges. This helps prevent any shifting while you’re sewing, just like how you’d pin your cat down while they try to wriggle away during a cuddle session.
- Sew the Edges: Using your sewing machine, sew around the edges, leaving a gap of about 8 inches so you can flip it inside out later. Don’t worry about being perfect; just channel your inner Picasso and get those corners well-sewn.
- Flip It: Carefully turn your bed right side out through the gap you left. Use something gentle, like the end of a chopstick or a pencil, to poke those corners out nicely.
- Close the Gap: Tuck the edges of the gap inward and sew it shut. At this point, you can breathe a sigh of relief because your heated cat bed is almost ready.
- Heat It Up: Plug in your heating pad, place it inside the bed, and let it warm up for a few minutes before inviting Mr. Whiskers for a test run. Watch as they sink into the warmth like they just found Nirvana.
Optional Add-ons/Variations:
- Fabric Fun: Consider using patterned fleece or minky fabric instead of plain for an added pop of style. Cats love a touch of pizzazz, just like they love lounging in sunbeams.
- Personal Touches: Embellish with their name or favorite little toys sewn into the bed fabric. It’s like a VIP lounge especially for your cat, because they clearly need more of those.
Pro Tip:
When choosing a heating pad, make sure to look for one with an auto shut-off feature. This way, you can rest easy knowing your kitty is warming up safely. Plus, it’ll save you the heart-stopping moment when you think, “Did I leave that heating pad on?” and run like a maniac to check.
Now, go ahead and create this cozy oasis. Your cat will thank you, and you might even get a few less disturbed nights of sleep. After all, what’s a bit of crafting when it means providing the ultimate comfort for your beloved furball?
Extra Tips & Ideas
When it comes to creating the perfect cozy retreat for your feline friend, a few extra tips can really elevate your homemade cat bed game.
Think about adding a soft blanket or an old sweater inside. Your cat will love curling up in that familiar scent.
And don’t forget to customize! Use catnip-infused fabric or a little sprinkle of catnip to make it irresistible.
Got extra cushions? Stack ‘em for a plush effect.
Also, consider trying different shapes—cats like to feel enclosed, so a cave-style bed might just be their next favorite spot.
And hey, if you mess it up, just call it “artistic expression.”
After all, the best bed is one made with love, and maybe a bit of cat fur too.
Frequently Asked Questions
How Do I Clean Homemade Cat Beds?
To clean homemade cat beds, shake out any debris, then machine wash the fabric if possible. Use gentle detergent, then air dry or tumble dry on low. Regular cleaning keeps beds fresh and inviting for your cat.
What Materials Are Safe for Cats?
While your cat dreams of lounging on clouds, you should stick to safe materials like cotton, fleece, and wool. Avoid anything toxic or synthetic—let her dream, but keep safety at the forefront!
Can I Customize Size for My Cat?
Absolutely, you can customize the size for your cat! Just measure your cat’s length and width, then tailor the bed’s dimensions accordingly. This guarantees your feline friend has a snug, comfortable spot to relax.
How Often Should I Replace the Beds?
You should replace cat beds every six months to a year, depending on wear and tear. Regularly inspect for odors, stains, or damage, ensuring your feline always has a fresh, comfortable spot to rest.
Are Homemade Beds Suitable for Outdoor Use?
Think of homemade beds as temporary shelters; they’re often not suitable for outdoor use. If you want to keep your feline safe and comfortable outside, consider weather-resistant materials and proper insulation tailored for outdoor conditions.
Conclusion
With a cozy cat bed, you’re not just giving your furry friend a place to nap; you’re creating a little haven, a soft cloud in their world. Just like a warm hug on a chilly day, these beds wrap your kitty in comfort and love. So, which one will you choose? Whether it’s a snuggly fleece or a stylish velvet lounge, your cat’s purrs will be the sweetest sound. They deserve the best, after all, don’t they?

Hi, I’m Ali Tarek, the founder of Animalsman. I’ve always been passionate about pets, especially dogs and cats, and I created this website to share practical tips, easy recipes, and helpful care advice for fellow pet lovers. My goal is to make pet care simple, enjoyable, and accessible for everyone. When I’m not writing or curating content, you’ll usually find me spending time with my furry friends or learning new ways to keep them happy and healthy.

