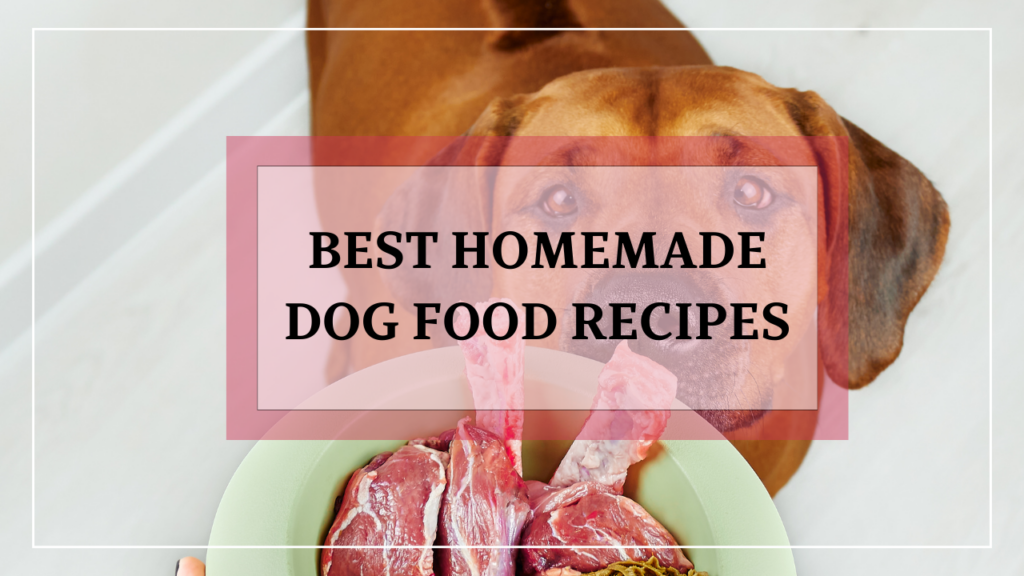
Okay, so you know that face your golden makes when he smells peanut butter? That full-body wiggle, the whining, the “I will literally do anything right now” energy?
Yeah. Mine does the same thing.
The problem is, store-bought treats are… a lot. The ingredient list reads like a science experiment, and half the time you don’t even know what you’re putting in your dog’s mouth.
Real talk: I started making homemade peanut dog treats after my dog, Koda, had a reaction to a bag I grabbed without thinking. Never again.
These recipes are dead simple, use ingredients you already have, and your dog will lose his mind over them. Honestly? It’s one of the best swaps I’ve made for him.
#1: Heart-Shaped Peanut Butter Dog Treats Piled in a Tin
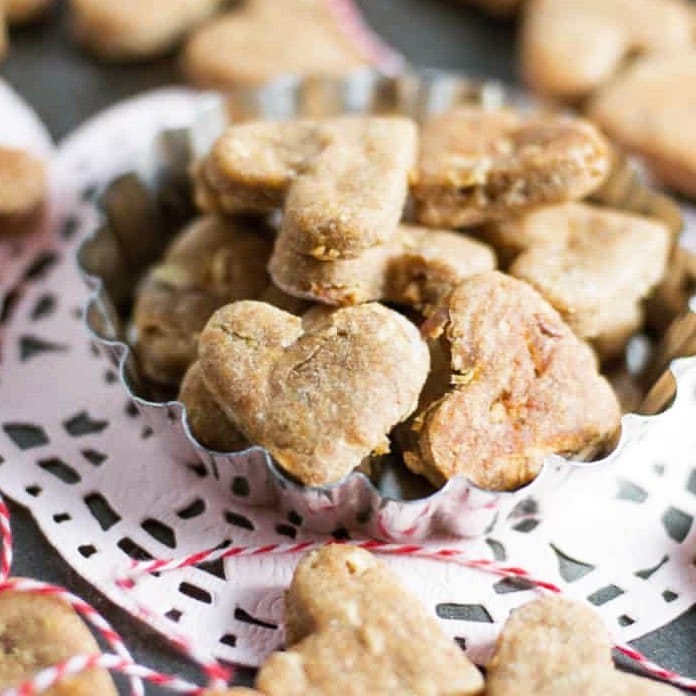
Your golden is staring at you again — that full-body wiggle, the hopeful eyes, the little whine that means “please, Mom.” And you want to give her something good. Something you actually made.
These treats are whole wheat flour-based, rolled and cut into heart and flower shapes using mini metal cookie cutters. The batch in the image is piled into a small round tin on a lace doily — honestly so Pinterest it hurts.
Ingredients:
1. 2 cups whole wheat flour
2. 1/2 cup rolled oats
3. 1/3 cup natural peanut butter (unsalted, xylitol-free)
4. 2 eggs
5. 1/4 cup water (add more if dough feels dry)
How to Make These (It’s Easier Than You Think)
Preheat your oven to 350°F. Mix the peanut butter, eggs, and water in a bowl until smooth. Stir in the flour and oats until a firm dough forms — it’ll feel like play-dough, and that’s what you want. Roll it out to about 1/4 inch thick on a floured surface. Press your cutters down firm and clean. Arrange on a parchment-lined baking sheet and bake 18–20 minutes until golden and set through. Let them cool completely before handing one over — warm treats crumble and nobody wants that mess on the rug.
Whole wheat flour gives these structure, peanut butter adds the protein your dog craves, and the payoff is a treat that actually lasts more than two seconds in the tin.
Last Christmas I made three batches and gifted them in little tins to my dog-mom friends. They were obsessed. Pair these with homemade dog biscuits recipes if you want to build out a whole treat box.
Store in an airtight container for up to 2 weeks, or freeze them for up to 3 months. And skip the xylitol check on the peanut butter label — that stuff is toxic to dogs, so read it every single time, even with brands you trust.
Prep Time: 15 mins | Cook Time: 20 mins | Serving Size: ~40 mini treats
📸 Photo credit: Instagram @theitsybitsykitchen
#2: Peanut Butter Drizzle Cookies Your Dog Will Lose Their Mind Over
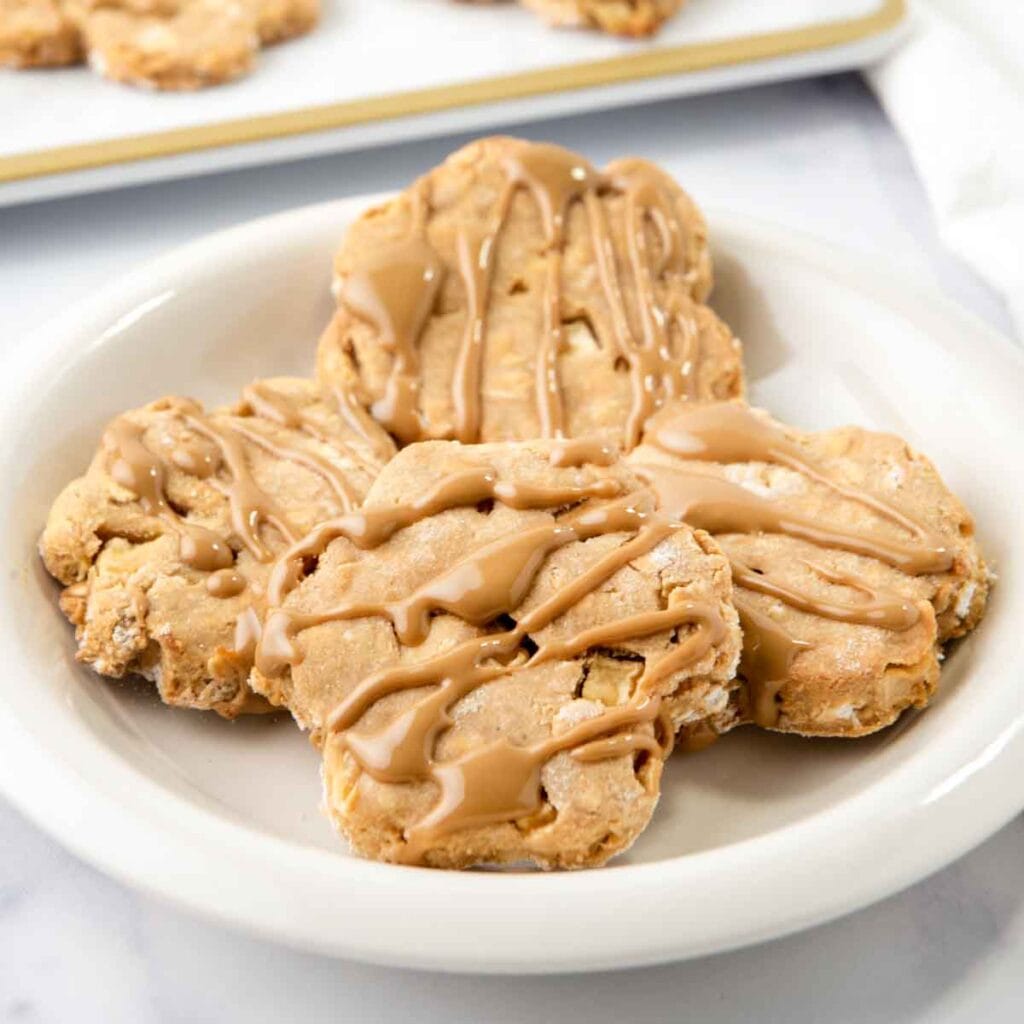
You know that moment when your golden is just staring at you while you eat? Like, full eye contact, chin on your knee, doing the most? That’s exactly when I started making these.
These cookies are golden-tan, slightly chunky, and drizzled with a warm peanut butter glaze that hardens just enough to make them look like something off a Pinterest board. Honestly they’re prettier than some stuff I’ve baked for myself.
Ingredients:
1. 2 cups whole wheat flour
2. ½ cup rolled oats
3. ½ cup natural peanut butter (unsalted, xylitol-free — this part matters)
4. 2 eggs
5. ¼ cup unsweetened applesauce
6. 2 tablespoons honey
7. ¼ cup peanut butter (for the drizzle)
8. 1-2 tablespoons warm water (to thin the drizzle)
How To Make Them
Preheat your oven to 350°F. Mix the peanut butter, eggs, applesauce, and honey together first until it’s smooth and sticky. Then fold in the flour and oats gradually. The dough will feel dense — that’s right. Roll it into balls, press them flat onto a parchment-lined baking sheet, and bake for 12-14 minutes until the edges go just slightly golden.
While they cool, thin your drizzle peanut butter with warm water and drizzle it over each cookie. It sets in about 10 minutes.
Make it even easier: batch-freeze the unbaked dough balls so you always have fresh cookies ready in under 15 minutes.
The oats add fiber, the applesauce keeps them moist without extra fat, and that drizzle? Pure drama for zero effort — your golden gets a treat that’s actually good for them, and you get a photo worth saving.
Prep Time: 15 min | Cook Time: 14 min | Serves: 20-24 cookies
If your pup has a sensitive stomach, swap the whole wheat flour for oat flour — same texture, gentler on digestion. And always let them cool completely before serving so the drizzle doesn’t get sticky on their fur.
📸 Photo credit: Instagram @spoiledhounds
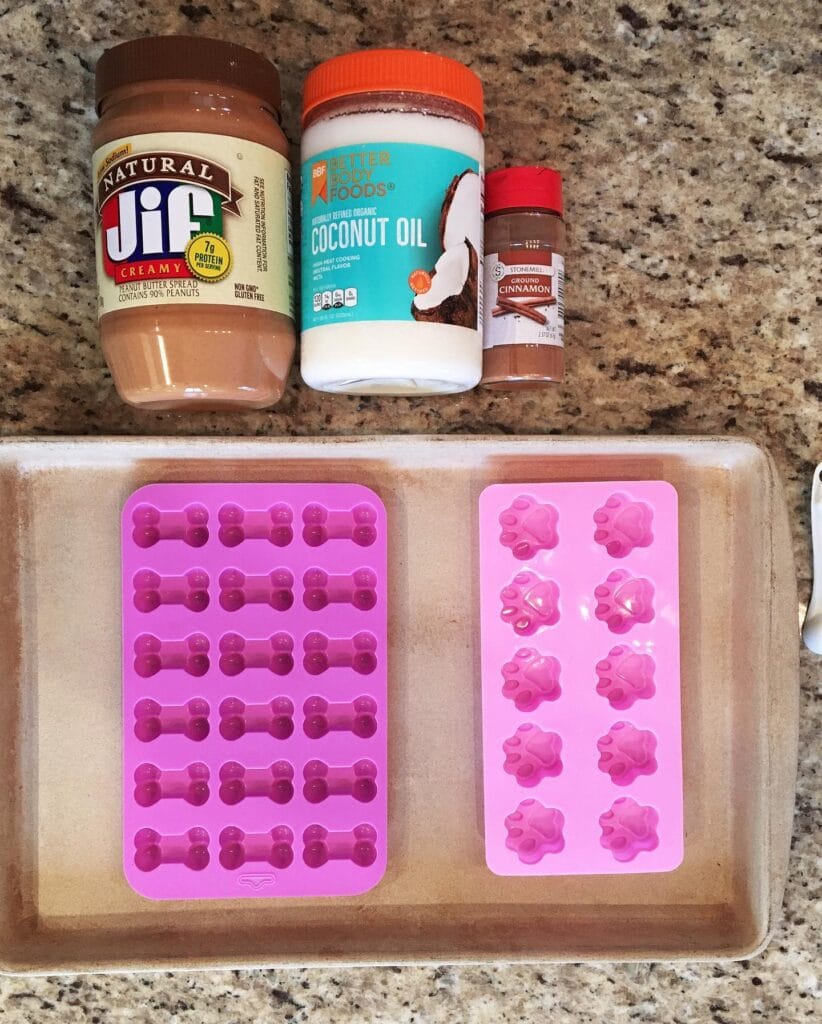
#3: Peanut Butter & Coconut Oil Frozen Dog Treats (Bone + Paw Molds)
Okay so picture this — your golden is sitting right next to you on a hot afternoon, just staring at you with those big eyes like you personally owe her a snack. That’s literally what made me try this recipe the first time, and girl, I haven’t stopped making them since.
Ingredients:
1. ½ cup natural peanut butter (xylitol-free — check that label!)
2. ¼ cup coconut oil, melted
3. ½ teaspoon ground cinnamon
How to Make Them
Melt your coconut oil first — just 20 seconds in the microwave does it. Stir in the peanut butter until the mixture looks smooth and pourable, then add your cinnamon and give it one more good mix. Pour into your silicone bone or paw molds and set them on a baking tray so they’re easier to move. Freeze for at least2 hours before popping them out.
Prep Time: 5 min | Freeze Time: 2 hours | Serving Size: 20–30 mini treats
The coconut oil helps the treats hold their shape — which means zero crumbling mess on your floors — and gives her coat that extra shine you’ll notice within weeks.
These pair so well alongside other simple recipes like these homemade 3-ingredient dog treats if you want to mix up her snack rotation.
Store them in a freezer bag. They last 3 weeks and you can grab one anytime she gives you that look.
📸 Photo credit: Instagram @baileymakesvideos
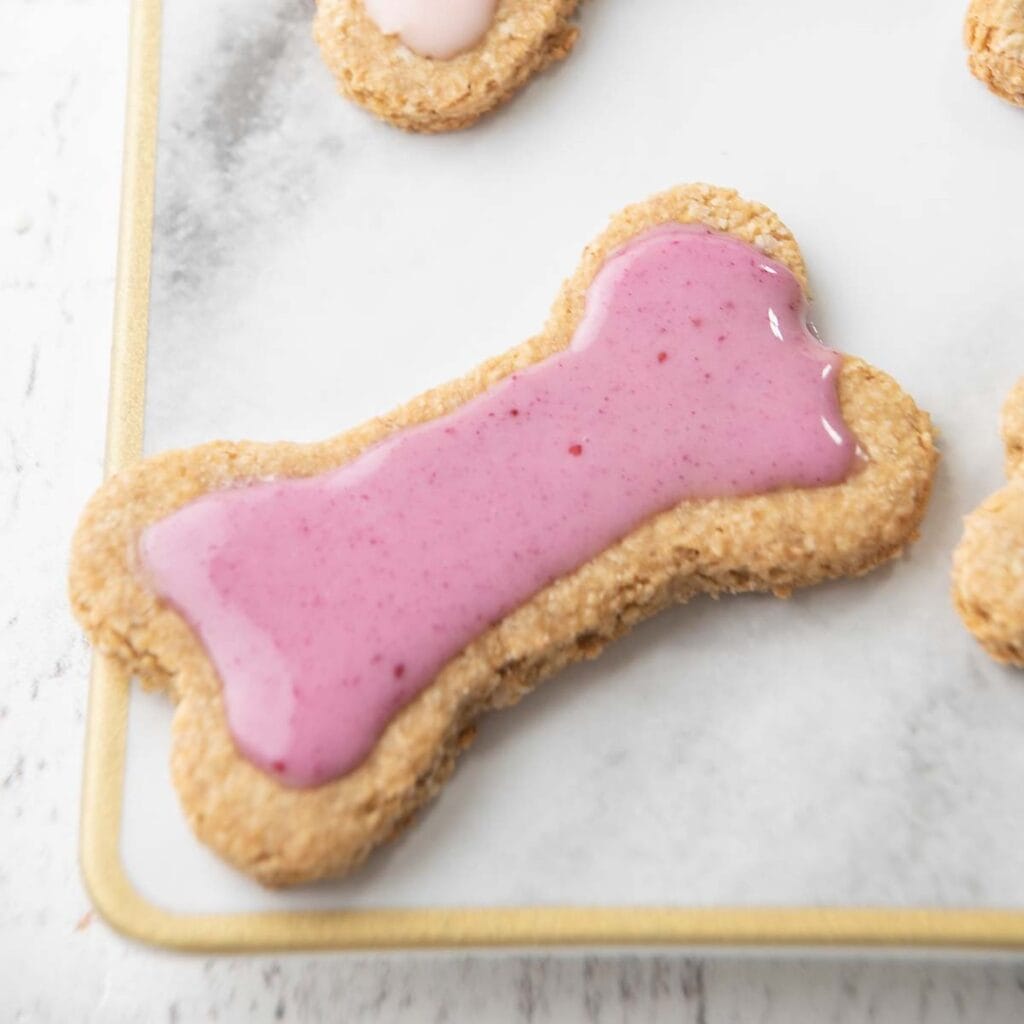
#4: Bone-Shaped Oat Cookies with Berry Frosting
You know that moment when your golden gives you those eyes — the ones that say please, just one treat — and you reach for the store bag, flip it over, and can’t pronounce half the ingredients? Yeah. That’s what pushed me to make these.
Ingredients:
1. 2 cups whole wheat flour
2. 1 cup rolled oats
3. 1/3 cup natural peanut butter (unsalted)
4. 2 eggs
5. 1/4 cup water
For the berry frosting:
1. 1/2 cup plain Greek yogurt
2. 3 tablespoons mashed fresh strawberries or raspberries
Let’s Make These Happen
Mix the flour, oats, peanut butter, eggs, and water until a firm dough forms. Roll it out to about 1/4 inch thick — not thinner, or they’ll crumble after baking. Cut with a bone-shaped cookie cutter and place on a parchment-lined baking sheet.
Bake at 350°F for 25 minutes until golden and firm. Let them cool completely before frosting — and I mean fully cool, or the yogurt slides right off. Stir together the yogurt and mashed berries, then spoon it over each cooled cookie.
The oats add fiber, which keeps digestion smooth — that means fewer tummy issues and happier walks for both of you. And honestly, the pink frosting makes these so Pinterest-board worthy you might not want to give them away.
These pair beautifully with the recipes in this Dog Cookies Recipes: Easy & Healthy Homemade Treats for Your Pup collection if you want to make a whole batch variety.
Freeze leftovers in a single layer first, then transfer to a bag — keeps the frosting intact for up to 3 weeks.
Prep Time: 15 min | Cook Time: 25 min | Serves: 18–20 cookies
📸 Photo credit: Instagram @spoiledhounds
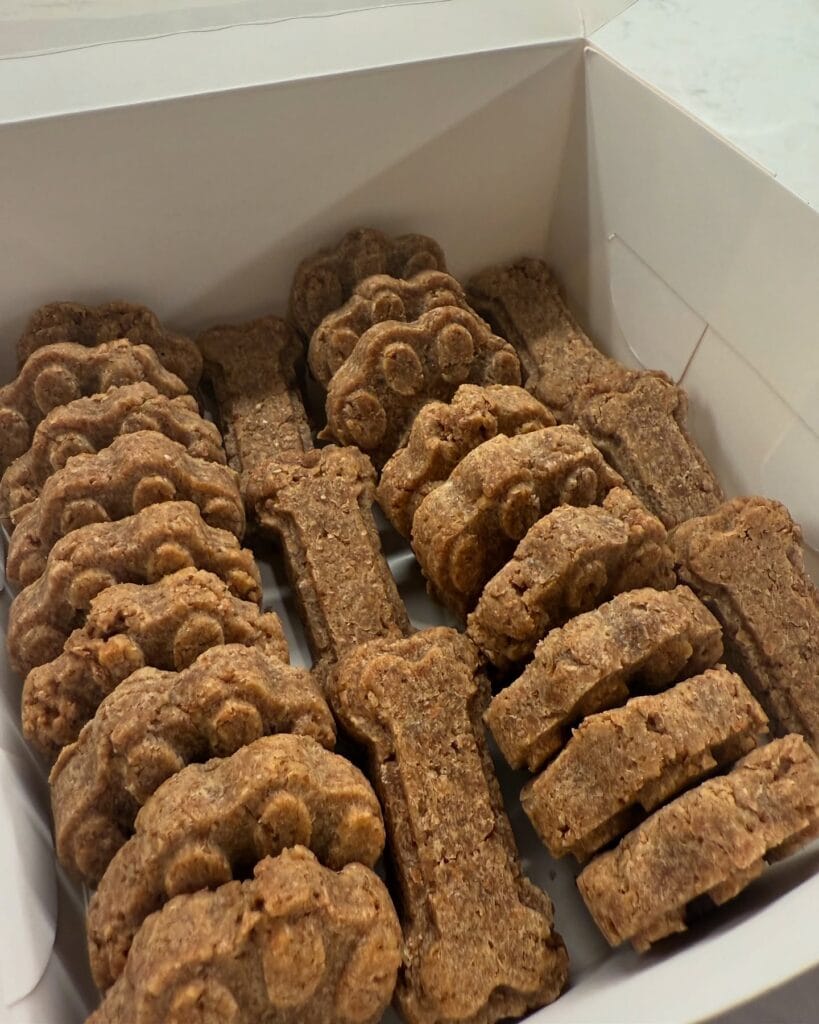
#5: Homemade Dog Bone & Paw Print Biscuits (Three-Shape Variety Box)
You know that moment when your golden gives you the look — the one where she plants herself right in front of the treat cabinet and just stares you down? Yeah. That’s every Tuesday in my house with my cousin’s lab.
These biscuits are the answer. Baked in bone, paw print, and rectangle shapes, they’re packed into a white gift box and made from wholesome pantry staples your pup already loves.
Here’s What You Need:
1. 2 cups whole wheat flour
2. ½ cup rolled oats
3. 1 tablespoon ground flaxseed
4. ½ cup natural peanut butter (unsalted, xylitol-free)
5. 2 eggs
6. ⅓ cup low-sodium chicken broth
Let’s Bake These:
Preheat your oven to 350°F. Mix the peanut butter, eggs, and broth together first — getting that wet mixture smooth before adding dry ingredients keeps the dough from crumbling when you roll it. Fold in the flour, oats, and flaxseed until a firm dough forms. Roll it out to ¼ inch thick and cut with your cookie cutters. Bake for 25-30 minutes until golden and firm. Let them cool completely on a rack — they crisp up as they cool, which is actually where that satisfying crunch comes from.
Small change, big win: swapping regular broth for low-sodium means the treats stay safe for daily snacking without salt overload.
Prep Time: 15 min | Cook Time: 30 min | Serving Size: 30-35 biscuits
Store in an airtight container for up to 2 weeks — or freeze for 3 months. These also make the cutest neighbor gift, just saying.
📸 Photo credit: Instagram @emmazbakery
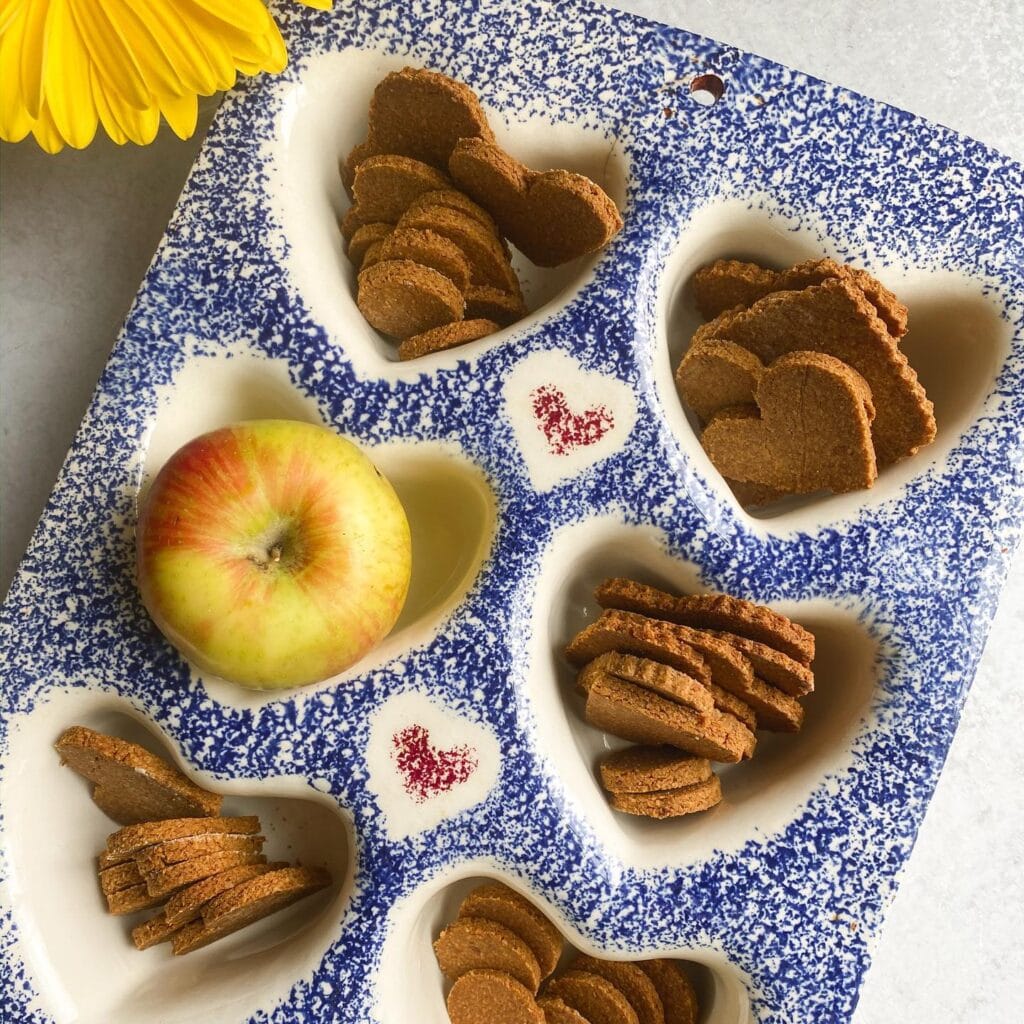
#6: Heart-Shaped Apple Cinnamon Dog Treats Baked in a Blue Speckled Pan
You know that moment when your golden gives you those eyes while you’re eating an apple? Mine does it every single time. And honestly, I caved — but in the best way possible.
These little heart-shaped apple cinnamon biscuits are baked right in a white ceramic heart-shaped muffin pan (the blue speckled enamel tray here is just chef’s kiss for presentation). The treats come out a warm golden-brown, smell like fall, and your girl is going to go absolutely feral for them.
Ingredients:
1. 2 cups whole wheat flour
2. 1 medium apple, peeled and grated (I used a Honeycrisp — that red-yellow beauty you see right there)
3. 1 teaspoon cinnamon (plain, dog-safe, no nutmeg)
4. 2 tablespoons natural peanut butter (xylitol-free, always)
5. 1 egg
6. ¼ cup water, added slowly as needed
Prep Time: 15 minutes | Cooking Time: 25 minutes | Serving Size: ~30 treats
—
How to Make Apple Cinnamon Heart Dog Treats
Preheat your oven to 350°F. Grate your apple directly into a large mixing bowl — don’t squeeze out the juice. That moisture helps bind everything without extra fat or sugar.
Add the peanut butter and egg. Mix until it looks shaggy and rough. Stir in the cinnamon, then add your flour one cup at a time. The dough should feel firm but not crumbly — if it’s too dry, add water one tablespoon at a time.
Roll the dough to about ¼ inch thick on a lightly floured surface. Press your heart-shaped cookie cutter firmly and transfer each piece onto a parchment-lined baking sheet. Bake for 22-25 minutes until the edges turn deep golden and the centers feel firm to the touch.
Pull them out and let them cool completely on a wire rack — this is what makes them crunchy rather than soft, which means they’ll keep longer.
The whole-wheat flour gives these structure (that’s the feature), which makes them shelf-stable for up to 2 weeks in an airtight jar (that’s the benefit), so you’re not re-baking every three days like some kind of short-order cook for your dog (that’s the payoff).
Store some in your heart-shaped pan on the counter — it genuinely looks like Pinterest art. And if your girl is anything like mine, she’ll smell these the second they come out of the oven and sit at your feet the whole cooling time.
If you want to go deeper into homemade treat recipes, 10 Irresistible Homemade Soft Dog Treats Your Pup Will Love has some great options to rotate through.
Slice the dough into thin strips before cutting shapes if you want some chewier “stick” treats — you can see those on the bottom-left of the pan. Same dough, two textures, one batch.
📸 Photo credit: Instagram @nourishgf
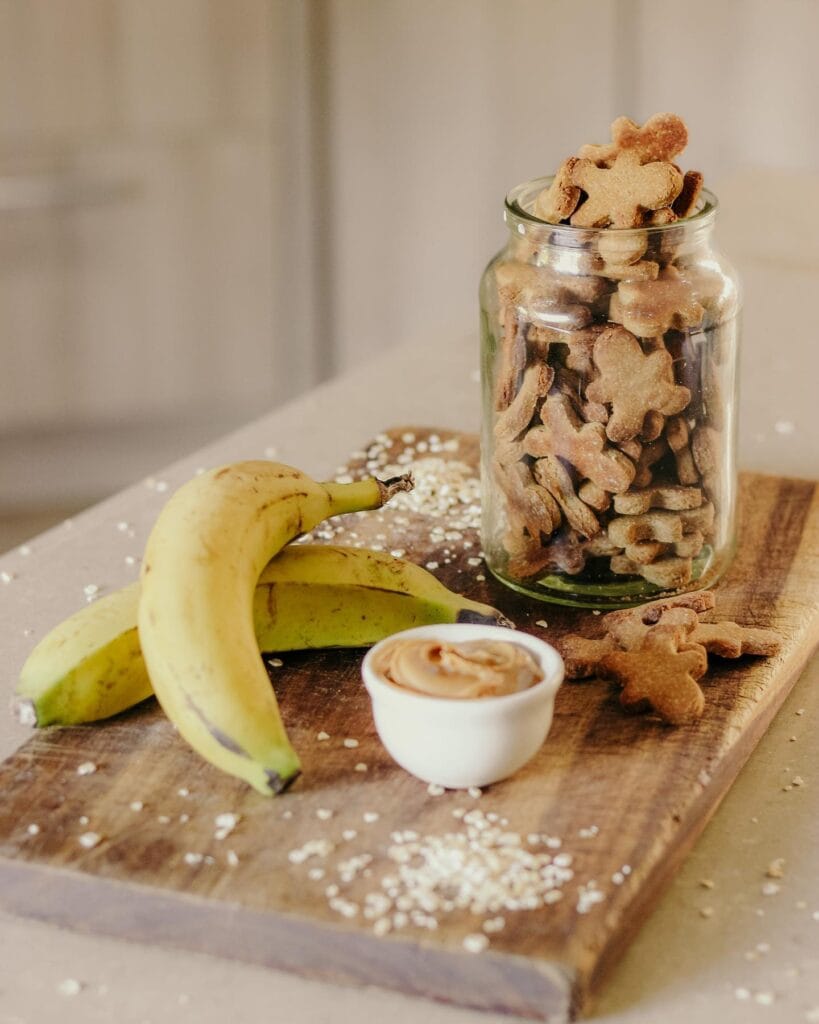
#7: Peanut Butter Banana Dog Biscuits in a Mason Jar
You know that moment when your golden gives you those eyes while you’re eating a banana? Mine used to do that every single morning — just sitting there, tail going a mile a minute, completely convinced that banana was meant for her.
These biscuits are exactly what you make when you want to feel like a good dog mom.
Prep Time: 15 minutes | Cooking Time: 25 minutes | Serving Size: About 30–35 small biscuits
Ingredients:
1. 2 ripe bananas, mashed
2. ½ cup natural peanut butter (xylitol-free — check the label)
3. 2 cups whole wheat flour
4. ½ cup rolled oats
5. 1 egg
Let’s Bake These
Preheat your oven to 350°F. Mash your bananas in a big bowl until they’re mostly smooth — a few lumps are totally fine and actually help bind everything together. Add the peanut butter and egg, then stir until combined.
Fold in your flour and oats gradually. The dough will feel stiff, and that’s what you want. Too sticky? Add flour one tablespoon at a time.
Roll it out to about ¼ inch thick on a floured surface. Use your favorite cookie cutters — gingerbread shapes look adorable in a mason jar, just like this. Bake on a lined sheet for 22–25 minutes until golden and firm.
Good news: these stay fresh in a sealed glass jar for up to two weeks.
Since these use whole, simple ingredients, they’re gentle on digestion — which pairs beautifully with what you’d find in a guide to homemade probiotics for dogs if your girl has a sensitive stomach.
Let them cool completely before jarring. Warm biscuits trap steam and go soft fast — and you want that satisfying crunch when she bites down.
📸 Photo credit: Instagram @thetwoebs
The Peanut Butter Trick That Changes Everything About Dog Treat Baking
Okay, real talk — most people grab any jar of peanut butter and just go for it. Big mistake.
Xylitol hides in “natural” and “sugar-free” peanut butter labels, and it’s genuinely toxic for dogs. Your golden’s life isn’t worth saving a dollar on a fancy jar. Always flip it over and read the ingredients before anything else.
Here’s the pro tip nobody tells you: use room-temperature peanut butter, not cold from the fridge. Cold peanut butter seizes up your dough, making it crack and crumble when you cut shapes. Room temperature blends smooth and holds together perfectly.
Also? Let your treats cool completely on the rack before storing them. I learned this the hard way — sealed warm treats in an airtight container once and woke up to a moldy batch. Heartbreaking.
One more thing: if your pup runs hot in summer, freezing these treats makes them last weeks longer. Frozen dog treats are genuinely a game-changer for warm months.
Your golden deserves the good stuff, made right.
Your Dog Deserves This — Go Make It Happen
Honestly? This is one of those recipes you’ll wish you’d found sooner. Your golden is already giving you those eyes every time you open the fridge — now you actually have something worth giving her.
Mix up a batch this weekend. See how fast they disappear. I made mine on a Sunday afternoon while my coffee was still warm, and my dog lost her mind over them.
And hey, if you want to keep spoiling her right, sweet potato dog treats are another easy win she’ll absolutely go crazy for.
So tell me — what’s your golden’s all-time favorite treat flavor?

Amr Mohsen is a software engineer who traded his keyboard for a leash — at least on weekends. His love for dogs inspired him to share what he learns as a dog owner and enthusiast, bringing a detail-oriented, research-driven perspective to every article he writes. If it’s about dogs, he’s probably already looked it up twice.