So, you’ve heard that homemade dog food can help with bladder stones, and now you’re curious about how to whip up some tasty, healthy meals for your furry friend, right? It’s not as intimidating as it sounds—trust me, I’m no chef, and I’ve managed to turn my kitchen into a doggy food factory. With the right ingredients, you can create dishes that not only tackle those pesky stones but also make your pup drool. Want to learn how to get started?
Why Homemade?
Why consider homemade dog food, anyway? Well, if your pup’s struggling with bladder stones, homemade dog food for bladder stones might be your best bet. You control the ingredients, ensuring they’re fresh and safe—no more wondering what’s really in that bag of kibble.
Plus, you get to tailor meals to your dog’s specific needs. Isn’t that better than bland, mass-produced options?
Think about it: you can add the right proteins and fibers, cutting down on those nasty stone-forming minerals. I mean, who wouldn’t want their furry friend to have a happier, healthier tummy?
You could even sneak in some veggies, if your dog’s not too picky.
Sure, cooking for your pup might sound like a lot of work (and it can be). But I promise, it’s rewarding.
Watching your dog thrive on homemade goodness? That’s the real treat. Plus, you get ultimate bragging rights—dog chef extraordinaire!
Delicious Dog Meal Options
When it comes to homemade dog meals, you’ve got some delicious options that’ll make your pup’s tail wag.
Think about a savory chicken and rice blend or a hearty turkey and sweet potato stew—both are tasty and satisfying.
And if you want to impress your furry friend even more, how about whipping up a fish and quinoa medley?
1. Chicken and Rice Blend
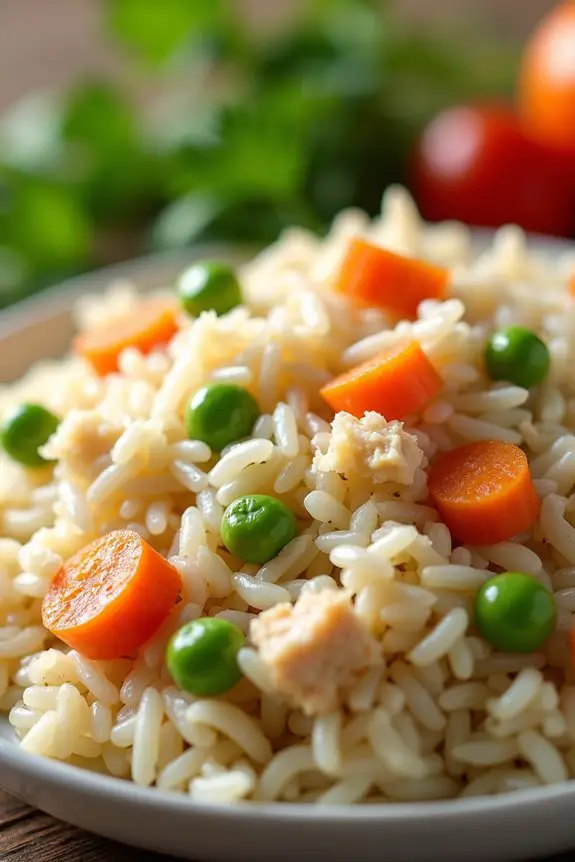
When you’re ready to whip up a chicken and rice blend for your pup, you’ll find it’s simpler than you might think.
Just gather a few basics and follow along with these straightforward steps.
And hey, you might even want to sprinkle in some optional add-ons to really make their tails wag.
Ingredients
When it comes to whipping up a delicious homemade meal for your furry friend, this Chicken and Rice Blend is a go-to. Not only is it tasty, but it’s also tailored to help prevent bladder stones. Plus, you probably have most of the ingredients in your pantry already, which makes it a winner in my book. Let’s explore what you’ll need to create this nutritious dog meal!
- 1 cup boneless, skinless chicken breast, diced
- 1 cup cooked white rice
- 1/2 cup carrots, finely chopped (or shredded if you’re feeling fancy)
- 1/2 cup green beans, chopped
- 1/2 cup peas, fresh or frozen
- 1 tablespoon olive oil (because dogs like a bit of flavor too)
- 1/2 teaspoon turmeric (a little sprinkle for extra health benefits)
Step by Step Instructions
- Start by gathering all your ingredients: 2 cups of cooked chicken (shredded or diced), 1 cup of cooked rice, and 1 cup of steamed vegetables (like carrots or green beans). Make sure they’re fresh and dog-friendly.
- Preheat your oven to 350°F (175°C). While it warms up, you can take a moment to grab that coffee you forgot about. Yes, we all do it.
- If you haven’t cooked the chicken yet, boil it in water for about 20-25 minutes. Once it’s done, let it cool and then shred it into bite-sized pieces. You’ll want to make sure it’s not too hot for your pup.
- Cook the rice according to package instructions. Usually, that means adding 2 cups of water to 1 cup of rice, bringing it to a boil, then simmering until the water is absorbed—about 15-20 minutes.
- Steam your chosen veggies until they’re soft, which should take about 5-7 minutes. Remember, we want them mushy enough for Fido to chew but not a total mush—think tender but still holding their shape.
- In a large mixing bowl, combine the shredded chicken, cooked rice, and steamed vegetables. Use a spatula to fold everything together gently, making sure it’s well mixed but not mushy (we don’t want a lumpy dog food experience).
- Take a baking dish and lightly grease it with a bit of olive oil or cooking spray. Transfer your mixture into the dish, spreading it evenly. No need for perfection; just make sure it’s spread out.
- Place the dish in the preheated oven and bake for about 25-30 minutes. You’ll know it’s ready when everything is heated through, and the top has a slightly golden color.
- Remove the dish from the oven and let it cool for a good 15 minutes. Your furry friend’s nose might be twitching, so be sure to cool it off before serving.
- Once cooled, scoop out appropriate portions for your dog and add any supplements your vet recommended.
Cool completely before serving to your dog. Enjoy the wagging tails!
Optional Add-ons
Adding optional ingredients to your homemade chicken and rice blend can really ramp up the flavor and provide extra nutrition for your pup.
Think carrots, peas, or even sweet potatoes. These add-ins not only pack vitamins but also keep things interesting.
You could even sprinkle some parsley for fresh breath. Your dog will think they’re dining at a fancy restaurant—who wouldn’t love that?
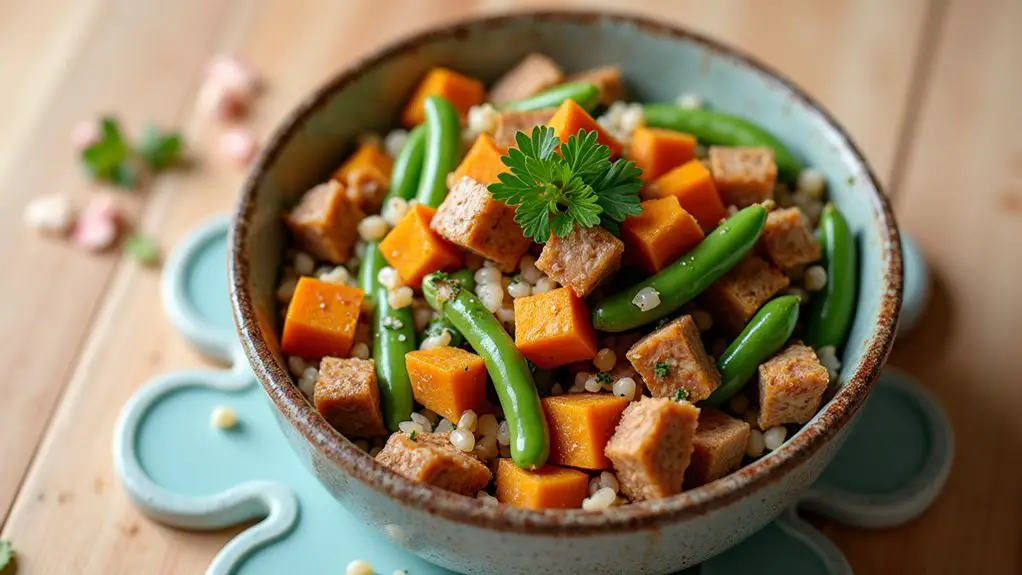
2. Turkey and Sweet Potato Stew
Ready to whip up a tasty turkey and sweet potato stew for your furry friend? Let’s check out the ingredients you’ll need, then I’ll guide you through the step-by-step process to create this flavor-packed meal. And don’t worry, I’ll toss in some optional add-ons to spice things up, because why not make it a little extra special? Additionally, consider incorporating essential dog health supplements to further enhance your dog’s nutrition and overall well-being.
Ingredients
Alright, folks, let’s plunge into the tasty world of homemade dog food!
This Turkey and Sweet Potato Stew isn’t only delicious but also perfect for pups dealing with bladder stones. Packed with nutrients and flavors that even picky eaters will love, it’s the kind of meal that shows just how much you care about your furry friend.
Now, let’s gather the ingredients and turn our kitchen into a doggy restaurant.
- 1 pound ground turkey (lean stuff, please)
- 1 large sweet potato, peeled and diced (the kind you might secretly wish to munch on)
- 2 cups green beans, trimmed and chopped (freshness is key!)
- 1 cup carrots, diced (because who doesn’t love a colorful meal?)
- 1 tablespoon olive oil (a little drizzle goes a long way)
- 3 cups low-sodium chicken broth (the kind that respects our furry friends’ health)
- 1 teaspoon dried rosemary (for that perfect touch of flavor)
There you go! With these simple ingredients, you’re well on your way to making Fido’s meal a highlight of the day.
Just imagine the wagging tails and happy barks when they take their first bite.
Don’t worry; your secret is safe with me—I’ll keep it on the down-low that your cooking skills are actually on point!
Now let’s get cooking!
Step by Step Instructions
1. Gather all your ingredients: ground turkey, sweet potatoes, carrots, green beans, and low-sodium chicken broth.
This is crunch time—make sure you have everything you need.
2. Peel and chop 2 medium sweet potatoes into small cubes.
You want them to cook evenly, so keep them about the same size, okay?
3. Wash, trim, and chop 1 cup of green beans into bite-sized pieces.
Add those to the sweet potato cubes.
4. Peel and dice 2 medium carrots into small pieces.
Carrots add a nice crunch—your pup will love them!
5. In a large pot, add 1 tablespoon of olive oil over medium heat.
This will help prevent sticking and add a nice flavor boost.
6. Once the oil is hot, add the ground turkey.
Cook it for about 5–7 minutes until it’s browned and no longer pink, stirring occasionally.
Keep an eye on it—nobody likes undercooked turkey!
7. Add the sweet potatoes, green beans, and carrots to the pot.
Mix everything together and let it sit for a minute—it’s all about that flavor marry moment.
8. Pour in 2 cups of low-sodium chicken broth.
This helps to cook the veggies and keep everything moist.
Stir, stir, stir!
9. Bring the mixture to a boil.
Once it’s bubbling happily, reduce the heat to low and cover.
Let it simmer for about 20–25 minutes, or until the sweet potatoes are tender.
You’re almost there!
10. Check the mixture occasionally, giving it a little stir now and then.
You want it to look cohesive and inviting—a feast fit for your furry friend.
11. Once everything is tender, remove it from the heat and let it cool for a few minutes.
12. When you can handle it without burning your hand (safety first), divide the stew into your dog’s bowl.
13. Cool completely before serving to your dog, and maybe give it a sniff.
If it makes you think of a cozy home-cooked meal, your pup will probably feel the same way!
Optional Add-ons
When it comes to boosting your homemade dog food, adding a few delightful ingredients can make mealtime much more fun for your pup—and let’s be honest, for you too.
Think about a turkey and sweet potato stew. It’s easy! Just simmer ground turkey, diced sweet potatoes, and a splash of low-sodium broth. Your dog won’t know he’s eating healthier, but you will. Tasty, right?
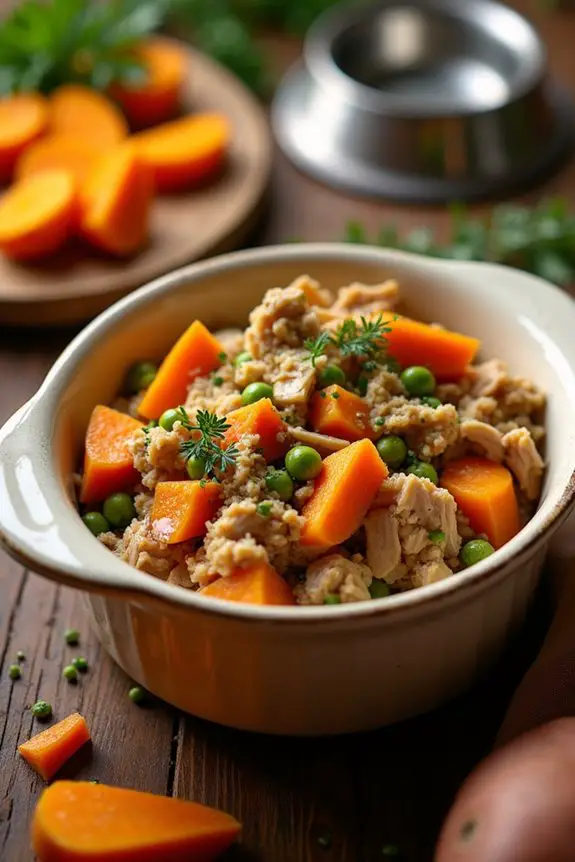
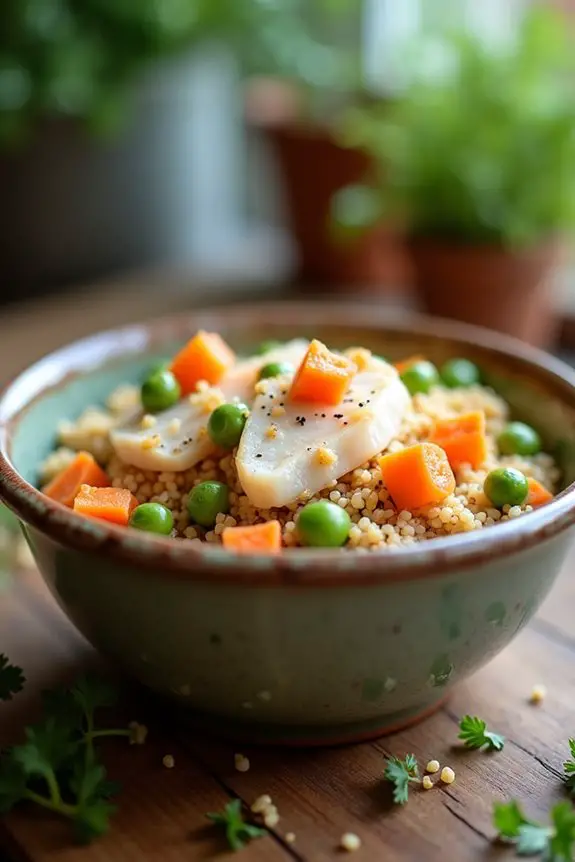
3. Fish and Quinoa Medley
You’re in for a treat with this Fish and Quinoa Medley, perfect for your pup’s health. Packed with protein and fiber, this meal isn’t only tasty but also super easy to make. Let’s talk about what you’ll need, how to whip it up step by step, and maybe even some fun add-ons to customize it just for your furry friend. Dogs can also benefit from grainfree snacks, which can support their overall well-being and provide a delightful crunch! Additionally, feeding your dog a high-quality premium dog food can further enhance their nutritional intake and overall health.
Ingredients
When it comes to making a tasty and dog-friendly meal that can help with bladder stones, this Fish and Quinoa Medley is a winner. Not only is it easy to whip up, but it’s packed with nutritious ingredients that are safe and healthy for your furry friend.
Let’s explore what you’ll need.
- 1 cup of quinoa, rinsed well (to wash away that bitter coating that makes it taste like… well, let’s just say it’s not yummy)
- 1 ½ cups of water (for cooking the quinoa, because dogs appreciate well-cooked food too)
- 1 cup of cooked salmon, shredded (you could use canned salmon, just make sure it’s packed in water, not oil – we want to keep things healthy)
- ½ cup of minced carrots (because, who doesn’t love the crunch of a fresh carrot? Plus, they’re good for your dog’s eyesight!)
- ½ cup of peas (frozen or fresh, just make sure they’re plain, no seasoning)
- 1 tablespoon of olive oil (for that extra shine and health boost – humans still like shine, right?)
- ¼ cup of blueberries, chopped (tiny and bursting with antioxidants—just for a little sweetness)
Now that you have your ingredients ready, you’re one step closer to becoming the dog chef of the year.
How’s that for a title? Just remember, before starting to mix and match, make sure each ingredient is fresh and suitable for your dog’s diet.
Happy cooking!
Step by Step Instructions
- Start by gathering all your ingredients: fresh fish, quinoa, carrots, peas, and any dog-safe seasonings you’d like to use.
- Rinse 1 cup of quinoa under cold water in a fine mesh strainer to remove its natural coating, called saponin (this part can get a bit foamy — it’s normal).
- In a medium saucepan, combine the rinsed quinoa with 2 cups of water. Bring to a boil over medium heat.
- Once boiling, reduce the heat to low, cover the saucepan, and let the quinoa simmer for about 15 minutes, or until all the water is absorbed and the quinoa is fluffy.
- While the quinoa is cooking, chop 1 cup of fresh fish into bite-sized pieces (make sure any bones are removed — we don’t want a doggy mishap here).
- In a non-stick skillet, heat a splash of water or a small amount of olive oil over medium heat.
- Add the chopped fish to the skillet and cook for 5-7 minutes, stirring occasionally until the fish flakes easily and turns opaque.
- Dice 1/2 cup of carrots and add them to the skillet with the fish, cooking for another 3-4 minutes until the carrots are tender.
- Stir in 1/2 cup of peas and continue cooking for another minute until everything is heated through.
- Once the quinoa is done, fluff it with a fork, and then combine it with the fish and veggie mixture in a large mixing bowl.
- Mix thoroughly to confirm everything is well combined (you want every bite to be a delicious surprise for your furry friend).
- Allow the mixture to cool completely before serving to your dog (otherwise, you might’ve a very unhappy pup with a burnt tongue).
- Serve the meal in your dog’s bowl and watch the tail wagging begin.
The best part? You’ve just whipped up a wholesome meal right in your kitchen, and your dog is going to love it!
Optional Add-ons
While crafting a nutritious meal for your furry friend, why not take it up a notch with some delightful optional add-ons?
A tasty fish and quinoa medley can elevate your pup’s dinner. Just cook quinoa, add cooked fish, and mix in some veggies. It’s simple!
Your dog will wag their tail in approval, thinking they’re dining at a gourmet restaurant. Trust me, they’ll love it.
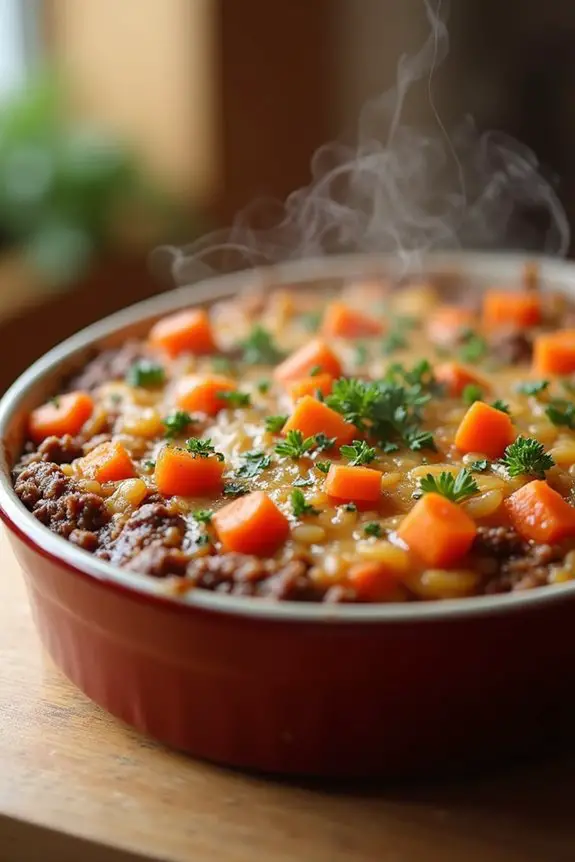
4. Beef and Carrot Casserole
Ready to whip up a delicious Beef and Carrot Casserole for your pup? You’ll love how simple it’s to mix hearty ingredients, like tender beef and fresh carrots, into a satisfying meal. Plus, you can enhance your dog’s mealtime experience by adding emotional support dog accessories that provide comfort and joy. Let’s walk through the ingredients, step-by-step instructions, and some fun optional add-ons to really please that furry palate. By feeding your dog premium dog food, you can ensure optimal nutrition and support their overall health.
Ingredients
When it comes to cooking for your furry friend, it can be a little tricky to figure out what’s safe and nutritious. For this Beef and Carrot Casserole, we’re keeping it simple yet delicious, so your pup will be tail-wagging happy. Just a heads up—if you’ve ever tried to eat carrots yourself, and felt like you might just be a rabbit, you’re not alone. But trust me, dogs love ’em. Let’s explore the ingredients!
- 1 pound ground beef (lean is best for your pup’s health)
- 2 cups diced carrots (good for their vision and oh-so-sweet)
- 1 cup cooked quinoa (a fantastic protein-packed base)
- 1 cup peas (frozen works just fine, don’t worry)
- 1 tablespoon olive oil (just a touch for healthy fats)
- 1 cup low-sodium chicken broth (check for no harmful additives)
- 1/4 cup chopped parsley (for the fresh breath, or so they say)
Step by Step Instructions
- Preheat your oven to 350°F (175°C). This is when the magic begins; the smell of homemade goodness will soon fill your kitchen.
- In a large pot, bring about 4 cups of water to a boil. It’s like heating up a hot tub for your ingredients.
- Once boiling, add 2 cups of diced carrots. Boil for about 5 minutes, just until they’re tender enough for a fork to pierce but not mushy.
- In the meantime, chop 1 pound of lean ground beef into small pieces. You want it bite-sized, not a meat mountain, right?
- Heat a large skillet over medium heat, then add the chopped beef. Cook for around 7–10 minutes, stirring occasionally, until it’s browned throughout. Look for that nice, savory color.
- Drain the cooked carrots and set them aside. No need for a veggie after-party in that pot. Just let them chill while we finish the beef.
- Add the carrots back to the skillet with the beef. Mix it all together gently (not a wrestling match here, just a dance).
- Toss in 1 cup of cooked brown rice and stir until everything is well combined. The rice is like the glue holding this delicious ensemble cast together.
- Pour the mixture into a greased 9×13 inch baking dish. Spread it out evenly—like you’re smoothing a blanket for your favorite pup.
- Bake in the oven for 25–30 minutes, or until the top is golden brown. You want it looking like a cozy, sun-kissed retreat.
- Cool completely before serving to your dog. Hot food can burn those little tongues; we want happy tails, not sad faces.
Optional Add-ons
Imagine your pup’s tail wagging with excitement as you whip up some optional add-ons for that delicious beef and carrot casserole.
Why not mix in some peas or sweet potatoes? They’ll add extra flavor and nutrition. Honestly, who doesn’t love a little variety?
Just remember to chop everything small, so it’s easy for your dog to munch.
Happy cooking, chef!
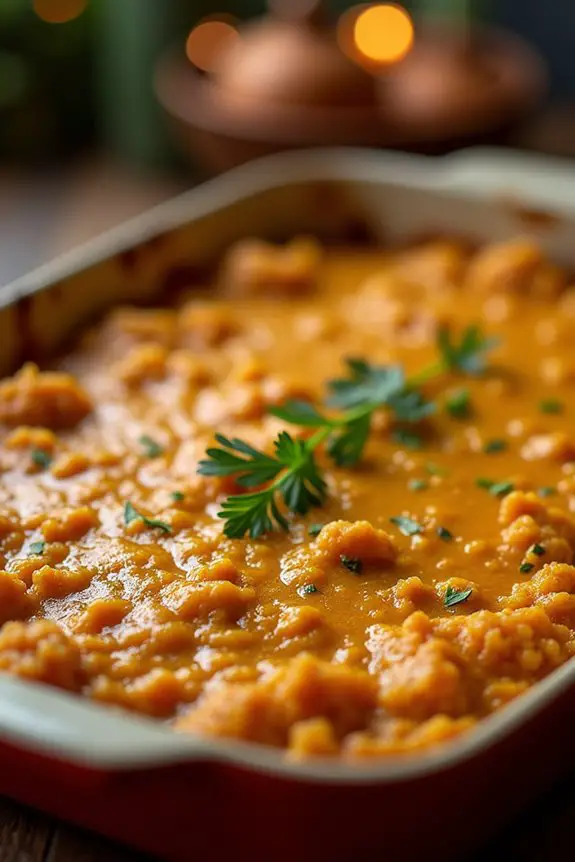
5. Pork and Pumpkin Delight
Ready to whip up something special for your pup? Let’s talk about a combination that’s as tasty as it sounds: Pork and Pumpkin Delight. We’ll cover the ingredients you’ll need, step-by-step instructions to make it easy, and some fun optional add-ons to really make it pop for your furry friend.
Ingredients
When it comes to whipping up a tasty yet healthy meal for your furry friend, this Pork and Pumpkin Delight recipe is a game-changer. It’s easy to make and packed with nutritious goodness that’ll keep your pup wagging their tail for more.
Plus, it’s all made from simple ingredients you can easily find at your local grocery store or maybe even in your kitchen already. Let’s explore what you’ll need to create this delightful dish!
- 1 cup ground pork (make sure it’s lean)
- 1 cup pumpkin puree (not the spiced pie filling, just pure pumpkin)
- ½ cup cooked brown rice (a great sidekick for protein and fiber)
- 1 tablespoon olive oil (for that healthy fat and shine)
- ¼ cup peas (fresh or frozen, dogs love ’em)
- 1 tablespoon parsley (finely chopped, for a little fresh flair)
- ½ cup low-sodium chicken broth (to add a bit of moisture and flavor)
And there you have it! Just a handful of wholesome ingredients that won’t break the bank.
You know, every time I make this, I get a little misty-eyed seeing my dog’s happy dance—it’s like I’m a gourmet chef in their eyes. Trust me, they’ll appreciate this special meal.
Step by Step Instructions
- Begin by preheating your oven to 350°F (175°C) to get it nice and warm for baking later.
- In a large pot, boil about 4 cups of water. This is where the fun begins—watch it bubble and boil like a happy little cauldron.
- While you wait, grab 1 pound of ground pork and toss it into a large skillet over medium heat. Stir it around until it’s browned, which should take about 5–7 minutes. Enjoy the delightful aroma wafting through your kitchen.
- Once the pork is nicely browned, drain any excess fat (if needed) and set it aside for later.
- Now, it’s pumpkin time! In that same pot of boiling water, add 2 cups of chopped fresh pumpkin. Allow it to cook for about 15 minutes until it’s fork-tender. This is a great time to admire how bright and orange it is—your dog is going to love it.
- When the pumpkin is ready, drain the water and mash it up with a fork or a potato masher until it’s smooth and creamy. No lumps here—unless your dog prefers it that way!
- In a large mixing bowl, combine the cooked pork and mashed pumpkin together. Mix them until nicely blended, making sure your dog can savor every bit of both flavors.
- For added nutrition, mix in 1 cup of cooked brown rice. Give it a good stir to distribute everything evenly—it’s turning into a feast!
- Finally, spoon the mixture into a greased 9×13 inch baking dish. Spread it evenly so every bite can be enjoyed.
- Bake the combined ingredients in the preheated oven for about 30 minutes until everything is heated through and slightly bubbling at the edges.
- Cool completely before serving to your dog. Patience is a virtue, especially when it means treating your furry friend to something delicious!
Optional Add-ons
While you might think that a simple pork and pumpkin mix is enough to satisfy your pup’s taste buds, there are plenty of optional add-ons that can take this meal from good to fantastic.
How about a sprinkle of spinach for some leafy goodness?
Or maybe a dash of quinoa for added texture?
Your dog will surely appreciate these little upgrades—and so will you, seeing that happy tail wag.
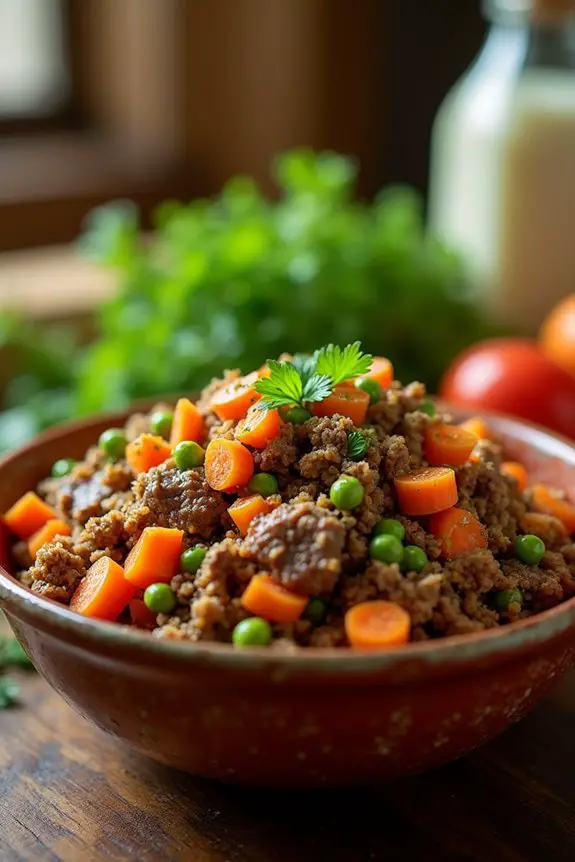
6. Lamb and Rice Mix
If you’re looking to whip up a tasty meal for your pup, the lamb and rice mix is a great choice.
You already know how important it’s to pick the right ingredients, so let’s walk through the simple steps together.
And hey, I’ll even share some optional add-ons to kick things up a notch, because who doesn’t love a little extra flavor?
Ingredients
When you’re making food for your pup, using fresh, wholesome ingredients is key. A delightful lamb and rice mix isn’t just tasty; it’s also gentle on the bladder, especially beneficial for dogs dealing with stones.
Plus, it’s an easy recipe that’ll make your tail-wagging friend beam with joy. So, let’s explore what you’ll need for this homemade meal!
- 2 cups of lean ground lamb – because what’s better than a little lamb to make your dog happy?
- 1 cup of brown rice – it’s good for digestion and a good source of carbohydrates.
- 1 cup of carrots, chopped – they’re crunchy, colorful, and packed with vitamins.
- 1 cup of green beans, chopped – a vibrant addition to the mix, full of fiber.
- 1 tablespoon of olive oil – yes, a little good fat goes a long way for shiny fur.
- 4 cups of water – or maybe a little more if your rice is feeling thirsty.
Just a heads up, make sure to check that the lamb is lean; nobody wants a heavy meal making our furry friends feel sluggish.
Gather these simple ingredients, and you’ll be well on your way to creating a dish that’s sure to please! Happy cooking!
Step by Step Instructions
- Start by gathering all your ingredients: lamb, rice, carrots, and peas. Make sure you have everything ready before you begin, so you don’t end up scrambling during the process.
- Rinse the rice under cold water in a fine mesh strainer until the water runs clear. This helps remove excess starch, giving you fluffier rice.
- In a large pot, add 2 cups of water and bring it to a boil. Once it’s bubbling, add the rinsed rice. Reduce the heat, cover, and simmer for 15-20 minutes, or until the rice is tender and the water is absorbed.
- While the rice cooks, heat 1 tablespoon of olive oil in a large skillet over medium heat. Don’t let that oil heat too long, or you might end up with a greasy mess.
- Add 1 pound of ground lamb to the skillet. Cook the lamb for about 5–7 minutes, stirring occasionally, until it’s browned and no longer pink. Drain any excess fat if necessary—nobody wants a greasy dog meal.
- Toss in 1 cup of finely chopped carrots and 1 cup of peas into the skillet. Cook for another 5 minutes, stirring often, until the veggies are soft but still bright in color. You want them to maintain some crunch.
- Once the rice is done cooking, add it to the skillet with the lamb and veggies. Mix everything together well to combine all those tasty flavors.
- Allow the mixture to cool for about 10 minutes before serving it to your dog. Trust me, no pup wants to eat a hot pile of food—scalded noses are no fun.
- Scoop out a serving for your furry friend, and remember to cool completely before serving to your dog. You wouldn’t want to feed them hot food and witness a pup dance, would you?
Optional Add-ons
Adding optional ingredients to your lamb and rice mix is like giving your dog a culinary adventure.
Think about adding some diced carrots or peas—those little bits can add color and crunch.
Maybe toss in a spoonful of pumpkin for fiber? Your pup won’t just love it; you’ll feel like a gourmet chef.
Plus, who knew meal prep could be so fun?
7. Savory Duck and Green Beans
For a delicious dog meal that’ll have your pup wagging their tail, let’s whip up some savory duck and green beans. You’ll love how simple the ingredients are, and I promise, your furry friend will appreciate every bite. Ready to roll up your sleeves? Let’s get cooking!
Ingredients
When it comes to cooking for our furry friends, it’s all about being both creative and mindful of what goes into their bowls. For this savory duck and green beans recipe, you’ll find that the ingredients are simple and easy to track down at your local grocery store.
Plus, your pup is going to love every bite.
- 1 cup duck meat, cooked and shredded (you can use skinless, boneless duck breast)
- 1 cup fresh green beans, chopped into small pieces (make sure they’re nice and tender)
- 1/2 cup carrots, shredded or finely chopped (because who doesn’t love a little color)
- 1/4 cup peas, frozen or fresh (they’re packed with nutrients, and they look like little green candies)
- 1 tablespoon olive oil (for a little extra richness that your dog will appreciate)
- 1/4 teaspoon turmeric (just a pinch for health and a hint of flavor, because why not spoil your pup)
Now you’re armed with everything you need to whip up a delightful meal for your dog.
Strolling through the grocery aisles, it’s sure to make you feel like a real chef, only without the fancy hat and sous-chef running around—unless, of course, your pup follows you like mine does, in which case, that’s just adorable.
Step by Step Instructions
1. Start by gathering all your ingredients: fresh duck, green beans, and any additional items like rice or sweet potatoes.
Once you’ve got everything, you can avoid that last-minute dash to the grocery store.
2. Preheat your oven to 350°F (175°C).
This way it will be nice and toasty when it’s time to pop in your casserole.
3. Trim any excess fat from the duck and chop it into small, bite-sized pieces.
It’s important to keep the pieces manageable for your furry friend.
4. In a large skillet, heat over medium heat and add the diced duck.
Cook until browned, about 5-7 minutes, stirring occasionally.
Look for that nice golden color—your pup is going to love it.
5. While the duck is cooking, rinse the green beans under cool water and trim the ends.
Feel free to chop them into smaller pieces if you prefer your dog’s meal to be super easy to chew.
6. Once the duck is browned, add the green beans to the skillet and stir everything together.
Cook for an additional 3-5 minutes, until the green beans are tender but still bright green.
7. If you’re adding any cooked rice or sweet potatoes, fold those in now and mix everything well.
Make certain to keep an eye on the colors; a vibrant mix is a sign of deliciousness.
8. Remove the skillet from heat and let the mixture cool for a few minutes, just enough so it’s safe to serve.
Don’t rush this part; you wouldn’t want any singed pup tongues.
9. Scoop the mixture into your dog’s bowl and let it sit for a bit longer to make sure it’s cool enough.
Dogs have a hard time waiting, but it’s worth it to keep their mouths safe.
10. Cool completely before serving to your dog.
Trust me, no one wants a pooch with a burnt tongue—especially after all this work.
Enjoy watching your furry friend chow down on this tasty, homemade meal!
Optional Add-ons
After whipping up that mouthwatering duck and green beans, why not elevate your pup’s dining experience with some optional add-ons?
Think about sprinkling in a few blueberries for a burst of antioxidants or even a dash of pumpkin puree for some belly benefits.
Your dog won’t know what hit ’em. Trust me, they’ll wag their tails in gratitude while you bask in the glory of your chef skills.
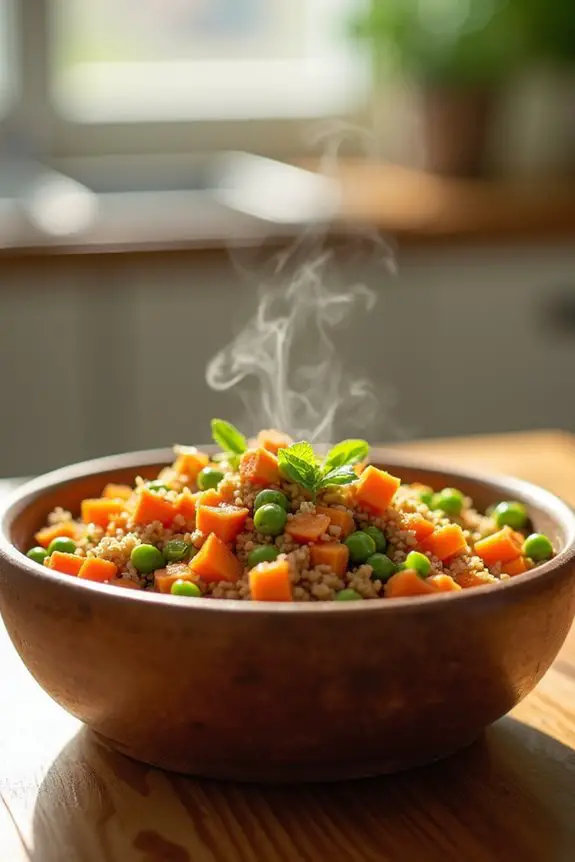
Proper Ingredient Measurements
Getting the ingredient measurements just right is essential when making homemade dog food, especially if your furry friend is dealing with bladder stones. Too much of one ingredient can upset their delicate balance.
Getting ingredient measurements spot on is crucial for homemade dog food, particularly for pups with bladder stones. Balance is key!
You’ll want a solid base—start with 50% protein, like chicken or turkey. Then, mix in about 25% grains, such as brown rice or quinoa. Oh, and don’t forget those veggies; aim for 20%—carrots and green beans work wonders.
Here’s a secret: weigh everything for accuracy. You might think you can eyeball it, but that’s just asking for trouble. Ever made soup too salty? Yeah, not fun.
Keep measuring cups handy, and if your pup’s picky, adjust the flavors gradually. Just remember, you’re crafting a masterpiece here. A little experimentation can lead to a drool-worthy meal. And hey, if it passes the sniff test, you’ve got a winner. Your pooch will thank you with tail wags.
Frequently Asked Questions
What Are the Symptoms of Bladder Stones in Dogs?
Your dog may show symptoms like frequent urination, straining to urinate, blood in urine, or pain while urinating. They might also exhibit increased thirst, restlessness, or lethargy. Keep an eye out for these signs.
How Do I Know if My Dog Needs Homemade Food?
If your dog shows signs of digestive issues, allergies, or weight problems, it might need homemade food. Observe their energy levels, coat condition, and overall health; these can indicate whether it’s time for a diet change.
Can I Mix Homemade Food With Commercial Dog Food?
Yes, you can mix homemade food with commercial dog food. Just guarantee the combination meets your dog’s nutritional needs and consult your vet to avoid any dietary imbalances or digestive issues. Your dog’s health comes first!
How Long Can I Store Homemade Dog Food?
You can store homemade dog food in the refrigerator for about three to four days. If you’re freezer-storing it, it’ll last up to three months. Just remember to thaw it properly before serving!
Are There Specific Vitamins or Supplements I Should Include?
Yes, consider including omega-3 fatty acids, vitamin E, and specific minerals like potassium and calcium. Always consult your vet first to tailor the supplements to your dog’s unique dietary needs and health conditions.

Hi, I’m Ali Tarek, the founder of Animalsman. I’ve always been passionate about pets, especially dogs and cats, and I created this website to share practical tips, easy recipes, and helpful care advice for fellow pet lovers. My goal is to make pet care simple, enjoyable, and accessible for everyone. When I’m not writing or curating content, you’ll usually find me spending time with my furry friends or learning new ways to keep them happy and healthy.

