Did you know that indoor dog potties can actually be stylish and functional? Gone are the days of plain, clunky solutions that clash with your decor. Imagine having a chic indoor grass patch or a cute potty station that fits right in with your home. It’s all about making life easier for you and your furry friend. Curious about how to blend practicality and aesthetics? Let’s explore some creative ideas that could transform your space.
Pet-Friendly Indoor Grass Patches
When you think about it, having a pet-friendly indoor grass patch can be a game changer for both you and your furry friend.
Imagine those rainy days when your pup just can’t wait to go outside. An indoor dog potty DIY project can save you both from that awkward dance by the door. You can easily create a small patch of synthetic grass, add a drainage system, and voilà! Your dog has a designated spot.
Just remember to train them to use it consistently. It’s like having a mini dog park right in your living room. Plus, you’ll feel a little like a pet-parenting genius, and who doesn’t love that?
Your floors will thank you, and so will your pup’s bladder.
Our Collection
Let’s explore our collection of indoor potty solutions that’ll make your life a whole lot easier.
From training pads that soak up all the mess to decorative dog urinals that’ll have your guests wondering if they’re in a fancy dog spa, there’s something for every pup.
And don’t forget the self-watering planters and potted grass—because who says your indoor potty can’t be a little stylish?
1. Indoor Potty Training Pads
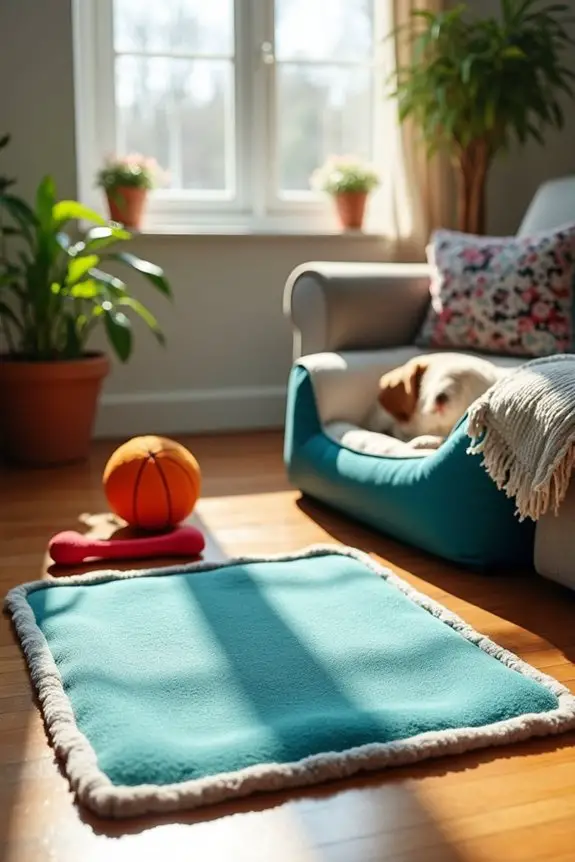
If you’re a dog owner, you know that accidents happen — especially when your pup is still getting the hang of things. Creating your own indoor potty pad can be a game-changer. Not only does it save you money on store-bought pads, but it also provides a comfortable and familiar spot for your furry friend to do their business. Plus, you can make it look cute, which is a win-win for everyone! Additionally, consider incorporating a dog grass potty station to enhance your pet’s experience and help them transition smoothly.
Materials Needed:
- Waterproof fabric (like PUL or vinyl) — about 1 yard
- Soft absorbent fabric (like microfiber or fleece) — about 1 yard
- Sewing machine (or needle and thread if you’re feeling adventurous)
- Scissors
- Measuring tape
- Pins or clips
- Optional: Velcro strips or snaps (for a removable cover)
Step-by-Step Instructions:
- Measure and Cut: Start by measuring out a rectangle or square about 30 inches wide (or whatever size you think your pup needs). Cut your waterproof fabric and absorbent fabric to match these dimensions.
- Layer the Fabrics: Lay your waterproof fabric down first, shiny side up. Then, place the absorbent fabric on top, soft side up.
- Pin It Down: Use pins or clips to hold the two layers together. This keeps them from shifting when you sew.
- Sew the Edges: Using a sewing machine (or your trusty needle and thread), sew around the edges, leaving a small gap to turn it inside out later. Make sure to backstitch at the start and end to secure your seams.
- Turn It Inside Out: Carefully pull the pad through the gap you left, so the absorbent side is now facing out.
- Close the Gap: Fold in the edges of the gap you left and sew it shut.
- Optional – Add Fasteners: If you want to make it easier to wash, sew on Velcro strips or snaps to keep the absorbent layer in place while allowing for washing.
Optional Add-ons/Variations:
- Play with Colors and Patterns: Choose fun fabrics with cute prints or colors that match your home decor. You could even make a themed pad for holidays, like a pumpkin spice pattern for fall.
- Add a Scent: Some dogs respond well to specific scents. Try adding a few drops of dog-safe essential oils to the absorbent layer before sewing for an inviting aroma.
Pro Tip:
Make sure to use a fabric that’s durable and easy to clean. A waterproof layer is essential to protect your floors, but it’s also smart to choose a machine-washable absorbent fabric. Trust me, cleaning up after a dog is messy enough without having to hand-wash everything.
Creating your own indoor dog potty pad isn’t just a practical solution; it’s a fun project that lets you add a personal touch to your home. Plus, your pup will appreciate the cozy spot you’ve made just for them. Who knew potty training could come with a side of DIY creativity?
2. Self-Watering Indoor Planters
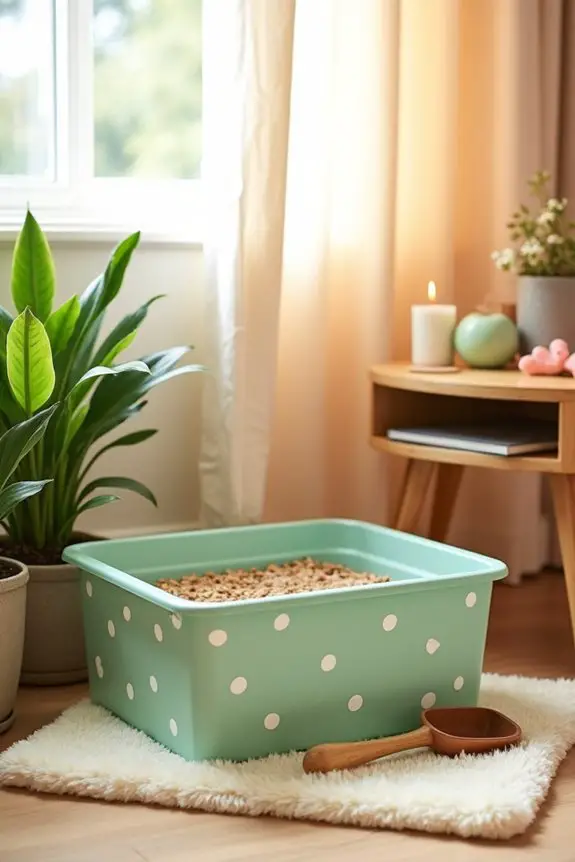
Let’s face it; sometimes, taking your dog out for a bathroom break just isn’t feasible. Whether it’s pouring rain, snow, or the middle of the night, having an indoor dog litter box can save you from those frantic moments. Investing in a luxury indoor dog potty can elevate your pet’s comfort while ensuring your home stays clean and stylish.
This DIY project not only helps keep your home clean but also provides your furry friend with a designated space that feels safe and familiar. Plus, you can customize it to fit your home décor, making it a win-win for everyone involved.
Materials Needed:
- Plastic storage container (at least 20 gallons)
- Dog-safe litter (like recycled paper or wood pellets)
- Scoop (a small shovel or a kitty litter scoop works well)
- Optional: mat (to catch stray litter)
- Optional: lid (to keep odors contained)
Step-by-Step Instructions:
- Choose the Right Container: Start by selecting a plastic storage container that’s big enough for your dog to comfortably move around in. Look for one with low sides for easy access.
- Prep the Base: Rinse out the container to verify it’s clean. Once dry, place it in an area of your home where your dog feels comfortable and has some privacy.
- Add the Litter: Pour in about 2-3 inches of dog-safe litter. This depth allows your pup to dig a bit without feeling like they’re just moving dirt around.
- Introduce It to Your Dog: Show your dog their new potty area. You might want to encourage them to sniff around and explore. If your dog has a favorite spot for business, try placing the box nearby.
- Train Your Pup: If your dog is hesitant, take them to the litter box regularly, especially after meals or naps. Positive reinforcement (like treats and praise) when they use it can work wonders.
- Maintain the Box: Scoop out any waste daily and change the litter weekly. This keeps odors at bay and makes it feel like a clean space for your pup.
- Optional – Personalize It: If you want to get a little fancy, place a mat underneath to catch stray litter or use a lid to keep things tidy and reduce odors.
Optional Add-ons/Variations:
- Decorate the Container: Use non-toxic paint or stickers to customize the outside of the box. Choose fun colors or patterns that match your home’s vibe. Who says a litter box can’t look cute?
- Add a Privacy Screen: If your pup appreciates a little privacy, consider using a small curtain or even a few plants around the box to create a cozy nook.
Pro Tip:
Make sure to regularly clean the container with mild soap and water to keep it fresh. A little maintenance goes a long way in making this a comfortable spot for your dog, and it helps eliminate odors before they become a problem. Trust me, your nose will thank you later.
There you have it — a simple, stylish, and functional indoor dog litter box that both you and your pup can appreciate.
3. Indoor Dog Litter Box
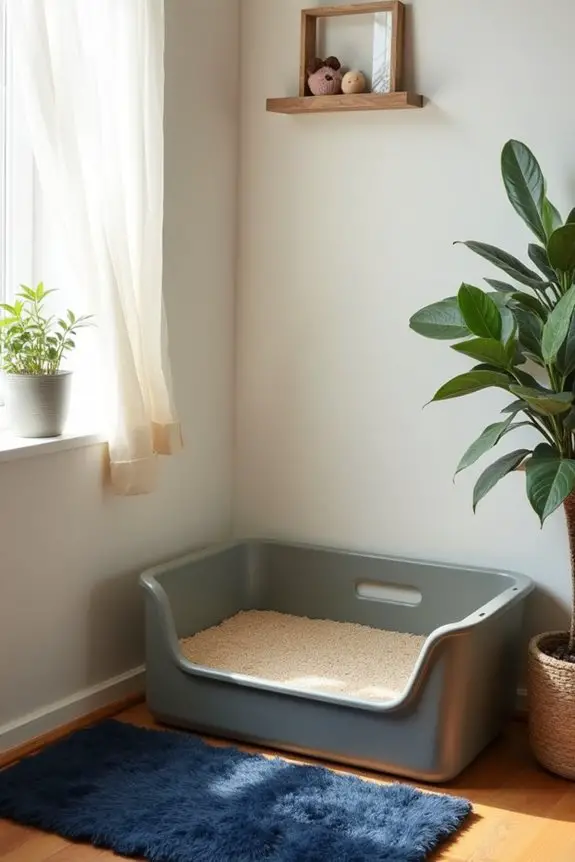
Creating an indoor dog litter box is a fantastic DIY project that can make life a whole lot easier for dog owners. Imagine those rainy days or late-night emergencies when stepping outside isn’t an option—this little haven can save your sanity and keep your home clean.
Plus, it’s a budget-friendly way to give your furry friend a cozy spot that feels like their own, while also adding a touch of personalization to your space. Let’s explore.
Materials Needed:
- Plastic storage container (at least 20 gallons)
- Dog-safe litter (recycled paper or wood pellets work great)
- Scoop (a small shovel or kitty litter scoop)
- Optional: mat (to catch any stray litter)
- Optional: lid (to minimize odors)
Step-by-Step Instructions:
- Select Your Container: Find a plastic storage container that’s spacious enough for your pup to maneuver. Look for one with low sides; trust me, they’ll appreciate the easy access.
- Clean It Up: Before setting it up, give the container a good rinse to make certain it’s squeaky clean. Once dry, place it in a quiet corner where your dog feels comfortable and has a bit of privacy—maybe near their favorite spot.
- Add the Litter: Pour in 2-3 inches of dog-safe litter. This depth encourages your dog to dig and scratch without making a mess. It’s like their little sandbox, minus the beach vibes.
- Show It Off: Introduce your dog to their new potty area. Encourage them to sniff around and explore. If they’ve a preferred bathroom spot, consider placing this box nearby. It’s all about making them feel at home.
- Train Your Pup: If your dog seems unsure, take them to the litter box regularly, especially after meals or naps. Praise and reward them with treats when they use it. It’s like a little training session that pays off.
- Keep It Clean: Scoop out waste daily and change the litter weekly. This keeps the area fresh and inviting for your pup. A clean space means they’re more likely to use it.
- Optional – Add Flair: Want to elevate the aesthetic? Consider placing a mat underneath to catch any stray litter, or use a lid to keep odors contained and things looking tidy.
Optional Add-ons/Variations:
- Decorate: Get creative with non-toxic paint or fun stickers to jazz up the container. Coordinate colors or patterns with your home décor. Who said a litter box can’t be stylish?
- Create a Cozy Nook: If your dog likes a bit of privacy, think about adding a small curtain or some plants around the box to give them a little sanctuary.
Pro Tip:
Don’t forget to keep the litter box in a well-ventilated area. This helps with odors and keeps your dog comfortable.
And hey, if you can find a litter that clumps well, it’ll make your life easier when it comes to scooping. Remember, having a designated spot for your dog’s potty needs can also help you maintain a tidy home and enhance your overall dog ownership experience, especially with a practical solution like a dog food storage cabinet. Happy DIY-ing!
4. Decorative Indoor Dog Urinals
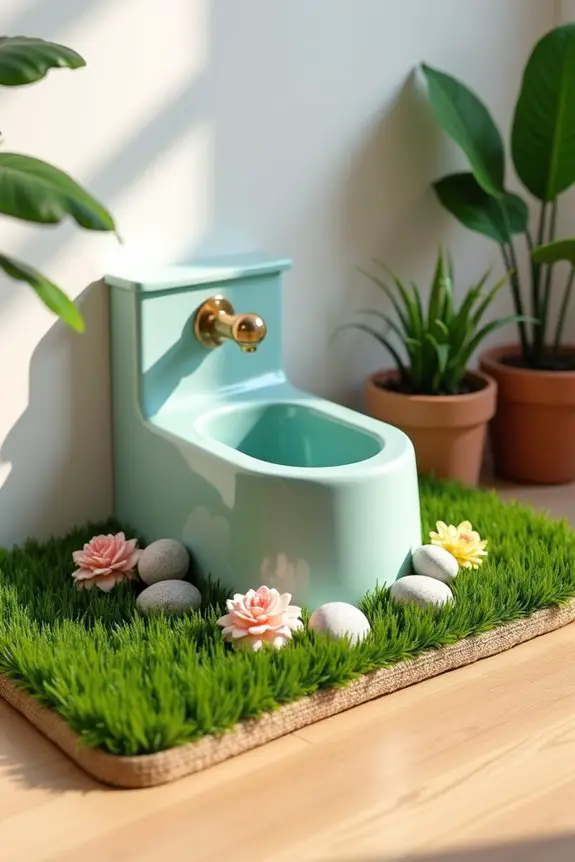
If you’re tired of the hassle of late-night bathroom runs or your pup’s occasional accidents indoors, a decorative indoor dog urinal can be a game-changer. Not only does it offer a designated potty spot for your dog, but it also adds a stylish touch to your home. Who knew pet care could be so chic? Let’s explore how you can create one that blends functionality with flair.
Materials Needed:
- Small plastic or ceramic urinal (dog-friendly size)
- Artificial grass or turf (to mimic outdoor vibes)
- Dog-safe cleaning solution
- Decorative tray or mat (to catch spills)
- Optional: faux flowers or decorative stones (for a stylish touch)
Step-by-Step Instructions:
- Choose Your Urinal: Start by selecting a small, dog-friendly urinal. Look for one that’s easy to clean and suits your pup’s size. If it’s cute, even better.
- Prepare the Base: Place the urinal on a decorative tray or mat to catch any stray liquid. This will help keep your floors clean and make your setup look more polished. No one wants to deal with puddles on the floor.
- Add the Turf: Cut your artificial grass to fit the urinal. This adds a natural element that dogs love. Just imagine them trotting over to their fancy new potty area, feeling like they’re outside.
- Introduce the Urinal: Show your dog their new potty spot. Encourage them to sniff around and explore. If they’re hesitant, gently guide them to the urinal after meals or naps. Treats work wonders here, turning potty time into a celebration.
- Keep It Fresh: Clean the urinal regularly with a dog-safe cleaning solution to keep odors at bay. A clean potty area is more inviting for your pup. You’ll thank yourself later when you don’t have to scrub stubborn stains.
- Optional – Add a Touch of Decor: Get creative with decorative stones or faux flowers around the urinal. It’s a small way to elevate the look, making it a cute focal point in your home instead of an eyesore.
Optional Add-ons/Variations:
- Customize the Turf: Choose turf in different colors or textures to match your home’s aesthetic. You could even go for a quirky pattern that reflects your personality.
- Create a Pet-Friendly Garden: Surround the urinal with small potted plants (safe for dogs, of course) to create a mini indoor garden vibe. Your dog will feel like they’ve their own little paradise.
Pro Tip:
Make sure to place the urinal in a quiet, low-traffic area of your home where your dog feels comfortable. This will encourage them to use it more often, making it a reliable option for those unexpected moments when they just can’t hold it any longer. Plus, it gives you peace of mind knowing they’ve a safe place to go.
Creating a decorative indoor dog urinal doesn’t just improve your dog’s potty experience; it also adds a unique touch to your home. By investing in a luxury dog potty system, you can ensure both style and functionality in this essential aspect of pet care. Give it a try, and watch both you and your pup thrive in this new setup.
5. Potted Indoor Dog Grass
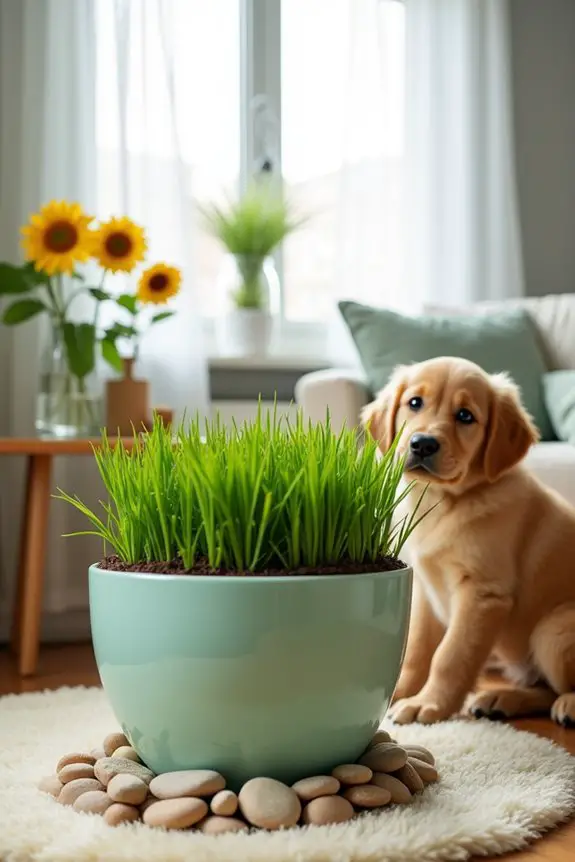
If you’re looking for a simple yet effective way to help your pup feel more at home indoors, potted dog grass is a fantastic DIY project. Not only does it provide a dedicated potty area that mimics the outdoors, but it also adds a touch of greenery to your living space. Plus, it saves you from those late-night bathroom runs and the stress of accidents on your floors. Additionally, setting up a luxury dog washing station can complement your indoor grass setup, providing a complete pet care solution.
Let’s explore how you can create a cozy potted grass area for your furry friend.
Materials Needed:
- Plastic or ceramic pot (dog-safe and easy to clean)
- Dog-friendly grass seed (like wheatgrass or pet grass)
- Potting soil (choose quality soil for better growth)
- Watering can or spray bottle (for easy watering)
- Optional: decorative stones or mulch (to enhance the look)
- Shovel or small trowel (for planting)
Step-by-Step Instructions:
- Choose Your Pot: Find a pot that’s the right size for your dog. It should be deep enough to hold soil and allow the grass to grow, but shallow enough for easy access. If it’s cute, that’s a bonus.
- Prepare the Soil: Fill the pot with potting soil, leaving about an inch of space at the top. Make sure the soil is loose and crumbly, so the grass roots can establish easily. Trust me, your grass will thank you for the good foundation.
- Plant the Seeds: Sprinkle the dog-friendly grass seeds evenly over the soil. Don’t be shy; give them a good scattering. Then, gently press the seeds into the soil. Cover them lightly with a thin layer of soil to protect them.
- Water It Up: Grab your watering can or spray bottle and give the soil a good soak. You want it damp, but not soggy. Overwatering can lead to sad, mushy grass. Think of it as giving your grass a revitalizing drink, not a bath.
- Find the Perfect Spot: Place your potted grass in a well-lit area, but avoid direct sunlight, which can scorch the delicate sprouts. A sunny windowsill usually does the trick. Your little grass patch deserves a cozy corner.
- Be Patient: Water the grass regularly, keeping the soil moist. It can take a week or two for your grass to sprout. While you’re waiting, practice your best “patience is a virtue” face. I know, waiting can be hard, especially when you’re excited about your new project.
- Introduce Your Dog: Once the grass is up and thriving, introduce your pup to their new potty area. Encourage them to sniff and explore. If they seem unsure, lead them over after meals or playtime, and reward them for using it. Treats are a great way to show your appreciation.
Optional Add-ons/Variations:
- Decorative Touches: You can personalize your pot with paint or stickers that match your home decor. Maybe go for a quirky design that reflects your dog’s personality. Think of it as a tiny garden party for your furry friend.
- Create a Grass Box: Instead of a single pot, consider using a shallow wooden box filled with grass. This gives your dog more room to roam and can be a fun centerpiece in a room.
Pro Tip:
Make sure to rotate the pot occasionally to encourage even growth. Grass tends to lean toward the light, so turning it will help create a bushy, full look. Plus, your dog will appreciate the extra shade on one side.
Creating a potted indoor dog grass area isn’t just practical; it’s a wonderful way to bring a bit of the outdoors inside. Your pup will love it, and your home will feel just a little more alive. Happy planting!
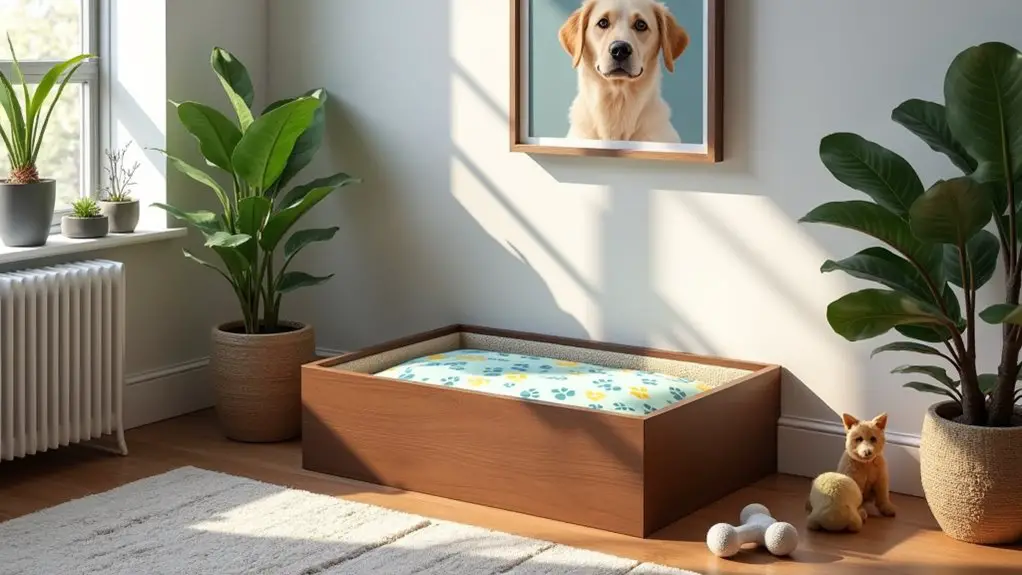
6. Indoor Dog Potty Furniture
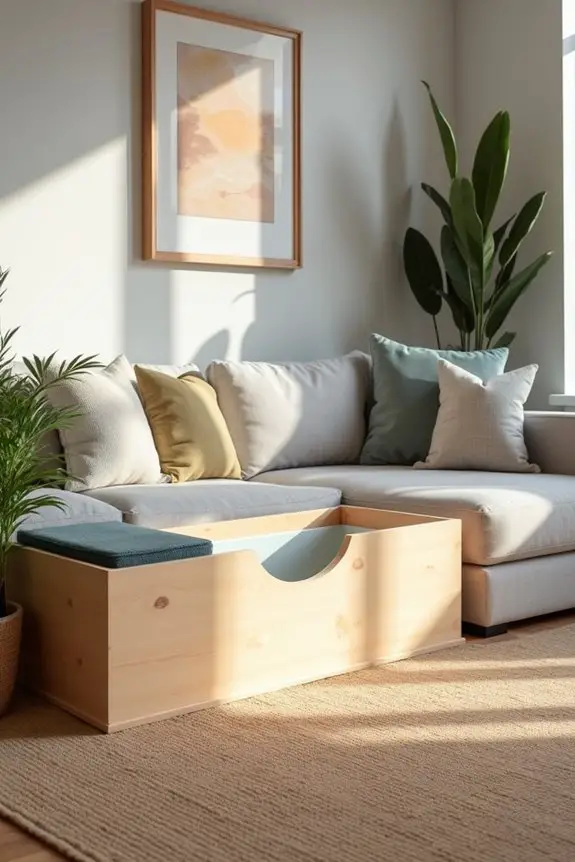
Creating a cozy and functional indoor potty area for your dog doesn’t have to feel like a chore. With a little creativity and some DIY spirit, you can build stylish indoor dog potty furniture that blends with your home decor. Not only does this project save you money compared to store-bought options, but it also adds a unique touch to your space while keeping your pup comfortable.
Let’s explore how you can craft this furniture piece that your dog will love!
Materials Needed:
- Wood (plywood or MDF) – for building the structure
- Non-toxic wood stain or paint – to enhance the look
- Sandpaper – for smoothing edges
- Wood screws – to secure the pieces together
- Hinges – if you want a lid for easy cleaning
- Plastic liner or tray – to contain mess and make cleaning easier
- Measuring tape – for precise dimensions
- Saw – for cutting the wood to size
- Drill – for making holes for screws
- Paintbrush or roller – for applying stain or paint
- Optional: cushion or mat – to make it comfy for your dog
Step-by-Step Instructions:
1. Design Your Furniture Piece: Think about the size and shape you want. A simple box design works well. Measure your dog to guarantee it’s comfortable, and sketch your plan.
Let’s be honest, drawing a blueprint makes you feel like a real architect.
2. Cut the Wood: Using your saw, cut the wood pieces according to your design. You’ll likely need a base, sides, and a top. Remember, measure twice, cut once.
No one wants a wonky potty box.
3. Sand the Edges: Take your sandpaper and smooth out all the edges. This step is vital to avoid any splinters.
Trust me, your pup (and your hands) will thank you for this extra care.
4. Assemble the Structure: Secure the sides to the base using wood screws. If you’re adding a lid, attach it with hinges for easy access.
Now is the time to channel your inner handyman. It’s okay if you feel like a DIY superhero — embrace it.
5. Paint or Stain: Apply the non-toxic wood stain or paint to your assembled furniture. Choose a color that complements your home decor.
This is where your personal style shines through. Just remember to let it dry thoroughly.
6. Add the Liner: Once the paint or stain is dry, place a plastic liner or tray inside to catch any mess. This makes cleanup a breeze and keeps your furniture looking fresh.
You’ll be the cleanup champion in no time.
7. Introduce a Comfy Touch****: If you want, add a cushion or mat inside for extra comfort. Your dog deserves a cozy spot to relieve themselves, don’t you think?
Plus, it makes the whole area look more inviting.
Optional Add-ons/Variations:
– Change the Color Palette: Get creative with your paint choices. Consider a fun pop of color or even a funky pattern.
Maybe your pup deserves a little flair, right?
– Customize the Shape: Instead of a box, feel free to create a more unique shape like a bench or a small table.
It can double as furniture while being functional.
Pro Tip:
Always confirm the materials you use are pet-safe and non-toxic.
When it comes to cleaning, consider lining the bottom with puppy pads. This little trick can save you from dealing with messes and make your cleanup routine a snap.
Plus, it keeps your furniture looking brand new longer.
7. Indoor Pet Potty Stations
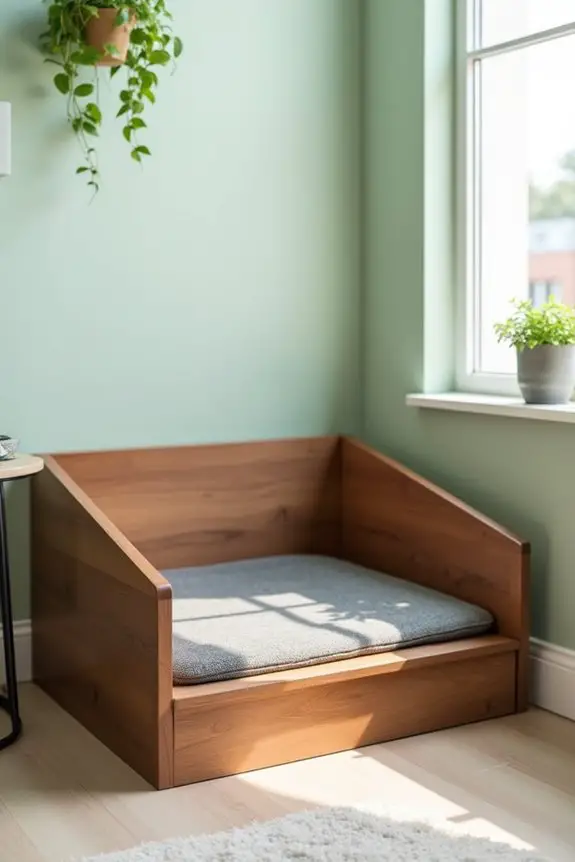
Creating an indoor pet potty station can be a game-changer for dog owners, especially during those rainy or snowy days when going outside is less than appealing. This DIY project not only gives your furry friend a designated area to relieve themselves but also keeps your home looking neat and tidy. Plus, it’s a budget-friendly solution that can be customized to fit your style.
Materials Needed:
- Wood (plywood or MDF) – to build the base structure
- Non-toxic wood stain or paint – to match your decor
- Sandpaper – for smoothing rough edges
- Wood screws – to hold everything together
- Plastic liner or tray – to catch any mess
- Measuring tape – for accurate dimensions
- Saw – for cutting wood
- Drill – for making screw holes
- Paintbrush or roller – for applying stain or paint
- Optional: cushion or mat – to provide comfort for your dog
Step-by-Step Instructions:
- Plan Your Design: Start by sketching out the design of your potty station. A simple rectangular box works wonders. Think about the space you have and how large your dog is—this will help you decide the perfect size.
- Cut the Wood: Using your saw, cut the wood pieces according to your measurements. You’ll need a base, four sides, and possibly a top if you want a lid. Remember, safety first—keep your fingers clear of the blade.
- Sand Those Edges: Grab your sandpaper and smooth out all the edges of your cut wood. This step is essential—no one wants splinters, right? Your pup deserves a safe space, and you want to avoid any accidental scratches on your hands.
- Assemble the Structure: Secure the sides to the base using wood screws. If you opted for a lid, attach it with hinges—this way, cleaning will be a breeze. It’s like building a doghouse with a twist, but for indoor use.
- Paint or Stain: Once the structure is assembled, it’s time to make it pretty. Apply your non-toxic wood stain or paint, choosing something that fits your home’s vibe. Let it dry completely—patience is key here.
- Add the Liner: After the paint is dry, insert a plastic liner or tray inside the potty station. This will contain any mess your pup might make, keeping things nice and tidy. It’s like a built-in cleaning system.
- Final Touch: If you want to pamper your dog a bit, add a cushion or mat inside the potty station. This makes it cozier for them and shows that you care about their comfort.
Optional Add-ons/Variations:
- Color Customization: Feel free to paint your potty station in a bright color or fun pattern that matches your living space. You could even decoupage fun dog-themed images on the sides.
- Fabric Inserts: Instead of a plastic liner, consider using a removable fabric insert that’s washable for easy cleaning. Choose a fabric that complements your home, and you’ll have a stylish potty station.
Pro Tip:
Make sure to place your indoor potty station in a quiet, low-traffic area of your home. This way, your pup can feel secure while doing their business. Also, remember to keep an eye on the cleanliness of the station—regular maintenance keeps it comfy and pleasant for both you and your furry friend.
With just a little effort and creativity, you can put together a fantastic indoor potty station that looks great and serves its purpose beautifully. So, why not give it a try? Your dog will thank you, and you’ll enjoy the extra peace of mind!
Extra Tips & Ideas
While you might think that setting up an indoor potty for your dog is just about picking a spot and calling it a day, there’s actually a lot more you can do to make the experience better for both of you.
First, consider using a specific command or cue to signal potty time. Dogs love routine, and this helps them understand what you expect.
Next, keep the area clean—nobody enjoys a stinky bathroom, right? You might even want to add a little artificial grass for that outdoor feel.
And hey, don’t forget to reward your pup with treats when they get it right. It’s like a mini celebration! Trust me, you’ll both feel great about it.
Frequently Asked Questions
How Often Should I Clean the Indoor Dog Potty?
You should clean the indoor dog potty daily to keep it hygienic and odor-free. Regular maintenance prevents bacteria buildup and makes it more appealing for your dog, ensuring they use it without hesitation.
What Size Indoor Potty Is Best for My Dog?
The best size indoor potty for your dog depends on their breed and size. Generally, it should be big enough for them to comfortably turn around but small enough to fit in your space easily.
Can I Use Regular Soil in an Indoor Potty?
You can use regular soil in an indoor potty, but it’s best to opt for a cleaner, odor-absorbing option. Regular soil can retain moisture and lead to unpleasant smells and mess.
What Scents Deter Dogs From Using the Potty?
Strong citrus scents, bitter apple spray, and vinegar deter dogs from using the potty. You’ll find that these scents create an unpleasant experience, pushing your furry friend away and encouraging them to seek a more suitable spot.
Are Indoor Dog Potties Suitable for Puppies?
Yes, indoor dog potties are suitable for puppies. They provide a designated area for your puppy to relieve themselves, helping with training and preventing accidents. Just make certain you’re consistent and patient during the training process.
Conclusion
So, ready to transform your indoor space for your furry friend? With these creative potty solutions, you can keep your home clean and stylish while making potty time a breeze. Whether you go for a chic indoor grass patch or a whimsical doggie urinal, it’s all about finding what works best for you and your pup. After all, who wouldn’t want a happy, well-potty-trained dog? Let’s face it, we all know accidents can happen, but they don’t have to ruin your day.

Amr Mohsen is a software engineer who traded his keyboard for a leash — at least on weekends. His love for dogs inspired him to share what he learns as a dog owner and enthusiast, bringing a detail-oriented, research-driven perspective to every article he writes. If it’s about dogs, he’s probably already looked it up twice.

