Okay so, can we talk about cats for a sec? Because my cat, Little Thunder, destroyed my throw pillow last winter looking for a warm spot — and I just stood there holding my coffee like… why don’t I just get her an actual house?
That’s the thing. Cats want their own cozy corner. And without one, they claim yours — your blankets, your couch, your favorite chair that you just reupholstered.
The scratching. The fur on everything. The 3am “I’m cold and unhappy” meowing that wakes the whole house up.
It adds up fast.
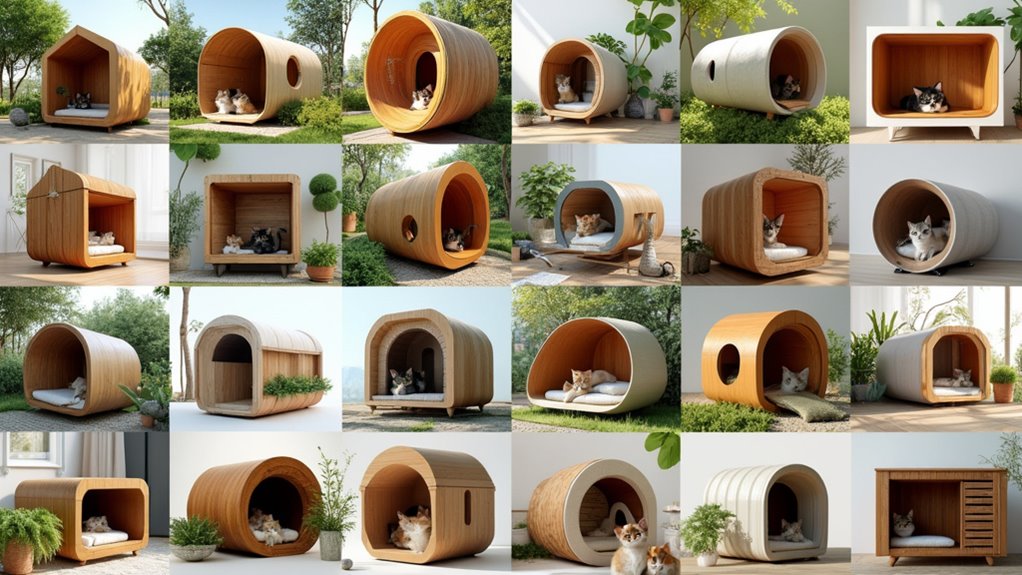
These 19 cozy cat house ideas cover every season — so whether Little Thunder needs shade in July or a warm hideout in January, there’s something here that actually works.
Your cat gets her space. You get your throw pillow back.
#1: The Rattan Cat Sofa That Makes Your Living Room Look Like a Pinterest Board
Your golden retriever has claimed every couch cushion in the house. The cat? She’s been squished into a corner with a $12 Amazon bed that clashes with everything. I’ve been there — my cat Mika used to sleep on a sad little pillow next to my bookshelf and honestly it stressed me out every time I looked at it.
This rattan and walnut-finish cat sofa is a whole different story.
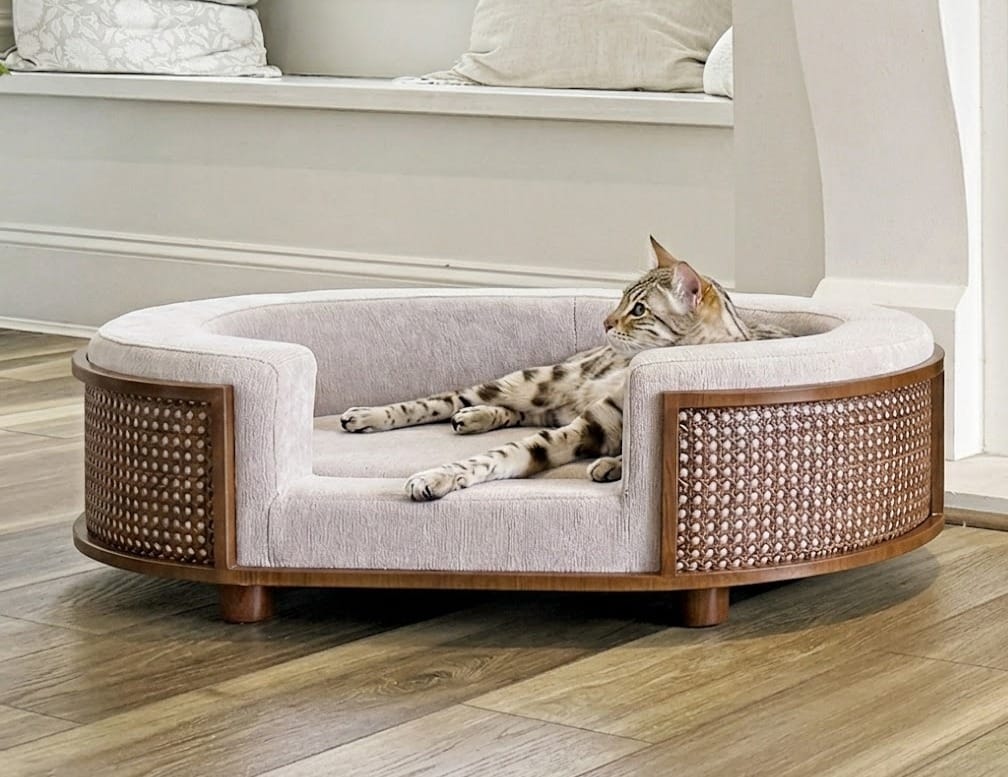
The frame is solid wood with woven cane panels on both sides, finished in a warm walnut stain. The cushion is a cream boucle-style fabric that sits inside a curved backrest — it’s shaped like a mini barrel chair. The legs are short turned wood, keeping it low and stable on hardwood or tile floors.
Place it near a window seat like in this photo. Cats live for that natural light, and the neutral cream-and-brown palette blends into almost any room without fighting your existing decor.
Size it right — this style typically runs around 24 inches wide, which is roomy enough for a large cat but won’t eat up floor space.
The cane panels double as a subtle scratcher surface, which means your cat gets texture to knead without destroying your actual furniture.
📸 Photo credit: Instagram @catsplayfurniture
#2: The “I Sleep on the Floor, You Take the Bed” Setup — And Why It Works
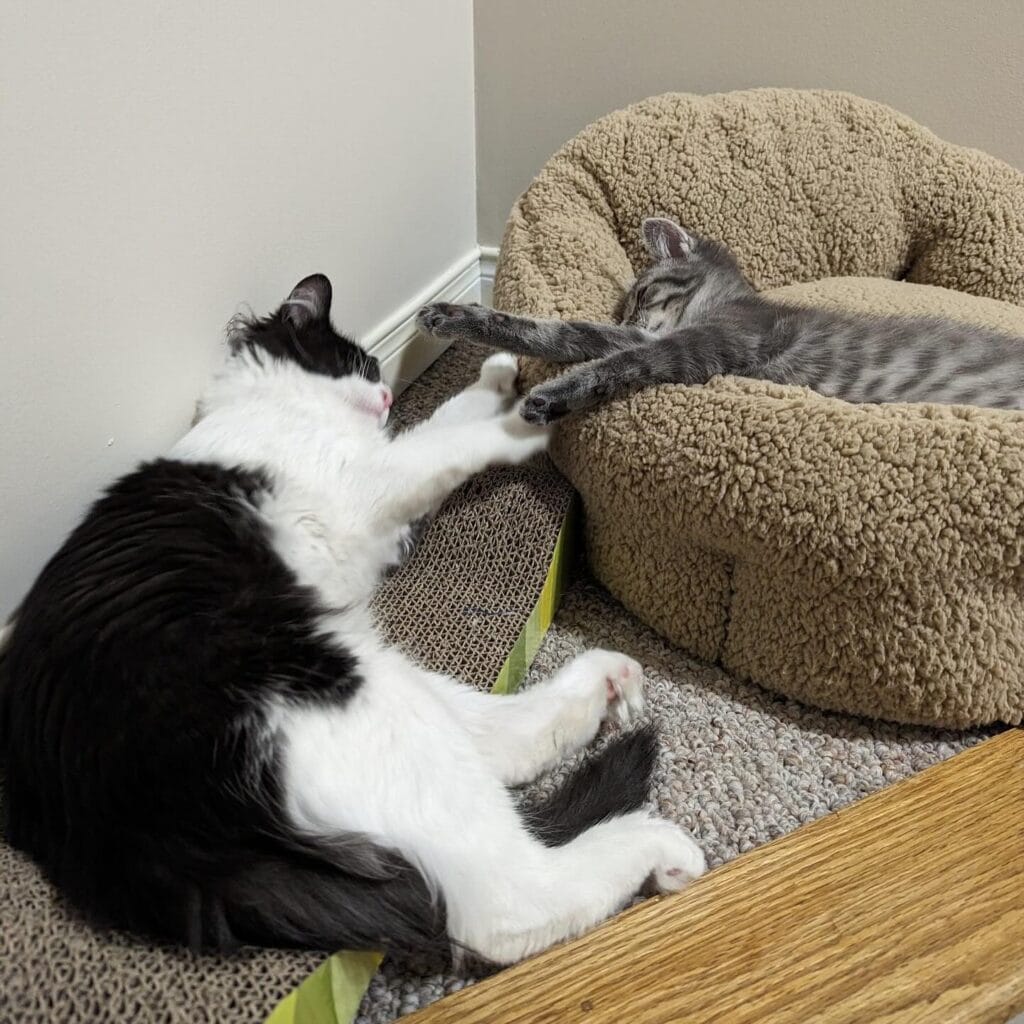
Okay so this one genuinely made me laugh out loud because this is the most cat thing I’ve ever seen. The big tuxedo cat is sprawled on the carpet like he owns the whole floor, while the tiny gray kitten has completely claimed the tan sherpa donut bed. Nobody asked. Nobody negotiated. It just happened.
And honestly? This setup is goals.
You need a round sherpa pet bed (the bouclé texture wears well and photographs beautifully), a corrugated cardboard scratch pad in a lime green tray, and a low-pile area rug underneath to anchor the whole corner.
The scratch pad sitting between them is doing real work here — it gives the floor cat something to knead and claw without destroying your baseboards.
Keep this in mind: tuck this little station into a wall corner the way they did here. Corners = security for cats. They’ll actually use the setup instead of ignoring a $60 bed you put in the middle of the room.
Pair this with more 19 Clever Cat Area in House Ideas for Cozy Corners if you want to build out a full cat zone without sacrificing your aesthetic.
📸 Photo credit: Instagram @catsplayingdead
#3: The Sphere-in-a-Cube Cat Pod That Looks Like Modern Art
Okay, you know how your golden retriever has that one spot on the rug she claims as hers? Cats are the same way — except they want walls around that spot. This pod gives them exactly that, and it looks so good you’ll want it in your living room on purpose.
The star here is a dark charcoal felt sphere nested inside a black powder-coated steel cube frame. The sphere has a circular cut-out opening just wide enough for a cat to slip in, and inside sits a small mustard-yellow cushion that pops against all that gray. The whole thing sits on your rug like a sculpture.
The felt is wool-blend, which naturally regulates temperature — warm in winter, not stuffy in summer. That’s the feature, but the real payoff is your cat actually using their bed instead of your couch.
Small change, big win: swap the included cushion for a washable cotton insert so cleanup takes two minutes flat.
The cube frame lifts the sphere just enough off the ground to feel intentional, not random. Keep it near — not against — the wall so your cat feels sheltered but not cornered. Cats pick spots with sightlines, and this placement honors that instinct.
If your cat runs cold in winter, pairing this with an insulated cat house idea for outdoor spaces is worth bookmarking too.
📸 Photo credit: Instagram @homeadore_arch
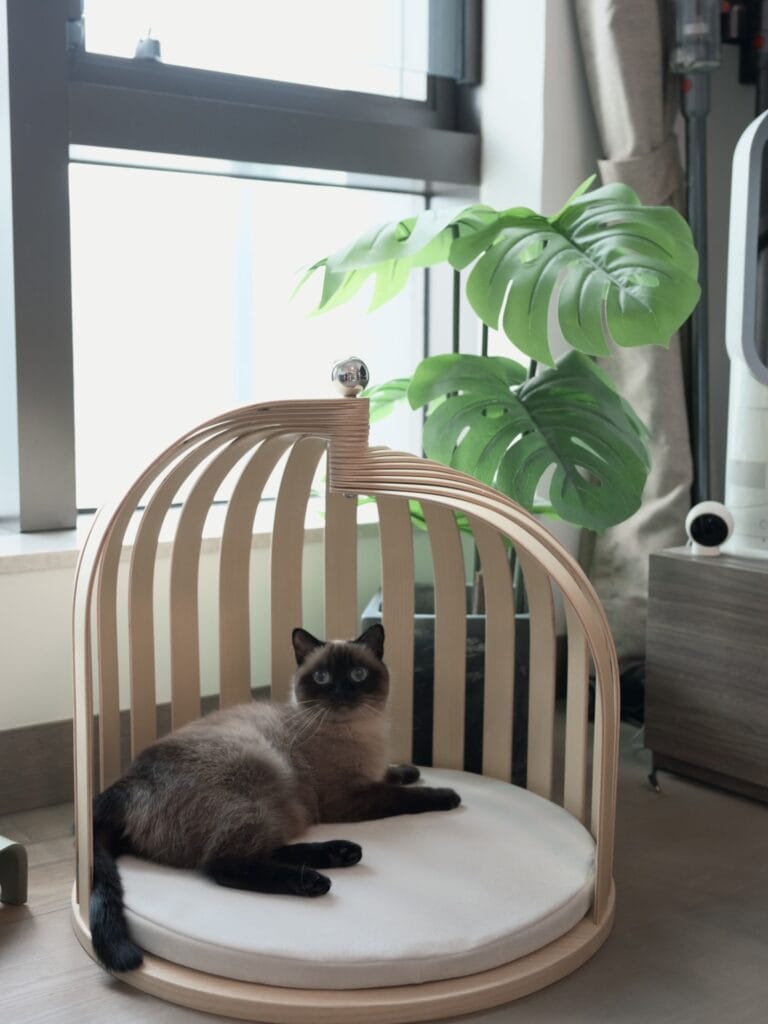
#4: The Birdcage Cat Bed That Makes Your Living Room Look Like a Pinterest Board
You know that moment when your golden plops down in the middle of the floor and you think, why does my dog have better taste in napping spots than I do? Yeah. This cat bed just gave me that same feeling.
This birdcage-style cat house is built from bentwood slats in a warm cream finish, shaped into an arched dome that honestly looks more like furniture than a pet product. The round cushion base is padded and white, sitting flush inside the frame. And the tiny silver ball finial on top? Chef’s kiss.
To get this exact look, you need the birdcage bed itself, a monstera deliciosa plant nearby (the big leafy one you see peeking over the top), and a wood-tone floor to ground the whole setup.
Place it near a window so your cat gets that warm natural light. The open slat design means airflow stays good, your cat feels cozy but not trapped — and you get a piece that doesn’t scream “pet stuff.”
Pair it with neutral linen curtains and a small security camera (you can spot one tucked in the background here) to keep an eye on your fur baby without adding clutter.
📸 Photo credit: Instagram @carbon.britishshort
#5: The Fluffy Donut Bed That Turns Your Kitten Into a Little Cinnamon Roll
Okay, so you know how your golden retriever has that one spot on the couch she claims every single night? Kittens do the exact same thing — they just need something way cozier to sink into.
This round donut-style cat bed in light gray faux sherpa is everything. The raised, cloud-like walls cradle the kitten’s body so it curls into a perfect little ball — which is exactly what you’re seeing here. That tabby kitten looks basically melted into it.
The bed itself is made from long-pile plush fabric — that thick, shaggy texture mimics a mother cat’s warmth, which means kittens sleep longer and cry less at night. The circular opening is wide enough to feel safe but snug enough to hold body heat. Deep-sided walls + heat retention + soft texture = a kitten that actually stays put.
Size matters here. Go for a 20-inch diameter minimum so your cat doesn’t outgrow it in three months.
Toss it near a sunny window but away from drafts. And if your kitten ignores it at first, rub a little catnip along the inner rim — they’ll claim it within the hour.
📸 Photo credit: Instagram @claricethesiberian
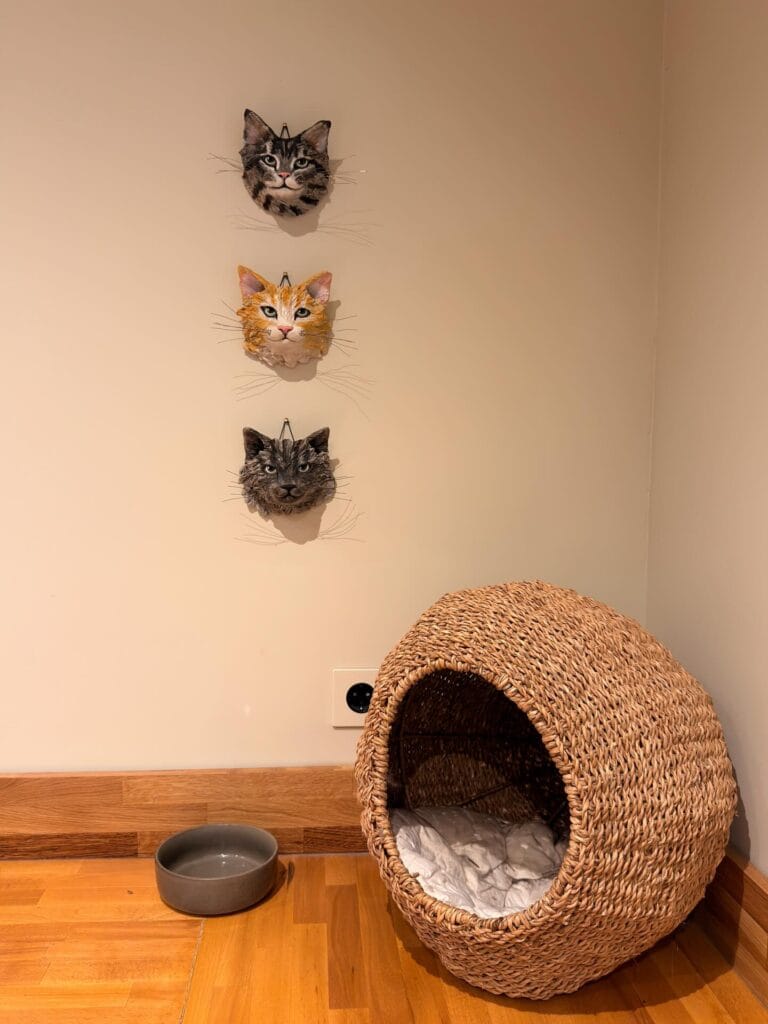
#6: The Woven Dome Cat House That Looks Like It Belongs in a Design Magazine
Okay, so picture this — you’ve got your golden’s bed shoved in the corner, a water bowl nearby, and honestly? It just looks like chaos. But this setup? This is what it looks like when someone actually thought about it.
The natural seagrass woven dome sits right in the corner of a warm, oak-floor room, and it looks like a piece of decor, not an afterthought. Three hand-painted ceramic cat face wall mounts hang above it in a vertical line — gray tabby, orange tabby, dark gray — each one with real wire whiskers. And that matte gray ceramic water bowl on the floor ties the whole thing together without screaming “pet zone.”
To get this look, grab a dome-shaped seagrass cat igloo (roughly 18–20 inches wide) and tuck a white cotton insert cushion inside. The wall mounts are the statement piece here — they’re the kind you’d find in a boutique, not a pet store.
Here’s the trick: mount all three faces in a straight vertical column, centered above the dome. It creates a gallery wall moment that actually makes sense in the space.
Keep the wall color neutral — a warm greige or cream makes those cat faces pop without competing.
📸 Photo credit: Instagram @homeatlariviere
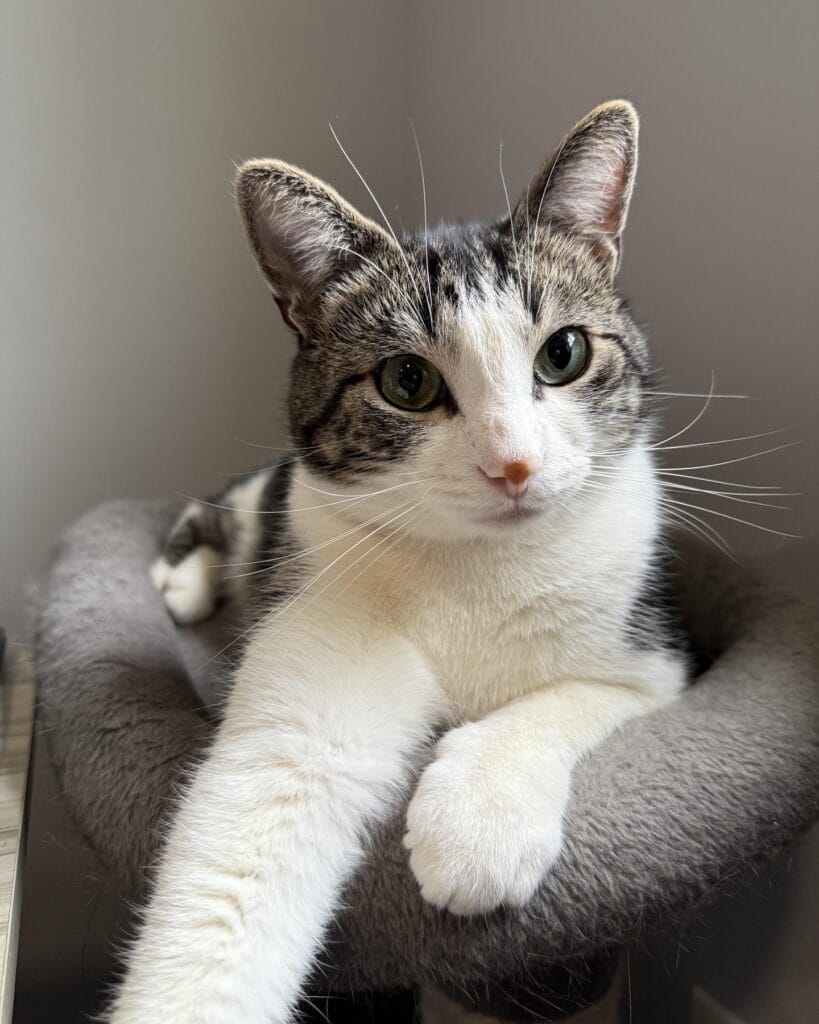
#7: The Gray Cuddle Pod — A Minimalist Cat Bed Your Kitty Will Never Leave
Okay, so you know how your golden has that one spot on the couch she claimed the second you brought it home? Cats do the exact same thing — and this gray cuddle pod gives them something even better to claim.
This round, plush gray cat bed is giving full hygge energy. The deep-walled design cradles the cat from all sides, and that soft microfiber interior means your cat sinks right in. The neutral color blends into any room without screaming “pet stuff lives here.”
The bed itself is a round bolster-style cat bed in gray fleece fabric, roughly 18–20 inches in diameter. Look for ones with non-slip bottoms — they stay put on hardwood without sliding around. Pair it near a window or a quiet corner wall to give your cat that safe, tucked-in feeling.
Cats feel safest when their backs are protected. What this means for you: a high-walled bed — walls sitting 4–6 inches tall — reduces stress and actually improves sleep quality for anxious cats. And if your cat ignores it at first, toss in a worn T-shirt. That scent makes it irresistible.
📸 Photo credit: Instagram @catofig_00
#8: The Petsfit Multi-Level Outdoor Cat House That Makes Your Porch Look Pinterest-Perfect
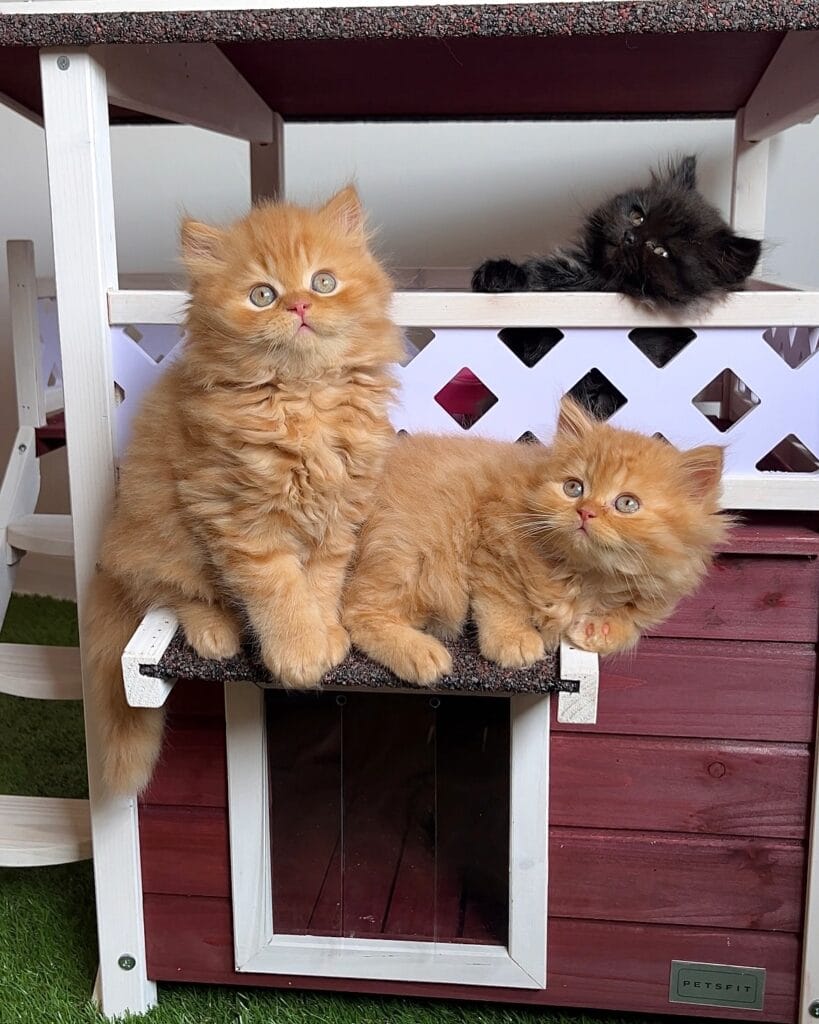
Okay, so you know how your golden retriever has basically claimed every inch of your living room? Imagine your cats having their own little setup that’s just as stylish. This Petsfit wooden cat house is giving full-on dollhouse energy — burgundy-stained wood, white lattice panels, and a carpet-lined platform shelf that kittens cannot get enough of.
The structure is two-tiered, with a lower enclosed den and an upper open-air deck separated by that white diamond-cut lattice. Two orange Persian kittens claimed the middle platform ledge, while a black fluffy kitten took the upper floor. The artificial grass base underneath ties the whole outdoor setup together.
That carpet-lined shelf isn’t just cute — it grips tiny paws and keeps kittens from sliding, which means fewer heart attacks for you watching them climb.
If you’re building out a full outdoor space for your cats, 19 Outdoor Cat Room Ideas That Cats Will Love has so many ideas that pair perfectly with a structured house like this one.
Place the house against a wall or fence to give it stability — wind can shift lightweight wooden structures, and that top-level kitten does not need an adventure.
📸 Photo credit: Instagram @felindorcats
#9: The Beige Cat Tower That Blends Into Your Home Like It Was Always There
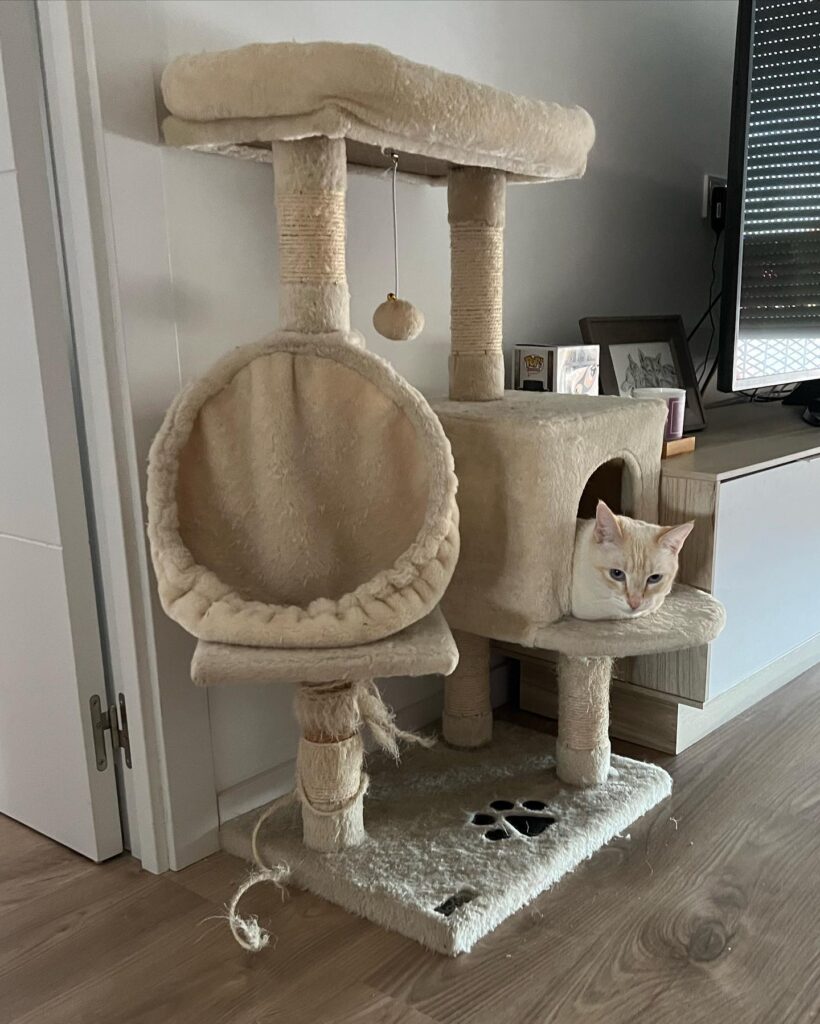
You know that feeling when you bring home something for your pet and it sticks out like a sore thumb against everything you’ve carefully curated? Yeah. This is not that.
This cream and beige sisal-wrapped cat tower looks like it was styled by the same person who did the rest of the room. Neutral tones, clean lines, soft textures — it genuinely belongs next to that wood-finish media console.
The tower features rope-wrapped sisal scratching posts, a circular hammock perch, a enclosed cube hideaway, and a top platform with plush padding. The base has a paw-print cutout carpet panel that honestly looks like a Pinterest prop. And that dangling pompom toy? Chef’s kiss.
Keep the scratching posts wrapped tight by checking the sisal monthly — loose fraying (you can see it starting on the lower post) means your cat shifts to your sofa instead.
Match your cat tower to your existing palette. Beige and cream tones photograph beautifully and won’t fight your décor the way bright colored towers do. A white or cream cat also disappears into this thing, which is peak aesthetic.
📸 Photo credit: Instagram @linkyarwen
#10: The Tufted Teal Throne — A Sun-Soaked Lounge Spot Your Cat Will Never Leave
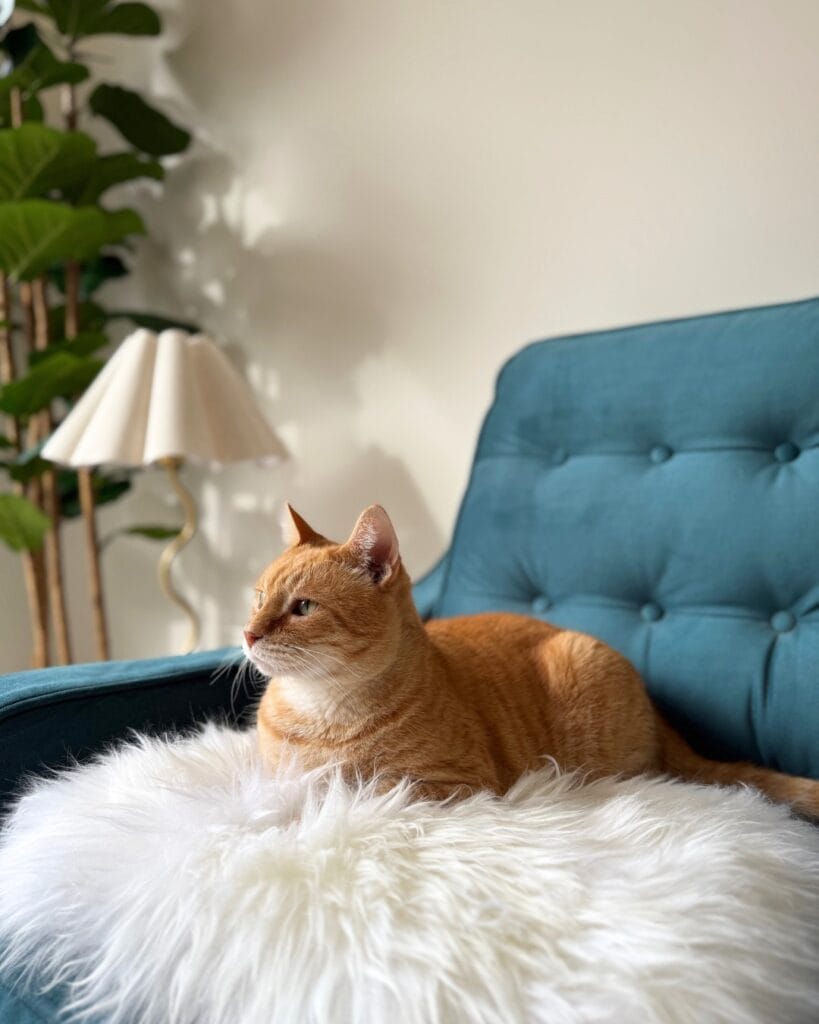
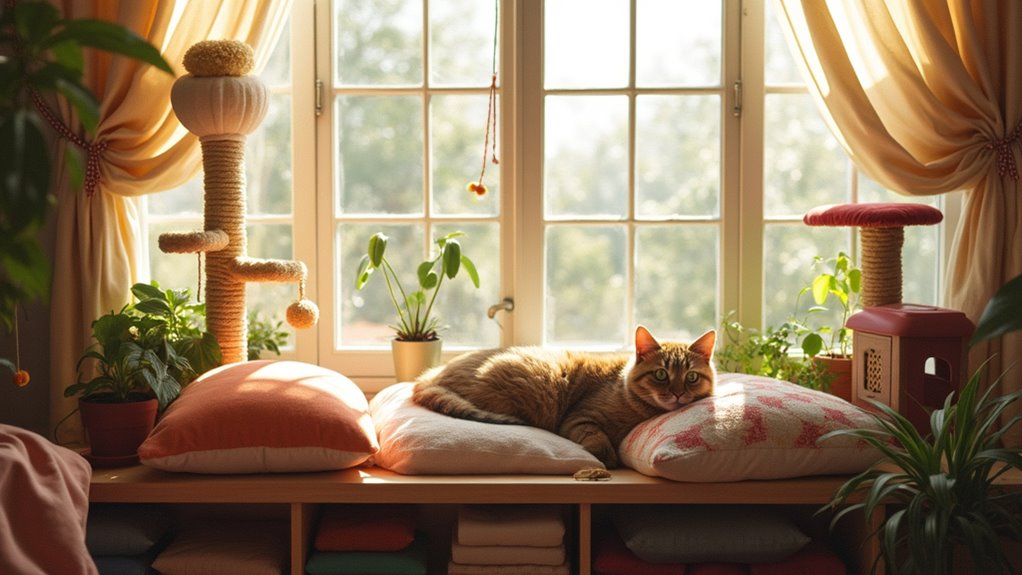
Okay, so picture this — warm afternoon light spilling across a teal tufted velvet armchair, a fluffy white faux sheepskin throw draped right on the seat, and one very smug orange tabby absolutely owning the whole setup. It’s the kind of cozy corner that makes you want to curl up yourself. And honestly? Your cat would pick this over any store-bought cat bed without thinking twice.
To get this look, you need a button-tufted accent chair in teal or peacock blue velvet (IKEA’s OSKARSHAMN or any mid-century style chair works). Layer a thick faux Mongolian sheepskin throw — the white, long-pile kind — directly on the seat cushion. Add a brass serpentine floor lamp nearby and a fiddle leaf fig in the corner to complete the vibe.
The sheepskin throw does the heavy lifting here — the deep pile traps warmth, keeps your cat anchored to one spot, and protects the velvet underneath from scratches and fur. That is the payoff.
Tuck the throw edges under the seat cushion so it doesn’t slide when your cat jumps up. And if your chair sits near a south-facing window, even better — cats will seek that sun patch every single time.
📸 Photo credit: Instagram @lunacatdesign
#11: The Cream & Caramel Bolster Bed — A Maine Coon’s Favorite Lounge Spot
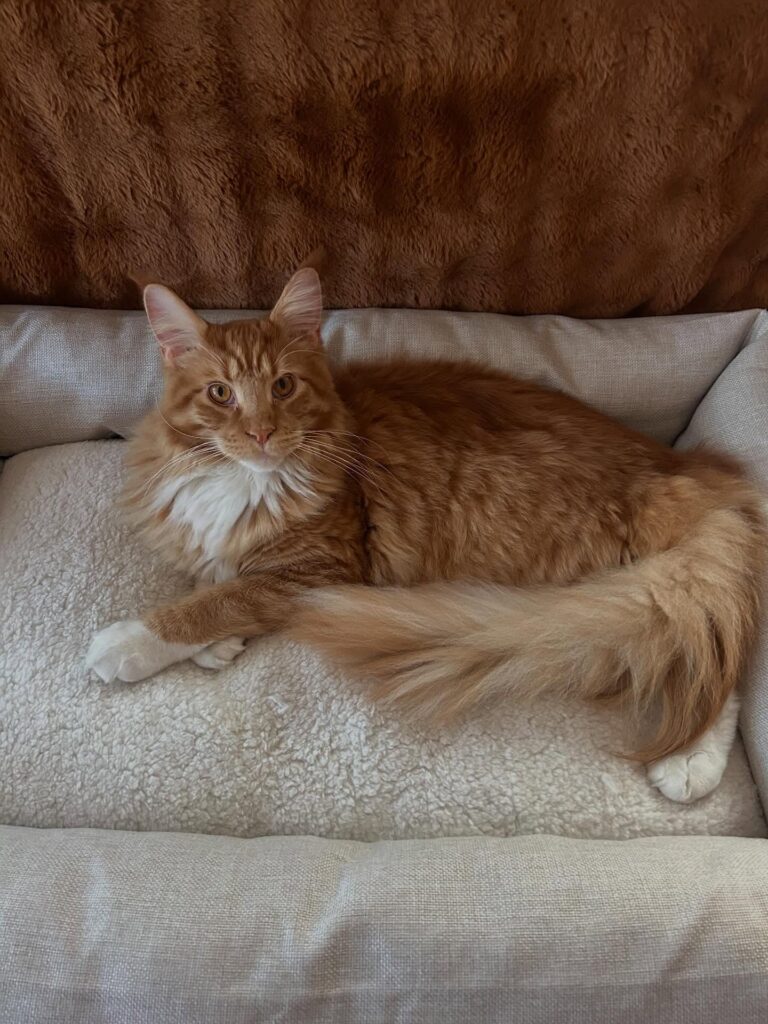
Okay so this photo stopped me mid-scroll and I had to include it. There’s this gorgeous orange Maine Coon just melting into a cream sherpa bolster bed, with a brown faux fur throw behind him — the whole setup looks like something straight off a cozy fall Pinterest board. And honestly? The way this cat is stretched out like he owns the place tells you everything about how comfortable this bed actually is.
The star here is a rectangular bolster pet bed with wraparound cushion walls in a light linen fabric and a sherpa fleece insert pad. Pair it with a chunky chocolate brown textured throw blanket draped over the couch behind — that contrast between warm caramel and cream is exactly what makes this look so polished.
Quick note: Maine Coons need more bed real estate than your average cat — look for beds that are at least 30 x 20 inches so they can fully stretch without their tail hanging off the edge.
The bolster walls do double duty here — raised side panels give cats a head rest and create that “tucked in” feeling that reduces anxiety. For your home, this setup tucks against any sofa corner without looking like pet furniture took over your living room.
📸 Photo credit: Instagram @martinthemainecoon
#12: The “Proud of You” Cat Cave That’s Actually Cute Enough for Your Living Room
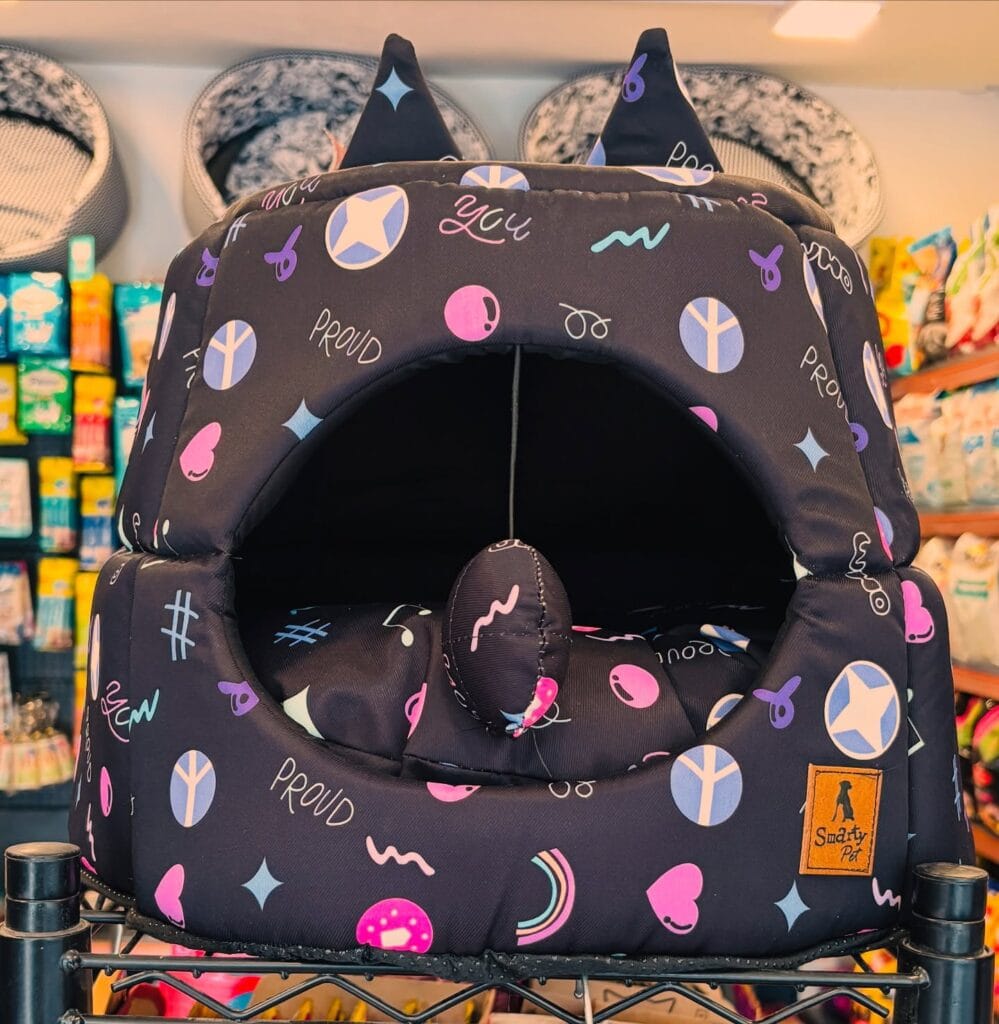
Your golden probably has that one corner of the couch she’s claimed as her throne. Meanwhile, your cat is still looking for a spot that’s actually hers.
This is the Smarty Pet cat cave house, and honestly? It’s doing a lot.
The black polyester fabric is printed with a bold graphic pattern — peace signs, hearts, rainbows, a little mushroom, the word “PROUD” scattered everywhere. Two little pointed ears sit on top. It’s got this whole rebellious-cute energy that doesn’t look like it belongs in a pet store.
The cave opening is wide enough for most medium-sized cats, and the padded bottom cushion means your cat isn’t sitting on hard floor. It even comes with a dangling toy inside — that tiny fish hanging right at the entrance. The quilted walls keep the structure upright without any frame.
Place this on a wire shelf or low bench instead of the floor. It photographs so much better elevated, and your cat will use it more when it feels like her territory.
Black hides fur surprisingly well. And if you have a golden retriever leaving tumbleweeds everywhere, having one piece of furniture that doesn’t show it? That’s the win you didn’t know you needed.
📸 Photo credit: Instagram @naughtydogs_pet_store
#13: Woven Seagrass Cat Bed With Rope Toy — The Boho Pet Corner Your Cat Will Claim Immediately
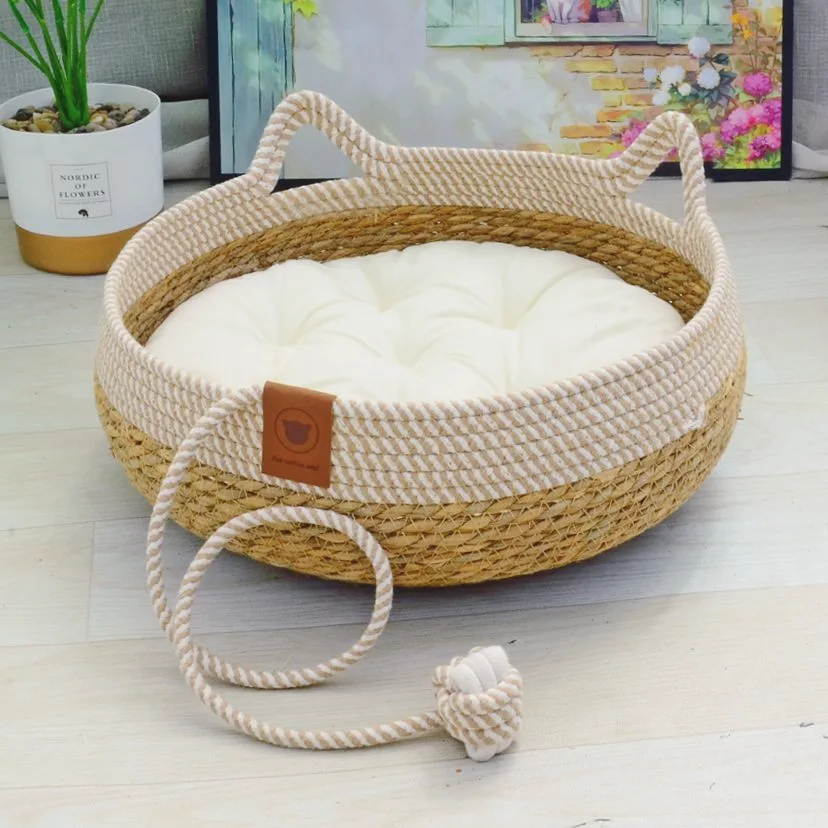
Your golden retriever has her spot on the couch, her favorite corner, her thing. Cats are exactly the same — maybe even more dramatic about it. And this woven seagrass basket bed? It’s giving your cat a spot so cozy, so Pinterest-ready, she might actually stay off your linen sofa.
The bed is built from natural seagrass at the base, wrapped with twisted cotton rope along the upper rim. Two looped rope handles sit at the top — shaped like cat ears, which is ridiculously charming. A round cream cushion sits inside, and a knotted rope toy dangles from the front for solo play.
The cotton rope construction keeps the bed breathable, which means your cat stays cool without overheating — no sweaty, matted fur situation happening here.
Place it near a low window or beside a bookshelf. The neutral seagrass-and-cream palette blends into almost any room without looking like a pet store display. If your cat ignores the cushion at first, rub a little catnip into the fabric. She’ll claim it within the hour.
If you love handcrafted textures in your pet corners, you’ll probably also fall down a rabbit hole browsing 20 plush crochet cat bed styles for sleep — same cozy energy, totally different look.
📸 Photo credit: Instagram @newtouseicrafts
#14: The Gold-Frame Cat Tower That Looks Like It Belongs in an Interior Design Magazine
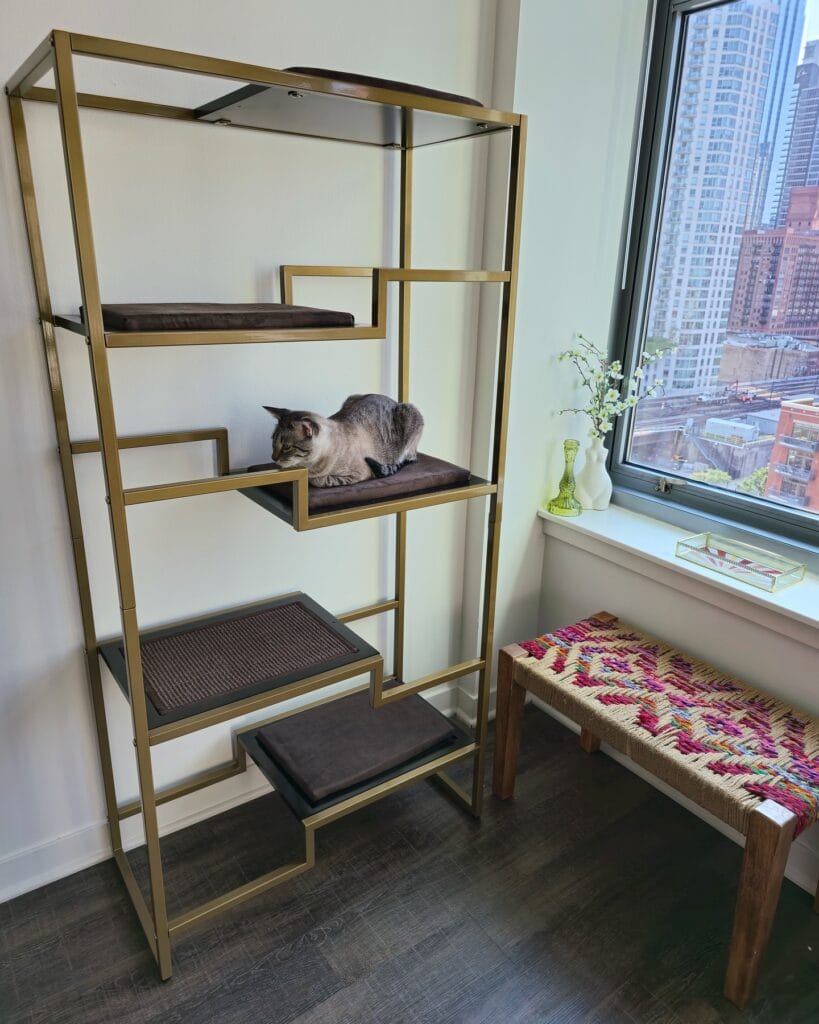
okay so you know how your golden retriever has that one spot in the living room that’s completely taken over by his giant dog bed and suddenly your whole aesthetic is just… gone? Yeah. Cat owners feel that too — but this setup? It’s different.
This gold metal frame cat tower lives right next to a floor-to-ceiling window, and it genuinely looks like a piece of furniture someone picked from a high-end boutique. The brushed brass finish against the white walls hits that warm-modern sweet spot I’m always trying to nail in my own place.
The whole thing is built around a multi-tiered etagere-style frame — think open shelving with staggered platforms. Each level has a dark brown suede cushion, and one shelf holds a sisal scratching pad instead of a cushion. The top shelf has a glass panel insert, which keeps it feeling airy. And that woven bench in the corner? That colorful chevron-pattern rattan bench pulls the warmth together without competing.
To recreate this, grab a gold or brass metal etagere — the kind you’d find at HomeGoods or on Wayfair for around $150–$300. Then swap out decorative items for cat-friendly inserts: cut-to-size memory foam cushions wrapped in microsuede, and a sisal mat trimmed to shelf size.
One thing I learned the hard way — anchor the frame to the wall with L-brackets behind the top shelf. It disappears visually but keeps the whole structure from tipping if your cat launches off a platform like mine does at 2am.
The cushions being removable means you toss them in the wash weekly — clean cushions mean fewer odors, which means guests don’t immediately know you have a cat the second they walk in.
If you love this DIY-meets-design vibe, 16 Easy Cat Bed Pattern Ideas For Beginners has some great cushion inserts you can sew yourself to match any color scheme.
📸 Photo credit: Instagram @refinedfeline
#15: The Chunky Knit Oval Bed That Makes Your Cat Look Like Royalty
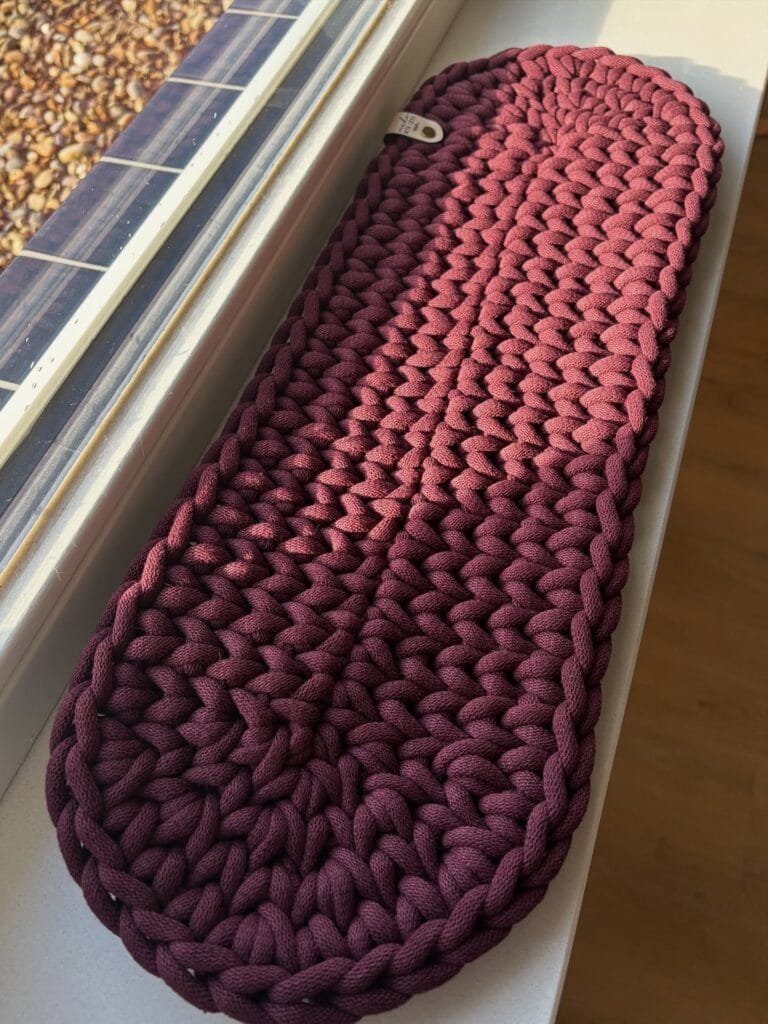
You know that moment when your golden flops onto your couch cushion and leaves a little fur souvenir? Yeah. Cats are different — they actually want their own cozy corner, and this chunky knit oval bed gives them exactly that.
This bed is handcrafted from thick cotton rope yarn in a two-tone colorway — deep plum/eggplant on the outer rings fading into a dusty rose/mauve center. The spiral crochet construction creates natural raised ridges that cats go wild for. It sits flat but has enough cushion depth to feel like a nest.
The oval shape fits cats who love to stretch. The cotton rope material means it’s washable — toss it in a gentle cycle and it holds its shape. Place it on a windowsill ledge (exactly like shown) so your cat gets that coveted sun patch.
Keep the yarn tight when storing. Loose fibers attract lint and pet hair faster than you’d think. A lint roller lives near mine now — just saying.
And if your cat ignores it at first? Rub a little catnip into the center ridges. Game over.
📸 Photo credit: Instagram @silkycatbeds
#16: The Wicker Pet Bed That Makes Your Living Room Look Like a Pinterest Board
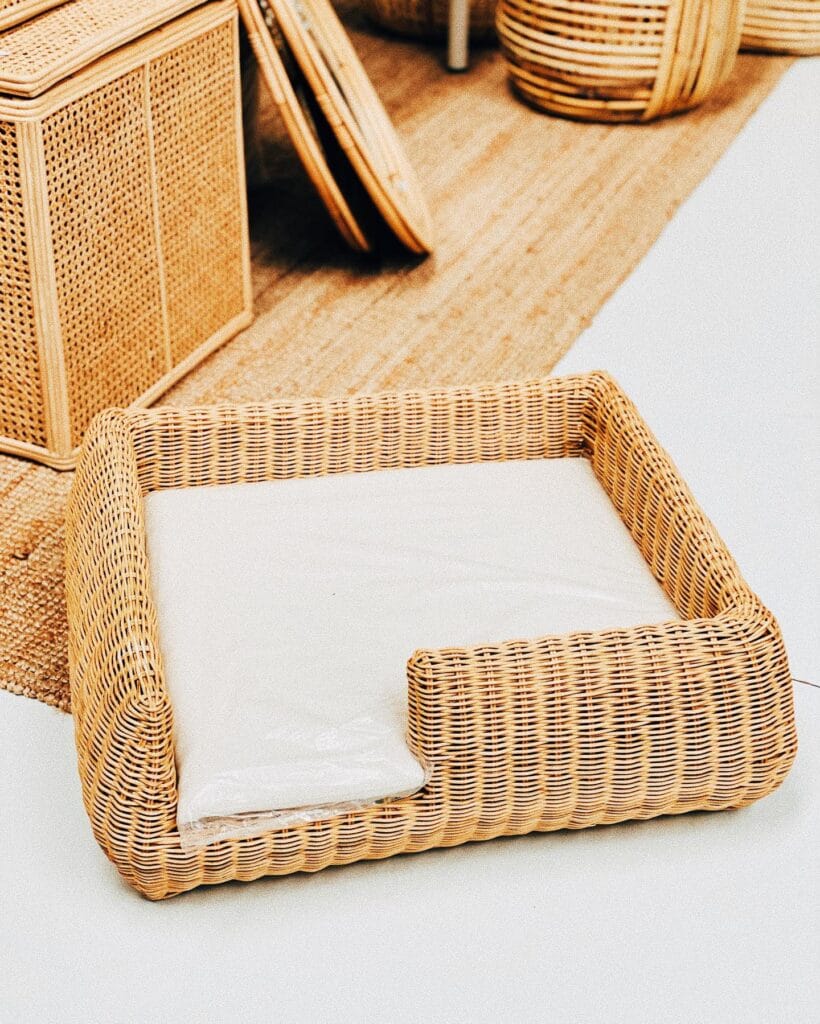
Okay, so you know that moment when your golden is sprawled across the floor and the whole room just looks… chaotic? This rattan wicker pet bed completely fixes that. It’s got these rounded corners, a natural honey-toned weave, and a thick white cushion insert that tucks right inside — and it somehow makes the space look more put-together, not less.
The bed itself is handwoven rattan, sitting low to the ground with walls about 4–5 inches high — enough to give your dog that cozy “den” feeling without blocking sightlines across the room. Pair it with a jute area rug and some cane storage cubes (you can see them stacked in the background) and the whole corner becomes a moment.
Swap the plain white cushion for a washable linen cover in oatmeal or ivory — golden retriever hair basically disappears against light neutrals, and you’re not panic-washing it every single week.
The low-profile frame also means older dogs or puppies can actually climb in without struggling. That’s the thing about wicker beds — the structure holds its shape for years, the cushion does all the comfort work, and your room looks intentional the whole time.
📸 Photo credit: Instagram @sundaymorning.ae
#17: The Serta Perfect Sleeper Dog Bed Your Cat Claimed First
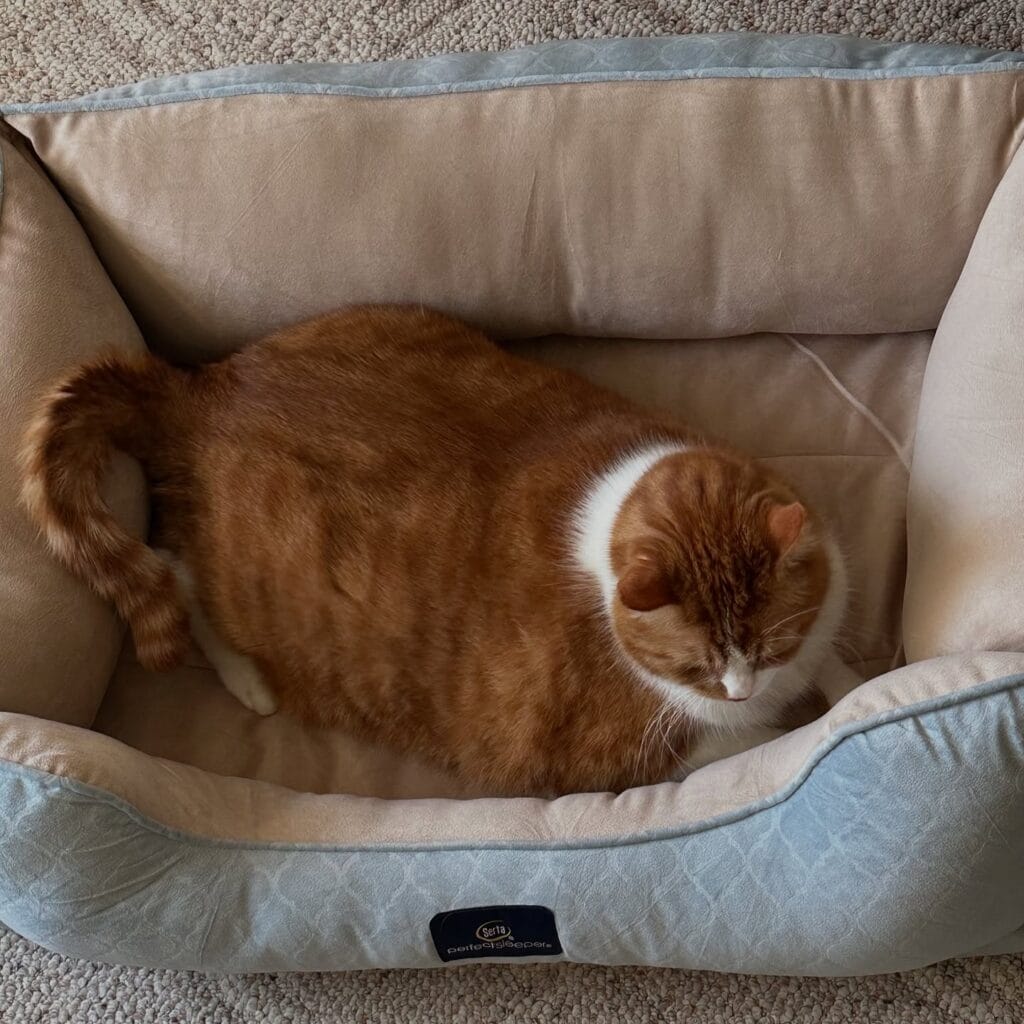
You know that moment when you buy something specifically for your golden, and your cat just… takes it? My cousin did that with a brand-new dog bed, and honestly, her cat never looked more smug about it.
This Serta Perfect Sleeper pet bed — yeah, the same brand as your mattress — has this bolstered wraparound wall in light blue quilted fabric with a tan microsuede interior. It’s genuinely plush. The raised sides give cats that “tucked-in” feeling they go absolutely feral for.
To recreate this setup, grab the Serta Perfect Sleeper Bolster Pet Bed (available in sizes up to 40 inches). Place it on low-pile beige carpet near a wall so your cat feels enclosed on one side.
The microsuede lining holds warmth without trapping fur — so it’s easier to lint-roll before your golden inevitably tries to reclaim it.
Size up one level from what you think you need. Cats sprawl. And a roomier bolster bed means they’ll actually stop stealing your dog’s spot on the couch.
📸 Photo credit: Instagram @themrkittyshow
#18: The Plush Round Cat Bed That Turns Sunbathing Into an Art Form
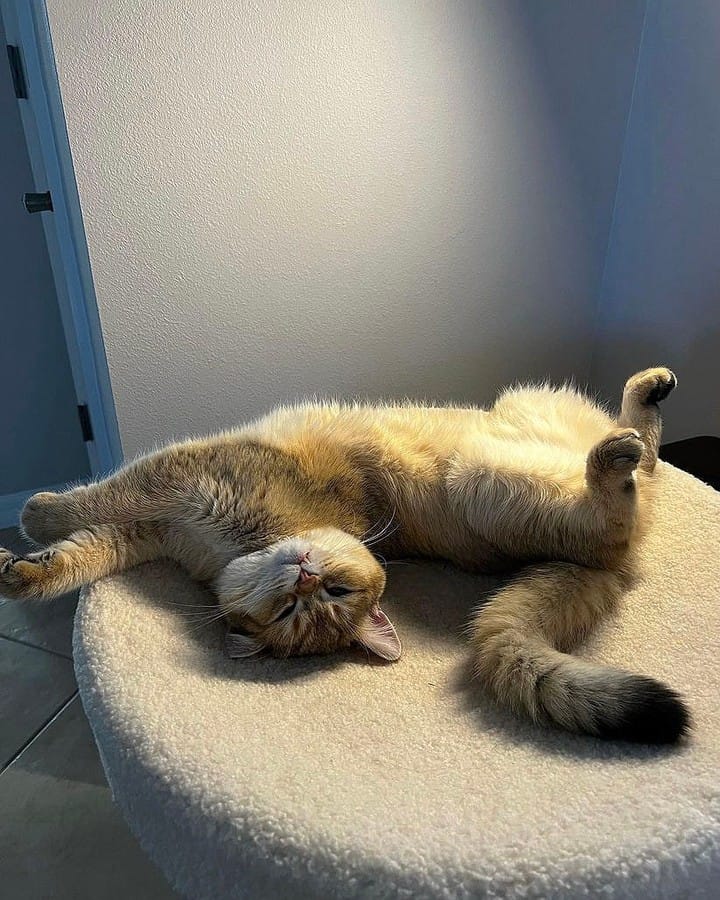
Picture this — your cat sprawled out like she owns the entire universe, back flat, paws in the air, mouth open in pure bliss. That’s exactly the energy this round sherpa cat bed gives off.
This bed is all about that warm, minimalist vibe. The cream boucle fabric is thick and cloud-soft, sitting low on what looks like a tiled floor near a sun-facing wall. No fuss, no clutter — just a glowing patch of afternoon light hitting the perfect napping spot.
To recreate this, you need a round cat bed in ivory or cream sherpa, ideally 23–25 inches in diameter — big enough for a full dramatic stretch like our friend here. Place it near a west-facing wall where afternoon sun pools naturally. The textured white wall behind it keeps the whole setup feeling spa-like and Pinterest-ready.
Position the bed directly in a sun patch — cats will find it and never leave. The sherpa fabric traps warmth even after the sun shifts, so your cat stays cozy long after golden hour.
And honestly? A bed this size handles even the wildest sprawl — the deep cushioned base supports the spine, which means better rest and a happier, calmer cat.
📸 Photo credit: Instagram @tuftandpaw
#19: The Stacked Cat Condo That Doubles as Actual Home Decor
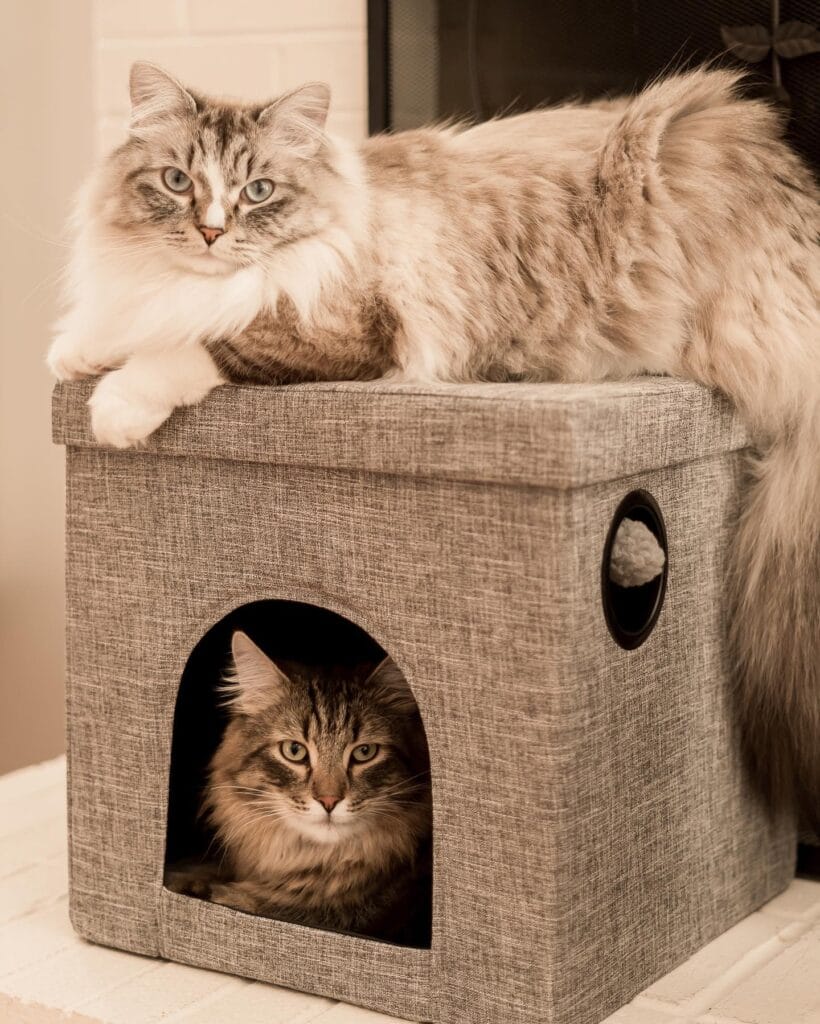
Okay, so you know how your golden’s dog bed is always the first thing people notice when they walk in — and not in a good way? This is the cat version of that problem, totally solved.
This two-level fabric cat cube is giving cozy cabin energy, and it actually looks like it belongs next to a fireplace. The gray linen-blend exterior blends into neutral home decor without screaming “pet furniture.” One cat lounges on top, one hides inside — zero territorial drama.
The bottom cube has an arched entry opening plus a circular side peephole, which gives the inside cat a little lookout window. The top level works as an open lounging platform. It’s basically a tiny apartment building for cats.
Stack two collapsible storage ottomans in matching fabric — you can find them at most home goods stores. The linen texture photograph beautifully and holds up to claws better than velvet or microfiber.
Place it near a fireplace or a warm wall. Cats always migrate toward heat, so that spot becomes their permanent territory — which means they stay off your sofa.
If your cats are anything like mine, the top cat will claim dominance and the bottom one will pretend to be unbothered. Mine did this for six months straight.
For bonus coziness, tuck a sherpa insert pad inside the bottom cube — warm material, zero extra bulk.
📸 Photo credit: Instagram @yourcatbackpack
The One Cat House Mistake That’ll Cost You a Frustrated Cat (and Wasted Money)
Okay, real talk — most people size cat houses way too big, thinking bigger equals better. It doesn’t.
Cats feel safe in tight spaces. A house that’s too roomy actually stresses them out because their body heat can’t warm it up. Think of it like sleeping in a cold stadium versus a cozy sleeping bag. Same logic.
Here’s the pro secret nobody mentions: the entrance hole matters more than the whole structure. Size it at exactly 6-7 inches in diameter. Big enough for your cat, small enough to block raccoons and drafts.
My neighbor built this gorgeous wooden cat house last winter — seriously Pinterest-worthy. But she made the interior huge and left a wide opening. Her cats never touched it.
Also? Raised floors are non-negotiable in colder months. Ground moisture kills warmth faster than anything.
If you’re building something yourself, these 7 warm DIY outdoor cat shelter winter designs nail the sizing and insulation details exactly right.
Small tweaks. Huge difference.
Your Floors (and Your Sanity) Deserve This
Look, I’ve been where you are — staring at a muddy paw trail across a clean rug, wondering why you even bother. A good pet-friendly floor mat isn’t a luxury. It’s the thing standing between you and a full meltdown every time your golden comes in from the backyard.
Pick one mat. Try it for a week. You’ll feel the difference on day two, I promise.
And honestly? Your home can still look Pinterest-worthy with a dog in it. That’s not a fantasy — it’s just about choosing the right pieces.

Amr Mohsen is a software engineer who traded his keyboard for a leash — at least on weekends. His love for dogs inspired him to share what he learns as a dog owner and enthusiast, bringing a detail-oriented, research-driven perspective to every article he writes. If it’s about dogs, he’s probably already looked it up twice.