Halloween is so close and I just know you’re already deep in Pinterest mode trying to figure out what to dress your golden retriever in this year.
Same, girl. Same.
Here’s the thing though — last October I spent three weeks pinning the cutest dog costumes, then panicked the night before and threw together something that looked… rough. My dog survived the embarrassment. Barely.
And I’ve seen you stress over this too — you want something that actually looks good, not just a sad store-bought hot dog suit that falls apart after two photos.
That’s where Slinky Dog comes in. You know, Woody’s stretchy little buddy from Toy Story? It’s honestly the perfect costume — it’s recognizable, it’s adorable, and it’s so much easier to DIY than you’d think.
These slinky dog costume DIY ideas are about to make your Halloween the moment.
The One Measurement Most DIYers Get Wrong (And It Ruins Everything)
Okay, real talk — the bowl height is the thing nobody warns you about, and it’s the reason so many DIY feeding stations end up collecting dust in the garage.
Here’s the trick: measure from your dog’s shoulder down to the floor, then subtract four inches. That’s your ideal bowl rim height. Most people just eyeball it or copy some random Pinterest build, and their dog ends up straining their neck down or hunching weird. My cousin built this gorgeous cedar station for her lab — we’re talking stunning — and the bowls sat two inches too low. Her dog basically ate with her nose touching the floor.
For golden retrievers, you’re usually landing somewhere between 6-8 inches, but measure YOUR dog specifically.
Also — build your drawer or shelf slightly wider than the bowl diameter. Water bowls overflow. Kibble spills. You want that surface to catch the mess, not funnel it straight onto your floor.
And if you’re already in project mode, 7 heartwarming DIY dog ramp ideas for your pup pair so well with a feeding station for older goldens with joint issues.
Your Golden Deserves a Clean Space (And So Do You)
You’ve got the style, the dog, and honestly? The motivation now. Pick one zone — just one — and build it out this weekend. A DIY dog washing station doesn’t have to be a whole project. It can be simple, functional, and still look good in your space.
My cousin started with just a hook and a mat. Now her mudroom is literally the cutest thing I’ve seen.
Start small. Stay consistent. Your golden will still make messes — that’s just the deal we signed up for. But at least you’ll have a system.
So what’s the first corner you’re tackling first?
#1: DIY Slinky Dog Costume for Your Pup (That Actually Looks Like the Real Thing)
You know that moment when your golden is just sitting there being cute, and you think — she needs a costume, like, yesterday?
Same.
This Slinky Dog look from Toy Story is everything. And honestly? It’s way more doable than it looks.
Materials & Tools:
– Tan canvas fabric (body wrap + ear flaps)
– Dark brown felt (ear details, boot ruffles)
– Green fabric (collar band)
– Gray striped fabric (slinky body wrap)
– Fabric glue or needle + thread
– Scissors, measuring tape, velcro strips
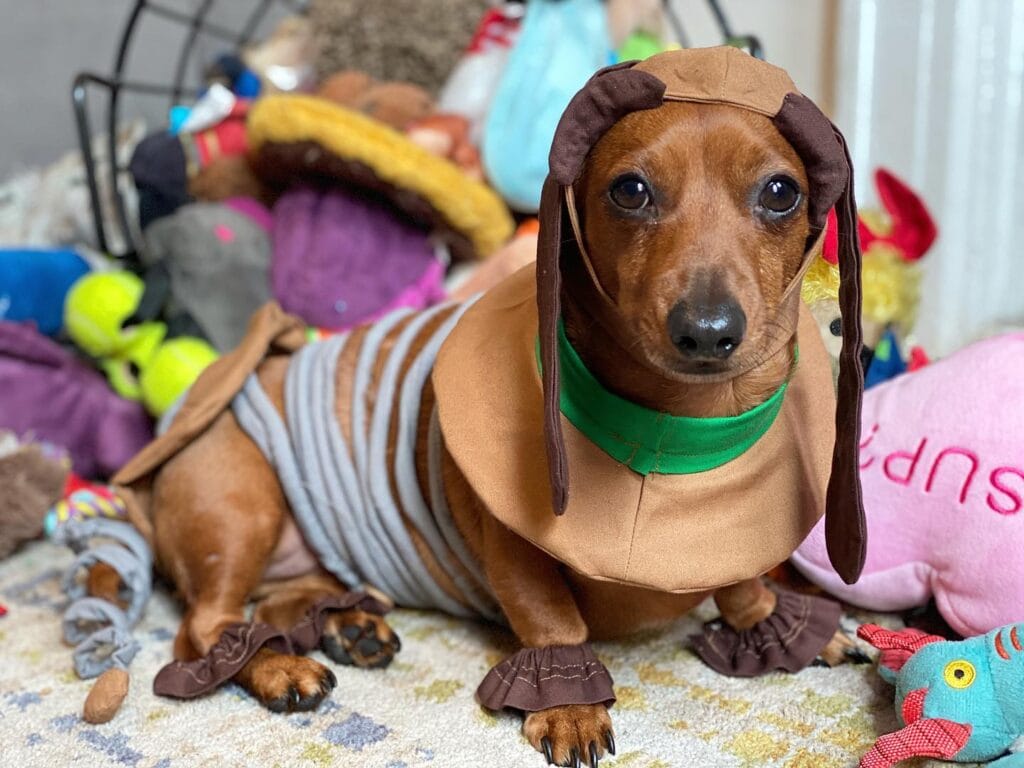
Instructions
Cut the tan fabric into a chest bib shape, then attach the green collar band along the top edge. Stitch the brown ear flaps to a small fitted cap — this keeps it snug without pulling. Wrap the gray striped fabric loosely around the torso so your dog can actually move. Sew small brown boot ruffles around each paw opening. Velcro everything for easy on/off.
Soft fabric against the skin means your pup stays comfortable while you get those Pinterest-worthy shots.
Test the fit before any treats disappear — a relaxed dog holds a pose longer.
Prep Time: 30 min | Active Project Time: 2 hrs | Difficulty: Intermediate
📸 Photo credit: Instagram @edgar_the_wiener
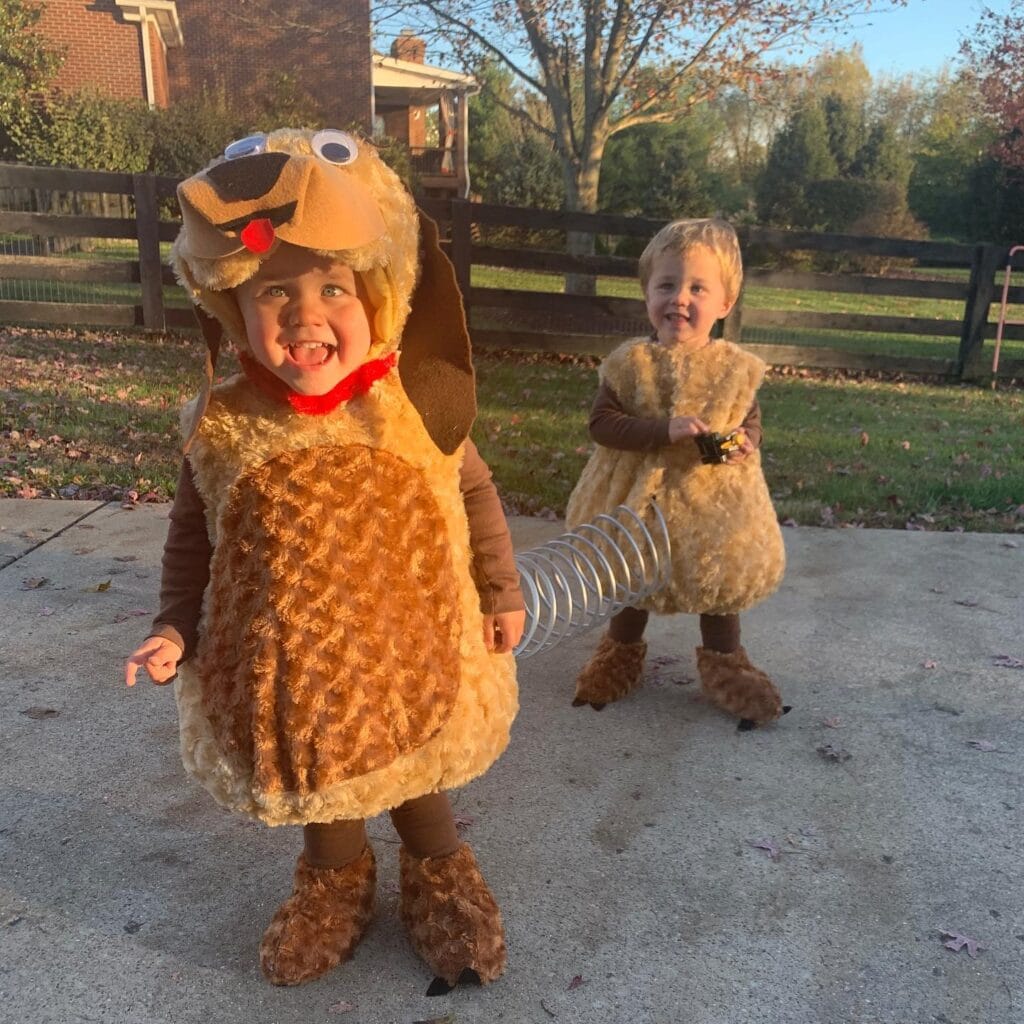
#2: DIY Slinky Dog Costume for Babies (Yes, It’s as Cute as It Looks)
Prep Time: 30 min | Active Project Time: 1.5 hours | Difficulty Level: Beginner-Friendly
Okay so picture this — your little one waddling across the front lawn at golden hour, holding a cardboard jack-o’-lantern cutout, while their twin drags the other end of a rainbow Slinky. That’s the moment right here.
Materials & Tools:
– Brown felt fabric (at least 1.5 yards)
– Green and black felt for collar detail
– Tan felt for ear hood
– Large rainbow Slinky toy
– Orange cardboard for pumpkin cutouts
– Fabric scissors, hot glue gun, velcro strips
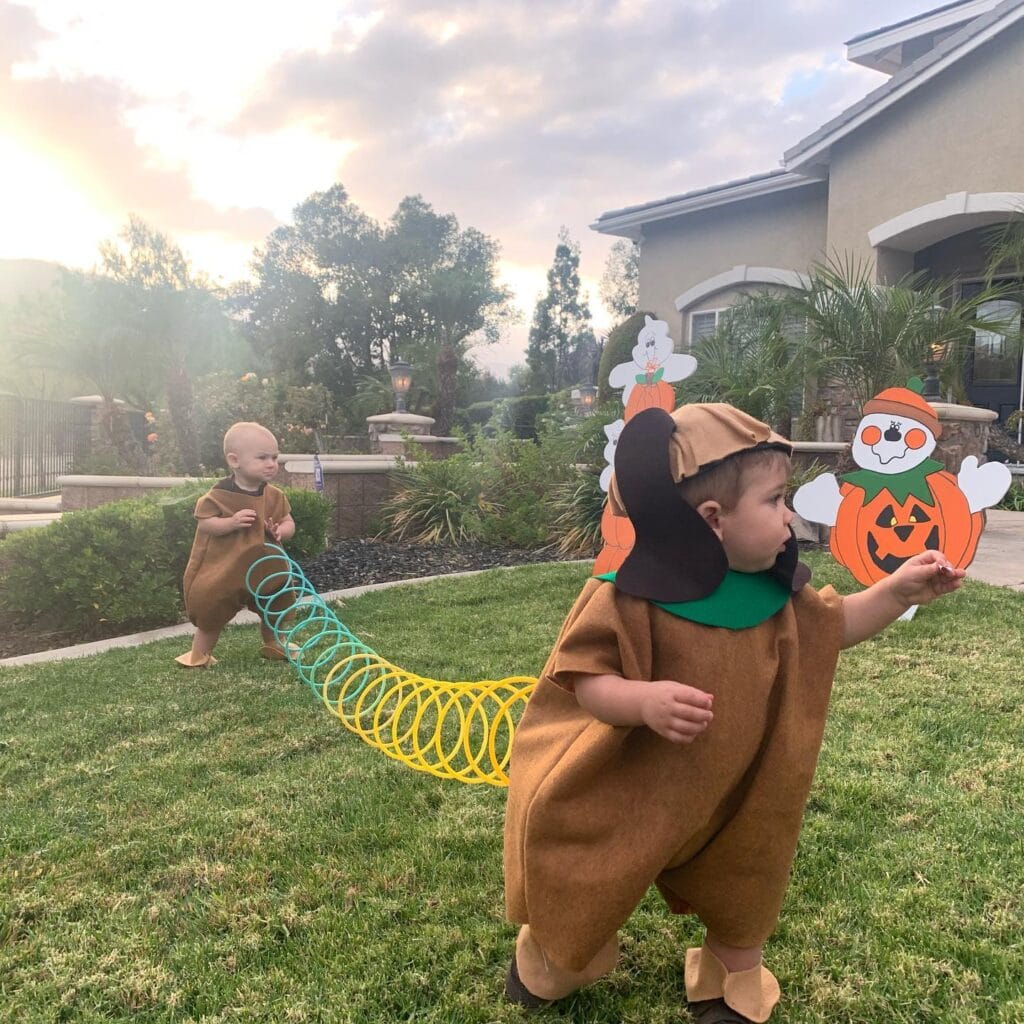
Instructions
Cut the brown felt into a poncho shape with a head opening. Hot-glue the black felt bib and green collar underneath the neckline. Stitch or glue the tan ear hood on top. Attach one end of the Slinky to each costume’s back hem using velcro strips — this keeps it removable and safe.
And the cardboard pumpkin props? Trace a jack-o’-lantern face, cut two mirror pieces, and sandwich them together for rigidity.
Pair this with 18 Hilarious Dog Costumes Your Pup Will Love! if you want matching pet-and-baby chaos this Halloween.
Make the poncho a size bigger — babies move a lot, and extra room means zero meltdowns mid-trick-or-treat.
📸 Photo credit: Instagram @cdavisss_
#3: DIY Slinky Dog Costume — The Cutest Trick-or-Treat Look Ever
Prep Time: 30 min | Active Project Time: 1.5 hrs | Difficulty: Easy-Medium
Your golden is already the neighborhood celebrity. Might as well dress him up like one.
Materials & Tools:
– Brown felt fabric (1.5 yards)
– White felt for belly patch
– Tan/yellow plush foam for the head hat
– Floppy felt ears in dark brown
– Orange plastic bucket (trick-or-treat style)
– Hot glue gun + fabric scissors
– Velcro strips for closure
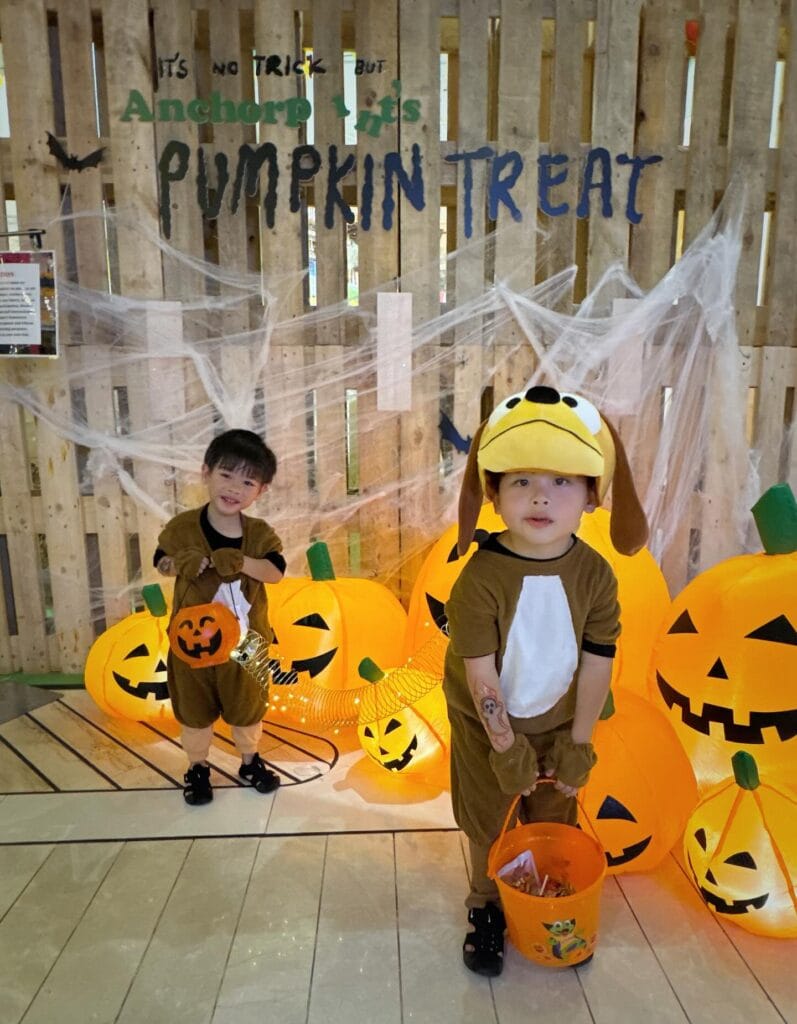
Instructions
Cut the brown felt into a simple pullover tunic shape — wide enough for your dog’s chest. Glue the white belly patch centered on the front. This breathable felt keeps your pup comfortable without overheating, so Halloween walks stay fun, not stressful.
For the hat, shape tan foam into a dome, attach floppy brown ears on each side, and secure under the chin with velcro.
Sew or glue the tunic sides, leaving enough room for free movement. The velcro closures mean zero struggling during dress-up.
Stuff that orange bucket with candy. Done.
Hot glue tends to stiffen felt — use fabric glue along ear edges instead for a softer, more natural drape.
📸 Photo credit: Instagram @d4phn3
#4: The Floppy-Eared Frontier Pup Costume (And It’s Easier Than You Think)
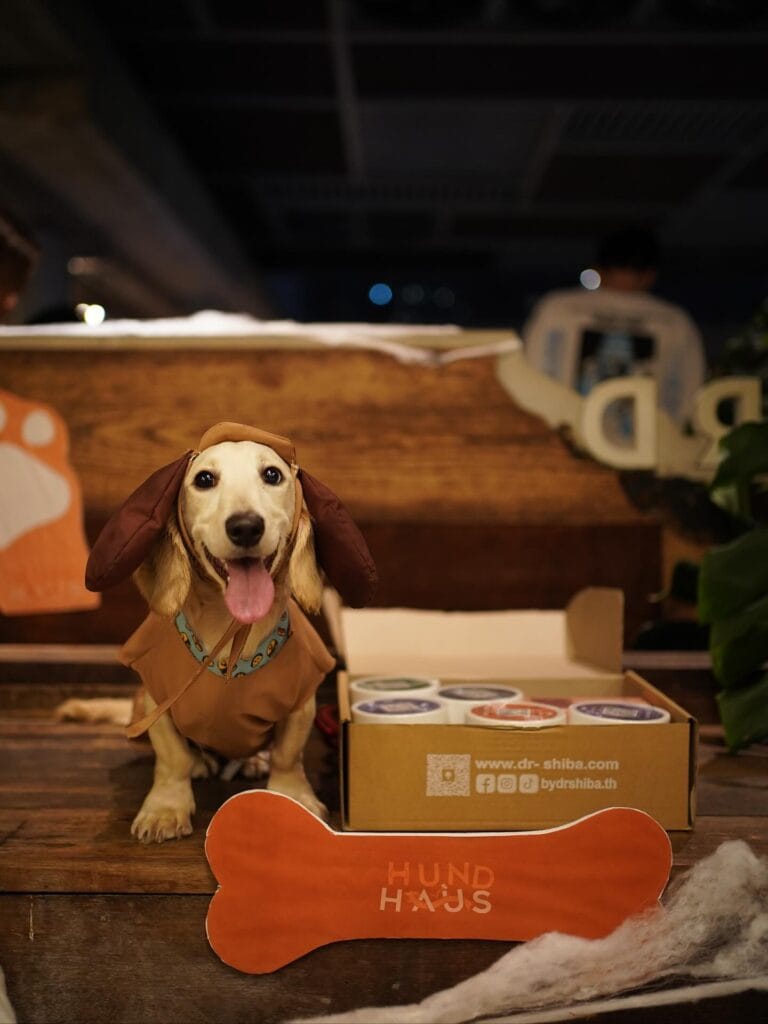
Your golden is sitting there looking at you with those eyes, and Halloween is literally next week. You want something cute but not sad-looking from a bag.
Materials & Tools:
– Brown felt fabric (about ½ yard)
– Dark brown fleece for the ear panels
– Teal/turquoise printed collar fabric
– Fabric scissors + hot glue gun
– Velcro strips (2-inch width)
– Tan fringe trim
Instructions
Cut the brown felt into a vest shape — measure your dog’s back length first, mine runs about 12 inches for a mid-size dog. Attach the dark fleece ear panels to a fitted hood piece using hot glue along the inner seam.
The fringe trim glued along the bottom edge gives you that frontier look without sewing. Velcro closures under the belly mean your dog stays comfortable — zero struggling during dress-up.
And that teal collar peeking out? Chef’s kiss. It ties everything together.
If your dog runs warm, skip lining the vest. A single felt layer breathes better and keeps them moving happily all night.
Prep Time: 20 min | Active Project Time: 45 min | Difficulty: Beginner
📸 Photo credit: Instagram @pudding.thedach
#5: Twin Slinky Dog Costumes That’ll Stop Every Parent on the Block
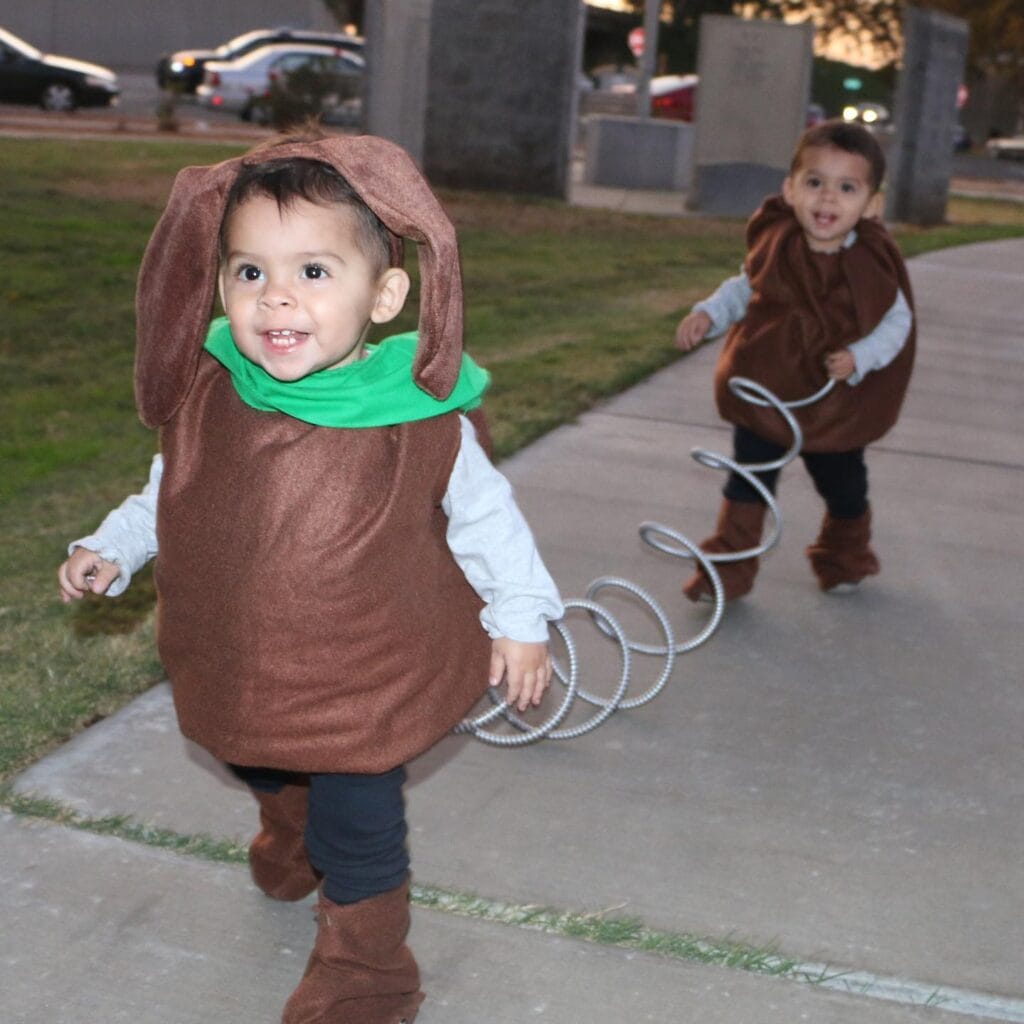
Prep Time: 30 min | Active Project Time: 2 hours | Difficulty Level: Medium
Picture this — your golden is trotting down the sidewalk and every single neighbor stops to take a photo. That’s the energy these costumes give off.
Materials & Tools:
– Brown felt fabric (at least 1 yard per costume)
– Green felt for the collar accent
– Flexible metal coil/slinky (silver, 12–18 inches)
– Brown suede-style boots (toddler size)
– Fabric scissors, hot glue gun, velcro strips, needle & thread
Instructions
Cut the brown felt into a rounded tunic shape with a hood featuring floppy dog ears. Hot glue the green felt collar piece around the neckline opening. Attach the silver coil from the back hem of costume #1 to the front hem of costume #2 — this connects both wearers like the actual Slinky Dog toy.
The coil attachment means both kids have to stay close together, which keeps the group moving and the costume intact all night.
Velcro closures on the sides make dressing two toddlers fast — and zero meltdowns when it’s time to remove them.
Pair these with coordinating costumes from 13 Adorable Dog Halloween Costumes You Need to See for serious group-costume goals.
Use a lighter-weight coil if you’re dressing actual toddlers — heavy springs drag and nobody’s happy after block two.
📸 Photo credit: Instagram @the_e_z_twins
#6: Slinky Dog Costume DIY for Babies (The Cutest Toy Story Moment Ever)
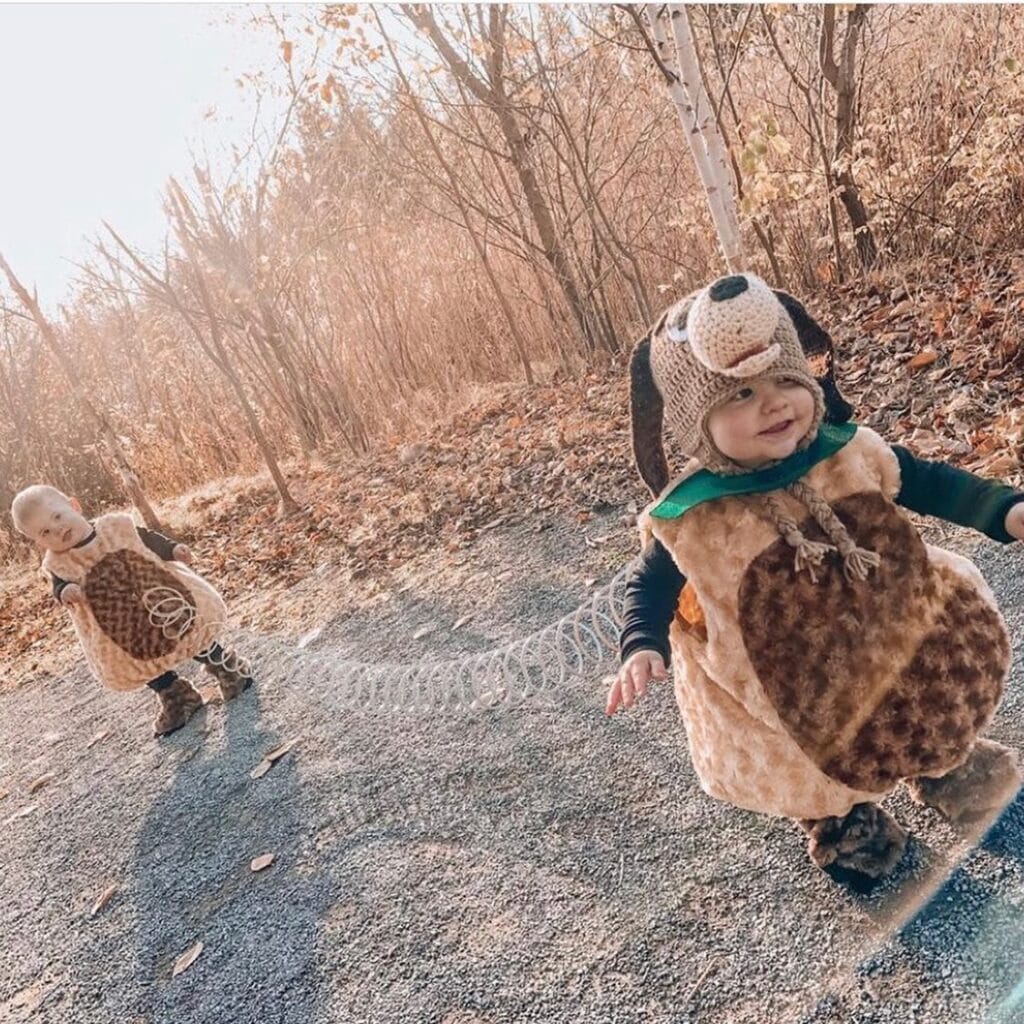
Your golden retriever isn’t the only one who can rock a Halloween look, friend.
This baby Slinky Dog costume? Absolutely melts me every time I see it. Two little ones dressed as the front and back of Slinky Dog — one wearing a brown faux fur vest with tan felt spots, the other holding the silver coiled spring connector between them. The dog hat is hand-crocheted in beige and dark brown yarn with floppy felt ears.
Materials & Tools:
– Brown faux fur fabric (½ yard per child)
– Tan felt sheets for spot detailing
– Green felt for collar accent
– Beige/brown chunky yarn for crochet hat
– Large silver Slinky toy as the connector prop
– Hot glue gun, scissors, needle & thread
Instructions
Cut the faux fur into a simple vest shape — front panel, back panel, side ties. Hot glue the tan felt spots onto the back piece before assembly. Stitch both panels together at the shoulders, leaving armholes open so little ones stay comfortable. For the hat, crochet a basic beanie and attach 6-inch dark brown felt ears on each side. The Slinky connects both kids during photos — one child grips each end.
Prep Time: 30 min | Active Project Time: 2 hrs | Difficulty: Intermediate
Sewing the vest slightly oversized means it layers over a black long-sleeve shirt, keeping babies warm during outdoor photos.
📸 Photo credit: Instagram @minimioche
#7: The Full Slinky Dog DIY Costume That’ll Stop Everyone at the Door
Your golden is already dramatic enough flopping across your Pinterest-perfect living room. Now picture her actually being Slinky Dog for Halloween.
This two-chair build is genius.
Materials & Tools:
– Tan, brown, and cream craft felt sheets
– Large metal Slinky (the classic silver kind)
– Two small chairs (as the body frame)
– Black fabric paint + brush
– Hot glue gun
– Scissors, marker, foam pieces
Instructions
Cut a large tan felt oval for the head — think 12–14 inches wide. Paint on Slinky’s signature thick brows, white circle eyes with black pupils, and that goofy smile using black fabric paint. Glue cream felt for the muzzle, brown felt ears on each side.
Wrap tan felt fabric around the Slinky coil to create the stretchy body. Drape it between both chairs, front chair holding the head, back chair anchoring the tail end.
And honestly, the coil does all the heavy lifting here — it holds its shape without any internal structure needed.
One thing to remember: hot glue cools fast on felt, so press and hold each piece 10–15 seconds for a strong bond.
The felt-over-Slinky construction means zero sagging, exactly the bouncy shape you see here.
Prep Time: 20 min | Active Project Time: 1.5 hrs | Difficulty Level: Moderate
📸 Photo credit: Instagram @mommyscraftyhelper
The One Slinky Dog Trick Most DIYers Get Wrong (And How to Fix It)
Okay, real talk — I made this mistake my first time and it almost ruined the whole costume.
Most people connect their Slinky Dog sections with stiff wire, and then wonder why the “slinky” part just… sits there. Dead. Sad. Zero bounce.
Here’s the pro secret: use bungee cord threaded through a flexible dryer duct instead. That metallic accordion duct already looks spot-on for Slinky’s coils, and the bungee cord gives it that satisfying stretch-and-snap motion when your pup walks.
Cut your duct into two sections — one for each side of the dog’s back. Attach them to a soft harness base, not directly to the costume fabric. Fabric tears under repeated movement. A harness holds.
Also — size your coil sections to your dog’s actual stride length. My friend measured her lab’s body and completely ignored leg movement, and the sections kept tangling mid-walk. Total chaos at the Halloween parade.
Do this today: test the stretch BEFORE the event, not in a dark parking lot ten minutes before.
Your Home Gets to Be Beautiful and Dog-Proof
Okay, so here’s the thing — you don’t have to keep choosing between a home you love and a dog you adore. Those two things can absolutely coexist. The right furniture protects your space without making it feel like a kennel catalog exploded in your living room.
Pick one piece. Start there. Maybe the sofa, maybe the rug your golden keeps using as a napkin.
Small change, big win: one swap and you’ll stop holding your breath every time she trots in with muddy paws.
Your Pinterest board and your pup both deserve a win. So — which room is she wrecking first? 🐾

Amr Mohsen is a software engineer who traded his keyboard for a leash — at least on weekends. His love for dogs inspired him to share what he learns as a dog owner and enthusiast, bringing a detail-oriented, research-driven perspective to every article he writes. If it’s about dogs, he’s probably already looked it up twice.

