Ever thought about crafting a cozy cardboard cat house for your furry buddy? It might sound a bit out there, but trust me, it’s easier than it seems. Imagine a whimsical castle or a snazzy apartment with balconies. You’ll surprise your cat, and maybe even yourself, with your newfound DIY skills. Plus, it’s a fun way to stretch those creative muscles. Want to explore some fantastic ideas? Buckle up; let’s plunge into some purr-fect options.
Cardboard Castle for Your Cat
Building a cardboard castle for your cat isn’t just a fun project; it’s a chance to release your inner architect, even if you’ve never constructed anything beyond a sandwich.
First, gather those cardboard boxes that pile up after deliveries. You’ll need scissors, tape, and maybe a snack for motivation. Cut out windows and doors—cats love peeking out. Stack boxes to create levels; your cat will feel like royalty.
Add some cushions inside for comfort; trust me, they’ll appreciate it. Get creative: draw designs, or paint them if you’re feeling fancy. Just remember, it’s a cat house DIY cardboard project, not the Taj Mahal.
Before you know it, Fluffy will have the coziest kingdom on the block.
Our Collection
Now that you’ve created that awesome cardboard castle, let’s talk about some other fun designs you can whip up for your furry friend.
Imagine this: a cozy cat tunnel with a secret hideaway, or maybe a towering scratching post to keep those claws sharp and stylish.
With options like a cat apartment featuring balconies or a playhouse with a rooftop, you’ll keep your kitty entertained and cozy in no time.
1. Cat Tunnel With Hideaway
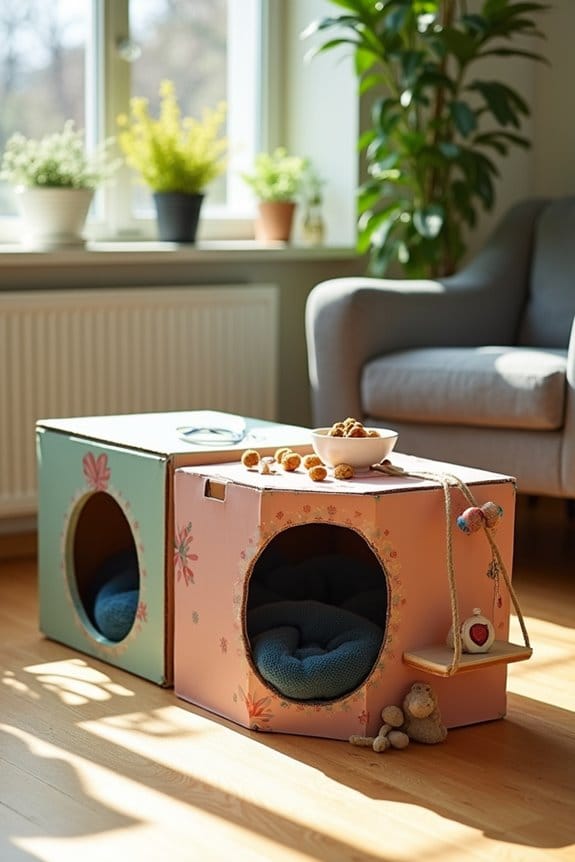
Looking for a fun way to keep your feline friend entertained while saving some cash? A cat tunnel with a cozy hideaway is the perfect DIY project! Not only does it provide hours of enrichment and exercise for your kitty, but it also adds a charming touch to your home decor. Plus, your cat will appreciate having a little private nook to retreat to after a long day of napping and window watching.
Materials Needed:
- 2 large cardboard boxes (ideally the same size)
- Scissors or box cutter
- Tape (packing tape or duct tape works well)
- A ruler or measuring tape
- Marker or pen
- Optional: Paint, fabric, or patterned paper for customizing
Step-by-Step Instructions:
- Choose Your Boxes: Start by selecting two sturdy cardboard boxes. Make sure they’re clean and intact. The sturdier, the better—just like your cat’s desire for comfort.
- Cut Openings: Use your scissors or box cutter to carefully cut a cat-sized door on one side of each box. Make sure the openings are at least 4-5 inches wide and high enough for your kitty to easily enter and exit. You want it comfy, not challenging; we’re not training for the Cat Olympics.
- Connect the Boxes: Lay one box flat on its side and place the second box in front of it, aligning the openings. Tape the boxes together securely, ensuring no wobbly bits will threaten your cat’s hideaway adventure.
- Add a Hideaway: Cut a small hole in the top of one of the boxes (this serves as a secret escape hatch). Tape any flaps down to avoid accidents. This will be the ultimate hangout spot for your feline. Think of it as a private retreat, away from those rude vacuum cleaners.
- Decorate (Optional): Release your inner artist. Paint the outside with cute colors or patterns, or staple fabric over the boxes. Your cat mightn’t care about the aesthetics, but you sure will. If you’re feeling fancy, consider using wallpaper remnants or wrapping paper to make it pop.
- Make it Comfy: Toss in a soft blanket or some old clothes, because it’s not a proper hideaway without some cozy lounging spots. I mean, who doesn’t love a snuggle? Plus, it makes you feel like you did something nice for your furry friend.
- Place It in Their Fave Spot: Find a quiet, sunny corner of your home for the tunnel. Cats love sunbathing—kind of like we all do. Then, sit back and watch your kitty jump in like it’s a jackpot of fun.
Optional Add-ons/Variations:
- Design Dilemma: If you want your cat tunnel to fit a specific vibe, try covering the boxes in colorful fabric or even contact paper. Patterned paper gives a chic touch—think of cat chic as the next big thing.
- Personalized Perks: Make it more fun by adding small toys that dangle from the top opening or create a mini ‘cat cafe’ vibe by providing a small shelf for treats. Who says we can’t spoil them a little?
Pro Tip:
Ensure that everything is secured well—your fluffy acrobat may need to practice her jump! And, to save on materials, try reusing any old cardboard boxes from deliveries. I mean, who doesn’t have a spare box lying around? It’s practically a cat commandment to convert boxes into play areas.
2. Cat Scratching Post Tower
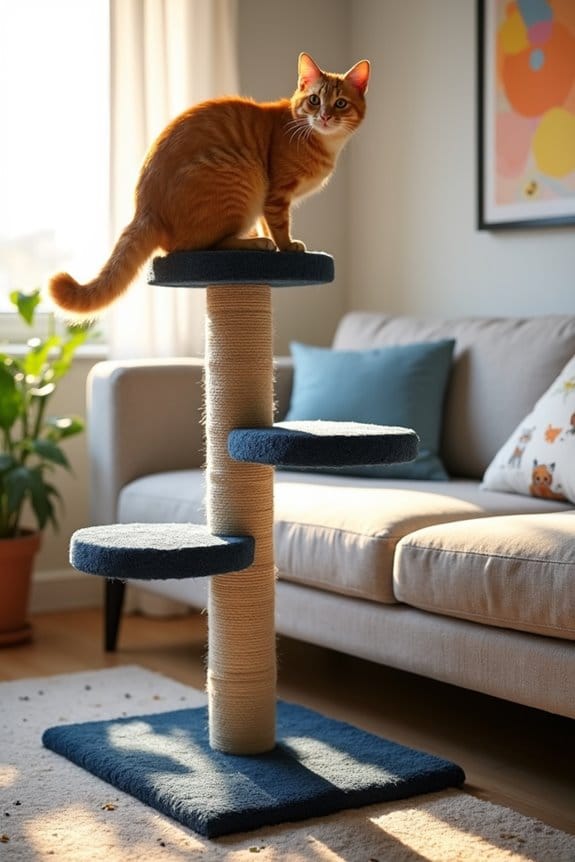
Is your cat taking their scratching game to the next level? If so, a cat scratching post tower is just what your furball needs! This DIY project not only protects your furniture from those sharp claws but also provides a designated play area that’s interactive and tons of fun.
Plus, it’s a money-saving alternative to the pricey options found in stores, allowing your kitty to stretch out, play, and exercise—all while elevating your home’s charm.
Materials Needed:
- 1 sturdy cardboard box (the size will depend on how tall you want the tower)
- Scraps of carpet or thick fabric
- 1 or 2 regular-sized cardboard tubes (like from paper towels or toilet paper)
- A hot glue gun and glue sticks (or strong adhesive)
- Scissors
- Tape (optional for reinforcement)
- Ruler or measuring tape
- Marker
Step-by-Step Instructions:
- Prepare The Base: Cut the top flaps off the cardboard box to create a base. If you want extra stability, you can attach another piece of cardboard to the bottom. Just think of it as laying the foundation for your kitty’s dream castle.
- Cover with Fabric: Cut the scraps of carpet or fabric to fit the sides of the box base. Secure them in place using your hot glue. This adds a lovely touch and gives the tower a flashy update—goodbye, boring cardboard box.
- Vertical Excitement: Take the cardboard tubes and decide whether you want one or two for the tower height. It’s your call! Cover them in fabric the same way you did with the box, then glue them upright onto the base. You want them to be sturdy, like a gentle hug, so make certain they’re fully supported and tight.
- Add Levels: If you want to get creative (and cater to your cat’s climbing instincts), cut out additional pieces of cardboard for platforms. Secure them at different heights using the glue or tape. Your cat deserves a multi-level playground, after all.
- Final Flourish: Once everything is secure, give each tube and platform a gentle scratch test to make sure everything’s steady as a rock. Grab some catnip, sprinkle it around. You’ll be amazed by how your feline friends will rush to explore, as though they’ve found buried treasure.
- Position it Right: Carefully place your new scratching post tower in your cat’s favorite lounging area—maybe near the sunniest window. This space will become their throne, and they’ll reign supreme from atop their new creation.
Optional Add-ons/Variations:
- Extra Cozy Spaces: Create hideaways by cutting small doorways in the platforms where your kitty can peek through. Think of it as a private nook for their royal paws.
- Decorate Away: Paint the edges or add fun designs with markers for a personalized touch. Bright colors could spark joy both for you and your kitty, turning your creation into a statement piece.
Pro Tip:
Cats love to scratch after a good ol’ nap, so placing their new scratching post tower near their sleeping area will encourage the habit.
Additionally, you might want to add a layer of sisal rope around the tubes for extra scratching delight. Your cat’s claws will thank you, and you’ll be one step closer to keeping the sofa intact.
Finding a little balance in your home is worth the effort, and you can have a laugh while doing it. Who knew cardboard could turn into a castle?
3. Cat Apartment With Balconies
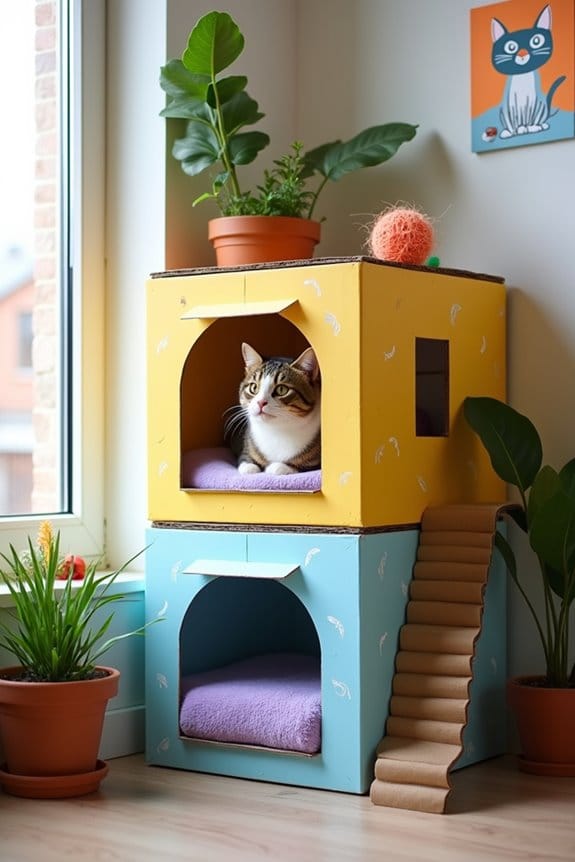
Want to give your feline friend a chic new home that even you’d want to curl up in? This DIY cat apartment with balconies is a delightful way to spoil your kitty while keeping your budget intact. Not only does it provide a cozy retreat for your cat to lounge and play, but it also adds a whimsical touch to your home, making it a win-win for both you and your furry overlord.
Materials Needed:
- 3 sturdy cardboard boxes (varying sizes)
- Craft knife or scissors
- Hot glue gun and glue sticks
- Paint (non-toxic or pet-safe, preferably in your cat’s favorite colors)
- Ruler or measuring tape
- Marker
- Optional: Soft fabric or pillow for added comfort
Step-by-Step Instructions:
- Base Construction: Take your largest cardboard box and cut off the top flaps. This will create the main area of the apartment. Now, cut windows on two sides, making sure not to cut all the way through—leave some flaps for a fun entryway!
- Balcony Creation: Grab the second box, which should be slightly smaller. Cut it down so it’s the perfect size to sit on top of the first box. Cut out sections of the front to create balconies. Think of it as a scenic overlook for your cat, where they can survey their kingdom below.
- Connecting the Dots: Use some extra cardboard to create ramps that connect the two levels. Cut out a strip and fold it to provide some slope. Glue it at one end to the second box and the other end to the first. It’s like a main street leading to fabulous holiday apartments for the kitties.
- Decorate to Impress: Time to spruce things up! Paint or cover the exterior of the boxes with fabric to really jazz up the appearance. You want to make your creation as stylish as possible—after all, we all judge a book by its cover, or in this case, a cat by its apartment.
- Final Touches: Make sure everything is securely glued and no edges are sticking out. You don’t want any unfortunate paw-related incidents. If you have a soft fabric or cushion, place it inside for extra comfort. Cats love luxurious lounging spots—just don’t ask them to share.
- Location, Location, Location: Now that your cat apartment is complete, find the prime spot in your home, preferably near a window or a sunny nook. Your cat will appreciate the view, and you’ll enjoy the stylish addition to your decor.
Optional Add-ons/Variations:
- Color Explosion: Consider adding led lights inside for a cozy glow or painting the boxes in various bright colors to match your home decor.
- Personalized Touch: Have some spare fabric? You can create a custom blanket or toys that match the theme of the apartment—because every cat needs their accessories, right?
Pro Tip:
Use a sturdy glue for better durability, especially if your cat has a knack for jumping around like a mini gymnast. Plus, a little extra sealing on edges will help in preventing any accidental sharp edges from sneaking into your cozy cat corner. You wouldn’t want your cat to have a mystery cut before they even settle into their new digs.
With a bit of creativity and a gentle push into the artsy zone, you’ll have your cat living in style. Who knows? They might even enjoy their new home too much—so much that they decide not to come out for guest visits. That’s one happy kitty!
4. Cat Playhouse With Rooftop
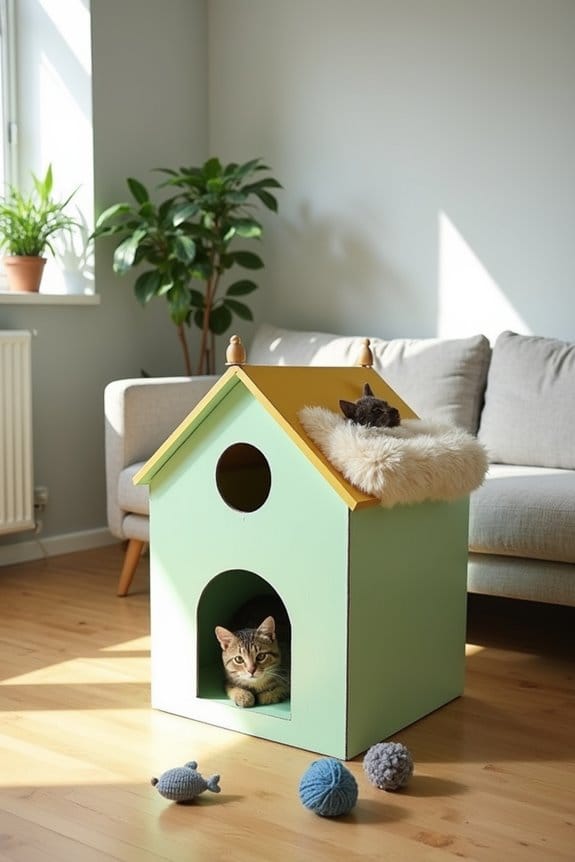
Are you ready to create the ultimate playground for your kitty? This DIY cat playhouse with a rooftop isn’t just a fun project; it’s a place where your feline friend can hop, perch, and play while adding a stylish touch to your decor.
It’s a cost-effective way to offer your cat an adventure without breaking the bank. Plus, who wouldn’t want to show off a charming little cat house to guests that your furball actually loves?
Materials Needed:
- 2 large and 1 medium sturdy cardboard boxes
- Craft knife or scissors
- Hot glue gun and glue sticks
- Non-toxic or pet-safe paint (choose colors that match your home)
- Ruler or measuring tape
- Marker
- Optional: Soft fabric or faux fur for added comfort on the rooftop
Step-by-Step Instructions:
- Base Structure: Start with the largest cardboard box. Cut it open by removing the top flaps and adding a fun doorway and a couple of windows on the sides, leaving some flaps as entryways. This will be the main living area of your playhouse.
- Rooftop Creation: Next, take the medium-sized box. Cut it down so it’s slightly smaller than the base box, then remove the front flaps to create a sloped rooftop. This adds an architectural flair while giving your cat an elevated vantage point.
- Combine the Two: Position the smaller box on top of the larger one. Make sure it’s stable—no one wants a rooftop that collapses during a cat nap. You might want to glue the corners down to keep it sturdy.
- Ramp Time: Now for the fun part: creating access to the rooftop. Cut a strip of cardboard and shape it into a ramp leading from the lower box to the top. Secure it with hot glue, and make certain there are no sharp edges for those little paws.
- Decorate Like a Pro: Time to release your inner artist! Paint the exterior of the cat house with pet-safe colors that brighten your living space. Want a pattern? Go on, be wild. Add some cute details with contrasting colors or even stickers. It’s your canvas, after all.
- Comfy Rooftop: If you have some soft fabric, attach it to the rooftop to create a cozy spot where your kitty can lounge. Cats, after all, love a good sunbathing session. Just make sure the fabric is securely glued down.
- Find the Perfect Spot: Once your masterpiece is complete, find a sunny spot for it in your home. This is where the magic happens—your cat will love to climb up and survey their domain, and you get to enjoy the sight of a happy, playful cat.
Optional Add-ons/Variations:
- Color Palette Play: Instead of plain colors, consider using a variety of colors to make the house a real eye-catcher. You could even add some wall decals that reflect your cat’s personality—think fish, paw prints, or little yarn balls.
- Interior Styling: Add a small hanging toy from the top of the rooftop or create a little napping nook inside with extra soft fabric—just imagine your kitty lounging like royalty!
Pro Tip:
When using a hot glue gun, be careful—it’s super effective, but it can also be super hot (trust me, I learned this the hard way). If you’re concerned about stability, don’t skimp on glue. A little extra glue here and there could save you from a potential cat-related disaster in the future.
Now, roll up your sleeves and get ready for some quality bonding time with your craft and your kitty. Each paw-print your feline leaves inside will be a little reminder of your effort and love. Happy crafting!
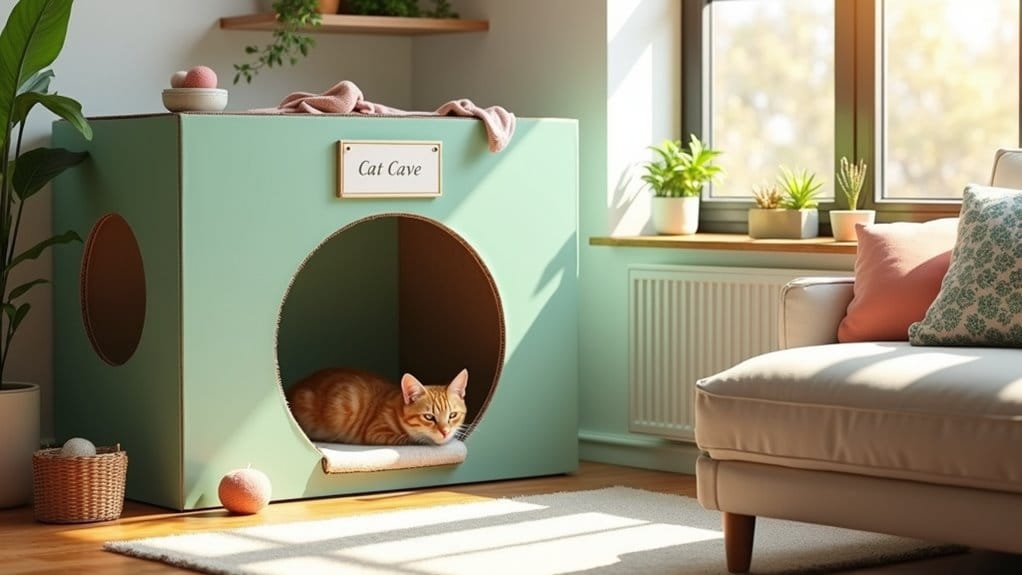
5. Cat Cottage With Window
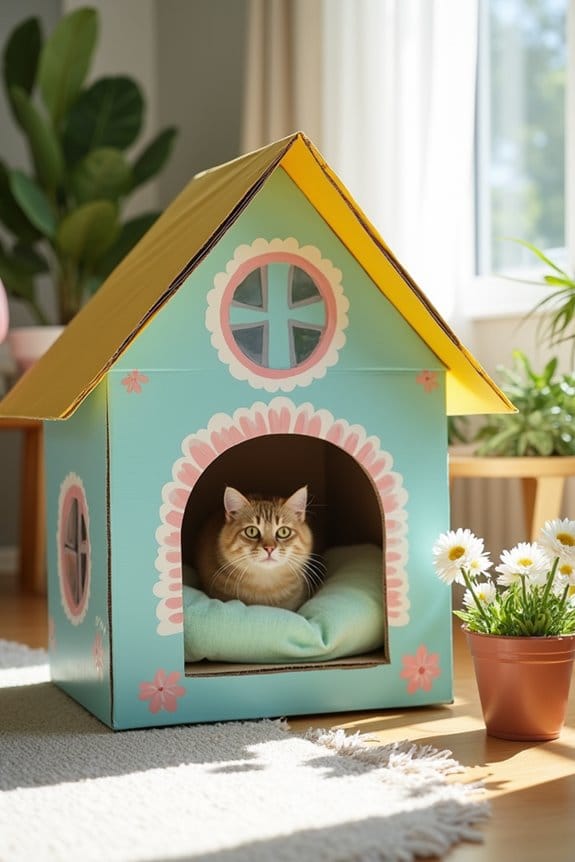
Looking to add some charm to your home while giving your feline friend a cozy haven? This DIY cat cottage with a window is the purr-fect project for you! Not only does it save you money compared to store-bought cat houses, but it also adds a delightful touch to your decor. Plus, just think of the joy on your kitty’s face as they curl up inside their very own cottage, peeking out the window like a little furry lookout. With the right care, your pet will thrive on premium dog food subscription to maintain their health and happiness.
Materials Needed:
- Sturdy cardboard boxes (1 large, 1 medium)
- Craft knife or scissors
- Hot glue gun and glue sticks
- Non-toxic or pet-safe paint (choose fun colors you love)
- Ruler or measuring tape
- Marker
- Optional: Decorative paper or fabric for a whimsical touch
Step-by-Step Instructions:
- Building the Cottage Base: Start with the large cardboard box. Cut off the top flaps and use your ruler to mark out a charming door on one side. Don’t forget to add a few windows—you can use a marker to outline where you’ll cut, ensuring they’re nice and cat-sized.
- Creating the Roof: Take the medium-sized box and cut it down to create a roof that fits snugly on top of the base. You can angle the roof for that adorable cottage feel. Just remember to secure it well; we don’t want a roof that falls in on a cozy cat nap.
- Add the Window: Using your craft knife, cut out the window frame from the large box. For a cute touch, consider making it a heart or a round shape. Make sure there are no sharp edges—safety first, right?
- Assembly Time: Place the roof on top of the base and secure it with hot glue. This way, the entire structure remains stable, and your kitty can jump in and out easily! Give it a little wiggle to make sure it’s sturdy.
- Just Let It Shine: Time for some fun! Grab your non-toxic paint and liven up your cottage. Go as bold or as pastel as you like. You could even use a sponge for a textured look, or go wild with polka dots. This is your creative moment, so have fun with it!
- Cozy Decor: If you have some fabric or decorative paper, cover parts of the cottage to give it character. Maybe a little flower print or some bright colors that match your living room? Cats love to curl up in comfy spaces, so add a soft blanket or cushion for extra coziness.
- Find the Right Home: Place your new cat cottage in a sunny spot or near a favorite perch. Watch as your furry friend discovers their new hideaway. Trust me; it’ll bring some serious joy—especially when they peek out the window to survey their new territory.
Optional Add-ons/Variations:
- Consider adding a little awning over the window using some additional cardboard or fabric for that extra cottage-y look.
- You can also create a little flower pot from cardboard to place outside the window, painted to match your cottage for an adorable garden touch.
Pro Tip:
When cutting cardboard, always be sure to wear safety gloves. Cardboard edges can get a little sharp, and we wouldn’t want you to end up with a paper cut during your creative escapade.
It’s faster to clean up your crafting area regularly too—less mess means more time building fabulous cat cottages!
6. Cat Observatory With Perch
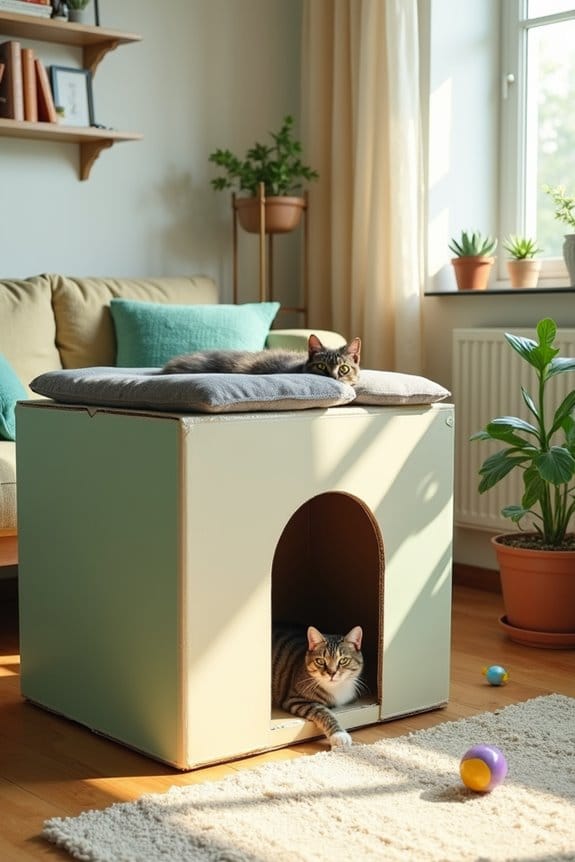
Ever wish your cat could enjoy the great outdoors while staying safe and sound inside? This DIY cat observatory with a perch is just the solution you need! Not only does it keep your kitty entertained for hours (and let’s be honest, it might save your favorite houseplants), but it also adds a stylish touch to your home. Imagine watching your furry friend lounge in their own personal viewing station, keeping a watchful eye on the world outside.
Materials Needed:
- Sturdy cardboard boxes (2 large)
- Craft knife or scissors
- Hot glue gun and glue sticks
- Non-toxic or pet-safe paint (choose colors to match your style)
- Ruler or measuring tape
- Marker
- Optional: Soft fleece or cozy fabric for the perch
Step-by-Step Instructions:
- Start with the Base: Grab one of the large cardboard boxes and cut off the top flaps. This will act as the base of your observatory. On one side, use a ruler to mark and cut out a large square where your cats can enter. Nice and simple.
- Create the Perch: Take the second large box and cut it down to create a perch platform that fits securely on top of the first box. This is where your cat will lounge and keep an eye on their kingdom. Aim for a snug fit; you don’t want it wobbling during a dramatic bird-watching event.
- Secure the Perch: Once you have your perch piece ready, attach it on top using your hot glue gun. Make sure you apply plenty of glue so it can handle any enthusiastic jumps from your kitty. Give it a gentle shake to check its stability—safety first.
- Add a Fun Viewing Window: Use your craft knife to cut out a fun window shape on one side of the observatory. This could be a classic rectangle, or go adventurous with a star or heart shape! Remember, smooth out any rough edges to keep those tiny paws safe.
- Decorate to Impress: Time to reveal your inner artist! Grab your non-toxic paint and color your observatory in shades that complement your home. You can even use sponges or brushes for added textures. Just imagine the vibrant, fun piece this will be!
- Cozy Up the Perch: If you decided to grab some soft fleece or fabric, now’s the time to cover the perch to make it comfy for your feline friend. Use hot glue to secure the fabric down so your kitty can stretch out in style.
- Find the Perfect Spot: Finally, place your new cat observatory in a sunny corner, or right by the window if they love to watch the world go by. Give your kitty a little nudge toward it, and watch them transform into a proud little observer.
Optional Add-ons/Variations:
Want to get creative? Consider adding some wooden dowels or sturdy cardboard to create a ladder for an added climbing feature.
Or deck out the observatory with some stickers or washi tape for that customized flair—let your imagination run wild!
Pro Tip:
When securing your observatory, don’t skimp on the glue. It’s the glue that keeps the peace (and the perch upright).
If you’re concerned about wear and tear, you can even cover the outside with clear packing tape for durability. Trust me, your kitty will appreciate the extra sturdiness, especially during their zoomie sessions.
Now, get to work and let your crafting adventure begin! 🌟
7. Cat Garage With Ramp
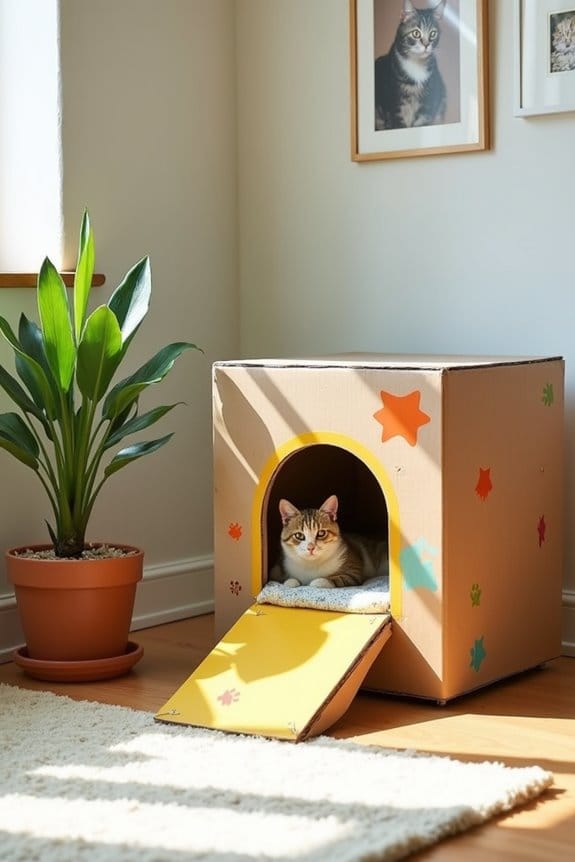
Have you ever noticed your cat’s fascination with reaching new heights? If so, a DIY cat garage with a ramp could be the perfect addition to your home. Not only does it give your feline friend a cozy little hideaway, but it also makes it easier for them to access their favorite perch without jumping and risking injury.
Plus, it’s a fantastic way to keep your home looking stylish and organized while saving you money on store-bought cat furniture.
Materials Needed:
- Large cardboard box (1)
- Smaller cardboard box (1)
- Craft knife or scissors
- Hot glue gun and glue sticks
- Ruler or measuring tape
- Marker
- Non-toxic or pet-safe paint (optional)
- Optional: Soft fabric or old blanket for added comfort
Step-by-Step Instructions:
- Prepare the Large Box: Begin with the large cardboard box. Cut off the top flaps to create a cozy garage base for your cat. Use your marker to outline a cat-sized door on one side—this will be the entrance.
- Cutting the Ramp: From the smaller cardboard box, cut a slanted strip to create a ramp. It should be long enough to give your cat a gentle incline but short enough to fit comfortably next to your cat garage. You want it to be stable, not like that wobbly table at the cafe down the street.
- Secure the Ramp: Attach the ramp to the front of the larger box using the hot glue gun. Make sure it’s angled securely so that your kitty can walk up and down without hesitation. Test it by giving it a gentle wiggle—no one wants an unplanned cat tumble.
- Create More Access: If you’re feeling adventurous, cut additional holes on the sides of the garage for your cat to peek through or as extra exits. You could create fun shapes, like circles or triangles; after all, who doesn’t love a little character?
- Decorate Your Creation: Use non-toxic paint to add some color to your cat garage. Let your artistic side shine as you paint on patterns or designs that match your home decor. Who’d have thought a cat garage could double as a modern art piece?
- Add Comfort: If you have any old fabric or blankets lying around, cut them to size and place them inside the garage to make it extra cozy. Just be sure to secure the fabric with hot glue so it doesn’t slide around during those high-energy cat naps.
- Place It Perfectly: Finally, find a nice sunny spot for your cat garage, or somewhere near their favorite window. Cats love to soak up warmth and be on lookout duty for the big, scary world outside. You’ll appreciate that, too.
Optional Add-ons/Variations:
- You could personalize the garage by painting it in your cat’s favorite color (if that’s a thing). Perhaps some cute paw prints or a little “cat cave” sign can go a long way in sprucing it up.
- Try using patterned fabric for the inside! Floral patterns could make it extra inviting, or even animal prints could give them a touch of the wild.
Pro Tip:
Always remember to use non-toxic materials, especially if your kitty is known for doing a little taste-testing.
And for a little extra durability, consider using packing tape over the seams after you glue—it’s like giving your box a solid armor to withstand many cat adventures.
Extra Tips & Ideas
Creating a cozy cardboard cat house can be as simple as one, two, three, and these extra tips will help make your project even better.
First, consider adding a few windows for ventilation—your cat deserves fresh air, right? You can cut small holes, but be careful; you don’t want to accidentally create a “cat door” to Narnia.
Next, how about some fun designs? Grab some markers, let your kiddo go wild, and personalize it with your cat’s name. Don’t forget a comfy pillow or blanket inside; trust me, they’ll appreciate it.
Finally, glue or tape the edges well—no one wants a surprise collapse during cat playtime. Remember, it’s all about creating the purr-fect haven for your furry friend.
Frequently Asked Questions
What Tools Do I Need for Building a Cardboard Cat House?
You’ll need scissors, a craft knife, a ruler, and a pencil for cutting and measuring. Glue or tape will hold everything together, while decorative materials can add a personal touch to your cat house.
How Can I Make the House More Durable?
To make the house more durable, reinforce the joints with tape or glue, and layer cardboard for added strength. You might even discover that applying a waterproof sealant helps protect against spills and moisture!
Can I Paint My Cardboard Cat House?
Yes, you can paint your cardboard cat house! Just use non-toxic, water-based paint for safety. Make certain it’s completely dry before letting your cat explore, and consider sealing it with a clear coat for extra protection.
How Long Will a Cardboard Cat House Last?
Your cardboard cat house can last anywhere from a few weeks to several months, depending on usage. Did you know that average cardboard life spans range from 2 to 12 months? Proper care can extend its durability!
Is It Safe for My Cat to Chew On?
It’s generally safe for your cat to chew on cardboard, but watch for any pieces that might break off. Verify there’s no toxic ink or glue. Regularly inspect it to keep your cat safe and healthy.
Conclusion
So, after crafting your cat’s dream house, imagine the moment when they first discover it—their wide eyes, the curious sniffing. You’ve poured love and creativity into these whimsical designs, and soon, you’ll witness their delight. What did you expect? Cats are natural explorers, after all. Whether they choose the castle or the cottage, your cardboard creation is sure to spark endless adventures. Just wait, those cardboard walls might hold more surprises than you think. Are you ready for it?

Hi, I’m Ali Tarek, the founder of Animalsman. I’ve always been passionate about pets, especially dogs and cats, and I created this website to share practical tips, easy recipes, and helpful care advice for fellow pet lovers. My goal is to make pet care simple, enjoyable, and accessible for everyone. When I’m not writing or curating content, you’ll usually find me spending time with my furry friends or learning new ways to keep them happy and healthy.

