If you’ve got a feline climber at home, you’re probably well aware that they crave vertical space. But who wants to spend a fortune on a fancy cat tree? You’ve got cardboard boxes, old bookshelves, and maybe even some wooden stools just waiting to be transformed. Imagine your kitty scaling a faux tree trunk or chilling in a cozy fabric teepee. Intrigued? Let’s explore some fun DIY projects that could keep both you and your cat entertained and maybe even craft your next cat mansion.
Instant Cat Tree Ideas
When you’re in need of a cat tree but don’t want to break the bank or spend hours building one, how about whipping up an instant cat tree that’ll have your feline friend climbing to new heights in no time?
Grab some cardboard boxes or even an old wooden stool. Stack them up—secure with tape if you must. Toss in some soft blankets or cushions for comfort.
You’ve got yourself a cozy little hideaway. If you’re feeling extra crafty, add a few scratching post essentials, like sisal rope, to keep those claws happy.
Trust me, your cat won’t care if it’s a diy cat tree homemade from whatever’s lying around, as long as it’s a perch with a view!
Our Collection
Now that you’ve got those instant cat tree ideas, let’s check out our collection.
Imagine a cozy hammock corner cat bed or a quirky cardboard box climbing spot—your cat will love you even more for it!
Seriously, think about how much fun they’d have exploring a repurposed bookshelf cat tower or that faux tree trunk climbing spot; it’s like giving your feline a little adventure right at home.
1. Wooden Pallet Cat Platform
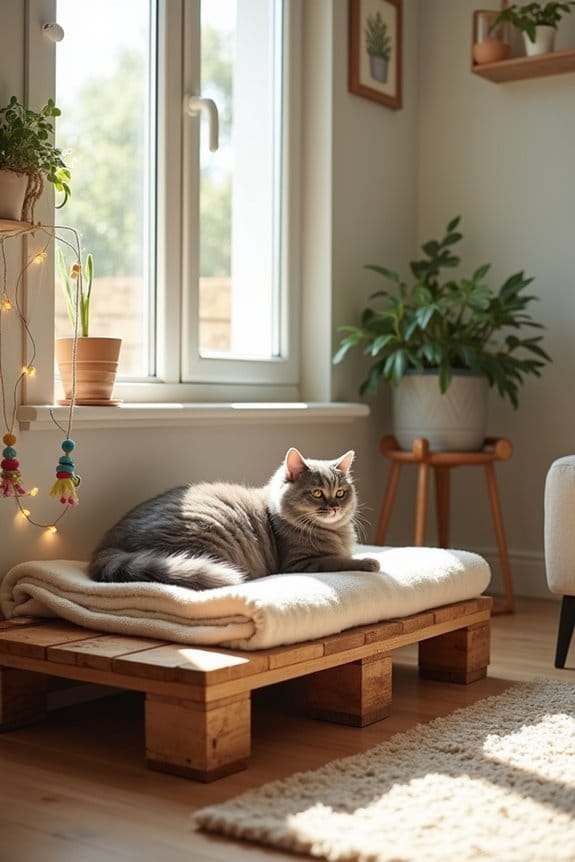
Are you looking for a stylish yet affordable way to give your feline friend a cozy spot to hang out? A wooden pallet cat platform is a fantastic DIY project that not only saves you money but also adds a rustic touch to your home. With a bit of creativity and some elbow grease, you can create a unique space that your cat will adore. Plus, you’ll be feeling pretty proud every time your cat shows off their new hangout!
Materials Needed:
- Wooden pallets (make sure they’re clean and in good condition)
- Sandpaper or a power sander
- Non-toxic wood stain or paint (optional)
- Rope or fabric for added texture (if you want to jazz it up)
- Wood screws
- Drill or screwdriver
- Measuring tape
- Level
- Safety goggles
Step-by-Step Instructions:
- Find Your Pallet: Scour local marketplaces or your neighborhood to find a sturdy wooden pallet. Look for one that feels solid and doesn’t have broken slats.
- Prep the Pallet: Give your pallet a good sanding. Remove any rough edges and splinters—your cat will thank you for it. And hey, it’s a therapeutic workout.
- Decide on Placement: Choose a prime location for your platform. Is it by the sunniest window or next to your favorite reading chair? Measure the space to guarantee a good fit.
- Add Color (Optional): If you’re feeling artsy, apply a non-toxic wood stain or paint to match your home décor. It only takes a little bit of color to transform your space into a chic cat retreat.
- Secure It: Once the paint or stain has dried, use the wood screws to secure the pallet to the wall or to another solid surface to make sure it won’t tip over when your playful cat jumps on.
- Add Comfort: Lay down some cushy fabric or a soft blanket on top of the pallet. Cats love comfy spots, and this will make your platform even more appealing.
- Make Sure It’s Safe: Finally, check with a level tool to guarantee everything’s straight and secure. You wouldn’t want your feline friend taking a tumble.
Optional Add-ons/Variations:
- Whimsical Touch: Consider hanging a few cat toys or a small plant nearby, adding life and charm to the setup. You could even drape some fairy lights along the edges for a magical effect.
- Layer Up: Use multiple pallets stacked at different heights to create a multi-tiered experience. Cats in the wild love climbing, so give them that thrill at home.
Pro Tip:
Always wear safety goggles when sanding or using power tools. It’s easy to get caught up in the excitement of DIY, but protecting your eyes should always be a priority. Plus, you’ll look really cool in them. You might even consider a few cat eye stickers over the lenses—party on!
Creating a wooden pallet cat platform can be a rewarding and fun project, not to mention a special haven for your furry best friend. So roll up those sleeves and get tapping on those pallets—it’s time to elevate your cat’s lounging game!
2. Hammock Corner Cat Bed
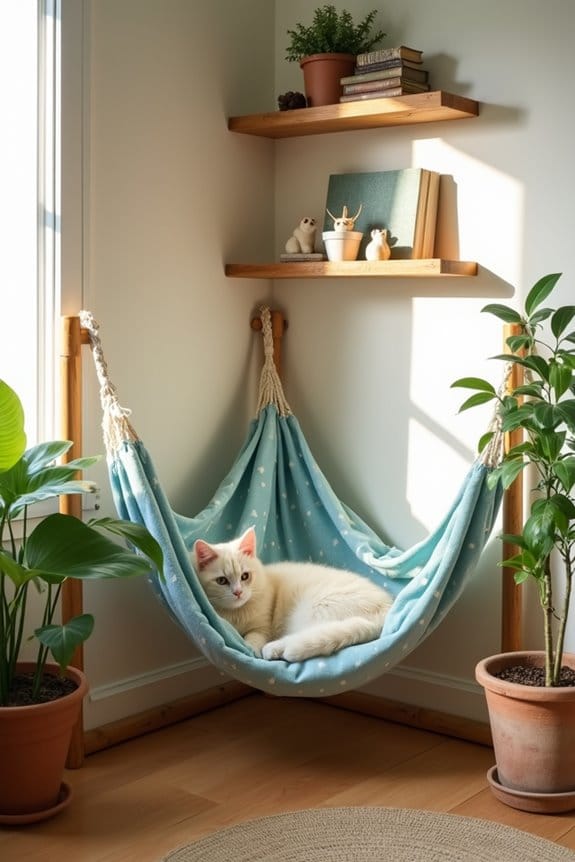
Do you want to give your furry friend a cozy nook that they simply can’t resist? A hammock corner cat bed isn’t just a comfy hideaway for your kitty; it’s also a fun addition to your home’s aesthetic. Plus, it’s an affordable way to keep your cat off the couch and give them their own special spot to relax and play.
Materials Needed:
- Two wooden dowels (sturdier is better)
- A piece of durable, soft fabric (like canvas or cotton)
- Rope or strong twine
- Scissors
- Drill or screwdriver
- Measuring tape
- Safety goggles
- An optional sewing machine or needle and thread (for fabric finishing)
Step-by-Step Instructions:
- Select Your Corner: Choose a cozy corner where your cat often lounges. It’s ideal to pick a spot close to a window for some sunbathing opportunities. Measure the space so you know how large your hammock will be.
- Prepare the Fabric: Cut your fabric into a rectangle—about 30 inches long and 20 inches wide should do the trick, but feel free to adjust it based on the size of your cat. If you’d like, you can hem the edges to prevent fraying, but let’s be honest, your cat won’t judge you if it’s a tad messy.
- Create the Hammock Frame: Take those wooden dowels and position them parallel to each other, about 20 inches apart. This will give your hammock proper support. Drill small holes in each end of the dowels to attach the rope.
- Attach the Fabric: Lay your fabric across the two dowels, creating a hammock-like shape. Use your rope or twine to secure each end of the fabric to the dowels by threading the rope through the holes you drilled earlier. Make certain it’s snug, but not too tight—no cat wants to feel like they’re in the Wrath of Khan.
- Hang It Up: Find a way to secure the dowels between two walls (or to a sturdy shelf) using additional rope. Use the drill to put screws into the wall to hang the dowels. If you’re unsure about it staying up, consider asking a friend for help. It’s always good to have a pair of enthusiastic eyes on your handiwork.
- Double-Check for Safety: Take a moment to make sure everything is secure. Gently tug on the fabric and dowels to make certain they’re firmly in place. Just imagine how sad your kitty would be if the hammock gave way during a particularly ambitious leap.
- Let Your Cat Explore: Set the hammock in place, and watch your cat discover their new throne! You can even sprinkle some catnip inside to lure them in. It’s like a red carpet for your royal kitty.
Optional Add-ons/Variations:
- Color Pop: Choose fabric in bright colors or patterns that match your home décor. You could even sew on fun patches or embroidery for a personal touch—go wild with your creativity.
- Hanging Décor: Consider attaching little dangling toys or a small blanket for an extra layer of comfort. Think of it as creating a spa retreat for your cat.
Pro Tip:
Always make certain to use non-toxic materials, especially if your cat is a chewer. Keep an eye out for any signs of wear and tear—better safe than sorry when it comes to our beloved companions.
Plus, if you’re ever worried about securing the hammock, remember that a little extra rope or twine goes a long way; you can never be too cautious with our furry friends.
3. Faux Tree Trunk Climbing Spot
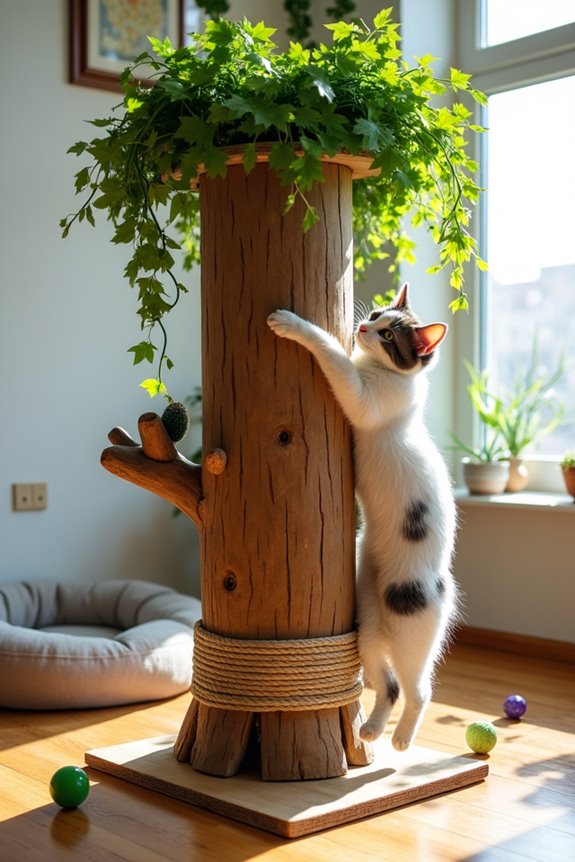
Is your cat a natural climber and an adventurous explorer? If so, a faux tree trunk climbing spot is a brilliant DIY project to ponder. Not only does it give your kitty a place to scratch, climb, and play, but it also ties beautifully into your home decor, making it look delightful while keeping your furniture safe from those sharp claws.
Plus, it’s a fun activity that will save you money compared to buying a similar item from a pet store.
Materials Needed:
- One large cardboard tube (like the kind used for carpet rolls)
- Brown and green paint (or fabric, if you prefer)
- Sisal rope (for scratching post)
- Hot glue gun and glue sticks
- A sturdy base (like a wooden board)
- Utility knife
- Measuring tape
- Paintbrush or sponge
- Optional: Faux foliage (like plastic vines or leaves)
Step-by-Step Instructions:
- Gather Your Materials: Start by clearing your workspace and laying out all the items you’ll need. It’s much easier when everything is at hand.
- Prepare the Tube: Take your large cardboard tube and cut it down to your desired height. Aim for something that’s at least 3 to 4 feet tall, giving your cat a nice high climbing space.
- Create the Base: Securely attach the cardboard tube to the sturdy wooden board as a base using hot glue. This way, your structure won’t topple over when your kitty decides to go on a climbing spree.
- Paint Your Tree Trunk: Now for the fun part. Use the brown paint to give your tube a textured tree trunk look. You can use a sponge to dab on some lighter and darker shades of brown for a more realistic appearance. Allow it to dry completely.
- Add the Sisal Rope: Wrap the sisal rope around the lower part of the tube to create a scratching area. Use hot glue to help keep it in place occasionally while you wrap. Cats really love to scratch, and this will save your other furniture from their claws.
- Decorate with Foliage: If you have faux foliage, glue some vines or leaves around the top of your faux tree trunk. This won’t only make it look appealing but will offer your cat an exciting climbing challenge.
- Final Touches: Once everything is set and dry, place the tree trunk in a sunny spot where your cat loves to hang out. Watch them interact with their new climbing spot and enjoy the playful antics.
Optional Add-ons/Variations:
Feel free to personalize your faux tree trunk. You can paint it in different shades of green and brown for a more colorful, whimsical look.
If you’re feeling crafty, drape some local fabric around the base to simulate a forest floor or add little pebbles in glue for extra aesthetics.
Pro Tip:
Make sure to regularly check the stability of the tree trunk as your cat uses it, especially if you live with a particularly rambunctious partner in crime.
Ensuring it remains secure will provide your furry friend with a safe haven to explore and play without fear of topple over during their adventures. Plus, it might save you from an unexpected cat-themed disaster on a rainy afternoon.
4. Repurposed Bookshelf Cat Tower
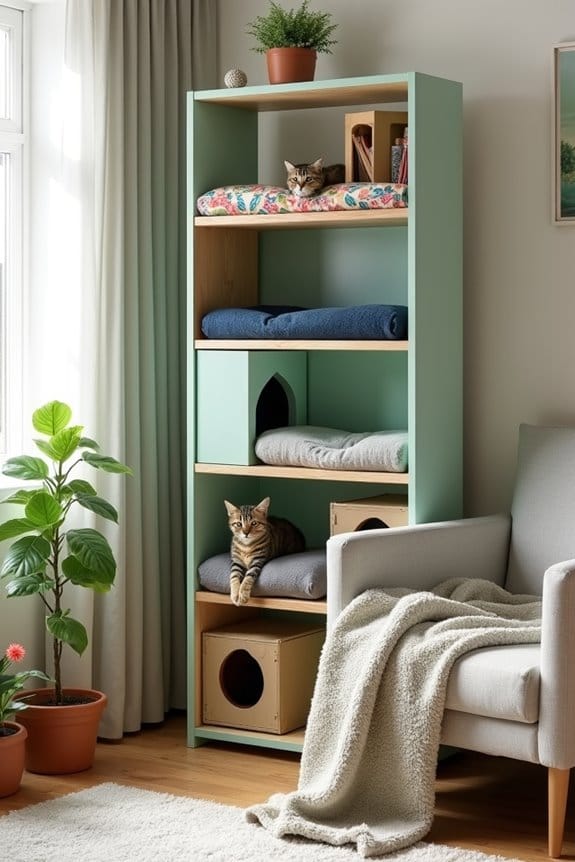
Have you ever looked at your old bookshelf and thought, “This could be more than just a book holder”? If you’re a cat lover, it can actually serve as an enchanting cat tower! This DIY project transforms a simple bookshelf into a multi-level playground for your feline friend. Not only does it give your cat a cozy space to climb and explore, but it also adds a unique decorative element to your home. Plus, you save money by repurposing what you already have — it’s a win-win.
Materials Needed:
- Old bookshelf (preferably wooden)
- Soft fabric (like fleece or carpet remnants)
- Non-toxic glue or carpet adhesive
- Sisal rope (optional, for scratching posts)
- Measuring tape
- Scissors
- Sandpaper (if needed, for smoothing rough edges)
Step-by-Step Instructions:
- Choose the Right Bookshelf: Start with a sturdy bookshelf. If you have one with shelves that can be adjusted or removed, that’s even better! Verify it’s not too tall, so your kitty can easily navigate it without a grand climbing expedition.
- Prep the Shelves: If any of the shelves are removable, pull them out. You can leave a couple in – just remember your cat loves vertical space. Sand any rough edges that might be a bit splintery. The last thing we need is for your cat to have an unexpected splinter party.
- Add Softness: Cut your soft fabric into pieces that fit the shelves and glue them down using non-toxic glue. Cats appreciate comfy spots, so don’t skimp on fluff. You can even layer a couple of different fabrics for a color pop. Just think — your kitty can lounge in style.
- Optional Sisal Scratching Posts: If your bookshelf’s legs are exposed, consider adding sisal rope around them. This gives your cat a designated scratching option while beautifying the tower. Just wrap it around tight and secure it with glue every few inches to keep it in place.
- Arrange Fun Elements: If you want to get creative, you can add tunnel-like structures made from cardboard or additional cozy beds on higher shelves. Cats love hiding spots, and you’ll appreciate seeing your little jungle gym come to life.
- Final Touches: Once everything is secure and dry, place the bookshelf against a wall or in a cozy corner of the room. Make sure it’s not prone to toppling — we want a playground, not a cat catastrophe.
- Introducing Your Cat: Now comes the fun part — coaxing your kitty to explore their new playground. Use a favorite toy or treat as bait, and watch the magical moment unfold as they clamber around.
Optional Add-ons/Variations:
Feeling a bit creative? Consider painting the bookshelf in vibrant colors, or even creating a theme (like “jungle” or “space”) with stickers or vinyl decals.
You could also line the shelves with different textures – a silky scarf here, a rough carpet piece there – a sensory adventure for your little explorer.
Pro Tip:
If you want to prevent any potential scratching on the wooden parts of the bookshelf, sprinkle some catnip on the scratched or uncleared areas. Cats go crazy for catnip, and it redirects their attention while enhancing the playful vibe of their new tower.
Plus, it’s just another method to keep that feline imagination alive.
Your bookshelf cat tower isn’t only a cozy retreat for your furry friend but also a beautiful piece of functional art for your home. So grab those old shelves, and let the DIY fun begin. Your kitty will thank you — and you may just feel like a DIY cat furniture wizard.
5. Cardboard Box Climbing Fun

Ever thought that a simple cardboard box could turn into a cat’s dream playground? This DIY project is the perfect way to transform ordinary cardboard into an exciting climbing structure for your feline friend. Not only is it budget-friendly and easy to make, but it also gives your cat a place to channel their inner jungle explorer. Plus, you use up all those empty boxes lying around the house — talk about a clutter buster!
Materials Needed:
- Several cardboard boxes (different sizes preferred)
- Box cutter or scissors
- Non-toxic paint (optional, for decoration)
- Soft fabric or carpet remnant (optional, for added comfort)
- Hot glue gun (optional, for strong adhesion)
- Ruler or measuring tape
Step-by-Step Instructions:
1. Gather Your Boxes: Start by collecting different sizes of cardboard boxes. The more variety, the better!
Think about a small box for kittens to pop in and a larger one for them to conquer.
2. Cutting Openings: Use your box cutter or scissors to cut out various openings and cat-sized doors in the boxes.
Think about how your cat likes to play. Is it a leap-in and leap-out kind of cat? Then you’ll want to make those entrances nice and big.
3. Build Your Tower: Layer your boxes by stacking them in a way that creates an ascending tower.
You can use the largest box at the bottom and complement it with medium and small boxes on top. You can secure them with hot glue for added stability, especially if your cat is a bit of an acrobat.
4. Add Fun Features****: Consider cutting holes between boxes for easy access or creating ramps from one box to another using cardboard strips.
Think of how your kitty would navigate their new domain — a little creativity goes a long way.
5. Soft Touches: If you want to add comfort, you can glue down some soft fabric to the tops of the boxes where your cat will sit.
Cats love cozy spots, after all. It’s like a mini penthouse suite, just right for a cat-nap.
6. Decorate If You Like: This step is optional but fun.
Break out the non-toxic paint and let your inner artist shine. Splash on some colors or patterns that match your home decor. Just keep it safe for your furry friend.
7. Place and Enjoy: Once everything is built, position your box tower in a spot your cat loves.
A sunny corner? Yes, please. Then sit back and watch your cat explore their new climbing wonderland. You may even get some exercise too — enjoy that agility training as they bounce around!
Optional Add-ons/Variations:
– Multiple Levels: Stack additional boxes for an even taller tower for more climbing fun.
You can also create a ‘catwalk’ by connecting boxes with narrower cardboard bridges to encourage adventurous leaps.
– Themes: Paint or decorate your boxes to create a themed playground.
An ocean theme? Go blue and add some fish cutouts. A jungle vibe? How about green with leaf designs?
Pro Tip:
Always double-check that each box is stable and secure.
Cats can be surprisingly good at turning a mild wobble into an unexpected tumble, so safety first.
And if your cat is a little tentative, toss in some of their favorite toys. A bit of encouragement never hurt anyone, especially when it leads to some smile-worthy moments.
6. Fabric Teepee Cat Hideaway
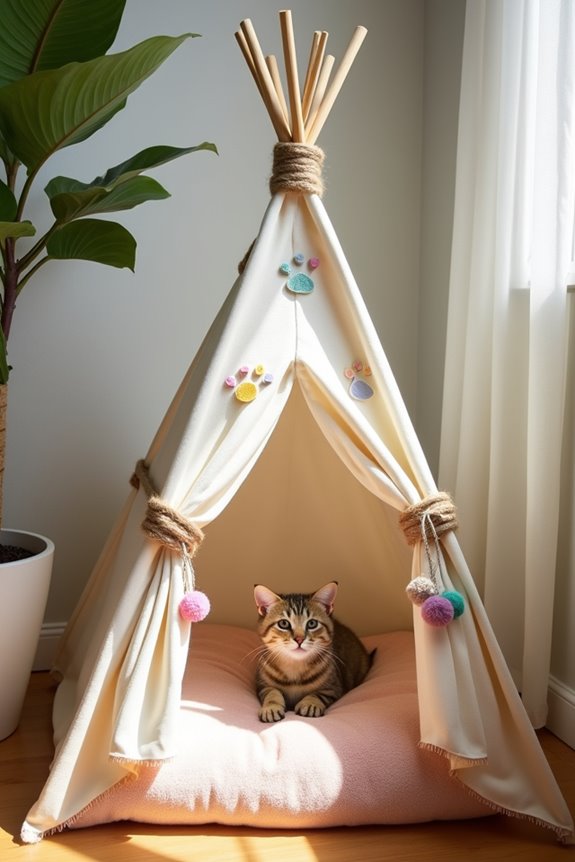
Creating a Fabric Teepee Cat Hideaway is a delightful way to give your feline friends a cozy spot that feels like their own magical fortress. This DIY project not only provides your cat with a snug retreat, perfect for napping or playtime, but it also adds a charming touch to your home décor. You’ll save some cash compared to store-bought options while indulging your creativity – think of it as a lovely bonding experience with your pet that also spruces up the living space.
Materials Needed:
- 4 wooden dowels (about 3-4 feet long)
- Heavy-duty fabric (enough to cover the teepee)
- Twine or string
- Scissors
- A sewing machine (or needle and thread for a hand-sewn teepee)
- Fabric glue (optional)
- Craft felt (optional, for added decorations)
- Measuring tape
Step-by-Step Instructions:
- Prepare Your Dowels: Take those sturdy wooden dowels and bundle them together like you’re creating a cool campfire. Tie the ends together with twine or string about six inches from the top to form the frame of your teepee.
- Measure Your Fabric: Lay your dowels flat and spread them out in a circle. Use your measuring tape to determine how much fabric you’ll need to cover the frame. A good rule of thumb is to use a piece that’s about 3-4 feet wide and 5-6 feet long — it needs to drape beautifully.
- Cut the Fabric: Once you have the right measurements, cut your fabric accordingly. If you want to add a personal touch, consider using fabric in a fun color or pattern that complements your home.
- Attach the Fabric: Drape the fabric over the dowels, ensuring that the whole teepee is covered. You can secure the top by tying the fabric to the dowels with more twine. If you’re feeling ambitious, sew the fabric at the top for extra durability (and a fancy finish).
- Create a Base: For added comfort, throw a soft blanket or cushion inside the teepee. Your cat will appreciate the cozy touch and might even think they’ve hit the kitty jackpot.
- Add Personal Touches: This step is your chance to get crafty! Use craft felt to cut out shapes or designs to decorate the exterior of your teepee. Think about sticking some cute cat paw prints or even your cat’s name on it. It’s a canvas waiting to be filled with creativity.
- Position It Right: Once your masterpiece is complete, find a spot that your cat loves. Is it near a sunny window? A quiet corner? Place it there and let your cat discover their new hideaway.
Optional Add-ons/Variations:
- Use different fabrics for a patchwork effect. Think about mixing patterns and colors to really make it pop.
- You could even add pom-poms or tassels to the entrance of the teepee. It’s like giving your cat a welcome mat that’s stylish and fun.
Pro Tip:
Always make sure that the fabric you choose is machine washable. Cats have a knack for shedding and occasionally turning their cozy hideaways into mini hairball factories.
Plus, it’ll save you from having to clean tea parties for dirt (your cat, of course) out of it. Now, go ahead and let your cat set forth on their new cozy adventure.
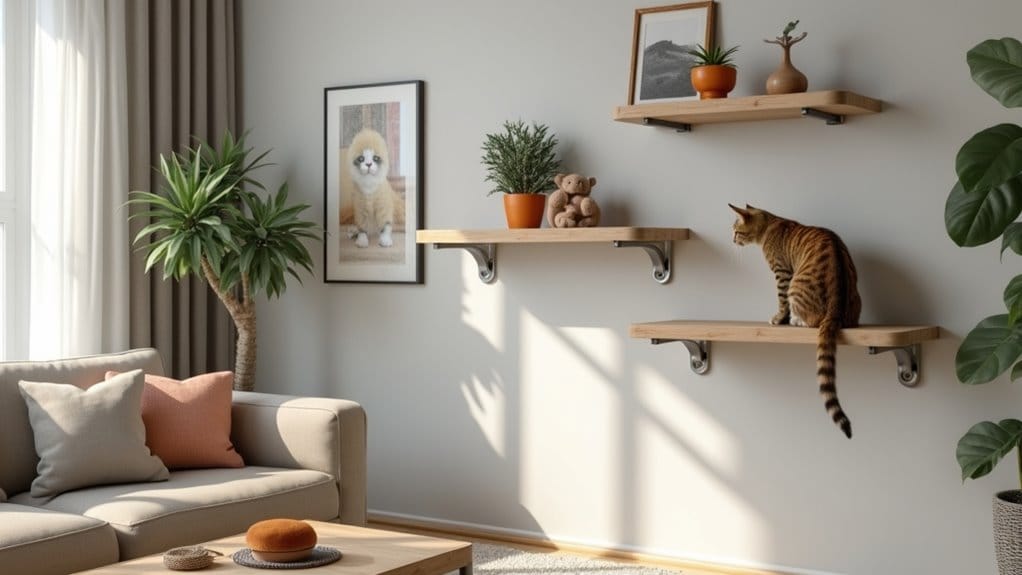
7. Wall-Mounted Cat Climbing Shelves
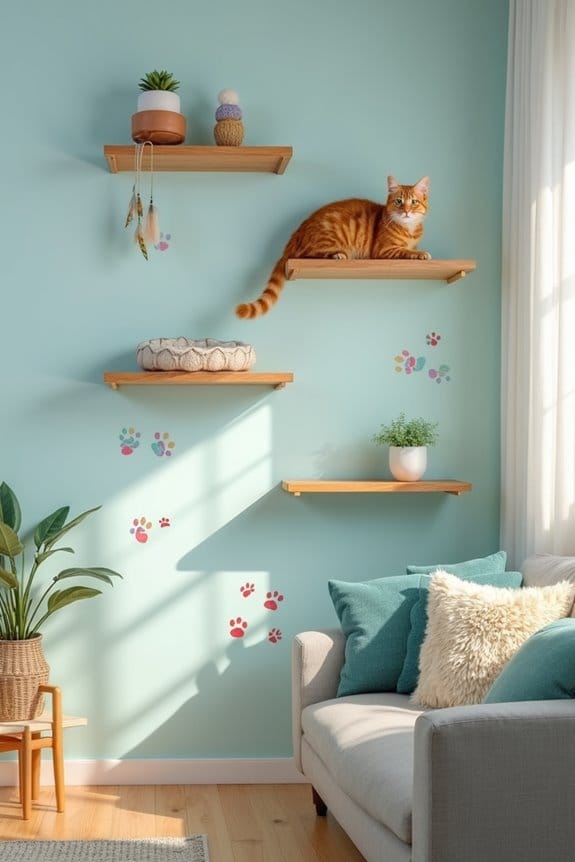
If you’re looking to give your feline friend a fun, vertical playground without taking up precious floor space, then wall-mounted cat climbing shelves are the perfect DIY project for you. Not only do they satisfy your cat’s natural love for climbing and exploring, but they also add a stylish and modern touch to your home decor.
Plus, you’ll save money compared to purchasing fancy cat furniture while providing your kitty with an engaging environment – it’s a win-win!
Materials Needed:
- Wooden shelves (pre-cut or cut to size)
- Brackets (strong enough to hold your cat’s weight)
- Screws and wall anchors
- Stud finder (for secure placement)
- Drill and drill bits
- Level
- Pencil
- Sandpaper (optional, for smoothing edges)
- Paint or wood stain (optional, for finishing touches)
Step-by-Step Instructions:
- Choose the Right Shelves: Pick out wooden shelves that are sturdy enough to support your cat. A width of about 8-12 inches should give your kitty plenty of room to lounge.
- Find the Perfect Spot: Use your stud finder to locate wall studs where you plan to mount the shelves. This guarantees the shelves are secure. Think about where your cat naturally likes to hang out or where they can enjoy a view.
- Mark the Layout: Using a pencil, mark where you’ll place the brackets. Measure to ascertain the shelves are level and spaced out nicely. Your cat doesn’t want to feel cramped.
- Attach the Brackets: Drill the screws into the marked spots to secure the brackets, making sure they’re sturdy and can hold your cat’s weight (just picture your cat leaping joyfully onto it).
- Install the Shelves: Carefully place your shelves on the brackets and make sure they’re snugly fitted. You might want to do a little happy dance at this point (I definitely would).
- Smooth and Finish: If your shelves need a little TLC, use sandpaper to smooth the edges. If feeling artsy, paint or stain them to match your decor or make them pop – a fun pattern or color could really add some flair.
- Let Your Cat Explore: Now for the best part. Position some cat-friendly decor, like a small plant (non-toxic, of course) or a favorite toy, on the shelves. Then, encourage your feline to check them out.
Watch the excitement unfold as they realize they’ve been gifted with an adventure park right in your home.
Optional Add-ons/Variations:
- Consider adding a ramp or bridge between two shelves for an extra challenge. Your cat may think they’re the king of the castle.
- Use colorful paint or fun patterns, like paw prints or stripes. You could even write your cat’s name on the shelf for a personal touch.
Pro Tip:
When choosing your shelves, opt for materials that are easy to clean. No one wants to get stuck scrubbing cat hair off their beautiful new shelves every week.
And hey, if you’re feeling handy, spice up those shelves with a little natural catnip rubbed into the wood for extra kitty appeal.
Extra Tips & Ideas
While you might be itching to plunge into building your cat tree, don’t overlook some extra tips that can really take your project to the next level.
First, think about the materials. Plywood’s great, but why not use some reclaimed wood for a rustic touch? Maybe add some fabric or carpet remnants; your cat might love a cozy spot to nap.
Give those shelves some flair with cat-safe plants like catnip. You may find your kitty enjoying those more than pricey toys.
Oh, and don’t skimp on the base—make it sturdy! A top-heavy tree can become a wonky disaster, and we don’t want your cat auditioning for a feline stunt double.
Trust me; stability is key.
Frequently Asked Questions
What Materials Are Safe for Building a Cat Tree?
You can use untreated wood, sisal rope, and natural fabrics like cotton or wool. Avoid toxic materials like plywood or treated wood. Make certain all parts are sturdy and safe for your cat’s climbing and scratching needs.
How Do I Train My Cat to Use the Tree?
To train your cat to use the tree, encourage climbing with treats, reward exploration with praise, and create a playful atmosphere. With patience, consistency, and understanding, you’ll build their confidence in enjoying the tree.
Can I Personalize the Cat Tree’s Design?
Absolutely, you can personalize your cat tree’s design! Choose colors, materials, and shapes that match your style. Add your cat’s favorite toys and features to create a unique space they’ll love exploring and lounging in.
How Much Space Do I Need for a Cat Tree?
You’ll need at least a couple of square feet for a cat tree, but more is better. Make sure there’s enough space for climbing and lounging, while keeping your feline’s playfulness in mind.
What Age Is Best for Introducing a Cat Tree?
When your kitten’s about six months old, it’s the perfect time to introduce a cat tree. They’ll be curious and energetic, exploring every inch like adventurers on a mission, making it an ideal experience!
Conclusion
So there you have it—seven creative DIY cat tree ideas to keep your feline friends climbing and exploring. Who knew it could be this easy to transform your living space into a cat’s paradise? Just think, while you’re hammering away or stacking boxes, your cat’s inner adventurer is roaring like it’s 1899. These projects not only give your kitty plenty of exercise but also add a unique touch to your home. Now, go on and let your creativity soar!

Hi, I’m Ali Tarek, the founder of Animalsman. I’ve always been passionate about pets, especially dogs and cats, and I created this website to share practical tips, easy recipes, and helpful care advice for fellow pet lovers. My goal is to make pet care simple, enjoyable, and accessible for everyone. When I’m not writing or curating content, you’ll usually find me spending time with my furry friends or learning new ways to keep them happy and healthy.

