Bathing your dog can turn into a splashy adventure, don’t you think? Imagine your pup’s excitement as you give bath time a makeover. From a charming outdoor shower that’s almost spa-like to portable setups that fit right in your garage—yes, please! Each design not only makes cleaning easier but adds a fun twist. Curious about how to bring your vision to life? Let’s explore some clever ideas that might just transform your routine into a tail-wagging good time.
Instant DIY Bath Ideas
If you’ve ever faced the chaos of giving your pup a bath, you know it can feel like a circus act gone wrong. Your dog’s wriggling, the slippery floor, and water splashing everywhere—it’d make anyone dizzy.
But don’t fret! You can create an instant DIY dog bath that’ll make the experience smoother. Just grab a kiddie pool or a large storage bin, set it up in your yard, and fill it with warm water.
Add some dog-friendly shampoo, a non-slip mat for safety, and a few toys to keep your pup entertained. Remember, a towel handy can be your best friend.
You might end up drenched too, but hey, it’s all part of the fun, right?
Our Collection
Let’s check out our collection of DIY dog bath designs that can make bath time a breeze for you and your pup.
You’ll love the convenience of options like a portable tub setup or an outdoor shower station, and honestly, who wouldn’t want a bathing station on wheels?
With these creative solutions, your dog can enjoy bath time, and you might even get to keep your house from turning into a soggy mess.
1. Portable Tub Setup
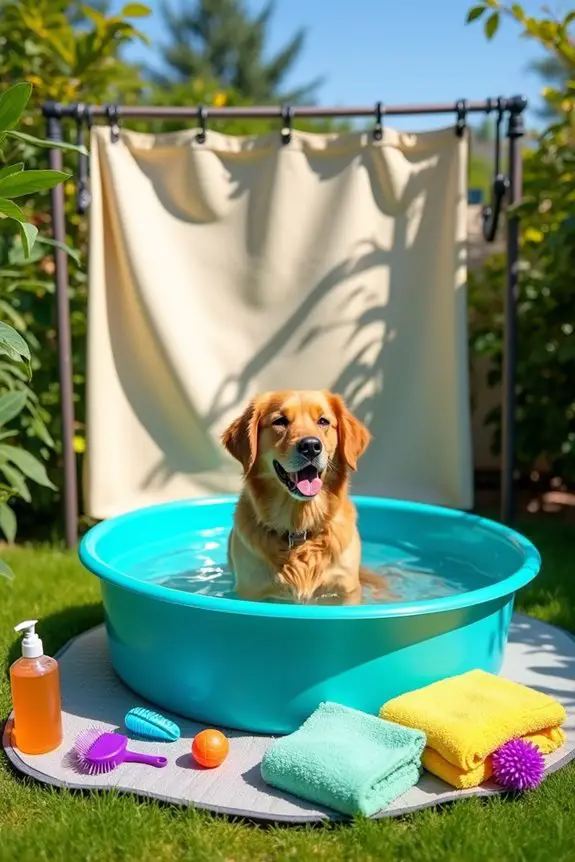
When it comes to giving your furry friend a bath, having a portable tub setup can be a game changer for dog owners. Not only does it save you the trouble of wrestling with your pup in the bathtub, but it also makes bath time less chaotic and more enjoyable for both of you. Additionally, using a retractable leash can help keep your dog secure while you set up the bath to prevent any unexpected escapes!
Plus, it offers a practical and stylish solution for cleaning your dog anywhere around the house or even in the backyard. Let’s explore how you can create your own portable dog bath!
Materials Needed:
- Plastic kiddie pool or large storage tub
- Hairdryer (optional, for drying)
- Non-slip mat (rubber or textured mats)
- Portable water sprayer or garden hose with adjustable nozzle
- Dog shampoo (the good kind, please)
- Clean towels
- Dog brushes and combs
- Optional: waterproof shower curtain for extra splashes
Step-by-Step Instructions:
- Choose Your Spot: Find a convenient place for your portable tub—maybe the backyard, your deck, or even inside your garage. Just be sure there’s easy access to water.
- Set Up Your Tub: If you’re using a kiddie pool, simply inflate it and set it on a level surface. For a storage tub, place it where you chose. Make sure it’s big enough for your dog to sit comfortably.
- Add the Non-Slip Element: Safety first! Lay a non-slip mat at the bottom of the tub to help prevent any slip-and-slide situations that might scare your pup.
- Get the Water Ready: Connect the garden hose or prepare your portable sprayer. Make sure it’s set to a gentle spray—no one likes a surprise cold shower, especially your dog.
- Gather Your Supplies: Before calling your pooch over, arrange all your grooming supplies like shampoo, brushes, and towels close at hand. This way, you won’t be running around looking for things when your dog is ready (or not so ready).
- Invite Your Pup: Call your dog over for a treat-filled introduction to the tub. You can even toss some toys or treats in there to encourage them. Remember, enthusiastic encouragement is the key here!
- Bath Time Magic: Start wetting your dog gently, applying shampoo, and giving them a good scrub. Rinse thoroughly, and don’t forget those spots behind the ears and under the belly.
Well, you might forget once, but you’ll be reminded when they shake a whole ocean of water on you. Fun times!
Optional Add-ons/Variations:
- Get creative with colors! Try painting the kiddie pool with waterproof paint to match your outdoor decor or your dog’s personality.
- If you want to take it up a notch, consider adding a foldable shower curtain around the setup to protect your yard or garage from excessive splashes. It makes cleanup easier, and if your dog is like mine, they’ll appreciate a bit of privacy when feeling vulnerable.
Pro Tip:
Make sure the water temperature is comfortable for your dog—lukewarm is best. Nothing says “bad bath experience” like icy water on a Saturday afternoon or hot water that could send your dog running for the hills.
If you have a particularly fuzzy friend, consider using a hairdryer on a low setting for drying. But let’s be honest, remember to check if they’re okay with the noise first. Some pups think the hairdryer is an evil machine from another planet.
With this portable tub setup, bath time can transform from a messy hassle into a fun bonding experience. Additionally, ensuring your dog receives premium dog food brands can help maintain their overall health and well-being. Who knows, after a few sessions, your dog might even start looking forward to bath day!
2. Outdoor Shower Station

Creating an outdoor shower station isn’t just a fabulous way to pamper your pup after muddy playdates; it’s also a valuable addition for any dog owner who enjoys spending time outdoors. This DIY project allows you to keep your home clean, gives your dog an enjoyable washing experience, and you can impress your friends with your impressive handyman skills. Plus, who wouldn’t want to shower their pet in the fresh air? Incorporating premium dog coat materials into your outdoor setup can enhance your dog’s comfort during bath time.
Materials Needed:
- A garden hose (long enough for your setup)
- Shower head (you can find affordable options at any home improvement store)
- Hose splitter or Y-connector (to attach the shower head)
- Wall-mounted shower bracket or rod
- Shower curtain (optional, for privacy)
- Anchors and screws (for securing your setup)
- Trowel and shovel (if you need to dig a trench)
- Waterproof sealant (to prevent leaks)
Step-by-Step Instructions:
- Choose the Perfect Location: Find a shaded spot in your yard that has easy access to water, preferably near a fence or wall where you can mount your shower head. Think about where the sun hits and the best way to keep it chill for your dog.
- Gather All Your Supplies: Before diving in, line up all your materials. This will save you from sprinting back and forth to the store when you inevitably realize you forgot something important—like the shower head.
- Mount the Shower Head: Using the wall-mounted shower bracket or rod, secure the shower head to the wall at a comfortable height. Make sure to use anchors and screws correctly so it can withstand your dog’s enthusiastic shaking post-bath.
- Connect the Hose: Attach one end of your garden hose to the faucet and use the Y-connector for an easy split. Attach the other end to your shower head. Test the connection—you don’t want to be drenched by a rogue spray when you turn on the water.
- Check for Leaks: Turn on the water and make sure there are no leaks at the connections. If you see water escaping, use waterproof sealant to patch things up.
- Finish with a Shower Curtain (Optional): If privacy is a concern, especially for shy dogs, hang a shower curtain to give your furry friend a little bit of personal space.
Optional Add-ons/Variations:
- Paint the shower privacy wall or your shower bracket a fun color to coordinate with your garden décor. You could also hang up hooks for towels or their favorite toys.
- For a fancier touch, think about adding a little wooden platform under the shower to catch the water and make it look like a fancy spa retreat for your pup.
Pro Tip:
Always start the water at a lukewarm temperature before introducing your dog to the outdoor shower. A sudden stream of cold water could send them running for the hills, and you might find yourself chasing after a slippery, soapy pup.
If you’re showering your dog after a muddy day out, a light rinse before applying shampoo is always a good idea. It’ll save you on shampoo and worth it just to avoid the puppy explosion of dirt all at once.
3. Wash Station With Storage
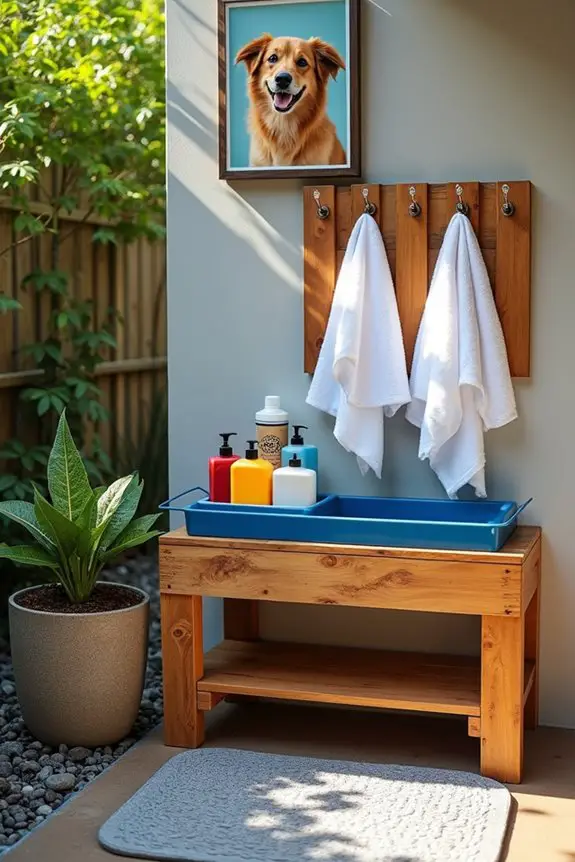
Creating a wash station for your dog that doubles as storage is both a genius and practical solution for any dog owner. This DIY project keeps your bathing essentials organized, saves space, and makes bath time much more enjoyable for both you and your furry friend. Plus, you’ll feel like the ultimate dog-parent with a stylish setup that combines function with flair—who doesn’t want that? Consider having some essential accessories for your emotional support dog at your wash station to make bath time even more comfortable for your pup.
To enhance your experience, consider utilizing some essential tools for baking homemade dog treats which can add a fun twist to your dog’s routine.
Materials Needed:
- Wooden pallets or sturdy shelving unit
- Shower caddy or basket (for storage)
- Towel hooks or racks
- Waterproof paint or wood sealant
- Saws (if cutting pallets)
- Sandpaper (for finishing rough edges)
- Screws and screwdriver
- Measuring tape
- Optional: cute decorative labels for organization
Step-by-Step Instructions:
- Pick Your Base Material: If you’re using wooden pallets, verify they’re intact and free from splinters. If you’re opting for a shelving unit, make sure it fits your dog’s bath area and is sturdy enough for your supplies.
- Measure and Cut: Using your measuring tape, find the perfect height for your wash station. If needed, cut pallets down to size using a saw. A height between your waist and knee is ideal to guarantee comfort during bath time. Sand down any rough edges to prevent scratches.
- Paint or Seal Your Wood: This is where you can get creative. If you want your wash station to be weatherproof or just pop with color, apply a waterproof sealant or a coat of waterproof paint. Choose a color that matches your home or garden—you want it to look good, after all.
- Assemble Your Storage: If you’re using a shelving unit, secure it in place with screws. If you’ve created your station from pallets, stack them securely and screw them together for stability. Verify everything is firm and won’t topple over during baths.
- Add Storage and Hooks: Attach your shower caddy or basket to hold shampoos, towels, and toys. Install hooks for towels or leashes above the station so they’re easily accessible. Labeling your caddy can add a fun touch and keep everything organized—no one enjoys digging through bottles during a bath, trust me.
- Personal Touches: Consider adding a decorative element, like a framed picture of your pup or some fun dog-themed art. This will make the wash station feel more personalized and welcoming.
Optional Add-ons/Variations:
- Customize with colors that match your home or garden by choosing brightly colored caddies or painting the wood in a funky pattern. If you want to go all out, you could even stencil on your dog’s name for that extra flair.
- Try incorporating a small plant or some decorative stones around the base to blend your wash station into your outdoor landscape more seamlessly.
Pro Tip:
Install rubber mats or a textured surface beneath the wash station to prevent slips during those soapy moments. It’s a little investment for a lot of peace of mind. Also, add an extra towel on hand—dogs have a knack for shaking water everywhere right after they’re clean. It’s nearly a superpower.
Now, grab your supplies and transform bath time from a chore to a delightful bonding experience with your pup.
4. Dog Bathing Station on Wheels
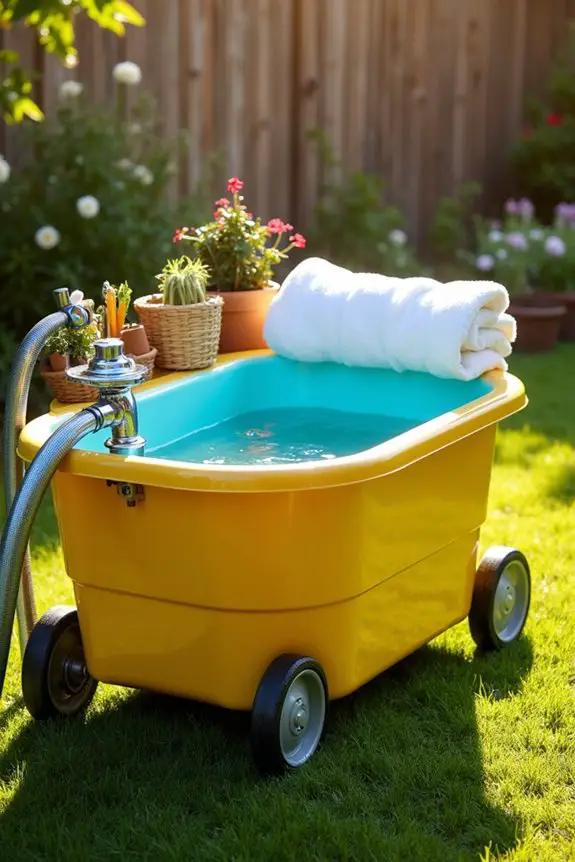
Imagine creating a mobile dog bathing station that makes washing your pup a breeze, even if your furry friend usually shies away from bath time. This DIY project is perfect for pet parents who need flexibility while bathing their dogs. With a rolling bath station, you can easily maneuver it around your yard or garage, taking the stress out of keeping your dog clean.
Plus, it adds a unique touch to your space—function meets flair in a way that’s guaranteed to impress visitors!
Materials Needed:
- Large rolling cart or heavy-duty wheels
- Waterproof tub or large basin
- Hose adapter and nozzle (for easy water access)
- Waterproof paint or sealant
- Dog shampoo and conditioner
- Soft towels
- Optional: dog grooming tools (brushes, nail clippers, etc.)
Step-by-Step Instructions:
- Choose Your Cart: Start by selecting a sturdy rolling cart. Be certain it’s large enough to accommodate the tub and has heavy-duty wheels for easy movement, especially if you need to roll it on grass or gravel.
- Waterproof Your Tub: Secure a waterproof tub in the cart. Make sure it’s deep enough for your pup to stand comfortably. If it’s not already waterproof, apply sealant around any seams or openings to prevent leaks during baths.
- Attach the Hose: To make your life easier, connect a hose adapter to your water source. This allows you to fill the tub directly. Attach a nozzle for controlled water flow, making sure it’s long enough to reach the cart wherever it’s parked.
- Organize Bath Supplies: Use baskets or bins on the cart to store your shampoo, towels, and grooming tools. Having everything in one place saves you from running back and forth, which is especially helpful when your dog is enthusiastic about their bath—trust me, it’s a race against time.
- Customize and Decorate: Feel free to paint your cart with fun colors that match your aesthetic. It could be bright yellow or a calming blue—whatever sparks joy! You can even add stickers or designs that celebrate your dog’s personality.
- Test It Out: Before making it a permanent bathing solution, do a trial run. Give your pup a bath during warm weather before the snow comes to test the setup. Make necessary adjustments and verify the wheels roll smoothly, especially on wet surfaces.
Optional Add-ons/Variations:
- Consider adding a removable liner to the tub, making cleanup a breeze. Liners come in various colors and patterns, allowing you to change the look of your station whenever you want.
- Want a more compact option? Use a smaller cart with multiple tiers. This allows for better organization of towels and grooming products without taking up too much space.
Pro Tip:
To keep your dog calm during baths, use non-slip mats or carpet squares inside the tub. This gives them a secure footing and helps prevent slips, making bath time feel safe and cozy.
Plus, it saves you from a slippery dog drama moment—because, let’s face it, nobody wants that.
5. Grooming Table With Splash Guard
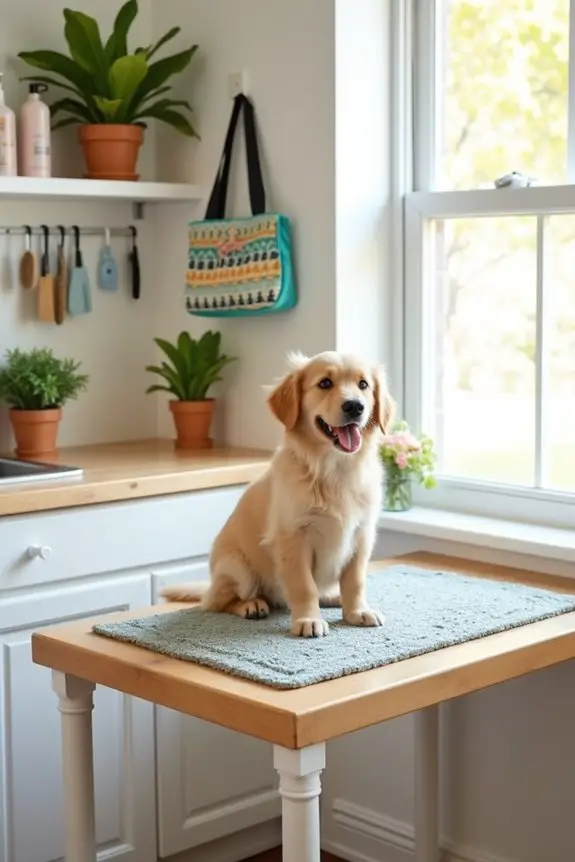
Creating a grooming table with a splash guard is a game-changer for dog owners who want to make grooming time a cleaner and more enjoyable experience for both them and their furry friends.
Imagine this: no more soggy mess all over your floor, and your pooch is comfortable while you pamper them. This DIY project not only helps keep your home tidy but also saves you the cost of professional grooming. Plus, you can customize it to match your style—who wouldn’t love that?
Materials Needed:
- Sturdy table (foldable or fixed)
- Shower curtain or waterproof fabric
- PVC pipe (for the splash guard frame)
- Hose clamps or zip ties
- Measuring tape
- Screwdriver
- Non-slip mat (to keep your dog steady)
- Paint or sealer (to customize the table)
Step-by-Step Instructions:
1. Choose Your Table: Start with a table that’s the right height for you to groom your dog comfortably. A foldable table is great if you need to save space or want to take it to the park!
2. Measure Your Splash Guard: Use your measuring tape to determine how high and wide you want the splash guard to be. Typically, 2-3 feet high works great for most dogs.
3. Create the Frame: Cut your PVC pipe to your desired lengths. You’ll need two vertical pieces and two horizontal pieces to create a rectangular frame. Connect the ends with hose clamps or zip ties, ensuring it’s sturdy enough to stand on its own.
4. Attach the Guarding Fabric: Drape your waterproof fabric or shower curtain over the frame. You can either sew the fabric to the frame or secure it using clips or additional hose clamps.
Make sure it hangs low enough to catch splashes but is also easy to remove for cleaning.
5. Secure the Table: Place the table in an area where you have enough space to groom your dog without feeling cramped. If necessary, attach a non-slip mat to the top of the table to prevent your pup from slipping around, which can happen during a bath or trim.
6. Add Some Flair: This is the fun part! Give your table a quick makeover with paint or sealer to match your decor. You can even personalize it with your dog’s name or stickers that reflect their personality.
7. Do a Quick Trial Run: Before you get all fancy with grooming, do a dry test to see how everything stands up. Set it up like it would be during grooming time, and make sure it holds up well against those inevitable splashes.
Adjust as needed.
Optional Add-ons/Variations:
– Want to elevate your table’s looks? Consider using colorful fabric patterns for the splash guard or even adding fun designs with stencils and paint.
If you’re feeling adventurous, you could even attach a retractable shower nozzle to your splash guard for easy rinsing.
Pro Tip:
Always keep a towel handy on your grooming table; things can get slippery in a hurry, and your pup will appreciate the extra comfort when they’re all wet and ready for their spa session.
Plus, it saves you from diving around for one while trying to hold your dog’s collar with your other hand—trust me on this.
Now, go ahead and craft your very own grooming table with a splash guard. Happy grooming!
6. Hose Attachment for Sink
If you’re tired of the awkward shower routine with your dog that leaves both of you soaked, it’s time to reflect on a hose attachment for your sink. This DIY project makes bath time a breeze by allowing you to easily clean your pup right at the sink, saving both time and money on grooming costs.
Plus, say goodbye to messy floors and hello to a more comfortable experience for you and your four-legged friend. With just a few handy materials, you can transform your sink into a dog-washing station that even fits your style.
Materials Needed:
- Hose attachment kit (available at home improvement stores)
- Adjustable wrench
- Teflon tape (to prevent leaks)
- Strong scissors or utility knife
- Bucket or large container (for filling and testing)
- Extra towel (for drying purposes)
Step-by-Step Instructions:
- Choose the Right Hose Attachment: Pick a hose attachment kit that fits your sink faucet. These often include adapters to accommodate various sizes and shapes, guaranteeing you have the right fit.
- Prepare Your Faucet: Before attaching anything, turn off the water supply. Using the adjustable wrench, gently remove the faucet aerator (the small mesh screen at the tip of your faucet). Keep it safe; you might want to use it again later or need it for backup if the hose doesn’t fit.
- Apply Teflon Tape: Wrap Teflon tape around the threads of your faucet where the aerator was attached. This step is essential, as it helps create a watertight seal. Remember, no one likes an unexpected shower!
- Attach the Hose: Following the manufacturer’s instructions, screw the hose adapter onto the taped faucet threads. Make sure it’s snug but not overtightened to avoid any cracks.
- Connect the Hose: Attach the other end of the hose to the sprayer. If your kit includes a nozzle, make sure it’s securely in place. This will be your new best friend during bath time!
- Test Your Setup: Grab that bucket or large container and place it under the sprayer. Turn on the water slowly to check for leaks. If water squirts everywhere like a scene from a comedy movie, don’t worry. Just adjust the hose and verify everything is tightly secured.
- Give it a Try: Now it’s time to put your new dog wash station to the test! Fill up the bucket, wet down your furry friend, and watch them enjoy their spa day. Just be ready for enthusiastic jumping, tail wagging, and possibly some waterworks of your own.
Optional Add-ons/Variations:
- Get creative with decorative hose attachments. Look for colorful or patterned hoses that blend in with your kitchen to make bath time feel a little more stylish.
- If you’re feeling crafty, reflect on customizing a holder for your hose(s) using wood or a cute basket to keep everything organized and within reach.
Pro Tip:
For a smoother experience, keep some treats handy. They not only keep your dog calm during bath time but can also help create positive associations with the washing process.
And hey, if you can bribe them with their favorite snacks, it might also make clean up a whole lot easier when they start to shake off.
Now that you’ve got your nifty hose attachment set up, bath time will no longer be a chore but an opportunity for bonding with your best buddy, one splash at a time!
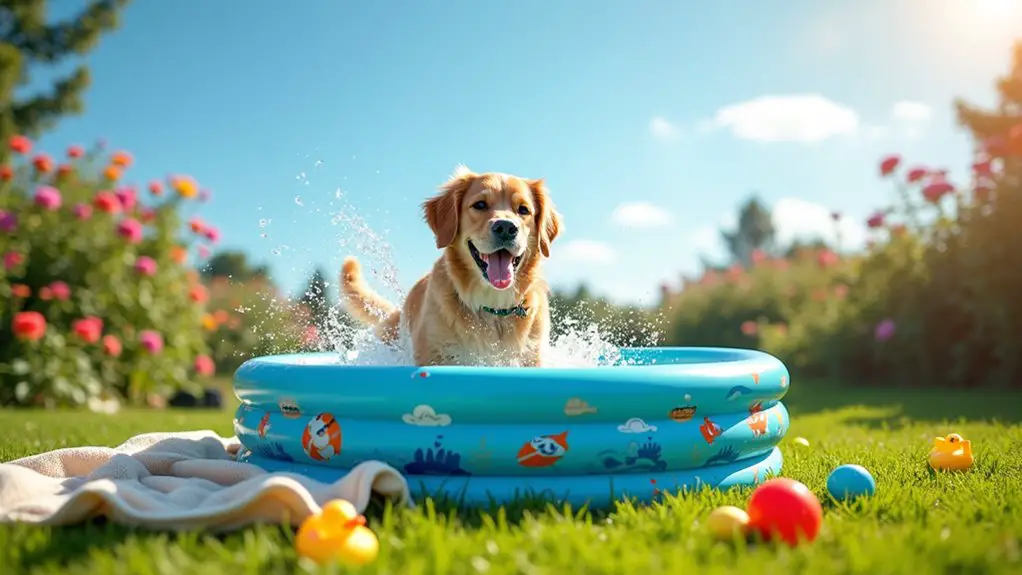
7. Inflatable Dog Bath Pool
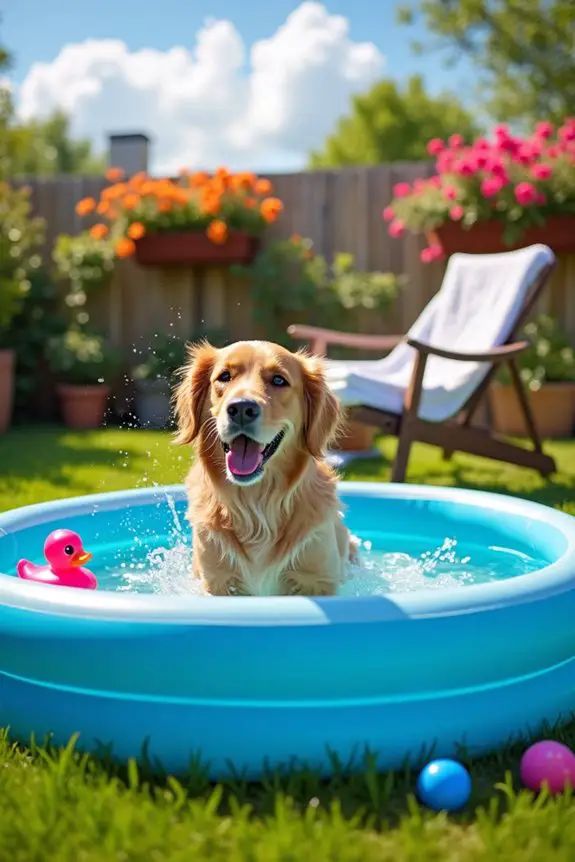
Is your furry friend more of a water-loving canine than a mud-digging one? If bath time is a struggle but water play is a blast, an inflatable dog bath pool could be just the solution you’re looking for. Not only does it make washing your dog easier, but it turns bath time into pool party fun, saving you from expensive trips to the groomer. Plus, it’s a stylish addition to your backyard, giving your dog a mini oasis.
Materials Needed:
- Inflatable dog bath pool (available in various sizes)
- Water hose
- Dog shampoo (preferably gentle and dog-friendly)
- Soft dog brush or sponge
- Large towel for drying
- Pet-friendly toys (optional for distraction)
Step-by-Step Instructions:
- Pick the Right Pool: Start by choosing an inflatable dog bath pool that fits your dog’s size. There are ones that can accommodate small pups to large breeds, so make sure it’s the right fit.
- Find a Good Spot: Set up your pool in a shaded area outside to keep it cool during those sunny days. Avoid places where the grass might get muddy, because – trust me – a muddy dog and a fun bath day don’t always mix well.
- Inflate Your Pool: Following the instructions, use a pump (or go the old-school way and blow it up!) to inflate the pool. Make sure it’s nice and firm but not over-inflated. Safety first, right?
- Fill It Up: Connect your hose and fill the pool with lukewarm water. You want your puppy to feel like they’re swimming in a spa, not an ice bath. Aim for about 3-4 inches of water to keep things playful.
- Add Shampoo: Once your pup hops in (with some gentle coaxing if needed), lather them with dog shampoo. Using a sponge or your hands, clean from their neck all the way to their tail, avoiding their face for now. This is the moment for soft brushes and gentle rubs that will turn bath time into a pampering session.
- Rinse and Have Fun: Use the hose to rinse them off. A sprayer attachment can be helpful here. Let your dog splash around a bit and have fun while getting clean. Just be ready for wet dog shakes!
- Dry Off: Once they’re squeaky clean, towel them down to prevent a water trail through your house. If you like, toss in a few of their favorite toys for some fun post-bath playtime while they dry.
Optional Add-ons/Variations:
- Colorful Pool: Choose a pool with fun colors or designs to match your backyard decor. If you can’t find one you love, use waterproof stickers or paint to customize it to your taste.
- Floating Toys: Throw in floating toys or a mini kiddie pool for extra entertainment. Your dog will feel like they’re at a beach party.
Pro Tip:
To save on shampoo and avoid over-sudsing, wet your dog down thoroughly before applying soap. A lighter amount of shampoo spread evenly can work wonders without the risk of soap getting in their eyes or too much rinsing needed.
Remember, a happy dog equals a happy owner. So, bring on the fun!
With this inflatable dog bath pool, bath time transforms from a chore into a fun and revitalizing experience. Dogs love it, and you’ll enjoy watching them splash while knowing they’re getting a good clean too. It’s a win-win all around!
Extra Tips & Ideas
While you’ve already got the basics down for your DIY dog bath, there’s always room to add a sprinkle of creativity and some personal flair.
Ever thought about adding a few colorful tiles? They not only look great but also give your pup a non-slip surface. You could even paint paw prints along the edges—cute, right?
If you’ve got a water hose, why not create an overhead sprayer to make rinsing easier? Just don’t forget the dog shampoo; it’s not just for humans.
And hey, consider keeping your pup entertained with toys during bath time; it might just save your sanity (and your towels).
It’s all about making bath day less of a chore and more fun—for both of you.
Frequently Asked Questions
What Materials Are Best for a DIY Dog Bath?
For a DIY dog bath, use waterproof materials like plastic, wood, or fiberglass. You’ll need non-slip flooring, sturdy walls, a drain, and a comfortable bathing area. Don’t forget durable, easy-to-clean accessories to enhance usability.
How Can I Ensure My Dog Feels Comfortable During Bath Time?
To guarantee your dog feels comfortable during bath time, create a calm environment, use warm water, offer treats, and speak softly. Let them explore the area, and never rush; patience makes the experience enjoyable for both of you.
Is a DIY Dog Bath Suitable for Large Breeds?
Yes, a DIY dog bath can suit large breeds. You’ll want to make certain it has ample space, includes a sturdy surface, and allows easy access. With proper planning and design, it’ll work just fine!
How Often Should I Bathe My Dog?
You should bathe your dog every four to six weeks, but it depends on your dog’s breed, coat type, and lifestyle. Regular brushing can also help reduce the need for frequent baths.
Can I Use Regular Shampoo for My Dog in the Bath?
Can you really use regular shampoo on your dog? You shouldn’t. Human shampoos can irritate their skin and disrupt natural oils. Instead, opt for dog-specific shampoos designed to keep your pup clean and healthy.
Conclusion
So there you have it—10 creative ways to make bath time for your pup a whole lot more fun. Did you know that the average dog owner spends about 30 minutes a week cleaning their furry friend? That’s over 26 hours a year. Imagine turning those hours into a delightful bonding experience. With a bit of imagination, some DIY spirit, and maybe a splash or two (or ten), bath time can be a joy, not a chore.

