
Your golden retriever looks adorable in that bandana, but those store-bought ones are either $15 each or they fade after two washes. You’ve scrolled past dozens of Pinterest-perfect pups wearing custom bandanas that somehow match their owner’s home decor.
Or perhaps you’ve bought a mass-produced one, that somehow never seems to fit right. It’s either too tight on your dog, or slides off when you’re out walking. Finding one that matches your throw pillows seems impossible.
As we approach the final weeks of spring, we are packing away all our favorite outdoor patterns and rolling out our winter favorites. Although it is still warm out, we love to be inside snuggled up, so we’ve come up with some of our favorite no-sew dog bandana designs to fit your home’s theme. Some of these are perfect for spring and summer, and other more cozy designs are perfect for fall and winter. We’ve been using our favorite dog bandana designs for under $3 each, using fabric scraps that we already have or that I purchased at thrift stores. All of our dog bandanas take no-sew DIY, but we have a variety of designs, including reversible, holiday, seasonal and others. You can easily incorporate your home’s theme, and create an Instagram-worthy design for your dog that fits your home’s aesthetic. Whether you want a seasonal pattern, a design to take on the beach or in the winter, or a pattern that matches your farmhouse kitchen, you are sure to find a DIY dog bandana pattern that suits your needs.
Disclosure: This post contains affiliate links. If you purchase through these links, I may earn a small commission at no extra cost to you. I only recommend products I use or think will help you create beautiful bandanas for your pup.
What You’ll Need to Get Started
Before diving into these designs, gather these supplies (most crafters already have 3-4 of these):
- Cotton Quilting Fabric Fat Quarter Bundles – Pre-washed, print variety packs give you 8-10 bandanas for $12-18
- Fabric Scissors 8-inch – Sharp blades = clean cuts without fraying
- Fabric Marking Pen Washable – Disappears after first wash
- Rotary Cutter and Mat Set (optional but speeds up cutting by 70%)
#1: Over-The-Collar Slide-On Bandana (No-Tie Design, Stays Put All Day)
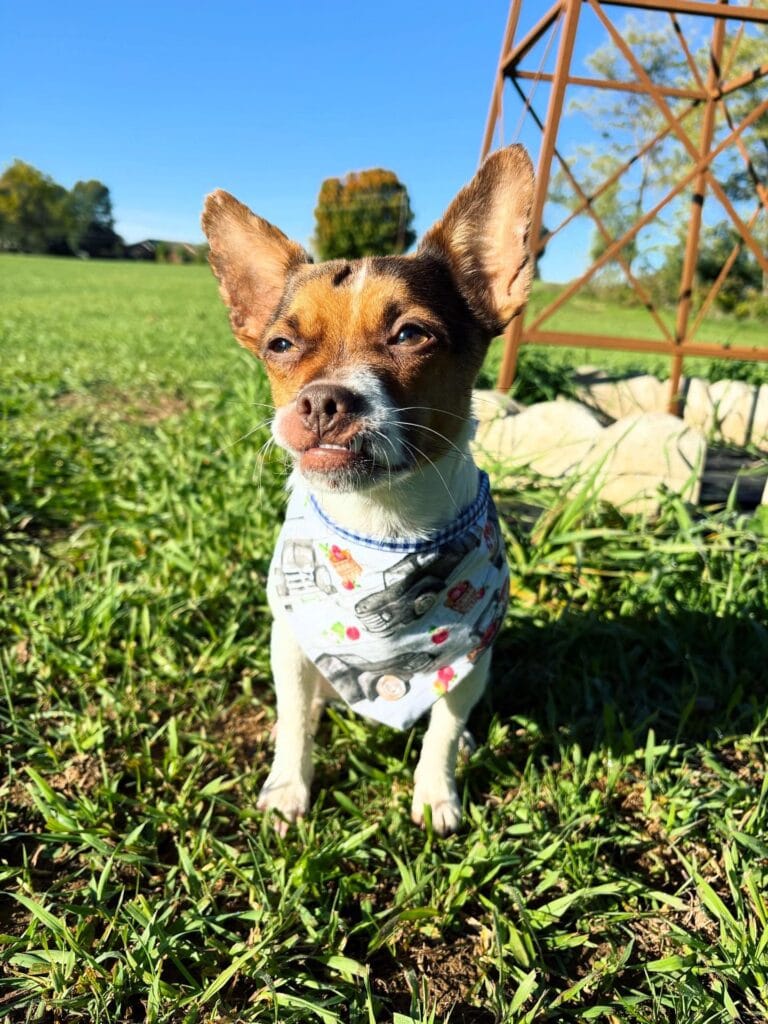
If your dog shakes off regular bandanas after five minutes, leaving a trail of fabric across the dog park, then this slide-through collar style is for you. It threads onto your dog’s existing collar so you can change up his patterns in ten seconds without any knots to tie.
Cut a 18×18-inch square of pre-washed cotton. I chose the geometric print in the photo, but any small to medium print will do. Fold the square into a triangle and fold the long edge down about 3 inches to make a tube wide enough for your dog’s collar to fit through. Then, sew along the bottom edge, leaving both triangle ends open. Thread your dog’s collar through the “tunnel”, and you’re all set! The collar will sandwich the bandana between it and your dog’s neck so it won’t slip off during zoomies.
Laced up on a dog it looks like this without any knots to worry about. I love it because the tie covers the collar when we’re on muddy walks and I only have to wash the bandana instead of the whole leather collar. The point of the triangle drapes between the shoulder blades and sways as the dog trots- I might have to start taking more Instagram photos of her wearing it!
Learn how to sew these adorable dog bandanas from a fat quarter bundle and rotate your bandanas weekly. Your dog will learn to associate bandana-on with adventure time and you’ll get complimented for a sewing job that nobody would believe came from your sewing machine. Check out our top 10 Creative Designs for a DIY Slinky Dog Costume.
Pro tip: Choose prints that will work with the color of your dog’s fur. For example, prints in rust will show up really well against a black dog, while navy prints will work well with a brown dog and brass hardware.
📸 Photo credit: Instagram @doseofgoosedog
#2: Quilted Triangle Slide-On Bandana (No-Tie Design, One-Handed On and Off)
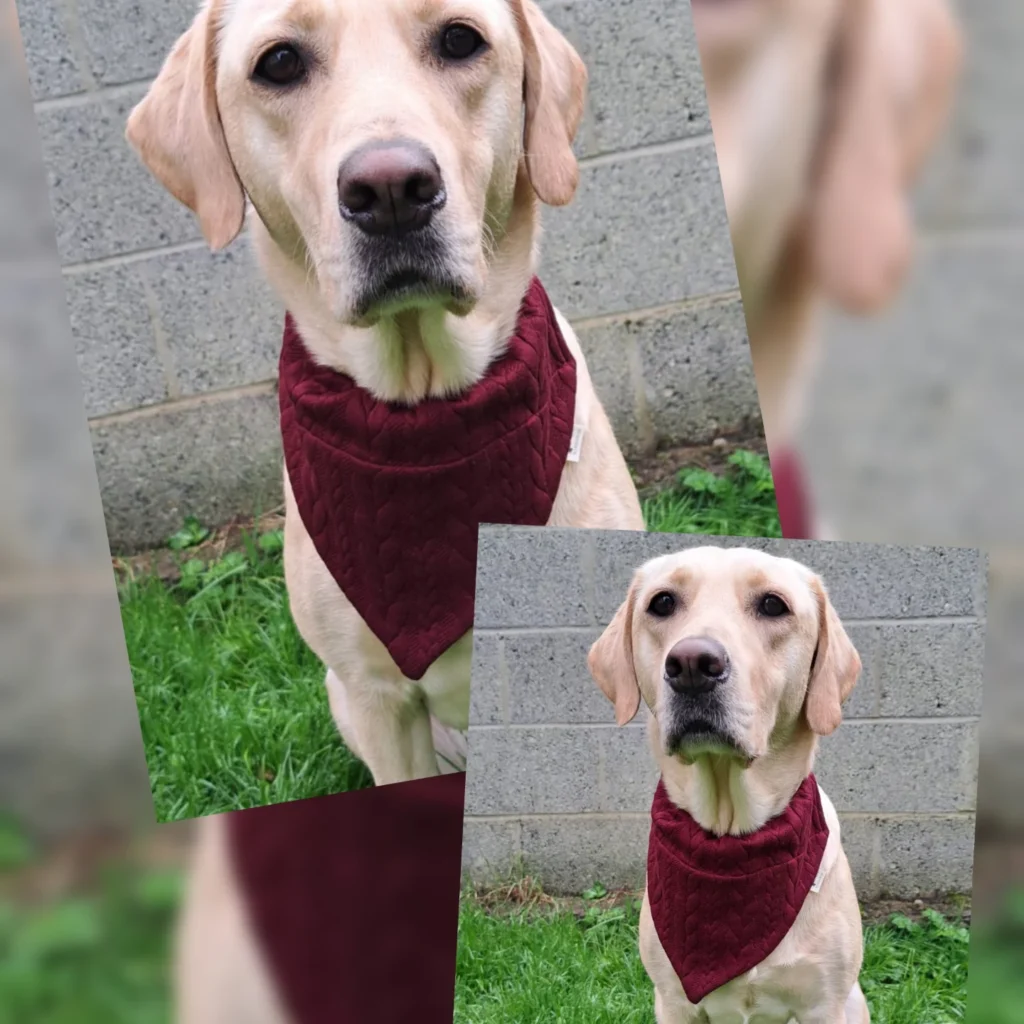
Everytime I put a regular bandana on my dog, he shakes his head and loosens the knot…before we even leave the house. This is a great idea! I like the fact that it slides on over his collar and is on in 3 seconds! He can zoom around all he wants and I won’t have to retie a knot in the bandana.
Cut a 18 x 18 inch square out of quilted burgundy cotton. Pre-wash it if you would like, so it doesn’t shrink. Fold the square in half diagonally to create a triangle, then fold one side over so that the longer edge is folded over twice, creating a 2 inch pocket. Pin this pocket to your collar so that it sits at the bottom and is open on both sides. Sew the pocket closed, leaving one end open.
The material is quilted and has a nice texture to it, it also catches light really well in pictures. I love how the deep wine color looks against a cream or golden color like the Labrador in the picture. It is thick enough to keep your dog from getting dirty between washes so you don’t have to wash the bandana after one muddy walk. I keep the finished bandanas rolled in a basket near my leash hooks so I always have one ready to grab.
Pro tip: Five colors: rust, mustard, forest green, burgundy, and burnt orange, allow you to dress in a new color combination every day of the workweek.
📸 Photo credit: Instagram @thepawfectfamily5
#3: Blue Paisley Slide-On Bandana (Over-Collar Style, No-Tie Needed)
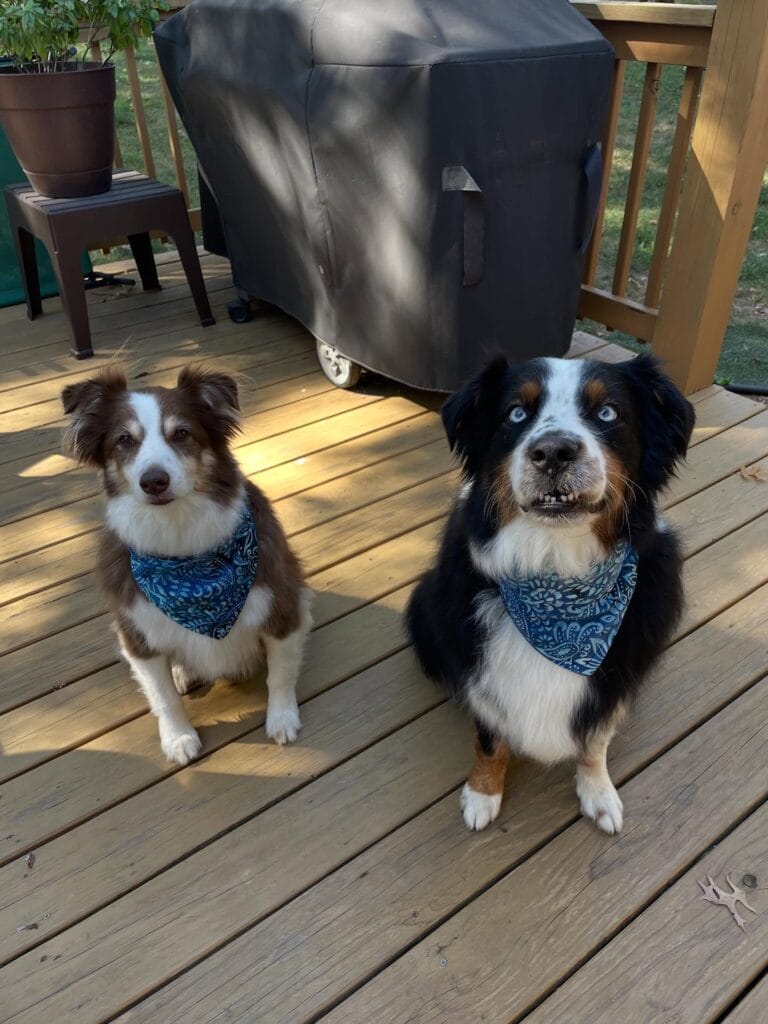
Have you ever been walking your dog and your dog shakes his head and the tied bandana flys off in the wind? It’s happened to me several times. If you have a “Slide On” you don’t have to worry about that ever happening again. The “Slide On” bandana threads through your dog’s collar and you’ll never have to chase a flying bandana again.
I cut a 18×18 inch square of cotton fabric, so you can see the dirt between washings. I folded it in half, then in half again, and I folded down the long edge 3″ to form a pocket. I sewed across the bottom but left the ends open, so the tunnel could slip over my collar. It takes about 12 minutes from the time I cut the fabric to have a finished bag, even if you’re just starting to sew. I used this bag for my medium sized dogs, but the tip of the triangle should hang just behind their shoulders.
If you don’t have a sewing machine, use Fabric Glue for No-Sew Projects to create the pocket—it holds through 30+ washes.
I always pre-wash my fabric when making a cover because I don’t want it to shrink after the first mud puddle trip in the park. I love it because the cover stays put on my daughter during active play so I don’t have to constantly be adjusting it. I get compliments all the time on the cover. The paisley print was my favorite. I have used both brown and black fur with it. 3 of my neighbors have asked me where I bought it because they were shocked when I told them I made it.
Swap bandanas in 8 seconds between car and house—faster than removing their whole collar. One client made reversible versions (navy paisley on one side, solid rust linen on the other) that coordinate with her DIY dog crate cover fabric. When traveling, keep bandanas rolled in your Crash-Tested Dog Car Safety Harness bag for quick outfit changes at rest stops.
Pro tip: Take the measurement of your collar width. Add 1 inch to this measurement. This is the pocket height. Choose a length that will allow you to slide the shirt on without the shirt bunching up.
📸 Photo credit: Instagram @vinyl_and_veggies
#4: Reversible Slide-On Dog Bandana (No-Tie Design, Stays Put During Zoomies)
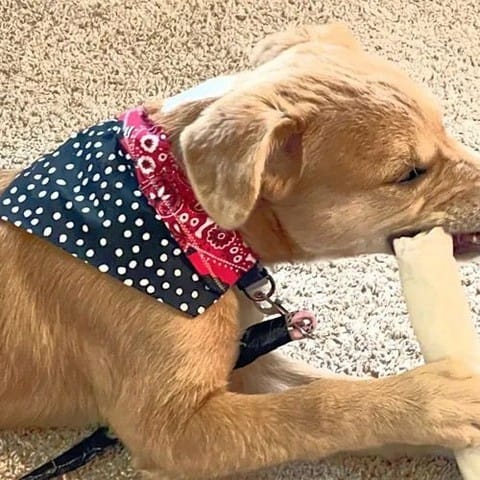
Your dog decides to pull the leash taut the moment you decide to tie a bandana around his neck. Again. We’ll try a slide-on version today. This version threads through his collar in three seconds flat with no knots! Cut two 18×18-inch squares of coordinating fabric: one red bandana print and one navy polka dot cotton. Pin them right-sides together, stitch around the edges, leaving a 4-inch gap. Flip it inside-out and topstitch closed. Fold the bandana into a triangle and sew a channel on top of the folded edge where your dog’s collar slides through.
I wrap the bandana around the channel behind his back so it shows up better in photos. If he gets dirty on one side at the park, I flip it to the clean side before we head to the coffee shop patio. I washed it cold with his bedding. Maya’s has only slightly frayed at the corners after 35+ washes. The polka dots don’t show dirt between washes so I don’t feel the need to wash it daily.
This design works perfectly under a Remote Training Dog Collar System since there’s no bulky tie interfering with the receiver. Total construction time: 22 minutes from cutting to finished. Neighbors assume you bought it from a boutique until you mention the fabric came from your curtain remnants.
Pre-wash both fabrics before cutting. This will help avoid uneven shrinkage that will make the bandana puckered after the first wash.
📸 Photo credit: Instagram @grandmashousediy
#5: Rainbow Paw Print Slide-On Bandana (No-Tie Design, 15-Minute Project)
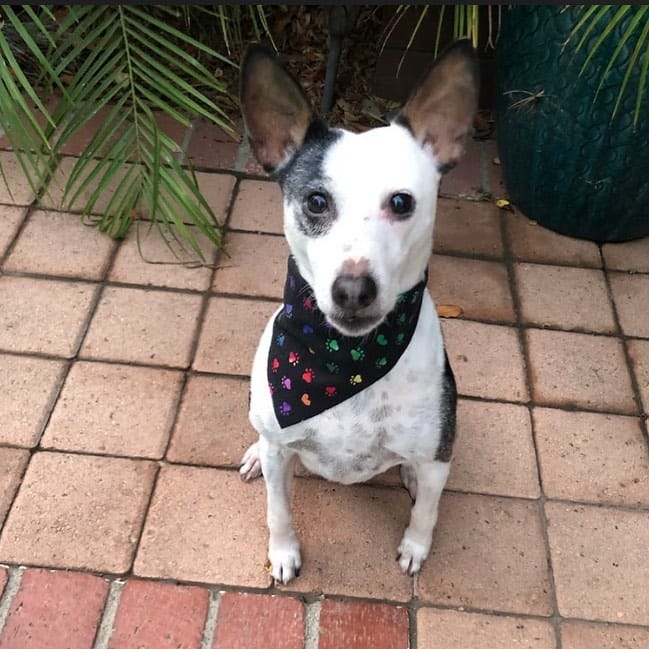
My dog shakes his head every time I put a traditional bandana on him, and he has it loosened by the time we make it out of the house. This solves that problem. It slips right over his regular collar, so he can change looks in just 10 seconds. No need to retie at the dog park, or adjust for pictures.
Cut out one 18″ x 18″ square from a light weight cotton. (If you want, prewash it now so that it doesn’t shrink after your pup gets muddy on his first adventure). Fold the square in half diagonally to create a triangle. Fold the long edge of the triangle down 3″ to create the pocket. Sew a straight line across that fold, leaving the two ends open, so that you have the bottom of the sleeve that the collar slides through. The colourful paw print pattern is the perfect accent against the black and white fur. This is the detail that catches the light as he trots off to his next adventure over the weekend.
Measure the width of your dog’s collar. Most collars are 3/4 to 1 inch wide. This will provide you with a pocket that is 3 inches wide. The triangle point should drape between your dog’s shoulder blades when he is standing, not bunch up near his ears.
Pre-Cut Dog Bandana Fabric Squares eliminate cutting if you’re making 10+ bandanas for a craft fair booth.
Make 5 from one yard of fabric for daily rotation. I love change it up and have fun with seasonal prints for photo shoots, plain colors for everyday and novelty print for holidays. Much like the 10 Creative Dog Shoe Designs You Can DIY each bandana will be customized to match a specific outfit or occasion.
Pro tip: If you add a small loop of elastic inside the pocket opening, the loop can grip the collar and keep the triangle in the center.
📸 Photo credit: Instagram @nicolepajer
🎨 Never Sewn Before? Start With This $25 Toolkit
These five items let you create all 10 designs without a sewing machine:
- No-Sew Fabric Tape (iron-activated, permanent hold)
- Pinking Shears (prevent fraying without hemming)
- Fabric Weights (keep fabric flat while cutting)
- Self-Healing Cutting Mat (protects tables)
- Hook and Loop Dots (closures that stick instead of tie)
#6: Kansas City Royals Over-Collar Slide Bandana (Game Day Style That Stays Put All Day)
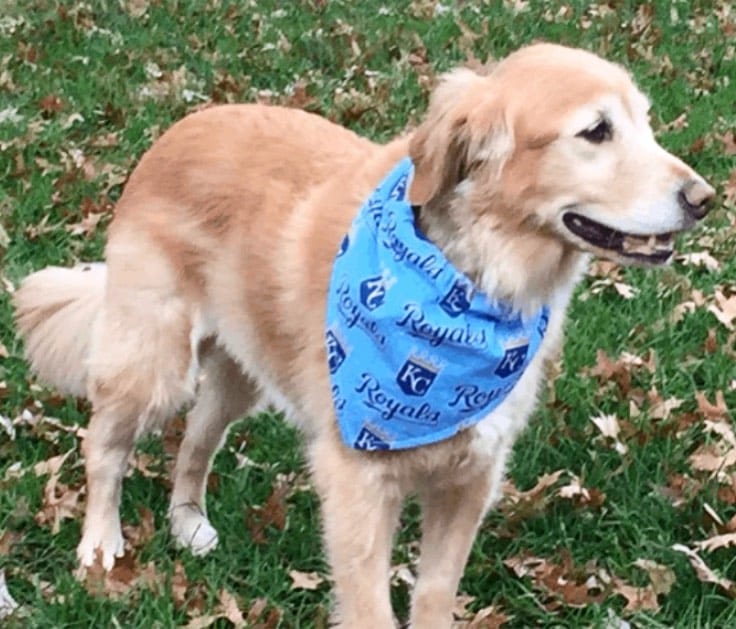
45 minutes (probably) – Golden had a bit of fun this morning when she discovered that she could easily take off the tie on bandanas by scratching herself against the fence. My solution was to buy a pack of plain over-collar slides. (Mine is a canvas collar, but these would work with any material collar.) The design has the fabric tube threaded directly onto the collar. I cut a 22×11 inch piece of cotton (the boys had a lot of fun picking out some sports team prints), folded it lengthwise, put the right sides together, sewed the long edge, flipped it inside out, and hemmed the short ends. I slide it on over the existing collar before buckling it and it sits nicely at the shoulder blades. Of course, it’s a cinch to remove, but hopefully it will be comfortable and stay put during zoomies!
I love how the Royals blue pops against his golden fur in these photos! These ties are perfect for our pups to coordinate with our game day outfits rather than our throw pillows! These ties don’t require tying or snapping in, and simply thread through any color bandana! Great if you have different lengths of fur on the same dog!
Wash the fabric twice before cutting, as it will shrink after a day of getting muddy at the park. My neighbor made eight bandanas from one yard of fabric. Depending on who is visiting, she flips between the team logo and a stripey pattern. The triangle point sways when he trots, catching the light on the printed logos.
Measure the width of your collar, and add one inch to the measurement. Cut your tube of fabric to this measurement. Then, when you’re done, slip the tube onto your collar (it should fit but not bunch up at all). Stitch across both short ends of the tube twice at the top and bottom of the tube, where the fabric meets the hardware of the collar. This will prevent the fabric from fraying after 50+ washes.
📸 Photo credit: Instagram @skiptomyloublog
#7: Striped Slide-On Triangle Bandana (No-Tie Simplicity, Instagram-Worthy Style)
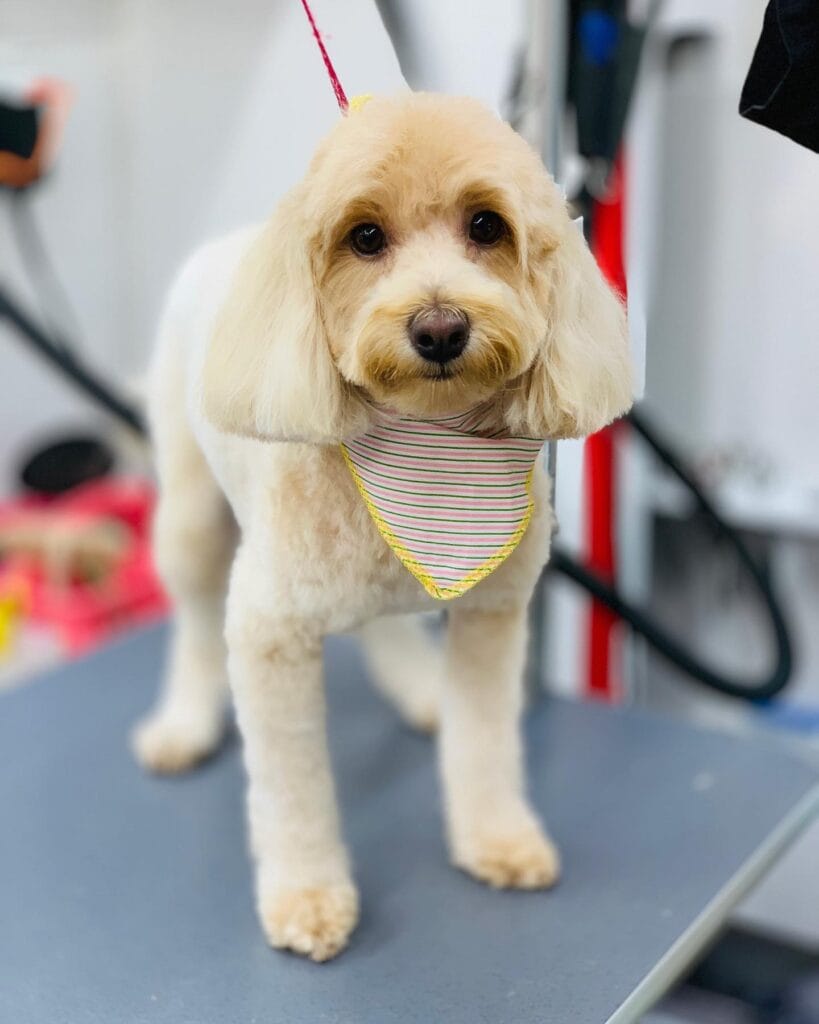
Trim the fabric with your scissors, while the dog on the bed watches you. Fifteen minutes later he is wearing a bandana that matches your throw pillows. You will need one square of pre-washed cotton, 18×18 inches. Use a cotton fabric with a stripe scale of 1/4 inch for small dogs or 1 inch for larger dogs. Cut the fabric into a triangle. Hem the raw edges with a double-fold and top-stitch 1/8 inch from the edge. Create a channel of 2 inches along the long edge of the bandana for the dog’s collar to slide through.
slide on: Thread the existing collar through the channel so you can change bandanas in 8 seconds flat. (no muddy park adventures have to ruin his look!) To ensure you can slip the bandana on easily, measure the width of his collar before you stitch down the channel (add 1/4 inch for wiggle room). The triangle point should fall between his shoulder blades, and be seen from behind but not bunch under his chin when he sniffs the ground.
This stripy version of the same blanket hides dirt a bit better between washes. After 40+ washes in the washing machine (cold) on his bedding, there’s only very slight fading at the corner point. The pink and yellow stripes look lovely against the cream colored fur of the blanket, and three of my neighbours have asked me where I got it as they were surprised I had actually made it during nap time!
Store your finished bandanas in a Clear Storage Organizer with Dividers so you can see all patterns at a glance when dressing your pup.
Cut five triangles out of fabric in different coordinating colors so you have a rotation for each week day. Keep them rolled up in a basket next to the dog’s leash. For more cute dog ideas, check out these 10 Creative Designs for Your DIY Dog Bath. Pre-wash any fabric before cutting to avoid shrinkage when he is first out and about in the mud.
📸 Photo credit: Instagram @tailsnwheels
#8: The 15-Minute Reversible Bandana That Looks Designer (Two Styles, Zero Wardrobe Crisis)
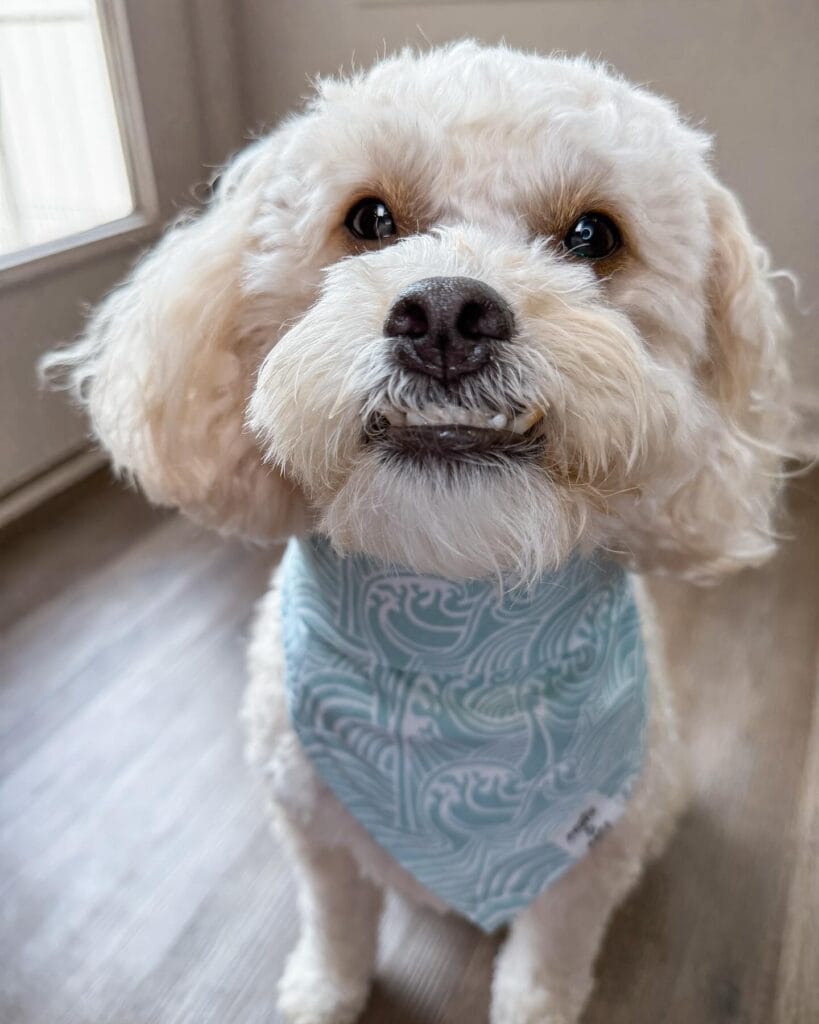
Winston’s owner cut one piece of blue swirl cotton, an 18×18-inch square, then folded the square into a triangle. We didn’t even need a pattern. We just picked this two-toned marble print fabric that looks a little dirty between washes, but it looks intentional next to our white throw pillows.
Here’s your foolproof method: Measure your dog’s neck where a Premium Leather Dog Collar sits, then add 12 inches for tie length. Cut your fabric square accordingly—small dogs need 14×14 inches, medium breeds like Winston need 18×18, large dogs need 22×22. Fold the square diagonally to create your triangle. Hem raw edges by folding twice (1/4 inch each fold) and topstitch 1/8 inch from the edge, or use fabric glue for a no-sew version that dries in 4 hours.
The over the collar slide style keeps it secure during play. Thread the triangle’s long edge through the gap on the collar, and buckle it around the neck. The point of the triangle will drape between the shoulder blades, so you can grab treats from your pocket while training, and not have a whole bunch of fabric bunching up. It’s super easy to snap a photo that will look great on Instagram too. The swirl pattern catches the light so it will look great!
Make three bandanas from a fat quarter bundle (18×21 inches each) for $8 total. Choose prints that complement your home aesthetic—geometric patterns for modern spaces, florals for farmhouse vibes. Pre-wash cotton twice so it won’t shrink after your dog’s inevitable puddle jump. Double-stitch the point where it wraps around the collar for reinforcement, especially if you’re using an Automatic Ball Launcher for Dogs for high-energy fetch sessions that put fabric to the test.
Actionable tip: Cut the bandanas slightly larger than you think you need as you can always fold down the top edge to make them smaller but you can not add fabric to it after it has been cut.
📸 Photo credit: Instagram @winstonthecockapoo.ky
#9: Reversible Submarine Print Bandana (Two Looks in One, Zero Extra Storage)
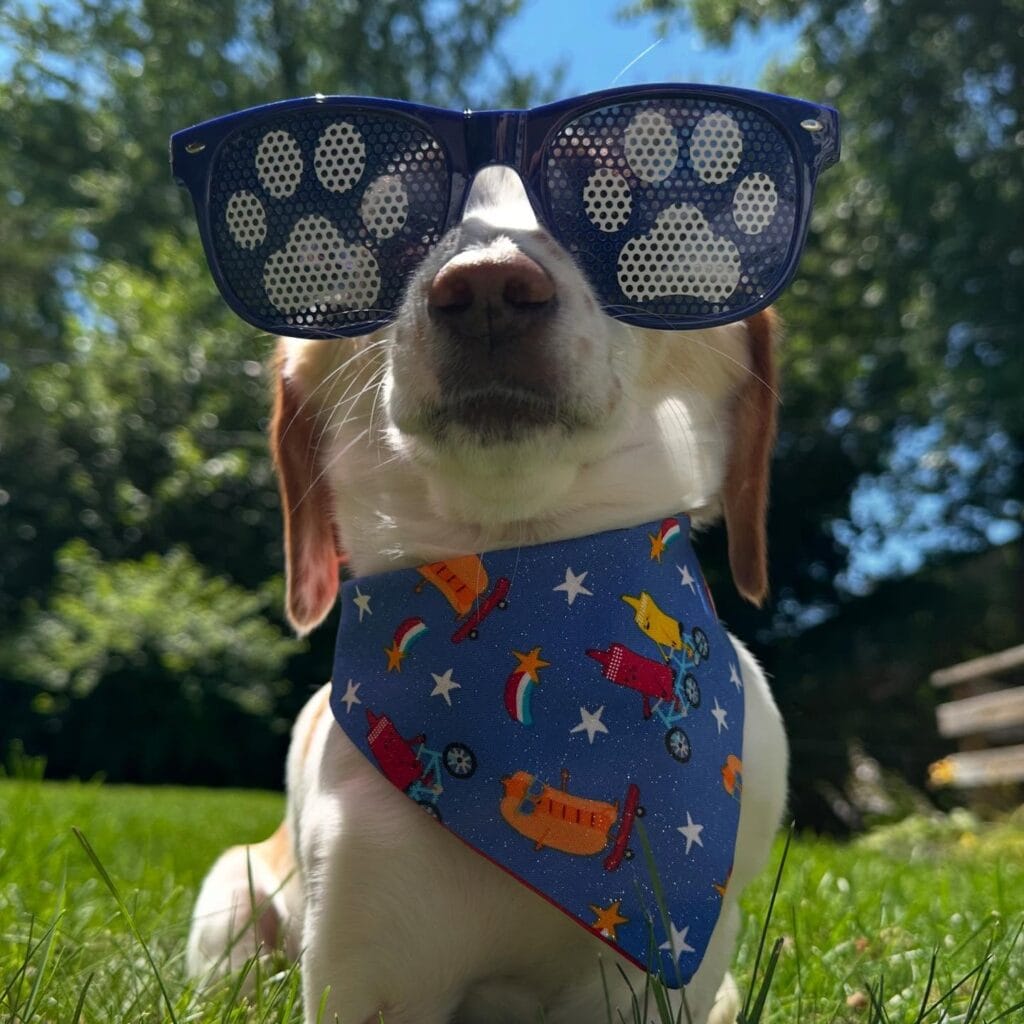
Your dog’s bandana collection should not require its own closet. Cut a 18×18-inch square of quilted cotton. Pick a playful print (i.e. submarines and stars on navy or another complementary solid color) for one side and the back will be a solid color. Fold the square in half to make a triangle. Iron the fold. Top stitch both sides 1/4 inch from the folded edge.
Measure your dog’s neck where a Tactical Dog Harness with Handle would sit—add 4 inches to that number for your triangle’s top edge length. The reversible design lives next to your leash in a woven basket, rolled so both fabric options show. Cooper’s submarine print coordinates with his brown collar for park days, flip to solid sage for coffee shop patios where you want understated polish.
Wash your fabric before cutting it. I learned this the hard way after Bailey’s first bandana shrank two sizes after a muddy morning. The quilted texture holds its shape much better than single layer cotton and the prints are whimsical enough that it doesn’t look like a Halloween costume in a photo. He has been wearing these for the last 18 months and we swap out the space themed one for the floral one based on what I am wearing. If you are looking for some other more creative designs check out these 10 Creative Designs for Your DIY Dog Cage to coordinate with your home.
Pro tip: Make 5 reversible bandanas in 90 minutes from a fat quarter bundle. That’s 10 bandana looks using less fabric than buying the single sided ones!
📸 Photo credit: Instagram @adventuresofautumndog
#10: Classic Red Bandana with Paisley Print (Triangle Tie-On, Timeless Western Style)
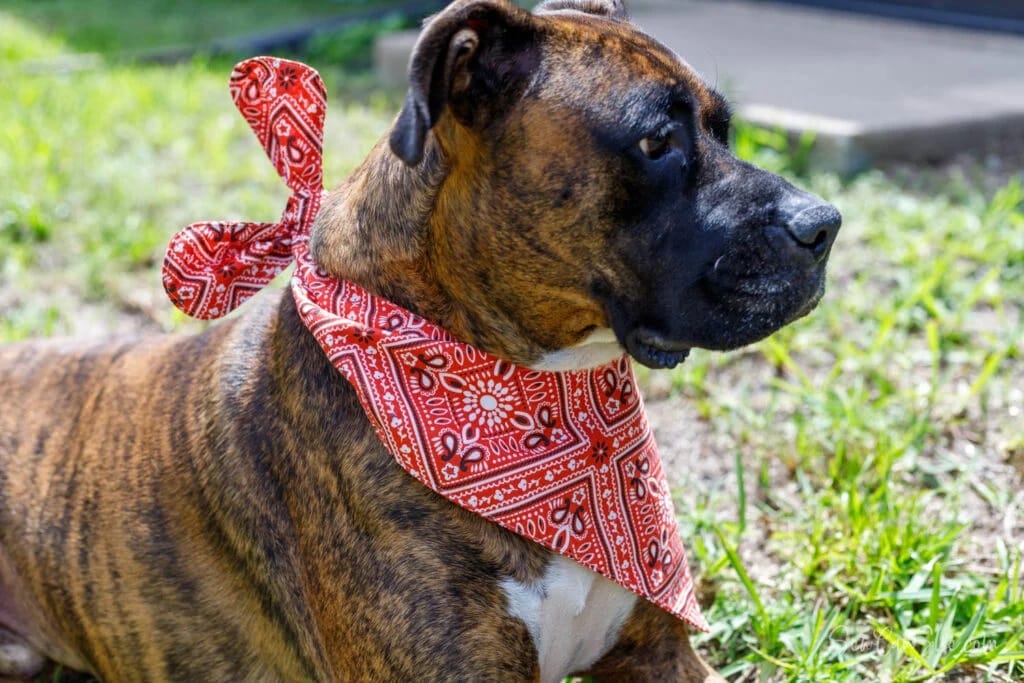
A few Sundays ago, I cut four triangles from a vintage red bandana print. Max’s look was ready by noon and now we call him “Cowboy” at our local dog park. It’s a classic, simple tie on that is perfect between his shoulder blades. I can’t help but see the white paisley against his brindle every time I take a walk with him.
Next, you’ll need an 18×18-inch square of lightweight cotton (I use quilting cotton) sharp fabric scissors and either a sewing machine or needle/thread. Take a tape measure and measure around your dog’s neck where you want the bandana to sit (not tightly around the collar, but draped loosely). Add 8 inches to this measurement. This will be the length of the longest side of your triangle. Fold your square of fabric over, diagonally, and cut along the fold. You now have 2 bandanas from 1 piece of fabric. You’ll need to fold the raw edges under twice by 1/4 inch and then iron them down. Next, top stitch around the bandana, about 1/8 inch from the edge.
It drapes naturally so you can coordinate training sessions—Max associates his red bandana with visiting new places. The tie-on style lets you adjust tightness perfectly, leaving that crucial two-finger gap between fabric and neck. When we’re heading to outdoor events, I keep backup bandanas in our Waterproof Back Seat Cover for Dogs storage pocket for quick changes after muddy creek crossings.
Before cutting the fabric, you should prewash it. I learned this the hard way with my first bandana, when Max’s loose, floppy drape turned into a snug hug around his neck. Paisley prints (like my favorite) hide dirt between washes better than solid colors. After 30+ machine washings, the tied corners are the only places the bandana is faded. Three dog owners at the farmers market asked me where I bought it last month, and when I explained the 20-minute process, they were surprised and kind of horrified. The point of the triangle catches the light on the white patterns in a way that makes every photo look intentional and not, you know, trying too hard.
Pro tip: Cut six triangles at once from a fat quarter bundle. Sew them all assembly-line style in just one hour for a rotating wardrobe that keeps your home looking harmonious whether you’re stitching up a set of fall throw pillows or spring tablecloths.
📸 Photo credit: Instagram @sewcanshe
Your Pup’s New Signature Look Starts This Weekend
Pick one design from this list—the slide-on styles take 15 minutes and don’t require sewing skills. Grab a fat quarter bundle in colors that match your throw pillows, and you’ll have an Instagram-worthy bandana by Sunday afternoon.
Still exploring DIY dog projects? Check out these coordinating tutorials:
- 10 Heartfelt Designs for DIY Dog Accessories
- 10 Inspiring Designs for DIY Dog Leashes
- 10 Thoughtful Designs for a DIY Dog Potty Area
📌 Make sure you’ve pinned your favorite bandana design so it’s ready for you to begin your next craft project.
Frequently Asked Questions
What size bandana does my dog wear? – Measure your dogs neck length and add 12 inches. Small dogs (under 20 lbs) = 14×14″ square Medium dogs (20-50 lbs) = 18×18″ square Large dogs (50+ lbs) = 22×22″ square.
Can I make these without a sewing machine?
Yes! Use no-sew fabric tape or fabric glue for hems. Pinking shears prevent fraying without stitching.
What’s the best fabric for dog bandanas?
100% cotton quilting fabric. It’s breathable, machine-washable, and doesn’t irritate skin. Pre-washed fat quarters won’t shrink after your dog’s first muddy adventure.
How do I keep the bandana from sliding off? Slide-on collar designs (Designs #1-#7) do a better job of staying on than tie-on designs. You can also add a small piece of elastic inside the pocket to grip the collar.
Which DIY dog bandana design does your dog’s personality best?

Amr Mohsen is a software engineer who traded his keyboard for a leash — at least on weekends. His love for dogs inspired him to share what he learns as a dog owner and enthusiast, bringing a detail-oriented, research-driven perspective to every article he writes. If it’s about dogs, he’s probably already looked it up twice.



