
This post contains affiliate links. When you purchase through links on this site I may earn a small commission at no extra cost to you. This helps support the free content I create.
Your dog needs paw protection when walking on hot pavement, but those booties from the pet store fall off after one walk. You’ve spent money on three different brands, and your golden still stops every few steps to shake them off.
The dog shoes you bought squeeze their paws until blood flow cuts off, or slip off in mid-stride. Summer sidewalks could be as hot as 145°F, and winter sidewalks have been salted for safety. Your expensive dog booties sit unused in your closet, next to the homemade dog shampoo supplies.
You can also make your own custom fitted dog shoes from scraps or from your craft drawer. You can make any of these 13 dog shoe patterns and they will stay on because they are fitted to your dogs exact paw measurements. And they will look great in your home. You could even make your dog’s boots match your new dog collar you made with the DIY dog collar guide.
Your dog gets a pair of beautiful paws that don’t slip around. You get to save money and create something fun to show your friends on social media!
Grab Your Materials First
Most designs below use these same supplies—buy once, make multiple pairs:
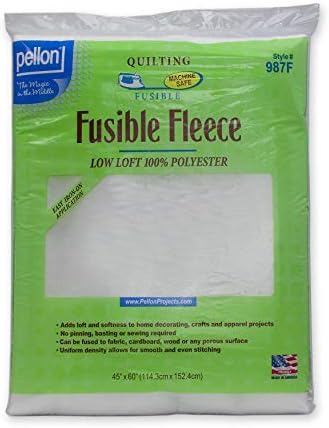


Total investment: Materials that’ll make 4-6 pairs of custom booties.
#1: Cozy Fleece Boots with Velcro Straps (Paw Protection That Actually Stays On)
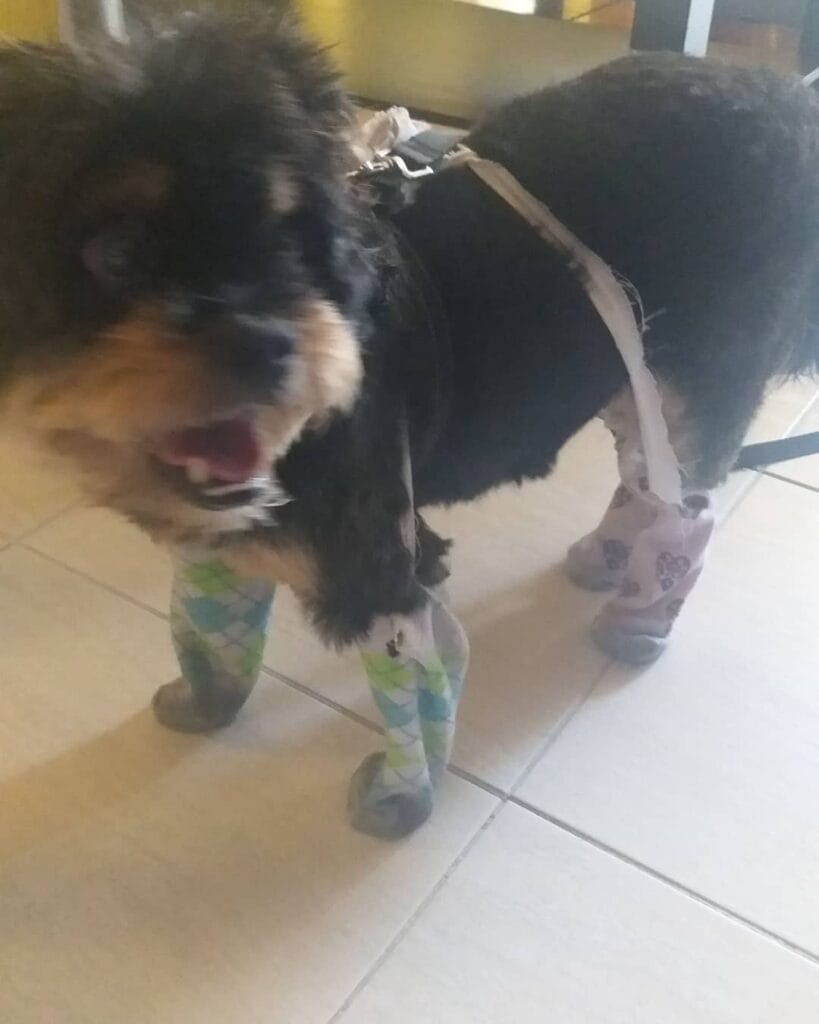
Unfortunately, my dog’s paws hit 140°F pavement and he tried to walk like he was walking on hot coals. Luckily, it only took me 45 minutes to make all four shoes for my dog.
You will need: 1/2 yard of polar fleece, yoga mat for soles, 4 6 inch pieces of velcro, fabric scissors, hot glue gun.
How to make them: Trace dog paws onto paper. Add 1/2 inch around edges. Cut two ovals out of fleece for each shoe. Cut two matching soles out of textured side of yoga mat. Hot glue fleece around the bottom of rubber sole, leaving the top open. Attach velcro strips across the top to tight around the ankle.
The textured yoga mat grips the tile better than my paws, so no more sliding into the furniture when Bailey is doing zoomies. Bailey walked on the scorching pool deck without hopping for 10 seconds after putting them on. These are much more in line with my coastal decor than the neon pet store boots. Save the excess velcro and fleece scraps in your craft bin, or use them to create matching accessories for Bailey’s outdoor space.
After outdoor adventures, let them rest on an orthopedic memory foam dog bed while you admire your creation.
Pro tip: If your dog chews them off in the first hour, spray the edges of the beds with a bitter apple or other deterrent and try again after he has calmed down.
📸 Photo credit: Instagram @gricelbatista
#2: Fleece-Lined Winter Booties (Soft Sole Protection, Zero Sewing Required)
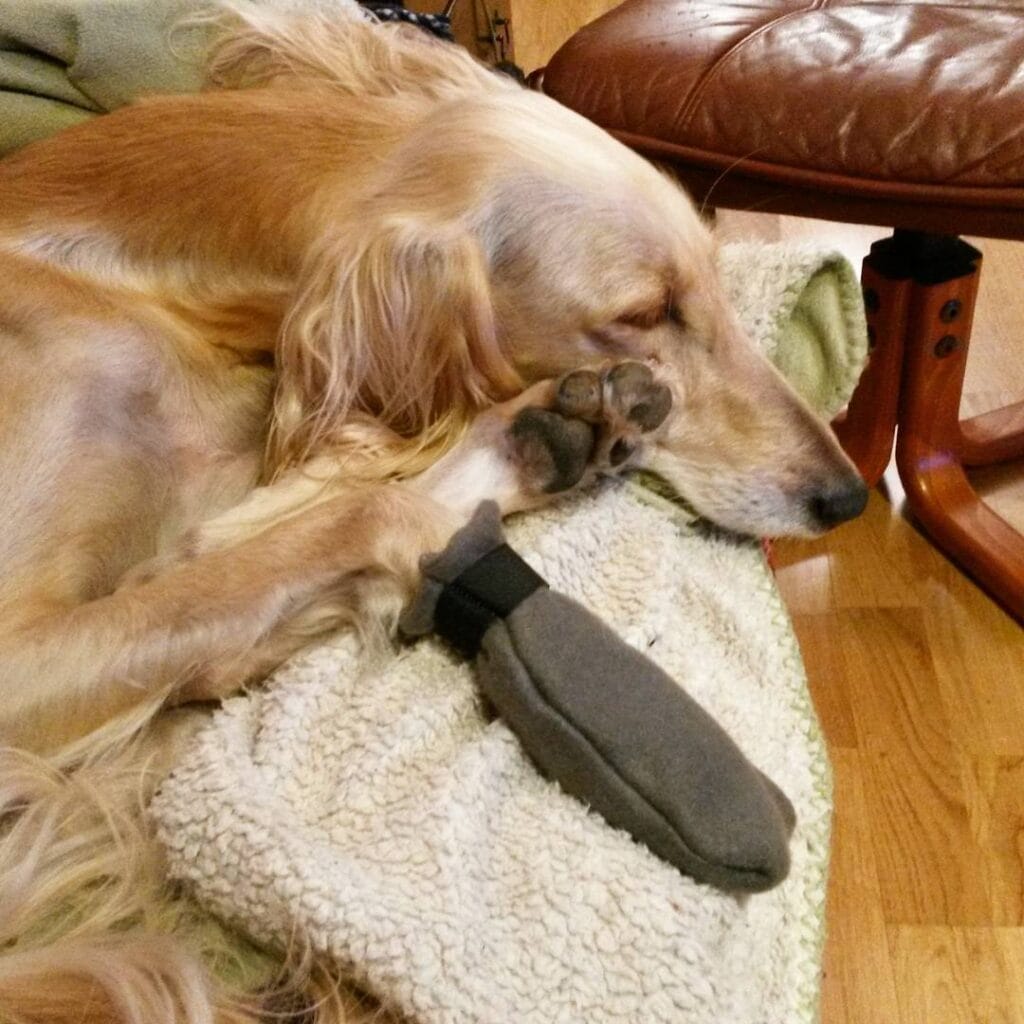
My golden’s paw hit the ice once and she jerked it back up three times before we even walked 10 feet! These no-sew fleece booties take only 45 minutes to make all four shoes.
With this project you will need: one fleece blanket remnant (12×12 inches), 4 yoga mat squares (4×4 inches for soles), fabric glue gun, scissors, and 2-inch velcro strips.
How to make them: . Have your child draw their dog’s paw print on a piece of paper then draw around it and add a half an inch all around it. Use these to cut four pieces of fleece, in the shape of the oval. Hot glue your yoga mat chunk to the bottom of the fleece piece. I put this on the bottom because we have a tile floor and I didn’t want the dogs to slip. Then fold the sides of the fleece over the top of the imaginary paw, hot glue velcro tabs to the edges of the fleece.
Measure the paw width at the widest part of the toe. Your 60-pound retriever should have a 3.5-inch base. The fleece should be tight enough to fit one of your fingers under the velcro strap when you have it fastened. Chester stopped his high-stepping gait after four minutes and trotted across our hardwood floor without slipping.
Pro tip: Dab a little honey in each shoe’s interior the first time. He may want to lick them instead of chewing, giving him 30 seconds to forget they’re there.
📸 Photo credit: Instagram @ninniosterholm
#3: Cozy Knit Dog Boots With Elastic Straps (No-Sew Fleece Design, 30-Minute Project)
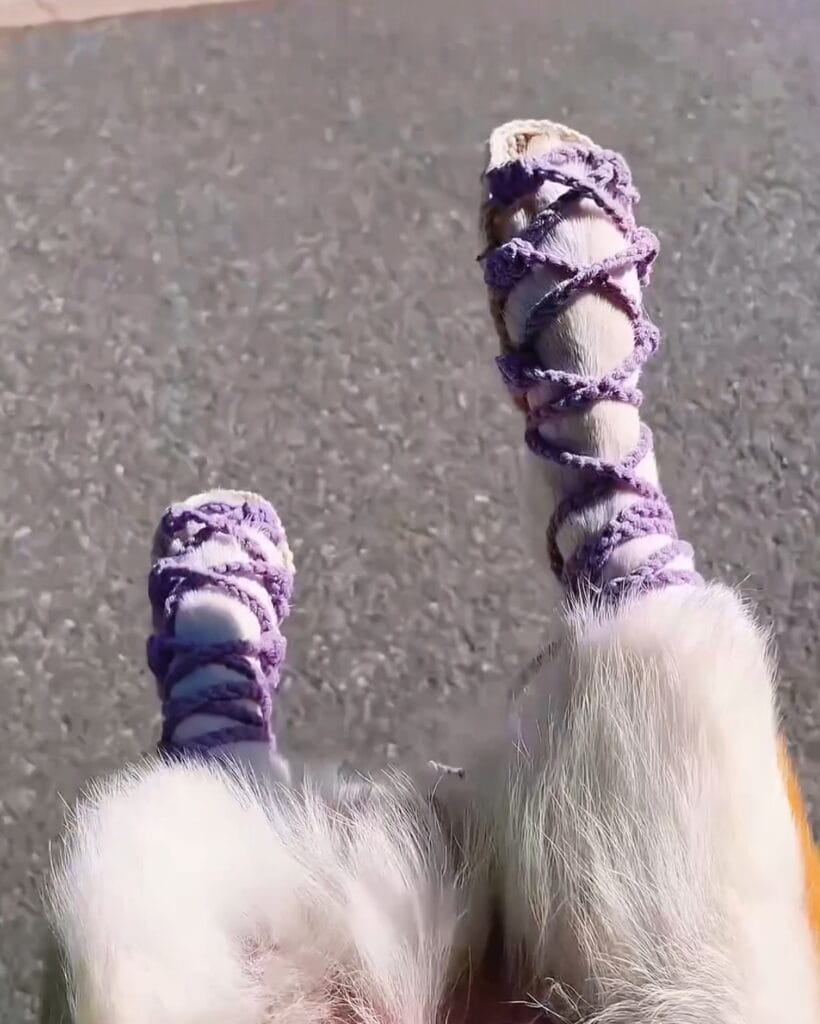
Your old purple fleece scarf can be turned into four boots to keep Buddy’s paws clean from the slushy sidewalks of winter. You will need one 12×48-inch piece of fleece, four 18-inch elastic cords, fabric glue, scissors, and a cardboard paw template.
How to make them: First cut out the paw print of your dog on a piece of cardboard. Add 0.75 inches around the edge. Cut four rectangles of fleece that are 6 inches wide by the length of your dog’s paw plus 3 inches. Wrap the fleece around your dog’s paw vertically. Mark where the edges of the fleece meet. Then sew the seam together. Wrap the elastic around the boot in a spiral pattern (as shown in the picture). Secure the ends with fabric glue on the top and bottom. The set should take less than 30 minutes to make once you have a good rhythm going.
These were great. Max walked on the salted sidewalks and didn’t leave white paw prints on the couch. They didn’t cut off circulation, as I could fit one finger underneath the elastic band if adjusted correctly. They stayed on for his entire 20-minute evening walk (and he didn’t kick them off in 30 seconds like the boots we bought him at the store).
If your dog is moving normally after 5 minutes, he’s probably fine. He might walk a little high-steppy if he is on quicksand, but not too badly. For summer paw protection when the pavement is scorching hot, try these Frozen Dog Treats: Delicious & Easy DIY Recipes to Keep Your Dog Cool.
📸 Photo credit: Instagram @yonghui9913
#4: Navy Stripe Athletic Dog Socks (Protect Paws in 45 Minutes)
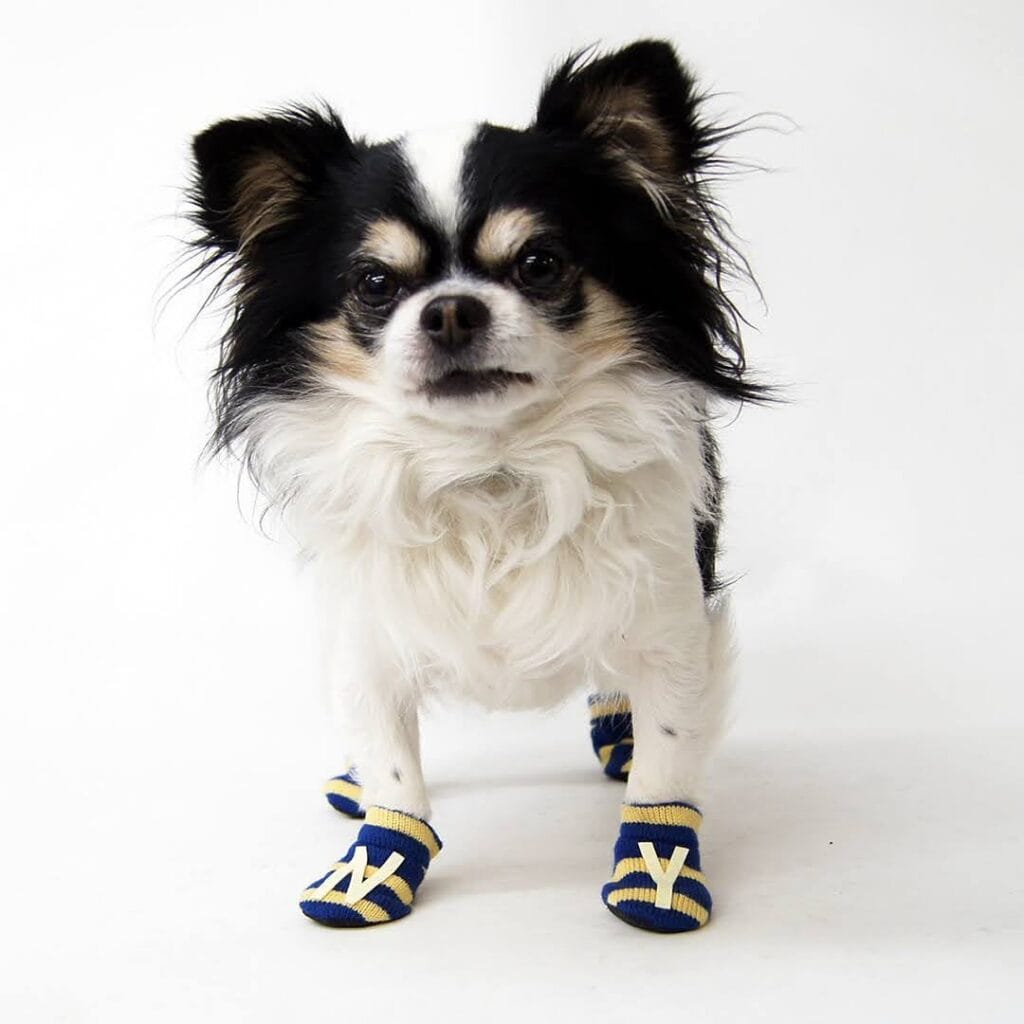
The other day I heard my dog do his hot-pavement hop across the driveway as he put his paws down on it. Thinking that his paws must be really hot I decided to make my own set of athletic socks to give Milo a chance to walk on some nice cool concrete. These took me only 45 minutes to make all four, and I heard no hot-pavement hops from Milo when he walked across the 135°F concrete.
One sweatshirt for adults (sleeves become the socks), 4 yoga mat squares cut to 3×3 inches to use for soles, velcro strips to use for the straps, and fabric glue.
How to make them: So I measured my dog’s paw with a piece of paper and drew a line around it. Then I added 0.5 inches to the top to add a seam. Then I cut the sleeves off the sweatshirt and made them into 4 inch tubes and sewed the end so they are long enough to fit my dog’s paw. I put glue on the bottom of the tube and then on the sticky side of the textured yoga mat and put it on. Then I sewed a strip of velcro across the top so I can fit a finger under it when it is fastened.
For example, it gripped my hardwood floors better than his bare paws– no more skidding around corners! Or, the sole of the mat will protect his paws from the heat of summer pavement, so he can go for a walk at noon, instead of 8 PM, which gives me more freedom.
Bella took about 3 minutes of funny high-stepping then sprinted around the yard as normal. She gets hand washed with dog shampoo when she’s muddy then air dried overnight on our radiator.
Tighten the velcro until your dog can wiggle the toes inside but can’t get them off with three shakes of the head.
📸 Photo credit: Instagram @celebdog_sewing
#5: DIY Fleece Booties with Grip Soles (90 Minutes Total for All Four Paws)
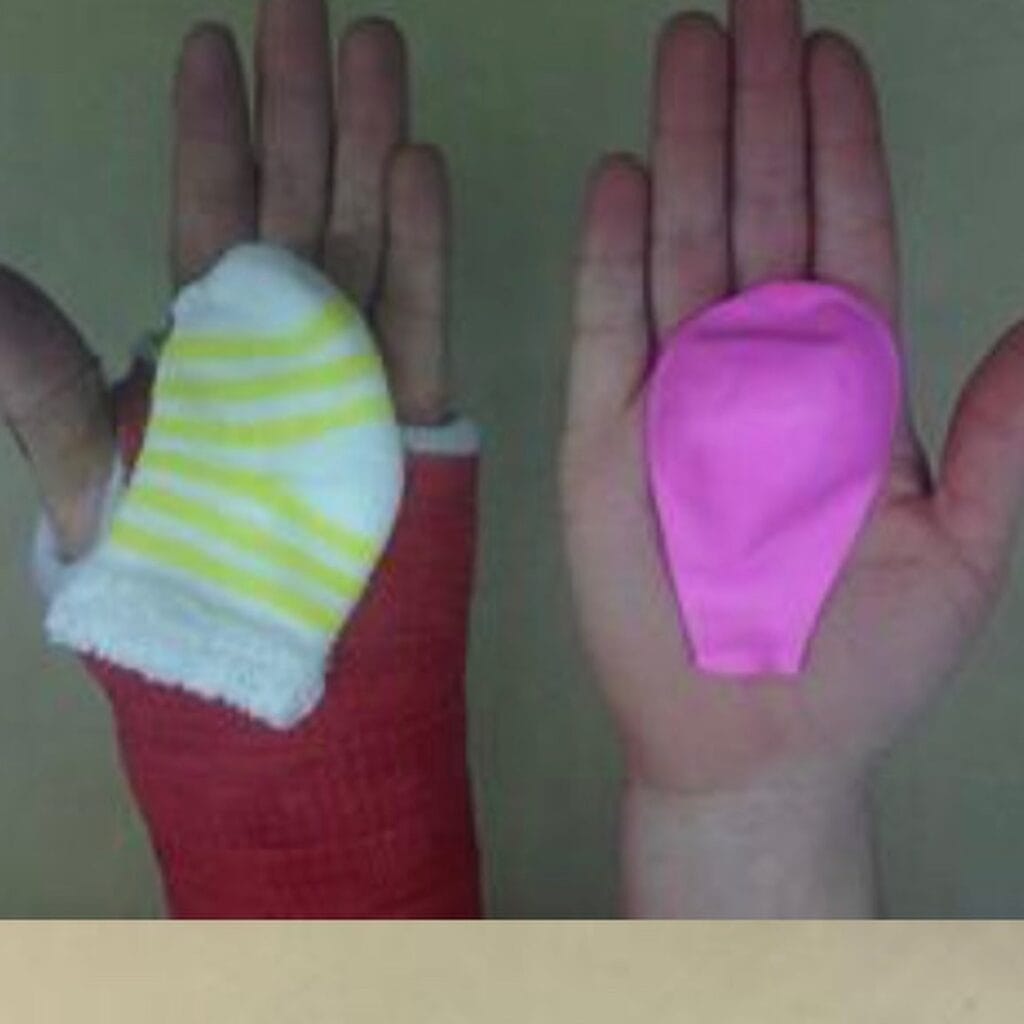
These super easy fleece booties are a life saver in the winter. No muddy dog paws and no pad burn from the salt on the sidewalks!
Yay! It is time to start making the shoes. You will need 1/2 yard of pink fleece, one yoga mat for soles, four 6 inch velcro strips, scissors, hot glue gun, and a marker.
How to make them: 1. Trace your dog’s paw. Add 0.5 inch around the perimeter. 2. Cut four rectangles out of fleece that are 2 inches taller than the length of the paw. Cut each rectangle so it is wide enough to wrap around your dog’s foot with 1 inch overlap. 3. Glue one yoga mat circle to the bottom of each fleece rectangle. This will give the bootie a textured, grippy bottom so your dog will have traction on the tile. 4. Wrap the fleece rectangle around the paw and mark where you want to attach the velcro. Mark the velcro placement at the ankle of the paw. 5. Attach the velcro strips to the bootie. Each bootie only takes about 20 minutes to make so you could do it while watching TV.
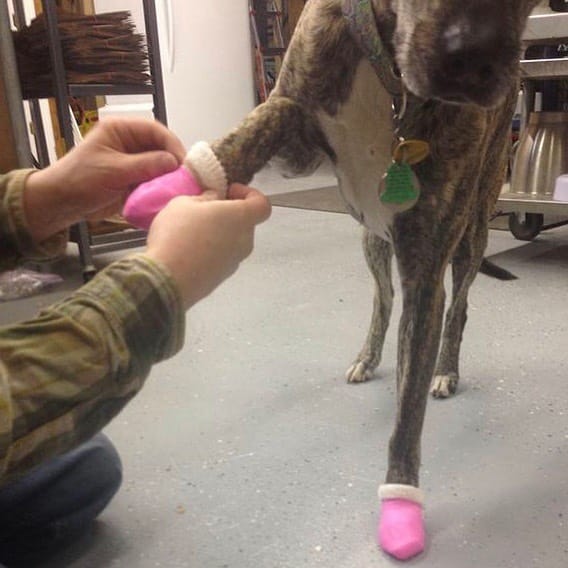
Bella in the boots – Before my Bella was limping across the 145 degree pavement. Now she trots for her 30 minute walks. She loves them so much she “prances” all over the hardwood floors. They grip really well on the hardwood floors. I don’t even have to worry about my little Bella getting her “paw fur” trimmed at the expensive dog grooming place. So far, we have survived 25 snowy walks, and the bottoms are finally wearing out. We’ve got to get some new ones.
Pro tip: If your dog just can’t seem to help chewing on his booties, the author suggests using the method of distraction that she presents in her book, “DIY Dog Chew Treats: Healthy & Easy Homemade Recipes” to give your dog something better to bite while getting used to the booties.
📸 Photo credit: Instagram @furgottenpaws
Essential Materials Comparison
| Material | Best For | Where to Buy |
| Polar fleece | Soft indoor booties, winter warmth | Amazon |
| Nylon ripstop | Waterproof outdoor boots | Amazon |
| Yoga mats | Non-slip grippy soles | Amazon |
| Rubber shelf liner | Budget alternative soles | Amazon |
| Industrial velcro | Stays fastened during runs | Amazon |
Table 1: Material selection guide for DIY dog booties
#6: DIY Tube Sock Dog Boots (Zero-Sew Protection in 8 Minutes)
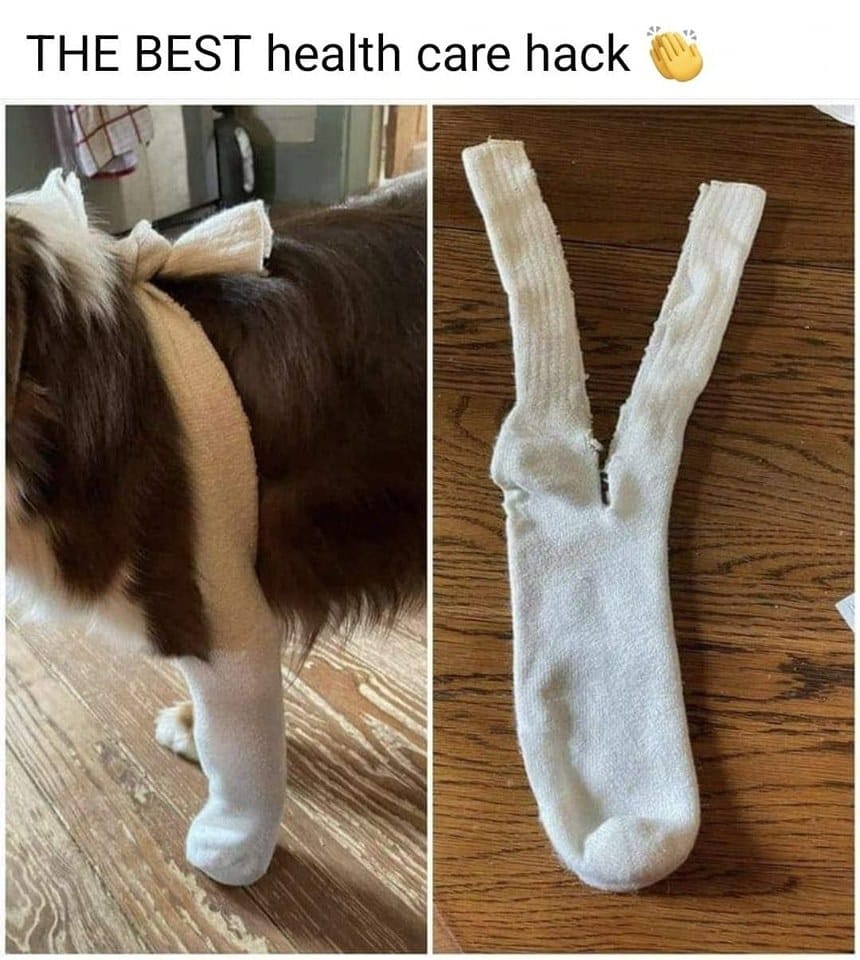
Your dog is pulling his paws up off the floor like he’s walking on hot coals on your July patio. Cut the foot off an old tube sock and fold the ribbed top down twice. Voila! Instant paw protection. It’s what’s already in your drawer.
Grab: 4 adult crew socks (you know the kind with the 2 inch ribbed cuffs) sharp fabric scissors a ruler.
How to make them: Measure your dogs paw from the very tip of the toe, all the way to the ankle. Most medium sized dogs will need 4-6 inches of sock. I cut just below the heel part, so I’m just left with the tube and the cuff. If the sock has pills or a spot that has worn off, I turn it inside out. The ribbed cuff that is on the ankle, is what I use. It has no velcro or ties, so he can’t chew them off in the middle of the night.
It takes 2 minutes per boot, so 8 minutes for all four paws. My dogs don’t even notice they are wearing them after walking around funny for 90 seconds. In fact, one of my beagles just walked on 135°F concrete and I didn’t see him lick his paws afterwards (he usually does). We also no longer slide on the hardwood floors since our paws are roughed up a bit.
Pro tip: These white socks will show every mud splash so I’d choose a tan or gray color if your dog loves to get their paws wet. I walked my dog in them about 12 times before they started wearing through the toe area on the bottom where my dog walks on rough pavement.
📸 Photo credit: Instagram @home_garden_and_DIY
#7: Fuzzy Pink Snow Boots (Fleece-Lined Comfort, Hot Pavement Protection)
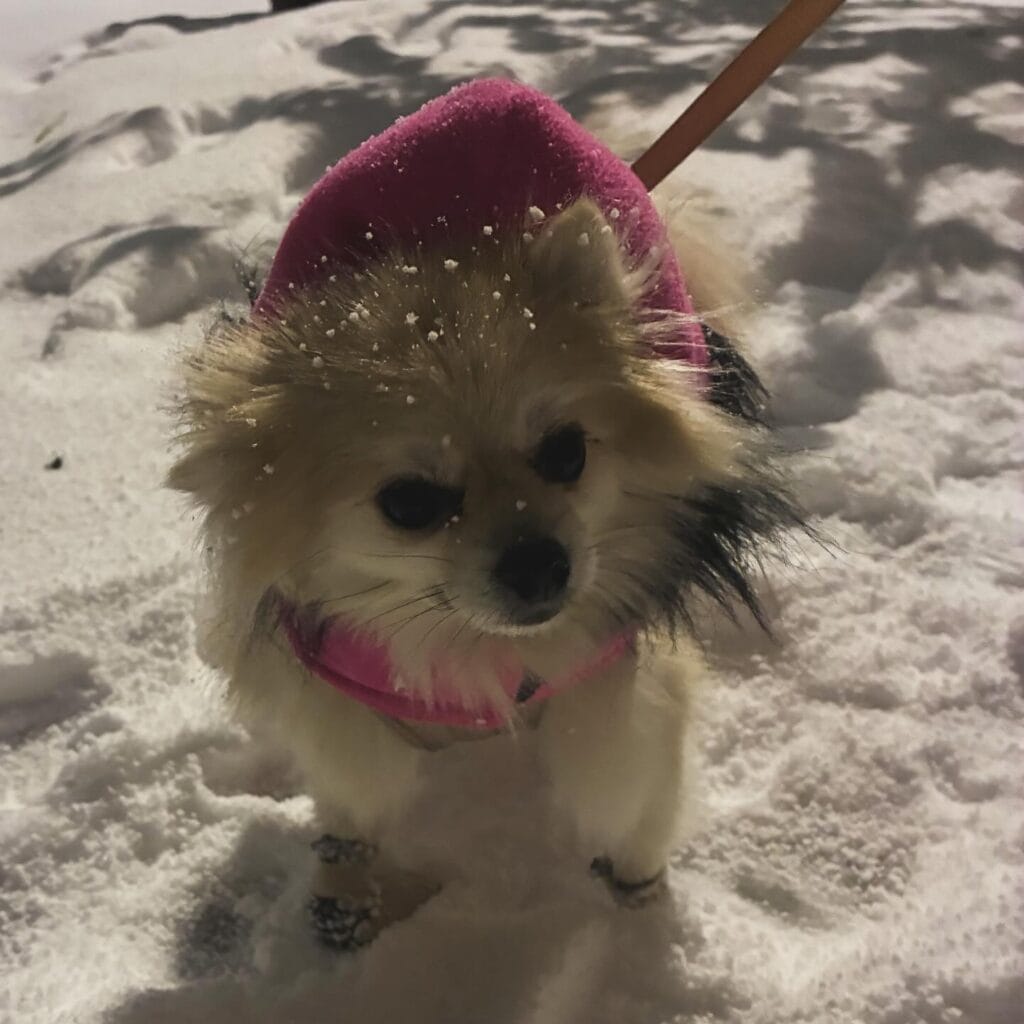
Your Pomeranian is not walking on the hot summer pavement of death. These homemade fleece booties are made with old sweatshirt material and pieces of yoga mat. Each pair takes 15 minutes to make and all four were done in under an hour. Yay!
How to make them: I traced my dog’s paw onto some paper and added 0.5 inches around the edges. I cut two fleece rectangles ( 3×4 for small dogs and adjust up from there for bigger dogs) and one textured yoga mat piece (sole). I hot glued the sole to the bottom piece of fleece, folded the other piece over like a taco and attached it to the bottom piece with a 6-inch velcro strap across the top. The ribbed texture of the yoga mat grips the tile but the fleece is soft enough to cushion his little paws.
Bailey walked across 130°F pool deck without his usual frantic hopping—he trotted straight to his orthopedic dog bed like nothing happened. The fuzzy pink material matches your blush living room pillows, so nobody knows they’re homemade. They lasted 35 walks before the velcro wore out (easy replacement). Tighten straps until you can fit one finger underneath—Max stopped trying to shake them off after day two. Hand wash with dog shampoo between adventures, air dry overnight.
Pro tip: This time of year I spray the outside of the fleece with some waterproof spray so that’s good for muddy walks and snowy walks and makes sure their paws stay dry so they don’t get cold. Check out DIY Dog Treats: The Ultimate Guide to Homemade Snacks for Your Pup to see what to give the dog when it goes through the phase of funny walking.
📸 Photo credit: Instagram @probablyasnail
#8: DIY Rubber-Sole Dog Boots (Croc-Style Protection That Actually Stays On)
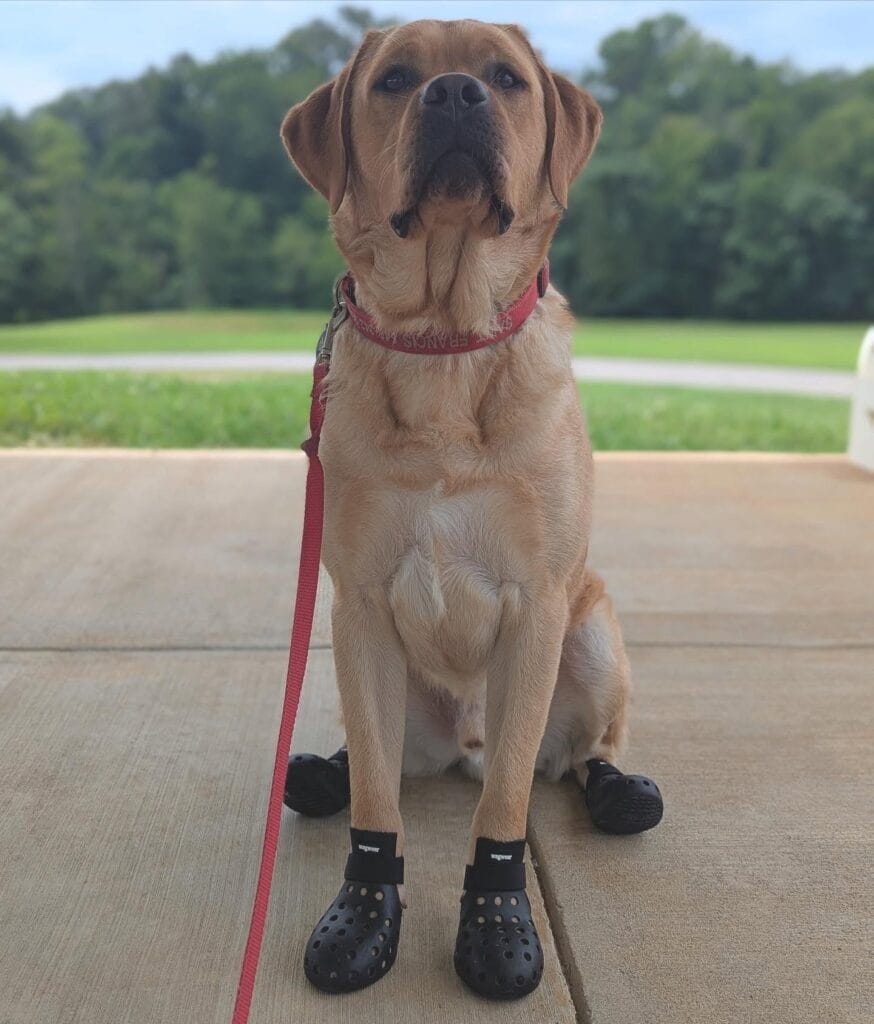
p.s. your lab limps across the august driveway at 2pm because the asphalt is 145 degrees. These homemade boots take 45 minutes to make all four.
Materials: – 1 paire de chaussons en caoutchouc noir de la vieille cité, 2 m de ruban de cotonnette rouge, 2 rubans d’adhésif velcro gros, ciseaux de tissu, glaçonnette et marqueur.
How to make them: Trace your dog’s paw on paper with his weight spread evenly on top, then add 1/2″ around the outline. Cut the clog soles to fit your template. The textured rubber grips tile and wet grass, so it won’t slip.
Wrap the nylon webbing around the opening of each boot and glue it down for a nice finished edge. Attach two velcro straps to each boot: one across the toe, and one around the ankle. The boots will stay on during your dog’s zoomies across the backyard, and you won’t get frustrated because they are constantly kicking them off.
Cooper walked funny for 8 minutes, then trotted normally. After 3 weeks and 42 walks the soles show no wear. No more tar stains on the cream sofa – you’ll actually enjoy the cuddles again after the park.
Pro tip: I tighten them up so that I can just get one finger under them (they’ll stay on while I’m running, but not so tight they will cut off my circulation).
📸 Photo credit: Instagram @dogblessyou
#9: DIY Fleece & Nylon Dog Booties (Waterproof Protection for All Four Paws)
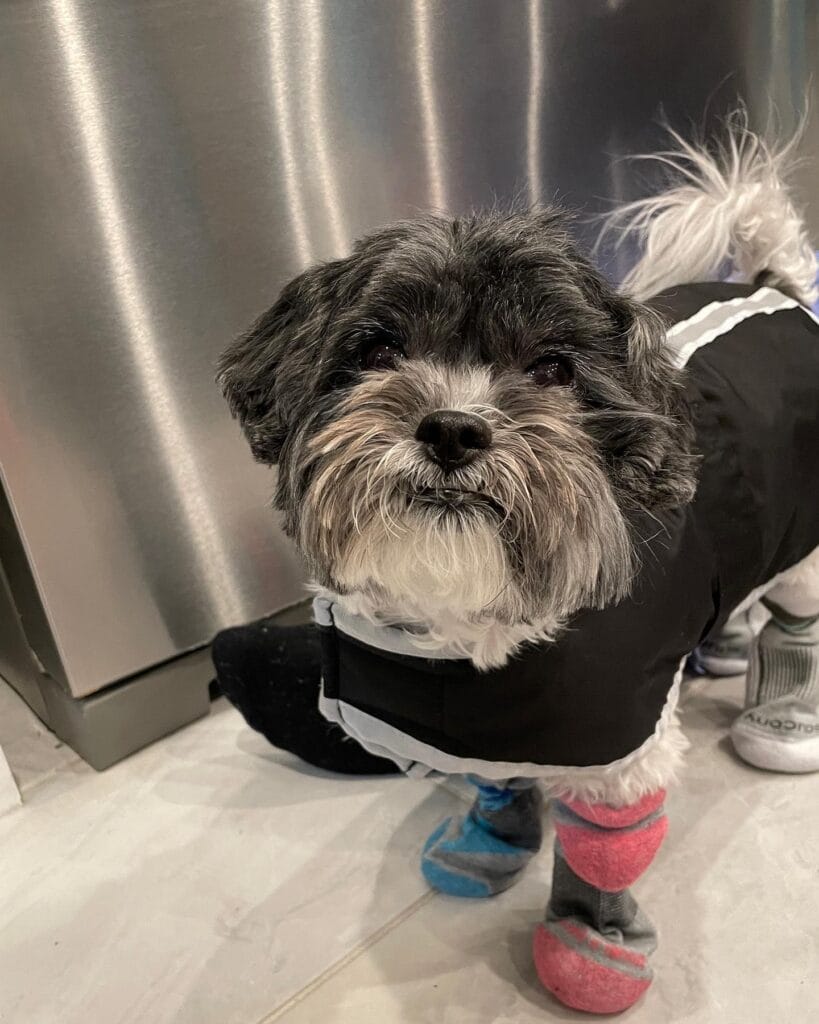
Just the other day, I noticed Charlie limping across our hot driveway. I put these navy fleece booties on his paws, and he walked for a full 30 minutes without trying to shake them off.
You will need: .5 yards navy nylon, .25 yards of coral fleece lining, one 12 inch strip of reflective tape, and two yards of velcro. I used my old yoga mat for the grippy soles. The total time to make all four booties is 45 minutes.
Sizing guide: Trace your dog’s paw on the paper while standing. Add 0.5 inches around the entire paw outline. Measure the width of your dog’s paw at its widest point. If your dog is small, you want the paw piece to be less than 2 inches wide, if he is a medium size dog you will want it to be between 2-3 inches and if he is a large dog you will want it to be over 3 inches. Cut out your fabric 1 inch wider than your traced paw.
Step-by-step:
- Cut the nylon outer layer with your paw template plus 0.5-inch seam allowance
- Cut matching fleece lining pieces
- Slice yoga mat into paw-shaped soles with textured side down
- Hot glue fleece to nylon, wrong sides together
- Attach sole using fabric glue, letting it cure 2 hours
- Sew or glue velcro straps 1 inch from top opening
- Add reflective tape strips for evening visibility
The mat also protects from 140 F pavement burns so I can walk with him at noon without guilt, and no more paw pad blisters! It also has a textured yoga mat bottom, so my hardwood floors don’t slip, and Milo doesn’t slip around the corners anymore!
The boots stayed on for 35 walks before the sole wore thin on the concrete. The Velcro can be adjusted very tight in less than 3 seconds.
My dog stood on it awkwardly for 2-5 minutes, but when she first put it on, she bolted across the yard and didn’t leave a single muddy print on our white kitchen tile. The navy color was even better in my coastal living room than the store bought colors.
Pro tip: How do I keep my dog’s fur waterproof? If you have a furry friend that loves to run around outside, you know how important it is to keep their fur waterproof. Washing him with a gentle dog shampoo, and air drying him overnight every 3-4 walks should do the trick. If your dog spends most of his time indoors, check out these 10 Creative DIY Dog Bed Ideas for Your Furry Friend to keep him cosy and comfortable.
📸 Photo credit: Instagram @lydiakang
#10: Fleece Bootie Dog Shoes (15-Minute DIY)
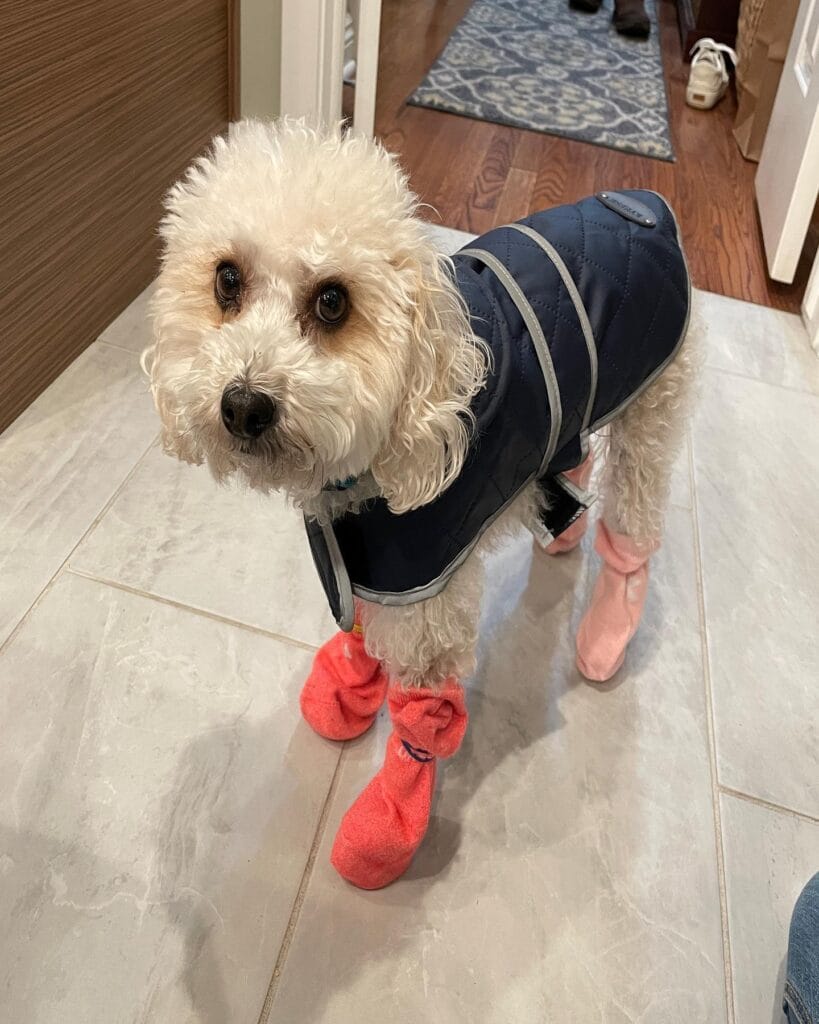
Your dog’s feet hit the scorching pavement and you can see them hopping from foot to foot. You can make these fleece booties with rubber yoga mat soles very easily, using materials you already have at home.
You will need: Four, 6×8 inch pieces of fleece (we used old sweatshirt sleeves) One yoga mat cut into 3 inch circles Scissors Hot glue gun Velcro strips, 16 inches each.
How to make them: Step 1: Trace your dog’s paw on a piece of paper. Add 1/2 inch around the outline and cut it out. Wrap fleece around the paw template, and glue the back seam. Glue the yoga mat circle to the bottom of your paw print and add a 2 inch velcro strap across the top. Takes about 15 minutes per shoe. Makes 4 shoes.
Bella stopped limping across 135°F concrete within seconds of putting them on. The textured sole on the yoga mat gripped our slippery hardwood better than her paws did. After 40 walks in three weeks, the sole is barely worn.
Pro tip: My dog will do a funny high-step walk for the first 5 minutes. Let them adjust indoors for a bit before heading outside.
📸 Photo credit: Instagram @lydiakang
#11: DIY Donut Dog Booties (Non-Slip Soles, Weekend Craft Project)
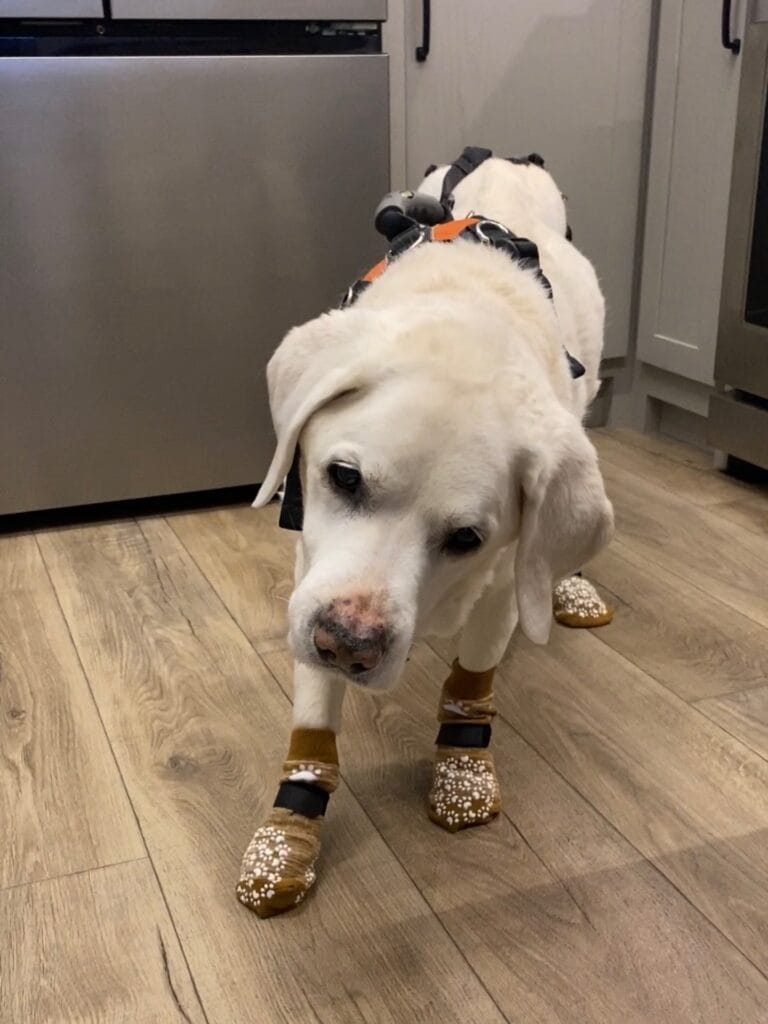
Your dog’s paws should not clash with your kitchen’s look. These donut booties took me 45 minutes to make all four.
you will need Tan fleece (8×10 inch piece), chocolate brown felt for “frosting” (6×8 inch), white seed beads for “sprinkles”, a rubber shelf liner for the soles, and 2 inch velcro strips. you will also need fabric scissors, a hot glue gun, a ruler, and paper for the paw templates.
How to make them: Paw print trace your dog’s paw print on paper, and then outline it with a 0.5 inch pencil line. Then cut out the fleece circles using your traced paw print as a guide. For a 50 pound dog the circles should be approximately 4 inch diameter circles.
Next I cut the donut shapes out of the tan fleece and left the center hole open. Then I took some brown felt and hot glued it on the top, sort of like the donut would have frosting. I threw some seed beads on it and glued those down. I also hot glued some shelf liner to the bottom of the dog’s feet so that I could control where she was going on the tile floors. You can watch your dog trot around the kitchen and you don’t have to worry about her skidding across the tile. I then cut a piece of velcro and wrapped it around her ankle, overlapping 1 inch. I then made it so I could barely fit one finger under the strap.
To my amazement, after about 3 minutes she started walking funny again. After 2 weeks of daily indoor use, there has been no peeling and the beads are still glued to the paw, and her paws don’t leave any scratch marks on the hardwood floor. I think these would work well for elderly dogs who need traction or puppies that are learning to walk on smooth surfaces. I had these on my dog when I was building a DIY dog run for her. I wanted to protect her paws from getting scratched by the rough gravel.
Pro tip: If your dog tries to chew off the velcro edges, spray around the edges with bitter apple.
📸 Photo credit: Instagram @cruisingwithcooper
#12: DIY Yellow Croc-Style Dog Boots (Waterproof Protection)
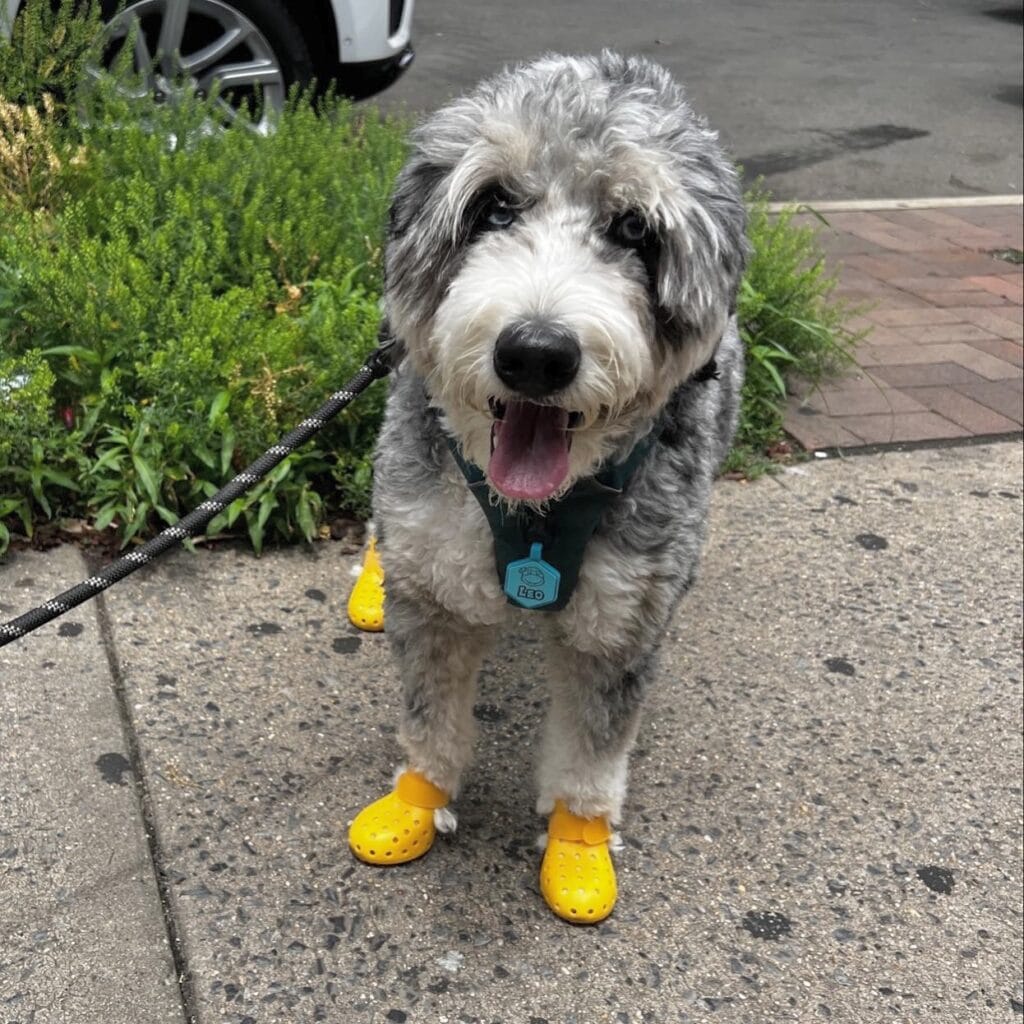
Your dog just tracked wet leaves all over your newly mopped floors for the third time this week. If you have the time, these waterproof foam boots only take 45 minutes to make all four.
You will need: 4 kids’ foam clogs (small for dogs under 30 lbs, medium for 30-60 lbs), sharp scissors, a ruler and 1-inch elastic bands.
How to make them: Tracy says to measure your dog’s paw. Just put it on a piece of paper and trace around the widest part. Then add 1/4 inch on each side. Cut out the part of the clog that goes under your toe. Cut it 2 inches from the front of the clog. Remember to leave the “rough” part of the clog on the bottom so it will look more like a shoe. Punch two holes on each side with a heated tip of a screwdriver. Thread the elastic through and knot inside.
Those cute dog paw prints that decorate the white tile in my kitchen when it’s raining are a thing of the past. Because the ribbed foam sole grips the wet tile, I can take my dog for a walk without leaving a mess when I get back inside. The sole is also made of a waterproof material so there’s no soggy dog smell that lingers for hours after the walk.
I did have to change the elastic after about 25 walks, as Leo took 3 minutes of high-stepping like a show pony, then ran normally across the yard. They’re easy to hand wash with dish soap and air dry in 2 hours.
Pro tip: If your dog chews off the elastic straps, we recommend cutting Velcro straps from old sneakers.
📸 Photo credit: Instagram @itsleothebernedoodle
#13: Croc-Style Protective Booties (Weatherproof Paws, Zero Vet Bills for Cuts)
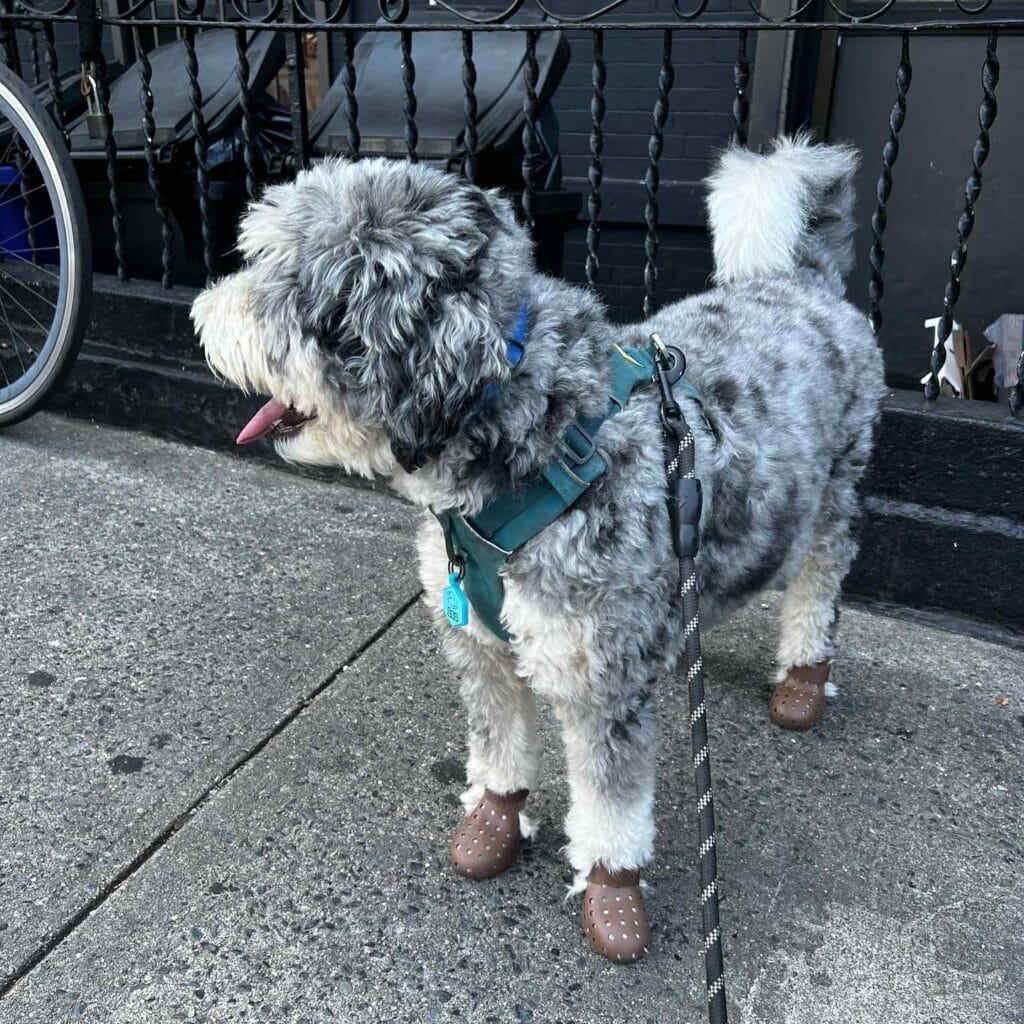
Look like something out of a garden catalog, but kept my little ones feet blister free while we traipsed around 140+ degree Brooklyn sidewalks in July, even though they’re made of leather. You will spend about 45 minutes making the 4 shoes.
Materials needed: 4 adult sized foam clogs, 1 yard of teal webbing, 3 inch velcro strips (2 per shoe), and a hot glue gun.
How to make them: Measure the width and length of your dog’s paw and add 0.5 inches to each measurement. Cut the toe section 2 inches behind the ventilation holes so that you have that little cap. The textured foam sole grips the floor like your bathroom mat so you can forget about those, “oh no! I just zoomed into a wall” moments.
I put glue webbing straps across the top, putting an “X” with the velcro closures at each end. Tighten straps so one finger can be placed under the strap when straps are tight. Luna stopped her funny high-stepping walk after 5 minutes and ran three laps around the yard. They lasted for 60 walks on the rough concrete before the sole wore smooth and neighbors asked where I bought them at least 6 different times.
If your dog likes to get muddy or muddy paw prints on your bed, hand wash your dog in dog shampoo and let him air dry on your deck overnight from these 18 Creative DIY Dog Fence Ideas for Your Yard.
Pro tip: If you dog is chomping on the ends of the wrap then put bitter apple spray on the ends. This is only necessary for the two day adjustment period.
📸 Photo credit: Instagram @itsleothebernedoodle
Common Questions About DIY Dog Booties
How long should booties last?
Most fleece designs last 25-40 walks on concrete before soles wear through. Rubber-sole versions (designs #8, #12, #13) last 60+ walks. Extend life by hand washing with gentle pet shampoo after muddy adventures.
My dog keeps chewing them off – help!
Spray edges with bitter apple deterrent and distract with a puzzle toy for the first 5 minutes. Most dogs adjust within 2-3 days.
What size yoga mat do I need?
One standard 6mm thick yoga mat provides soles for 12-16 dog shoes depending on paw size.
Can I machine wash these?
Hand wash only! Do not machine wash or agitate. Dry overnight.
Will these work on hardwood floors?
Yes, and I can tell you why. The yoga mat is textured or rubber soled and provides great grip. No more skidding.
Your Pup’s Paw-some Style Journey Starts Now
You can choose one of the thirteen stylish and protective shoe designs for your dog that will match the style of your home and your dog.
If you are looking for some fun & stylish DIY project, try these 13 Genius DIY Dog Stuff Every Pet Parent Needs to Try Today! for a homey look. You’ll also like 21 Creative DIY Dog House Ideas for Your Dog Friend and 14 Creative DIY Elevated Dog Bed Ideas You’ll Love to create a beautiful and unique look.
Pinning your favorite shoe design will keep you from losing it when you’re ready to craft. This will help keep your floors clean, your pup’s paws off the floor, and your home looking Instagram-worthy. What shoe design did you choose?

Amr Mohsen is a software engineer who traded his keyboard for a leash — at least on weekends. His love for dogs inspired him to share what he learns as a dog owner and enthusiast, bringing a detail-oriented, research-driven perspective to every article he writes. If it’s about dogs, he’s probably already looked it up twice.



