So, you’ve got a small dog, and you’re on the hunt for the perfect bed, right? Think about it: cozy spots make all the difference for tiny pooches. With so many designs out there, from DIY beds sewn from old sweaters to orthopedic styles that support aging joints, the choices are endless. Feeling overwhelmed? Don’t worry, we’ll break it down together. Let’s explore which dog bed could become your furry friend’s new favorite hangout.
Cozy Beds for Tiny Pooches
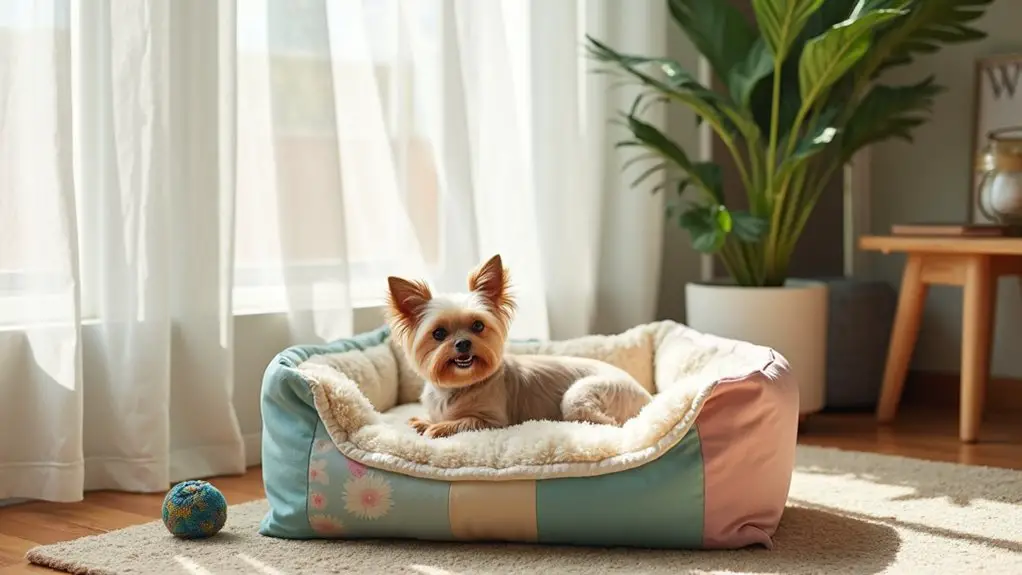
When you’re on a quest to find the perfect cozy bed for your tiny pooch, it can feel a bit like searching for a needle in a haystack. Sure, those expensive beds look nice, but have you thought about DIY dog beds for small dogs?
They’re not just budget-friendly; they let your creativity shine. Imagine turning an old sweater into a snuggly bed. Just cut it down the middle, stuff it with soft materials, and voilà! Your pooch will love curling up in it.
Or, how about a cushion made from foam and fabric? Go wild with prints. You know your dog’s favorite colors, right?
Every time they snooze in their custom bed, they’ll be dreaming of your crafty brilliance. Isn’t that worth a try?
Our Collection
When you check out our collection, you’ll find something for every tiny companion.
Think orthopedic support for that extra snuggly comfort, stylish patterns so your pup can flaunt their personality, and water-resistant fabrics because—let’s be honest—accidents happen.
Plus, we’ve got heated options for those cold winter nights when even dogs want to cozy up and binge-watch their favorite shows with you.
1. Orthopedic Support for Comfort

Creating a cozy orthopedic dog bed for your little furball is an easy and rewarding project. Not only will you save money by making your own, but you’ll also be providing your dog with the comfy support they need, especially as they get older. Plus, it’s a fun way to add a little personalized touch to your home decor! Why not make a comfy haven just for them? Additionally, an orthopedic elevated dog bed can significantly improve joint health and provide relief for aging pets. The right bed can even enhance sleep quality and promote overall well-being for your furry companion. Choosing a bed that features premium orthopedic support can further ensure your pet’s comfort and health. Investing in high-quality materials will also lead to a more durable and luxurious sleeping surface, ensuring your pet feels pampered.
Materials Needed:
- Soft foam pad (memory foam or high-density foam)
- Fabric (fleece, cotton, or any soft material)
- Sewing machine or needle and thread
- Scissors
2. Stylish Patterns for Personalization
Creating a personalized dog bed not only makes it snuggly for your pup, but it also allows you to showcase your own flair. With various stylish patterns, you can transform a simple orthopedic bed into a statement piece in your home. Plus, you’ll save some bucks doing it yourself, all while feeling like the crafty pet parent you realize you are. Let’s plunge into this fun project! Additionally, having the right dog baking equipment can enhance your experience while making delicious treats for your furry friend.
Materials Needed:
- Soft foam pad (memory foam or high-density foam)
- Fabric (choose a cute pattern or color from cotton or fleece)
- Sewing machine or needle and thread
- Scissors
- Measuring tape
- Fabric pins (optional for keeping things neat)
Step-by-Step Instructions:
- Measure Your Pup: Grab your measuring tape and get the dimensions of your dog. A little too much space can be cozy, but a bed that’s too big might feel empty.
- Cut Your Foam: Using your measurements, cut your foam pad to the desired size. If you’ve ever tried cutting through a good piece of foam, you know it’s like wrestling a wiggly octopus. Just take your time, and you’ll do great.
- Prepare Your Fabric: Lay your fabric on a flat surface. Cut two pieces that are large enough to wrap around the foam like a cozy, fluffy burrito. Make sure to add a couple of inches on each side for sewing.
- Pin it Down: If you’re feeling fancy (or want to avoid a fabric runaway), use fabric pins to secure your fabric pieces together, right sides facing each other.
- Sew It Up: With your sewing machine (or sewing needle, if you prefer the zen of hand stitching), start sewing the pieces together, leaving one end open. Remember, no need to rush! Take it step by step—think of it as a relaxing evening date with your sewing machine.
- Turn it Inside Out: Once you’ve sewn all sides, turn the fabric inside out so the pretty side is facing out. It’s always a fun surprise revealing your work, kind of like opening a birthday gift!
- Insert the Foam: Finally, tuck that foam cushion into its stylish fabric cover. If you left a gap, you can hand stitch or machine sew it closed. Voilà! Your pup is about to enjoy the comfiest nap in town.
Optional Add-ons/Variations:
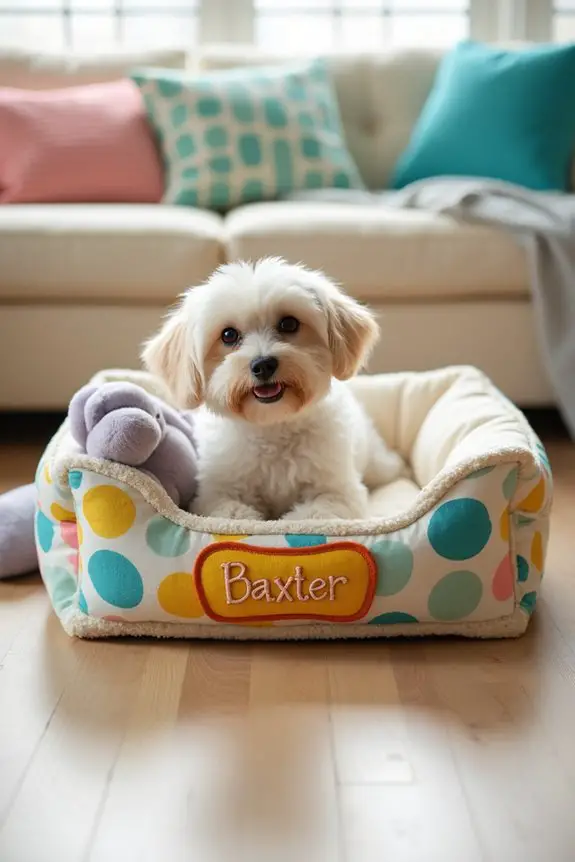
Want to jazz it up? Try using different colors or patterns, like polka dots, stripes, or even a fun animal print that reflects your dog’s personality.
You could also add a personalized patch or embroidery with your dog’s name on it, so everyone knows who the true king or queen of the house is.
Pro Tip:
Always pre-wash your fabric before sewing. It helps prevent any weird surprises later, like shrinking or bad dye jobs.
Plus, it’s one less thing you need to worry about when it comes to washing the bed. After all, it’s understood dogs can be little mess-makers, right?
3. Water-Resistant Fabrics for Durability
Creating a cozy dog bed for your small pup isn’t just a fun DIY project, but it’s a great way to save money and guarantee your furry family member is comfortable, too.
Plus, nothing beats the satisfaction of knowing you made something special just for them. Let’s get crafty!
Materials Needed:
- Soft foam pad (memory foam recommended for extra comfort)
- Water-resistant fabric (perfect for those little accidents)
- Sewing machine or needle and thread
- Scissors
- Measuring tape
- Fabric pins (optional)
- Fabric markers (for personalization)
Step-by-Step Instructions:
1. Measure Your Pup: Time to whip out the measuring tape. Measure from the tip of their nose to the base of their tail and get the width of your pup in a curled-up position. This will help you get the perfect dimensions for their new bed.
2. Cut Your Foam: Carefully cut the foam pad to match your measurements. Remember, foam can be tricky, so take your time—don’t be a foam-cutting ninja unless you want to risk stabbing yourself.
3. Prepare Your Fabric: Lay your water-resistant fabric on a flat surface and cut two pieces, each large enough to encompass the foam. Add a couple of inches on each side for seam allowances—you don’t want a tight fit here.
4. Pin it Down: If you’ve got fabric pins, use them to keep your fabric pieces together, with the right sides facing one another. This step helps avoid any fabric slipping when you start sewing.
5. Sew It Up: Using your sewing machine or needle and thread, stitch around the sides of the fabric pieces, leaving one end open for the foam.
No stress here; take it slow, and enjoy the process. It’s like crafting with a purpose.
6. Turn it Inside Out: Now for the fun part! Flip your fabric inside out so the pretty design is showing. It’s like your dog’s new bed is playing dress-up.
7. Insert the Foam: Slide the foam pad into the cover you just made and sew or hand-stitch the open end closed. Your pup’s snuggly new bed is all set up for some luxurious napping.
Optional Add-ons/Variations:
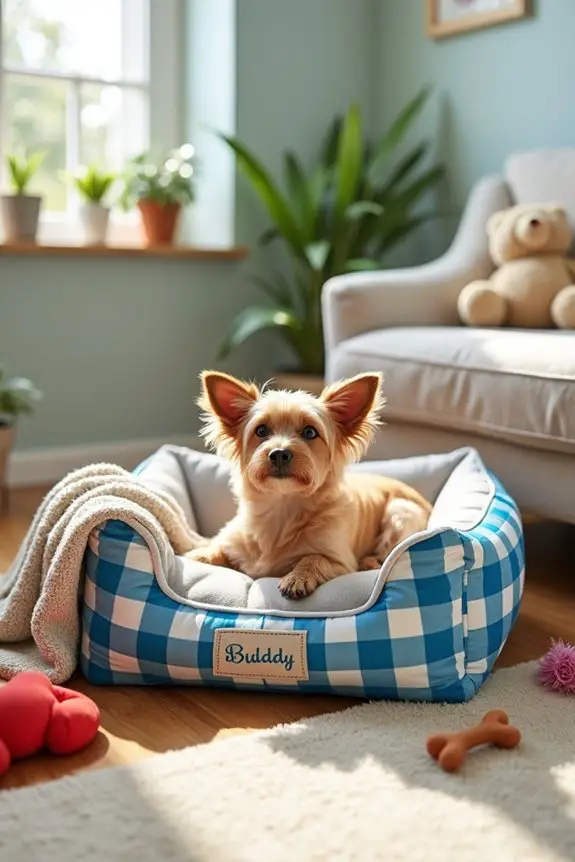
Want to add a little pizzazz? Use different patterns of water-resistant fabric, like a chic checkered pattern or even something with dog bones if you’re feeling silly.
You can even personalize the bed with your dog’s name using fabric markers or by sewing on a cute patch.
Pro Tip:
If you really want to extend the life of the bed, consider adding a waterproof liner inside before placing the foam. That way, you’ll protect your foam from unexpected accidents.
Trust me, it’s much easier to wash a liner than to scrub foam.
4. Breathable Mesh for Ventilation
Making a comfortable dog bed for your tiny teacup or furball isn’t only a rewarding project but also a great way to keep your best buddy comfy without breaking the bank. Plus, you’ll have the joy of crafting something special and personalized just for them. Let’s dig in, shall we?
Materials Needed:
- Soft foam pad (memory foam is ideal for ultimate coziness)
- Water-resistant fabric (to handle those little accidents)
- Sewing machine or needle and thread
- Scissors
- Measuring tape
- Fabric pins (optional, but helpful)
- Fabric markers (to add a personal touch)
Step-by-Step Instructions:
- Measure Your Pup: Grab that measuring tape and measure your dog from the tip of their adorable nose to the base of their tail, as well as the width when they’re all curled up. This will help guarantee their bed is perfectly snug.
- Cut Your Foam: Position your foam pad on a stable surface and use scissors to carefully cut it to the measurements you just took. Take your time—this isn’t a race. Trust me, no one wants foam chunks flying everywhere.
- Prepare Your Fabric: Spread out your water-resistant fabric on a flat surface. Cut two pieces of fabric, each larger than the foam pad by a couple of inches on all sides (these are your seam allowances). Remember, we want a comfy, fluffy bed, not a sausage casing.
- Pin it Down: If you’re using fabric pins, place them to hold the two fabric pieces together (right sides together, of course). This will save you from the fabric sliding all over the place when you start sewing.
- Sew It Up: With your sewing machine (or good old-fashioned needle and thread), stitch around the edges of the fabric pieces, leaving one side open to allow the foam to slip in. Relax and enjoy this creative process; think of it like creating a cozy hug for your pup.
- Turn it Inside Out: Once you’re done stitching, it’s time for a little flip. Turn the fabric inside out, so the stylish part is on the outside. Your dog’s bed is now ready for its photo op—well, at least after you fill it with foam.
- Insert the Foam: Slide that comfy foam pad into the bed cover you made. Finally, sew or hand-stitch the open end closed. Voilà! Your pup’s new cozy spot is ready for some serious napping.
Optional Add-ons/Variations:
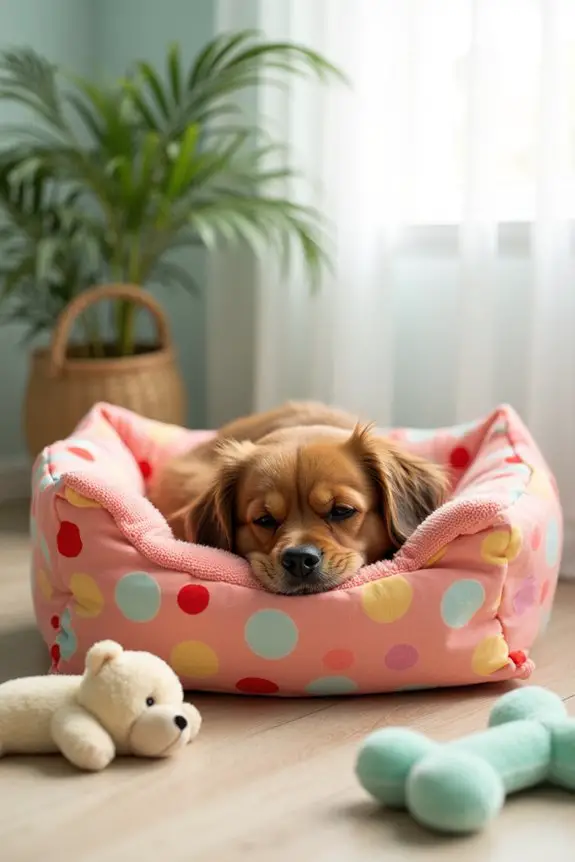
Feeling crafty? Mix and match different patterns of water-resistant fabric. Picture your canine friend lounging on a bold polka dot bed or something with cute little bones—it’s all about what reflects your dog’s unique personality.
You can even grab those fabric markers and add your dog’s name right on the bed for that extra touch.
Pro Tip:
To guarantee that the bed stays fresh and lasts longer, throw a removable cover over your bed design. You can make this cover using the same easy steps mentioned and just add a zipper or some Velcro for easy washing.
Trust me, nothing says “fresh” like a clean dog bed.
Now bump those crafting vibes up a notch, and create a snuggly nook for your precious pooch!
5. Heated Options for Winter Warmth

As the chilly winter months roll in, keeping your tiny furball warm and comfy becomes a top priority. Why not create a cozy heated dog bed that will wrap your small dog in warmth and comfort? Not only will it save you money compared to store-bought options, but it also allows you to create a personalized haven just for your pup. Let’s get started on this delightful winter DIY project that will keep snuggles at an all-time high.
Materials Needed:
- Soft foam pad (memory foam works wonders)
- Water-resistant fabric (for those little accidents)
- Heating pad (choose a low-wattage, pet-safe version)
- Sewing machine or needle and thread
- Scissors
- Measuring tape
- Fabric pins (optional but super handy)
- Fabric markers (for that personal touch)
- Safety scissors (for kids or pets – better safe than sorry)
Step-by-Step Instructions:
- Measure Your Pup: Grab that trusty measuring tape and measure your dog from the tip of the nose to the base of the tail, plus the width while curled up. This isn’t just a craft project; it’s about stair-stepping towards your dog’s ultimate comfort.
- Cut Your Foam: Grab your foam pad and lay it flat on a stable surface. Carefully cut it to the size you just measured. Take your time—no one wants foam scraps raining down like snowflakes in a blizzard.
- Prepare Your Fabric: Lay out your water-resistant fabric and cut two pieces that are larger than your foam pad by about two inches all around. Remember, we’re crafting a bed, not a foam sandwich with no wiggle room.
- Locate the Heating Pad: Before sewing everything together, place the heating pad on one of the fabric pieces, ensuring it fits within the fabric borders, and double-check that the electric cord hangs out toward the open end. Safety first, after all.
- Pin it Down: With the heating pad in place, pin the two fabric pieces together with the right sides facing each other (yes, the prettiest sides should be facing in). This will help keep everything snug and secure while you sew.
- Sew it Up: Stitch around the edges of your fabric, leaving one side open for the foam pad to slide in. Make sure to go slow and steady, as this is akin to crafting a little warm cocoon for your pup.
- Turn it Inside Out & Insert the Foam: Flip the fabric inside out so that the right side is on the outside, showcasing that fabulous design. Then, push the foam pad into your cozy cover, tucking it in neatly, like tucking your pup into bed.
- Close it Up: Hand-stitch or sew the opening closed, ensuring the heating pad’s cord can still hang out comfortably. You wouldn’t want that cord getting tangled now, would you?
Optional Add-ons/Variations:
Feeling extra crafty? Try using different patterns and colors of water-resistant fabric or add a layer of soft fleece on top for additional coziness. Imagine your furbaby lounging in style, snuggled in patterned joy.
Pro Tip:
Always make sure to periodically check the heating pad for wear and tear—after all, safety is paramount. If your dog seems to favor one spot more than another, consider adding a little extra padding in that area for a super comfy warm zone.
And just like that, you’ve created a paw-sitively perfect heated bed for your pooch, ready for winter hibernation. Happy crafting!
6. Non-Slip Bottom for Stability

If you’re tired of watching your little pooch slide around the floor in their bed like they’re on a puppy amusement park ride, it’s time to make a non-slip bottom for their dog bed. Not only will this add a touch of safety, preventing those unexpected tumbles, but it also boosts your dog’s comfort and makes your home look a bit more put-together.
Plus, it’s a super simple DIY project that won’t break the bank. Let’s get crafting!
Materials Needed:
- Fabric of your choice (cotton or fleece works great!)
- Non-slip fabric (like silicone-backed material or rubber)
- Sewing machine or needle and thread
- Scissors
- Measuring tape
- Fabric pins
- Marker or chalk (to mark cutting lines)
Step-by-Step Instructions:
- Measure Your Dog Bed: First things first, get that tape measure out and measure the bottom of the dog bed. Write down the length and width so you know how much fabric you’ll need. This isn’t a race; take your time to get it right.
- Cut Your Pieces: Using your measurements, cut out two pieces: one from your chosen fabric and one from the non-slip material. Make sure they match in size—this will be the bottom of your dog bed, and we want everything to fit snugly.
- Lay It Out: Place the non-slip fabric piece down on a flat surface, with the silicone side facing up. Then, lay the fabric piece on top of it, with the right side (the prettiest side) facing down toward the non-slip material. Kind of like making a bed sandwich—who knew DIY could involve tasty metaphors?
- Pin It Together: Use fabric pins to secure the two pieces together. This step guarantees that they don’t shift around while you’re sewing. Channel your inner chef; no one wants a salad with ingredients flung everywhere.
- Sew It Up: Carefully sew around the edges, leaving a small gap open. Go slow and steady, just like your pup does when they’re getting ready for their afternoon snooze. Don’t forget to backstitch at the beginning and end to keep it all secure.
- Turn It Inside Out: Once you’ve sewn around the edge, turn it inside out through that tiny opening you left. Give it a gentle shake and pat down the corners to make sure it looks just like it should.
- Stuff the Non-Slip Bottom: Finally, tuck the non-slip fabric into the bottom of the dog bed, making sure it covers the entire area. Sew the opening shut, and voilà! You now have a stylish, secure dog bed that stays in place, no more slip ‘n slide for your furry friend.
Optional Add-ons/Variations:
- Fabric Fun: Consider using different fabric patterns, like paw prints or bright colors, to add a fun touch to your dog’s personality.
- Incorporate Padding: You can always add a thin layer of foam or batting between the layers for extra comfort if your pup is really into the cushy life.
Pro Tip:
Make sure to wash both fabric and non-slip materials regularly to keep your pup’s sleeping space fresh and clean.
And remember, the tighter and more secure your seams, the longer your DIY project will last—and who doesn’t want a bed that can hold up to all those cozy naps?
Creating a non-slip bottom for your dog’s bed not only enhances their comfort but also shows how much you care about their well-being.
7. Eco-Friendly Materials for Sustainability
Are you looking for a way to give your furry friend a cozy place to rest while caring for our planet? This DIY eco-friendly dog bed is perfect for you. Using sustainable materials not only makes your pup’s crate look adorable but also reduces your carbon pawprint. Plus, you’ll save money and create a comfortable space that your dog will love. Let’s get started, shall we?
Materials Needed:
- Old blankets, towels, or fabric remnants (the softer, the better)
- Stuffing or batting (you can also use recycled fabric scraps for filling)
- A sewing machine or needle and thread
- Scissors
- Measuring tape
- Fabric pins
- Marker or chalk
Step-by-Step Instructions:
- Measure Your Pooch’s Favorite Spot: Grab your tape measure and find out how big you want the bed to be. Measure the length and width of your dog’s favorite sleeping position. Jot these numbers down. Remember, comfort is key.
- Cut the Fabric Pieces: Choose a couple of old blankets or fabrics that match each other in size for the outer and inner layers. Cut two matching pieces following your measurements—these will be the top and bottom of your dog bed.
- Prepare the Stuffing: If you’re using old fabric or towels for stuffing, cut those into smaller pieces so they can be evenly spread. You want to create a cloud-like layer for your pup’s comfort, not a brick.
- Pin It Together: Place the two fabric pieces together, right sides facing inward. Use fabric pins to hold them in place, because trust me, no one wants to wrestle with slipping fabric while sewing.
- Sew Around the Edges: Set your sewing machine to a straight stitch and sew along the edges, leaving a little gap for stuffing. If you’re sewing by hand, just take your time and go steady. Backstitch at the start and end to secure your seams. Trust me, your dog will love you for it.
- Turn It Inside Out: After you finish sewing, reach inside that gap and pull the fabric right side out. These little moments feel rewarding. Give it a pat to fluff up the corners, creating that snuggly look.
- Stuff Your Bed: Now it’s time to fill the bed! Use your stuffing or torn fabric pieces to fill the space before you sew that gap shut. Make it as fluffy as possible but also not overstuffed—just think comfy, not like a marshmallow!
- Finish It Up: Hand-stitch the opening closed or run it through the sewing machine to finish. Now, find your dog and watch them settle into their new eco-friendly retreat, tail wagging like crazy.
Optional Add-ons/Variations:
Want to make this project even more special? Consider using fabric paint to add your dog’s name or some paw prints as a fun design. You could also mix and match fabrics for a patchwork look—who doesn’t love a little flair?
Pro Tip:
Double-check those seams before you let your pup dig in. Dogs can be enthusiastic chewers, so reinforcing the seams can extend the life of your DIY bed. An extra round of sewing might be a game-changer, trust me.
Now that you’ve crafted a snug, eco-friendly haven for your furry companion, sit back, relax, and pat yourself on the back. You’re helping the planet while pampering your best friend—what could be better than that?
Extra Tips & Ideas
While finding the perfect bed for your small dog might seem like a straightforward task, it can also spark a few creative ideas that elevate your pup’s space from ordinary to extraordinary.
Why not add a cozy blanket or a fun throw pillow? Dogs love to snuggle, and giving them extra layers makes their bed feel like a warm hug.
You could even DIY a stylish bed using old furniture. Got an old suitcase lying around? That could be a trendy dog bed. Seriously, your dog will think it’s the coolest thing ever.
And don’t forget about personalization. Your pup deserves their own space, so maybe embroider their name on it. It’s a small touch that shows you care, and trust me, they’ll appreciate it.
Frequently Asked Questions
What Materials Are Best for Small Dog Beds?
For small dog beds, look for materials like memory foam for comfort, breathable cotton for softness, and waterproof fabrics for easy cleaning. You’ll find these options provide the best balance of support and durability your pet needs.
How Often Should I Wash My Dog’s Bed?
You’d best wash your dog’s bed every couple of weeks, or more often if it’s particularly dirty. Keeping it fresh helps maintain hygiene, prevents odors, and guarantees your pup’s comfort. Clean, cozy, happy dog!
Can Small Dogs Use Orthopedic Beds?
Yes, small dogs can definitely use orthopedic beds. They offer excellent support for their joints and promote overall comfort, helping to prevent issues like arthritis, especially as they age. It’s a smart choice for your pup!
What Size Dog Bed Is Ideal for My Small Dog?
Your small dog deserves a cozy, warm nest—a bed that’s around 24 to 30 inches. It’ll cradle them perfectly, promoting restful sleep and a sense of security as they dream of playful adventures.
How to Prevent My Dog From Chewing the Bed?
To prevent your dog from chewing the bed, use deterrent sprays, provide chew toys, and guarantee it’s getting enough exercise. Positive reinforcement for good behavior also helps and keeps your pup entertained.
Conclusion
When picking the perfect bed for your little pup, think about their needs and quirks. Maybe your tiny diva loves snuggling in a luxe, patterned cushion, or perhaps a cozy, heated bed is what warms their heart in winter. Picture your Chihuahua, Bella, drifting off in a plush, orthopedic bed—her little paws tucked in, dreaming of chasing squirrels. Whatever you choose, remember, it’s about making your fur baby feel comfy and loved in their little corner of the world.

Amr Mohsen is a software engineer who traded his keyboard for a leash — at least on weekends. His love for dogs inspired him to share what he learns as a dog owner and enthusiast, bringing a detail-oriented, research-driven perspective to every article he writes. If it’s about dogs, he’s probably already looked it up twice.

