
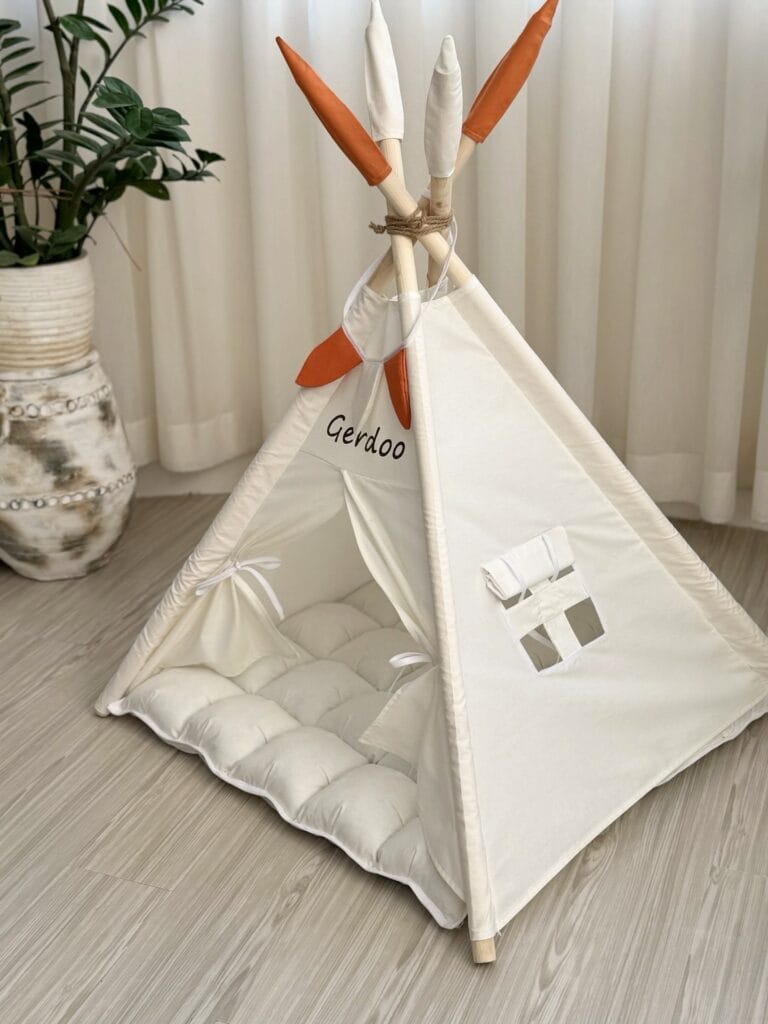
When you have a beautiful dog like a golden retriever, he deserves so much better than a sad plastic crate sitting in the corner of your living room.
I’m talking about the one that he drags his blanket out of every single morning. The one that clashes with your aesthetic and makes you a little crazy every time you walk past it.
I’ve been there, Girl. My dog Remy lived in this old, beat-up kennel for two years. It looked like a crime scene. Mud tracked in from outside, along with fur. It just sat there destroying my vibe.
You don’t have to spend a lot of money to have something built. It can be easy too.
The best part of these 7 dog house DIY plans is that they’re doable and they look good. That’s hard to find because so many plans look good but not functional. And that’s the last thing you want to do for your pup.
#1: DIY Modern Furniture-Style Dog Crate (The One That Actually Looks Good in Your Living Room)
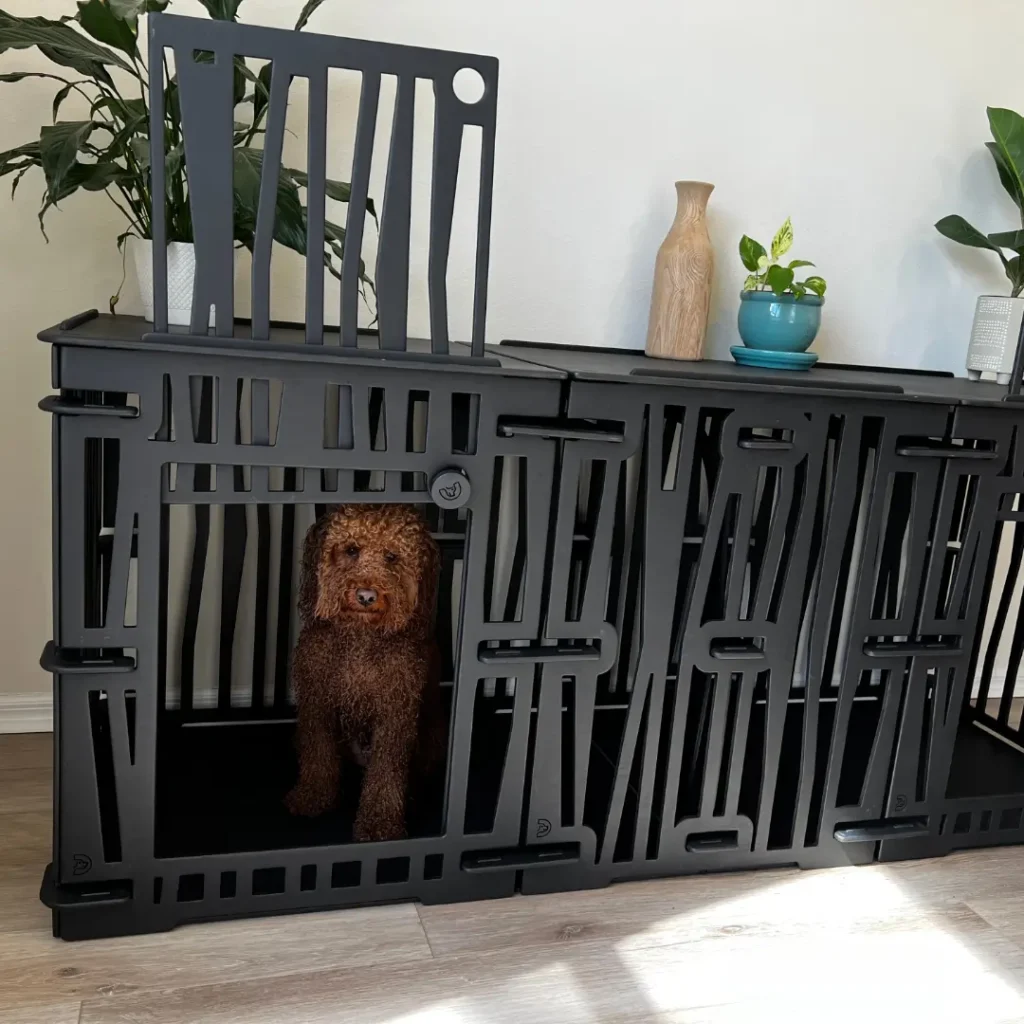
You know that moment when your golden retriever gives you one of those sad looks from his sad wire crate and you cringe because it does not match your interior decor?
Yeah. Same.
Materials & Tools:
– Matte black powder-coated steel panels
– Laser-cut decorative side panels
– Steel corner brackets + bolt hardware
– Drill, wrench set, level
– 48″ x 24″ flat-top surface panel (doubles as a console)
Instructions
Begin by laying your base frame flat on the floor and attaching the four corner posts to the frame using bracket hardware. Finger tighten these first, then level and lock in place. Slide the laser-cut side panels into the groove channels of each post. These lock without welding and can be swapped later.
Attach the front door panel with the included hinges. The latch will click into place to the center-left. Attach the flat console top last. It can hold plants, vases, etc.
That flat top is great for storing decor, so you can have a polished living room and a cozy dog den, without sacrificing either.
Leave your crate near the light; your dog will sleep better, and you’ll have a better picture for the feed.
Prep Time: 20 min | Active Project Time: 1.5 hrs | Difficulty Level: Beginner-Intermediate
📸 Photo credit: Instagram @dogplayfurniture
#2: Build a Double Dog House With a Built-In Feeding Station (Side-by-Side Design)
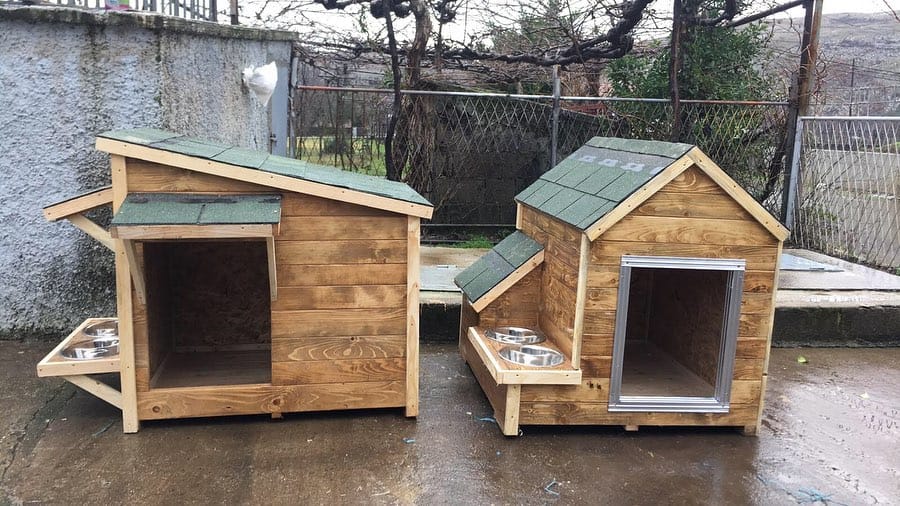
This happened today. As you can tell my dog’s food bowl slid across the wet patio again and she’s just giving me a look of “SERIOUSLY?”.
Yeah. This setup fixes that.
Prep Time: 2 hours | Active Project Time: 2 days | Difficulty Level: Intermediate
Materials & Tools: Pressure-treated pine planks, 1×6 and 2×4 Green asphalt shingles Stainless steel feeding bowls, 2 per house Wood stain, warm cedar Aluminum door frame trim Circular saw, drill, wood screws, measuring tape
Instructions
Cut your 2x4s into an A-frame skeleton. Build two separate frames side by side and leave 24 inches of clearance between entrances. Attach your pine planks horizontally across each frame. Layering the planks horizontally along the length of the frame makes your dog warmer in winter.
build a small shelf in front of each house – i put in my stainless bowls and they just drop in the cut out to the shelf so no falling over again! no more chasing kibble to the other side of the yard!
Finish the top with green asphalt shingles that overlap from the bottom up. For a clean edge, add aluminum trim around the entrances, which will also protect against chewing.
Seal everything with two coats of cedar-tone stain.
Overlap the two rooflines slightly to shed rain between the houses without warping either structure.
📸 Photo credit: Instagram @alu_bravarija_sv
#3: Pallet Wood Dog House with a Covered Porch (The One Your Golden Will Actually Use)
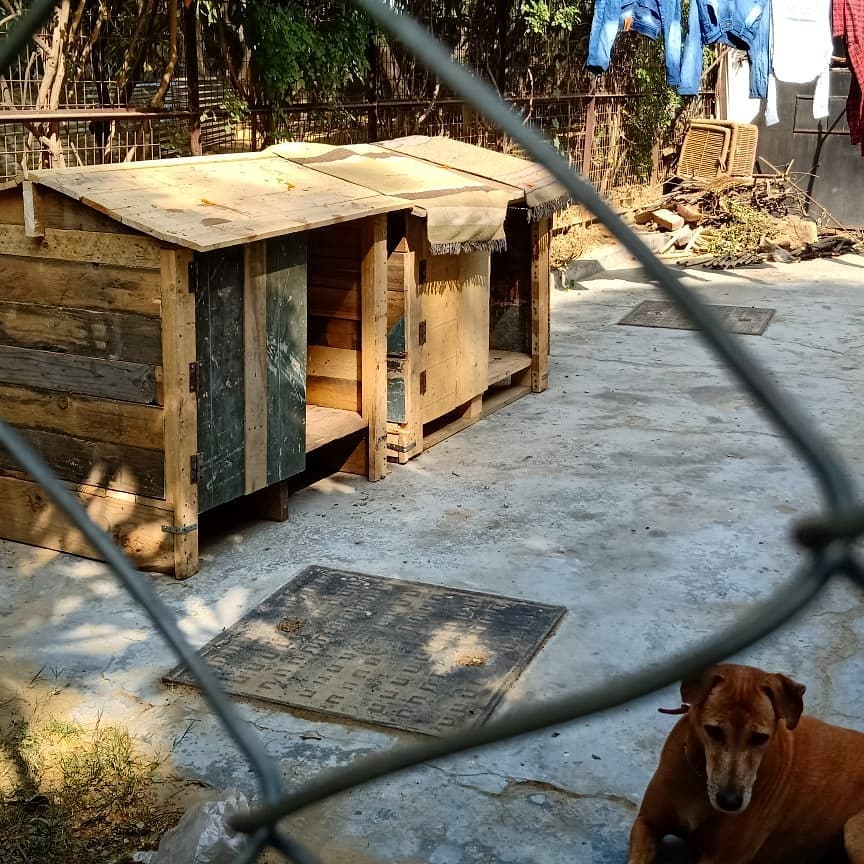
Every time it rains my dog runs and parks herself right by the back door. No shelter and just those sad puppy eyes looking at me through the glass.
Nice pallet wood build. I needed it to fix this picture.
Prep Time: 2 hours | Active Project Time: 6–8 hours | Difficulty Level: Intermediate
Materials and Tools: ? 4–6 reclaimed wood pallets ? ½-inch plywood sheets (for roof panels) ? 2×4 lumber (for frame posts) ? Old blanket or canvas drop cloth (for door curtain) ? Wood screws, drill, circular saw, sandpaper
### Instructions
Break apart the pallets and sort them out by size. Build a rectangular base frame with your 2x4s. Next, lay the pallet boards out horizontally across all four walls. You could leave some of them the same color as the old pallets. The boards in the image above were all green-painted, so there is no harm in mixing old and new wood.
Attach the open-front porch section separately to the main sleeping section so it sits flush to the main part of the tent. It’s a two-section tent allowing your dog to have a shade section as well as a shelter section. She will choose where she will lay depending on the weather.
Lean two plywood panels at opposing angles to form the pitched roof. This will allow for fast shedding of rain to keep the inside dry without waterproofing.
Hang a canvas curtain at the entrance. It will keep out the wind, but she can easily push through it.
Sand every edge before putting together. I used a rough pallet to put together the bed, and it splintered the edges of the wood. Not good for the cats paws to be walking on.
Check out this and 12 more Genius DIY Dog Stuff Every Pet Parent Needs to Try Today!
📸 Photo credit: Instagram @makersasylum
#4: Built-In Dog Kennel Nook With Shiplap Panels and Baby Gate Doors
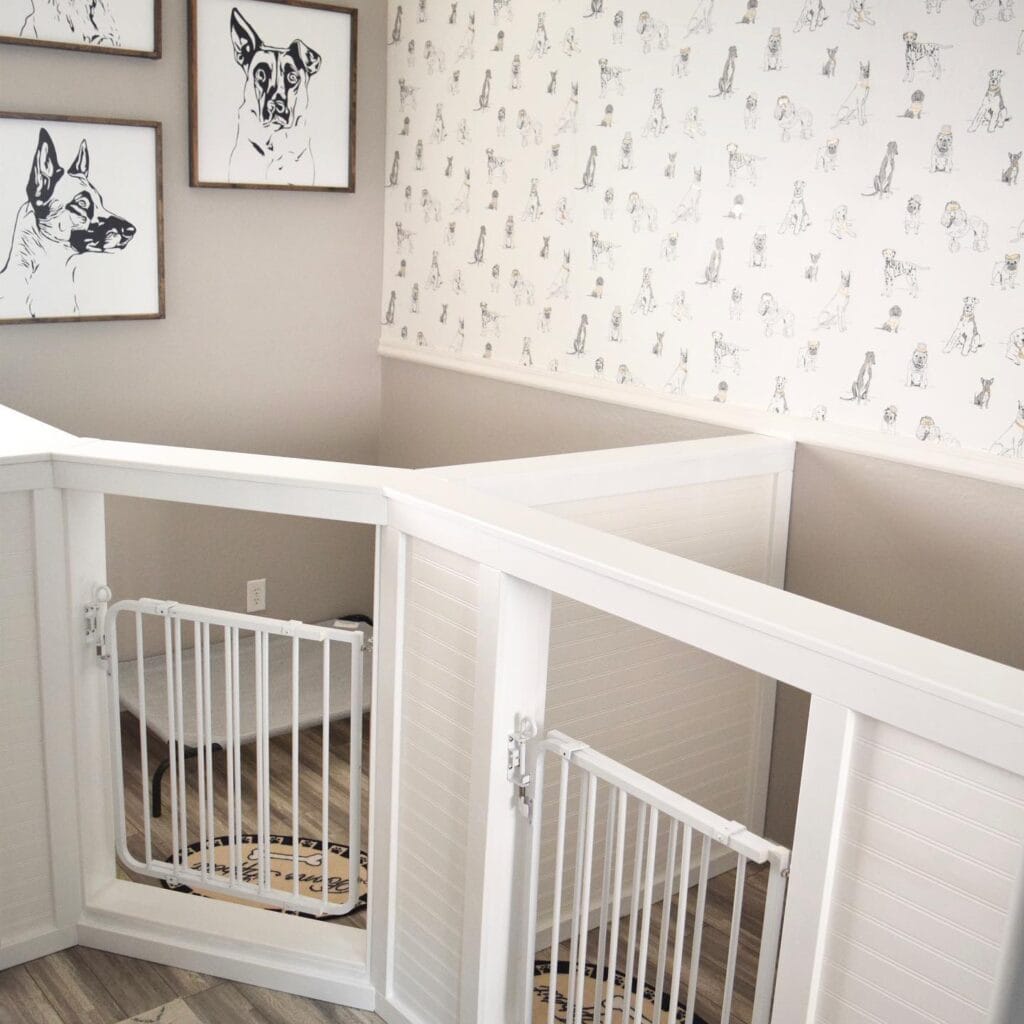
Your dog does that one thing again – she sprawls out across the hallway, blocking everyone from getting by, and shedding all over the floor that you just mopped. While you love her, she really needs her own space.
Prep Time: 1 hour | Active Project Time: 6–8 hours | Difficulty Level: Intermediate
– 3/4″ MDF or pine boards (white-painted) – Beadboard/shiplap panels (side walls) – White metal baby gate with latch (x2) – Piano hinge or gate hinges – Circular saw, drill, nail gun – White semi-gloss paint + primer – Dog-print wallpaper (upper wall accent) – Rounded dog bed or mat.
Instructions
I made two separate bays out of twox4’s for my dog that is a large breed. Attached shiplap panels to the inside of the kennel walls for some texture. Then I mounted a white-framed top rail across the top of both bays at 48 inches high.
For one, the swing-latch baby gates give you easy access without having to unscrew them every day. The latches keep my golden in and away from the outside world and a dinner party with no accidents.
Paint everything in bright white semi-gloss for easy wipe-downs. Add some DIY dog accessories to your bays for a personal touch.
Line floors with washable mats. Do what you need to do to reclaim your hallway.
📸 Photo credit: Instagram @qbhome
#5: Pressure-Treated Lumber Framed Dog House with Platform Base
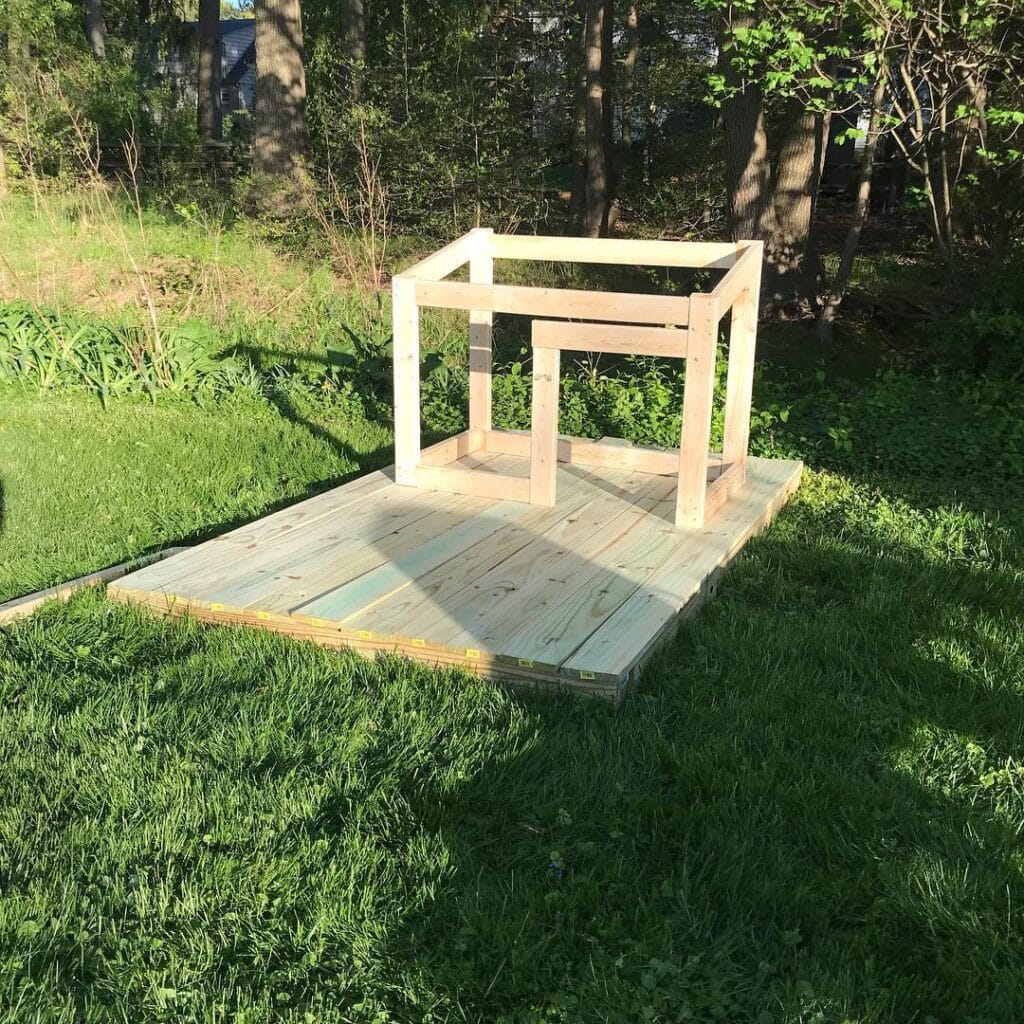
Prep Time: 30 min | Active Project Time: 6–8 hours | Difficulty Level: Intermediate
Your golden retriever deserves more than a flimsy plastic kennel baking in the sun.
We began with a pressure-treated pine platform about 8ft x 6ft, and laid it flat on the grass as a base. The frame is made of 4×4 lumber posts at each corner, and 2×4 horizontal rails connecting them.
Materials & Tools: Pressure-treated 2×6 boards (floor decking) 4×4 pine posts (x4 corner uprights) 2×4 lumber (horizontal frame rails) Galvanized screws, drill, circular saw, level
Instructions
Cut your 2×6 boards to the same length and screw them together to make a solid floor. Then screw your four 4×4 corner posts directly to the corners of the platform. Then connect the top posts of the corners with 2×4 rails on all three sides. The open side will be your door.
keep a level handy, one wunky post and the whole roof goes off.
sand every single edge that your dog might brush up against. Splinters on a golden retriever’s coat are miserable.
If you love this project, you’ll also like these 14 Stylish DIY Dog Crate Furniture Ideas You’ll Love.
📸 Photo credit: Instagram @artsymom100
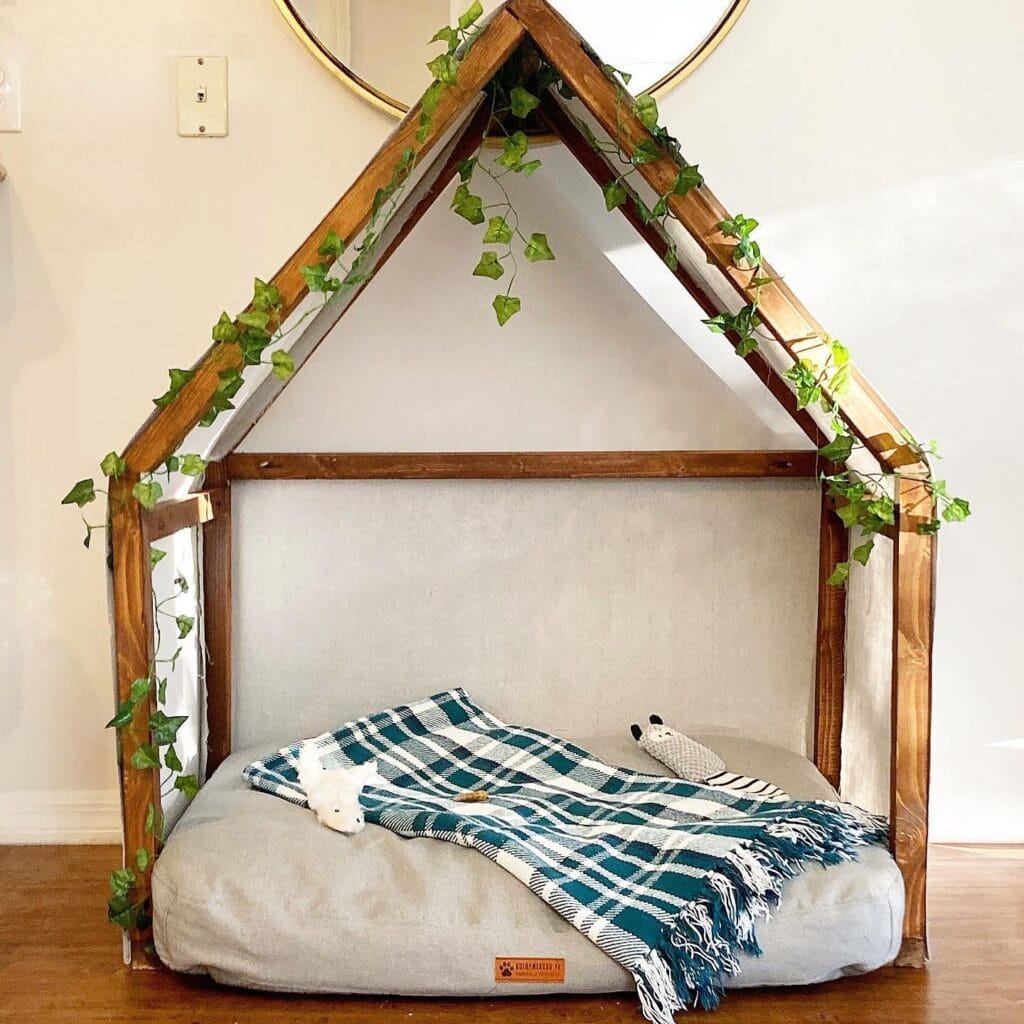
#6: House-Frame Dog Bed With Ivy and Plaid Blanket
Your golden flops onto the couch, again. Blanket is half-dragged out and toy is somewhere in the couch cushions. Girl, I’ve been there.
This open wood-frame pet house bed is the Pinterest moment your living room needs. And your dog will actually use it.
– 2×4 lumber (stained dark walnut) – Large gray canvas dog cushion that fits up to 40″x30″ – Faux ivy garland (6 feet) – Plaid throw blanket (teal/white) – Wood screws, drill, sandpaper
Instructions
Cut the 2×4’s into side panels and two angled pieces at the top that meet in the middle and form the peak of the roof. Sand every edge. Your dog will be brushing past these every day. Drill the frame together at the base corners and then attach the A-frame roof. Stain everything a dark walnut and let it cure well before bringing it inside. Wrap the faux ivy around the roof pieces and tuck the ends behind the roof joints. Lay the cushion in and add the plaid throw, and a couple of stuffed toys.
It’s an open front design which means that your dog can sprawl and not feel trapped. This means more restful sleep for both you and your dog.
Tuck this beauty in loosely so you can easily take it out on wash days.
Prep Time: 30 min | Active Project Time: 3–4 hours | Difficulty Level: Intermediate
📸 Photo credit: Instagram @thewildprince
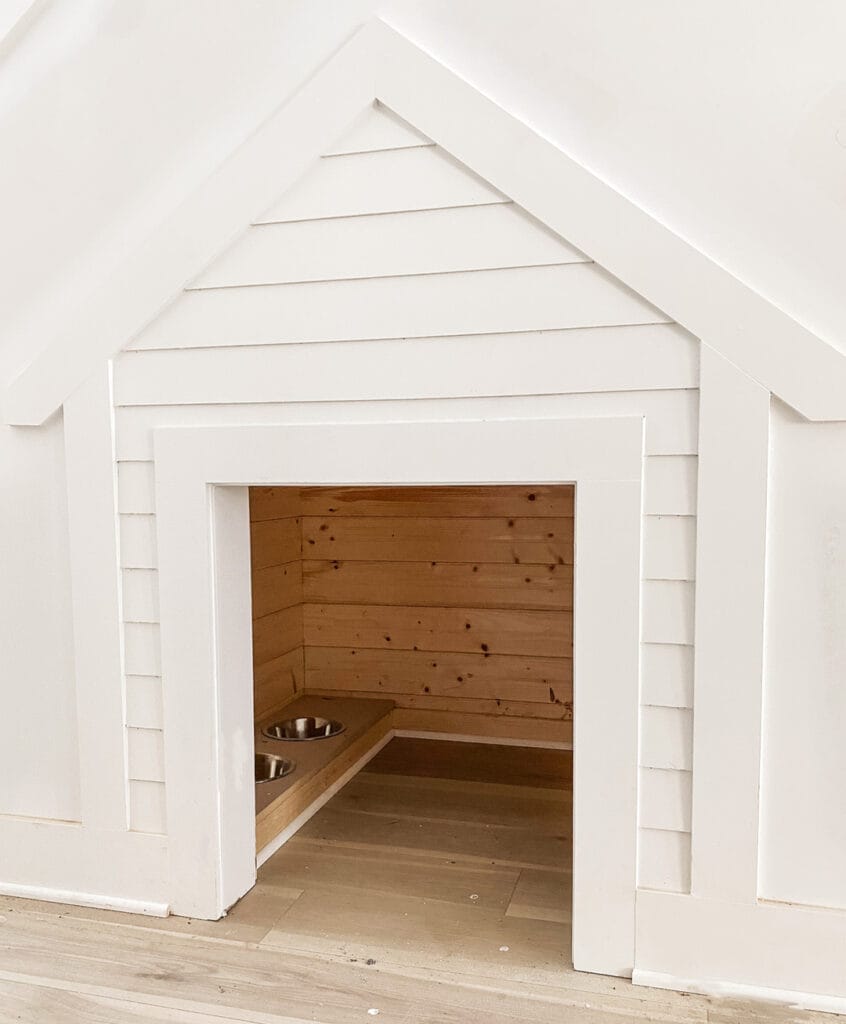
#7: Built-In Dog House Nook With Cedar Interior and Feeding Station
Your dog’s golden girl nudges past you each morning looking for her spot – and right now, that spot is your couch.
Another feature of this built-in dog house nook is that the dog house nook is framed into the wall. White-painted shiplap siding covers the exterior and natural cedar tongue-and-groove planks line the interior, lending the dog house nook a warm, wood smell. A built-in cedar ledge holds two stainless steel bowls to keep food dishes off of hardwood floors.
MATERIALS & TOOLS: • White-painted pine shiplap (exterior) • Cedar tongue-and-groove boards (interior walls + floor ledge) • Stainless steel dog bowls (x2) • Miter saw, nail gun, wood glue, sandpaper, white exterior paint
Instructions
Make a 36″ wide by 30″ tall opening into a wall stud bay and nail shiplap horizontally across the outside face. Cut the peaked roof line trim from ¾” pine boards. Line the interior walls with cedar planks that run horizontally (cedar is naturally resistant to moisture and odor). Create a small stepped ledge on the left corner with ½” plywood then set your bowls into the ledges.
Sand everything smooth before your golden moves in.
Prep Time: 1 hour | Active Project Time: 6–8 hours | Difficulty Level: Advanced
I sealed the inside of the cedar with a food safe matte sealant so it is wipeable. I wanted to be able to see the pretty grain.
📸 Photo credit: Instagram @jtaylordesigns
The One Measurement Mistake That Ruins Most DIY Dog Houses
Most people measure their dog while standing. This is incorrect! Your dog should be measured laying down with room to turn around inside the house without bumping into walls.
If she is curled up sleeping, measure from the tip of her nose to the end of her tail. Add 6 inches to that circle. This is the interior floor space of the house.
I learned that the hard way when I built my first dog house several years ago. I spent a whole weekend on it, and my sister’s lab refused to go inside. She couldn’t spin around in it to get comfortable, so she basically built her a pretty coffin. Not again.
In the morning it should be possible to raise the floor a few inches off the ground (using small platform legs) so that the body heat from the central floor does not make the floor too cold during the night (this is especially important during the winter nights).
Why this works: So that air gap underneath acts like insulation and stops the moisture from rotting your base boards in one season.
But here’s the thing, once your girl has her little outdoor space dialed in, she is one happy dog. Now add something like this DIY dog agility course and you’ve made your backyard her little kingdom.
Your Golden Deserves a Clean Home Too
I am in no way saying you need to choose between loving your dog and loving your space, however, I do suggest that you pick one product from the list below and try it.
I started with the couch cover and the rest is history. Now my living room actually looks like my Pinterest board instead of like a dog shelter. Big difference.
The best part: Once you set up these things the mud and the drool stop running your life. Your home feels like home again, and so does your car. You and your golden retriever both.
Which one of these are you picking up first?

Amr Mohsen is a software engineer who traded his keyboard for a leash — at least on weekends. His love for dogs inspired him to share what he learns as a dog owner and enthusiast, bringing a detail-oriented, research-driven perspective to every article he writes. If it’s about dogs, he’s probably already looked it up twice.



