A store-bought cake may look fancy, but nothing beats a homemade treat that’s crafted just for your pup. Imagine their wagging tail as you serve them a slice packed with their favorite flavors. From peanut butter to sweet potato, I promise your furry friend’s taste buds will dance. Curious what creative designs will make their special day unforgettable? Let’s explore some mouthwatering ideas that are bound to get pups drooling and tails wagging.
Dog-Friendly Birthday Cake Ideas
When it comes to celebrating your pup’s big day, why not whip up a dog-friendly birthday cake that’ll make their tail wag uncontrollably?
Think about it—a DIY dog cake tailored just for them. You could use mashed bananas, peanut butter, and whole wheat flour for the base.
Mix it all, pour it into a cake pan, and bake for about 30 minutes. Easy, right?
Once it’s cooled, how about a yogurt frosting? Simply mix plain Greek yogurt with a hint of honey. Just don’t tell them it’s healthier than the store-bought stuff.
Top it off with dog-friendly treats like small biscuits. Trust me, your pup won’t know what hit them, and you’ll win the title of Best Dog Parent—at least for the day.
Our Collection
When it comes to dog cakes, you’re in for a treat with our collection.
Picture your pup munching on a Peanut Butter Delight Cake or getting all excited about a Carrot Apple Celebration Cake—can you imagine those happy tail wags?
Each cake, from the Banana Blueberry Paw Cake to the Pumpkin Spice Pup Cake, is crafted just for your furry friend, because let’s be real, they deserve the best.
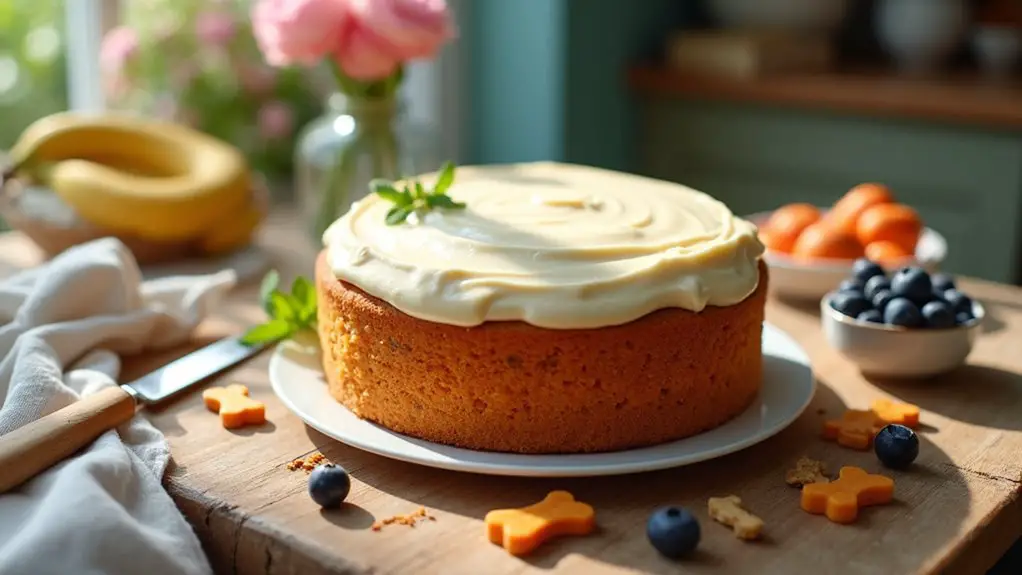
1. Peanut Butter Delight Cake
Dog lovers, you know the struggle—every time a birthday rolls around, you want to celebrate your furry friend the way they deserve. A Peanut Butter Delight Cake isn’t just a scrumptious treat; it’s a way to shower your pup with love while saving money and making their special day even more memorable. Plus, incorporating the right premium dog food ingredients can ensure a delicious and nutritious cake for your pup! The cake will also provide added support for your dog’s joints and sleep quality, promoting luxury orthopedic beds for their ultimate comfort. Additionally, using the right dog food processor kitchen tools can make preparation a breeze.
Plus, your kitchen will smell heavenly, and let’s be honest, who wouldn’t want to whip up something so tasty? Let’s dig in and get baking!
Materials Needed:
- 1 cup whole wheat flour
- 1/2 cup rolled oats
- 1/4 cup unsweetened peanut butter (make sure it’s dog-friendly)
- 1/2 cup unsweetened applesauce
- 1/4 cup honey (optional for sweetness)
- 1/2 cup water
- 1 teaspoon baking powder
- 1 carrot, grated (optional, but adds color and nutrition)
- Dog-safe decorations (like carob chips or yogurt drops)
Step-by-Step Instructions:
1. Preheat Your Oven: First, set your oven to 350°F (175°C). The preheating step is essential, kind of like getting the party started before the guests arrive, right?
2. Mix Dry Ingredients**: In a large bowl, combine** the whole wheat flour, rolled oats, and baking powder. That’s your dry mix, bringing all the goodness together.
3. Combine Wet Ingredients: In another bowl, mix the peanut butter, applesauce, honey, and water until it’s all smooth.
Don’t worry if it looks a bit clumpy; it’s like when you try to get that perfect pancake batter—sometimes it just doesn’t want to cooperate.
4. Blend It All Together: Gradually pour the wet mix into the dry ingredients, stirring until everything is combined and looks like a thick cookie dough. If it feels too dry, splash in a little extra water—you know, keep it friendly!
5. Add the Carrot: If you’re using the grated carrot, fold it into the mixture now. This adds a fun texture and a little burst of veggie goodness.
6. Pour and Bake: Grease an 8-inch round cake pan (or any dog-friendly shape you fancy) and pour in the batter.
Bake for about 25-30 minutes or until a toothpick comes out clean. Your patience will be rewarded with the smell of pure joy wafting through your kitchen.
7. Cool and Decorate: Once it’s done baking, let it cool in the pan for 10 minutes before transferring it to a wire rack to cool completely. Once it’s cool, decorate with dog-safe toppings, making it as festive as you wish.
Optional Add-ons/Variations:
– Flavors & Shapes: Want to spice things up? Try adding mashed bananas or pumpkin to the mix.
Or, use a bone-shaped mold instead of a round cake pan for a fun twist. Dogs love a good shape as much as we do!
– Frosting Heaven: For a special touch, you can whip up a simple yogurt “frosting” with plain Greek yogurt mixed with a bit of peanut butter, perfect for spreading on top.
Pro Tip:
A quick safety note—always use unsweetened peanut butter that doesn’t contain xylitol, which is very harmful to dogs. Also, opting for premium dog food brands can provide your pup with top-notch nutrition alongside delicious homemade treats like this cake.
If you’re worried about sugar, skip the honey altogether; your pup will love it just the same. If it ends up looking a little less than perfect, don’t stress.
Remember, it’s just a cake; what really matters is the tail wagging when they get a taste of it!
Now that you’re all set, grab those ingredients and get your bake on. Celebrating our pups doesn’t have to be over-the-top, but with this Peanut Butter Delight Cake, it’ll surely be an unforgettable occasion. Happy barking!
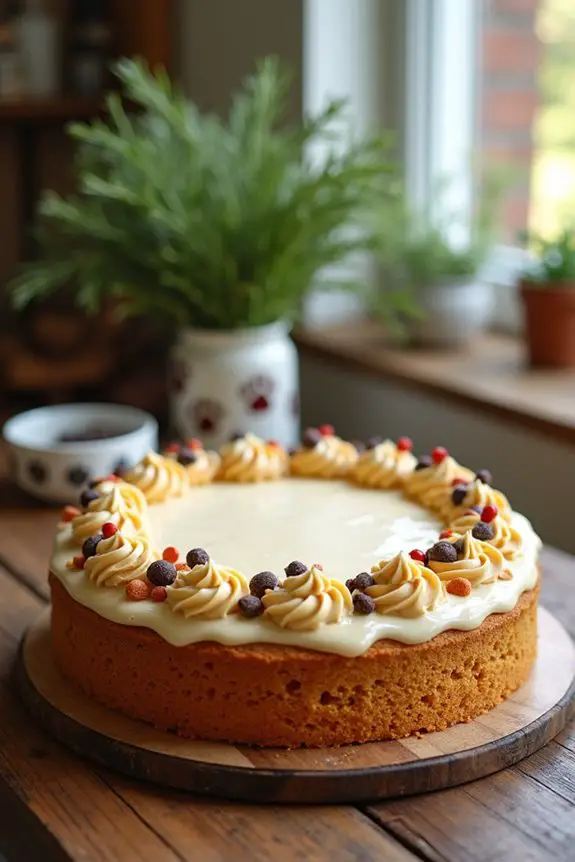
2. Carrot Apple Celebration Cake
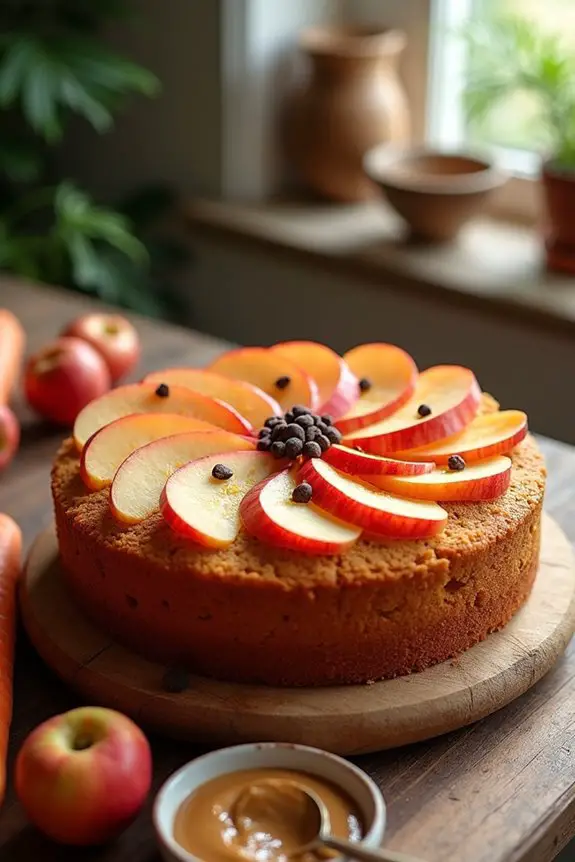
Who doesn’t love a good party? And when it’s a celebration for your furry companion, it’s even more exciting! The Carrot Apple Celebration Cake isn’t only a delightful treat for your dog but also a fantastic way to show your love while saving money. With just a few simple ingredients, you can whip up a tasty cake that will have your pup’s tail wagging with joy. Let’s get this party started.
Materials Needed:
- 1 cup whole wheat flour
- 1/2 cup grated carrots
- 1/2 cup unsweetened applesauce
- 1/4 cup unsweetened peanut butter (double-check that it’s dog-friendly)
- 1/4 cup honey (optional)
- 1/2 cup water
- 1 teaspoon baking powder
- Dog-safe decorations (like thin apple slices or carob chips)
Step-by-Step Instructions:
- Preheat the Oven: Set your oven to 350°F (175°C). Think of this as warming up for a great show. You want everything ready for the main act.
- Mix the Dry Ingredients: In a mixing bowl, combine the whole wheat flour and baking powder. This is where the magic starts to happen, so make sure they’re blended nicely together.
- Combine the Wet Ingredients: In another bowl, mix together the applesauce, peanut butter, honey, and water until smooth. If you’re wondering about measurements, grab a spatula and channel your inner chef—this is all about the love we pour into these ingredients.
- Stir it Up: Slowly pour the wet mixture into the dry ingredients. Grab a spoon and stir it all up until everything is just combined. It should look like a nice thick batter, similar to pancake mix but with an extra paw-sitive vibe.
- Fold in the Carrots: Gently fold in the grated carrots. Let’s be real, this is where the celebration vibe kicks in with a pop of color and nutrients.
- Bake the Cake: Grease an 8-inch round cake pan, pour in the batter, and pop it into the preheated oven. Bake for about 25-30 minutes, or until a toothpick comes out clean. You’ll want to keep an eye (and a nose) on it as that heavenly smell fills your kitchen.
- Cool and Decorate: Once done, cool the cake in the pan for 10 minutes before moving it to a wire rack to cool completely. Now’s the fun part—let your creativity shine with dog-safe decorations. Apple slices on top can add a festive touch, along with a sprinkle of carob chips if you’re feeling extra.
Optional Add-ons/Variations:
- Fruit Fusion: Want to personalize? Try adding mashed bananas to the batter or top it with a drizzle of dog-safe yogurt. Your pup won’t know what hit him!
- Different Shapes: Get playful with the shape of your cake—use a bone-shaped pan or even mini cupcake molds for individual servings.
Pro Tip:
Be careful with the honey—sugar isn’t always necessary for your pup. If your dog has a sweet tooth but shouldn’t go overboard, you can always skip it!
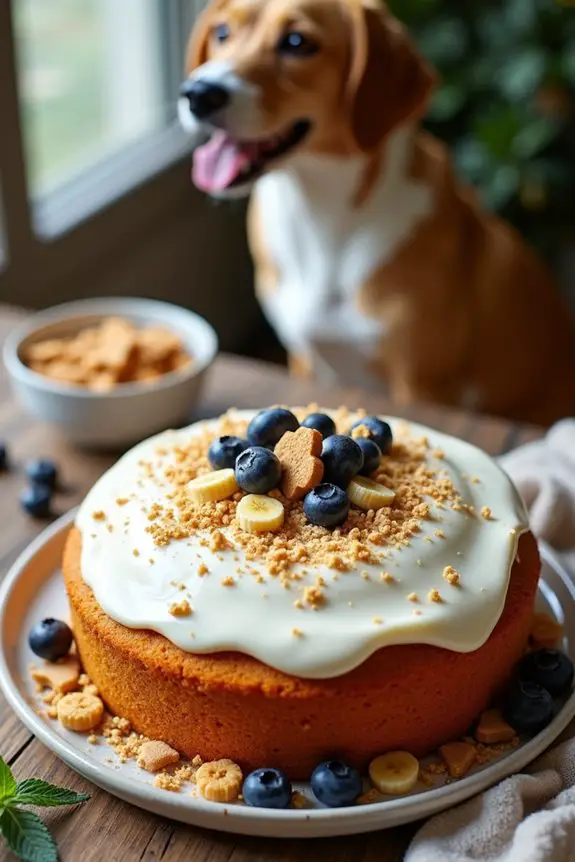
3. Banana Blueberry Paw Cake
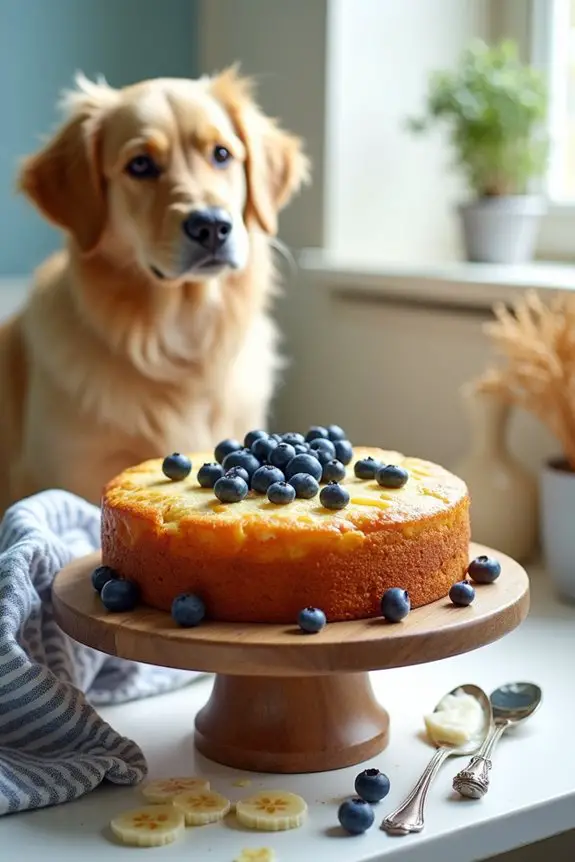
Who says dogs can’t enjoy birthday cakes that look as good as they taste? The Banana Blueberry Paw Cake isn’t only an adorable treat shaped like your pup’s favorite paw print, but it also offers a delicious way to celebrate your furry friend’s big day without breaking the bank. With just a few simple and wholesome ingredients, you can create a cake that makes your dog’s tail wag in pure joy. Plus, it’s easy to whip up and perfect for on-the-go families who want to celebrate anywhere.
Materials Needed:
- 1 cup whole wheat flour
- 1 ripe banana, mashed
- 1/2 cup fresh blueberries or blueberry puree
- 1/4 cup unsweetened peanut butter (make sure it’s xylitol-free)
- 1/4 cup unsweetened yogurt (plain, dog-safe)
- 1/2 teaspoon baking powder
- Paw-shaped silicone cake mold (or any baking dish you have on hand)
- Dog-friendly decorations for topping (like blueberries, banana slices, or a yogurt icing)
Step-by-Step Instructions:
- Preheat the Oven: Let’s set the mood by preheating your oven to 350°F (175°C). This is your personal oven warm-up session, getting ready for the chocolate-free, dog-friendly delight you’re about to create.
- Mix the Dry Ingredients: In a bowl, combine the whole wheat flour and baking powder. Give it a good stir, letting them know they’re about to join forces for something fantastic.
- Combine the Wet Ingredients: In a separate bowl, mash the ripe banana until it’s nice and smooth. Mix in the peanut butter and yogurt until all the gooey goodness is well-blended. Just imagine how excited your pup is while you’re doing this.
- Add the Blueberries: Fold in those glorious blueberries, whether they’re fresh or puree, and watch the beautiful colors come together. It’s like a blueberry parade in your mixing bowl.
- Create the Batter: Slowly mix the wet ingredients into the dry, stirring just until everything is combined. The batter should be thick, almost like a fluffy cloud of happiness (if clouds were edible and tasted like banana and peanut butter).
- Pour and Bake: Pour your batter into the paw-shaped mold or whatever baking dish you’ve chosen. Pop it into the oven and set your timer for 20-25 minutes, checking with a toothpick for doneness. You’ll know it’s done when it bounces back when lightly touched. Remember to enjoy those delightful smells wafting through your kitchen.
- Cool and Decorate: Once baked, let the cake cool in the mold for about 10 minutes, then transfer it to a wire rack to cool completely. Time for the grand finale—add your creative dog-friendly toppings. Whether it’s more blueberries, slices of banana, or a dollop of yogurt on top, let your inner artist shine here.
Optional Add-ons/Variations:
– Fruity Frenzy: Feeling adventurous? Swap out the blueberries for diced strawberries or add a splash of pumpkin puree for a seasonal twist. Your pup won’t mind the change one bit—they just want to enjoy this deliciousness.
Pro Tip:
Always make sure any peanut butter you use is xylitol-free. This sweetener is toxic for dogs. Check your labels, and if you’re in doubt, just use plain, unsweetened peanut butter. Your pup will thank you for it, and you’ll have peace of mind knowing it’s safe.
With this Banana Blueberry Paw Cake, you’re not just creating a tasty treat; you’re crafting a moment of joy for you and your four-legged friend. Enjoy the celebration and those happy “paws” you share!
4. Pumpkin Spice Pup Cake
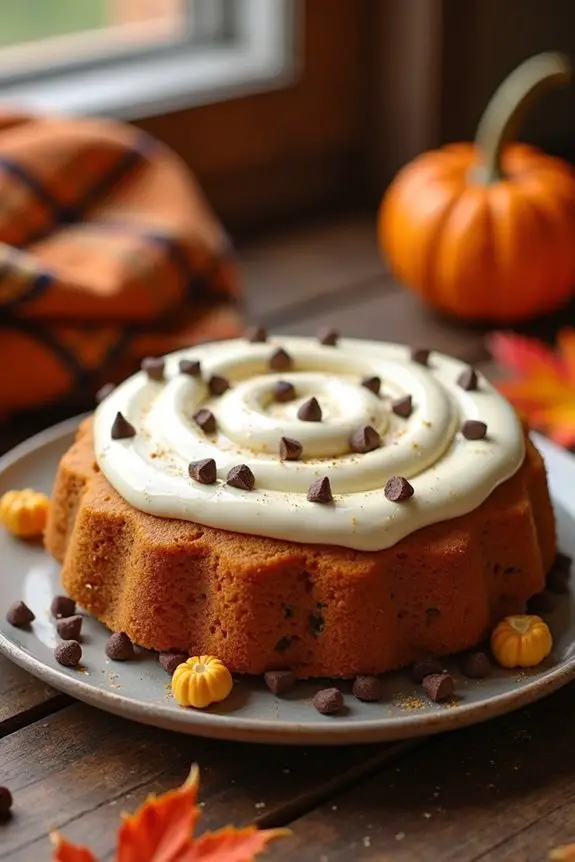
Who could resist the charming idea of baking a specially crafted cake for your furry friend? The Pumpkin Spice Pup Cake isn’t only a delightful treat for your dog but also a budget-friendly way to celebrate their special moments.
Loaded with wholesome ingredients, this cake will leave your pup wagging their tail and begging for more. Plus, who doesn’t love the warm, cozy scent of pumpkin spice wafting through the air?
Materials Needed:
- 1 cup whole wheat flour
- 1/2 cup canned pumpkin (not the spiced pie filling)
- 1/4 cup unsweetened peanut butter (xylitol-free, of course)
- 1/4 cup unsweetened applesauce
- 1 teaspoon cinnamon
- 1/2 teaspoon baking powder
- 1/2 cup low-sodium chicken broth (be sure it’s dog-safe)
- Dog-friendly decorations for topping (such as carob chips or yogurt drizzle)
- Round cake pan (or a silicone mold for added fun)
Step-by-Step Instructions:
- Preheat the Oven: Start by preheating your oven to 350°F (175°C). You want everything to be nice and cozy by the time those ingredients get together.
- Mix the Dry Ingredients: In a medium-sized bowl, whisk together the whole wheat flour, cinnamon, and baking powder. Think of this as your dry ingredient assembly line, ready to mix some puppy happiness.
- Combine Wet Ingredients: In a large mixing bowl, combine the canned pumpkin, peanut butter, applesauce, and chicken broth. Blend these together until it’s smooth and creamy—imagine a pumpkin patch party happening right there in your bowl.
- Create the Batter: Gradually add the dry ingredients to the wet mixture, stirring until combined. Don’t worry if it’s a little thicker than expected; that’s just the pumpkin magic working its charm.
- Pour and Bake: Grease your round cake pan and pour the batter in. Use a spatula to spread it evenly—no batter left behind! Bake it in the oven for about 25-30 minutes. You’ll know it’s done when you can insert a toothpick and it comes out clean, and your kitchen smells like a fall festival.
- Cool and Decorate: Once baked, allow the cake to cool in the pan for about 10 minutes before transferring it to a cooling rack. After it cools completely, feel free to decorate! Top it with carob chips or a drizzle of yogurt for a fancy finish that’s sure to impress your pooch.
Optional Add-ons/Variations:
- Flavor Twist: Consider adding a dash of nutmeg or vanilla extract to make it even more flavorful for your pup. Just make sure to avoid any ingredients that aren’t dog-safe.
- Fun Shapes: If you want to switch things up, use different-shaped silicone molds to create fun little cakes. Bone shapes? Yes, please.
Pro Tip:
When you’re measuring out the peanut butter, try microwaving it for a few seconds first. It makes it easier to mix and gives you more of that warm, nutty aroma that your dog will just adore. Just be sure to let it cool slightly before use for safe handling.
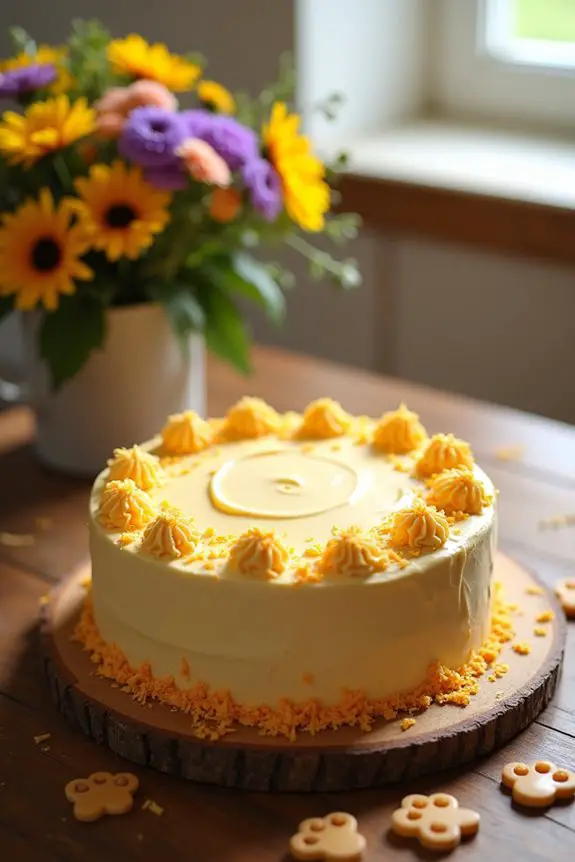
5. Peanut Butter Paws Cake
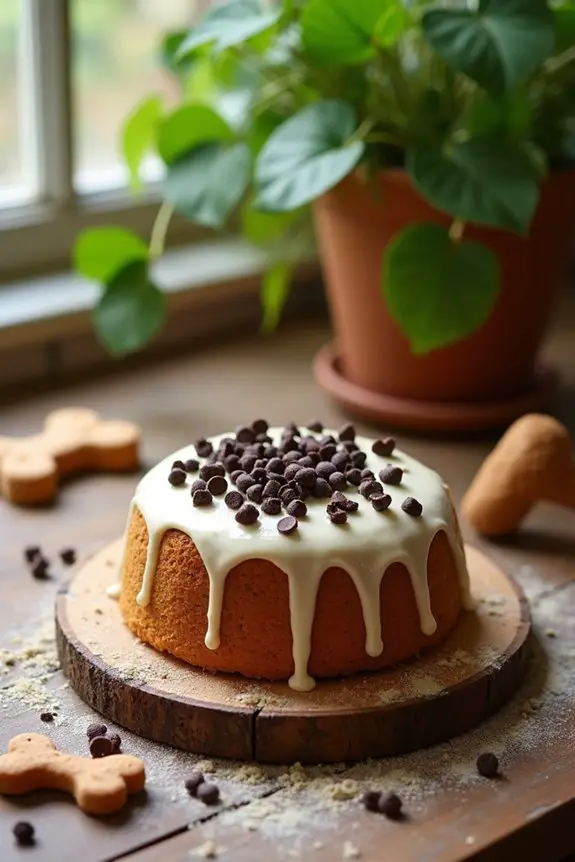
Is your pup drooling at the sight of peanut butter? Well, get ready to bake a cake that will send tails wagging and whiskers twitching! The Peanut Butter Paws Cake is an absolute fan-favorite that’s not only simple to make but also a fantastic way to celebrate your dog’s special moments—like their birthday or just because they gave you those puppy-dog eyes.
And let’s face it, baking at home saves money while providing a tasty, healthier treat for your furry friend.
Materials Needed:
- 1 cup whole wheat flour
- 1/2 cup unsweetened peanut butter (xylitol-free)
- 1/2 cup unsweetened applesauce
- 1 egg (or a flax egg for a vegan option)
- 1/4 cup low-sodium chicken broth or vegetable broth
- 1 teaspoon baking powder
- Dog-friendly decorations (such as carob chips or yogurt for drizzle)
- 8-inch round cake pan or silicone baking mold
Step-by-Step Instructions:
- Preheat the Oven: Begin by preheating your oven to 350°F (175°C). Nothing says “let’s bake a cake” like a warm oven, right?
- Mix the Dry Ingredients: In a mixing bowl, combine the whole wheat flour and baking powder. Whisk these together like you’re preparing a secret potion for puppy happiness.
- Combine Wet Ingredients: In another large bowl, mix together the peanut butter, applesauce, egg, and chicken broth. Stir until the mixture becomes smooth and creamy—think peanut butter heaven.
- Blend it All Together: Slowly add the dry mixture to the wet ingredients, stirring until everything is well combined. The batter will be thick, but that’s just what we want—it’s a cake, not a smoothie.
- Bake the Cake: Grease your cake pan with a little oil or non-stick spray. Pour the batter into your pan, and smooth it out with a spatula. Time to bake! Pop it into the oven for 25-30 minutes. It’s done when the top is golden brown, and a toothpick comes out clean.
- Cool and Decorate: Let the cake cool in the pan for about 10 minutes before transferring it to a wire rack. Once it’s cooled completely, you can get fancy! Drizzle some yogurt on top or sprinkle carob chips for decoration.
Optional Add-ons/Variations:
- Nutty Twist: What about swapping out half of the peanut butter for almond butter? Your pup might just love the flavor surprise.
- Fun Shapes: Use cookie cutters to create fun shapes and mini cakes for a delightful platter, perfect for a doggy party.
Pro Tip:
Make sure to check that all ingredients are dog-safe, especially your peanut butter; not all brands are created equal.
And if your pup has a sensitive tummy, consider introducing new treats gradually. Baking these treats at home not only saves you cash but guarantees your furry friend gets the wholesome goodness they deserve!
6. Cheddar Chicken Celebration Cake
Is your dog ready to paw-ty? The Cheddar Chicken Celebration Cake is the perfect treat for your furry friend’s big day or just a regular Tuesday that needs a little extra sprinkle of joy. This cake isn’t only packed with flavor—hello, cheddar and chicken—it’s also super easy to whip up in your own kitchen. By making this cake at home, you’re not just saving money, you’re also ensuring your pup gets a delicious and wholesome treat, free from the mystery ingredients often found in store-bought goodies.
Materials Needed:
- 1 cup whole wheat flour
- 1 cup shredded cheddar cheese (make sure it’s xylitol-free)
- 1 cup cooked, shredded chicken (plain, unseasoned)
- 1/2 cup unsweetened applesauce
- 1 egg (or a flax egg for a vegan option)
- 1/4 cup low-sodium chicken broth
- 1 teaspoon baking powder
- Dog-friendly frosting (like Greek yogurt or cream cheese mixed with peanut butter)
- 8-inch round cake pan or silicone baking mold
Step-by-Step Instructions:
- Preheat Your Oven: Set it to 350°F (175°C). This is when the magic begins—trust me, your dog will know something delicious is on the way.
- Combine Dry Ingredients: In a mixing bowl, toss together the whole wheat flour and baking powder. Give it a little whisk, and let those two mingle.
- Mix Together the Wet Ingredients: In another large bowl, mix the shredded chicken, cheddar cheese, applesauce, egg, and chicken broth. Keep stirring until it’s nice and creamy. You want it to feel like a warm hug for your pup—only without the calories.
- Combine Wet and Dry: Gradually add your dry ingredients to the wet mixture. You might need some muscle here, but don’t worry, soon it will all connect in a cheesy, chickeny harmony.
- Pour and Bake: Lightly grease your cake pan with some oil or non-stick spray, then pour the batter in. Smooth it out with a spatula. Now, pop it in the oven for about 25-30 minutes, or until it’s golden brown and a toothpick comes out clean. This is the moment you wish there was a smell-o-vision.
- Let It Cool: Allow the cake to cool in the pan for about 10 minutes before transferring it to a wire rack. Patience, right? Once cooled, it’s ready for its crowning glory of frosting.
- Decorate: Slather on your dog-friendly frosting. You can even get creative and sprinkle a few bits of cheese on top for extra flair.
Optional Add-ons/Variations:
- Savory Surprise: Want to kick it up a notch? Toss in some finely chopped veggies like carrots or peas to enhance both flavor and nutrition.
- Tail-Wagging Treats: Use mini cake pans or muffin tins to create smaller, individual cakes. Perfect for a doggy birthday bash or playdate.
Pro Tip:
When using chicken, always make sure it’s unseasoned and cooked plainly. No need for your pup to experience the wonders of garlic and onion; they aren’t dog-friendly.
Also, if you’re feeling generous, consider making a double batch and freezing some mini cakes for later use. Those puppy-dog eyes will thank you.
With this Cheddar Chicken Celebration Cake, you’re all set to throw a tail-wagging party that your dog—and you—will never forget. Happy baking!
7. Sweet Potato Tail-Wagging Cake
Get ready to score some serious brownie points (or shall we say, “pup points”) with your furry companion by whipping up a Sweet Potato Tail-Wagging Cake. Perfect for celebrating special moments or just because it’s Tuesday, this cake isn’t only delicious and protein-packed, but it’s also super simple to make at home.
Plus, you’re saving money while making sure that your pup enjoys a tasty treat without any mystery ingredients from store-bought options.
Materials Needed:
- 1 cup whole wheat flour
- 1 cup mashed sweet potato (cooked and cooled)
- 1/2 cup unsweetened applesauce
- 1/2 cup low-sodium chicken broth
- 1 egg (or a flax egg for those paw-sitively delighted vegans)
- 1 teaspoon baking powder
- Dog-friendly frosting (like Greek yogurt or a peanut butter blend)
- 8-inch round cake pan or silicone baking mold
- Mixing bowls
- Whisk or spoon
Step-by-Step Instructions:
- Preheat the Oven: Start off by preheating your oven to 350°F (175°C). Just imagine the sweet aroma of freshly baked goodies wafting through your home—your dog will definitely pick up on that energy.
- Mix Dry Ingredients: In a bowl, combine the whole wheat flour and baking powder. A quick whisk will do the trick to make them well-mixed. It’s like they’re getting to know each other before the big bake-off.
- Blend Wet Ingredients: In another larger bowl, combine the mashed sweet potato, applesauce, chicken broth, and the egg. Give it a good stir until the mixture is smooth and combined. A little elbow grease never hurt anybody, especially not when it’s for your four-legged friend.
- Combine the Mixtures: Gradually add your dry ingredients to the wet ones, mixing until they just come together. Don’t overdo it; we want a fluffy cake, not a dense brick of “why did you do this to me?”
- Bake It: Lightly grease your cake pan, then pour in the batter and spread it evenly. Time to pop it into the oven for about 30-35 minutes, or until golden brown and a toothpick comes out clean. Can you smell that? It’s the scent of affection—doggy style.
- Cool Down: Once baked, allow the cake to cool in the pan for about 10 minutes, then carefully transfer it to a wire rack. Remember, patience is a virtue, even if your dog is giving you those pleading eyes right now.
- Frost and Decorate: Finally, give your masterpiece a lovely layer of dog-friendly frosting. Feeling fancy? You can toss on some dog treats or a dash of peanut butter for that extra touch of deliciousness.
Optional Add-ons/Variations:
- Fruity Flavor: Mixing in some blueberries or mashed bananas can add a sweet twist to the cake. Think of it as putting on a fancy hat—your cake deserves it.
- Decorative Toppings: Instead of frosting, try topping your cake with a yogurt drizzle or sprinkle some crushed dog treats on for added crunch. Very Instagrammable, right?
Pro Tip:
Always keep an eye on the baking time; ovens can be a bit moody. If you’re not using a silicone mold, consider lining your pan with parchment paper for easy removal. A little precaution goes a long way in keeping your cake intact—and trust me, your pup will appreciate you putting in that extra effort.
Let’s get baking and delight our four-legged friends. Happy tail wagging!
Extra Tips & Ideas
When it comes to designing a dog cake, a little creativity can go a long way. Have fun with flavors! Consider mixing in dog-safe peanut butter or pureed pumpkin for an extra kick.
If you’re feeling adventurous, why not add a surprise layer of dog-friendly frosting? Just blend yogurt and mashed fruit—easy peasy.
Think about fun shapes, too. Instead of the usual round cake, how about a bone-shaped masterpiece?
And don’t forget about decorations. You can top it off with crunchy dog treats or even fresh fruit, like blueberries or strawberries.
Just imagine your pup’s tail wagging with excitement. Remember, it’s a special day, so make it memorable, and don’t worry if it’s a little lopsided—your dog won’t mind at all.
Frequently Asked Questions
Can I Use Regular Flour for Dog Cakes?
You can use regular flour for dog cakes, but it’s better to opt for healthier alternatives like whole wheat or almond flour. These options are easier on your dog’s digestive system and can be more nutritious.
How Can I Store Leftover Dog Cake?
Most dog owners report their pets prefer homemade treats, so store leftover dog cake in an airtight container in the fridge for up to five days. You could also freeze it for longer storage!
Are There Any Toxic Ingredients for Dogs?
Yes, there are toxic ingredients for dogs. Avoid chocolate, grapes, raisins, onions, garlic, avocados, and xylitol. Always check labels and consult your vet if you’re unsure about any ingredient’s safety for your pup.
What Size Cake Is Best for My Dog?
Most dog cakes should be about the size of your dog’s head. You want enough for everyone to celebrate, but not too big to overwhelm your pup. Always consider their appetite and weight.
Can I Customize the Cake Design for My Dog’s Breed?
Yes, you can absolutely customize the cake design for your dog’s breed! Tailoring the cake’s shape, colors, and decorations to match your pup’s personality and breed characteristics will make it even more special.
Conclusion
So there you have it, ten tail-wagging cake ideas your furry friend will absolutely adore. Whether you whip up a peanut butter masterpiece or a sweet potato delight, you’re bound to see your pup’s eyes light up like it’s Christmas morning. Remember, each cake’s a little love letter to your best buddy, so don’t sweat the small stuff. Just have fun, get messy, and enjoy those slobbery thank-yous. After all, who needs fancy bakeries when you’ve got home-baked goodness?

Hi, I’m Ali Tarek, the founder of Animalsman. I’ve always been passionate about pets, especially dogs and cats, and I created this website to share practical tips, easy recipes, and helpful care advice for fellow pet lovers. My goal is to make pet care simple, enjoyable, and accessible for everyone. When I’m not writing or curating content, you’ll usually find me spending time with my furry friends or learning new ways to keep them happy and healthy.