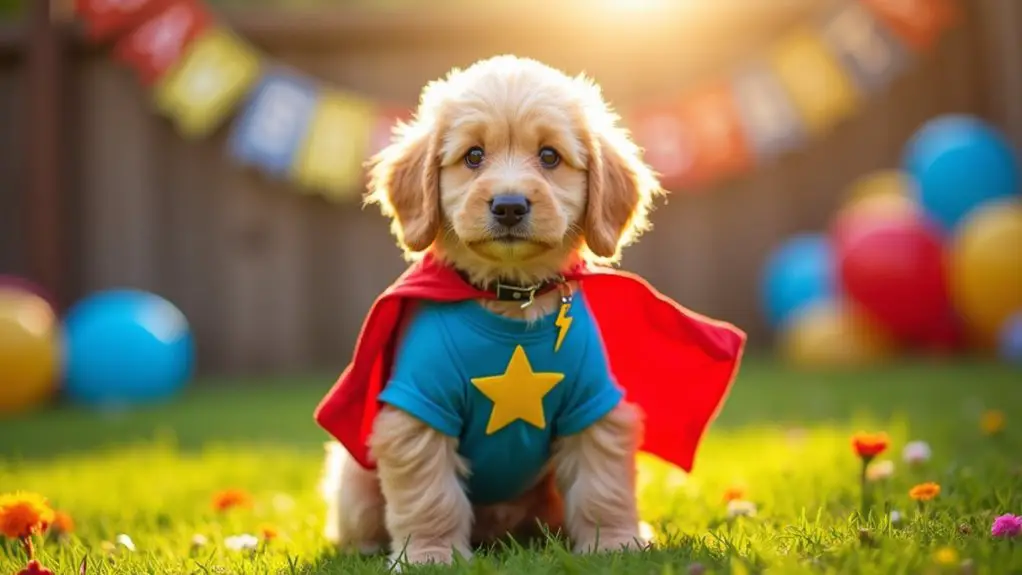
Your dog’s wardrobe shouldn’t just be a collection of boring, store-bought items; it should be a vibrant expression of their personality. Have you ever looked at an old T-shirt and thought, “That could be a cute outfit for Sparky”? Upcycling fabric is not only sustainable, but it also offers a fun way to create something unique. Stick around, and let’s explore some easy, creative DIY projects that’ll make your pup the talk of the park.
Upcycled T-shirt Dog Outfits
Turning an old T-shirt into a dog outfit is like giving your pup a brand-new wardrobe without spending a dime. You’ve got a treasure trove of t shirt patterns just waiting to be transformed. Grab those scissors, and let’s get crafting.
First, choose a tee with an adorable design—maybe a fun graphic or bright colors. Cut the sleeves off, and make a snug fit by taking in the sides. Measure your dog with a tape measure, of course—you wouldn’t want a too-big or too-small outfit.
Then, simply tie a knot at the bottom for a cute hem. You’ll laugh when your pup struts around, looking like a fashion icon. Who knew upcycling could feel this good?
Our Collection
Now that you’ve got those stylish upcycled t-shirt outfits down, let’s chat about our collection of cozy pieces for your pup.
Whether it’s a sweater vest for those chilly days or a raincoat made from plastic bags, there’s something here that’s sure to make your furry friend look fabulous.
And don’t forget the fleece pajamas for cold nights – trust me, your dog will thank you when they’re all snuggled up and ready to snooze.
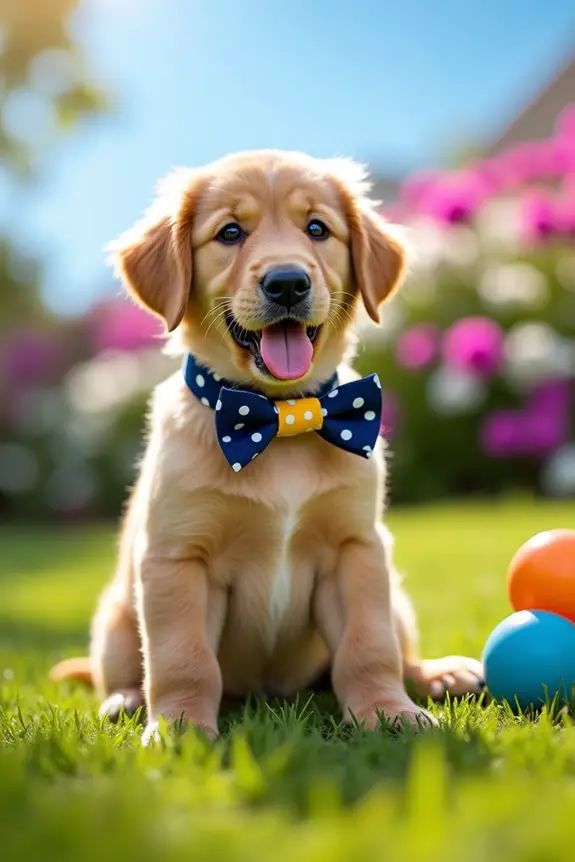
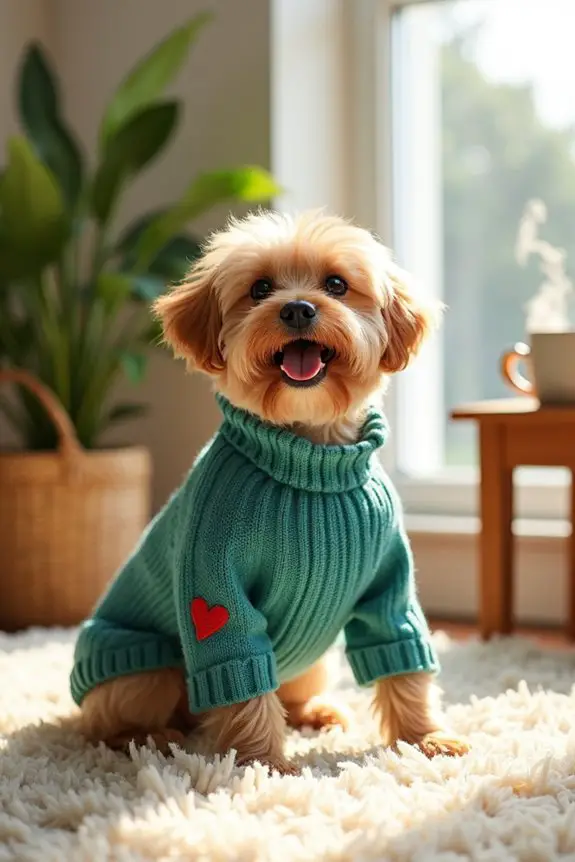
1. Sweater Vest for Chilly Days
As the leaves turn and temperatures dip, keeping our furry friends warm and stylish is a top priority. Enter the DIY sweater vest—a cozy, adorable addition to your pup’s wardrobe that not only saves you money but also gives your four-legged companion that snug comfort they crave. Plus, nothing puts a smile on your face like seeing your dog strut their stuff in something you crafted with love. Let’s get started! Consider creating a DIY dog house as a complementary project to enhance your pet’s warmth this winter. These homemade outfits can be tailored to any dog clothing style you envision.
Materials Needed:
- 1 old sweater (preferably wool or a stretchy knit)
- Scissors
- Measuring tape
- Chalk or fabric marker
- Needle and thread (or fabric glue for a no-sew option)
- A button (optional, for embellishment)
Step-by-Step Instructions:
- Measure Your Pup: Use the measuring tape to get your dog’s neck, chest, and length (from the base of the neck to where you’d like the vest to stop). Jot those numbers down—you’ll need them.
- Prep the Sweater: Lay your old sweater flat on a surface. This is the perfect moment to appreciate your choice because your pup deserves the best, right?
- Cut the Body: Cut a rectangle from the main body of the sweater. Make it about 3-4 inches wider than your dog’s chest measurement and long enough to cover your pup’s back comfortably.
- Cut the Neck Opening: Now, cut a u-shaped opening at the top of your rectangle for the neck. Make it slightly smaller than your dog’s neck measurement to keep it snug. It’s all about balance; you want it comfy, yet not too loose.
- Hem the Edges: Fold each edge of your rectangle under about half an inch and sew or glue it to create clean hems. This prevents any fraying—because who wants a fashion disaster when you’re trying to keep things stylish?
- Add a Button: For a little extra flair, sew a button onto the vest. Bonus points if it matches your dog’s personality, like a cheeky little heart for a lover or a bone for the jokester.
- Try it On: Carefully place the sweater vest on your pup. Adjust as needed to make sure it’s not too tight or restrictive. A well-fitted vest will have them strutting their stuff like it’s a runway in Milan.
Optional Add-ons/Variations:
Want to jazz up your creation? Consider choosing a vibrant color or playful pattern for the sweater fabric. You could even add patches or a cute fabric bow on the vest for some extra spice. Personalizing is key. Plus, every dog has its own personality; let that shine through in their swanky vest.
Pro Tip:
Always opt for fabrics that are machine washable. Dogs, as you might anticipate, love to get a little messy. Nothing cranks up the cuteness factor more than a vest that can handle your pup’s playtime antics without turning into a laundry nightmare.
There you go—a custom dog sweater vest that not only keeps them warm but also adds a bit of love and personality to their everyday life. A no-sew option makes this project accessible to everyone, even those without sewing skills! Don’t be surprised if it becomes their favorite cold-weather accessory. Happy crafting!
2. Dog Bandana From Scraps
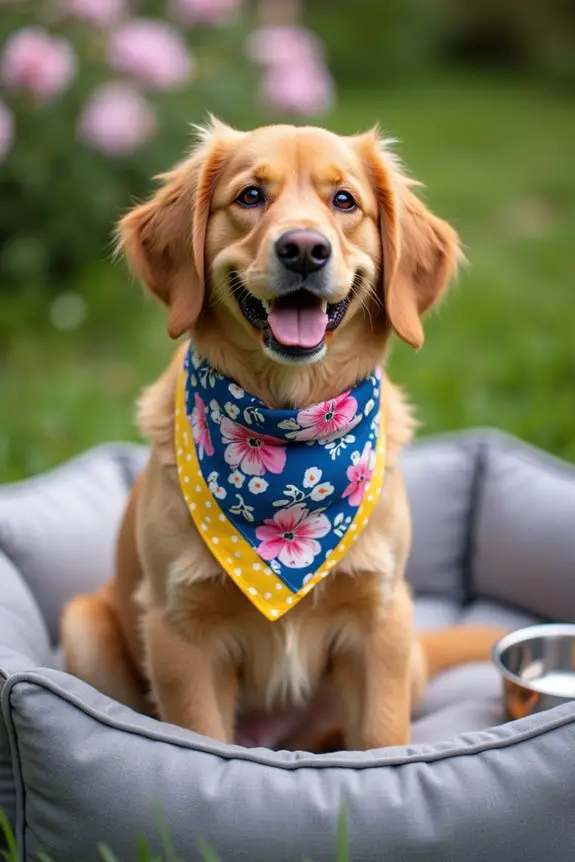
Every stylish pup deserves a fashionable accessory, and what better way to jazz up their look than with a cute dog bandana? This fun DIY project allows you to repurpose leftover fabric scraps to create a trendy accessory that’s perfect for the pup’s personality. Plus, why not pair your stylish bandana with a cozy luxury dog bed for the ultimate pet pampering experience? Consider also elevating your dog’s meal time with luxury dog food for yorkies, as a well-fed pup feels even more fabulous!
It’s simple, savvy, and adds a splash of color to your dog’s wardrobe—plus, it makes for a fantastic photo op!
Materials Needed:
- Fabric scraps (cotton or lightweight fabrics work best)
- Scissors
- Measuring tape or ruler
- Chalk or fabric marker
- Sewing machine or needle and thread (or fabric glue for a no-sew option)
- Iron (optional, but recommended for crisp edges)
Step-by-Step Instructions:
1. Choose Your Scraps: Gather all those fabric scraps that you’ve been saving. Select some fun patterns or colors that scream personality.
You know, the ones that say, “I’m adorable and fabulous!”
2. Measure and Cut: Decide on the size of the bandana. For most dogs, a square of about 20 inches is a good start.
Use your measuring tape to mark out the square on the fabric and cut it out. Don’t worry if it’s not perfect; dogs are way more tolerant than fashion critics.
3. Fold and Iron: If you want those edges to look sharp, fold over each side about a quarter-inch and press with an iron.
This is where you reveal your inner seamstress—just don’t burn yourself, or you’ll find your dog snickering at you.
4. Sew or Glue the Edges: Using either a sewing machine or needle and thread, sew along the folded edge to keep it neat.
If you’re taking the no-sew route, fabric glue can work wonders. Just make sure it’s dry before letting your pup wear it.
You wouldn’t want your pooch smelling like a craft store for a week.
5. Trial Run: Drape the bandana around your pup’s neck, securing it with a simple knot or leaving it loose, depending on your dog’s comfort level.
Make sure it’s not too tight; the last thing you want is a fashion mishap.
Optional Add-Ons/Variations:
Feeling extra crafty? Try using a different shape, like a triangle or a heart, for a unique twist.
You could also personalize it with fabric paint or even some dog-safe charms. Your pup will be the talk of the dog park, strutting around like the fashionista they are!
Pro Tip:
Make sure to prewash your fabric scraps before starting.
Not only does this prevent any shrinkage later on, but it also removes those pesky chemicals from the fabric. A clean canvas makes for a safer, happier pup!
Plus, it’ll give you a chance to sneak a peek at how fabulous your fabric looks in action—always a nice confidence boost.
3. Dog Raincoat From Plastic Bags
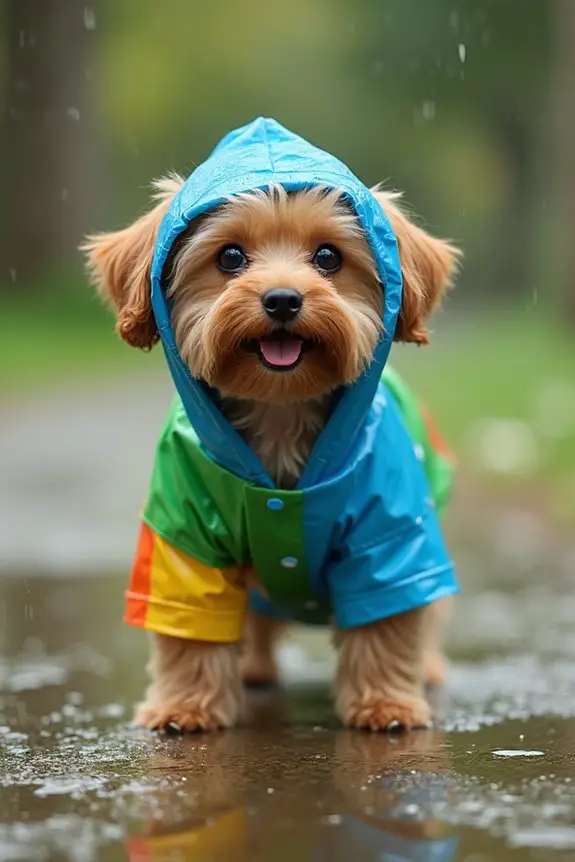
Rainy days can be a bummer, especially for our fur babies who don’t quite understand why the world looks so different and wet. But fear not—this DIY dog raincoat project is here to save the day (and your pup’s fur).
Using plastic bags, you can create a waterproof coat that keeps your dog dry and stylish without breaking the bank. Plus, you’re giving new life to those bags destined for the landfill. It’s eco-friendly and practical—what more could a dog owner ask for?
Materials Needed:
- Plastic grocery bags (around 6-8 for a small to medium dog; more for larger breeds)
- Scissors
- Measuring tape
- Duct tape or a strong adhesive tape
- Velcro strips (optional, for adjustable closures)
- A ruler or straight edge (optional)
Step-by-Step Instructions:
- Measure Your Pup: Grab your measuring tape and measure around your dog’s neck and chest. You’ll also want the length from their neck to their tail. Remember, it’s better to be a little loose than too snug—comfort is key.
- Create the Base Shape: Take 2-3 plastic bags and stack them for extra durability. Cut off the bottom of the bags so you have a long, flat rectangle. This will be the main body of your raincoat. For a standard small-medium dog, a piece about 24 inches long and 20 inches wide works well.
- Make Armholes: Fold your rectangle in half lengthwise and then cut two small semicircles (about 3 inches in diameter) on the top folded edge. This will create openings for your pup’s front legs. Unfold it, and voilà—now your dog can strut in style without tripping.
- Secure the Edges: To keep those edges tidy, you can use duct tape to reinforce them. This not only keeps the bag from fraying but also adds a bit of style—who says duct tape can’t be fashionable? Just make sure to fold over the tape at the edges to avoid any sharp points that could poke your pooch.
- Attach Fasteners: Depending on how adventurous your dog is (and how many treats they’ve been promised for being a good model), use Velcro strips on the sides to secure the raincoat around their body. Simply cut pieces to the desired length and attach one side to the coat and the corresponding piece on the other side, ensuring it’s comfortable yet secure.
- Add a Hood (Optional): If you really want to go all out, take another bag, cut it to make a hood—essentially a smaller version of what you made for the coat—and attach it to the top. It’s like a mini rain hat for your pup. They’ll look adorable and ready for a fashion show—puddle edition.
Optional Add-ons/Variations:
Feeling creative? You could decorate your raincoat with fabric markers or stickers for some extra flair.
How about using different colored bags to create a patchwork look? Your dog can rock the rainbow, turning rainy walks into a parade.
Pro Tip:
Make sure to test the raincoat on your dog before taking them out. A quick walk around the house will help you gauge whether it’s comfortable and fits well.
If you notice any irritation points, adjust the design. After all, the last thing you want is a soggy dog who decides to play hide-and-seek with the nearest mud puddle instead of staying dry.
4. Fleece Pajamas for Cold Nights
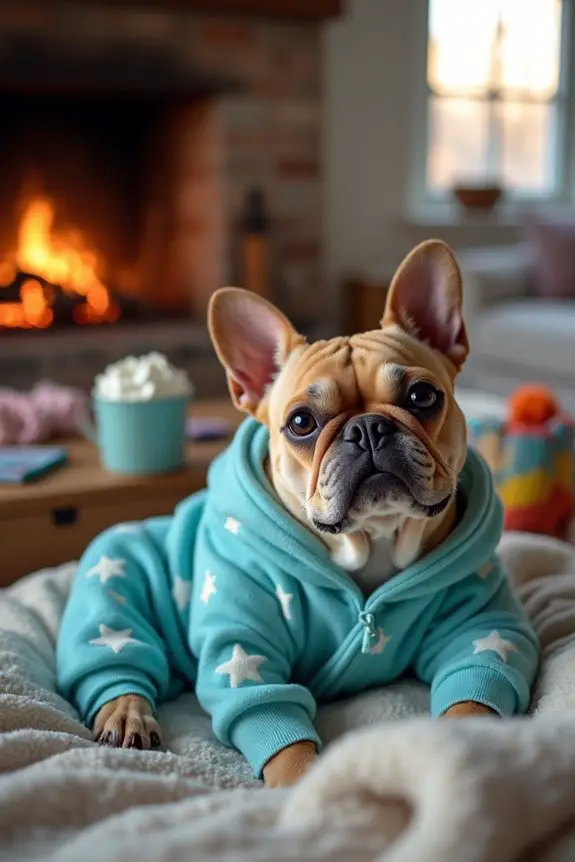
As the temperature drops and those chilly nights roll in, your dog deserves to snuggle up in something cozy. Why not try making them a pair of DIY fleece pajamas? They’ll keep your pup warm and comfortable while saving you a few bucks compared to store-bought options.
Plus, let’s admit it—there’s nothing cuter than seeing your dog in adorable jammies.
Materials Needed:
- Fleece fabric (about 1 yard; choose fun colors or patterns)
- Scissors
- Measuring tape
- Straight pins
- Sewing machine (or needle and thread for a hand-sewn option)
- Paper for pattern making (optional)
Step-by-Step Instructions:
1. Measure Your Pup: Start by measuring your dog’s neck, chest, and length from neck to base of tail. These measurements will guide your pattern so your pup doesn’t look like they’re wearing a tent.
2. Create Your Pattern: If you’re feeling fancy, draw a simple pajama shape on paper using your pup’s measurements. Think of it like a cozy onesie. If you’re ready to wing it, you can fold the fleece in half and cut out a basic shape without a pattern.
3. Cut the Fleece: Lay your pattern onto the fleece (or just freehand it) and cut out two identical pieces. Make sure to leave a little extra around the edges for seams. If you’re feeling bold, add some fun cuts, like a little tail hole for added flair.
4. Pin the Pieces Together: With the right sides together (the “pretty” side of the fleece), use straight pins to hold the pieces together. It’s like giving your project a little cuddle before it becomes real.
5. Sew It Up: Time to release the sewing machine—or your trusty needle and thread. Start by sewing along the edges, leaving openings for the legs (you can even add cuffs if you want).
Remember, neat stitches make for a professional finish—no pressure.
6. Turn it Inside Out: Once sewn, flip your jammies inside out so the seams are hidden. Give it a little shake and admire your work. Look at you, ready to rock the DIY world.
7. Fit it on Your Pup: Try the pajamas on your furry friend. Confirm they can move comfortably and that the fabric isn’t too tight. Adjust any hem or cuffs as needed to make it just right.
Optional Add-ons/Variations:
- Add a Snugging Feature: For extra comfort, sew a soft elastic band around the cuffs of the pajama legs to keep them from riding up during those nighttime shenanigans.
- Decorate with Fun Patches: Iron on some cute patches or embroider their name to personalize the jammies. Let your creative juices flow—it’s your dog’s chance to shine!
Pro Tip:
If your sewing machine starts to give you issues or if you feel like channeling your inner artisan, sewing by hand is just as valid. Don’t forget to use a knot at the end of each stitch to secure your efforts, and remember: mismatched stitches give it a rustic charm.
Plus, your dog will love it just the same.
Now that you have your fleece pajamas, your dog is all set for those cozy nights in—just imagine the cuteness factor skyrocketing as they snuggle in with you.
Happy crafting!
5. Refashioned Denim Dog Jacket
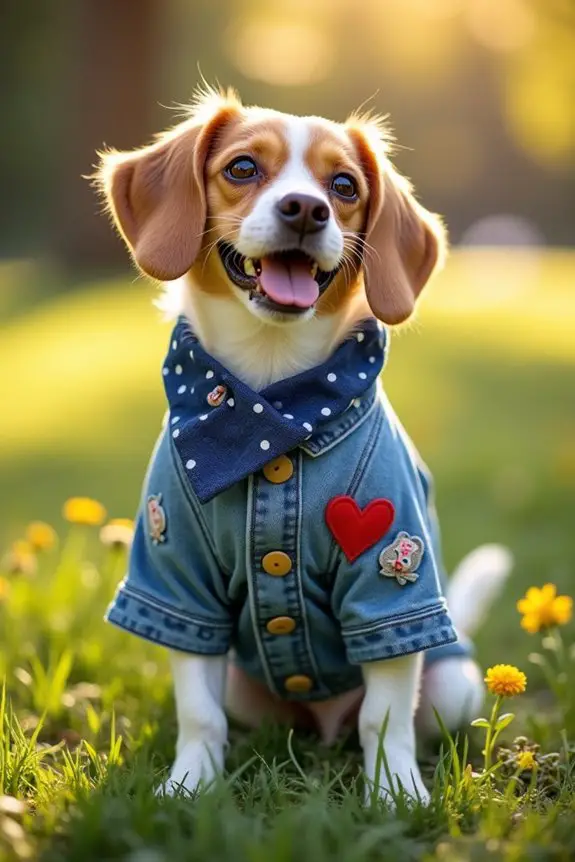
If you’re like many dog owners, you’ve probably got a few old pairs of jeans that hang in the back of your closet, waiting for their moment. Why not give those jeans a new lease on life and create a stylish denim jacket for your furry friend?
Not only is this DIY project a great way to recycle, but it also provides your dog with a fashionable, comfortable layer that keeps them warm. Plus, it saves you money compared to buying a fancy dog jacket.
Materials Needed:
- Old denim jeans (1-2 pairs, depending on the size of your pup)
- Scissors
- Measuring tape
- Straight pins
- Sewing machine (or needle and thread if you prefer hand-sewing)
- Felt or fabric for lining (optional for added comfort)
- Dog jacket pattern (optional, or you can draft your own)
Step-by-Step Instructions:
- Take Measurements: Start by measuring your dog’s neck, chest, and back length. This will help you determine how much fabric you’ll need and the size of your jacket pieces. Don’t forget, the more relaxed the fit, the happier the pup.
- Prepare the Jeans: Lay your old jeans flat and cut them apart at the seams. You’ll be using the legs for the jacket, so keep them intact. The waistband can be used for the collar. If you’re using two pairs, mix and match for a trendy patchwork look.
- Create Your Pattern: If you’re feeling adventurous, you can draft a pattern on paper by drawing out a simple dog jacket shape (think of it like a vest) using your pup’s measurements. Otherwise, freehand it by laying the jeans over your dog’s back to see how much to cut. Just make sure to add a little extra for seams.
- Cut Out the Fabric: Using sharp scissors, cut out the main jacket pieces from the jeans. You’ll typically need two main pieces for the back and front. Remember to cut the collar area from the waistband—this is where your dog will feel like a rockstar.
- Pin and Sew: With the right sides facing each other, pin the jacket pieces together. Sew along the edges, leaving openings for the front legs and the collar area. Use straight stitches for a clean look, and don’t worry if it isn’t perfect—your dog will appreciate the effort way more than the stitching details.
- Turn it Right Side Out: Flip the jacket inside out so the seams are hidden. At this point, you can add optional lining for extra comfort. Simply cut a piece of felt or soft fabric the same size as your jacket and sew it in.
- Fit It On Your Pup: Slip the jacket onto your pup to check the fit. Make certain it’s snug but comfortable—your dog should be able to move freely without being restricted. You might need to adjust the armholes or hem based on how your dog feels.
Optional Add-ons/Variations:
- Embellish with Patches: Add fun patches or even some dog-safe paint to customize your jacket. Whether it’s a cute heart or a funky design, this is your chance to make it unique to your pup.
- Accessorize with a Matching Bandana: Use leftover denim fabric to make a matching bandana. This way, your dog can strut their stuff in coordinated style. Plus, it’s a great way to use up more of those old jeans.
Pro Tip:
When sewing, always check for any rough edges that might irritate your pup’s skin. A quick run with a fabric edge smoother can save a lot of fuss later on.
And let’s be real, it’s much easier to deal with a cranky dog than a cranky sewing project gone wrong.
With a little creativity and some denim magic, your dog will be the talk of the park in no time. So grab those old jeans, roll up your sleeves, and have some fun making your pup the coolest canine on the block.
6. Customizable Bow Tie Collars
Looking for a way to make your dog’s wardrobe pop without breaking the bank? Well, you’re in luck! These customizable bow tie collars aren’t only adorable but also a fun DIY project that gives your pup a unique flair. Plus, you can personalize them to match their personality (and yours). How cool is that?
Materials Needed:
- Soft fabric (cotton, felt, or any material you like)
- Bow tie pattern (printable or homemade)
- Scissors
- Sewing machine or needle and thread
- Measuring tape
- Collar buckle or a sturdy nylon collar
- Fabric glue (optional)
- Pins or clips
Step-by-Step Instructions:
1. Measure Your Dog: First things first, Measure Your Dog‘s neck to determine how long the collar should be. Add an extra inch or two for comfort.
Remember, a puppy wiggling around makes it hard to get this measurement – a little treat can help keep them still!
2. Cut Your Fabric: Use your pattern to cut out two pieces of fabric for the bow tie and one long piece for the collar. Verify the fabric pieces are a bit larger than the pattern; this is a collar for a fluffy friend, not a delicate flower.
3. Sew the Bow Tie: With the right sides facing each other, fold the fabric in half for the bow tie and sew along the edges. Leave an opening for flipping it right side out.
Don’t worry if it’s a little crooked; your pooch probably won’t be critiquing your sewing skills.
4. Turn the Bow Tie Right Side Out: Carefully flip the bow tie through the opening. Push out the corners gently to give it that crisp look.
Give it a little iron if you want, but let’s be honest, your dog will just be thrilled to wear it.
5. Attach the Bow to the Collar: Take the longer fabric strip that you cut for the collar and fold it in half lengthwise, then sew the edges.
Slide the bow tie onto the collar fabric before sewing the ends of the collar together. Alternatively, you can glue it on if you’re feeling a bit lazy — because who needs perfection with a snuggly dog around?
6. Secure and Adjust: If you’re using a buckle, attach it now, test the collar size on your dog’s neck, and make any necessary adjustments.
It should be snug but not too tight — we want a cutesy look, not an escape artist.
7. Let Your Dog Strut Their Stuff****: Place the collar on your dog and watch them strut around like they own the place.
Prepare for lots of tail wags and sweet puppy eyes when they see your proud smile.
Optional Add-ons/Variations:
– Get creative with fabrics! Use a fun print or even sparkly material for a special occasion.
Maybe even try different shapes for the bow tie, like a butterfly or a more rounded design.
– Attach small charms or beads for extra flair — although, keep it simple; we don’t want to end up at the vet due to an accidental snack.
Pro Tip:
Always double-check that the collar fits properly and isn’t too tight around your dog’s neck.
While they might love their new look, comfort is key. Bonus: If you make multiple collars, it can save you money in the long run, and your dog will have a fresh look for every day of the week. Now, who’s ready for some Instagram-worthy photos?
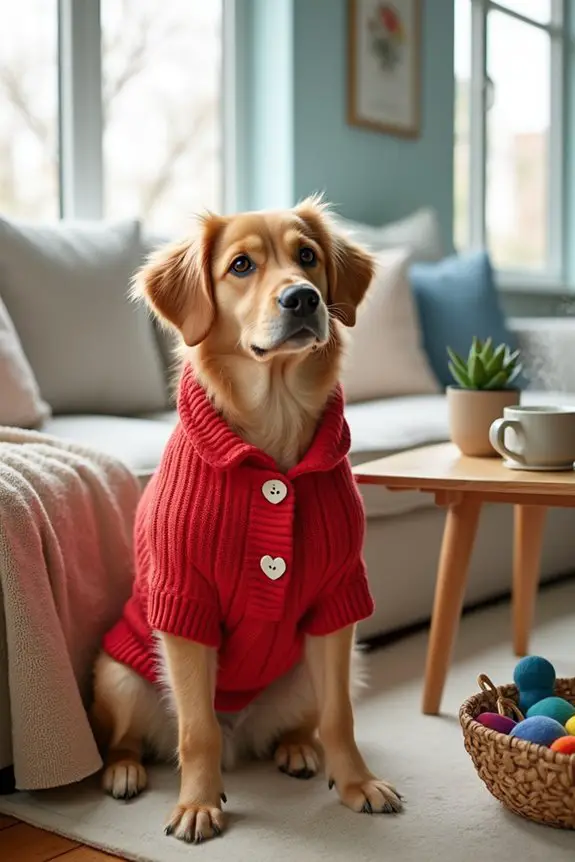
7. Upcycled Sweater Dog Coat
Have you ever looked at an old sweater and thought it was just taking up space? Why not transform it into a stylish coat for your furry friend? This DIY project isn’t only ingenious but also a fantastic way to keep your pup warm during those chilly walks. Plus, you get to recycle fabric and save some bucks instead of splurging on pricey pet apparel.
Materials Needed:
- An old sweater (preferably wool for warmth)
- Scissors
- Measuring tape
- Sewing machine or needle and thread
- Pins or clips
- A cute decorative patch or button (optional)
Step-by-Step Instructions:
- Organize Your Materials: Gather your sweater and measuring tape. A cozy couch and a warm cup of tea can make the process so much nicer — just saying.
- Measure Your Dog: Measure from the base of your dog’s neck to the base of their tail to determine the coat’s length. You’ll also want to measure around their chest for the width. Don’t fret if your dog is squirmy; a little treat can work wonders.
- Cut the Sweater: Lay your sweater flat and decide how much of it you want to use. Cut the sleeves off. You can use one sleeve for smaller dogs, or two for larger breeds. If you’re feeling adventurous, you can use the body of the sweater as the main part.
- Shape the Coat: Take the body part of the sweater (if you’re using it) and cut it to fit your dog’s measurements. Don’t forget to leave enough fabric for the collar area and some extra on the sides – adjustments can always be made later.
- Pin and Sew: If you’re using the sleeves, attach them to the main body of the coat by pinning them on the sides where your pup’s legs will go. Sew them in place, making sure everything is secure. A little wonky stitching gives it character, right?
- Try It On: Gently place the coat on your dog. Check how it fits and adjust if needed. Remember, it should be snug enough to stay on but loose enough for them to move comfortably. Your pup will probably look at you like you’re a fashion god.
- Decorate (If You Wish): Add a cute patch or button for a personal touch. Perhaps your dog is a star, so why not let everyone know?
Optional Add-ons/Variations:
Want to jazz it up a bit? Consider using a bright fabric paint or adding some funky patterns with fabric markers. You could even sew on some reflective strips if your dog likes late-night strolls. Personalizing will make your dog’s coat truly one-of-a-kind.
Pro Tip:
When measuring, always err on the side of comfort. You want your dog to feel snuggly, not squeezed. If they seem uncomfortable, a little bit of padding (think felt or another soft fabric on the inside) can make a world of difference.
Extra Tips & Ideas
While crafting those adorable outfits for your furry friend, don’t overlook some nifty tips and ideas that can take your DIY dog clothes to the next level.
Mix and match fashion materials—think upcycled fabrics or colorful cotton—to create unique pieces. Ever consider seasonal themes? Imagine a cozy pumpkin sweater for fall or a breezy floral shirt for summer strolls.
Don’t forget about comfort; your pup needs to feel good while looking great. And here’s a tip: always measure your dog before cutting. I once ended up with a dog coat that fit my coffee table perfectly. Maybe it’s just me, but better safe than sorry, right?
Frequently Asked Questions
What Materials Can I Use for DIY Dog Clothes?
You can use natural fibers like cotton or wool for comfort, and recycled fabrics for sustainability. These materials not only create stylish dog outfits but also help you contribute to a healthier planet for everyone.
Are There Safety Concerns With Homemade Dog Outfits?
Yes, there are safety concerns with homemade dog outfits. Guarantee your dog’s safety by avoiding clothing hazards like loose parts or tight fits that can restrict movement. Always prioritize comfort and safety in your designs.
How Do I Measure My Dog for Clothes?
To measure your dog for clothes, check their size by measuring the neck, chest, and length from neck to tail. Use fitting tips like allowing extra space for movement without being too loose.
Can I Customize Outfits for Specific Dog Breeds?
Just like a perfect fitting glove, breed-specific designs and tailored techniques let you create outfits that reflect your dog’s unique shape and style, ensuring they strut their stuff with confidence and flair.
How Often Should I Wash Dog Clothes?
You should wash dog clothes weekly or more often if they get dirty. Always check fabric care labels for specific instructions, and remember that regular washing frequency keeps them fresh and comfortable for your furry friend!
Conclusion
So, you’ve seen how easy and fun DIY dog clothes can be. Imagine your pup strutting down the street in a chic, refashioned denim jacket you whipped up in an afternoon. It’s not just about keeping them warm or dry; it’s about showing off their personality. Plus, you’re saving the planet one outfit at a time. So grab those old fabrics and let your creativity shine. Your dog deserves to be stylish, don’t they?