Have you ever watched your dog stare longingly out the window? It’s like they’re plotting their next great adventure, or maybe just dreaming of chasing squirrels. Well, what if I told you that with a little creativity, you could build a DIY dog door that gives them easy access to all that outdoor excitement? From stylish sliding designs to custom wooden flaps that vibe with your home, there are so many fun projects to explore. Let’s jump into these ideas together; you might just find the perfect fit for your pup.
Dog-Friendly Sliding Door Design
Have you ever wondered how to create the perfect dog door that blends seamlessly with your home? A dog-friendly sliding door design could be just what you need.
Start by measuring your pup—don’t worry, it’s not like you’re hosting a fashion show, but accuracy matters. Then, choose a sliding door that’s easy to install. You’ll want to cut a hole that matches your dog’s size, keeping in mind that they might need a bit of practice to figure it out.
When it comes to materials, lightweight options help prevent wear and tear from enthusiastic tails. You might find yourself wrestling with the screws, but hey, that’s part of the fun, right?
Enjoy the fresh air and the wagging tails.
Our Collection
Now that you’ve got a stylish sliding door for your furry friend, let’s check out our collection of dog door ideas that can meet all your needs.
Whether you’re after a weatherproof flap design or a snazzy personalized wooden flap, there’s something for every pup parent out there.
Ready to let your pooch come and go as they please?
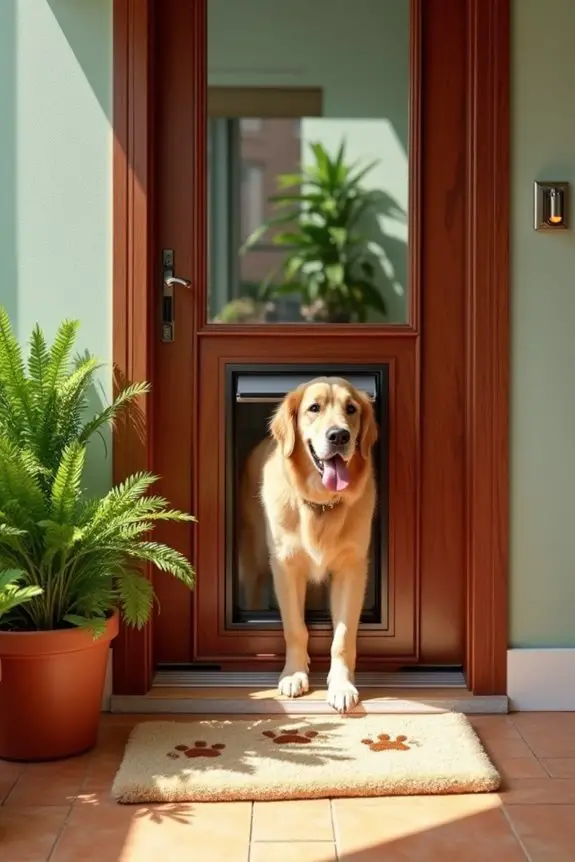
1. Weatherproof Flap Design
Who’s ready to transform your home and give your furry friend a taste of freedom? This DIY weatherproof flap door project isn’t just a lifesaver for your pup—it’s a total game changer for dog owners. Imagine saving money on energy bills while keeping the cold air out and your dog’s tail wagging. Plus, you’ll feel pretty proud every time you see that sturdy door you created together. Let’s get started!
Materials Needed:
- A suitable door or panel (wood or fiberglass works great)
- Dog door flap kit (includes flap and frame)
- Weatherstripping (to guarantee maximum insulation)
- Drill and drill bits
- Screwdriver
- Measuring tape
- Level
- Pencil
- Saw (if cutting is needed)
- Sandpaper
Step-by-Step Instructions:
- Measure Your Pup: Start by measuring your dog from nose to tail while standing. Choose a flap size that allows him to enter easily, but not so large that it becomes a wind tunnel for your home.
- Select the Right Location: Pick a door that’s easy for your pup to access. Avoid placing it near furniture—your dog deserves a clear pathway, after all.
- Trace the Cut: With your measuring tape, mark out the size of the flap on your door. Use a level to guarantee it’s even. After all, who wants a crooked dog door?
- Cut the Door: Carefully cut along your marked lines. If you’re not feeling like a lumberjack, it’s okay to ask a friend for help or even a professional. Safety first!
- Install the Flap: Follow the instructions in your dog door flap kit. Attach the frame securely, then pop in the flap. Make sure it opens and closes smoothly—like your dog will after a long day of play.
- Weatherproof It: Add weatherstripping around the edges of the door frame. This guarantees your home stays cozy and your dog stays comfy. You wouldn’t want a draft at dog level, would you?
- Final Touches: Sand any rough edges to keep your pup’s paws safe. Give it a test run to see how well it holds up against the elements. Maybe even toss in a little dog treat for good measure.
Optional Add-ons/Variations:
Want to spice things up a bit? Consider painting or staining the door to match your home’s décor. A splash of color couldn’t only brighten the entryway but also add a personal touch.
Or, you could add a fun pattern on the flap with fabric of your choice—maybe some cute paw prints or a whimsical design that reflects your dog’s personality.
Pro Tip:
When installing your dog flap, remember to keep it low enough for your pup but high enough to avoid any weather flooding. If you live in an area with extreme weather, consider adding a draft guard at the bottom of your flap to enhance insulation even more. Luxury dog training equipment can also support your pup’s overall training and well-being during this transition.
Now that you’re armed with all these tips, you’re ready to begin your DIY journey! Trust us, your dog will thank you (even if they can’t say it in words). Happy building!
2. Personalized Wooden Dog Flap
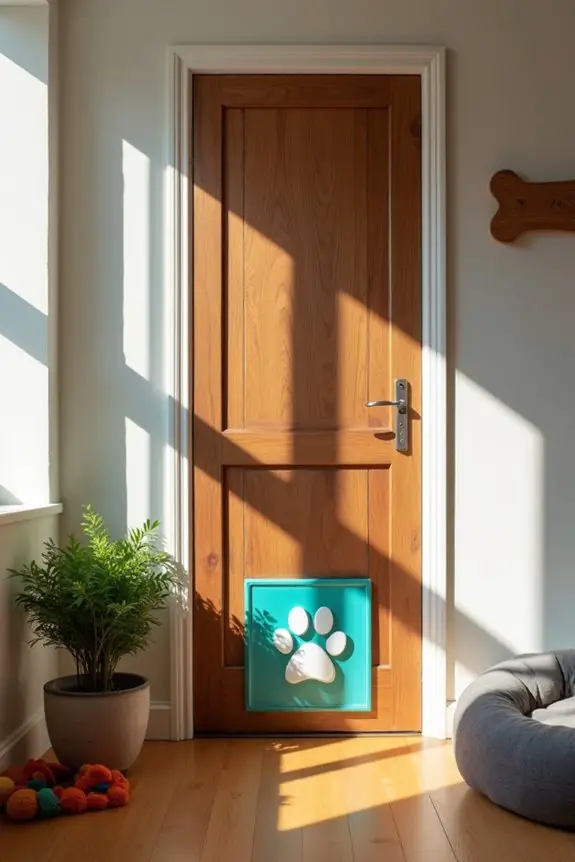
Looking for a way to add both charm and functionality to your home? Crafting a personalized wooden dog flap is a brilliant DIY project for dog owners. Not only does it offer your furry friend the freedom to roam, but it also enhances your home’s aesthetic and potentially saves you some money on energy bills. Integrating luxury pet furniture accessories can further elevate your dog’s space and comfort at home.
Let’s bring your canine companion’s entrance to the next level!
Materials Needed:
- Plywood or solid wood panel (choose a thickness that feels sturdy)
- Dog door flap kit (check for the flap size suited for your pup)
- Paint or wood stain (in your desired shade)
- Weatherstripping tape
- Wood screws
- Drill and drill bits
- Screwdriver
- Measuring tape
- Level
- Pencil
- Saw (circular or jigsaw will do)
- Sandpaper
Step-by-Step Instructions:
- Measure Your Dog: First, measure your dog standing up, from the top of their back to their belly. Verify you select a flap size that’s ample enough for them to pass through comfortably, yet not so big that a gust of wind turns it into a giant draft tunnel.
- Choose Your Spot: Pick a door that leads to your yard or patio—a place where your furry friend can happily scamper in and out. Confirm the location is free of clutter so they can dash out without hesitation.
- Mark the Dimensions: With the flap kit on hand as a reference, mark the outline of the cut on your selected door using a pencil. Make certain everything is level—if only choosing pizza toppings was as easy as this.
- Cut the Opening: Time for some woodworking fun! Carefully cut along your marked lines. If you’re feeling a bit “Tim the Toolman Taylor,” go for it! But, if power tools make you quiver, consider getting some help from a buddy.
- Assemble the Flap: Follow the instructions from the flap kit to attach the frame to the door, verifying it’s securely in place. After that, fit the flap into the frame. Give it a gentle nudge—no one wants a pooch stuck mid-leap.
- Seal it Up: Apply weatherstripping around the edges of the door frame. This will keep drafts at bay and confirm your home stays comfy while your pal remains cozy as they bound in and out.
- Smooth the Edges: Take a moment to sand any rough edges to prevent any accidental paw injuries. You’ve done well, and your pup deserves a safe and snug entrance.
Optional Add-ons/Variations:
Want to make this flap truly yours? Consider painting it in a color that complements your home’s exterior or adding a fun pattern with some stencils. Floral designs, paw prints, or even the name of your furball can make it uniquely special.
Pro Tip:
Before you finish up, consider applying a weather-resistant sealant over the paint or stain.
It prolongs the life of your beautiful custom flap and confirms it stands strong against the elements. Your dog will love it, and you can rest easy knowing your handiwork will withstand the test of time. A win-win, right?
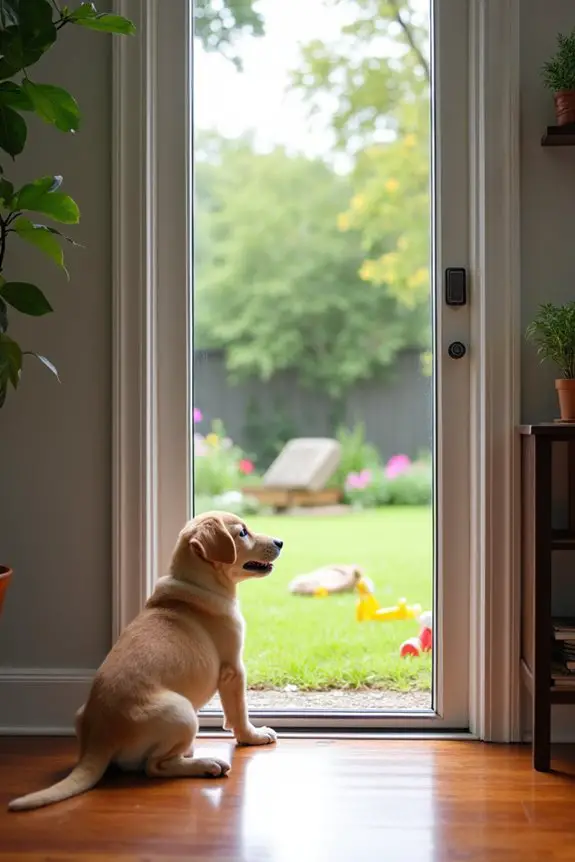
3. Decorative Pet Window Insert
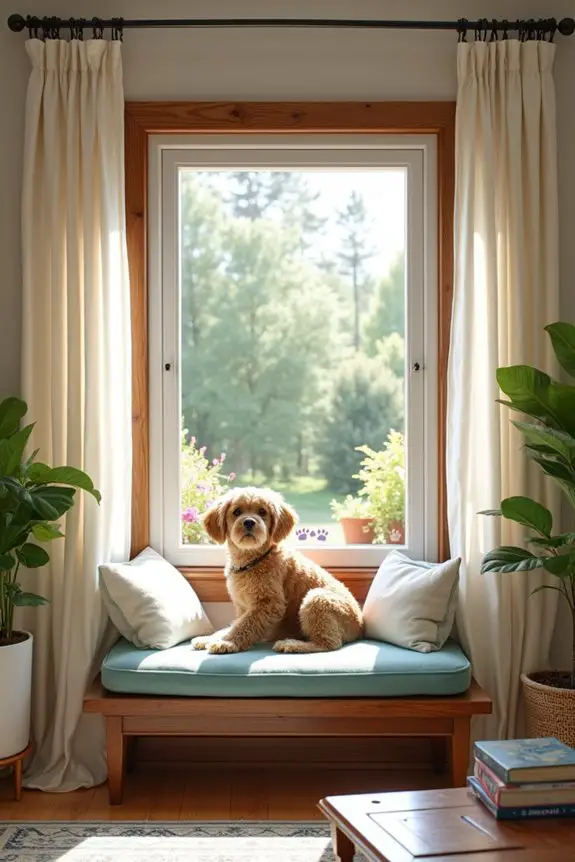
Have you ever wished your furry buddy could enjoy the great outdoors, even when they’re cooped up inside? A decorative pet window insert is a delightful DIY project that not only gives your pet a perfect view of the outside world but also adds a touch of style to your home. It blends functionality and decor, saving you the hassle of an overly active pet while making your space look much more inviting. Additionally, you can elevate your pet’s treat game by using a high-end pet treat maker for those moments when your pup deserves a special reward.
Materials Needed:
- A piece of clear acrylic or tempered glass (large enough for your window frame)
- Wood or composite material for framing (choose a nice finish)
- Wood screws
- Wood glue
- Sandpaper
- Paint or wood stain (optional, in your favorite color or finish)
- Measuring tape
- Saw (hand saw or circular saw works)
- Drill and drill bits
- Screwdriver
- Level
- Pencil
Step-by-Step Instructions:
- Measure Your Window: Before you get too excited, take the measuring tape and measure your window. Determine how wide and tall your insert needs to be. Make certain you’re measuring accurately, or you could end up with a case of the “whoopsies.”
- Cut Your Materials: Using your saw, cut the wood or composite material to create a frame that fits snugly around your piece of acrylic or glass. Don’t fret if it’s not perfect at first. Wood gives you a little wiggle room to adjust as needed.
- Assemble the Frame: Lay the frame flat and secure the corners using wood glue. Once the glue dries, reinforce the corners with screws—no dog should be able to knock this apart.
- Attach the Acrylic/Glass: Place the acrylic or glass into the frame you’ve built. If you’re feeling extra motivated, you can reinforce it further with more screws or a bit of silicone sealant around the edges to make sure it’s snug and secure.
- Add Finishing Touches: If you want to jazz it up, now’s the time to paint or stain the wood frame. Choose a color that complements your home. After all, your pet’s view of the neighborhood should at least be stylish.
- Install the Window Insert: Finally, put your custom insert into the window frame. Use the level to make sure everything sits just right. You’re on the final stretch—just imagine your pup gazing out at the world with that adoring little face.
- Safety Check: Go over everything once again. Check for any sharp edges or loose parts. You wouldn’t want Fluffy to get a boo-boo while trying to catch a glimpse of the passing squirrels.
Optional Add-ons/Variations:
Want to give your window insert that extra personal flair? How about painting paw prints around the frame, or using stencils to add your favorite pet-related quotes?
You could even use reclaimed wood for a rustic look, which tells a story of its own, or flowers for a pop of color.
Pro Tip:
For added durability, consider sealing your wooden frame with a water-resistant finish. This way, if there happen to be any rainy days or spills around your window, your masterpiece will hold up beautifully.
Plus, it’ll be easier to clean, keeping it looking fresh and stylish for your pooch’s viewing pleasure.
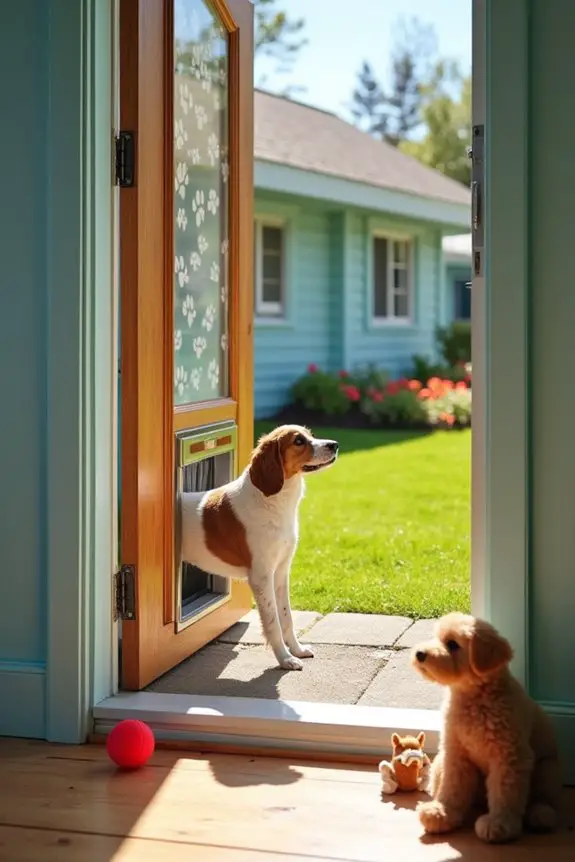
4. Automatic Sensor Dog Door
Ever wish your pup could let themselves in and out while you enjoy your coffee in peace? An automatic sensor dog door is your ticket to a stress-free, tail-wagging home. This DIY project is a game changer for dog owners who want to give their furry friend the freedom to access the outdoors, all while keeping your home secure. Plus, it saves you the trouble of opening the door a hundred times a day—your pup will feel like the king or queen of their castle. With the added convenience of automatic pet feeders, you can ensure your furry friends are well-fed while they explore their surroundings.
Materials Needed:
- Automatic dog door kit (includes the sensor, door flaps, and hardware)
- Drill with drill bits
- Measuring tape
- Saw (for cutting the door or wall as needed)
- Screwdriver
- Level
- Pencil
- Safety goggles
Step-by-Step Instructions:
- Choose the Best Location: Find a spot in your door or wall that works for your dog. Ideally, this should be where they can comfortably walk through without hitting their head—no one wants a ceiling fan incident.
- Measure and Mark: Use the measuring tape to determine the height at which the door will be installed. Mark the measurements with a pencil. Remember, dogs come in all shapes and sizes; measure, re-measure, then measure one more time for luck.
- Cut the Door: If you’re installing this on a solid door, you’ll likely need to cut a hole. With your safety goggles on, carefully cut along the outline you marked in the previous step. Channel your inner lumberjack, but maybe leave the plaid shirt off this time.
- Install the Sensor: Follow the instructions provided in your automatic dog door kit to install the sensor. It usually involves securing it inside the frame and making certain that it connects seamlessly with the door. Remember to keep your pup’s collar handy, as it’ll need the corresponding sensor.
- Attach the Door Flap: Once the sensor is in place, attach the door flap according to the kit’s instructions. Make sure it swings freely and seals properly; after all, we want your pup to feel like they’re entering their own luxurious lodge, not a prison cell.
- Test it Out: With everything installed, let your dog test it out. Make sure the sensor properly detects their presence and that the door operates smoothly. If everything is working as it should, watch them trot through that door as if they own the place—because they probably do.
- Safety Check: Finally, do a routine check to verify there are no sharp edges or loose parts. Your dog’s safety is paramount—confirm that everything feels sturdy enough to withstand your playful pup’s enthusiastic antics.
Optional Add-ons/Variations:
- Customization: Paint the exterior of the door flap a color that matches your home decor. You can also consider adding some stickers or decals for a fun touch.
- Weatherproofing: If your area sees harsh weather, look into weather-resistant door flaps or insulate the edges for added comfort.
Pro Tip:
Consider adding a motion sensor light nearby so your pup knows where the door is during the night. It’ll help them navigate more effectively and avoid those adorable but slightly embarrassing nighttime rumbles and tumbles.
Now, you’re all set to create a fabulous automatic sensor dog door. With this project, you’re not just enhancing your dog’s freedom; you’re adding convenience and a touch of luxury to both your canine companion’s life and your own. Enjoy your newfound peace, and don’t forget to revel in the sweet sound of paws padding away to the great outdoors.
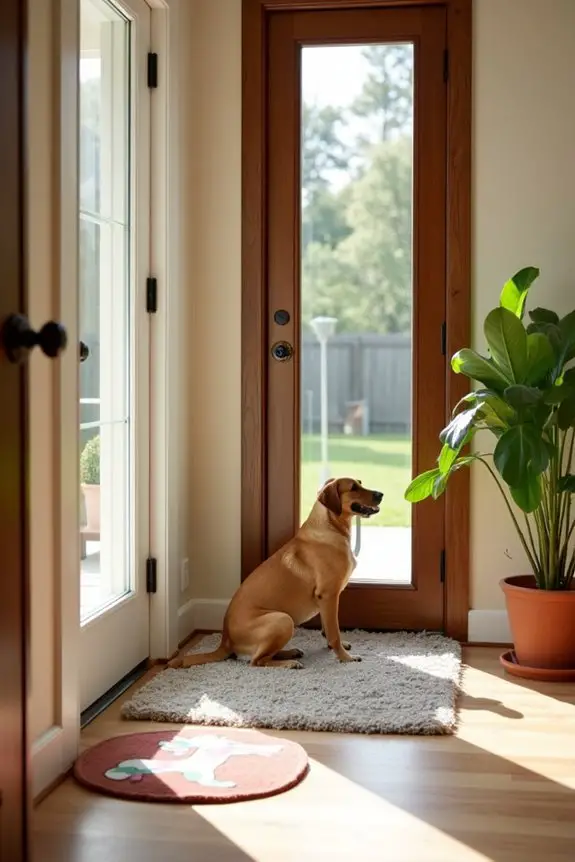
5. Invisible Dog Door Solution
If you’re looking for a way to give your dog the freedom to come and go without compromising your home’s aesthetics, consider creating an invisible dog door solution. This unique DIY project blends functionality with a sleek design that keeps your home looking polished while still allowing your pup to go outside whenever nature calls.
Plus, it saves you both time and wear and tear on your regular doors—talk about a win-win. For female dogs in heat, consider using dog diapers to help manage their menstrual cycle while they enjoy the freedom of coming and going.
Materials Needed:
- Vinyl or acrylic panel (clear to blend in)
- Weather stripping (to keep drafts out)
- Silicone adhesive or double-sided tape
- Drill and drill bits
- Measuring tape
- Utility knife
- Safety goggles
- Optional: decorative trim (to give it a finished look)
Step-by-Step Instructions:
1. Choose Your Location: Identify a spot near a wall or door where your dog usually heads out. Make sure it’s a place where it makes sense for you and your pup to have a door, and one where the invisible panel won’t be a trip hazard.
2. Measure and Mark: Measure the height and width that will fit your furry friend. Give yourself a little extra wiggle room—those tails are majestic but can get in the way!
3. Cut the Panel: Using the utility knife, carefully cut your vinyl or acrylic panel to the measurements you marked. Keep those safety goggles handy; we want zero doggy eye injuries here.
4. Attach Weather Stripping: To guarantee that the panel fits snugly and keeps drafts at bay, attach the weather stripping around the edges of your cutout. It’s the cozy, little hug your dog’s new entrance deserves.
5. Secure the Panel: Apply silicone adhesive or double-sided tape to the edges of the panel, then press it into the wall where your dog will enter. Give it a good press and make sure it’s secure.
You might want to sit there for a minute, channeling your inner DIY guru as you watch the adhesive do its magic.
6. Final Touches: If you’re feeling creative, add decorative trim to the edges of the panel for a touch of flair. You can paint or stain it to match the decor of your home, making it look like it was meant to be there from day one.
7. Test it Out: Encourage your dog to use their new invisible door. Send a treat through for motivation, and stand back as they barely notice they’ve just walked through a mystical portal into the backyard.
Optional Add-ons/Variations:
- Frame It Out: Use painted wood or stylish trim around the panel for a framed look. It’ll draw attention to the cool feature and can match your home’s aesthetic.
- Custom Art: How about adding a subtle paw print or your dog’s name etched onto the acrylic? It’s a personal touch that shows off your style.
Pro Tip:
When you’re using adhesive, make sure the area is clean and dry—any dust or moisture will keep it from sticking properly. Plus, letting the adhesive cure for the recommended time will guarantee your invisible door is strong enough to withstand a puppy’s excited entrance.
This project not only adds value to your home but makes life easier for you and your furry family member. Enjoy the serenity of not having to open the door every five seconds, and let the tail-wagging freedom begin!
6. Dog Door With Security Lock
If you’re a dog owner worried about safety concerns when it comes to letting your pooch roam freely, consider creating a dog door with a security lock. This DIY project not only offers convenience but also adds an extra layer of security, giving you peace of mind while keeping your furry family member happy.
It’s a practical solution that saves you from constantly scurrying to open the door, enhancing comfort for both you and your dog.
Materials Needed:
- Dog door kit with a security lock feature
- Measuring tape
- Pencil
- Level
- Phillips screwdriver
- Jigsaw or reciprocating saw
- Safety goggles
- Sandpaper (optional, for smoothing edges)
- Screw anchors (if needed, depending on wall type)
Step-by-Step Instructions:
1. Choose the Right Spot: Select a door or wall that your dog already uses regularly. Make sure it’s a location that’s convenient for both of you and guarantees easy access to the yard.
2. Measure for the Door: Use the measuring tape to find the right height for the dog door. Remember, you want your dog to walk through easily—no ducking or squeezing involved. Measure twice, cut once, right?
3. Mark the Cutout: Place the dog door frame on the surface, and trace around it with a pencil. Use a level to confirm your lines are straight—after all, we don’t want a lopsided dog door that could be the talk of the neighborhood.
4. Make the Cut: Wearing your safety goggles, grab the jigsaw and carefully cut along the lines you marked. Take your time; the last thing you want is a crooked cut.
5. Secure the Door Frame: After cutting, install the dog door frame according to the instructions that came with your kit. Usually, this involves screwing it into place, so grab your Phillips screwdriver and get to work.
If you’re dealing with a tough wall, you might need screw anchors for extra support.
6. Install the Security Lock: Follow the directions to install the security lock feature. This usually involves attaching the locking mechanism to the door frame. Make sure everything is secured tightly—your dog’s escapades shouldn’t require you to play a game of hide-and-seek to get them back.
7. Smooth the Edges: If you want that professional touch (look at you being all fancy), use sandpaper to smooth any jagged edges around your new dog door. Your dog will appreciate the less-than-snaggy entrance.
8. Test It Out: Let your furry friend have the first go. With the security lock in place, you can feel confident while they explore outside. Just keep an eye on their reaction.
You never know, they might give you their very own ‘paw of approval.’
Optional Add-ons/Variations:
- Customize the Look: Paint or stain the frame to match your home’s decor or your dog’s personality. Perhaps a bright color for a cheery vibe, or a rustic finish for that cozy farmhouse feel.
- Add an Astroturf Patch: Create a small area outside with some astro turf where your dog can comfortably trot onto when using the door. It’s like the VIP entrance just for them.
Pro Tip:
Before you start cutting, double-check your dog’s size with the manufacturer’s recommendations for the dog door kit. This guarantees you won’t accidentally create a gateway for your neighbor’s cat instead of your own pup.
It’s like ordering a sandwich—you don’t want to end up with pickles if you hate them.
With this dog door, you can breathe a little easier knowing your home is safe, and your pup can enjoy their newfound freedom without breaking a sweat.
Happy DIY-ing!
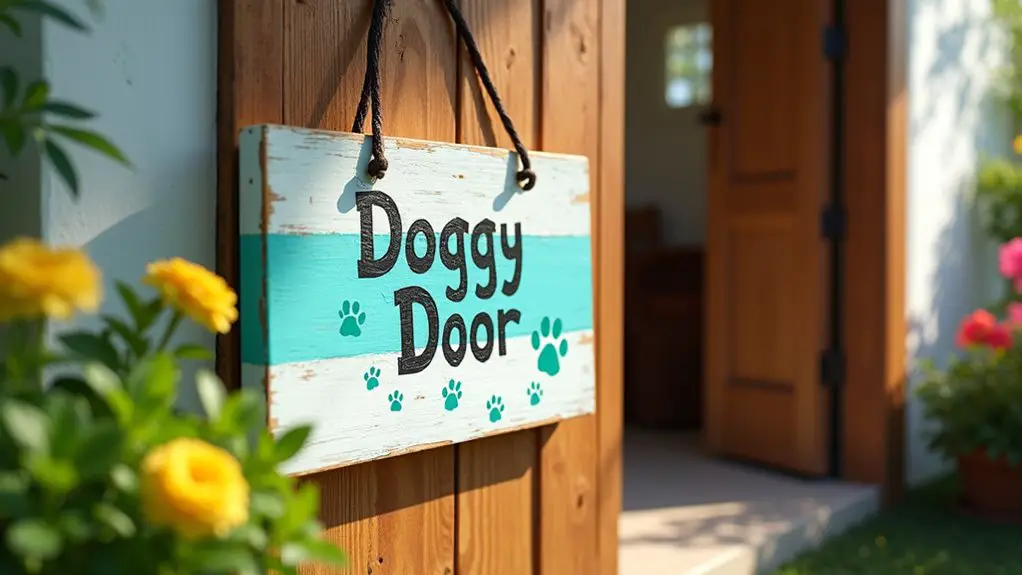
7. Customized Dog Door Sign
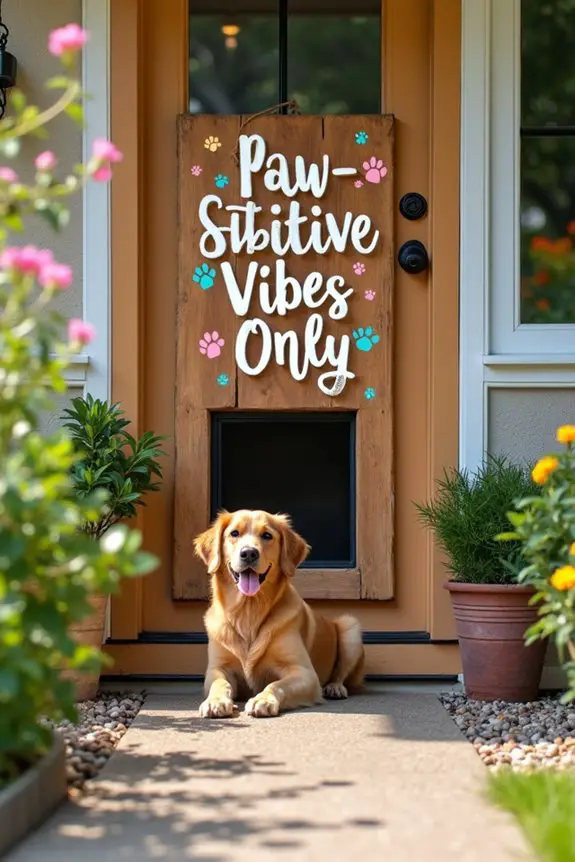
Creating a customized dog door sign is a delightful way to add a personal touch to your home while enhancing your dog’s entrance. Not only does it make your space feel warmer and more welcoming, but it’s also a great conversation starter for guests. Plus, you can save money by crafting this yourself instead of buying a premade sign!
Materials Needed:
- Wooden or acrylic sign blank
- Craft paint or permanent markers
- Paintbrushes (if using paint)
- Stencil or vinyl letters (optional)
- Twine or ribbon (for hanging, if desired)
- Clear sealer (for weatherproofing, if intended for outdoor use)
- Drill or screwdriver (for hanging)
Step-by-Step Instructions:
- Pick Your Sign Material: Choose a wooden or acrylic blank that suits your style. A good rule of thumb is to pick something sturdy enough to withstand the whims of weather if you plan to hang it outside.
- Design Your Message: Think about what you want your sign to say. It could be something simple like “Doggy Door” or quirky like “Paw-sitive Vibes Only.” If drafting isn’t your strong suit, don’t worry—there are plenty of stencils available that can help.
- Apply the Design: If you’re feeling crafty, use paint or markers to write your chosen message directly onto the blank. You can practice your design first on a piece of scrap paper for a little extra peace of mind. If using stencils or vinyl letters, adhere them properly before painting over.
- Add Details: Get creative! You could paint paw prints, bones, or even your pup’s name. This is your moment to let your imagination shine. Just be careful not to overdo it—less can be more!
- Seal the Deal: If this sign is going outside (or even if it’s inside, just to be safe), apply a clear sealer to protect your artwork from the elements. You don’t want your dog’s new sign looking sad after a rainy day.
- Hang It Up: Use twine or ribbon to hang your finished sign next to your dog door. Alternatively, you can drill holes and screw it directly onto the surface. Just make sure it’s secure—no one wants a sign crash-landing unexpectedly during a casual stroll.
- Step Back and Admire: Take a minute to appreciate your handiwork. You’ve created a lovely personalized piece that not only tells everyone about your pooch but also makes them smile.
Optional Add-ons/Variations:
- Consider painting your sign in your dog’s favorite colors or patterns. You could even use fabric to create a softer look around the edges.
- For a little bling, add some pet-safe embellishments like decorative stickers or even a small flower pot near the sign for a charming garden effect.
Pro Tip:
When painting or applying any finishes, use non-toxic materials, especially if your dog likes to lounge nearby.
And remember, a little patience goes a long way! It might take time for the paint to dry, but your pup will appreciate the effort when they see their new sign.
Extra Tips & Ideas
While you might think a dog door is just a simple opening for your furry friend, there’s a treasure trove of extra tips and ideas that can transform it into a stylish, functional part of your home.
Ever thought about adding a little privacy flap? It’ll give your pup some alone time when they’re feeling extra sassy. You could even paint the frame to match your home décor.
And hey, a cute doorbell for your pup? Why not! Just picture your dog ringing it with their nose when they want to come in. Trust me, it’s a conversation starter.
Finally, consider installing a motion-activated light—no more stumbling around in the dark. Your furry friend deserves the best, after all.
Frequently Asked Questions
Can I Install a Dog Door in a Wall Instead of a Door?
Yes, you can install a dog door in a wall instead of a door. Just make sure you choose the right size, follow installation instructions carefully, and consider the wall’s material for easy access.
What Materials Are Best for Making a DIY Dog Door?
You’ll love using materials like wood, weatherproof plastic, and sturdy metal for your DIY dog door. Funny how you’re crafting a door to let them out, right? Choose strong insulation for the ultimate protection.
How Do I Measure My Dog for the Right Door Size?
To measure your dog for the right door size, have them stand straight. Measure from the ground to their shoulder height, then add a few inches for clearance. Confirm the width accommodates their body comfortably.
Will a Dog Door Lower My Home Security?
A dog door can lower your home security if it’s not properly installed or secured. You’ll need to contemplate the door’s quality, locking mechanisms, and surrounding area to keep your home safe while giving your pup freedom.
Can I Customize the Design of a DIY Dog Door?
Yes, you can definitely customize your DIY dog door’s design! Choose materials, colors, and shapes that match your home’s style while ensuring it’s functional for your pup’s size and needs. It’s all about creativity!
Conclusion
So, there you have it—seven pawsitively fantastic DIY dog door ideas to transform your home into a paradise for your furry friends. Imagine their wagging tails and joyful barks as they explore the great outdoors at will. Each door can be a blend of your style and their needs, just like a cozy blanket fort that’s uniquely theirs. Go ahead, release your creativity and create a happy haven for your pup—because every dog deserves a door to their own adventures.

Hi, I’m Ali Tarek, the founder of Animalsman. I’ve always been passionate about pets, especially dogs and cats, and I created this website to share practical tips, easy recipes, and helpful care advice for fellow pet lovers. My goal is to make pet care simple, enjoyable, and accessible for everyone. When I’m not writing or curating content, you’ll usually find me spending time with my furry friends or learning new ways to keep them happy and healthy.

