
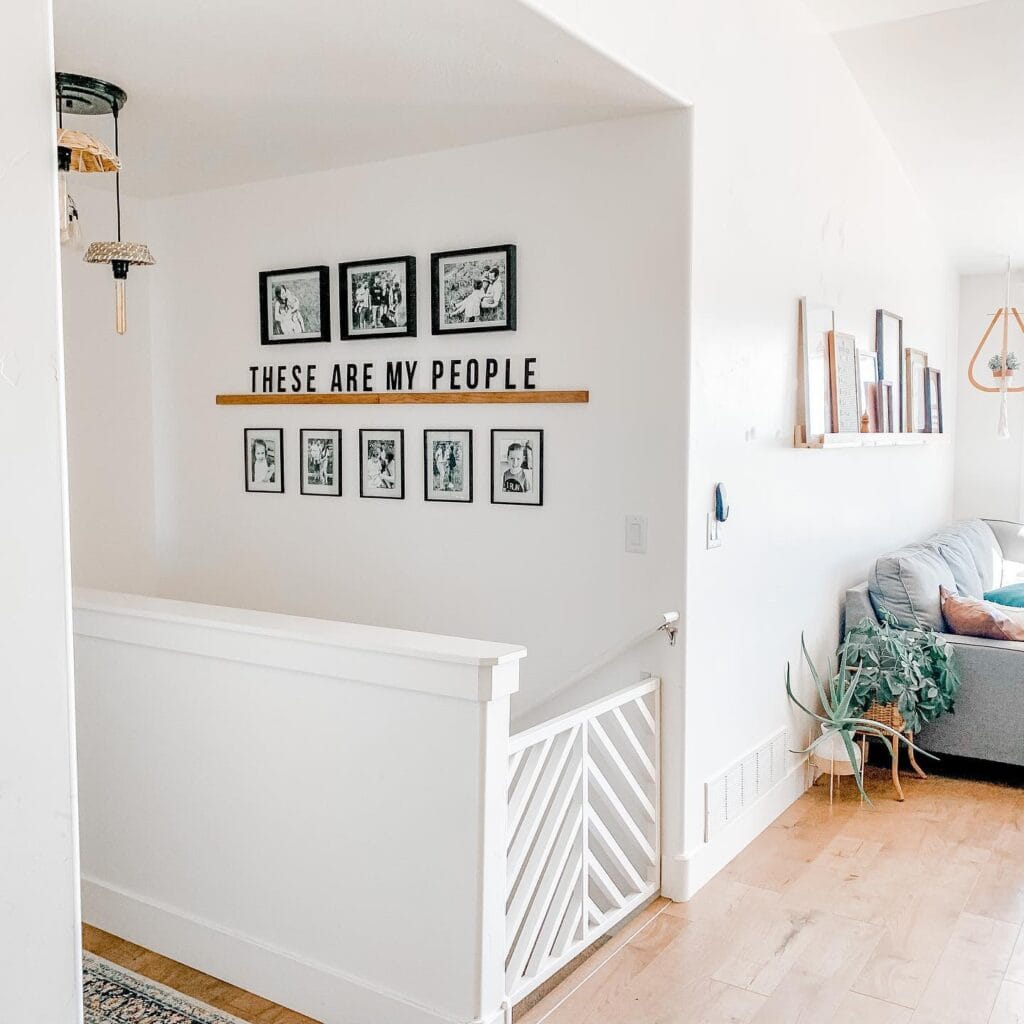
Living with a dog brings endless joy but may also present a few challenges when it comes to keeping those paws off the stairs. We’ve rounded up our favourite indoor dog gates to help keep your new best friend in the desired zone and away from trouble.
While many of the store bought gates work well, they’re just not the style you like or fit the space just right. And while the store bought ones work well, you can easily turn to a dog gate indoor diy solution. With a little creativity and a few tools, you can build a great looking gate that will keep your dog in place.
Discover all the DIY indoor dog gate styles that work beautifully in staircases, hallways or any open space in your home.
#1: Minimalist Slat Stair Dog Gate
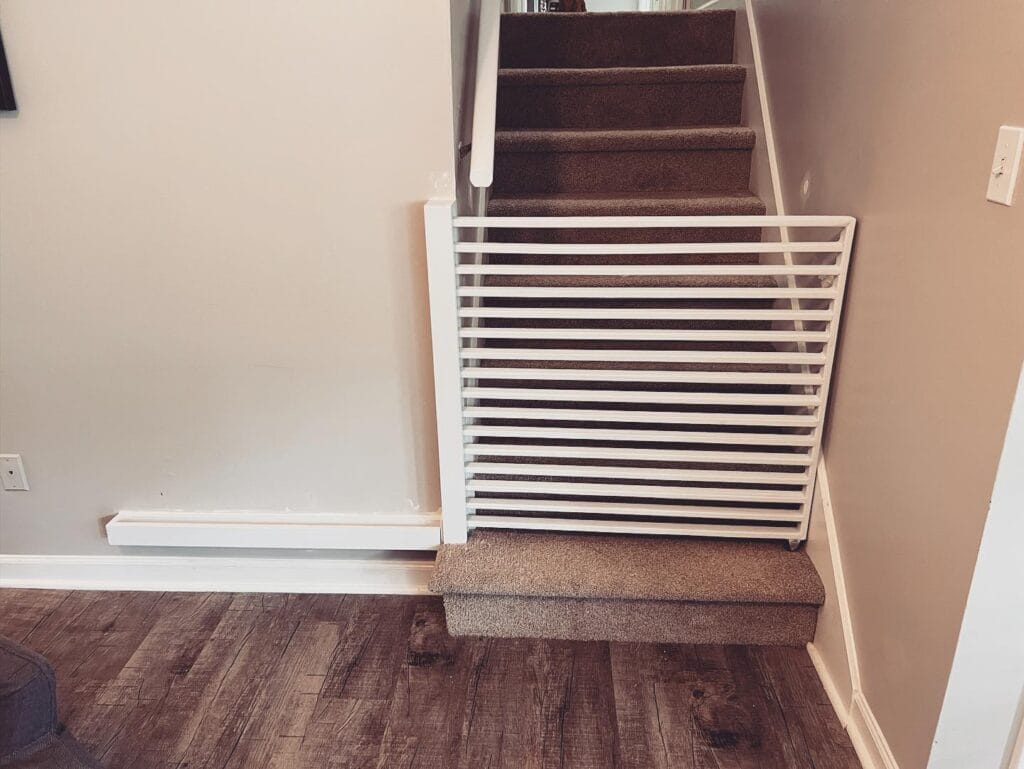
Very commonly, a dog gate is needed in the bottom of the stairs. The gate shown in the image below is a sleek white slatted dog gate, which is installed in the base of the stairs and blends in with the surrounding walls and railings.
Materials & Tools You’ll Need:
- Wooden slats or dowels
- Two vertical wooden posts
- Wood screws
- Drill
- Measuring tape
- White paint or wood stain
- Sandpaper
Prep Time: 20 minutes | Active Project Time: 2–3 hours | Difficulty Level: Intermediate
Instructions
You will want to measure the width of where the gate will be installed. This is the width of the stair opening. This is the width of the frame.
Next, cut two pieces of 2″ x 4″ wood to be the sides of the gate. Then, cut enough wood slats to have several horizontal bars on the gate. Sand each piece of wood to remove any splinters.
Lay the two posts down horizontally and start attaching the slats between them. Space them so it looks nice and even and doesn’t give your dog room to squeeze through.
Screw each slat into the frame with wood screws and a drill. Once the frame is assembled, paint or stain the frame to match your home’s interior. Allow the paint or stain to dry completely before hanging the gate.
Mount the gate onto the stairs using hinges or sliding brackets depending on how you wish to open the gate. This gate will stop dogs climbing the stairs while keeping your home looking modern and clean.
Tip: It is very important to make the spacing between the slats small enough so that small dogs do not slip through.
📸 Photo credit: Instagram @bbybatandbarbell
#2: Classic Vertical Railing Dog Gate
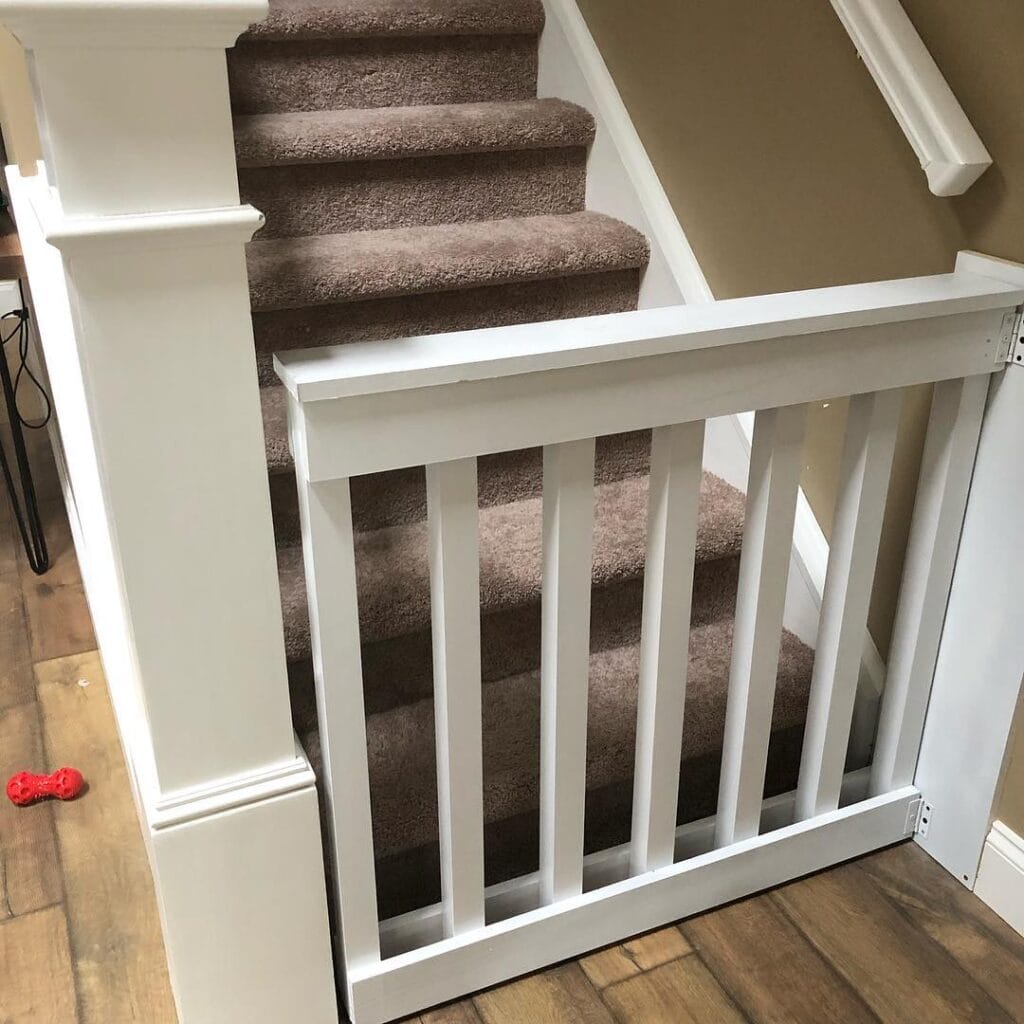
Sometimes the best design is a simple, but timeless one. The gate is made of vertical wooden rails, as the staircase banister.
Materials & Tools You’ll Need:
- Wooden railing spindles
- Frame boards for top and bottom
- Wood screws
- Drill
- Hinges
- Paint or stain
- Measuring tape
Prep Time: 15 minutes | Active Project Time: 2 hours | Difficulty Level: Beginner
Instructions
First, I measured the opening of the staircase where the gate will be installed. I cut two horizontal boards for the top and bottom part of the gate frame.
Cut some of the vertical railing spindles so that they are the height you want for the central barrier of the gate.
Screw the vertical spindles on to the bottom board evenly. Once all spindles are secured, screw the top board onto the bottom board to complete the frame.
Sand the whole gate so that the rough edges are removed and paint or stain it to match the stairs railings.
Put the hinges on one side of the gate and mount it to the wall or to the stair post. Install a latch on the other side to easily open and close the gate.
It’s a great style for traditional homes because it mirrors the existing stair design, and keeps the dogs safely contained.
Tip: I used the pre-made railing spindles that I bought at my hardware store to save cutting time.
📸 Photo credit: Instagram @dagwood_designs
#3: Decorative Diagonal Pattern Gate
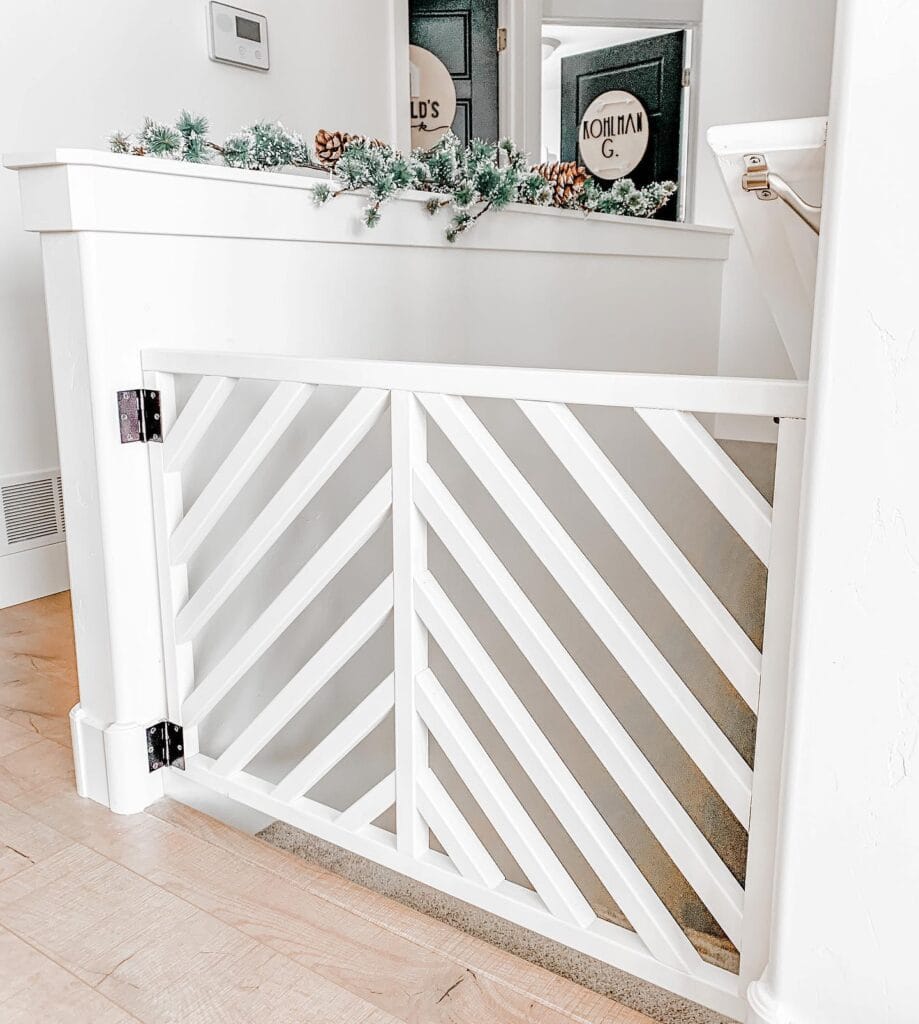
If you have a gate you want to use as décor, consider a diagonal wood pattern for a little more visual interest.
Materials & Tools You’ll Need:
- Wooden boards for frame
- Thin wooden slats
- Wood glue
- Drill and screws
- Sandpaper
- White paint
Prep Time: 25 minutes | Active Project Time: 3 hours | Difficulty Level: Intermediate
Instructions
Start by constructing a rectangular frame from sturdy wooden boards. Screw the corners onto the boards to keep the gate strong.
Cut thin strips of wood to fit diagonally into the frame. Then lay them across the gate so that they form an alternating pattern.
Place wood glue on the end of each slat and then attach with a few screws where needed. Continue filling the frame with slats until the pattern covers the whole gate.
After the unit is together you will need to sand it to make it smooth. Then you can put whatever paint or stain you like on it to make it match your interior design.
Oriental Animals 1, 2, 3, 4, 5, 6, 7, 8, 9, 10, 11, 12. by Will Durant. Text available at Internet Archive To install hinges on one side of the frame. Attach the gate to the wall post or a stair column.
Even though this decorative gate is really stylish, you will be able to still create a barrier for your dog.
Tip: Pre-measure each slat carefully so the pattern stays symmetrical.
📸 Photo credit: Instagram @just_courtney_slight
#4: Compact Corner Stair Gate
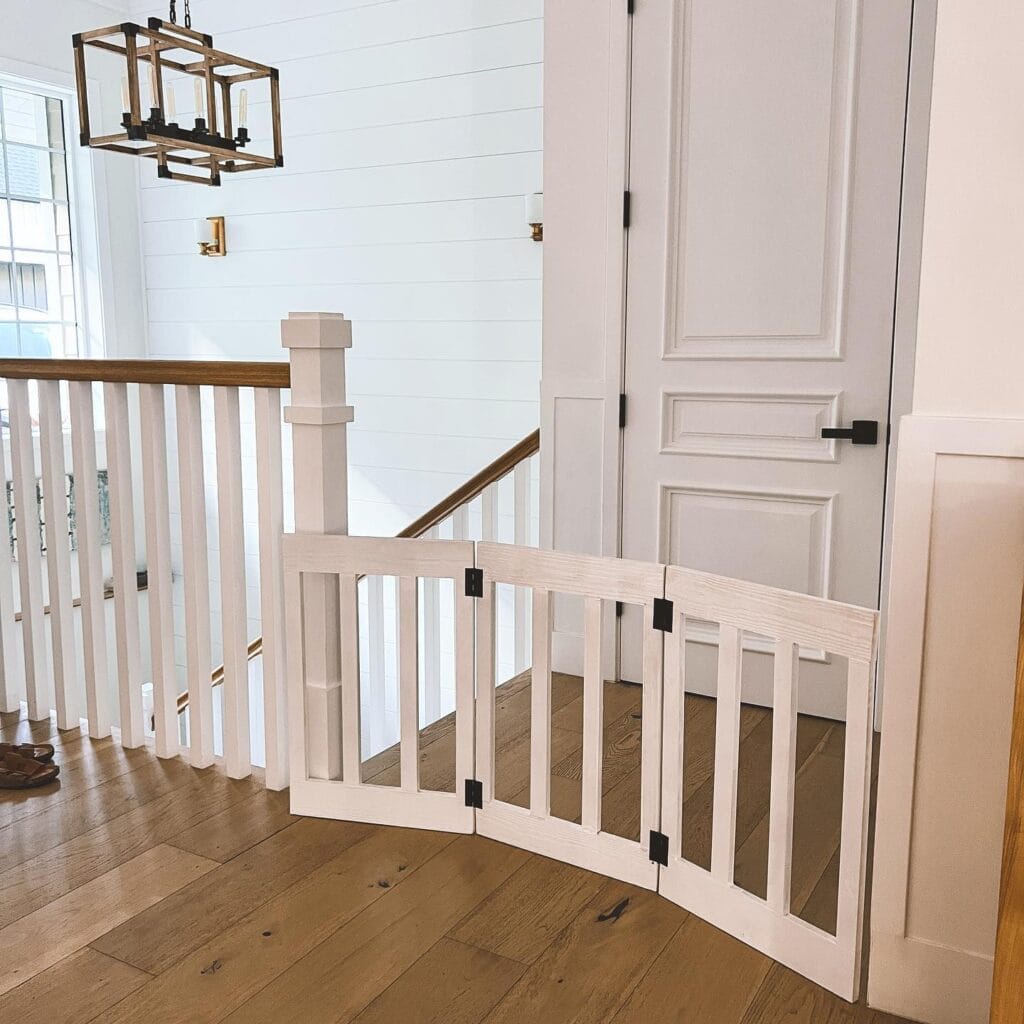
Sometimes the stairs are too tight and you have to improvise. Here we added a gate in the corner of the opening so we wouldn’t block the walkway.
Materials & Tools You’ll Need:
- Wooden frame boards
- Vertical or diagonal slats
- Hinges
- Latch lock
- Drill
- Measuring tape
Prep Time: 20 minutes | Active Project Time: 2 hours | Difficulty Level: Intermediate
Instructions
Make sure to measure the corner where the gate will sit. If you have an angled entryway, make sure to double check your measurements.
Build a wooden frame that matches the exact size of the stairs opening. You can attach the slats vertically or diagonally depending on the style you like.
Secure the slats to the frame with screws. Sand the gate, then paint or seal.
Attach the gate to the wall or the post of the stair railing using hinges and attach the latch to the other side of the gate so that it can be opened easily by adults.
It’s perfect for smaller homes where stair entrances might not be symmetrical.
Tip: Test the swing direction of the gate before putting hinges on it to avoid blocking the path.
📸 Photo credit: Instagram @agirlmakingit
#5: Durable Plastic Indoor Gate Solution
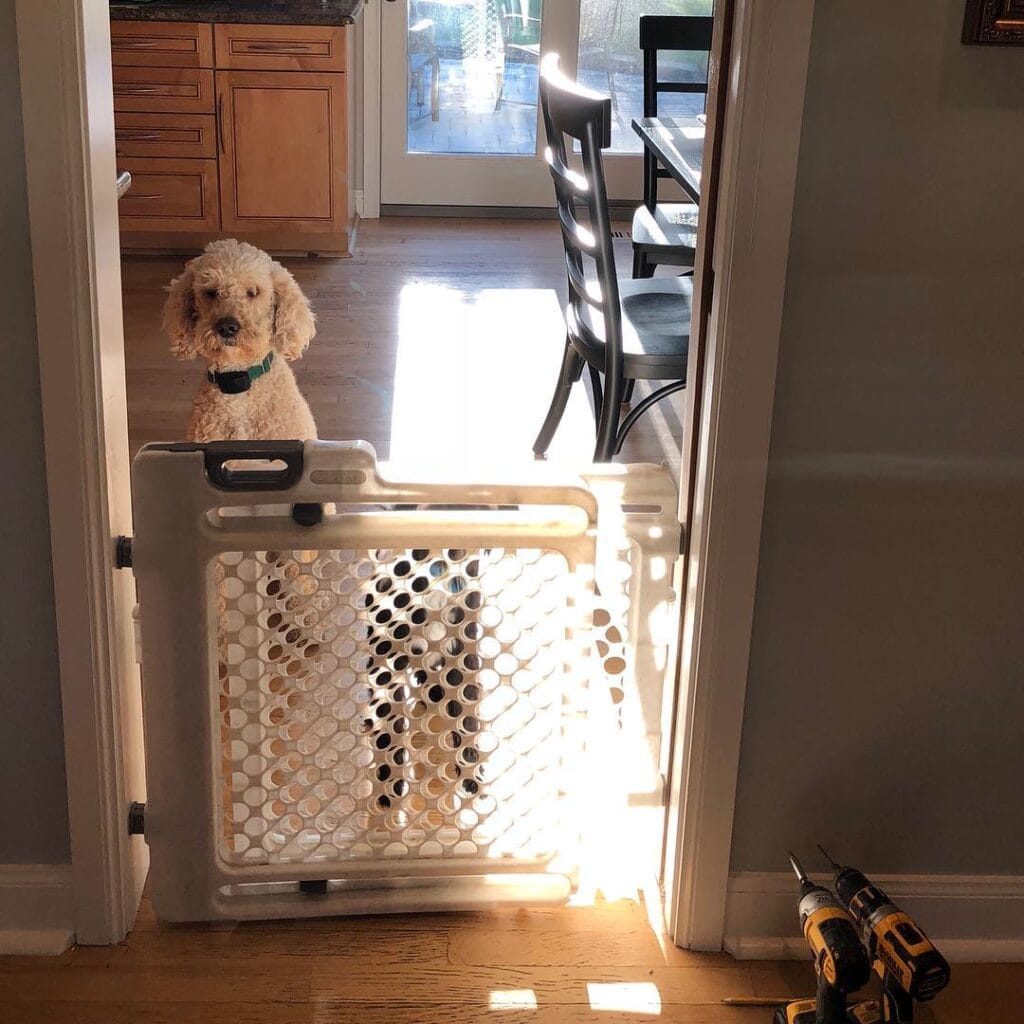
Not every project needs a piece of wood. Here I’ve installed a tough plastic safety gate in the doorway to create a barrier for the dog.
Materials & Tools You’ll Need:
- Plastic baby gate
- Wall mounting brackets
- Screws
- Drill
- Measuring tape
Prep Time: 10 minutes | Active Project Time: 30 minutes | Difficulty Level: Beginner
Instructions
First you will need to measure the doorway or hallway where you plan to install the gate. Attach the mounting brackets to each side of the doorway.
You can also use a drill to secure the brackets into the wall studs. Then, attach the plastic gate to the brackets according to the manufacturer’s instructions.
Slide the gate inward until it fits tightly in the opening of the door. Lock the gate into place using the built-in latch system.
Especially good as a temporary gate, or for training. Easy to use and ideal for renters who don’t want anything built.
Tip: If you are using gates, then pick the ones which close automatically for your convenience.
📸 Photo credit: Instagram @metrodetroitcraftsman
#6: Half-Wall Stair Landing Gate
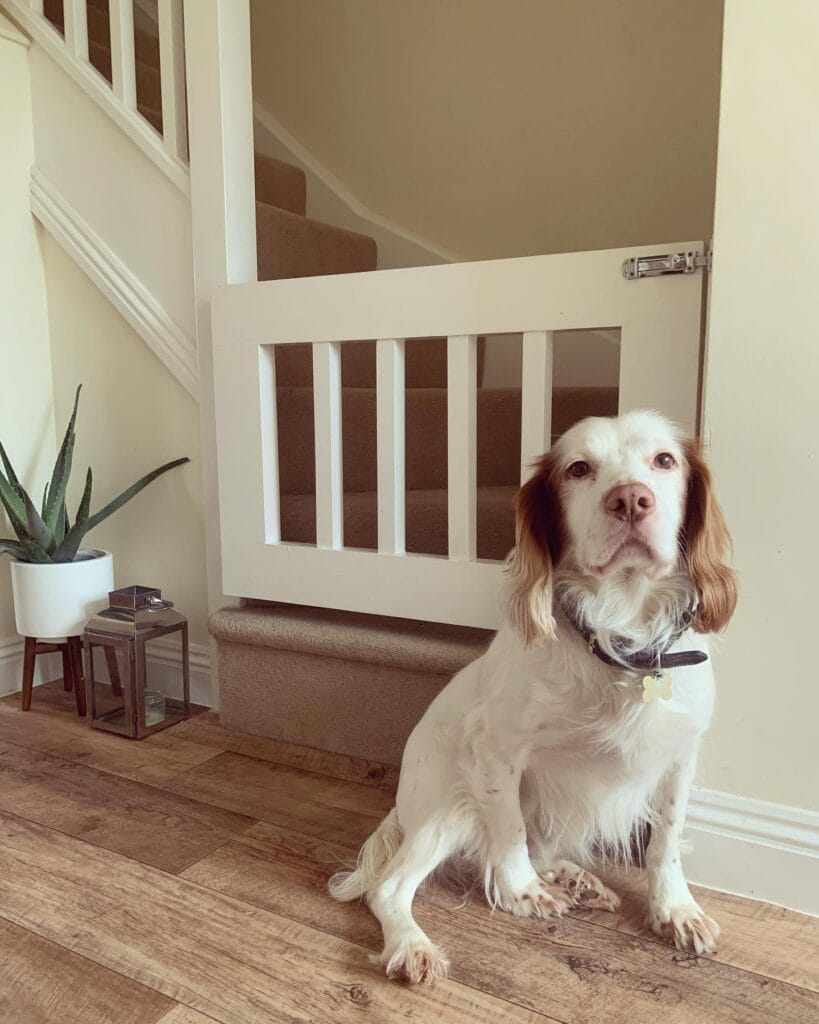
Some homes will have half walls near the stairs that need gates that are custom sized. This gate is mounted below a half wall at the stair landing.
Materials & Tools You’ll Need:
- Wooden frame boards
- Diagonal slats
- Hinges
- Screws
- Wood stain or paint
Prep Time: 20 minutes | Active Project Time: 2 hours | Difficulty Level: Intermediate
Instructions
Measure the opening underneath the half wall where the gate will be installed. Make a frame that will fit snugly into this space.
If you desire a more sturdy looking barrier, you will want to attach diagonal slats to the frame. Screw the slat to the frame.
Sand the gate surface and then paint or stain it to match your other trim and walls.
Place hinges along the side that is connected to the wall post and attach a latch on the opposite side.
It’s a great design for modern interiors while safely blocking stair access for dogs.
Tip: If you feel the gate is too flimsy for your liking, then add some diagonal slats to the frame.
📸 Photo credit: Instagram @_hunter_home_
#7: Rustic Wooden Barn-Style Dog Gate
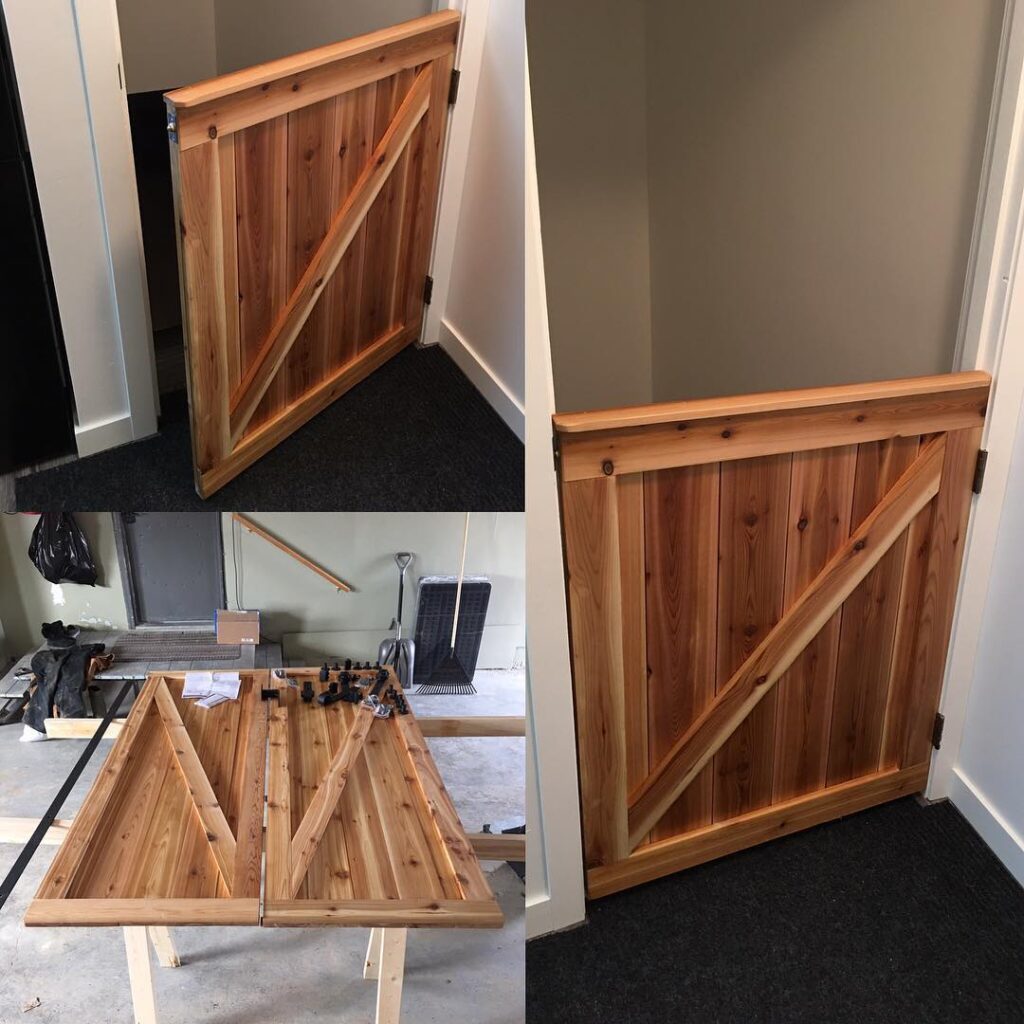
If you’ve got a rustic or farmhouse, then a barn-style gate is definitely something you should consider, especially if you’ve got pets that you don’t want roaming around the yard.
Materials & Tools You’ll Need:
- Cedar or pine boards
- Wood glue
- Screws
- Hinges
- Wood stain
- Sandpaper
Prep Time: 30 minutes | Active Project Time: 3 hours | Difficulty Level: Intermediate
Instructions
Make several vertical boards for the face of the gate. Lay them side by side and attach two horizontal boards to the back for support.
I added a diagonal board across the frame to make the classic barn door style. I secured all of the boards with screws and a little wood glue.
Sanding the wood and highlighting the grain is key. Applying a protective stain is the final step in creating the rustic look.
Attach the gate to the wall or stair post with sturdy hinges. Add a latch to keep the gate closed.
The barn-style gate is very durable and decorative. This gate is great for larger dogs.
Tip: Cedar wood is naturally resistant to moisture and will last longer indoors.
📸 Photo credit: Instagram @_the__turning__point_
Conclusion
Making your own dog gate indoor diy is the perfect solution to design your home as you like and keeping your dog safe and comfortable. From sleek modern slats to rustic barn-style gates, these diy dog gates are both functional and stylish.
What started out as a place to confine our very active boxer, the gate became an integral part of our home. It not only protects our dog, but it also organizes our living space. With the right tools, and a little planning, you can build a gate that fits your space.

Amr Mohsen is a software engineer who traded his keyboard for a leash — at least on weekends. His love for dogs inspired him to share what he learns as a dog owner and enthusiast, bringing a detail-oriented, research-driven perspective to every article he writes. If it’s about dogs, he’s probably already looked it up twice.



