Funny coincidence: I just finished building a DIY dog grooming table, and now I’m here chatting about it with you. Ever thought about how a proper grooming table can make life easier and less chaotic? With so many designs, you’re bound to find one that suits your space—or maybe even a quirky idea that’ll have your friends asking for your secrets. Let’s figure out how to elevate your grooming game, shall we?
Elevated Grooming Table Designs
When you think about grooming your furry friend, the last thing you want is to bend over like a pretzel trying to reach their fur, right?
That’s where elevated grooming table designs come in. With a DIY dog grooming table, you can create a comfy space for both you and your pup.
Start by building a sturdy frame with adjustable legs so you can choose the perfect height.
Don’t forget to add a non-slip surface—your dog will appreciate it, and so will your back. A built-in harness can keep your energetic buddy in place.
Plus, you can paint it in any quirky color that matches your home.
It’s not just about grooming; it’s about creating a fun space for bonding too.
Our Collection
You’re in for a treat with our collection of DIY dog grooming tables!
Whether you want a portable folding design that makes grooming on the go a breeze or an adjustable-height table that’ll save your back, we’ve got options.
Plus, check out features like non-slip surfaces and handy storage hooks that keep everything organized, because who doesn’t love a tidy grooming station?
1. Portable Folding Grooming Table
If you’ve ever wrestled with a wriggly pup during bath time or training, this DIY portable folding grooming table is your new best friend. Not only does it make grooming easier and more comfortable for your dog, but it also keeps your home looking sharp — who wants a fur-covered couch after all?
Plus, building it yourself saves a few bucks compared to those pricey store-bought versions. Let’s explore how you can create this grooming essential in no time.
Materials Needed:
- 4 pieces of 1” x 2” wood (for the table frame)
- 1 piece of plywood or MDF board (about 2’ x 3’ for the table surface)
- 2 sets of folding table legs (can be found at any hardware store)
- Wood screws (1 1/4” should do the trick)
- Wood glue
- Sandpaper (medium and fine grit)
- Paint or sealant (optional, for a polished finish)
- Measuring tape
- Saw (hand saw or circular saw)
- Screwdriver
- Safety goggles (always a smart choice)
Step-by-Step Instructions:
1. Measure and Cut Your Wood: Grab your measuring tape and mark the necessary lengths for your frame. Generally, you’ll want two long pieces (about 3 feet) and two short pieces (about 2 feet).
Using your saw, carefully cut your wood according to your measurements. It’s okay if it’s not perfect; just smile and remind yourself that *artistic charm* counts.
2. Build the Frame: Lay the two long pieces parallel to each other, and connect them with the two shorter pieces, forming a rectangle.
Use wood screws and your screwdriver to secure it all together, and don’t forget that wood glue adds strength, too—think of it as the icing on your dog treat cake.
3. Attach the Table Surface: Place your plywood or MDF board on top of the frame, ensuring it hangs over the edges just slightly.
Secure it with screws — just enough to hold it steady for your enthusiastic furry friend.
4. Add the Folding Legs****: Now it’s time to attach the legs. Most sets will have easy instructions, but basically, you’ll want to fix them to each corner of the frame.
Make sure they fold outwards so that you can easily set up and break down your table whenever needed. Secure with screws, and just like that, your table is starting to take shape!
5. Sand Your Edges: Now that you have a functional table, it’s all about comfort (for both you and your pup).
Grab your sandpaper to smooth out any rough edges on the surface and corners. Remember, no one wants a splinter during grooming.
6. Add the Final Touches****: If you’re feeling adventurous, slap some paint or sealant on that bad boy.
Go for a bright color or a fun pattern that matches your dog’s personality — maybe your pup loves stripes or polka dots.
7. Set Up and Get Grooming: Once everything is dry (if you painted), you can set up your table and get ready for some grooming fun.
Use a non-slip mat on top of the table surface for added grip and comfort — who doesn’t love a soft surface?
Optional Add-ons/Variations:
Feel free to mix things up. Instead of plain wood, you could use colorful contact paper for a fun design, or maybe even stencil your dog’s paw print to add a personal touch.
If you want something even more unique, try using reclaimed wood with natural imperfections — it gives a rustic charm that compliments your pup.
Pro Tip:
Always supervise your dog when they’re on the grooming table. If they seem wiggly, consider adding a leash attachment or a harness to keep them secure.
And here’s a little secret: giving them treats while they’re being groomed can turn the whole experience into a fun bonding time. After all, who doesn’t love snacks more than a bathtub?
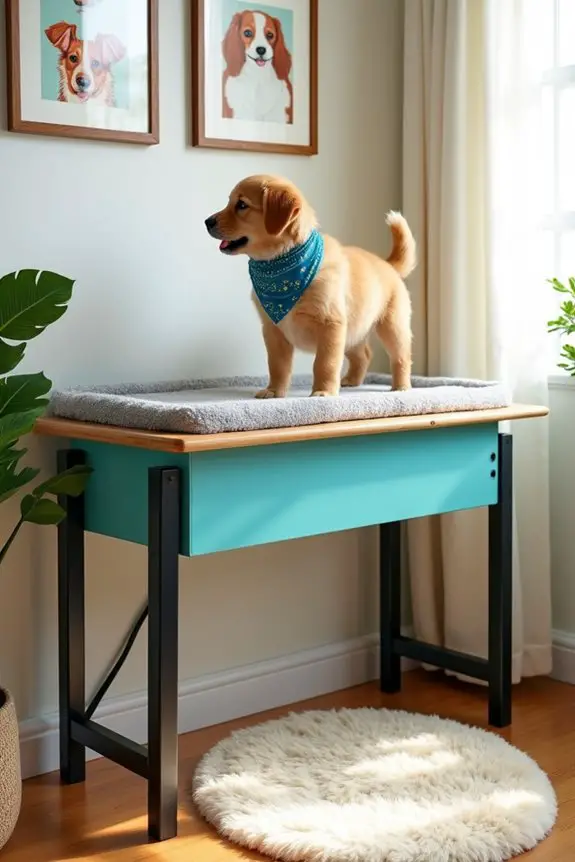
2. Adjustable Height Grooming Table
If you’re a dog owner and you’ve ever thought, “Why can’t this grooming session just be a little easier?”—this DIY adjustable height grooming table is for you. Not only does it allow you to customize the height based on your pup’s size or your comfort during grooming, but it also saves you a chunk of change compared to those fancy tables at pet stores. Plus, it keeps your furry buddy secure and comfortable while you pamper them. Additionally, maintaining your dog’s dental hygiene is crucial for their overall health and can complement your grooming routine. Regular dental care can also prevent serious health issues in dogs, making it an essential part of their overall care.
Materials Needed:
- 4 pieces of 1” x 2” wood (for the frame)
- 1 piece of plywood or MDF board (size based on your needs—2’ x 3’ is a good standard)
- Adjustable height table legs (available at your local hardware store)
- Wood screws (1 1/4” is great)
- Wood glue
- Sandpaper (medium and fine grit)
- Paint or sealant (optional, for a smooth finish)
- Measuring tape
- Saw (hand saw or circular saw works)
- Screwdriver
- Safety goggles (always a good idea)
Step-by-Step Instructions:
- Measure and Cut Your Wood: Use your measuring tape to get the dimensions right for a frame that suits your pup. You’ll need two longer pieces (about 3 feet) and two shorter ones (about 2 feet). Handle the saw with care as you cut. Even if the lengths aren’t perfect, remember—perfection is overrated; just take a deep breath and keep going.
- Build the Frame: Create a rectangle by placing the long pieces parallel to each other, then connecting them with the shorter pieces. Use wood screws and your screwdriver to lock it all in place, ensuring it’s sturdy. A little wood glue can work wonders as well—think of it as ensuring your frame has the utmost stability while your dog prances around.
- Attach the Table Surface: Lay your plywood or MDF board atop the frame. Make sure it slightly overhangs the sides—this just makes it look more custom. Secure it down with screws, just enough to hold it steady. If your pup loves to leap around, you might want to add extra for safety.
- Connect the Adjustable Legs: Now, you’ll attach your adjustable height legs to each corner of the frame. Follow the manufacturer’s instructions carefully here. Take a moment to visualize how high you want your table, as this functionality is the best part. Secure those legs well; we want no surprises when it’s grooming time.
- Sand Away: Smooth out any rough edges on your table surface and corners with your sandpaper. Trust me, you’ll thank yourself later—splinters aren’t a dog’s best friend or yours. A little elbow grease here goes a long way toward a comfortable grooming experience.
- Finishing Touches: Want to paint or seal your table? Now’s the time to add that personalized touch. Feel free to make it match your home decor or your pooch’s favorite color. Every bit of personality counts.
Optional Add-ons/Variations:
- Consider contrasting colors for your table legs versus the top for a fun twist. A vibrant blue with a natural wood tone can be both chic and eye-catching.
- If you’re feeling crafty, fabric can be wrapped around the table legs to provide a softer look, or even cushion around the edges for extra comfort for your dog.
Pro Tip:
Always make sure to test the stability of your table before your first grooming session. And here’s a cost-saving trick: if you have extra wood pieces lying around, use them to create a neat overflow space for grooming supplies. This way, you can keep everything handy without breaking the bank.
There you have it—a simple yet effective adjustable height grooming table that you created yourself. Now, your pup can look fabulous without the fuss, and your back will thank you too! Happy grooming!
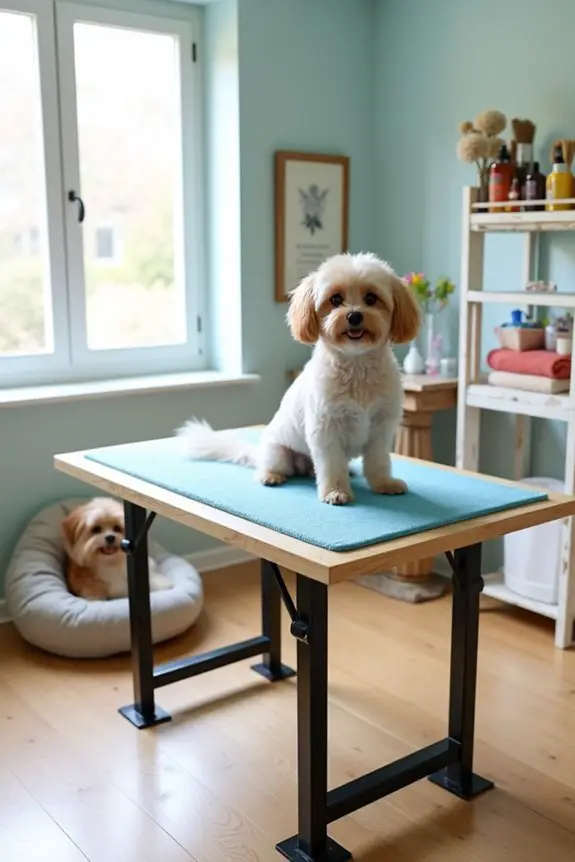
3. Non-Slip Surface Grooming Table
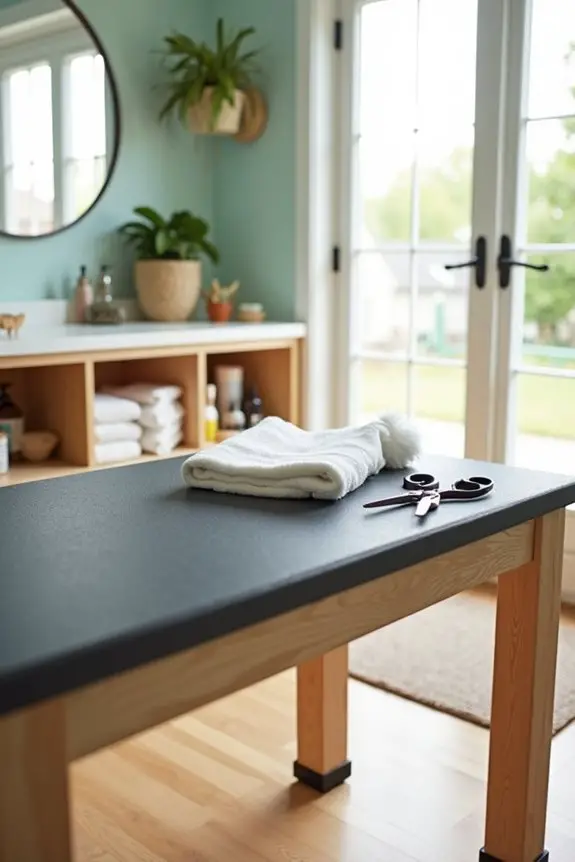
Grooming your beloved pup can be a slippery situation—literally. This DIY non-slip surface grooming table will give both you and your furry friend peace of mind during the grooming process. By creating a safe, stable surface, you can focus on pampering your pup without worrying about any unexpected slips. Plus, you’ll save money compared to purchasing a pre-made table, all while adding a polished touch to your grooming area.
Materials Needed:
- 1 piece of plywood or MDF board (2′ x 3′ is a good size to start with)
- Non-slip rubber matting (available at hardware stores or online)
- Spray adhesive or staple gun
- Wood screws (1 1/4” is a good size)
- Sandpaper (medium and fine grit)
- Measuring tape
- Saw (hand saw or circular saw)
- Screwdriver
- Safety goggles
- Optional: Acrylic sealer (for extra durability)
Step-by-Step Instructions:
- Measure and Cut Your Board: Grab your measuring tape and decide on the size you want for your grooming table. A dimension of 2’ x 3’ is usually ideal, but feel free to adjust based on your space. Carefully cut your plywood or MDF board to size, remembering to wear those goggles—you don’t want a splinter ruining your day.
- Sand the Edges: Use your sandpaper to smooth out any rough edges or splinters on your board. This is an especially important step because those nasty little bits can irritate both humans and pups alike.
- Cut Your Non-Slip Matting: Measure the dimensions of your table surface and cut the non-slip matting to match. It should hang slightly over the edges to enhance grip and stability.
- Attach the Matting: Apply spray adhesive to the top of your board, or if you’re using a staple gun, line the mat at the edge, pulling it taut as you go. Press down firmly to secure it in place or staple the edges, ensuring there are no loose areas that could cause a slip.
- Secure Your Surface: For a little added safety, flip the table over and secure the matting further by drilling screws through the corners of the mat into the board. Be careful not to go through the matting itself—trust me, you don’t want to ruin your masterpiece.
- Final Touches: If you want your table to last longer, you can add a coat of acrylic sealer over the board edges to protect against moisture from grooming products. It’ll give your table that extra touch of durability while looking fantastic.
Optional Add-ons/Variations:
- Custom Colors: Want your table to pop? Paint your table surface in a bright, fun color or pattern before attaching the matting. Just make sure the paint is safe for pets.
- Different Textures: Use a textured non-slip matting for extra grip, making it even cozier for your pup as they’re pampered.
Pro Tip:
Consider adding adjustable rubber feet to the bottom of your table legs for stability. This prevents wobbling and keeps everything steady, ensuring your grooming sessions go as smoothly as possible. Trust me, no one likes a shaking table while trying to trim a pup’s nails.
Now, get crafty and show your pup some love with their very own non-slip grooming table. Happy grooming!
4. Grooming Table With Storage Hooks
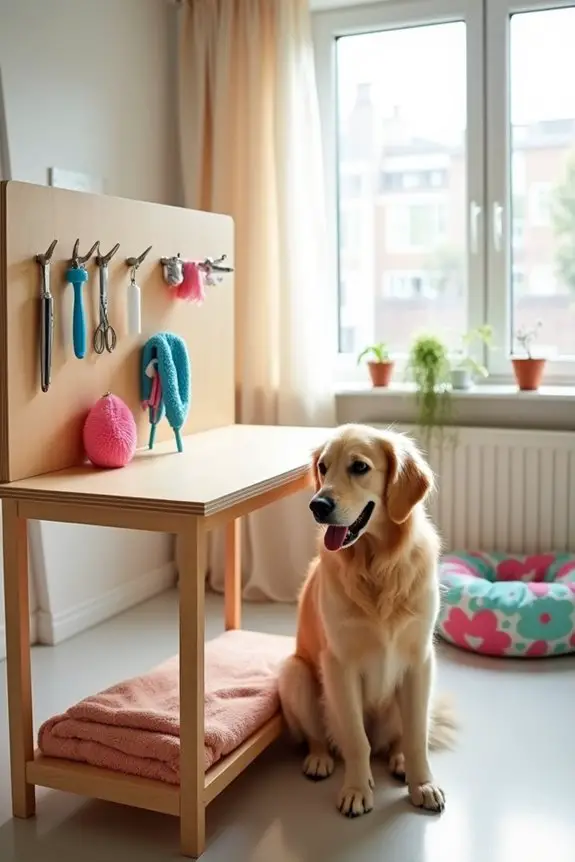
With a furry friend, you know that keeping their grooming essentials organized can become a bit of a wild adventure. Enter this DIY grooming table with storage hooks, which not only provides you with a dedicated space for grooming but also offers handy storage for all your tools. Quality professional pet grooming tools are essential to ensure your pet’s grooming experience is effective and safe. A well-designed dog grooming station ensures that you have everything at your fingertips for a smooth grooming session.
Imagine finishing up a bath and finding the exact brush or shampoo you need, instead of digging through a basket like a scene from a doggy version of a treasure hunt. Plus, it looks great in your home! Premium dog food appliances can also elevate your pet’s nutrition, ensuring they are healthy and happy.
Materials Needed:
- 1 piece of plywood or MDF board (2′ x 4′ for extra space)
- Wooden or metal storage hooks (variety pack)
- Spray paint or wood stain (optional for aesthetics)
- Sandpaper (medium and fine grit)
- Measuring tape
- Saw (hand saw or circular saw)
- Drill with drill bits
- Screwdriver
- Safety goggles
- Wood screws (1 1/4” is a good size)
- Level (to verify everything is straight)
- Optional: Cushion pads for legs (to protect your floors)
Step-by-Step Instructions:
1. Measure and Cut Your Board: First things first—grab your measuring tape. Cut your plywood or MDF board to a 2′ x 4′ size or whatever suits your grooming space. Don’t forget those safety goggles because splinters are no fun, believe me.
2. Sand the Edges: Use sandpaper to smooth out any rough edges on the board. There’s nothing worse than setting your pup up for grooming and finding a jagged edge—you might get more than just a furry friend from that experience.
3. Paint or Stain (Optional): If you want to add a personal touch, consider painting or staining your board. Choose a color that matches your decor or maybe your dog’s fur for extra flair. Just be sure to let it dry completely before moving on.
4. Attach Storage Hooks: Decide where you want to place the hooks on the side or back of the table—it’s all about what feels easiest for you.
Once you’ve made your marks, drill holes and screw in the hooks. This way, everything from brushes to clippers can hang out in their designated spots instead of taking flight in every direction.
5. Secure Your Table: If you want, you can add some cushion pads to the bottom of the legs to protect your floors. Place the table in your desired spot and use a level to verify everything is straight.
A crooked table might lead to some interesting grooming positions—and not the good kind.
6. Final Setup: Arrange all your grooming supplies on the table, hanging tools on the hooks, and create a little grooming space that works for both you and your pup.
Don’t forget to throw some treats in the mix to keep things extra positive during grooming time.
Optional Add-Ons/Variations:
- Choose Colorful Hooks: Instead of plain hooks, look for brightly colored or patterned ones that add personality to your table. It’s all about that style, right?
- Add a Built-In Towel Rack: If you have some extra space, attach a towel rack to the side for easy access to drying towels.
Pro Tip:
Always keep an eye out for those potential costs sneaking in—like extra hooks or paint—you can often find good deals at local hardware stores.
Also, consider using hooks that can hold various weights, so you’re prepared for more than just brushes, and your grooming area will never run out of space.
5. Grooming Table With Side Panels
If you’re a dog owner, you know that a well-equipped grooming table can make all the difference during bath time or nail trimming sessions. This DIY grooming table with side panels isn’t just a place to whip out the brush; it helps keep those pesky grooming supplies from flying all over the room.
With the added side panels, you’ll have more space to organize tools and keep your furry friend safely secure. Plus, it’s a fun weekend project that adds both value and charm to your grooming routine.
Materials Needed:
- 1 piece of plywood or MDF board (2′ x 4′)
- 2 pieces of plywood or MDF board for side panels (1′ x 4′)
- Wooden or metal brackets (for stability)
- Wood screws (1 1/4” works well)
- Drill with drill bits
- Saw (hand saw or circular saw)
- Sandpaper (medium and fine grit)
- Measuring tape
- Safety goggles
- Level
- Optional: Decorative fabric or contact paper (for side panels)
Step-by-Step Instructions:
1. Cut the Boards: Use your measuring tape to cut the main table board to 2′ x 4′ and the side panels to 1′ x 4′.
Make sure you’re wearing your safety goggles, unless you want to add “eyewear fashion” to your list of talents.
2. Sand Smooth: Grab your sandpaper and smooth down all the edges of the boards. Trust me, you don’t want your pup getting snagged on sharp corners—grooming should be more relaxing than an obstacle course.
3. Attach the Side Panels: Position the side panels on the shorter sides of the table and secure them with wood screws and brackets.
This will give you extra support and makes it hard for your furry friend to take off mid-haircut. Picture that scenario… not fun, right?
4. Stabilize and Secure: Check that everything is level. If you’ve got a slant, it could lead to a very confusing grooming session—like trying to do yoga on a slope with a dog that just wants to run.
5. Customize (Optional): If you’re feeling creative, you can cover the side panels with decorative fabric or contact paper.
Choose a pattern that reflects your personality or your dog’s—after all, who wouldn’t want a puppy-print themed table?
6. Final Check: Place the table in your grooming space, and make sure it feels sturdy. Organize your supplies and maybe even add a few comfy treats for your dog to enjoy while they wait.
Grooming is a two-way street; their comfort can make a world of difference.
Optional Add-ons/Variations:
- Color Splash: Paint the entire table a bright color or use multiple colors for a fun, funky look. A yellow table for a sunny vibe, or perhaps a calming blue to soothe those anxious pups?
- Fabric Panels: Instead of leaving the side panels bare, consider covering them with soft fabric for an even cozier touch. Think of it as a little spa retreat for your furry friend. You can use velcro to easily change out the fabric as needed.
Pro Tip:
As you build, consider using a moisture-resistant finish on your table. It’s a good idea if you’re dealing with water from baths and shampoo spills.
Not only will it make cleanup easier, but it’ll extend the life of your table through all those grooming adventures. Wouldn’t want to build something awesome only to have it turn into a soggy mess, right?
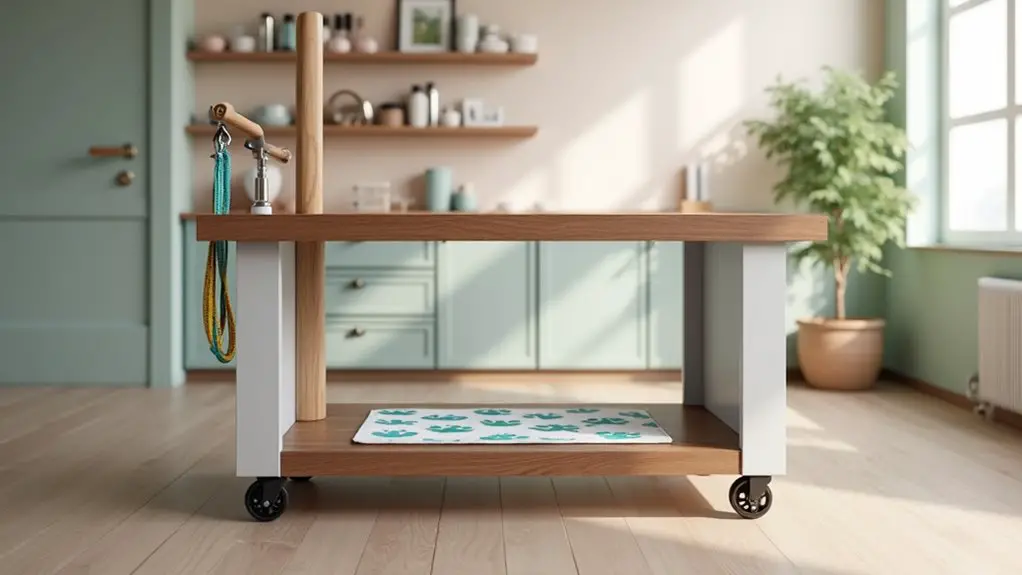
6. Grooming Table With Leash Holder
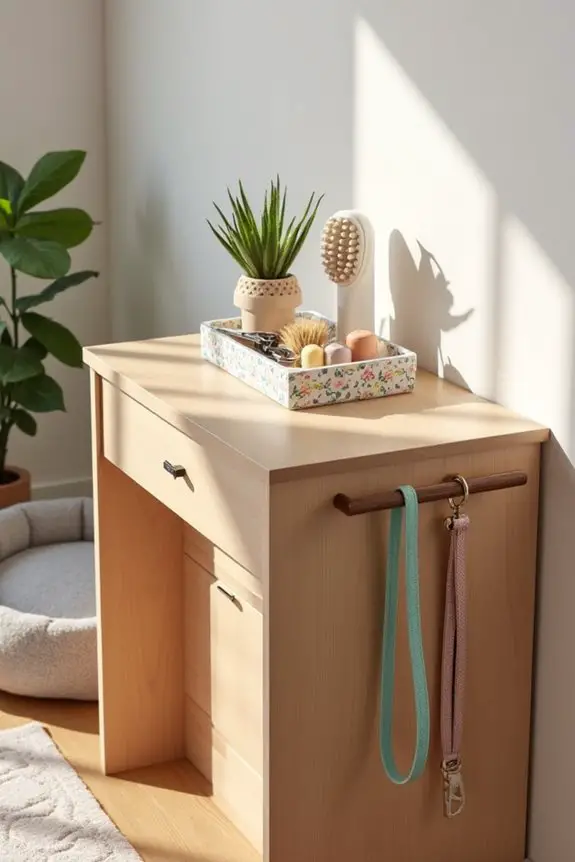
If you’re a dedicated dog owner, you know that a leash holder can make grooming sessions a whole lot smoother. A DIY grooming table with a leash holder keeps your pup secure while you work your magic, and it saves you from wrestling with an excited dog trying to bound away mid-groom.
This project not only streamlines the grooming process but also gives your space a touch of sophistication—perfect for a pet parent looking to elevate their home without breaking the bank.
Materials Needed:
- 1 piece of plywood or MDF board (2′ x 4′)
- 2 pieces of plywood or MDF board for side panels (1′ x 4′)
- Wooden dowel or a sturdy hook (for the leash holder)
- Wood screws (1 1/4”)
- Brackets (for extra stability)
- Drill with drill bits
- Saw (hand saw or circular saw)
- Sandpaper (medium and fine grit)
- Measuring tape
- Level
- Safety goggles
- Optional: Paint or stain (for a personalized finish)
Step-by-Step Instructions:
1. Cut the Boards: Start by measuring and cutting your main table board to 2′ x 4′ and the side panels to 1′ x 4′. You’ll want those safety goggles on while you’re at it—eye safety is no joke, trust me.
2. Sand It Down: Grab your sandpaper and work those edges until they’re smooth. No one wants a furry friend snagging on rough corners, right?
Consider it a grooming safety measure.
3. Attach the Side Panels: Position those side panels along the shorter sides of the table. Secure them using your wood screws and brackets.
This should help keep your dog comfy and prevent any unexpected escapes during their spa day.
4. Drill for the Leash Holder: Decide where you want the leash holder. Drill a small hole for the dowel or hook on the side or the back of the table for easy access.
You’ll need it right there when it’s time for grooming fun.
5. Stabilize Everything: Check that your table is level. A tilted table could mean a dog trying to do acrobatics instead of enjoying a trim.
6. Make It Yours: If you’re feeling creative, why not paint or stain the table? Give it a personal touch that reflects your style or matches your home decor.
You might love a rustic finish or a pop of color—who says dog grooming can’t be classy?
7. Final Setup: Once everything is secure and looking good, place your grooming table in your chosen space. Hang your leash on the holder, organize your grooming supplies nearby, and maybe even set down a few cozy treats.
Your pup deserves to be pampered too, after all.
Optional Add-ons/Variations:
- Color Splash: Use some fun chalk paint to give your grooming table a quirky look. You can always change it up when the vibe strikes.
- Pattern Fun: Consider wrapping the side panels in fabric that matches your dog’s personality—like paw prints or vibrant floral patterns. A whimsical touch can make all the difference in your grooming space.
Pro Tip:
Always check that your leash holder is securely attached. A loose holder could lead to some unexpected “doggy daredevil” moments.
And if you have a particularly wiggly pup, consider adding a comfortable cushion on the table to help keep them calm while you groom. A relaxed dog means a much smoother grooming experience, definitely worth it.
With this DIY grooming table with a leash holder, you’ll be ready to tackle grooming sessions like a pro.
Who knew taking care of your furry friend could be transformed into such a stylish and efficient experience? Happy DIY-ing!
7. Grooming Table With Wheels

Ah, the joys of dog grooming! But let’s be real, as much as we love our furry friends, getting them clean and looking sharp can be a bit of a wrestling match—especially when they’re trying to escape. A DIY dog grooming table with wheels transforms your grooming experience by making it mobile and convenient, turning what might be a chore into a manageable, efficient routine.
Plus, you save money by creating your own instead of splurging on costly pre-made tables. And hey, your living space ends up looking a little snazzier in the process.
Materials Needed:
- 1 piece of plywood or MDF board (2′ x 4′)
- 2 pieces of plywood or MDF board for side panels (1′ x 4′)
- 4 swivel caster wheels (preferably locking)
- Wooden dowel or sturdy hook (for the leash holder)
- Wood screws (1 1/4”)
- Brackets (for support)
- Drill with drill bits
- Saw (hand saw or circular saw)
- Sandpaper (medium and fine grit)
- Measuring tape
- Level
- Safety goggles
- Optional: Paint or stain for a personalized finish
Step-by-Step Instructions:
- Cut the Boards: Begin by measuring out your main table surface at 2′ x 4′ and the two side panels at 1′ x 4′. Safety goggles on, of course. Your eyes will thank you later.
- Smooth It Out: With sandpaper in hand, polish those edges. You’ve got to keep those corners smooth—trust me, your dog will appreciate the effort when they’re getting pampered.
- Attach the Side Panels: Take the two side panels and fix them onto the shorter ends of the table. Use your wood screws and brackets for added stability. This way, when Fido decides to squirm, he’ll be contained and comfortable.
- Add the Wheels: Flip the table upside down and attach the swivel caster wheels to each corner with screws. Make sure to get locking wheels, so your table doesn’t turn into a runaway vehicle mid-grooming session.
- Drill the Leash Holder: Choose a spot for your leash holder, ideally on one of the side panels, and drill a small hole to secure the dowel or hook. You want it handy for when your pup needs to be tethered while you tidy up those fur balls.
- Level It Up: After everything is secure, check to verify that your table is level. A tilted grooming table could turn your dog into an unwilling acrobat.
- Make It Your Own: If you want to jazz it up, get creative! A splash of paint or a nice stain can reflect your personality or fit seamlessly with your décor. Maybe a bright red for the bold?
Optional Add-ons/Variations:
Feel free to jazz things up with some cute fabric in your favorite pattern for a cushy table cover.
Or, if you’re feeling particularly crafty, using reclaimed wood can give your grooming table a rustic feel that’s sure to impress visitors. Personal touches can be all the difference.
Pro Tip:
Always remember to check that the wheels are properly fitted and locking. There’s no need for more chaos when there’s already a furry tornado in the house.
And if you’re feeling extra generous, throw in a soft mat for your pup—comfort is key when they’re sitting for their grooming session. Positive vibes, right?
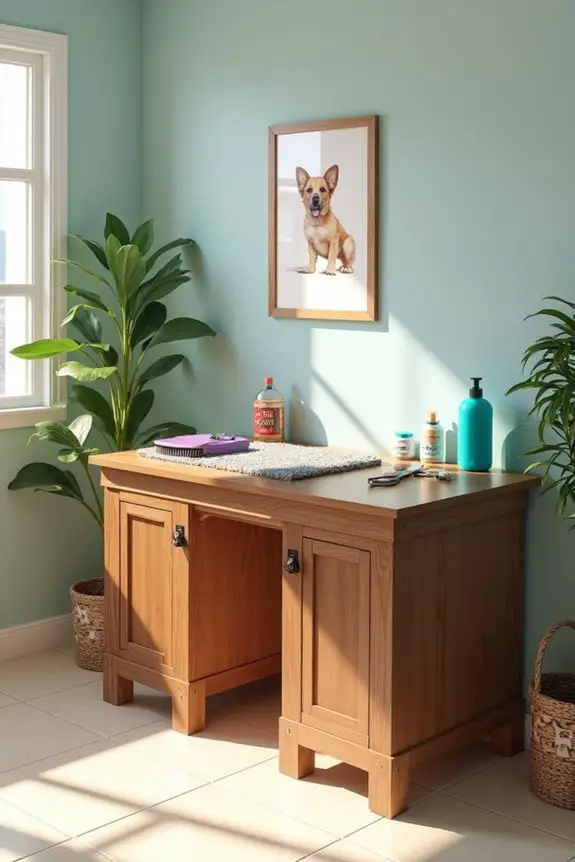
Extra Tips & Ideas
While you might think that building a DIY dog grooming table is all about the design, there are a few extra tips and ideas that can really take your setup to the next level.
First, consider adding a non-slip surface; that’ll keep your pup from having a dramatic slip-and-slide moment. Use adjustable height features too. Your back will thank you later!
And don’t forget to include storage for your grooming supplies. Think of it as your dog’s personal salon—why not have everything at arm’s reach?
Oh, and lighting is key; a well-lit area works wonders for those pesky mats. Finally, play around with colors—your table can totally have a ‘paw-some’ personality!
With a few tweaks, you’ll be grooming like a pro in no time.
Frequently Asked Questions
What Materials Are Best for a DIY Grooming Table?
For a DIY grooming table, use sturdy plywood for the tabletop, adjustable metal legs for support, and rubber non-slip mats for stability. Don’t forget clamps and a harness strap to keep your dog secure while grooming.
How Much Weight Can a DIY Grooming Table Support?
A DIY grooming table can typically support around 200 to 300 pounds, depending on the materials and construction techniques you use. Make sure to reinforce the legs and surface for stability and safety.
Can I Customize the Height of My Grooming Table?
Yes, you can customize the height of your grooming table. By adjusting leg lengths or using adjustable mechanisms, you can create a comfortable working height that suits both you and your furry friend perfectly.
What Safety Features Should I Include in My Design?
You wouldn’t want Fido taking an unscheduled leap, right? Include non-slip surfaces, secure harnesses, and rounded edges to keep your pup safe. After all, it’s a grooming table, not an amusement park ride!
How Do I Maintain and Clean My Grooming Table?
To maintain and clean your grooming table, wipe it down with a mild detergent and water after each use. Regularly inspect for any damage and guarantee the surface remains smooth to avoid injuries for your pets.
Conclusion
No matter which design you choose, building your own dog grooming table can feel like creating a stylish pet spa right in your garage. Imagine this: your furry friend comfortably perched, looking like a superstar while you work. With a few thoughtful touches—like a sturdy leash holder or those fancy non-slip surfaces—you’re not just grooming; you’re bonding. So roll up those sleeves, grab some tools, and make grooming a regular treat—your pup will appreciate it, paw-sitively.

Amr Mohsen is a software engineer who traded his keyboard for a leash — at least on weekends. His love for dogs inspired him to share what he learns as a dog owner and enthusiast, bringing a detail-oriented, research-driven perspective to every article he writes. If it’s about dogs, he’s probably already looked it up twice.

