Building a dog kennel can feel a bit like crafting a cozy castle for your furry friend. Ever thought about how much fun it could be to create something unique? From rustic charm to modern flair, there’s a ton of DIY options. Whether you’ve got some old pallets or just a little time on your hands, let’s explore seven creative ideas that’ll have your pup wagging their tail in excitement. Curious about what’s next?
Unique Kennel Designs Showcased
When you think about building a dog kennel, you might picture a plain old wooden box, but why settle for the ordinary?
Imagine a cozy, stylish diy dog kennel outdoor that reflects your pup’s personality. How about a chic cottage-style design with a slanted roof? Or a modern cube with large windows for natural light? You can even add a playful twist with vibrant colors or themed decor, like a beach hut or a log cabin.
The options are endless! Just remember to take into account your dog’s size and needs. With a bit of creativity, you can transform a simple shelter into a unique haven that makes your furry friend feel right at home.
Who knew building could be this fun?
Our Collection
Now that you’ve seen some unique kennel designs, let’s check out our collection of DIY ideas that’ll have your pup wagging their tail in delight.
Whether you’re into wooden pallet kennels, recycled tire dog houses, or something a bit more high-tech like a customizable modular kennel system, there’s something here for every dog lover.
You might even feel inspired to mix and match ideas—who says your dog can’t have the fanciest digs on the block?
1. Wooden Pallet Kennel Design
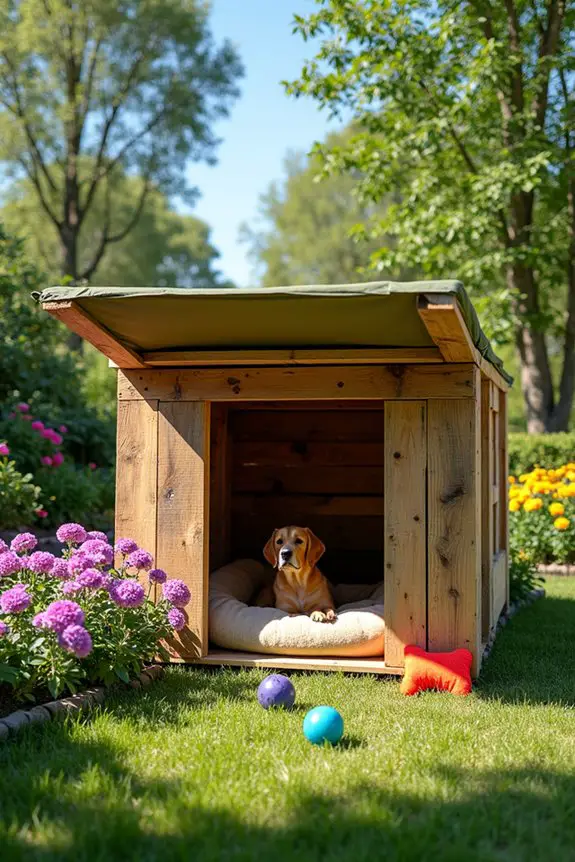
If you’re a dog owner, you know that your pup deserves a cozy and safe space to relax outdoors. A wooden pallet kennel isn’t only a budget-friendly solution but also a fun DIY project that adds charm to your backyard. Plus, it’s a great way to repurpose those pallets lying around, saving money while giving your furry friend a stylish retreat. Additionally, consider enhancing your dog’s look with premium dog fashion accessories that can complement their outdoor space.
Materials Needed
- 4 wooden pallets (make certain they’re in good condition)
- Sandpaper (medium and fine grit)
- Wood screws
- A screw gun or drill
- Wood stain or paint (optional)
- Outdoor weatherproof sealant
- A measuring tape
- A saw (if you need to cut pallets)
- Safety goggles
- A paintbrush (if staining or painting)
Step-by-Step Instructions
- Prepare Your Area: Find a flat spot in your yard where you want to set up the kennel. Make certain it’s away from direct sunlight, and preferably near some shade, so your pooch stays cool.
- Choose Your Pallets: Select four good-quality pallets. Lay them out to form a square or rectangle, depending on the size of your dog. Make certain there are no broken boards that could hurt your pup.
- Sand Down the Pallets: Use medium-grit sandpaper to smooth out any rough edges. Follow up with fine-grit sandpaper for a polished finish. You want your dog to be comfy, not splintered.
- Assemble the Walls: Using wood screws, secure the pallets together at the corners. Drill through the sides of each pallet where they meet to create a sturdy frame. If you’re feeling fancy, you can add an extra layer of pallets for height.
- Create a Roof (Optional): If your dog likes to lounge in the shade, consider placing a pallet on top for a makeshift roof. Secure it well, and make sure it’s stable. You can even cover it with fabric or a tarp for added protection.
- Finish with Stain or Paint: If you want to give your kennel a personal touch, apply wood stain or paint to match your home’s aesthetic. Don’t forget to use outdoor weatherproof sealant for durability.
- Final Touches: Once everything is dry, place a cozy dog bed or some blankets inside. Maybe throw in a few toys to make it feel like home.
Optional Add-ons/Variations
- Color Pop: Use bright, non-toxic outdoor paint to jazz up your kennel. Maybe a fun pattern or even your dog’s name painted on the side. Who doesn’t love a little personalization?
- Pallet Floor: To keep it extra cozy, consider laying down some extra pallet boards inside for a floor. Your pup will appreciate the cushy surface.
Pro Tip
Always check your pallets for chemicals or harmful substances before using them. Look for heat-treated pallets, which are safe for your dog. And, if you can, give it a little test run to verify everything is snug and secure.
Building this wooden pallet kennel isn’t just about creating a place for your dog; it’s about giving them a home away from home, a space where they can feel safe and loved while enjoying the great outdoors.
Plus, you’ll feel pretty proud of your handiwork every time you see your pup snoozing away in their new retreat. Happy building!
2. Recycled Tire Dog House
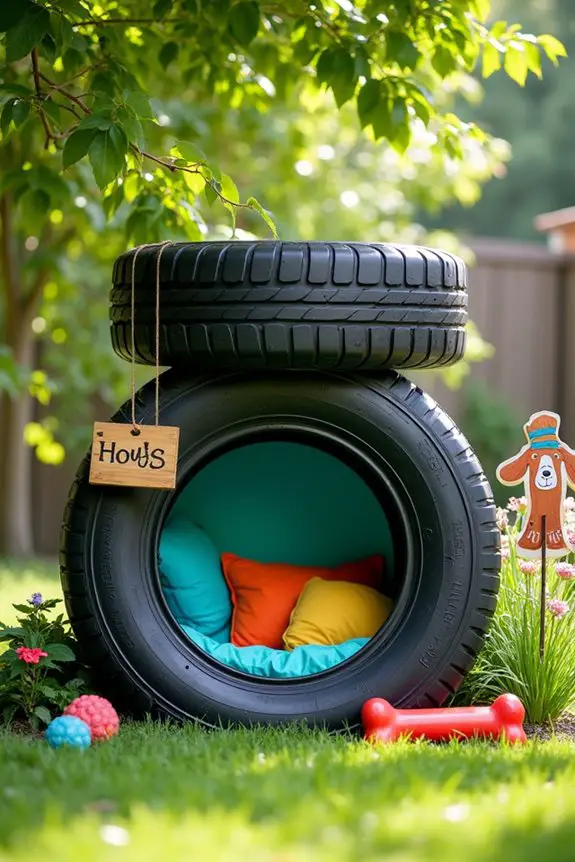
If you’re looking for a unique and eco-friendly way to provide your furry friend with a cozy outdoor retreat, a recycled tire dog house might just be the perfect solution. This DIY project not only saves money but also helps keep old tires out of landfills, and let’s be honest, it’s a conversation starter for sure. Plus, your pup will love having a snug spot to curl up in! Additionally, complementing your DIY efforts with luxury orthopedic dog furniture can further enhance your pet’s comfort and well-being.
Materials Needed
- Old tires (the bigger, the better for larger dogs)
- Heavy-duty outdoor fabric (for cushioning)
- Foam padding or old blankets (for added comfort)
- Strong adhesive or a staple gun
- A utility knife (for cutting fabric)
- Safety goggles
- A measuring tape
- Paint (optional, for customization)
Step-by-Step Instructions
- Gather Your Tires: Start by finding a few old tires. You can often find them for free at tire shops or through online classifieds. Choose sizes based on your dog’s breed—large tires are great for bigger pups, while smaller tires work well for smaller dogs.
- Clean the Tires: Give the tires a good scrub to remove any dirt or debris. You want to make certain they’re safe and clean for your furry friend, so a little elbow grease goes a long way.
- Prepare the Base: Decide if you want to stack the tires or use just one. If stacking, make sure to securely fasten them together using strong adhesive. This will create a cozy little den for your pup.
- Add Comfort: Cut your outdoor fabric to fit the inside of the tire. You can use a staple gun or strong adhesive to attach the fabric inside the tire, creating a soft, cushioned space. If you’re using foam padding or old blankets, layer them inside for extra comfort.
- Customize (Optional): Here’s where you can let your creative juices flow. Paint the outside of the tires with non-toxic outdoor paint, or use stencils to add your dog’s name or some fun designs. Just make sure it’s fully dry before letting your pup near it.
- Final Check: Before letting your dog explore, do one last safety check. Verify there are no sharp edges or protruding staples, and make sure the fabric is securely attached.
- Introduce Your Pup: Place the tire dog house in a shaded area of your yard, and toss in some treats or toys to entice your furry friend. Watch as they happily discover their new hangout spot.
Optional Add-ons/Variations
- Colorful Cushions: Instead of just the fabric, consider using colorful outdoor cushions or pillows. This not only adds comfort but also gives your recycled tire dog house a pop of personality.
- Decorative Touches: Attach some fun accessories like a small flag or a “dog house” sign for that extra flair. Your dog will have the trendiest house on the block.
Pro Tip
Always check the tires for any small bits of debris or sharp objects before letting your pup use their new house. Also, consider adding a small tarp or roof over the top of the tire to keep it dry in rainy weather. Your dog will appreciate staying cozy and dry, and you’ll appreciate the extra durability.
With this recycled tire dog house, you’ll not only be saving money and saving the planet, but you’ll also be giving your pup a stylish and comfortable place to hang out. Who knew eco-friendly could look so good?
3. Insulated Dog House Design
If you live in a region where the temperatures can drop, an insulated dog house is a must-have for your furry friend. Not only does it provide a cozy retreat from the cold, but it also protects your pup from harsh weather conditions, guaranteeing they stay warm and comfy. Plus, investing in a quality luxury dog house outdoor can elevate your pet’s living experience.
Plus, building one yourself can save you money while adding a personal touch to your outdoor space. Let’s plunge into how you can create a snug insulated dog house for your beloved pet.
Materials Needed
- Plywood sheets (for walls, floor, and roof)
- Insulation foam boards
- Waterproof exterior paint or sealant
- Wood screws
- Wood glue
- A saw (hand saw or power saw)
- Drill
- Measuring tape
- Sandpaper
- A utility knife
- Hinges (if you want a door)
- Optional: Dog bed or blankets for extra comfort
Step-by-Step Instructions
- Measure and Cut the Base: Start by measuring the size of your dog. A good rule of thumb is to make the house around 25% larger than your dog’s size. Cut a piece of plywood for the base to fit those dimensions.
- Build the Walls: Cut four pieces of plywood for the walls. You can make the back wall taller for added headroom. Be sure to pre-drill holes for your screws to avoid splitting the wood.
- Add Insulation: Cut the insulation foam boards to fit snugly between the walls. Attach them using wood glue, then cover with another layer of plywood for added strength. This will keep your dog warm in winter and cool in summer.
- Construct the Roof: Cut two pieces of plywood for the roof, ensuring they overlap slightly. This design helps keep rain out. Attach the roof to the walls using screws. If you want a hinged roof for easy access, attach it with hinges on one side.
- Paint and Seal: Once your house is assembled, give it a coat of waterproof exterior paint or sealant. This not only adds a pop of color but protects the wood from the elements. Let it dry completely before moving on.
- Create a Door (Optional): If you want to add a door, cut an opening in the front wall and attach a flap using hinges. You can use a flap of waterproof fabric or a lightweight piece of wood.
- Final Touches: Sand down any rough edges to guarantee your pup won’t get any splinters. Then, toss in a dog bed or some blankets for extra comfort. Place the house in a sheltered area of your yard.
Optional Add-ons/Variations
- Paint It Up: Use bright, fun colors or patterns to make your dog house stand out in your yard. You could even use stencils to add your dog’s name or some cute paw prints.
- Raise the Floor: For added comfort and insulation, consider elevating the dog house on wooden pallets. This not only keeps it dry but also allows for airflow underneath.
Pro Tip
Always make sure the dog house has good ventilation, especially if you live in a humid environment. A small vent near the top can help keep air circulating and prevent mold.
Plus, don’t forget to check your local weather to guarantee it’s suitable for outdoor use. After all, your furry companion deserves a cozy retreat, and you (and your wallet) deserve the satisfaction of a job well done.
4. Elevated Platform Dog Kennel
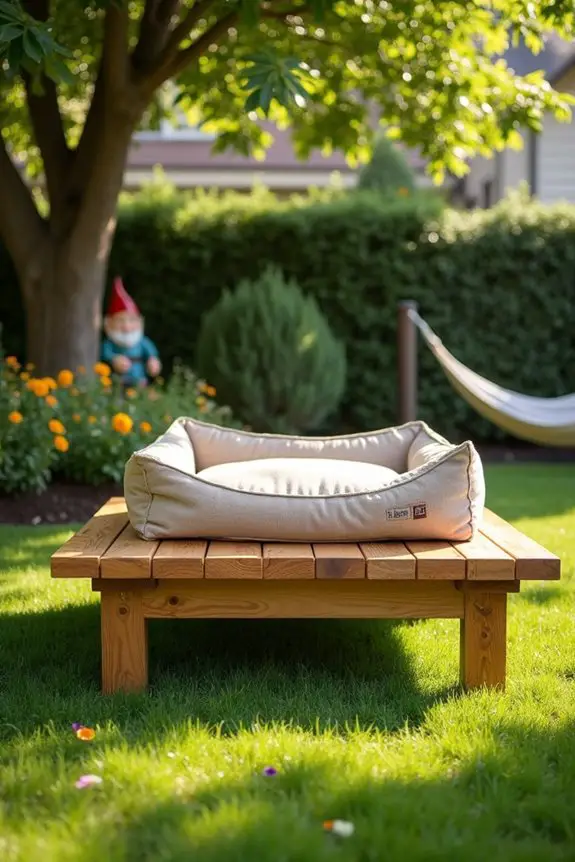
If you want to give your furry friend a comfy and stylish outdoor hangout, an elevated platform dog kennel is a fantastic DIY project. Not only does it keep your pup off the ground (hello, dry and cozy!), but it also adds charm to your yard. Plus, this project is budget-friendly and allows you to showcase your creativity. Let’s plunge into how you can whip up one of these elevated kennels!
Materials Needed
- Treated wood planks (for the base and legs)
- Wood screws
- Wood glue
- A saw (hand saw or power saw)
- Drill
- Measuring tape
- Sandpaper
- Outdoor paint or sealant (optional)
- Dog bedding or a soft mat for comfort
Step-by-Step Instructions
- Measure and Cut the Base: Start by deciding how big you want the kennel to be. A good size for smaller dogs is around 3 feet by 3 feet, while larger breeds might need a base of 4 feet by 4 feet. Cut your wood planks to fit these dimensions.
- Build the Legs: Cut four pieces of wood for legs. The height can vary, but 2 feet is a good start. Make sure they’re sturdy enough to support the weight of your dog and the base.
- Attach the Legs: Using wood screws, attach each leg to the corners of the base. You can reinforce the legs with some wood glue for extra strength. Sometimes, I find it helpful to ask a friend to hold things steady while I screw them together — teamwork makes the dream work, right?
- Create a Support Frame: For added stability, cut additional wood planks to create a support frame underneath the base. This helps keep everything steady, especially if your dog likes to jump around.
- Sand and Seal: Sand down any rough edges to keep your pup safe from splinters. Then, if you’d like, apply outdoor paint or sealant to protect the wood from the elements. A splash of color can really brighten up your yard.
- Add Soft Bedding: Toss in some comfy bedding or a soft mat to make it extra cozy for your pup. Trust me, they’ll appreciate it — it’s like their own little throne.
- Position Your Kennel: Finally, place the elevated kennel in a shaded area of your yard, away from direct sunlight. Make sure it’s stable on the ground, and there you go — your dog’s new favorite spot!
Optional Add-ons/Variations
- Color Themes: Get creative with outdoor paint. You might opt for a bright color or even a fun pattern to match your house or backyard decor. Who says dog homes can’t be stylish?
- Roof It Up: If you’re feeling adventurous, consider adding a roof to protect your pup from rain or harsh sun. A simple slant can do wonders.
Pro Tip: Before you start construction, check your local weather forecast. Building outdoors is much easier when it’s not raining, and you’ll want to verify the wood has time to dry if you’re painting or sealing it.
Plus, a little sunshine can definitely brighten your mood while you work. Happy building!
Additionally, investing in a premium dog kennel enclosure can provide your pet with extra safety and comfort while they enjoy the outdoors.
5. Customizable Modular Kennel System
If you’re looking for a versatile and practical dog kennel solution, a customizable modular kennel system is the way to go. This DIY project not only allows you to adapt the design to your dog’s size and needs, but it also saves you money compared to buying a pre-made one. Plus, it adds a touch of personal flair to your outdoor space. Let’s explore how you can create this amazing kennel setup that your dog will love!
Materials Needed
- Modular kennel panels (can be pre-fabricated or made from wood)
- Heavy-duty hinges
- Latches (for secure closure)
- Corner brackets (for added stability)
- Drill
- Measuring tape
- Wood screws (if using wooden panels)
- Optional: Outdoor paint or sealant
- Optional: Dog-friendly bedding for extra comfort
Step-by-Step Instructions
- Plan Your Design: Before you start building, sketch out a design for your kennel. Think about how much space your dog needs and how you want the layout to look. You can create a single unit or a larger multi-kennel setup.
- Cut the Panels (if applicable): If you’re making your own panels, measure and cut the wood to your desired dimensions. Each panel should be tall enough for your dog to stand comfortably and wide enough for them to move around.
- Assemble the Panels: Lay out the panels in your desired configuration. Using heavy-duty hinges, attach the panels together to create walls. Secure the corners with brackets for added durability.
- Add a Roof (optional): If you want to give your pup some extra protection from the elements, consider adding a roof. You can use a flat panel or a sloped design, depending on your aesthetic preference. Just make sure it’s securely attached.
- Install Latches: To guarantee your dog stays safe, install latches on the entrance of the kennel. Make sure they’re easy for you to operate but secure enough that your clever pup can’t figure them out.
- Sand and Seal: Sand down any rough edges on the panels to prevent splinters. If you’re using wood, applying an outdoor sealant or paint can help protect against weather damage and give a personalized touch.
- Set Up and Decorate: Position your kennel in a shaded area of your yard, and add some cozy dog-friendly bedding inside to make it a comfy retreat. Your dog will appreciate the thought you put into their new home.
Optional Add-ons/Variations
- Color Customization: Use outdoor paint to give your kennel a fun splash of color. You could even paint your dog’s name on the side — because every dog deserves a personalized space.
- Expandable Design: If you anticipate adding more dogs or want to change things up, consider a modular design that allows you to add or remove panels as needed.
Pro Tip
When constructing your kennel, always make sure to check for sharp edges and secure all screws and latches properly. A little extra attention to detail can keep your pup safe and happy in their new space.
And remember, investing in quality materials will pay off in durability, so your kennel stands the test of time—even if your dog decides it’s a chew toy. Additionally, consider enhancing your setup with a luxury dog kennel experience to provide your pet with ultimate comfort and style.
Now grab your tools and get started on this fun project. Your dog will thank you, and you might even find yourself enjoying the process. Happy building!
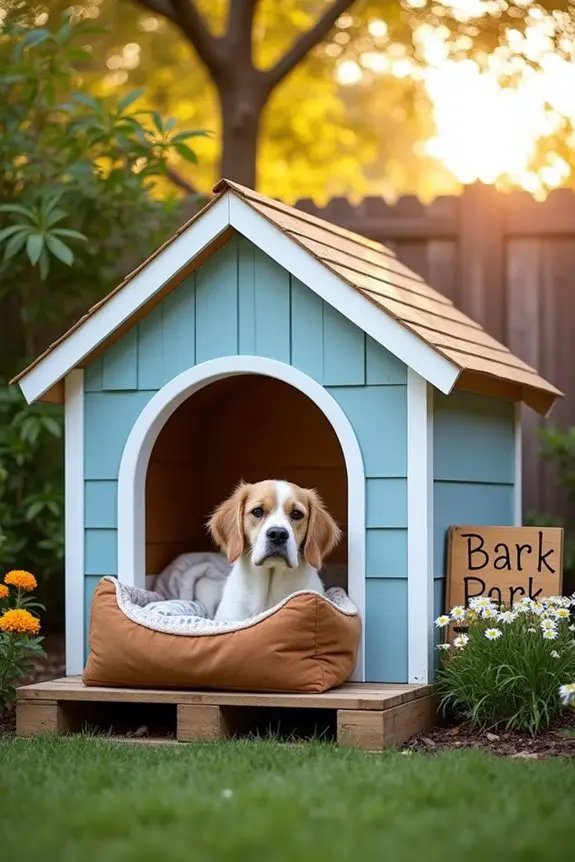
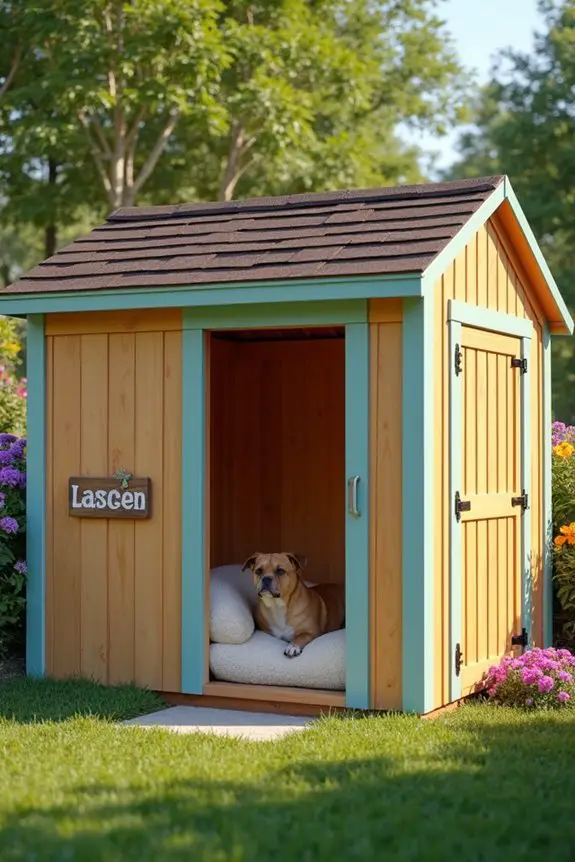
6. Cedar Wood Dog House

If you’re a dog owner looking to create a cozy sanctuary for your furry friend, a cedar wood dog house is a fantastic DIY project. Not only does it provide a comfortable retreat for your pet, but it’s also a beautiful addition to your backyard. Plus, cedar wood naturally resists rot and pests, guaranteeing your pup’s new home lasts for years. Let’s explore how you can craft this lovely dog house together!
Materials Needed
- Cedar wood boards (for the walls, floor, and roof)
- Plywood (for the floor)
- Wood screws
- Wood glue
- Heavy-duty hinges (for the roof, if you want it to be accessible)
- Measuring tape
- Saw (hand saw or circular saw)
- Drill
- Sandpaper
- Outdoor wood sealant (optional)
- Dog-friendly bedding (for extra comfort)
Step-by-Step Instructions
1. Measure and Plan: Start by measuring your dog to confirm the house is the right size. You’ll want it tall enough for them to stand comfortably and wide enough for them to lie down and stretch.
Sketch a simple design, ideally with a slanted roof for rain runoff.
2. Cut the Wood: Using your saw, cut the cedar boards to create the walls, floor, and roof. For a small dog, you might go with dimensions like a 3ft x 3ft base and 4ft height.
Remember, measure twice, cut once—no one enjoys a trip back to the lumber store.
3. Assemble the Base: Start by building the base. Attach the plywood to the cedar boards using wood screws and glue for added stability.
This will create a solid foundation for your dog house.
4. Build the Walls: Attach the cedar boards vertically around the base to form the walls. Use wood screws to secure them.
Make sure they’re straight and sturdy; your pup deserves a safe haven!
5. Add the Roof: Cut two large pieces of cedar for the roof. If you want a hinged roof for easy cleaning, attach one side with heavy-duty hinges.
Secure the roof in place with screws to keep it from blowing away in the wind.
6. Sand and Seal: Sand down any rough edges to keep your dog safe from splinters.
If you like, apply a coat of outdoor wood sealant to protect the wood from rain and UV rays, while also giving it a lovely finish.
7. Decorate and Personalize: Place some cozy dog-friendly bedding inside to make it inviting.
You can even paint the exterior with outdoor paint or add a little nameplate for your furry friend. They’ll love having a place that’s all their own!
Optional Add-ons/Variations
– Color Customization: Use exterior paint in your dog’s favorite color or a fun pattern to make the dog house pop.
Who says dogs can’t have style?
– Add a Porch: If you want to go all out, consider extending the base to create a little porch area.
Your pup will enjoy lounging outside, soaking up the sun.
Pro Tip
Consider placing the dog house in a shaded area of your yard.
It keeps your pup cool in the summer, and the cedar wood will help regulate temperature.
And don’t forget to check that the door is wide enough for your dog to enter comfortably—no one wants a pup stuck in the doorway, right?
With a little time and effort, you’ll have a beautiful cedar wood dog house that your furry friend will adore. Happy building!
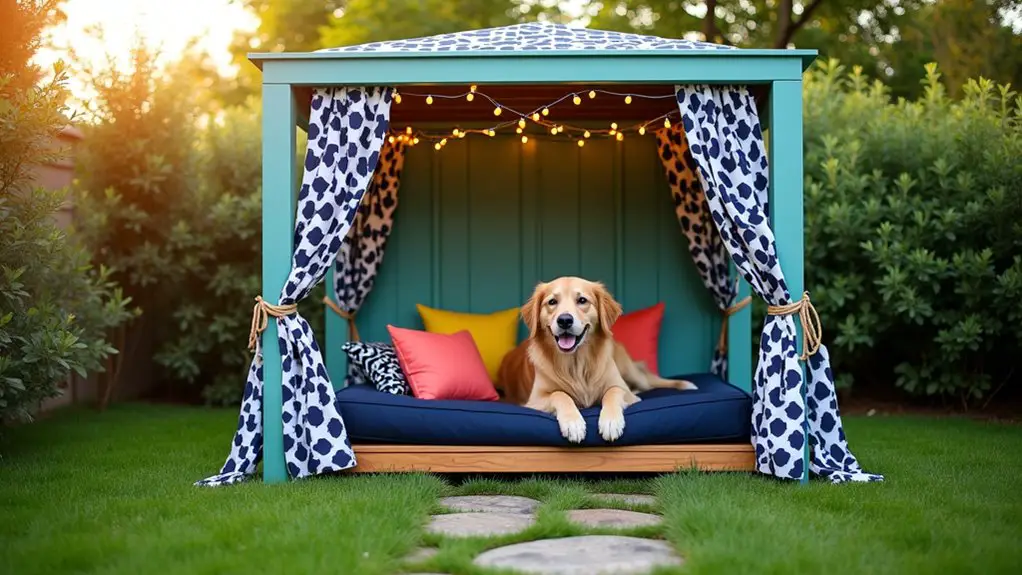
7. Luxury Canopy Dog Kennel
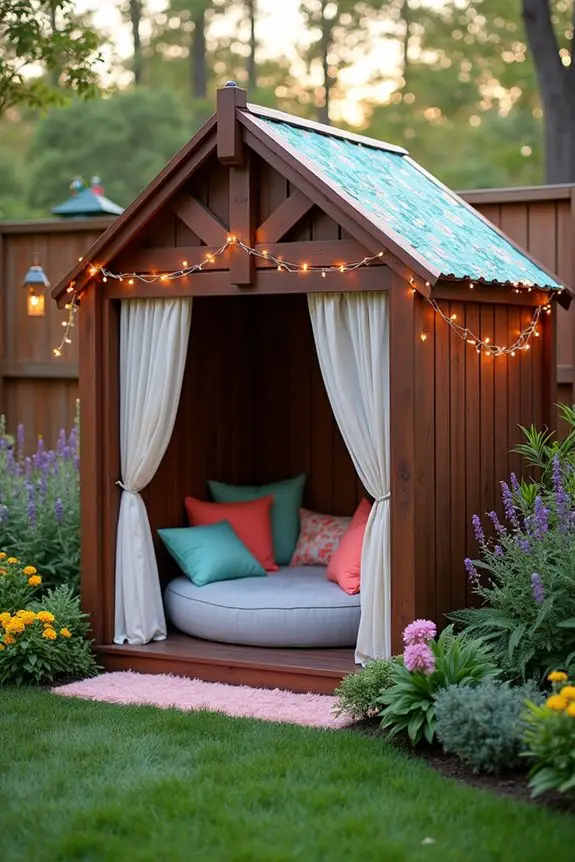
Creating a luxury canopy dog kennel is a delightful project that combines style with functionality—perfect for pampering your pup while giving them a chic space in your yard. Not only does this kennel provide shade and comfort for your furry friend, but it also elevates your outdoor aesthetic, making your backyard the envy of the neighborhood.
Plus, it’s a great way to save money compared to buying a pre-made kennel. Let’s explore how to make this fabulous canine retreat!
Materials Needed
- Canopy fabric (water-resistant or outdoor fabric)
- Wooden posts (for the frame)
- Wooden beams or boards (for the base and roof)
- Screws and bolts
- Drill
- Saw (hand saw or circular saw)
- Measuring tape
- Sandpaper
- Outdoor wood sealant (optional)
- Dog bed or cushions (for comfort)
- Decorative elements (like lights or banners)
Step-by-Step Instructions
- Measure and Plan: Start by choosing the size of your kennel. Measure your dog to guarantee they’ve ample space to move around. Sketch out a basic design—think of a rectangle or square with a slanted roof for rain runoff.
- Build the Base: Cut your wooden beams to create a sturdy base. You want it to be solid enough to withstand the elements and your pup’s antics. Secure the beams together using screws, forming a square or rectangle.
- Create the Frame: Cut the wooden posts to your desired height for the kennel. Attach them to the corners of your base using screws. This will form the vertical support for your canopy.
- Add the Roof Structure: Using the remaining wooden beams, create a roof structure on top of the posts. You can choose a flat or slanted design. Confirm everything is securely fastened and level; no one wants a doghouse that leans like a drunken sailor.
- Attach the Canopy: Drape the canopy fabric over the frame and secure it tightly. Make sure it’s taut to prevent sagging and water pooling. You can use decorative ropes or ties to add a stylish touch.
- Sand and Seal: Sand down any rough edges to keep your dog safe from splinters. If you wish, apply an outdoor wood sealant to the wooden parts for added protection against the weather.
- Furnish and Decorate: Place a cozy dog bed or cushions inside to make it inviting. Add some personal flair with decorative elements like fairy lights or a cute banner. Your dog will feel like royalty in their new palace.
Optional Add-ons/Variations
- Consider using vibrant, patterned fabric for the canopy to add a pop of color to your yard. You could also paint the wooden frame in a fun color that matches your home’s exterior.
- For added shade and style, think about adding side curtains made of the same fabric for a more enclosed feel.
Pro Tip
When building your kennel, make sure to elevate the base slightly off the ground. This will help keep it dry during rainy days and prevent rot. Plus, it creates a cozy little den for your pup, just like they’d find in nature.
Extra Tips & Ideas
While building your dream outdoor dog kennel can be a fun project, don’t forget to sprinkle in some extra tips and ideas to make it truly special for your furry friend.
Consider adding a cozy bed or a few toys to keep them entertained. You could even hang a chew toy from the roof—trust me, they’ll love it.
And how about a little shade? A simple tarp or some plants can work wonders.
If you’re feeling fancy, why not install a small water fountain? It’ll keep them cool and add a nice touch.
Oh, and don’t forget to personalize it with their name—because what dog doesn’t want their own “doghouse of fame”? Your pup deserves it, right?
Frequently Asked Questions
What Materials Are Best for Building a Durable Dog Kennel?
For a durable dog kennel, use treated wood or metal for the frame, waterproof roofing materials, and sturdy wire mesh for ventilation. Don’t forget to seal openings to protect against weather and pests.
How Can I Ensure My Dog Stays Safe Inside the Kennel?
Every year, nearly 1 million dogs escape from their yards. To keep your dog safe inside the kennel, secure the structure, use a sturdy latch, check for escape routes, and regularly inspect for wear and tear.
Are There Specific Regulations for Building Outdoor Kennels?
Yes, there are specific regulations for building outdoor kennels. You should check local zoning laws, guarantee proper size requirements, and follow guidelines for materials and safety to keep your dog secure and comfortable.
How Do I Choose the Right Size Kennel for My Dog?
To choose the right size kennel for your dog, measure their height and length, then add extra space for movement. Make certain it’s large enough for them to stand, turn around, and lie down comfortably.
Can I Easily Relocate a DIY Dog Kennel?
Yes, you can easily relocate a DIY dog kennel. If you build it with mobility in mind, using wheels or a lightweight frame, you’ll find moving it a breeze whenever necessary.
Conclusion
So, why not release your creativity and build a dog kennel that’s more than just a shelter? Think of it as your dog’s personal palace—because every pup deserves a cozy spot to call their own, right? With these ideas, you can mix functionality with flair, turning what could be a plain box into a stylish haven. Grab those tools and get started. After all, if I can do it without accidentally hammering my thumb, you’ve got this in the bag.

Hi, I’m Ali Tarek, the founder of Animalsman. I’ve always been passionate about pets, especially dogs and cats, and I created this website to share practical tips, easy recipes, and helpful care advice for fellow pet lovers. My goal is to make pet care simple, enjoyable, and accessible for everyone. When I’m not writing or curating content, you’ll usually find me spending time with my furry friends or learning new ways to keep them happy and healthy.

