Envision this: your tiny pup, struggling to jump onto the couch while you sip your coffee, hopelessly wagging his tail in frustration. DIY dog stairs can solve that! They’re easy to make, budget-friendly, and can transform your furry friend’s life. Plus, you can customize them to fit your style. Curious about the different designs that you can whip up? Let’s explore some simple yet effective ideas for keeping your pup happy and active.
Pup-Friendly Stair Designs
When you think about your pup’s comfort, designing stairs that are safe and accessible becomes essential, especially if your furry friend doesn’t quite have the spring in their step like they used to.
DIY dog stairs can be a game changer. Start with sturdy wood or plastic to guarantee stability. A gentle slope‘s always better than a steep climb—think gentle hills, not mountains.
Make certain to carpet those steps; your pup’s paws will thank you for extra grip. And don’t forget to measure your dog’s height when figuring out stair dimensions; nobody wants them to leap into the stratosphere. Just imagine their confused face.
With a little creativity and a few tools, you’ll craft a comfy stairway to your pup’s dreams.
Our Collection
Let’s take a peek at our collection of dog stairs that’ll suit any pup’s needs.
You’ll love the options we’ve got—from wooden steps with carpet grips to foldable designs that save space, there’s something for everyone.
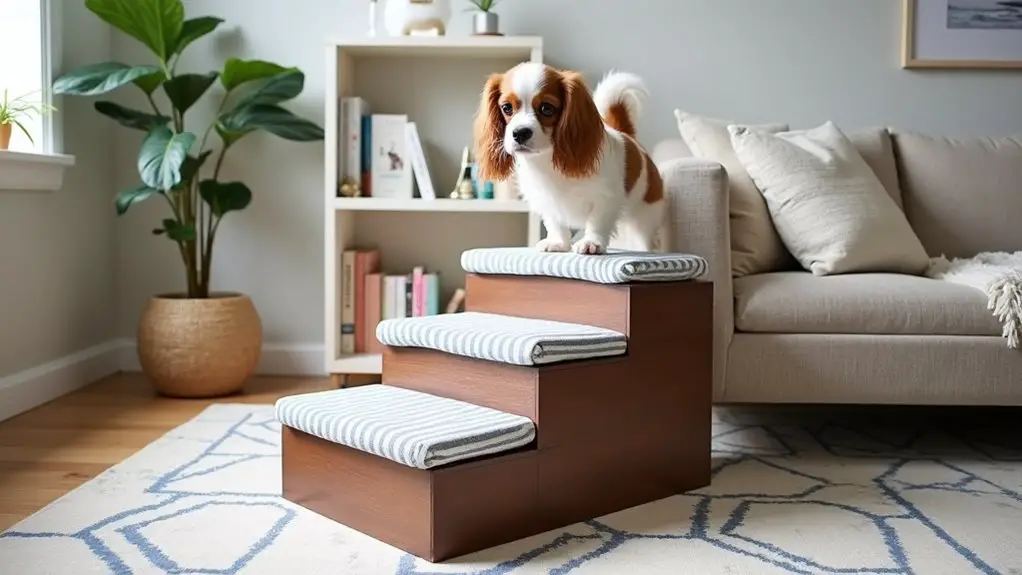
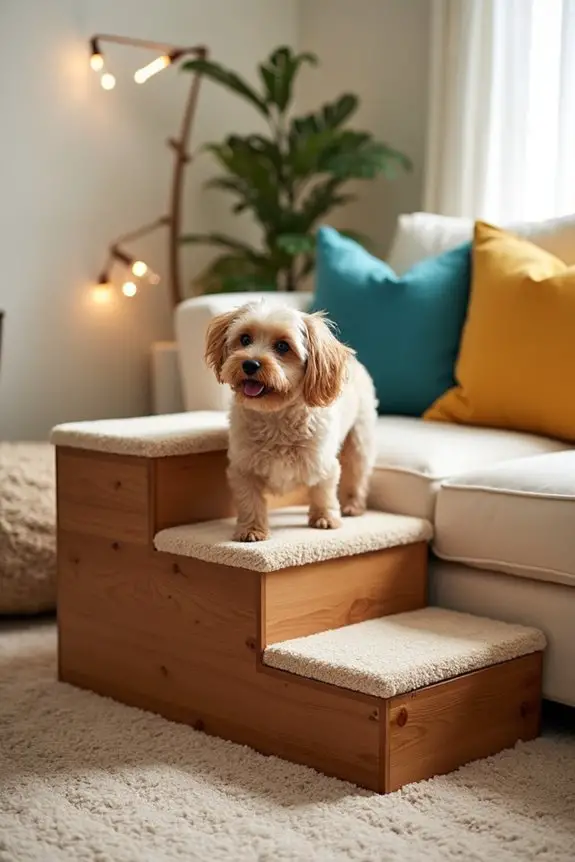
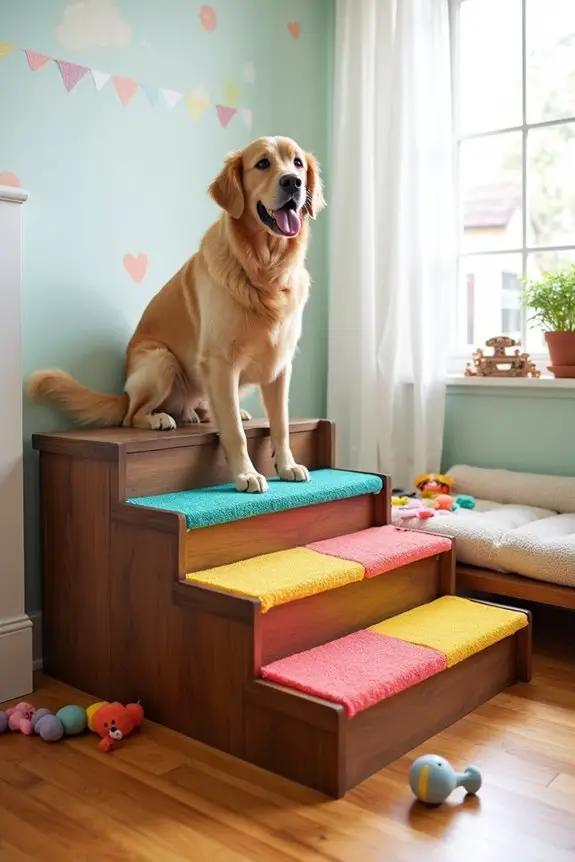
1. Wooden Steps With Carpet Grips
Have you ever watched your furry friend struggle to hop onto the couch or bed? That little wiggle of determination, followed by a comical tumble, tugs at the heartstrings—and maybe even your wallet.
Enter this DIY project: wooden dog stairs with carpet grips. Not only will these steps make life easier for your pup, but they’ll also save you from spending big bucks on a store-bought solution. Plus, crafting them adds a fun touch to your home decor. Let’s jump into it!
Materials Needed:
- 1 inch x 12-inch wooden boards (quantity depends on desired height and width)
- 1.5-inch wood screws
- Heavy-duty carpet or carpet strips (sized to cover steps)
- Carpet adhesive
- Sandpaper (medium and fine grit)
- Wood stain or paint (optional for a pop of color)
- Measuring tape
- Saw (hand saw or power saw)
- Drill
- Paintbrush (if using stain or paint)
- Safety goggles and gloves
Step-by-Step Instructions:
1. Measure and Cut the Wood: First, decide how tall you want the stairs to be. Measure the height from the ground to your couch or bed, and then cut your wood pieces. For three steps, you might want each step to be around 6 to 8 inches high, cutting three pieces for the risers and one long piece for the base.
2. Assemble the Frame: Lay down the base piece on a flat surface. Attach the risers at equal intervals using wood screws to form an L-shaped staircase. Make sure everything is sturdy, as we want these steps to hold up during your dog’s joyful hops.
3. Sand the Edges: This part might feel like a chore, but it’s essential. Use the medium grit first, then switch to fine grit to smooth out any rough edges. Trust me, no one wants their dog getting splinters while trying to be a brave mountaineer.
4. Paint or Stain (Optional): Want a chic look? Grab your paint or stain and apply a couple of coats to make those stairs *pop*. Choose a color that complements your furniture or go bold with something unexpected.
You can also let your inner Picasso shine with fun designs—dog paw prints, anyone?
5. Add Carpet Grips: Cut your carpet to fit the steps, leaving a little overhang. Use carpet adhesive to secure it firmly. This addition will prevent slips and give your furry buddy some extra traction.
6. Check Stability and Finish: Once everything is dry, give your stairs a little shake. Make sure they’re firm and secure. A wobble here could lead to doggy drama.
7. Introduce Your Dog: Place the stairs next to the desired furniture, and show your dog how to use them. A handful of treats can work wonders in getting them comfortable.
Optional Add-ons/Variations:
Want to take these stairs up a notch? Consider adding a fun stencil design on the sides or painting each step a different color for a whimsical look.
You could even use reclaimed wood for a rustic vibe or purchase patterned carpet for extra flair. Your DIY stairs can be as unique as your pup.
Pro Tip:
Always test adhesive on a small section of the carpet before applying it entirely. This way, you won’t end up with a sticky mess or an awkward carpet arrangement.
And remember, some dogs might prefer stair training, so be patient and encourage your pup. With a little time and encouragement, they’ll be climbing like pros.
There you have it! With just a handful of materials and some sweat equity, you can create a stunning set of wooden steps that will have your furry friend bounding up and down with ease. Additionally, while these DIY steps are great, consider investing in premium dog ramps for elderly as they provide additional support and stability for senior dogs.
Plus, every time you see them strut up those stairs, you’ll feel a little pride in knowing you crafted that with love—no more comic tumbles for your pup. Happy DIY-ing!
2. Foldable Dog Stairs
If you’re a dog owner, you know that some pups just can’t leap to the couch or bed like their younger, spryer counterparts. Enter foldable dog stairs—this DIY project is a game changer. Not only does it help your furry friend reach new heights of comfort, but it also provides them with luxury dog stairs that enhance their everyday life.
3. Lightweight Plastic Steps
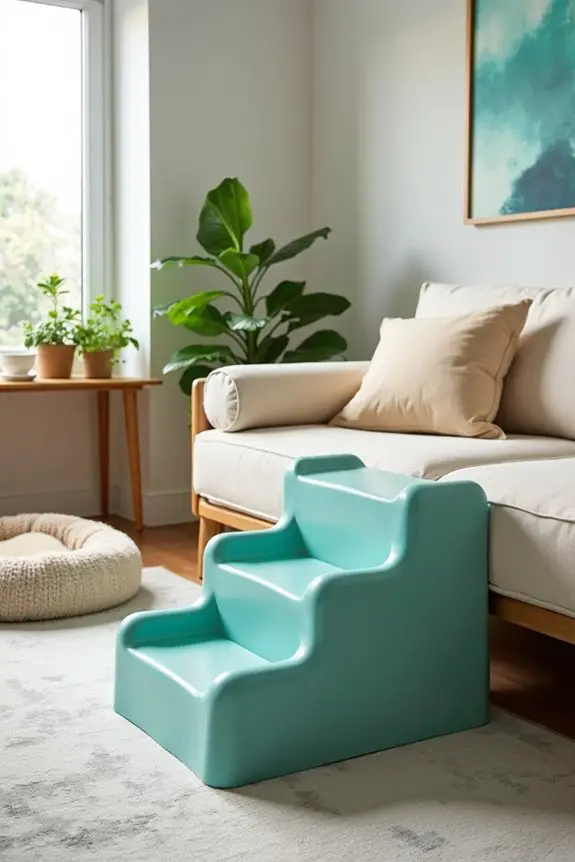
If you’re looking for a practical yet stylish solution to help your furry friend reach their favorite spots, lightweight plastic steps might just be the answer. These steps aren’t only easy to move and store but also budget-friendly, helping transform your pup’s life and your living space without breaking the bank. Plus, they come in various colors and styles, so you can find the perfect match for your home decor. Additionally, consider creating a custom design to pair nicely with a luxury dog food station for a coherent pet space.
Materials Needed:
- Lightweight plastic sheets (thick enough for durability)
- PVC pipes (for stability, extendable height)
- Heavy-duty plastic connectors (to hold it all together)
- Measuring tape
- Utility knife (to cut plastic sheets)
- Drill with bits (for creating holes)
- Sandpaper (medium grit)
- Safety goggles and gloves
Step-by-Step Instructions:
- Determine the Dimensions: First, decide how tall and wide you want your steps. A good rule of thumb is around 6-8 inches per step, and make sure they’re wide enough for your pup’s paws. Jot down these measurements—trust me, you’ll need them.
- Cut the Plastic Sheets: Using your utility knife, carefully cut the lightweight plastic sheets to shape for each stair. Don’t worry if it’s not perfect; this is DIY, and it’s all about creating something functional. Just be sure to wear your safety goggles, because nobody wants to lose an eye over a rogue slice of plastic.
- Create the Frame: Next, take your PVC pipes and cut them to the desired height for the side supports. Use the heavy-duty plastic connectors to secure everything together. This could get a little tricky; double-check that everything is lined up neatly. No one wants wobbly stairs.
- Assemble the Steps: Attach the cut plastic sheets to the side supports using your drill. Make sure they’re evenly spaced, so your pup has a secure path up. If they slide around, you’ll be rescuing your dog from a misstep—definitely not the fun kind of rescue.
- Sand Down the Edges: Safety first! Sand down any sharp edges with your medium-grit sandpaper. Your pup deserves a comfy and safe ride up and down those steps—splinters aren’t in the playbook.
- Decorate If Desired: At this point, you can leave your steps as is, or you can add a fun touch. Use non-toxic paint or stickers to personalize them. Just think of how nice it’d be to see your pup’s name or little paw prints on the stairs—so adorable.
- Test Them Out: Before letting your fur baby practice their climbing skills, give the steps a good test yourself. Make sure everything is sturdy and won’t collapse under your weight. If they pass the human weight test, you’re ready for the pup!
Optional Add-ons/Variations:
- Consider adding a non-slip tape to the steps for extra security. Think of it as fitting your dog with tiny sneakers; it’ll be a safe and stylish walk up.
- Customize the color scheme to fit your home decor—who knew a little plastic could look so chic? Maybe a bright pink for you and your pup, or classy navy blue to match that fancy sofa.
Pro Tip:
When working with plastic, heat can sometimes warp it. Avoid leaving your steps out in direct sunlight for too long, especially on a hot day. If you can, opt for outdoor-ready materials when creating these steps. Trust me, your pup will thank you later, and you won’t be scrambling for new steps every summer!
Now, get to crafting those lightweight plastic steps, and watch your pup take on new heights with confidence. You’ll be the proud parent of a dog that can reach the couch with style!
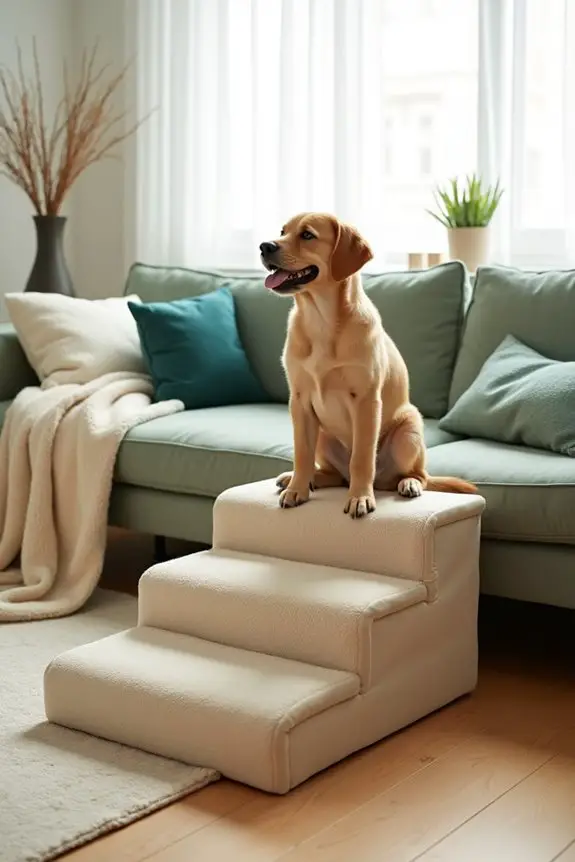
4. Padded Pet Ramp
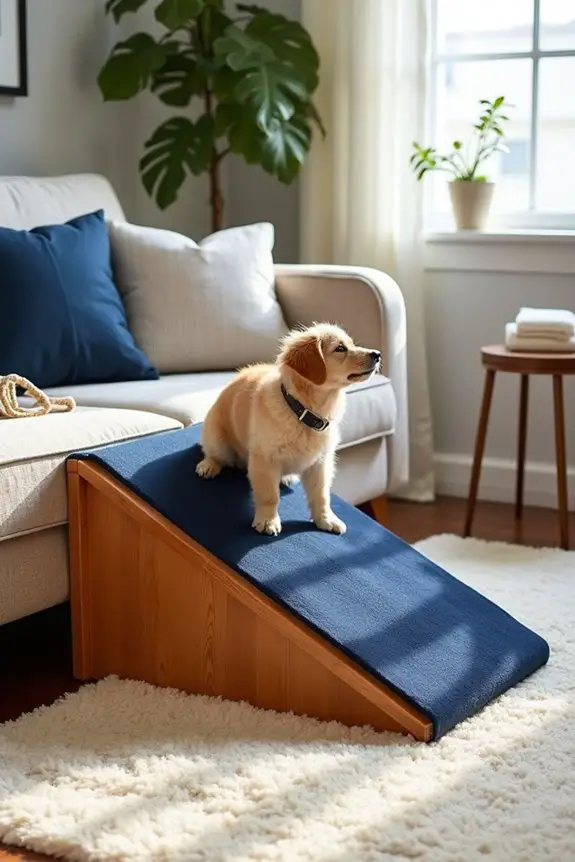
If your dog loves to cuddle up on the couch or hop into your bed but struggles to get there, a padded pet ramp could be the perfect DIY project for you. This stylish pet ramp not only makes it easier for your furry friend to reach their favorite spots but also adds a cozy, decorative touch to your home. Plus, it’s a cost-effective way to enhance your dog’s comfort and reduce the strain on their joints. Many dogs, especially those with arthritis, greatly benefit from luxury orthopedic furniture designed to support their joints while they relax.
Materials Needed:
- Plywood or sturdy wood board (for the ramp base)
- Foam padding (thick enough for comfort)
- Durable fabric (to cover the foam, think fleece or canvas)
- Wood screws (to assemble components)
- Electric saw or hand saw (for cutting wood)
- Staple gun (for attaching fabric)
- Measuring tape
- Sandpaper (to smooth edges)
- Drill (with bits for wood screws)
- Safety goggles and gloves
Step-by-Step Instructions:
- Measure the Ramp Size: Start by measuring the height of the surface your dog will be accessing to determine the right ramp length. A gentle slope is key, so aim for a length that’s 1.5 times the height, making it easier for your dog to climb.
- Cut the Wood: Using your saw, cut the plywood or wood board to the desired ramp length and width. Think about how wide your dog is; you’ll want it spacious enough for them to feel secure as they go up and down.
- Smooth the Edges: With sandpaper, smooth down the edges of the cut wood. This is essential for safety; you don’t want your pup getting snagged on any rough spots while making their way to the couch.
- Add Foam Padding: Cut your foam padding to match the size of the ramp. Secure it to the wood using your staple gun, pulling the padding snugly so it doesn’t bunch up as your pup walks over it.
- Cover with Fabric: Cut your chosen durable fabric to fit over the foam, leaving extra material to wrap underneath the ramp. Staple the fabric in place over the foam securely—again, a nice snug fit is vital for safety and aesthetics.
- Assemble and Secure: If your ramp consists of multiple pieces, use wood screws to secure them together. Make sure everything is tightly fastened—nobody wants a surprise collapse while Fluffy is in action.
- Test It Out: Before letting your dog loose on their new ramp, make sure everything is sturdy and the fabric is tightly secured. You can even walk up and down it yourself to test its strength. If you can do it, your little pooch surely can!
Optional Add-ons/Variations:
- Custom Colors: Choose a fun color scheme that matches your decor or your dog’s personality. Try adding some non-toxic paint or wood stain to the wood base for a personal touch.
- Decorative Patterns: Use patterned fabric that showcases your dog’s personality. Paw prints, stripes, or even whimsical designs can turn a simple ramp into a centerpiece.
Pro Tip:
To guarantee long-lasting comfort for your pup, consider using an anti-slip carpet for the ramp surface. This won’t only help them climb safely but also create a cozy surface for their paws.
After all, nobody likes a slippery slope when they’re making their way to the top.
5. Adjustable Height Dog Steps
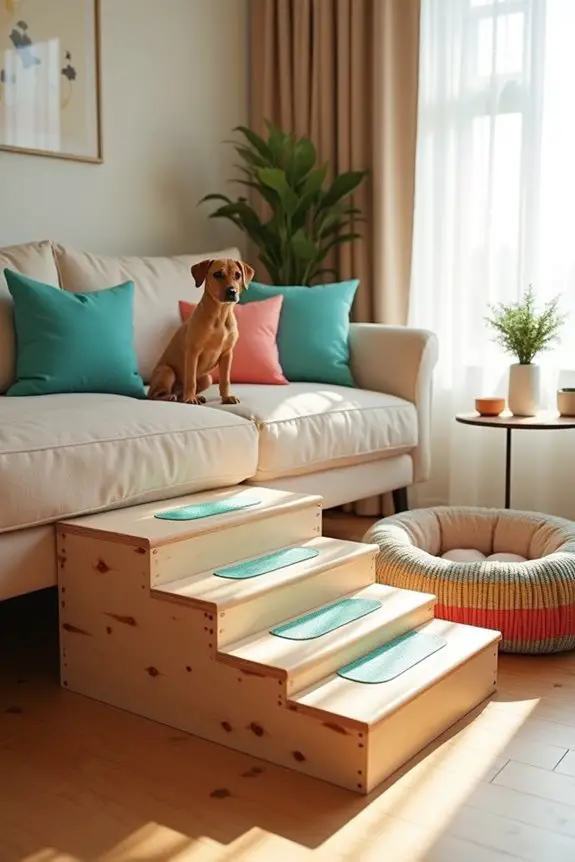
If your dog prefers the thrill of jumping, but it means risking their spine or those precious little paws, then building some adjustable height dog steps is the perfect DIY project for you! These handy steps allow your furry friend to reach their favorite spots with ease — whether it’s your bed or the backseat during car rides. Additionally, setting them up next to a dog automatic ball launcher can provide even more fun for your pup.
By making these steps adjustable, you can cater to dogs of different sizes, and they save you a pretty penny compared to buying commercial versions. Plus, a custom look just amps up your living space.
Materials Needed:
- Plywood or sturdy wood boards (for the steps)
- Wood blocks or adjustable risers (for height changes)
- Wood screws (to secure everything)
- Electric saw or hand saw (for cutting wood)
- Measuring tape
- Sandpaper (to smooth edges)
- Drill (with bits for wood screws)
- Safety goggles and gloves
- Non-slip grip tape (for the steps)
- Wood finish or paint (optional, for aesthetics)
Step-by-Step Instructions:
- Measure the Desired Height: Evaluate how high you want the steps to be—keep your dog’s height in mind. You can even set a height limit so the steps can be adjusted as your furry friend grows (or gains a few pounds).
- Cut the Wood: Using your saw, cut the plywood into equal pieces for each step. Generally, aim for three or four steps, with each one about 6-8 inches deep for comfort. You want your pup to feel secure, after all!
- Prepare the Base: For stability, cut a larger base piece of wood that will hold the steps in place. This base should be wider than the steps to avoid any wobbling.
- Smooth the Edges: Sand down all cut edges where your pup might get snagged. Trust me, nobody likes splinters — especially not your furry buddy.
- Assemble the Steps: Using the drill and wood screws, attach each cut-out step to the base, spacing them evenly apart for easy access. If you’re feeling fancy, you might choose to add adjustable risers between the base and the steps for height variations.
- Add Non-slip Grip Tape: Cut pieces of non-slip grip tape and stick them to the top of each step. This guarantees those little paws won’t slip when they’re excitedly bounding up!
- Finish with Paint or Stain: If you want those doggy steps to match your interior decor, now’s the time to apply paint or wood finish. Not only does this add a personal touch, but it also protects the wood from scratches and wear.
Optional Add-ons/Variations:
- Color Customization: Don’t hold back! Paint the steps in vibrant colors or patterns to match your dog’s personality or your home’s vibe. You could even use pet-safe paint for something truly unique and happy.
- Decorative Railing: Feeling crafty? Simply add a lightweight railing around the sides to give your pup even more confidence as they climb. A small foam guard can ensure they don’t take a tumble off the side.
Pro Tip:
Before letting Fido loose on their shiny new steps, run a little test drive yourself. It’s like the final inspection; if you feel confident on those steps, your dog is in good hands.
And always keep those doggie nails trimmed; you want them to grip the steps, not snag on the edges.
Now, roll up those sleeves, embrace your inner carpenter, and let’s build some dog steps to make your pup’s life easier and yours more stylish. Who knew DIY could be such a fun bonding experience with your dog?
6. Non-slip Rubber Steps
If you want to guarantee your pup can confidently make their way around your home, DIY non-slip rubber steps are a fantastic, budget-friendly project.
These steps provide a secure climb while adding a pop of color to your space. Plus, they’re a lifesaver for dogs who may need a little extra help getting up onto higher surfaces like your cozy bed or your car’s backseat.
Materials Needed:
- Plywood or sturdy wood boards (for the steps)
- Heavy-duty rubber matting or textured rubber sheets (for non-slip surfaces)
- Wood screws (to secure everything)
- Electric saw or hand saw (for cutting wood)
- Measuring tape
- Sandpaper (to smooth edges)
- Drill (with bits for wood screws)
- Safety goggles and gloves
- Contact adhesive or spray adhesive (to attach rubber)
- Optional: paint or wood finish (for aesthetics)
Step-by-Step Instructions:
- Measure and Cut Your Steps: Decide how tall and wide you want your steps to be based on your dog’s size. Use your saw to cut plywood into three or four step pieces, ideally around 6-8 inches deep. You want it to feel comfy and safe for your canine companion.
- Prepare the Base: Cut a larger piece of plywood that will serve as the base. It should be wider than your steps to provide stability and prevent any accidental wobbling. No one likes a wobbly set of stairs, especially not your pup.
- Smooth Those Edges: Grab your sandpaper and smooth out all the edges and corners. Trust me, a splinter on a dog’s paw can ruin both your day and their day.
- Assemble the Steps: Use the drill to secure each step to the base with wood screws, spacing them evenly apart. Make sure your pup can hop on up easily.
- Cut and Attach the Rubber: Measure the tops of each step and cut your rubber matting to fit. Use contact adhesive to secure the rubber onto each step, guaranteeing a solid bond. Your pup will appreciate the non-slip grip more than you know.
- Finish with Paint or Stain (Optional): If you want to jazz things up, now’s the time to give your steps a coat of paint or stain. A little color never hurt anyone, right? It also protects the wood from wear and tear.
- Let it Dry: Give everything ample time to dry – typically a few hours or as recommended on your adhesive. Once dry, you’re ready for your pup to put the new stairs to the test.
Optional Add-ons/Variations:
Why not switch things up with some fun fabric instead of rubber? You could use a chic outdoor fabric with vibrant patterns to give your steps a bold look that matches your home decor or your dog’s personality.
Or how about painting the steps with bright colors? You could turn each step into a fun rainbow, which would make climbing a whimsical adventure for your dog — and a feast for your eyes.
Pro Tip:
Before getting started, make sure you measure the height you’re working with. You don’t want to end up with a staircase that’s too tall or too short.
If your pup is more of a couch potato and prefers lounging over jumping, also consider a gentle incline rather than steep steps. That way, your furry friend can enjoy their ascent without feeling apprehensive—trust me, they’ll love you for it.
7. Stylish Stairs With Decorative Fabric
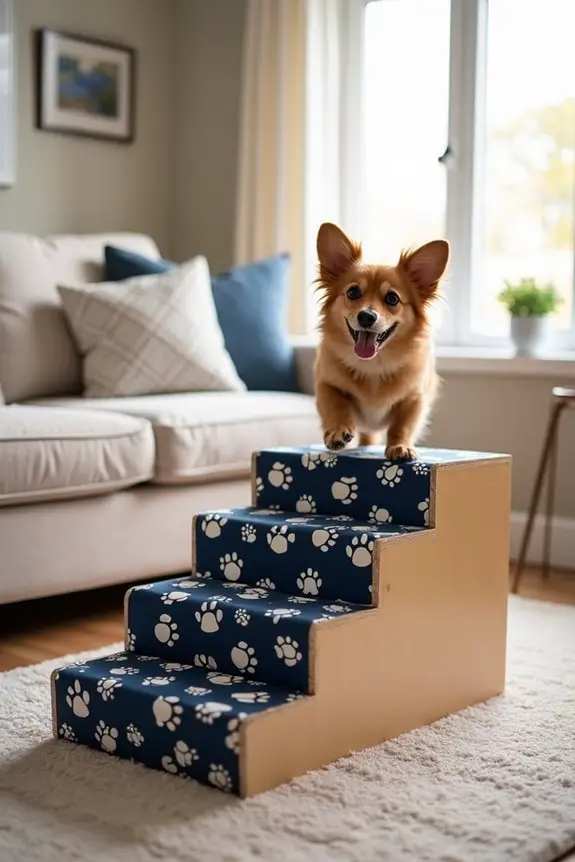
Looking to give your DIY dog stairs a makeover? Adding decorative fabric not only ramps up the style but also adds a bit of cushiness for your furry friend.
Trust me, those little paws deserve a comfy climb! Plus, you’ll save some bucks—with this project, you won’t have to raid your wallet for something store-bought.
Let’s turn those plain stairs into a chic addition to your home.
Materials Needed:
- Plywood or sturdy wood boards (for the steps)
- Heavy-duty fabric (your choice of pattern/colors)
- Heavy-duty spray adhesive or fabric glue
- Wood screws (to secure everything)
- Electric saw or hand saw (for cutting wood)
- Measuring tape
- Sandpaper (to smooth edges)
- Drill (with bits for wood screws)
- Safety goggles and gloves
- Optional: wood finish (for aesthetics)
Step-by-Step Instructions:
1. Measure and Cut Your Steps: Decide the height and depth of your steps based on your dog’s size.
Cut your plywood into three or four step pieces, keeping them about 6-8 inches deep. It’s like crafting mini staircases just for your pup.
2. Prepare the Base: Create a solid foundation by cutting a larger piece of plywood for your base.
This should be wider than your stairs itself, adding stability against any puppy shenanigans. A broad base means fewer surprises when your dog takes a leap.
3. Smooth Out Those Edges: Sand down all the edges until they feel nice and smooth.
Think of it as giving a gentle paw-dicure to the wood. Trust me, your dog will appreciate not stepping on any potential splinters.
4. Assemble the Steps: Use the drill to secure each step to the base with wood screws, ensuring they’re evenly spaced.
At this point, your stairs should start resembling something that’s ready for doggy business.
5. Cut and Attach the Fabric: Measure the tops of the steps and cut your fabric to match.
Use the heavy-duty adhesive to secure it onto the tops of each step. That’s right, you’re giving your dog a cozy texture to grip onto! How fancy.
6. Final Touches: If you want to make those stairs even prettier, you could finish the wood base with a stain or sealant.
This is like putting on a designer outfit for your stairs. Just let it dry thoroughly before letting your pup go all-in.
7. Introduce it to Your Pup: Once everything is set and dry, show off the new stairs to your canine partner.
You might just want to snap a quick picture because—how adorable will they look climbing their custom stairs?
Optional Add-ons/Variations:
Feeling extra creative? Try swapping out the fabric each season or choose patterns that match your home decor.
You could even create a fun theme, like beachy stripes for summer or cozy plaid for winter. Plus, if you’re loving the fabric idea but want a bit more comfort, consider using a foam padding beneath the fabric for maximum squishiness.
Pro Tip:
When choosing fabric, look for something durable and easy to clean.
Trust me, those little paw prints will happen—it’s just a fact of life. And a machine-washable fabric will save you from tears (yours, not your dog’s).
Happy crafting!
Extra Tips & Ideas
When you immerse yourself in building DIY dog stairs, you might find yourself stepping back to ponder a few extra tips and ideas that can really elevate your project.
First, consider non-slip treads. Trust me, you don’t want your pup taking a tumble during their grand descent. Measure twice and cut once—yeah, I’ve learned that the hard way.
If your dog’s on the taller side, a bit of extra height can make a world of difference. Don’t forget stylish add-ons; think of painted designs or fun decals to match your decor.
Finally, keep it sturdy. Your four-legged friend will thank you after all those zoomies. It’s about making their life easier while having fun in the process.
Frequently Asked Questions
What Materials Are Best for DIY Dog Stairs?
For DIY dog stairs, use sturdy plywood for the steps, non-slip carpet for traction, and wood glue or screws for assembly. Lightweight materials like foam can work too, ensuring safety and durability for your pup.
How Much Weight Can Homemade Dog Stairs Support?
Homemade dog stairs can typically support between 50 to 200 pounds, depending on the materials and construction. Make sure you reinforce the structure well, ensuring your pup’s safety while climbing up and down easily.
Can I Paint or Decorate Dog Stairs?
Yes, you can paint or decorate your dog stairs! Use non-toxic, pet-safe paint or materials. Just make sure the surface is smooth to prevent slipping, and choose designs that match your home décor for a stylish touch.
How Do I Ensure Stability for the Stairs?
To guarantee stability for the stairs, use high-quality wood, reinforce joints with screws, and add rubber pads to prevent slipping. Regularly check for any wear or wobbliness to keep your pup safe and secure.
What Sizes Should I Consider for Different Dog Breeds?
When designing stairs for different dog breeds, consider their height and weight. Smaller breeds need shorter, narrower steps, while larger ones require wider, sturdier options. Always measure before you start building to guarantee a perfect fit!
Conclusion
So, building these dog stairs is like crafting a cozy bridge to happiness for your pup. You don’t need a carpentry degree—just a bit of effort and creativity. Picture your furry friend bounding up those steps, tail wagging, feeling like a champion. It’s all about giving them that little boost. Now, grab your materials, get started, and watch your dog conquer new heights—literally. Because every pup deserves to reach for the clouds, right?

Hi, I’m Ali Tarek, the founder of Animalsman. I’ve always been passionate about pets, especially dogs and cats, and I created this website to share practical tips, easy recipes, and helpful care advice for fellow pet lovers. My goal is to make pet care simple, enjoyable, and accessible for everyone. When I’m not writing or curating content, you’ll usually find me spending time with my furry friends or learning new ways to keep them happy and healthy.

