Halloween’s coming and you’ve got a golden retriever just sitting there, looking ridiculously cute, doing absolutely nothing about it.
Meanwhile, your kids are begging to dress him up, and you’re staring at those overpriced store costumes thinking… hard pass.
Last year I grabbed some felt scraps and hot glue for my nephew’s dog, and honestly? Best decision ever. The whole neighborhood stopped us.
Here’s the thing — you don’t need a craft degree or a big budget. These diy dog costumes for kids are so doable that your kids can actually help make them.
And if you’re already eyeing Halloween inspo, these DIY dog Halloween costumes are chef’s kiss for extra ideas.
Seven ideas. All adorable. Zero stress.
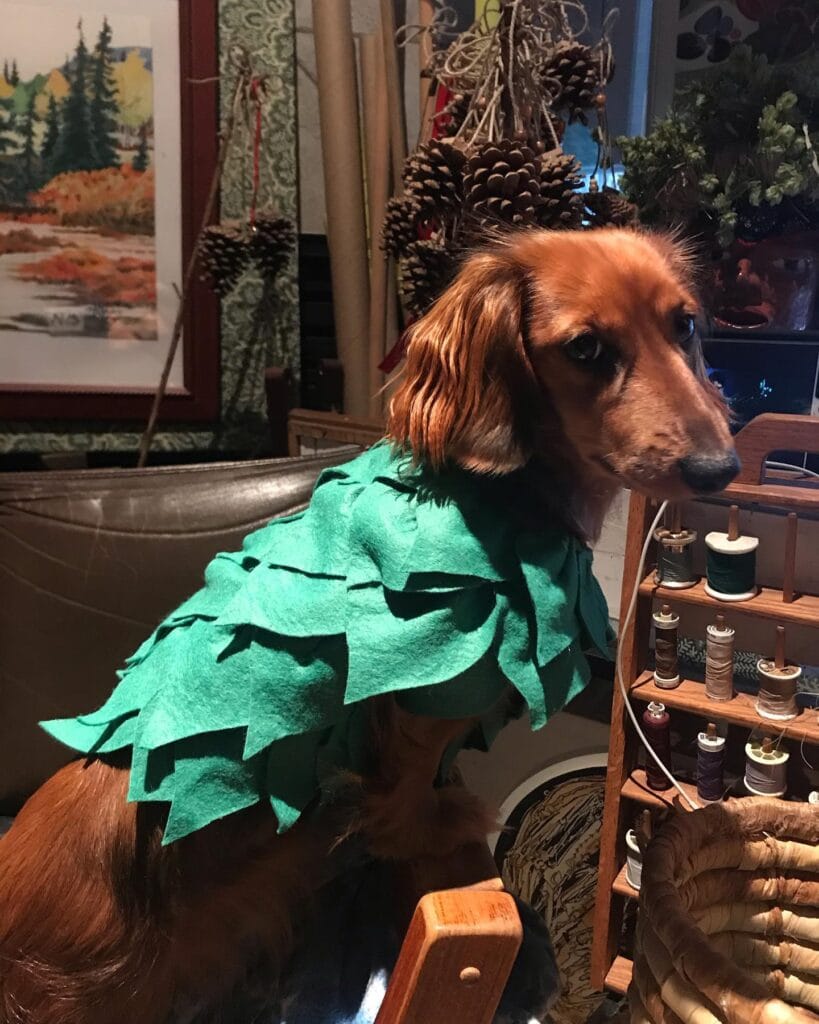
#1: Royal Blue Velvet Cape — The Dog Costume That Looks Like a Million Bucks (And Costs Almost Nothing)
Your golden retriever sits there, tail wagging, giving you that look — the one where you know she deserves something extra special for Halloween this year.
I made this exact costume for my cousin’s dog last fall, and honestly? People thought I bought it from a boutique pet shop. The secret is the crushed velvet. It photographs like a dream.
Prep Time: 20 minutes | Active Project Time: 45 minutes | Difficulty Level: Beginner-Friendly
Materials & Tools:
– ½ yard royal blue crushed velvet fabric
– ¼ yard white faux fur trim (fluffy, curly texture — like Mongolian lamb)
– 1 blue satin ribbon (18–24 inches long) for the bow tie detail
– Fabric scissors
– Hot glue gun + glue sticks
– Measuring tape
– Velcro strips (2 inches, sew-on or adhesive)
– Needle and blue thread (optional but adds durability)
### Instructions
Measure your dog’s back length from the base of the neck to the tail — this number is your cape’s main measurement. Cut the crushed velvet into a semi-circle shape using that measurement as your radius. The fuller the semi-circle, the more dramatic the drape.
Next, cut your faux fur trim into a collar strip roughly 4–5 inches wide and long enough to wrap around your dog’s neck with a 1-inch overlap on each side. Hot glue works here, but a quick hand-stitch along the edge keeps it from peeling after your dog does her signature shake.
And here’s the part that pulls everything together — attach the blue satin ribbon at the front of the collar where both sides meet. Tie it into a bow before you glue it down so it holds that perfect Pinterest shape. The ribbon fastens the cape at the chest, distributes the weight, and keeps the whole thing sitting flat on her back — no bunching, no sliding.
Attach one side of your Velcro strip to the underside of the collar overlap. Press firmly. Let it set for 10 full minutes before trying it on your pup.
The crushed velvet drapes naturally over your dog’s body without restricting movement — she can walk, sit, and shake without the fabric twisting. That comfort factor means she’ll actually keep it on for photos.
A little iron on a low setting smooths out any fold lines in the velvet before you cut — velvet shows creases, and starting flat makes the whole thing look polished straight away. Also, if your dog has a deeper chest, add an extra inch to the collar strip length before cutting. You can always trim down, but you can’t add fabric back.
For 7 creative DIY dog costume ideas for fun that work for different breeds and sizes, there’s a whole range of styles that follow this same beginner-friendly approach.
📸 Photo credit: Instagram @furry_couture
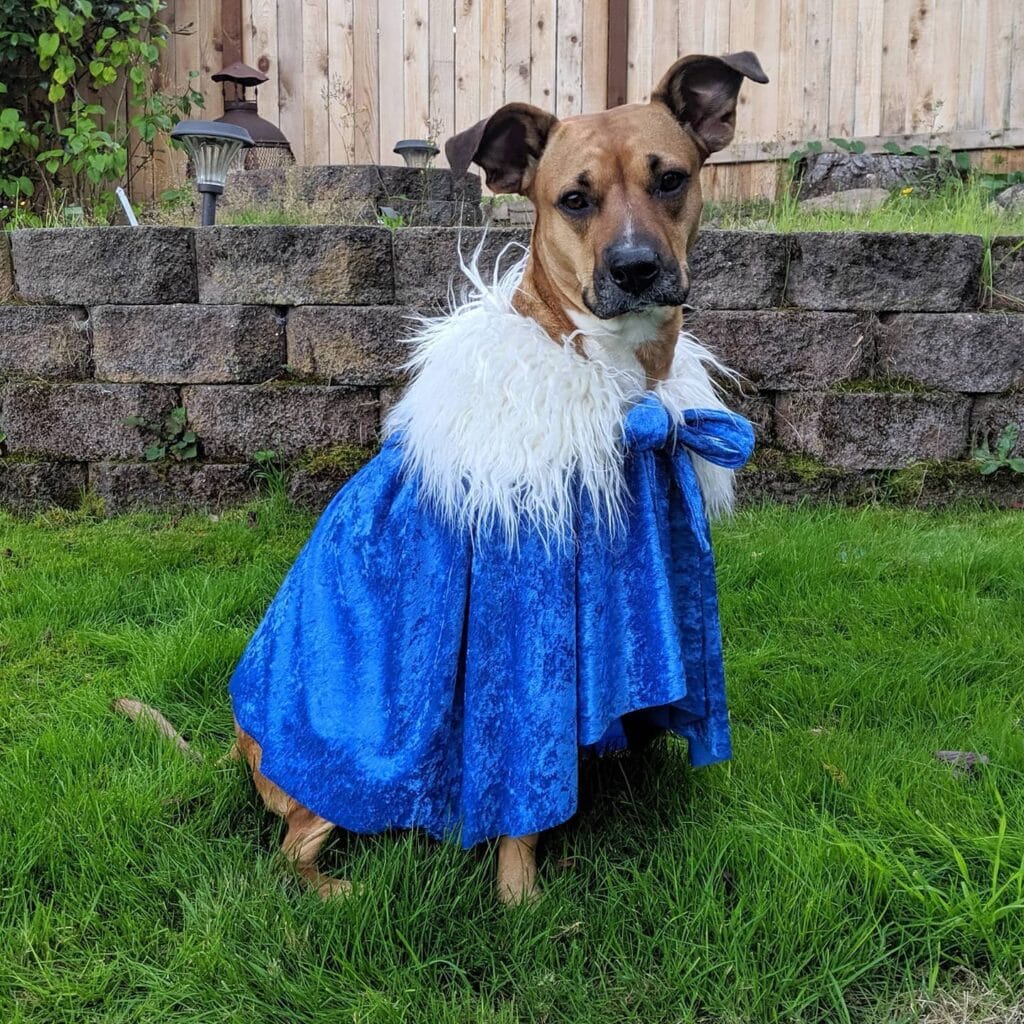
#2: DIY Jester Dog Costume — The Court Fool Look Your Dog Was Born to Rock
Okay so picture this — your golden is sprawled out on the lawn, tongue out, zero dignity, looking at you like “yes, I will wear whatever you put on me.” That’s the moment you’ve been waiting for.
This jester costume is genuinely so cute I almost screamed when I made it for my cousin’s dog last Halloween. The multicolor hat with the little bells? Chef’s kiss.
Materials & Tools You’ll Need:
– Felt fabric sheets in orange, green, yellow, purple, red, and white
– Small jingle bells (6–8 pieces, ½ inch diameter)
– Elastic band (¼ inch wide, about 12 inches long)
– Fabric glue or needle and thread
– Scissors and fabric chalk
– A collar base or stiff felt ring for the ruff
### Instructions
Cut your felt into 3-inch pointed triangles — you’ll need around twelve for the collar ruff and six longer 5-inch ones for the hat points. Alternate your colors as you go so it gets that classic jester pattern. Layer two triangles together for each point so they hold their shape instead of flopping.
For the hat, cut a 10-inch circle, slice it into thirds, and roll one third into a cone shape. Secure it with fabric glue and let it set for 20 minutes. Then attach your three colored hat points to the tip of the cone — one orange, one green, one yellow. Sew a jingle bell to each tip because the bells do the real work here. They alert you when your dog is sneaking around, which, trust me, is priceless.
Attach the elastic under the chin so the hat sits snug but not tight. The snug fit keeps the hat from sliding and gives your dog full range of movement — so they’re comfy and adorable.
For the collar ruff, glue your alternating triangles around the 12-inch elastic ring and stitch the bells between each point. It lays flat against the chest just like in the photo.
Cut your felt points clean and sharp — dull scissors leave frayed edges that unravel fast.
Prep Time: 15 min | Active Project Time: 45 min | Difficulty Level: Beginner
📸 Photo credit: Instagram @hgtv
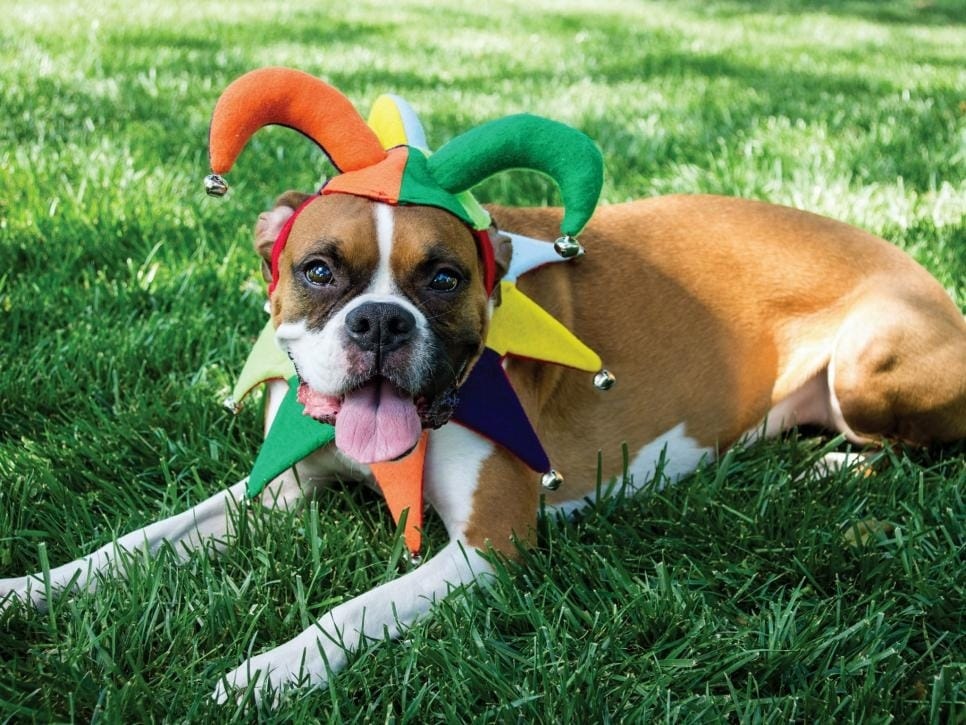
#3: DIY Purple Flower Dog Costume (No Sew, No Stress)
You know that moment when your golden retriever is just sitting there being her fluffy, ridiculous self and you think — she needs a costume that matches her whole personality? Yeah. This one is it.
Last Halloween, my cousin put this exact look on her cockapoo and I genuinely could not stop laughing. It’s so cute it almost hurts.
Materials & Tools You Need:
– Purple foam sheet (12×18 inch) — large petals
– White foam sheet (12×18 inch) — inner petals
– Two green foam sheets — leaves
– Yellow glitter foam or pom-pom — center
– Black dog harness
– Hot glue gun + glue sticks
– Scissors
– Velcro strips (1-inch width)
Prep Time: 15 minutes | Active Project Time: 45 minutes | Difficulty Level: Beginner
### Instructions
Cut 8 rounded petal shapes from your purple foam sheet — each about 5 inches long. Arrange them in a circle and hot glue the ends together, overlapping slightly so they fan out like a real bloom.
Cut 6 smaller white petals and glue them directly on top of the purple layer, centering them. Add your yellow glitter pom-pom right in the middle. And honestly, that golden center catches light in the best way.
Grab your green foam and cut two large leaf shapes, roughly 7 inches long. Score a center line with scissors — this gives each leaf that realistic folded look. Glue the leaves behind the flower base.
Here’s the simple fix: attach Velcro strips to the back of the flower and directly onto your dog’s harness. No sewing, no fuss, and your dog stays comfortable because the harness stays on as usual — the flower simply snaps off when playtime’s done.
Hot foam edges can feel scratchy. Run your finger along every cut edge and gently press a warm glue line along the back to smooth it out.
For more hilarious costume inspiration, 18 Hilarious Dog Costumes Your Pup Will Love! has ideas that’ll make your whole neighborhood stop walking.
📸 Photo credit: Instagram @hgtv
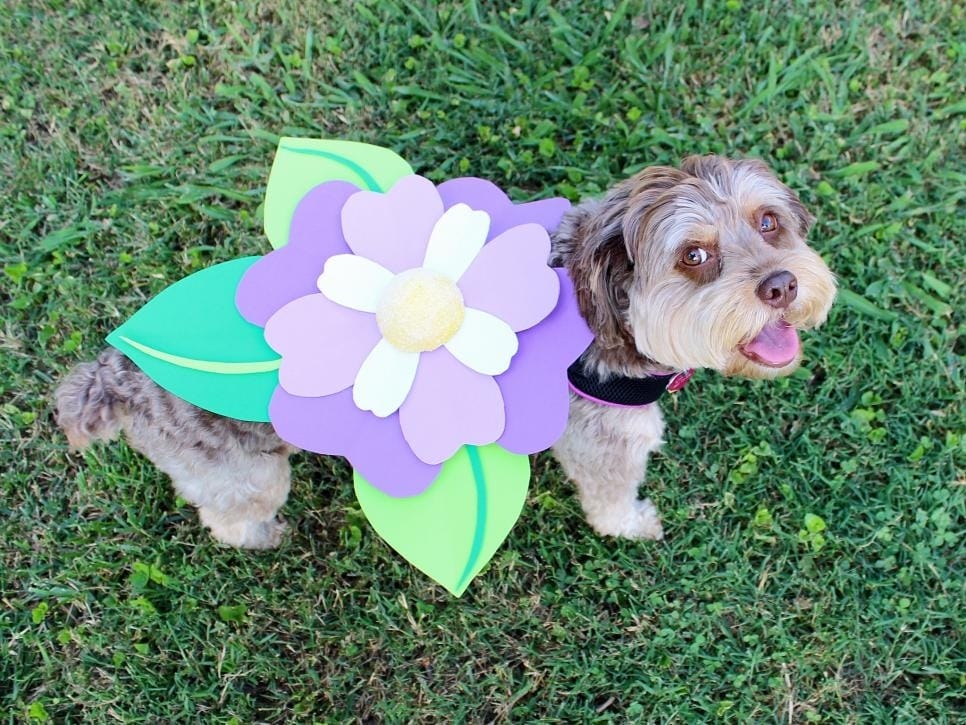
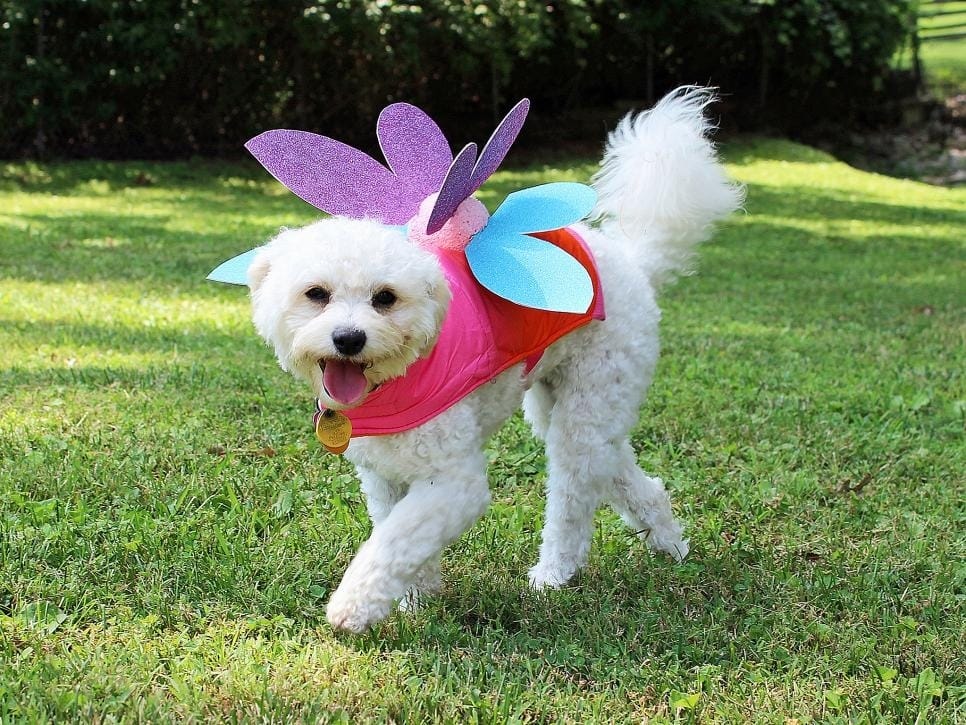
#4: DIY Fairy Wing Dog Costume — Your Pup Becomes Pure Magic
Prep Time: 20 minutes | Active Project Time: 45 minutes | Difficulty Level: Beginner
You know that moment your golden retriever trots across the yard and you just need a costume that matches her energy? This glittery fairy wing costume is exactly that.
Looking at this fluffy white pup rocking purple, blue, and pink glitter foam wings over a hot pink and red mesh vest — I literally gasped. It’s giving full Pinterest fantasy.
Materials & Tools:
– Pink and red mesh fabric (about ½ yard total)
– Glitter foam sheets in purple, blue, and pink (9×12 inch sheets, 2-3 per color)
– Velcro strips (1-inch wide, self-adhesive)
– Scissors, hot glue gun, glue sticks
– Elastic band (½ inch wide, roughly 12 inches)
– Fabric marker
Instructions
Cut your mesh fabric into a saddle-shaped vest that fits snugly across your dog’s back without bunching under her belly. Stitch or glue Velcro strips along the chest flap so putting it on takes zero wrestling with her.
Trace petal shapes onto your glitter foam sheets — aim for 4-5 petals per color, each about 4 inches long. Hot glue them in layered clusters, alternating purple and blue with pink centered on top. That layering is what gives the costume that full, dimensional fairy flower look you see in the photo.
Attach the petal clusters onto a small foam circle base (roughly 3 inches in diameter), then hot glue the whole piece centered on the back of the vest. Run a thin elastic loop underneath the base and secure it through two small slits in the mesh — this keeps the wings from shifting when she runs.
And honestly, keep the vest slightly loose around the ribcage. Your dog breathes easier, moves without restriction, and actually stays happy wearing it longer.
The glitter foam holds its shape through outdoor wear, the mesh vest stays breathable in warmer weather, and the payoff is a costume that photographs like a professional shoot without costing you more than $10 total.
If you’re already obsessed with DIY pet projects, 13 Genius DIY Dog Stuff Every Pet Parent Needs to Try Today! has even more ideas your golden will thank you for.
Store any leftover foam flat between two books overnight — it keeps the petals from curling at the edges before you’re ready to use them.
📸 Photo credit: Instagram @hgtv
#5: DIY Super Mario Dog Costume (Complete with Trophy-Worthy Style)
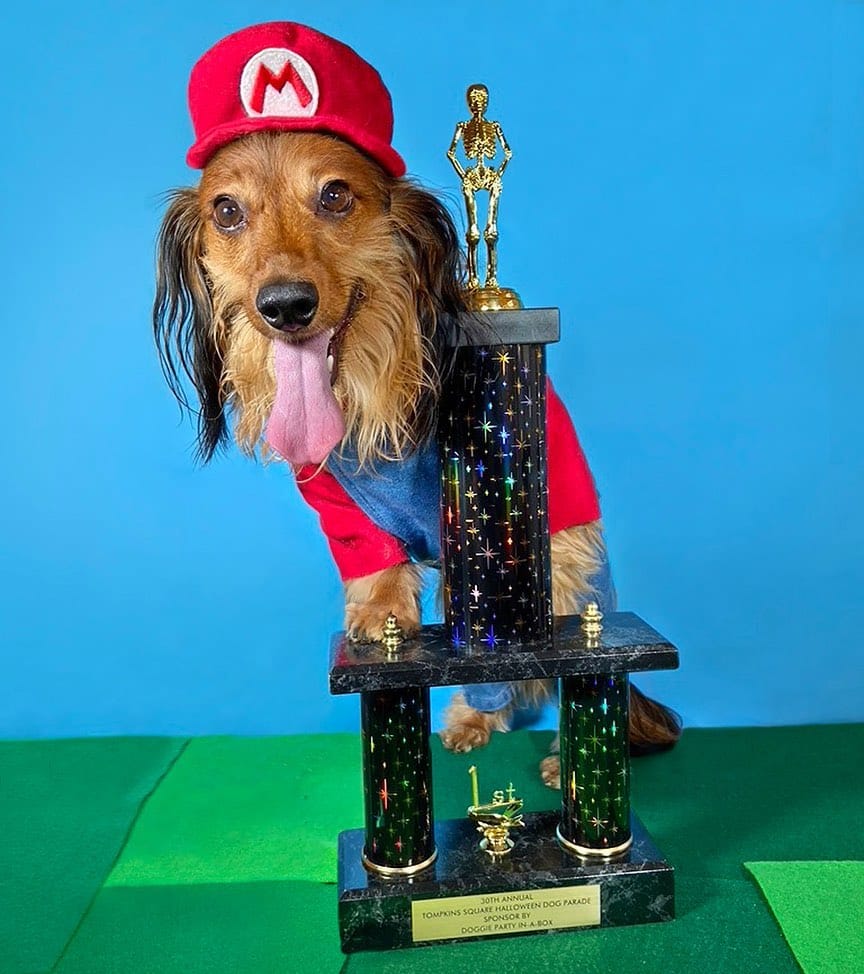
Your golden girl is already the cutest thing at every park. But Halloween? That’s her moment — and this Mario costume is going to make people stop mid-walk to take photos.
I actually saw this on Instagram and immediately sent it to three people. The red felt cap with a white “M” emblem, the denim and red two-tone shirt — it’s exactly the kind of costume that wins first place. (Literally. The pup in this photo took home the 1st place trophy at the 30th Annual Tompkins Square Halloween Dog Parade.)
Materials & Tools:
– Red felt fabric (½ yard)
– Denim fabric (½ yard)
– Red cotton fabric for the shirt overlay
– White felt scrap for the “M” emblem
– Fabric glue or needle and thread
– Velcro strips (for closures)
– Scissors, pins, fabric marker
Instructions
Start by measuring your dog’s neck, chest, and back length — this is where most people mess up, so measure twice.
Cut the denim fabric into a simple vest shape that matches your dog’s chest measurement plus 2 inches of overlap on each side. The denim sits closest to the body, so keep it loose enough that she can breathe and move without restriction. A snug-but-comfortable fit means she’ll actually keep it on instead of wiggling free after five minutes.
Layer the red cotton fabric over the top half of the vest, mimicking Mario’s signature two-tone shirt. Secure it with fabric glue along the edges, pressing firmly and letting it dry for 20 minutes before moving on.
For the cap, cut a circular brim and a curved crown piece from your red felt. Sew or glue the pieces together, then cut a 3-inch circle from white felt and a bold “M” shape from red felt. Glue the white circle to the front of the cap, then the red “M” on top. Let everything dry flat.
And here’s the part people skip — add a small elastic band under the chin to keep the cap on. It threads through two small slits on either side of the cap’s base and sits gently under her jaw. This keeps the hat in place without any pressure on her neck.
Attach Velcro strips to the vest’s side and belly closures so you can get it on and off in seconds. Because trust me, nobody wants to wrestle a golden retriever into a costume in a parking lot before a parade.
The cap is the feature that pulls the whole look together — recognizable costume equals more crowd reactions, which means more positive energy for your pup during the event.
If your dog is sensitive to hats, do short 5-minute practice sessions at home a few days before Halloween. Let her wear the cap while getting treats so she builds a good association with it before the big day.
Prep Time: 30 minutes | Active Project Time: 1.5–2 hours | Difficulty Level: Beginner-Intermediate
And if this one has you hooked on dog costume ideas, 13 Adorable Dog Halloween Costumes You Need to See has even more to add to your list.
📸 Photo credit: Instagram @longboy_lincoln
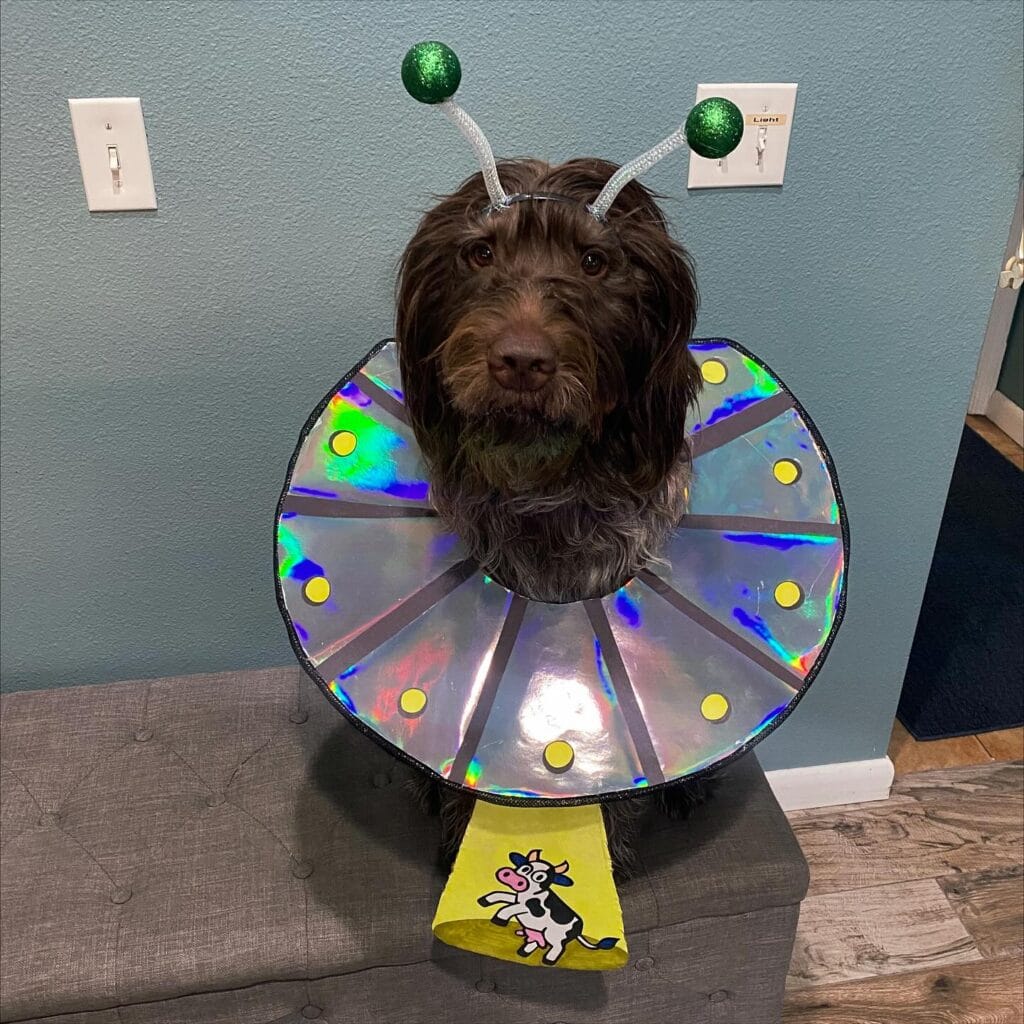
#6: DIY UFO Dog Costume (With a Cow Abduction Beam!)
Okay, so picture this — your golden is just sitting there, looking at you with those big eyes, and you’re thinking… she deserves something wildly extra for Halloween this year.
This UFO costume is genuinely one of my favorites I’ve ever seen. A dark, curly-haired pup wearing a holographic silver flying saucer collar, green glitter alien antennae, and a yellow tractor beam dangling a cartoon cow underneath? I died. My cousin made something similar for her lab last fall and it stopped traffic at the neighborhood parade.
Materials & Tools:
– Holographic iridescent fabric (silver/rainbow, approx. 14-16 inch diameter circle)
– Black craft foam for collar structure and dividing strips
– Yellow felt circles (1.5 inch diameter, x8) for saucer “lights”
– Silver pipe cleaners (2, approx. 10 inches each) for antennae
– Green glitter styrofoam balls (1.5 inch) for antennae tips
– Clear plastic headband
– Yellow cardstock for tractor beam cone
– Printed or hand-drawn cartoon cow sticker/image
– Hot glue gun, scissors, ruler, hole punch, velcro strips
Instructions
Cut your holographic fabric into a wide 14-inch donut shape — the center hole should fit your dog’s neck comfortably, around 5-6 inches across. Lay the black craft foam strips from center outward like clock hands, hot-gluing them down to create that classic saucer segmented look.
Glue the yellow felt circles evenly around the upper rim — these are your “landing lights” and they catch every bit of ambient light in photos.
For the tractor beam, roll yellow cardstock into a cone shape roughly 4 inches tall, secure with hot glue, and attach your cartoon cow to the tip. Attach the cone to the underside front of the saucer with a velcro strip so it hangs cleanly without flopping.
Wrap silver pipe cleaners around the headband base, shape them into gentle curves, and press a green glitter ball onto each tip with hot glue. The antennae headband sits behind the ears — because it rests lightly on the head rather than strapping under the chin, your dog stays way more comfortable throughout the whole trick-or-treat walk.
Attach velcro closures at the back of the saucer collar so sizing adjustments take seconds. And honestly, test the fit while your dog is standing — the saucer should sit flat and horizontal, not tilting forward.
The iridescent fabric catches light from every angle, which means your dog becomes an instant photo magnet — feature that saves you from seventeen blurry, mid-run Halloween shots.
Swap the cow for a tiny printed dog, a pumpkin, or a ghost depending on the vibe you want.
Prep Time: 20 min | Active Project Time: 45-60 min | Difficulty Level: ⭐⭐ Beginner-Friendly
📸 Photo credit: Instagram @mr_gunther_
#7: DIY Teddy Bear Dog Costume (The “Living Stuffed Animal” Look)
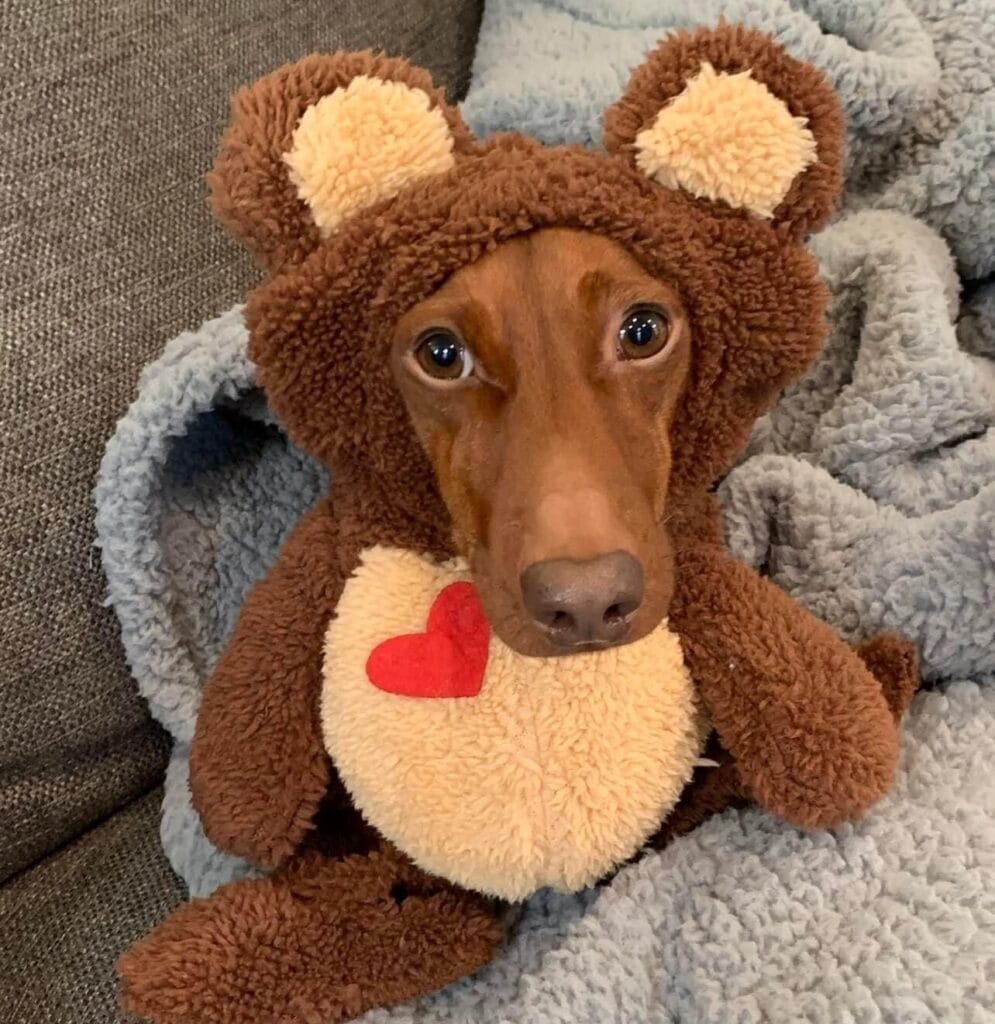
Okay, you know that moment when your golden retriever crashes onto the couch cushions and just stares at you with those big brown eyes like he’s posing for a photo? That’s exactly the energy this costume captures — and honestly, the result is so good it broke my brain the first time I saw it.
Prep Time: 20 minutes | Active Project Time: 1.5 hours | Difficulty Level: Beginner-Friendly
What You’ll Need:
– Brown sherpa fleece fabric (at least 1.5 yards)
– Cream/ivory sherpa fleece for the belly and inner ear patches
– Red felt (4×4 inches) for the heart detail
– Fabric glue or a basic sewing kit
– Scissors, pins, measuring tape
– A hoodie-style dog costume base (thrifted or from a dollar store works great)
– Fiberfill stuffing for the ears and belly panel
Instructions
Start by measuring your dog’s head circumference and neck width — getting this right means the hood sits snug without pulling on their ears.
Cut your brown sherpa into a hood panel sized to wrap around the head with about 2 inches of overlap at the chin. Round the top edge into a soft dome shape. This rounded cut is what gives it that classic stuffed-animal silhouette, not a sack-on-head look.
Next, cut two rounded ear shapes from the brown sherpa — each about 4 inches tall and 3 inches wide. Cut matching smaller ovals from the cream fleece for the inner ear. Glue or sew the cream piece centered onto the brown piece, then fold the base of each ear slightly inward and stuff lightly with fiberfill before sewing them shut. That little puff of stuffing is what makes the ears stand up like a real teddy bear, not flop flat.
Attach the ears to the top of the hood panel, spacing them about 3 inches apart. Pin first, then sew or glue firmly because this seam takes the most tension when your dog shakes their head (and they will shake).
For the belly panel, cut an oval from the cream sherpa about 6 inches wide and 8 inches tall. Cut your red felt heart — roughly 3 inches across — and glue it centered on the cream oval. Sew or glue the belly panel onto the chest area of the hoodie base. And just like that, the whole thing reads “teddy bear” from across the room.
Attach the finished hood to the hoodie neckline with a few anchor stitches so it stays positioned during wear. The sherpa-to-sherpa texture grips without scratching, which means your dog stays comfortable even during a full family photo session.
Keep this in mind: sherpa frays less than regular fleece, so raw edges are totally fine left unfinished — zero hemming required.
The soft sherpa construction means no stiff seams pressing against your dog’s skin, so they can actually relax in this thing instead of staging a great escape. That comfort factor means longer wear, which means you actually get the photos you want.
If you love projects like this, 7 Adorable DIY Dog Clothes Ideas to Try has more inspiration worth bookmarking.
Wash the finished costume on a cold, delicate cycle and air dry flat — sherpa holds its texture way longer that way and the felt heart won’t curl at the edges.
📸 Photo credit: Instagram @theartsconnectus
The One Trick That Makes DIY Dog Costumes Actually Stay On Kids
Okay, real talk — the biggest mistake I see with DIY dog costumes for kids? People build the whole thing around the dog silhouette and forget the kid has to move, run, and probably eat Halloween candy at top speed.
Hot glue is your enemy here. It cracks the second a seven-year-old does a cartwheel. Fabric glue or a basic whip stitch holds everything together even through a full night of trick-or-treating chaos.
Here’s my actual pro secret: build the ears and tail as removable pieces with velcro. That way, if your kiddo gets too hot or decides mid-night they’re “done being a dog,” you’re not destroying the whole costume.
My niece wore her golden retriever costume two Halloweens in a row because we did exactly this — just swapped the color of the ears and called it a different breed. Easy win.
Also, use fleece for the main body. No fraying, no sewing edges, and it’s so soft kids actually keep it on.
Your Dog-Proof Home Is One Decision Away
Okay, real talk — your golden deserves a beautiful home and you deserve one too. Those aren’t competing things.
Pick one spot that’s been driving you crazy — the muddy entryway, the fur-covered couch, wherever your golden wreaks the most havoc. Start there. One good cover, one washable rug, one small win.
Because once you nail that first spot? Everything shifts. You stop dreading muddy paw days and start actually enjoying lazy Sunday cuddles on your freshly protected sofa.
So tell me — what’s the one room in your house your golden has basically claimed as her own?

Amr Mohsen is a software engineer who traded his keyboard for a leash — at least on weekends. His love for dogs inspired him to share what he learns as a dog owner and enthusiast, bringing a detail-oriented, research-driven perspective to every article he writes. If it’s about dogs, he’s probably already looked it up twice.


