You’ve probably glanced at your cat’s store-bought treats and wondered what’s actually in that dusty powder coating the fish-shaped bits. The ingredient list reads like a chemistry experiment, and your cat deserves better than fillers and mystery meals. Making treats from scratch isn’t complicated—you need about three safe ingredients, fifteen minutes, and a basic oven. But before you start mixing tuna with flour, there’s critical information about what actually belongs in feline food and what could land your cat at the emergency vet.
Key Takeaways
- Homemade treats avoid harmful additives like BHA, BHT, and artificial colors found in commercial products that cause health issues.
- Use safe proteins like chicken, tuna, and salmon with oat flour and eggs; avoid toxic ingredients like onions, garlic, and chocolate.
- Mix ingredients separately, bake at 325-350°F for 15-25 minutes, and maintain clean surfaces to prevent bacterial contamination.
- Introduce new treats gradually over 5-7 days while monitoring for digestive upset or allergic reactions in your cat.
- Batch-prepare and freeze labeled portions monthly for convenient, cost-effective treats that maintain nutritional value and freshness.
Why Your Cat Deserves Better Than the Stuff in That Crinkly Bag
If you’ve ever squinted at the ingredient list on a bag of commercial cat treats, you probably spotted things like meat by-products, artificial colors, and fillers that sound more like chemistry experiments than food.
These additives can contribute to weight gain, digestive issues, and even allergies in some cats, especially when treats make up more than 10% of their daily calories.
Switching to homemade treats makes sense when your cat has food sensitivities, when you want complete control over ingredients, or when you’re simply tired of paying premium prices for what’s fundamentally processed kibble in a different shape. Plus, making delicious homemade treats for your furry friend can be a fun activity that enhances your bond with them.
What’s really inside most commercial treats and how that affects your cat
When you flip over that brightly colored bag of cat treats, you’ll find a list of ingredients that reads more like a chemistry experiment than actual food.
Those mystery meals often contain fillers, artificial preservatives, and by-products that your cat’s body struggles to process efficiently.
Here’s what you’re actually feeding your feline:
- Meat by-products (ground beaks, feet, and organs deemed unfit for human consumption)
- Corn and wheat gluten as cheap protein fillers
- BHA and BHT preservatives linked to health concerns
- Artificial colors like Red 40 and Yellow 5
- Salt and sugar to mask poor-quality ingredients
These additives can contribute to obesity, digestive issues, and allergies.
Your cat deserves ingredients you can actually pronounce. Plus, making homemade treats allows you to know exactly what goes into your cat’s diet, ensuring they get nutritious ingredients without harmful additives.
When it makes sense to switch from store-bought to homemade
Although commercial treats line every pet store shelf, they’re not your only option when your cat starts giving you those pleading eyes.
Making treats at home becomes worthwhile when your cat has food allergies, diabetes, or kidney disease requiring strict ingredient control.
You’ll also want to switch if you’re spending more than $15 monthly on premium treats, since homemade versions cost roughly half that amount.
Cats with sensitive stomachs often benefit from simple, single-ingredient recipes you can customize.
If you’re already cooking for yourself regularly, adding cat treats takes just 20 extra minutes.
Store-bought options work fine for healthy cats without dietary restrictions, but homemade treats give you complete transparency about what’s going into your pet’s body. Additionally, creating DIY dog toys can be a fun way to keep your pets engaged while you bake.
Before You Preheat the Oven: How Cats Actually Eat

Before you start whisking eggs and measuring flour, you need to understand something fundamental: your cat is an obligate carnivore, which means their body literally requires meat to survive.
This biological fact shapes everything about treats, from ingredients to portion sizes, because even homemade goodies should never exceed 10% of their daily calories.
What feels like harmless spoiling—a treat after breakfast, another before bed, one more because they gave you that look—can quietly tip into weight gain, nutritional imbalance, and the health problems that follow. Additionally, incorporating protein-rich bacon dog biscuits can be a delightful and nutritious option to consider for your furry friends during treat time.
Why being an obligate carnivore shapes every treat decision you make
Your cat’s body runs on a fundamentally different fuel system than yours, and this biological reality should influence every ingredient you add to their treat bowl.
Unlike you, your cat can’t manufacture certain amino acids from plant proteins, making animal tissue non-negotiable for survival. Their short digestive tract, designed for breaking down prey, struggles with carbohydrates and plant matter.
When you’re selecting treat ingredients, picture what a wild cat would consume:
- Muscle meat from mice, birds, and small mammals
- Organ tissues like liver, heart, and kidneys
- Bone marrow and cartilage for minerals
- Small amounts of predigested stomach contents from prey
- Zero grains, vegetables, or fruit
This carnivorous blueprint means your homemade treats should prioritize animal proteins, not fillers. Additionally, keep in mind that many cats suffer from skin allergies and sensitivities, which can be aggravated by inappropriate ingredients in their diet.
How to keep treats at 10% or less of your cat’s daily calories
When you’re excitedly mixing up a batch of salmon bites or chicken crunchies, it’s easy to forget that these delicious morsels can quickly derail your cat’s nutritional balance.
Treats should never exceed 10% of your cat’s total daily calories, which means you’ll need to do some math. An average 10-pound cat needs about 200 calories per day, so that’s just 20 calories from treats.
Three small homemade chicken treats might hit that limit. The solution? Make your treats tiny, really tiny, like pea-sized portions.
You can also reduce their regular food slightly on treat days. Most cats care more about frequency than size anyway, so five microscopic treats feel more rewarding than one large piece. Additionally, using nourishing ingredients in your treats can help support your cat’s overall health, especially if they have specific dietary needs.
When “just one more treat” quietly becomes a real health problem
Because cats evolved as desert hunters eating multiple small prey throughout the day, their bodies never developed the “I’m full, stop eating” signals that dogs have.
Your cat will happily accept treats even when she’s genuinely satisfied, which means you’re the only brake pedal in this system.
Watch for these sneaky signs you’ve crossed into problem territory:
- Your cat’s ribs disappear under a layer of padding when you gently run your fingers along her sides
- She’s gained more than 10% of her ideal body weight over six months
- Your vet mentions words like “pre-diabetic” or “joint stress”
- She’s less interested in jumping or playing than before
- Her waistline vanishes when viewed from above
Treats won’t refuse themselves, unfortunately. To maintain a healthy weight for your pet, consider homemade dog food tailored to their nutritional needs.
Hard No List: Ingredients That Do Not Belong in Cat Treats
Before you start whisking eggs and measuring flour, you need to know which ingredients are absolutely off-limits for your cat.
Some foods that seem harmless, or even healthy for humans, can make cats seriously ill or worse.
Onions, garlic, chocolate, grapes, raisins, and xylitol (a sugar substitute) top the danger list, but plenty of trendy “superfoods” like avocado can also cause problems you’d never expect. Additionally, it’s crucial to be aware of itchy dog remedies, as some ingredients harmful to dogs could inadvertently make their way into your cat’s treats.
Common toxic foods like onion, garlic, and chocolate explained simply
While you’re excited to spoil your feline friend with homemade goodies, certain ingredients can turn a loving gesture into a veterinary emergency.
Understanding which foods pose serious risks helps you create treats that nourish rather than harm your cat.
These common kitchen staples are absolutely off-limits:
- Onions and garlic damage red blood cells, causing anemia even in small amounts
- Chocolate contains theobromine, which cats can’t metabolize, leading to seizures or heart problems
- Grapes and raisins trigger kidney failure through unknown mechanisms
- Xylitol (artificial sweetener) causes rapid insulin release and liver damage
- Alcohol affects cats’ smaller bodies dramatically, causing respiratory failure
Additionally, be aware that some pets may experience yeast infections which can also require careful diet management to prevent worsening their condition.
Keep these ingredients far from your cat’s bowl, no matter how adorable their begging faces become.
Human “health foods” that are secretly risky for cats
The obvious dangers get plenty of attention, but your pantry likely contains trendy “superfoods” that seem perfectly healthy for humans yet wreak havoc on feline systems.
Avocado, packed with persin, causes vomiting and diarrhea in cats, even in small amounts. Grapes and raisins, nature’s candy for you, trigger acute kidney failure in felines through an unknown mechanism.
Raw yeast dough expands in warm stomachs, creating painful bloating and producing alcohol through fermentation. Xylitol, that sugar-free sweetener in your protein bars, drops blood sugar dangerously low and damages liver tissue.
Macadamia nuts cause weakness and tremors, though researchers haven’t pinpointed exactly why. Even nutritional yeast, beloved by health-conscious cooks, contains excessive phosphorus that stresses kidneys.
To avoid these risks, ensure that you familiarize yourself with common toxins in pet foods that could harm your cat. Your wellness cabinet isn’t automatically cat-safe, so scrutinize every ingredient before mixing treats.
Your Yes List: Cat-Safe Ingredients You Can Build Treats Around

Now that you know what to avoid, let’s focus on the good stuff—ingredients that are safe, nutritious, and actually appealing to your cat’s finicky palate.
The foundation of any great homemade treat starts with quality proteins like cooked chicken, tuna, or salmon, which most cats find irresistible.
You’ll also need simple binders like oat flour or egg to hold everything together, plus optional flavor boosters like catnip, bonito flakes, or a splash of low-sodium broth to make your treats extra tempting.
Easy proteins most cats love, like chicken, tuna, and salmon
Cats are obligate carnivores, which means their bodies are designed to thrive on meat-based proteins, and you’ll find that most felines go absolutely wild for chicken, tuna, and salmon.
These proteins pack essential amino acids like taurine, which your cat can’t produce on their own. When you’re selecting proteins for homemade treats, you’ll want to choose fresh, high-quality options and cook them thoroughly to eliminate harmful bacteria.
Here’s what makes these proteins perfect for cat treats:
- Boneless, skinless chicken breast that’s been poached or baked until fully cooked
- Canned tuna in water (not oil), drained and flaked into small pieces
- Fresh salmon fillets, baked without seasoning or sauces
- Cooked chicken thighs for cats who prefer richer flavors
- Leftover rotisserie chicken with skin and seasonings removed
Gentle binders and flours that hold treats together without filler
Once you’ve got your protein sorted out, you’ll need something to bind those tasty meat pieces into actual treat shapes that won’t crumble apart in your hands.
Oat flour works beautifully for most cats, offering just enough structure without adding empty calories or digestive irritants. You can also use chickpea flour, which packs extra protein, or rice flour for cats with grain sensitivities.
Tapioca starch creates a slightly chewier texture that some cats prefer. An egg works as a natural binder, holding everything together while adding nutrients.
Most recipes need only 1-2 tablespoons of flour per cup of protein, keeping the focus where it belongs: on meat. These gentle options help your treats maintain shape without overwhelming your cat’s carnivore digestive system.
Simple flavor boosters such as catnip, bonito flakes, or low-sodium broth
Flavor enhancement separates treats your cat tolerates from ones they’ll actually beg for, and you don’t need complicated ingredients to make that magic happen.
These simple boosters transform basic recipes into irresistible snacks:
- Dried catnip or silvervine – Crumble ½ teaspoon into dough for that classic feline euphoria
- Bonito flakes – These paper-thin fish shavings add umami punch cats can’t resist
- Low-sodium chicken or beef broth – Use as liquid in recipes, never the salty human stuff
- Nutritional yeast – A cheesy, savory flavor many cats love, plus B vitamins
- Freeze-dried meat powder – Grind freeze-dried chicken or salmon into flavor-packed dust
Start with small amounts, around ¼ to ½ teaspoon per batch, then adjust based on your cat’s enthusiasm.
You’ll know you’ve hit the right combination when they start circling the kitchen.
Setting Up a Cat-Treat-Friendly Kitchen Without Overcomplicating It
You don’t need fancy equipment or a dedicated cat-treat station to make this work—just a few basic tools, like a small mixing bowl, a cookie sheet, and maybe a silicone mat for easy cleanup.
What matters more than your gear is keeping things clean and safe, from storing ingredients properly in the fridge to washing your hands between handling raw proteins and finished treats.
Think of it as meal prep scaled down to tiny, cat-sized portions, where a little planning prevents cross-contamination headaches later.
Basic tools that make small-batch treats easy, not annoying
Most cat treat recipes require surprisingly little equipment, and chances are good that your kitchen already holds everything you need.
You’ll find that making small batches becomes genuinely enjoyable when you’re not wrestling with complicated gadgets or hunting for specialized tools.
Here’s what actually makes the process smooth:
- A small mixing bowl (1-2 cups works perfectly)
- Measuring
Safe handling habits from fridge to counter to cleanup
Having the right tools matters less than using them safely, especially when you’re working with raw proteins that cats love but bacteria also enjoy.
Wash your hands before starting, after handling raw ingredients, and once you’re done.
Keep a dedicated cutting board for cat treats, separate from your own food prep surfaces. Raw chicken, fish, and meat should stay refrigerated until you need them, then go straight back into the fridge or oven.
Wipe down counters with hot, soapy water between steps, not just at the end. Your cat won’t thank you for food safety practices, but their digestive system will.
Use paper towels for raw ingredient spills rather than reusable cloths that might spread bacteria around your kitchen.
Baked Treats: The Basic Method You Will Use Over and Over

Baked cat treats follow a straightforward process: you’ll mix wet and dry ingredients into a dough, shape them into bite-sized pieces, and bake at 300-350°F until they reach your desired crunchiness.
The most common mistakes include overbaking until they’re hockey pucks, making them too large for your cat’s mouth, or creating a texture that’s either too crumbly to hold together or so soft your cat ignores them completely.
Once you understand how to adjust baking time for crunch, portion size for your cat’s preferences, and moisture content for structure, you’ll be able to adapt any recipe to suit what your particular cat actually wants to eat.
How baked cat treats are typically mixed, shaped, and cooked
When you make baked cat treats at home, you’ll follow a straightforward process that becomes second nature after just a few batches.
You’ll combine wet and dry ingredients separately, then mix them together until a dough forms. The consistency should be workable, not sticky or crumbly.
Here’s your basic workflow:
- Mix wet ingredients like eggs, oil, and pureed protein in one bowl
- Combine dry ingredients such as flour and any supplements in another
- Knead the dough for 30-60 seconds until smooth and pliable
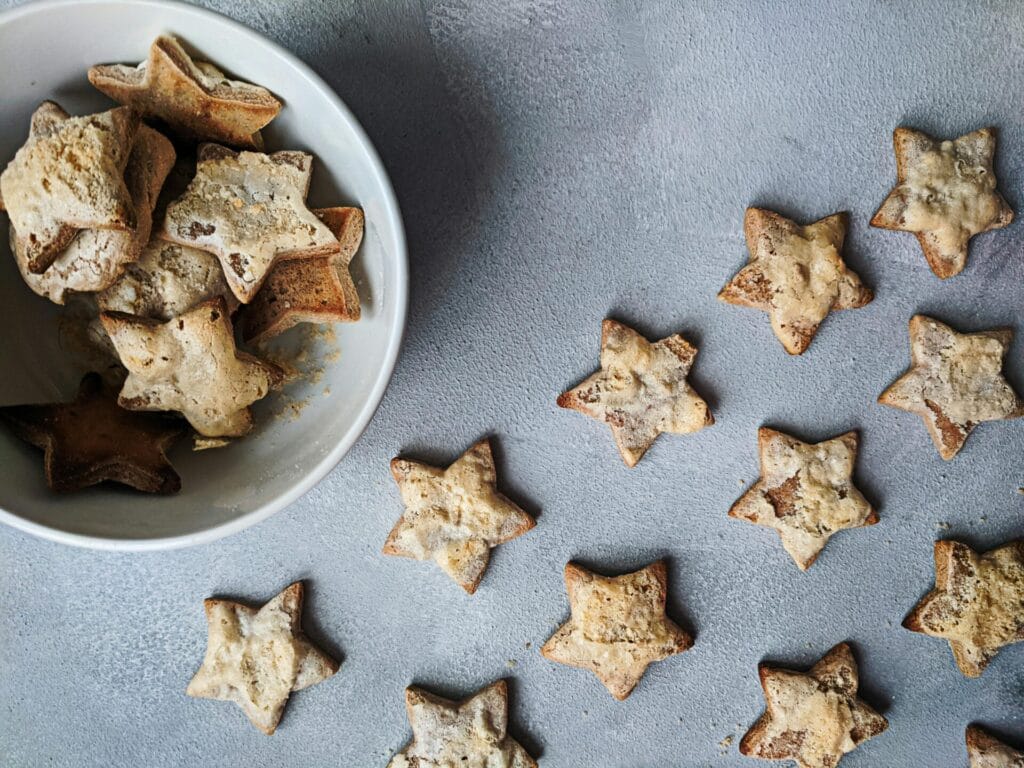
- Roll and cut into small, bite-sized shapes or use a cookie cutter
- Bake at 325-350°F for 15-25 minutes until firm and golden
Let the treats cool completely before storage. Your cat won’t mind if they’re imperfectly shaped.
Common mistakes that lead to burnt, crumbly, or completely ignored treats
Even if you’ve followed the recipe precisely, your homemade treats can still end up in the trash if you make one of these surprisingly common errors.
Overbaking is the biggest culprit, turning treats into hockey pucks your cat won’t touch. Check them two minutes early, as oven temperatures vary wildly.
Adding too much flour makes treats crumbly and dry, while insufficient binding ingredients cause them to fall apart.
Rolling dough thicker than ¼ inch creates treats that burn outside but stay raw inside.
The most heartbreaking mistake? Ignoring your cat’s protein preferences. Cats are obligate carnivores, so treats without strong meat flavors often get snubbed, no matter how perfectly you’ve baked them.
Simple ways to adjust size, texture, and crunch level
Once you’ve mastered the basics and avoided those pitfalls, you can tweak your treats to match your cat’s preferences with just a few simple adjustments.
For size, roll smaller balls for kittens or senior cats, about ¼ inch, while adult cats handle ½-inch portions.
Texture depends on baking time and moisture content. You’ll want to:
- Bake 8-10 minutes for soft, chewy treats that crumble easily
- Extend to 12-15 minutes for medium-firm texture with slight give
- Push to 18-20 minutes for maximum crunch that snaps cleanly
- Add extra egg to create binding, softer results
- Reduce liquid by one tablespoon for drier, crunchier outcomes
Test one treat first, let it cool completely, then adjust your next batch accordingly.
No-Bake and Frozen Treats for Hot Days and Sensitive Stomachs
No-bake treats are wonderfully simple—you’ll mix ingredients like tuna or chicken broth with gelatin or yogurt, then pop them in the fridge or freezer until firm.
These chilled snacks work beautifully for cats with sensitive stomachs that can’t handle rich, baked options, and they’re perfect for cooling down your kitty on sweltering summer afternoons.
If your cat seems hesitant about cold food at first, you can let frozen treats sit at room temperature for 2-3 minutes, or start with refrigerated versions before moving to the icier stuff.
How no-bake treats are typically mixed, chilled, or frozen
Making frozen treats for your cat couldn’t be simpler, since these recipes require just a few ingredients and absolutely no oven time.
You’ll typically blend or mash wet ingredients like tuna, chicken broth, or puréed pumpkin until smooth, then portion them into ice cube trays or silicone molds.
The freezer does all the work while you wait, usually for 2-4 hours.
Here’s what the process looks like:
- Combine ingredients in a bowl or blender until well-mixed
- Pour mixture into small molds or ice cube trays
- Freeze until completely solid, typically overnight
- Pop out individual treats and store in freezer bags
- Serve one treat at a time, monitoring your cat’s reaction
These chilled snacks stay fresh for several weeks when properly stored.
Helping cautious cats accept a new texture or temperature
Some cats will eye a frozen treat with the same suspicion they reserve for closed doors and unexpected houseguests.
Start by offering a partially thawed version, or let the treat sit at room temperature for 5-10 minutes before serving. You can also introduce new textures gradually by mixing a small amount of the frozen treat with their regular food.
If your cat prefers warmer foods, try refrigerated treats instead of frozen ones, keeping them at 40°F rather than 0°F.
Some felines need three or four exposures before accepting something new, so don’t give up after one sniff and walk-away.
Place the treat near their feeding area, and let curiosity work in your favor.
Storing Homemade Treats So They Stay Safe and Fresh

You’ve worked hard to bake those tasty treats, but now you need to store them properly so they stay safe for your cat to eat.
Most homemade cat snacks last about 5-7 days in the fridge, or up to 3 months in the freezer, depending on their ingredients.
If you notice any fuzzy mold, slimy texture, or sour smell when you pull them out, toss them immediately—your cat’s health isn’t worth the risk.
Typical fridge and freezer timelines for homemade cat snacks
Once you’ve prepared a batch of homemade cat treats, proper storage becomes essential for maintaining their quality and safety.
Your fridge will keep most treats fresh for about 5-7 days, while your freezer extends that timeline considerably to 2-3 months.
Different treat types have varying shelf lives you’ll want to remember:
- Meat-based treats last 3-5 days refrigerated, 2 months frozen
- Fish treats stay fresh 2-3 days in the fridge, 1 month frozen
- Egg-containing recipes keep for 4-5 days refrigerated, 2 months frozen
- Dairy-based treats remain safe 3-4 days chilled, 1 month frozen
- Dry, baked treats last 7-10 days refrigerated, 3 months frozen
Always label containers with preparation dates, and trust your nose—spoiled treats smell off.
How to spot a treat that has gone bad at a glance
While stored treats can last several weeks under proper conditions, knowing when they’ve crossed the safety line protects your cat from potential illness.
Trust your senses first: sniff for sour, rancid, or off odors that weren’t there initially. Check for visible mold growth, which appears as fuzzy spots in white, green, or black. Look for texture changes like excessive sliminess, unusual dryness, or crumbling that seems different from when you made them.
Discoloration, especially darkening or pale spots, signals breakdown. If you’re storing treats with moisture content, condensation inside containers means bacteria’s likely multiplying.
When in doubt, toss it out—your cat’s health isn’t worth the risk of food poisoning from spoiled treats.
Adjusting Treats for Kittens, Seniors, and Cats With Health Conditions
Not all cats can enjoy the same treats, and understanding your specific cat’s needs will help you keep them both happy and healthy.
Kittens and senior cats often need softer textures since their teeth and jaws work differently than adult cats, while cats with diabetes, kidney disease, or weight issues require careful attention to ingredients like protein levels, phosphorus content, and overall calories.
Before you whip up a batch of treats for a cat with any health condition, talk to your vet about which ingredients to use, which to avoid, and how many treats per day are safe for your furry friend.
Softer textures and gentler flavors for older cats and young kittens
Kittens and senior cats need treats with softer textures because their teeth and jaws aren’t as strong as those of adult cats in their prime.
You’ll want to adjust your recipes by adding more moisture, cooking ingredients longer, or pureeing them completely. Gentle flavors work best too, since younger and older cats can have sensitive stomachs.
Consider these softer treat options for your kitten or senior cat:
- Mashed cooked chicken mixed with a bit of low-sodium broth
- Pureed tuna or salmon blended until completely smooth
- Steamed and finely minced whitefish like cod or tilapia
- Scrambled eggs cooked soft and cut into tiny pieces
- Commercial baby food with pure meat, no onions or garlic
These treats should practically melt in their mouths, requiring minimal chewing effort.
Safer treat patterns for overweight, diabetic, or kidney-disease cats
When your cat faces health challenges like obesity, diabetes, or kidney disease, treats become more than just fun rewards—they’re part of managing their condition.
For overweight cats, limit treats to 10% of daily calories, focusing on high-protein, low-fat options like plain chicken breast.
Diabetic cats need low-carb treats without grains or sweeteners, keeping portions tiny—think pea-sized pieces.
Cats with kidney disease require phosphorus restriction, so skip fish and dairy entirely, choosing fresh meat treats instead.
Always coordinate treat timing with meals and medications, especially for diabetic cats needing stable blood sugar.
You’ll want to portion treats in advance, storing them in measured containers so you’re never guessing.
Your vet can calculate exact daily treat allowances based on your cat’s specific needs.
Questions worth asking your vet before changing anything in their diet
Before you switch up your cat’s treat routine or introduce homemade goodies, your vet needs to weigh in on what’s safe for your specific cat.
Every feline has unique nutritional needs, and what works for your neighbor’s tabby might spell trouble for yours.
Here’s what you’ll want to discuss:
- Can my cat handle new protein sources, or do allergies limit options?
- How many treats daily won’t disrupt their prescription diet balance?
- Are there ingredients I must avoid with their current medications?
- Should I adjust phosphorus, sodium, or protein levels for their condition?
- What symptoms mean the treats aren’t working out?
Your vet knows your cat’s medical history, lab values, and medications inside out, so they’re your best resource for personalized guidance.
Introducing New Treats Without Upsetting Your Cat’s Stomach
When you introduce your homemade treats, you’ll want to start slowly to avoid digestive upset, which can happen when cats encounter new ingredients too quickly.
Begin by offering just one small treat on the first day, then gradually increase the amount over 5-7 days while keeping an eye on your cat’s litter box habits.
Watch for red flags like vomiting, diarrhea, excessive gas, or decreased appetite, since these signs mean you should slow down the introduction process or reconsider the recipe ingredients.
How to phase in homemade treats gradually over several days
Your cat’s digestive system thrives on consistency, so introducing homemade treats requires a methodical approach to prevent stomach upset, diarrhea, or refusal to eat. Start by offering just one small piece alongside their regular commercial treats, then gradually increase portions over five to seven days.
Follow this phasing schedule:
- Day 1-2: One quarter-sized piece mixed with familiar treats
- Day 3-4: Two pieces, replacing half of commercial treats
- Day 5-6: Three to four pieces, making up 75% of treat portions
- Day 7: Full shift to homemade treats exclusively
- Monitor daily: Watch litter box consistency, energy levels, and appetite changes
If you notice soft stools or decreased appetite, slow down the shift and maintain the current ratio for two additional days before progressing.
Watching for vomiting, loose stools, or other early warning signs
Even with a careful introduction schedule, digestive problems can still appear in the first two weeks of serving homemade treats. Watch your cat closely for vomiting within 2-6 hours after eating, which suggests ingredient intolerance or too-rich recipes.
Loose stools or diarrhea typically show up 12-24 hours later, signaling your cat’s system needs more adjustment time. You’ll also want to monitor for excessive gas, reduced appetite, or unusual lethargy after treat time.
If you notice any of these symptoms, stop the new treats immediately and return to your cat’s regular diet. Most cats recover within 24-48 hours, but persistent vomiting or diarrhea lasting beyond two days requires a vet visit to rule out allergies or other underlying issues.
What to Do When Your Cat Flat-Out Rejects Your First Attempt
When your cat turns up their nose at your lovingly prepared treats, don’t take it personally—cats are notoriously picky, and the culprit is usually something you can fix.
The issue might be the smell (too fishy or not fishy enough), the texture (too soft, too crumbly, or too chewy), or even the temperature at which you’re serving them.
Before you toss the recipe entirely, try warming the treats slightly in your palm, adjusting the baking time by 2-3 minutes, or swapping out one protein for another.
Figuring out if the issue is smell, texture, or temperature
Cats typically reject homemade treats for one of three reasons: they don’t like how it smells, the texture feels wrong in their mouth, or the temperature throws them off.
To pinpoint the problem, you’ll need to do some detective work with your finicky feline.
Try these systematic tests to identify the culprit:
- Warm the treat slightly in your hands or microwave it for 3-5 seconds to release more aroma
- Crumble or break the treat into smaller pieces to change the mouthfeel
- Offer it at different temperatures: room temp, slightly chilled, or gently warmed
- Place the treat near your cat’s nose without forcing interaction to gauge their initial sniff reaction
- Compare the texture to their favorite commercial treats by touching both
Most cats prefer treats that are body-temperature and slightly soft.
Tiny tweaks that often turn a hard “no” into an enthusiastic “yes”
Once you’ve identified whether smell, texture, or temperature caused the rejection, you can make strategic adjustments that often completely transform your cat’s response.
For smell issues, try warming treats to 100°F, adding a pinch of nutritional yeast, or rubbing them with a bit of tuna oil.
If texture’s the problem, pulse your food processor longer for smoother consistency, or conversely, leave chunkier pieces for cats who prefer something to chew.
Temperature adjustments are easiest—some cats want treats straight from the fridge, while others won’t touch anything below room temperature.
You can also try cutting treats into different shapes, since some cats genuinely prefer thin strips over thick squares.
These small modifications require minimal effort but frequently turn complete rejection into enthusiastic acceptance.
Making Treat Time More Than Just Extra Calories
Treats don’t have to be empty calories that turn your cat into a persistent, counter-surfing beggar.
You can transform these homemade snacks into powerful training tools, teaching your cat tricks like sit, high-five, or come when called.
Using treats for training, tricks, and mental stimulation
While your homemade treats already offer nutritional benefits over store-bought options, you can maximize their value by incorporating them into your cat’s daily mental and physical enrichment.
You’ll find treats work brilliantly for basic training, like teaching your cat to come when called or sit on command. Here’s how to leverage their motivational power:
- Hide treats in puzzle feeders or cardboard boxes to encourage natural hunting behaviors.
- Reward your cat for using their scratching post instead of furniture.
- Place treats on cat trees or elevated perches to promote climbing and exercise.
- Use treats during clicker training sessions, offering one immediately after the click sound.
- Toss treats across the room to inspire chase-and-pounce play.
This approach transforms snack time into engaging, purposeful activities that strengthen your bond.
Turning treat time into real bonding time instead of daily begging
If you’ve noticed your cat materializing the instant you open the treat jar, you’re experiencing what happens when treats become purely transactional. Instead of automatic handouts, create intentional moments that strengthen your bond.
Offer treats during calm petting sessions, not when your cat meows demandingly at the counter. This shifts the association from begging to quality time together.
Limit treats to 2-3 scheduled times daily, perhaps after play sessions or grooming. Your cat will learn that treats come during positive interactions, not persistent vocalization.
Hide treats around the house for hunting games, or use puzzle feeders that engage their natural instincts. This transforms snack time from a demanding routine into enriching experiences that deepen your relationship while satisfying their predatory nature.
Batching and Freezing Treats to Save Yourself Time Each Month
You can save yourself hours each month by dedicating one afternoon to making two or three weeks’ worth of treats, then portioning them into weekly freezer bags.
This approach keeps your freezer stocked, prevents you from scrambling for last-minute snacks, and makes it easier to track exactly how many treats you’re giving.
Just remember that rotating between four different recipes might seem fun, but your cat’s digestive system often prefers consistency over culinary adventure.
Planning one treat-making session that covers several weeks
Dedicating just two hours once a month to making cat treats can stock your freezer with enough goodies to last four to six weeks, depending on how many cats you have and how often you reward them.
You’ll want to prepare multiple batches simultaneously, using different baking sheets and rotating them through your oven efficiently.
Picture your organized treat-making session with:
- Three rimmed baking sheets lined with parchment paper, each holding a different recipe
- Small cookie cutters creating uniform, bite-sized shapes that thaw quickly
- Labeled freezer bags marked with dates and treat names
- A kitchen timer preventing over-baking while you prep the next batch
- Cooling racks stacked with finished treats, ready for portioning
This assembly-line approach transforms treat-making from a weekly chore into a satisfying monthly ritual.
How to divide batches into small, easy-to-thaw weekly portions
Once your treats have cooled completely, the real organization begins with dividing them into portions that match your weekly feeding habits.
Count out seven days’ worth of treats, typically 14-21 pieces depending on your cat’s size, and place them in small freezer bags or containers.
Label each portion with the date and treat type, then stack them neatly in your freezer. This method lets you grab one container Sunday evening, thaw it overnight in the fridge, and you’re set for the week.
You’ll avoid the temptation to overfeed when the whole batch sits accessible on your counter. Plus, frozen treats maintain their nutritional value and texture far better than refrigerated ones that turn soggy after five days.
Signs you are overdoing variety and quietly confusing your cat’s stomach
Many cat owners fall into the trap of creating five different treat flavors each month, thinking they’re being generous, when their cat’s digestive system actually craves consistency.
Watch for these warning signs that you’re rotating recipes too aggressively:
- Soft stools appearing within 24 hours of introducing a new flavor
- Your cat sniffing treats suspiciously, then walking away with an offended tail flick
- Vomiting undigested treats 2-3 hours after eating
- Decreased enthusiasm for treat time, signaling gastrointestinal discomfort
- Intermittent diarrhea that coincides with your “variety week”
Stick with two proven recipes per month instead.
Your cat’s stomach will thank you, and you’ll waste less time troubleshooting digestive upset. Consistency doesn’t mean boring—it means strategic rotation.
Common Homemade Treat Myths You Can Safely Ignore
You’ve probably scrolled past dozens of gorgeous cat treat photos on Pinterest, assuming they’re exactly what your cat needs, but aesthetics don’t guarantee nutrition or safety.
The “natural” label gets thrown around liberally in homemade treat recipes, yet many natural ingredients like onions, garlic, and certain herbs are actually toxic to cats.
What looks Instagram-worthy in a mason jar might sit untouched in your cat’s bowl, because felines have their own ideas about what tastes good, and they rarely align with human food trends.
The idea that “natural” automatically means safe or nutritious
The myth of “natural equals safe” has sent countless well-meaning cat parents down a dangerous path, and it’s time to set the record straight.
Just because something grows in nature doesn’t mean your cat should eat it. Plenty of natural substances are downright toxic to felines, regardless of their wholesome origins.
Here’s what “natural” doesn’t protect your cat from:
- Onions and garlic causing hemolytic anemia
- Grapes leading to sudden kidney failure
- Lilies triggering severe renal toxicity
- Raw egg whites depleting biotin stores
- Avocado containing persin poisoning risk
You wouldn’t feed your cat poisonous mushrooms just because they’re natural, right? The same logic applies to homemade treats.
Focus on ingredients proven safe for cats, not marketing buzzwords that sound reassuring but offer zero protection.
Why Pinterest-pretty recipes do not always equal cat-approved
Beyond the safety concerns lies another inconvenient truth: those Instagram-worthy cat treat recipes with their perfectly shaped hearts and artfully arranged garnishes? Your cat doesn’t care. At all.
Felines lack the taste receptors for sweetness, so that honey-drizzled creation means nothing to them. They’re obligate carnivores who crave meat-based flavors, not aesthetic appeal.
That elaborately decorated pumpkin spice treat might photograph beautifully, but your cat will likely sniff it and walk away disappointed. The recipes requiring specialty molds, three-hour prep times, and ten ingredients often prioritize human satisfaction over feline preferences.
Instead, focus on simple, protein-rich treats that actually appeal to your cat’s biological needs. A plain chicken bite beats a pretty vegetable cookie every single time.
Frequently Asked Questions
Can I Substitute Dog Treat Recipes for My Cat?
You shouldn’t substitute dog treat recipes for cats because their nutritional needs are completely different.
Cats are obligate carnivores, requiring taurine, vitamin A, and arachidonic acid that dogs can produce themselves.
Dog treats often contain vegetables, grains, and ingredients that won’t harm your cat but provide zero nutritional value.
Your feline friend needs high-protein, meat-based recipes specifically designed for their unique dietary requirements.
Do Homemade Cat Treats Need Nutritional Balance Like Complete Meals?
No, treats don’t need total nutritional balance since they’re supplemental.
You should keep treats under 10% of your cat’s daily calories, meaning their regular complete-and-balanced food provides the nutrition they need.
Think of treats like human snacks—you wouldn’t expect a cookie to contain all your vitamins and minerals.
Focus on safe ingredients and appropriate portions instead of worrying about thorough nutrition.
How Often Can I Give My Cat Homemade Treats Daily?
Limit homemade treats to 10% of your cat’s daily calories, which typically means 2-3 small treats per day for an average 10-pound cat.
You can offer them once daily as a special reward, or split them across multiple training sessions.
If your cat’s begging for more, remember that those pleading eyes don’t mean they need extra calories—stick to the 10% rule to prevent weight gain and nutritional imbalances.
Are Organic Ingredients Necessary for Making Cat Treats at Home?
Organic ingredients aren’t necessary, but they’re a nice bonus if you can afford them.
Regular grocery store ingredients work perfectly fine for homemade cat treats. What matters most is freshness and quality—avoid anything moldy, expired, or heavily processed.
If you’re concerned about pesticides, washing produce thoroughly removes most residues. Your cat won’t know the difference between organic chicken and conventional, as long as it’s cooked properly and safe.
Can Homemade Treats Replace My Cat’s Regular Meals Completely?
No, homemade treats shouldn’t replace your cat’s complete meals.
Treats, even homemade ones, lack the balanced nutrition cats need daily—specifically taurine, vitamins, and minerals found in formulated cat food.
You can use your treats as supplements or rewards, but they should make up no more than 10% of your cat’s daily caloric intake.
Your cat still needs commercial cat food that meets AAFCO nutritional standards for complete, balanced meals.
Conclusion
You’ve got everything you need now: safe ingredients, simple techniques, and realistic expectations about feline approval rates. Start with one basic recipe, keep portions small, and don’t take rejection personally—cats are notoriously picky. Batch your favorites once a month, freeze what you won’t use immediately, and remember that homemade treats strengthen your bond while giving you control over what goes into your cat’s body. That crinkly bag can’t compete.

Hi, I’m Ali Tarek, co-founder of Animalsman. I’ve always been passionate about pets, especially dogs and cats, and I created this website to share practical tips, easy recipes, and helpful care advice for fellow pet lovers. My goal is to make pet care simple, enjoyable, and accessible for everyone. When I’m not writing or curating content, you’ll usually find me spending time with my furry friends or learning new ways to keep them happy and healthy.