Have you ever thought about making your own dog toothpaste? It sounds a bit wild, right? But trust me, it’s easier than you think and way more fun than squeezing out a commercial tube. Plus, you can whip up flavors your pup will love. Imagine your furry friend’s happy grin while you brush those pearly whites. Stick around, and I’ll share ten tasty recipes that’ll keep their smiles bright and make dental care a breeze.
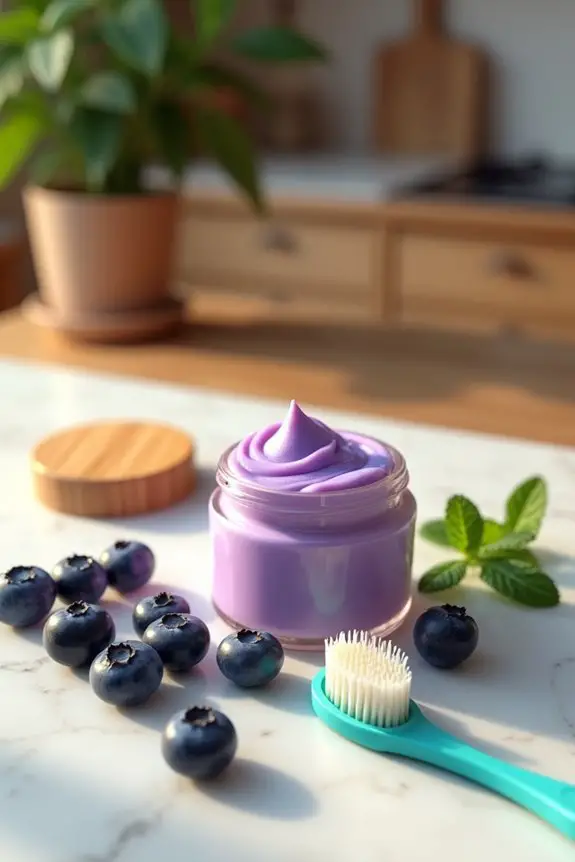
Homemade Minty Fresh Formula
When you think about giving your furry friend a fresh smile, why not whip up a Homemade Minty Fresh Formula?
Making your own DIY dog toothpaste isn’t just fun; it’s super easy. You’ll need some coconut oil, baking soda, and a dash of peppermint for that minty kick.
Start by melting about 1/4 cup of coconut oil, then mix in 2 tablespoons of baking soda. Finally, add around 1 tablespoon of peppermint oil. Stir it all together until smooth.
Pop it in a cute jar—you’ll feel like a gourmet chef! And trust me, while it mightn’t win a Michelin star, your dog’s wagging tail will tell you it’s a hit.
Now, let’s keep those doggy grins fresh and bright, shall we?
Our Collection
You’ve got to check out our collection of dog toothpaste recipes that will make your pup’s dental care a little more fun.
From the cozy vibes of Pumpkin Spice Delight to the irresistible Peanut Butter Bliss Blend, there’s something for every taste bud—including Bacon-flavored Treat Paste, if that’s not the jackpot of doggie dental care.
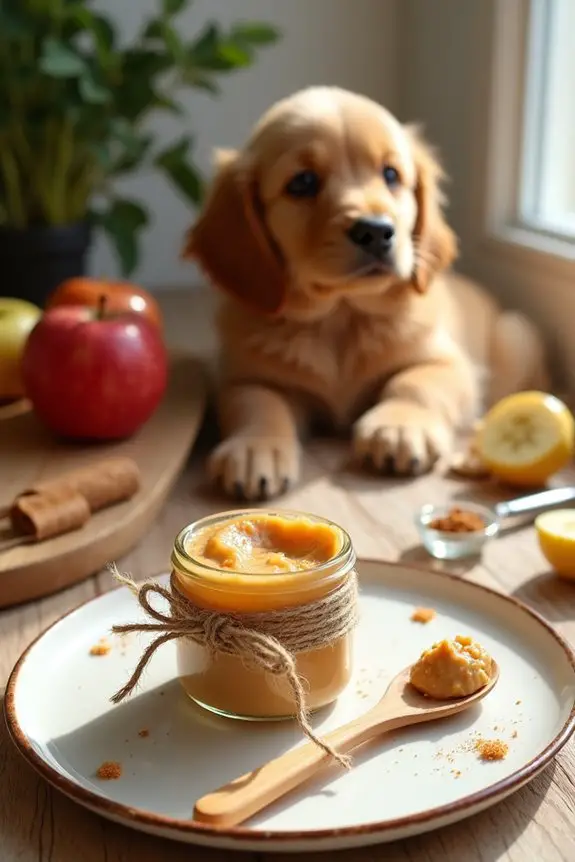
1. Pumpkin Spice Delight
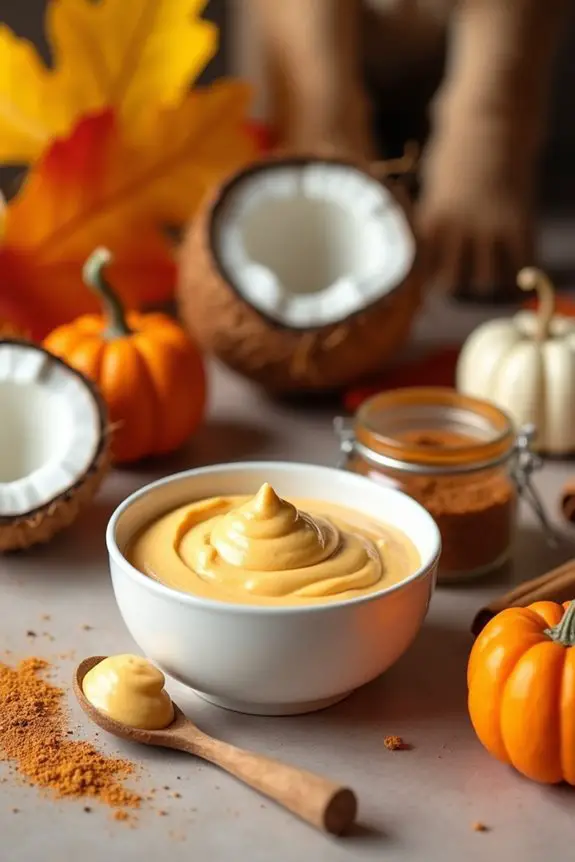
Who can resist the cozy scents of fall? Not us, and definitely not your furry friend. This DIY Pumpkin Spice Dog Toothpaste is an awesome project that brings the warmth of autumn right into your pup’s dental care routine. Not only does it save you money compared to store-bought alternatives, but it also guarantees your dog enjoys a tasty treat while you maintain their pearly whites. Plus, making it at home means you know exactly what goes into it—no questionable ingredients here! Incorporating essential multivitamins into their diet can enhance their overall oral health and vitality. Additionally, using freeze-dried chicken treats can provide your dog with a protein boost that supports strong teeth and gums.
Materials Needed:
- 1 cup canned pumpkin (pure pumpkin, not the spiced pie filling)
- 1/2 cup coconut oil
- 1/2 teaspoon cinnamon
- 1/4 teaspoon ginger
- 1/4 teaspoon turmeric (optional, for added health benefits)
- Mixing bowl
- Whisk or spoon
- Airtight container (for storage)
Step-by-Step Instructions:
1. Gather Your Ingredients: Find a cozy spot in your kitchen, and assemble all the ingredients. Trust me, you’ll feel like a pro chef with everything laid out.
2. Mix It Up: In your mixing bowl, combine the canned pumpkin and coconut oil. Use a whisk or spoon to mix until it’s a smooth, creamy consistency.
Your dog may already be sniffing around, so feel free to let them have a teeny taste (I guarantee they’ll give you those adorable puppy eyes).
3. Add the Spices: Sprinkle in the cinnamon, ginger, and turmeric if you’re using it. Stir again. The aroma should be delightful—if only they made pumpkin-scented candles for humans, right?
4. Taste Test: Now’s the fun part. If you’d like, dip a finger (or a spoon) in the mixture and give it a quick taste.
Okay, I won’t judge you if you find it slightly less thrilling than a latte. But remember, this is for your pup’s enjoyment.
5. Store It Right: Transfer your mixture into an airtight container. Make sure it’s well sealed because no one likes stale toothpaste, even if it’s the dog variety.
6. Time to Brush: When it’s time for dental care, apply a small amount of toothpaste to your dog’s toothbrush (or your finger if they’re not too keen on the brush). Brush away. They’ll be begging for more pumpkin spice in no time.
7. Share the Love: Snap a cute pic of your dog enjoying their new toothpaste and share it on social media.
You want to spread the pumpkin love, right?
Optional Add-ons/Variations:
– Add Different Flavors: Switch out the spices for peanut butter or carob powder for a different taste adventure.
Dogs love variety, just like us humans.
– Custom Containers: Decorate your airtight container. Take a photo of your pup and stick it on there, or label it with a fun name like “Fang-tastic Freshness.”
Pro Tip:
Make sure to store the toothpaste in the fridge for extra freshness. It should last about two weeks.
And here’s a little chow-down hack: if your pup finds the pumpkin flavor irresistible, try mixing in their regular dental chews with this for a doggy dental fiesta!
2. Peanut Butter Bliss Blend
What better way to keep your pup’s teeth clean than with something they already love? This DIY Peanut Butter Dog Toothpaste is a fun, easy project that not only enriches your dog’s dental routine but also keeps their tail wagging. Making your own peanut butter dog treats can be another delightful way to enhance their experience! Additionally, using a dog treat maker machine can streamline the treat-making process, allowing you to create customized snacks effortlessly.
Homemade goodies save you money and give you peace of mind knowing that you’re treating your furry friend to wholesome, safe ingredients. Plus, who could resist the charm of a doggie toothpaste that smells like their favorite snack?
Materials Needed:
- 1 cup natural peanut butter (make certain it’s xylitol-free)
- 1/2 cup coconut oil
- 1/4 cup unsweetened applesauce
- 1/2 teaspoon cinnamon (optional for a little added flair)
- Mixing bowl
- Whisk or spoon
- Airtight container (for storage)
Step-by-Step Instructions:
- Gather Your Ingredients: Get everything you need in one spot. It feels great to have control over the kitchen chaos, doesn’t it?
- Mix It Up: In your mixing bowl, combine the peanut butter and coconut oil. Use a whisk or spoon to blend until it’s smooth and creamy. Your dog might be hovering nearby, so go ahead, let them sample a tiny bit of the mixture. Just watch those puppy eyes light up.
- Add the Applesauce: Pour in the applesauce and stir it well. This will give the toothpaste a nice consistency that’s easy to spread. Additionally, the sweetness will make brushing time a treat for your pooch.
- Spice It (Optional): If you’re up for it, add the cinnamon for a touch of yummy flavor. Stir again until everything is well-mixed. Seriously, it may smell better than your own breakfast!
- Store It Right: Scoop your delightful mixture into an airtight container. Make sure to label it, unless you want to confuse it with your new baking project—you don’t want to accidentally put this on your morning toast.
- Time to Brush: When it’s time for that all-important dental hygiene, use a small amount of the toothpaste on a dog toothbrush or even your finger if that’s easier. Your pup will be so excited, they might try to lick the toothpaste off, so brace yourself for some slobbery joy.
- Snap and Share: Capture that adorable moment when your dog enjoys their peanut butter toothpaste, and feel free to show it off on social media. After all, no one can resist a cute dog photo.
Optional Add-ons/Variations:
– Add Extra Flavor: Swap out applesauce for mashed banana for a fruity twist, or try adding a bit of carob powder for a chocolate-like taste that dogs adore. Just be sure to keep it dog-safe!
Pro Tip:
Always check labels on your peanut butter to ascertain it doesn’t contain xylitol—a sweetener that’s toxic to dogs.
And if you’re feeling generous (because let’s be honest, you probably are), make a double batch and gift some to your doggy buddies. They’ll thank you later—probably with some tail wags and slobbery kisses.
3. Coconut Oil Infusion
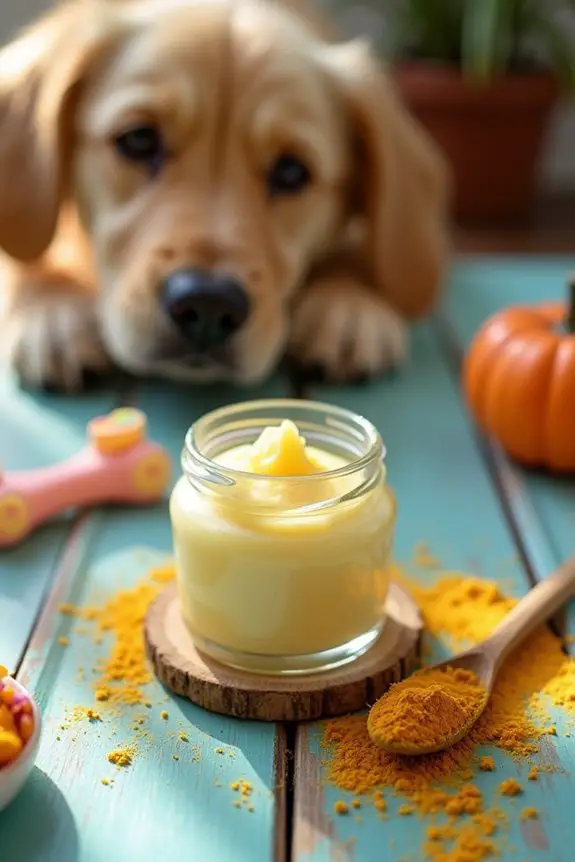
Want to treat your pup to something special that also promotes dental health? This DIY Coconut Oil Dog Toothpaste is the perfect solution. Combining the slick goodness of coconut oil with dog-friendly flavors not only makes brushing a delightful experience for your furry friend but is also a budget-friendly option for every dog owner.
No more spending a fortune on commercial products that sometimes include questionable ingredients.
Materials Needed:
- 1 cup organic coconut oil
- 1/2 cup unsweetened pumpkin puree (canned is fine)
- 1/2 teaspoon turmeric powder (optional for added benefits)
- Mixing bowl
- Whisk or spoon
- Airtight container (for storage)
Step-by-Step Instructions:
1. Gather Your Ingredients: Find a cozy spot in your kitchen and gather all your ingredients. Keeping the chaos to a minimum will help keep your dog from staging his own kitchen takeover.
2. Melt and Mix: If your coconut oil is solid, gently warm it slightly in the microwave or over a warm water bath until it melts. Then, in your mixing bowl, combine the melted coconut oil with the pumpkin puree.
Make sure to mix well until the two are blended into a smooth, creamy paste. Trust me, your pup’s gonna be hovering nearby in wonder.
3. Add the Turmeric: If you want to amp up the health benefits for your pup, sprinkle in the optional turmeric powder. It’s great for anti-inflammatory benefits.
Mix it all together until the color is consistent throughout. Have a sniff yourself. It’s kind of pleasant, right?
4. Store It Up: Carefully transfer the mixture into your airtight container using a spatula. Label it clearly—or else risk confusion during snack time.
Yes, that’s coconut oil, not peanut butter.
5. Time to Brush****: When brushing time rolls around, apply a small amount to a dog toothbrush or your finger. Your furry friend might think it’s time for a tasty treat, so prepare for a fun and messy brushing session.
6. Capture the Joy: Don’t forget to snap a pic of your pup enjoying their new toothpaste. After all, how often can you share a photo of a dog actively getting their teeth cleaned while loving it?
Optional Add-ons/Variations:
– Go Creative: Instead of pumpkin, try using sweet potato puree for a different flavor kick. Dogs tend to love that too.
Or for an added twist, experiment with mashed blueberries—just make sure they’re dog-friendly and don’t include any harmful additives.
Pro Tip:
Always keep a watchful eye on your dog during brushing. Some pups might want to sneak a lick before you’re done, and while it’s safe, it can definitely turn into a giggle-fest of slippery antics.
To save some dough, consider making larger batches. It stores well in the fridge, so you can whip up enough for a couple of months.
There you have it—a simple, effective way to guarantee your dog’s dental hygiene while having a whole lot of fun. It’s like turning a chore into a bonding experience. Happy brushing!
4. Apple Cinnamon Crunch Mix
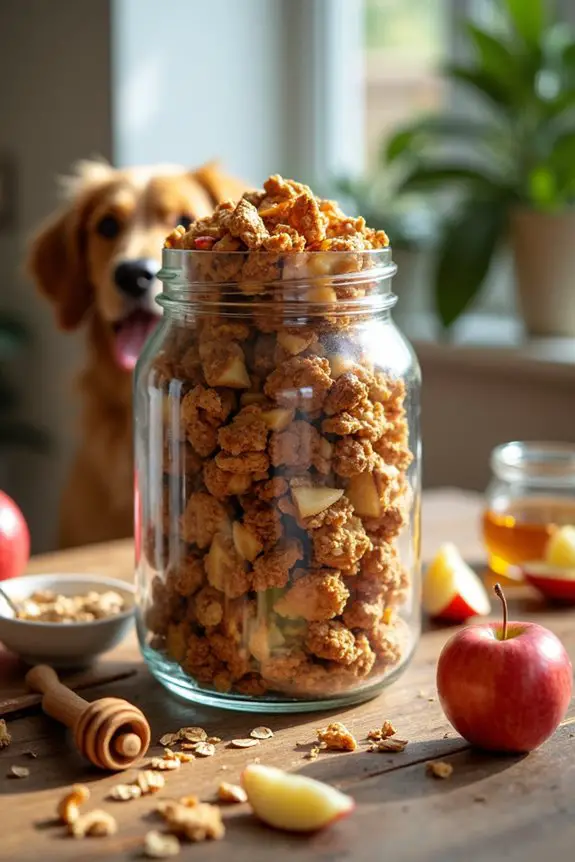
Looking for a fun and tasty way to pamper your pup? This DIY Apple Cinnamon Crunch Mix isn’t only a delightful treat but also an easy project that can elevate your dog’s happiness and health. Plus, it’s a budget-friendly alternative to store-bought snacks. Who knew making your dog’s favorite treats could be so simple and rewarding?
Materials Needed:
- 1 cup rolled oats
- 1/2 cup dried apples (unsweetened and unsulfured)
- 1 tablespoon cinnamon (make sure it’s safe for dogs, as some kinds can be harmful)
- 1/4 cup coconut oil (melted)
- Mixing bowl
- Baking sheet
- Parchment paper
Step-by-Step Instructions:
- Preheat the Oven: Turn your oven on to 350°F (175°C). While it warms up, you can start mixing your ingredients, but be careful not to run off to join your dog in their playtime yet—keep those paws off the counters!
- Mix the Dry Ingredients: In a mixing bowl, combine the rolled oats, dried apples, and cinnamon. Give it a good stir to make sure everything is evenly distributed. Just imagine your dog’s tail wagging while they wait for this tasty mix.
- Add the Wet Ingredients: Pour the melted coconut oil into the dry ingredient mix. Stir until everything is combined, and you see that beautiful apple-cinnamon goodness forming. If your mixture seems dry, you can add a little water to help it come together.
- Bake It Up: Line your baking sheet with parchment paper and spread the mixture across it in an even layer. Bake for about 15-20 minutes or until the edges start to look toasty and fragrant. The smell will lure your dog into the kitchen; just know that it’s not just the aroma of apples and cinnamon—it’s also their adorable little nose.
- Cool and Crunch: Once baked, remove the tray from the oven and let it cool for a few minutes. When it’s still warm but not hot, break it up into smaller pieces that are easy for your pup to munch on.
- Store It Right: Once completely cooled, store your Apple Cinnamon Crunch Mix in an airtight container. Just a heads-up – this mix might disappear faster than your dog can give puppy eyes.
Optional Add-ons/Variations:
- Change Up the Fruits: For variety, consider swapping dried apples with cranberries or even pumpkin seeds. Just confirm any other fruit is dog-friendly and free from added sugars or preservatives.
- Add Some Sweetness: If your dog has a sweet tooth, a drizzle of honey (only if they’re over one year old) can provide a delightful touch.
Pro Tip:
Make certain you monitor how much of this tasty mix your pup enjoys at once, as even healthy snacks can lead to tummy troubles if they indulge too much. It’s all about balance, right?
And don’t worry if it takes a few tries to perfect this recipe; each batch is a step closer to your dog’s dream treat. Plus, it’s a great bonding activity—after all, who wouldn’t want to share some love (and a few bites) with their furry friend while cooking?
5. Bacon-flavored Treat Paste
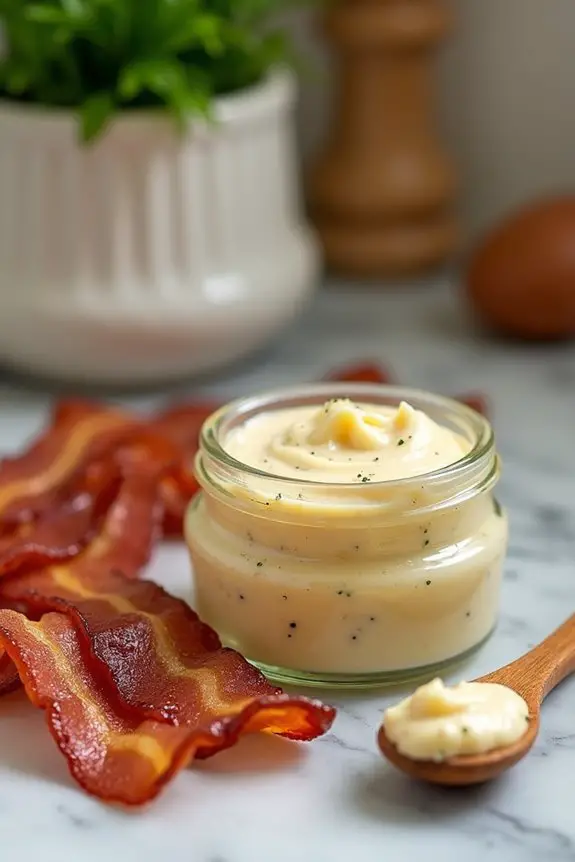
As a dog parent, you know that keeping your furry friend’s teeth clean isn’t the most glamorous task. But what if I told you there’s a DIY solution that makes brushing your pup’s teeth a lot more appealing? Enter this Bacon-flavored Treat Paste—it’s delicious, easy to make, and a fantastic way to keep your dog’s teeth shiny and healthy while saving some bucks on store-bought toothpaste. Who can resist bacon, right?
Materials Needed:
- 1/2 cup bacon (cooked and crumbled)
- 1/2 cup coconut oil (melted)
- 1/4 cup water
- 1 tablespoon parsley (fresh or dried, for breath freshening)
- A mixing bowl
- A blender or food processor
- A small airtight container
Step-by-Step Instructions:
- Cook the Bacon: First, fry up some bacon until it’s crispy. Treat yourself to a piece as a reward for being such a great dog parent. Just don’t let them give you that sad puppy look while you munch away!
- Mix Ingredients Together: In a mixing bowl, combine the crumbled bacon, melted coconut oil, and water. Toss in the parsley. This little herb works wonders for freshening doggy breath.
- Blend It Up: Grab your blender or food processor. Throw the mixture in and blend until it reaches a paste-like consistency. If you find it too thick, feel free to add a little more water. If it’s too thin, a touch of coconut oil will do the trick.
- Scoop Into a Container: Use a spoon to transfer the paste into an airtight container. You want to make sure it stays fresh for your pup’s next teeth-brushing session.
- Storage: Keep the container in the fridge. This not only keeps it tasty but also helps with preserving its freshness. Now you’re one step closer to brushing teeth without the drama.
- Use It Regularly: When it’s time for a cleaning session, just grab your preferred dog toothbrush (or a finger brush) and let your pup enjoy the bacon goodness while you sneak in a quick brush!
Optional Add-ons/Variations:
- Try Different Meats: Instead of bacon, you could use cooked chicken or beef bits, just make sure they’re safe for your furry friend.
- Herbal Boost: Add a spoonful of unsweetened pumpkin puree for added flavor and health benefits; it helps digestion too.
Pro Tip:
Be sure to use coconut oil in moderation. While it’s great for your dog’s coat and teeth, too much can cause tummy troubles.
Also, remember—always check with your vet before introducing new ingredients into your dog’s diet. They might add their two cents on what flavors your dog might like best!
Now, you can brush your pup’s teeth while enjoying the fact that they think it’s a treat. And there you have it—who knew dental care could be so rewarding?
6. Blueberry Vanilla Dream Paste
If you’re on a quest to make teeth brushing a delightful experience for your dog, the Blueberry Vanilla Dream Paste is just what you need. This sweet, fruity concoction not only keeps your pup’s pearly whites shining, but it also makes the brushing routine feel like a treat. Who wouldn’t want a scoop of blueberry bliss over a boring tube of store-bought toothpaste?
And the best part? It’s super easy to whip up at home, saving you money and keeping your furry friend healthy and happy.
Materials Needed:
- 1/2 cup fresh or frozen blueberries
- 1/4 cup plain yogurt (unsweetened and non-fat works best)
- 1 tablespoon coconut oil (melted)
- 1 teaspoon vanilla extract (pet-safe)
- A mixing bowl
- A blender or food processor
- A small airtight container
Step-by-Step Instructions:
- Prep the Blueberries: If you’re using fresh blueberries, give them a good rinse. If you’re using frozen ones, just measure out what you need. No need to thaw—this will save you time.
- Combine Ingredients: In your mixing bowl, add the blueberries, yogurt, melted coconut oil, and vanilla extract. Mixing them together guarantees all that blueberry goodness gets blended evenly.
- Blend It Up: Pour your mix into a blender or food processor. Blend until it’s nice and smooth. You want that dreamy, pastel-like consistency—almost like a fluffy cloud, but one your dog can eat.
- Scoop Into a Container: Once blended, use a spoon to gently transfer the paste into an airtight container. You want this to stay fresh and inviting for your pup.
- Storage: Pop it in the fridge. This keeps the paste fresh and tasty. Believe me, you don’t want your dog turning up their nose at brush time because the paste is stale.
- Brush with Love: When ready to brush, grab your doggy toothbrush or finger brush, scoop out a little Blueberry Vanilla Dream Paste, and start brushing. Your dog will think they’re getting a treat instead of dental care.
Optional Add-ons/Variations:
- Fruity Fusion: Feel free to mix in other dog-safe fruits like mashed strawberries or even a bit of pumpkin puree for extra nutrition and flavor. The more, the merrier, right?
- Play with Consistency: If you want a thicker paste, add more yogurt, and for a thinner option, feel free to add a splash of water.
Pro Tip:
Always check if your dog is allergic to certain ingredients before trying new recipes. Start with a small amount to monitor any adverse reactions.
Also, storing this in small batches is a great idea. Try making just what your pup can use within a week—that way, it stays fresh, and you can swap out flavors every few weeks. Who knew dental care could be this delicious?
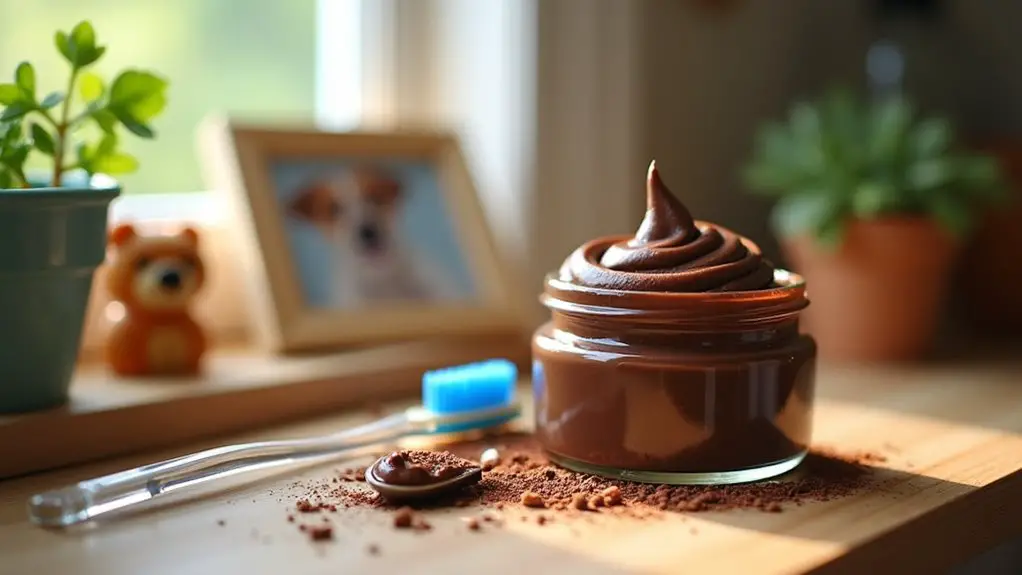
7. Carob and Honey Delight
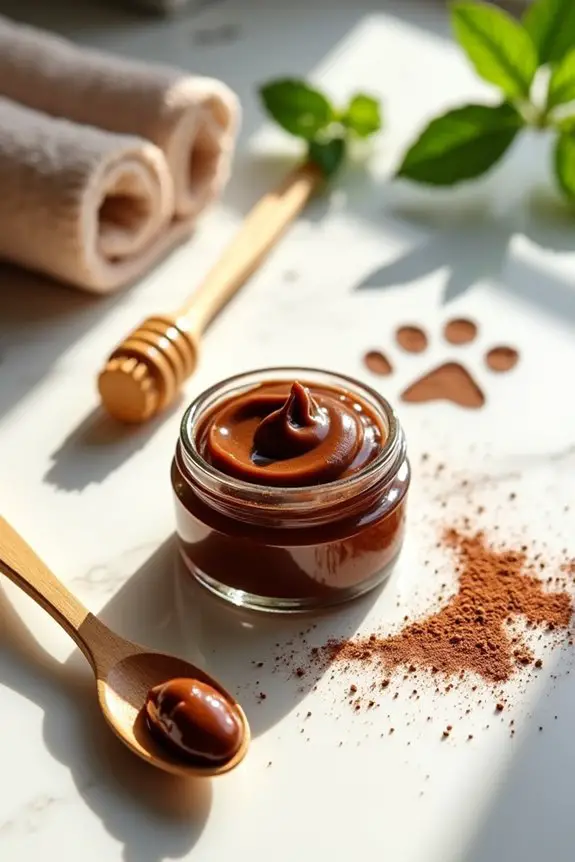
If you’re looking for a tasty treat to make teeth brushing a joy for your furry friend, then the Carob and Honey Delight is just the DIY project you need. This delightful toothpaste not only keeps your dog’s mouth healthy but also gives them something sweet to look forward to during brushing time.
Plus, making it at home is wallet-friendly—no more overpriced commercial toothpaste that’s more artificial than a Hollywood movie set. Let’s plunge into this simple, yet satisfying recipe that’s bound to become a staple in your doggy dental routine.
Materials Needed:
- 1/4 cup carob powder (safe and dog-friendly)
- 1/4 cup coconut oil (melted)
- 2 tablespoons honey (raw and organic if possible)
- 1 teaspoon water (to adjust consistency)
- A mixing bowl
- A spoon for stirring
- A small airtight container for storage
Step-by-Step Instructions:
- Melt the Coconut Oil: Start by melting your coconut oil if it isn’t already liquefied. Just pop it in the microwave for about 20-30 seconds. Make sure to let it cool slightly, so it doesn’t scald you when mixing.
- Combine the Ingredients: In your mixing bowl, mix together the carob powder, melted coconut oil, and honey. Get in there with your spoon and stir until everything is well combined. This won’t only create a sweet-smelling paste but also make your kitchen feel like a dog bakery.
- Adjust Consistency: Now, if your mix seems a bit thick, add a teaspoon of water to loosen it up. Stir again until it’s smooth and creamy. You want it to be spreadable but not runny—think of it as the perfect frosting consistency, but one that’s totally pup-approved.
- Scoop It Into a Container: Grab your small airtight container and carefully spoon the toothpaste mixture into it. Be careful with the mess, or you’ll be scrubbing your counters later, which is the last thing you need when you’re trying to impress your dog.
- Storage: Seal your container and store it in the fridge. The cooler temperature will help it stay fresh for longer—trust me, you want your dog to be excited for brushing time, not wary of stale toothpaste.
- Let the Brushing Begin: When you’re ready to take on those doggo chompers, grab that toothpaste and a dog-friendly toothbrush or finger brush. Scoop out a small amount and get brushing. Watch as your pup thinks they’re getting a special treat instead of dental hygiene.
Optional Add-ons/Variations:
- Nutty Twist: If your dog enjoys a hint of nutty flavor, consider adding a tablespoon of ground peanut butter to the mix. Just make sure it’s unsweetened and xylitol-free.
- Flavor Explorer: You can also explore adding a dash of cinnamon for an extra kick, but be cautious as some pups may not like it. Test it out in small amounts first.
Pro Tip:
Before trying out any new ingredients, do a quick allergy check to keep your furry friend safe.
And hey, if you want to save some bucks, making a double batch will stock you up for several brushing sessions—just keep an eye on its freshness. Who says being responsible can’t be deliciously fun?
Extra Tips & Ideas
While you might think making your own dog toothpaste is a breeze, there are a few extra tips and creative ideas to elevate your homemade concoction to a new level.
First, consider adding a splash of coconut oil for an extra moisturizing effect—your pup’s gums will thank you.
Want to make it a bit more interesting? Try varying the flavors. Instead of carob, how about pumpkin or even peanut butter? Just imagine your dog’s delight.
Don’t forget to store it in an airtight container; no one wants a toothpaste that goes stale, right?
Ultimately, if you’re having a rough day, just look at your fluffy friend enjoying dental care. It’s enough to bring a smile. Happy brushing!
Frequently Asked Questions
Can I Use Human Toothpaste for My Dog?
No, you can’t use human toothpaste for your dog. It contains ingredients like fluoride and xylitol, which are harmful to them. Instead, choose a toothpaste specifically designed for dogs to keep their teeth healthy and clean.
How Often Should I Brush My Dog’s Teeth?
Like a knight guarding a castle, you should brush your dog’s teeth at least two to three times a week. Regular brushing helps prevent plaque buildup, keeping your furry friend’s smile bright and healthy.
Is It Safe for Dogs to Ingest Toothpaste?
No, it isn’t safe for dogs to ingest regular toothpaste. Most human toothpastes contain xylitol or fluoride, which can harm dogs. Always use dog-safe toothpaste specifically designed for them to avoid potential health issues.
What Ingredients Should I Avoid in Dog Toothpaste?
You wouldn’t want to harm your furry friend, right? Avoid ingredients like xylitol, fluoride, and artificial sweeteners. These substances can be toxic or cause severe health issues, so keep your dog’s safety in mind when choosing toothpaste.
How Do I Introduce Toothpaste to My Dog?
Start by letting your dog sniff the toothpaste tube. Then, apply a small amount to your finger and let them taste it. Gradually introduce a toothbrush, making it a fun, positive experience for your pup.
Conclusion
Making your own dog toothpaste isn’t just about fresh breath; it’s about creating moments that shine brighter than your pup’s pearly whites. You’ve released a world of flavors, from pumpkin spice to peanut butter bliss, crafting something special for your furry friend. So why not sneak in a little playtime while you brush? After all, who wouldn’t want to make their dog’s smile even more irresistible? Your pooch will wag with delight—trust me, it’s a win-win.

Hi, I’m Ali Tarek, the founder of Animalsman. I’ve always been passionate about pets, especially dogs and cats, and I created this website to share practical tips, easy recipes, and helpful care advice for fellow pet lovers. My goal is to make pet care simple, enjoyable, and accessible for everyone. When I’m not writing or curating content, you’ll usually find me spending time with my furry friends or learning new ways to keep them happy and healthy.