Thinking about setting up a DIY dog washing station? You’re not alone. A space where your pup can get clean without turning your bathroom into a disaster zone is a dream for many. Envision this: your furry friend splashing around, while you laugh at the chaos, maybe even a little soaked yourself. But how do you turn this dreamy idea into reality? Let’s explore some cool designs that could make bath time a lot more fun, for both of you.
Pet-Friendly Shower Fixtures
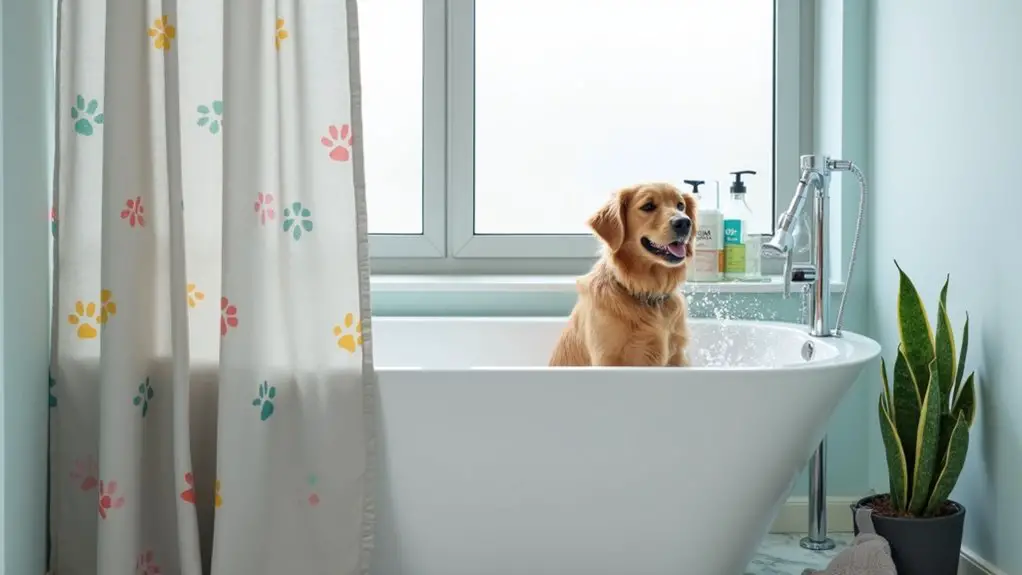
When it comes to setting up a dog washing station, choosing the right shower fixtures can make all the difference. You want something that’s easy to handle, right? A handheld sprayer is a must for your DIY dog washing station. Trust me, your dog will appreciate it.
Imagine trying to aim a fixed showerhead at your wriggly pup. Yeah, not a pretty picture. Look for adjustable sprays with a strong stream; it helps rinse off shampoo in record time.
And don’t forget non-slip mats—your furry friend’s going to need grip while you’re wrangling. Toss in some fun shower curtains to brighten up the space.
Who wouldn’t want a little color while battling dirt and fur? Go on, get started!
Our Collection
Now let’s talk about our collection, where function meets fun for your dog washing station.
You’ll find everything from innovative hose attachments to an adjustable sprayer nozzle that’s perfect for your pup’s bath time antics.
Love multitasking? Check out the grooming brush with a soap dispenser, because who doesn’t want to make washing your dog a little easier and a lot more enjoyable?
1. Innovative Hose Attachments
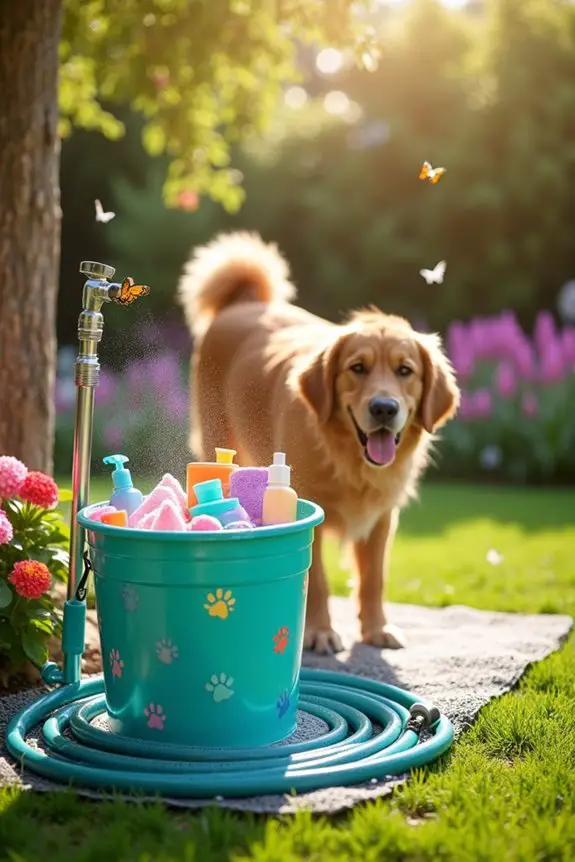
Creating a dog washing hose attachment is a game-changer for pet owners. Not only does it make bath time easier and more enjoyable for both you and your furry friend, but it can also save you trips to the groomer. Imagine how luxurious it feels to wash your dog in your own yard without the mess—comfort and convenience packed into one simple DIY project. Plus, using premium dog food makers can ensure your pup is healthy and happy, making bath time even more rewarding. Automatic dog feeders large are another great way to enhance your pet care routine, providing consistent meal times and reducing your workload. Additionally, providing a safe bathing environment is essential, and using a dog car harness seatbelt can help keep your pet secure during trips to the wash.
Materials Needed:
- 5-gallon bucket (with lid)
- Heavy-duty garden hose (at least 25 feet)
- Hose nozzle with adjustable spray settings
- Teflon tape
- Vinyl tubing (optional for extended reach)
- Plastic connector fittings (matching your hose size)
- Drill with a paddle bit
- Utility knife
- Measuring tape
- Marker
- Screwdriver
Step-by-Step Instructions:
- Cut the Bucket: Start by drilling a hole about 2 inches from the bottom of the bucket. Use a paddle bit that matches the size of your connector fitting. This will allow the hose to connect snugly.
- Attach the Connector: Feed the garden hose through the hole you just drilled. Screw the plastic connector fitting onto the end of the hose inside the bucket, using Teflon tape to verify it’s leak-free.
- Add the Hose Nozzle: Attach your hose nozzle to the other end of the hose. Check that the nozzle has options for different spray settings. You want to choose one that can go from a gentle mist to a powerful spray, depending on your dog’s bath mood.
- Seal the Lid: If your bucket came with a lid, you may want to seal it tightly if you plan to store supplies inside. The bucket can also double as a storage container for your dog washing supplies like shampoo and towels.
- Customize Your Hose Length: If you want more reach, cut your vinyl tubing to the desired length and attach it to your hose using the connector fittings to make it longer.
- Fill With Water: Before dragging your new hose attachment outside, fill the bucket with warm water. This way, you can easily have warm water at your disposal while washing your pup.
- Let the Fun Begin: Connect the hose to your outdoor water source, and you’re good to go. Get ready for a splashing good time with your dog!
Optional Add-ons/Variations:
- Color It Up: Paint the bucket with outdoor-safe paint or decorate it with fun patterns to encourage those Instagram-worthy bath photos. Think bright colors for a playful vibe or pastels for a calming look.
- Personalize with Collage: Use contact paper to add your dog’s name or paw print designs to the bucket. Every bath time can feel personal and special.
Pro Tip:
While washing, always keep an eye on your pup. A non-slip mat in your washing area can help prevent any surprise slips or tumbles. Also, hot water is cozy, but check the temperature first to make sure it’s just right for your pooch—nobody wants a surprised yelp mid-bath.
With this dog washing hose attachment, you’ll not only save time and money but also deepen your bond with your furry buddy. Who knew bath time could turn into such an enjoyable experience? Go ahead, give it a try. You both deserve it.
2. Adjustable Sprayer Nozzle
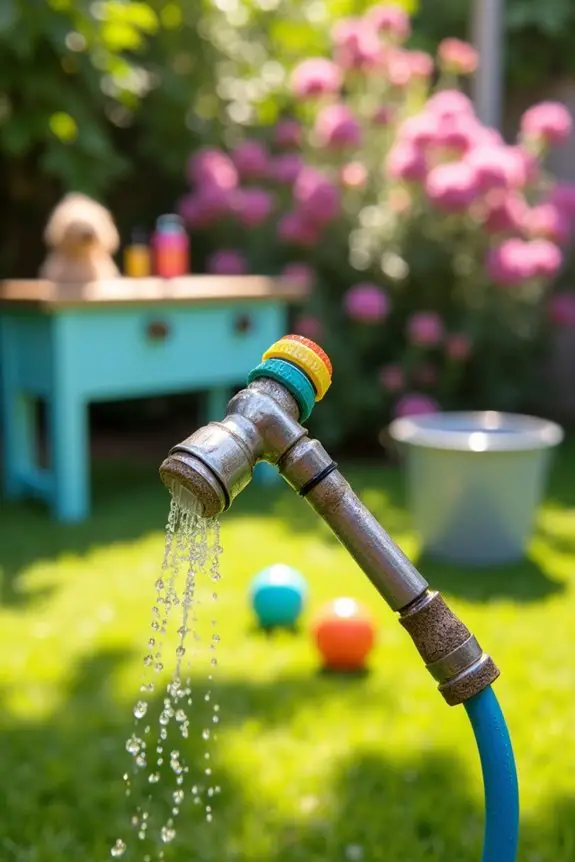
Are you ready to make bath time more fun for both you and your dog? With an adjustable sprayer nozzle, you can customize the bathing experience to fit your pup’s preferences, and you’ll save money on fancy grooming tools. Let’s explore creating this versatile sprayer that makes washing your dog at home a breeze. In addition, investing in a professional dog grooming table can greatly enhance your dog grooming routine. This customizable setup is perfect for owners who want to create their own dog grooming station.
Materials Needed:
- Garden hose with a standard fitting
- Adjustable sprayer nozzle (make sure it has multiple settings)
- Teflon tape
- Utility knife
- Screwdriver (if necessary)
- Measuring tape (for length adjustments)
- Bucket (optional for collecting water if needed)
Step-by-Step Instructions:
- Choose Your Nozzle: Pick an adjustable sprayer nozzle that suits your needs. Go for one with different spray settings—this way, you can easily switch from a gentle mist for cleaning to a powerful spray for muddy pups.
- Prepare the Hose: If your garden hose isn’t long enough, measure and cut it to your desired length with your utility knife. Don’t forget to account for your sprayer nozzle to verify you have ample distance to work with!
- Attach the Sprayer: Screw the adjustable nozzle onto the end of your garden hose. If it’s a snug fit, you can use Teflon tape on the threads for a leak-proof seal.
- Test the Connection: Turn on the water to check for leaks. Make minor adjustments as needed to confirm everything is snug and secure.
- Customize the Settings: Before bringing it outside, familiarize yourself with the different settings on your sprayer nozzle. Practice adjusting it to find the right setting that works for your dog—some pups might prefer a light mist to help calm their nerves!
- Ready for Bath Time: Take your newly-made sprayer outside, connect it to the water source, and fill a bucket with warm water if needed. Now, you’re prepared for a splashing adventure!
Optional Add-ons/Variations:
- Decorate with Colors: Paint your adjustable nozzle in bright colors or wrap it with outdoor-friendly fabric to add a splash of personality. Let your pup show off their style.
- Create a Themed Sprayer: Choose a color scheme or theme—like beach vibes or floral patterns—and paint or add decals to the nozzle. Your pup can feel like they’re at a tropical resort during bath time.
Pro Tip:
When using the nozzle, keep an eye on your dog. If your furry friend starts to squirm or look uncomfortable, switch to a gentler spray. Remember, the goal is to make bath time as enjoyable as possible.
Also, avoiding that hilariously chaotic moment of doggy zoomies right after a wash is definitely a win in any pet owner’s book.
Now, go give your pup the spa treatment they deserve, right in the comfort of your own backyard!
3. Grooming Brush With Soap Dispenser
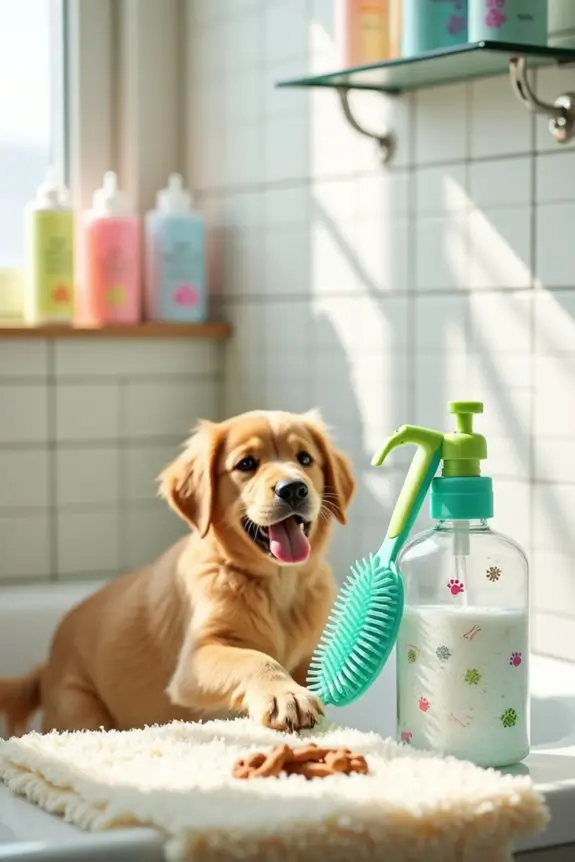
Bath time just became a whole lot easier and more enjoyable for you and your furry friend with this DIY grooming brush that features a built-in soap dispenser. Imagine giving your pup a delightful scrub while effortlessly dispensing shampoo right onto their fur—all without needing to fumble around and make a mess.
Not only does this handy tool save you time, but it can also help reduce costs on fancy brushes and grooming products. It’s a win-win.
Materials Needed:
- Rubber grooming brush (the kind with nubs or bristles, specifically for dogs)
- Plastic squeeze bottle (empty and cleaned)
- Drill with a small drill bit
- Shampoo or soap (gentle, dog-safe formula)
- Water
- Measuring cup
- Funnel (optional)
- Teflon tape or waterproof sealant (optional, for sealing)
Step-by-Step Instructions:
1. Prep Your Squeeze Bottle: Start by washing your squeeze bottle to make sure it’s completely clean. No one wants leftover ketchup mixing with puppy shampoo.
2. Mix Your Solution: In a measuring cup, combine equal parts shampoo and water. This mixture will help it flow smoothly from the bottle. Use your funnel if you have one—it’s a lifesaver.
3. Drill the Hole: Take your rubber grooming brush and, with the drill, create a small hole in the center of the brush’s base (the side that will face the pup). Make sure to start with a small bit, so you don’t accidentally create a hole that’s too big.
4. Attach the Squeeze Bottle: Insert the straw of your squeeze bottle into the newly drilled hole. It should fit snugly.
If it’s loose, use a bit of Teflon tape or waterproof sealant around the hole to keep it secure and prevent leaks.
5. Test the Dispenser: Fill the bottle with your shampoo solution, then gently squeeze to make sure it dispenses well through the brush. Adjust the opening if necessary to get just the right flow—too fast and you’ll have soap everywhere, too slow and your pup might lose interest.
6. Groom with Ease: Now it’s time for bath time fun. Use your new brush to groom your dog while applying the soap. Watch as their coat gets cleaned right before your eyes—no mess, just a happy pup.
Optional Add-ons/Variations:
- Personalize Your Brush: Paint the handle of your squeeze bottle with non-toxic spray paint, or use colorful tape to make it pop. You’d be surprised how fun it can be to match it to your pup’s collar.
- Create Different Solutions: If your dog has specific needs, like dry skin or odors, consider alternating shampoos by making several pre-mixed bottles. Just label them to avoid any confusion during bath time.
Pro Tip:
When using your grooming brush with the soap dispenser, start by letting your pup sniff it before you begin. This can help ease any anxieties they might have.
Also, if they start to squirm, try to make it a game—turn it into a mini spa day with plenty of treats and praise. Who knew bath time could be so much fun?
4. Built-in Storage Shelves
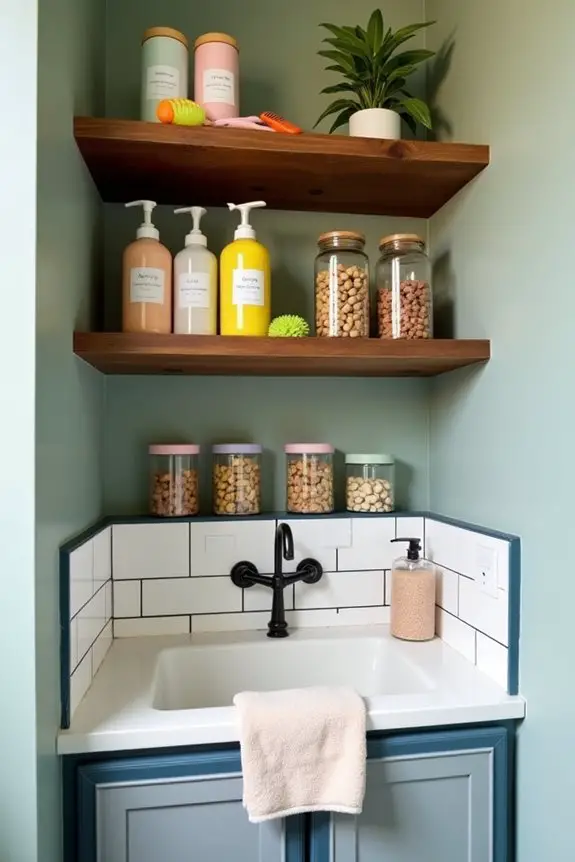
Creating a built-in storage shelf for your dog washing station is a clever way to keep your grooming supplies organized and easily accessible. It also enhances your space, making it look neat and inviting. Plus, if you’re like me and have a habit of misplacing dog shampoo or combs, this project is a game changer.
Say goodbye to rummaging through cabinets while your pup patiently waits (or impatiently tries to escape)!
Materials Needed:
- Wooden boards (1″x12″ for shelving, 1″x2″ for supports, length as needed)
- Wood screws
- Wood glue (optional)
- Drill
- Level
- Tape measure
- Sandpaper
- Paint or wood stain (optional)
- Paintbrush (if you’re painting/staining)
- Brackets (if extra support is needed)
Step-by-Step Instructions:
- Measure Your Space: Start by measuring the area where you want to install your shelves. You want to be sure your new shelves fit nicely without looking cramped or awkward. Take your time; a little bit of planning goes a long way.
- Cut Your Wood: Depending on your measurements, cut your wooden boards. You’ll need two boards for the shelf and others for the supports. If you’re not keen on cutting wood yourself, many hardware stores will do it for you—just ask!
- Sand It Down: Take your sandpaper and smooth out all the edges. Nobody wants splinters when reaching for that dog shampoo, right? Just think of it like giving your shelves a light massage.
- Attach the Supports: Use your drill to attach the 1″x2″ supports to the wall at the height you want your shelf. Make sure they’re level—nothing is more frustrating than a tilted shelf. Just imagine your dog’s shampoo sliding off like a soap opera star.
- Install the Shelves: Next, place your wooden boards on the supports. If you fear spontaneous shelf sliding, secure them down with brackets or screws. If you’re feeling fancy, this is where you’d add that wood glue for extra durability.
- Finish It Off: If you want to give your shelves a polished look, paint or stain them. This step is optional, but it can truly enhance the overall appeal of your space. Choose a color that complements your décor or even something fun that reflects your pup’s personality—perhaps a shade of golden retriever?
- Load ‘Er Up: Once everything is dry and secure, start organizing your grooming supplies! Make sure to keep the most-used items at eye level. Feel free to throw in some dog toys or treats to create a happy little corner for your furry friend.
Optional Add-ons/Variations:
- Colorful Touches: Use patterned fabric or washi tape to create a decorated edge on your shelves. It adds a fun flair and feels personal, like an accessory for your dog’s beauty station.
- Custom Labels: Add labels to containers or jars to help keep things organized. It’s both practical and stylish. I can’t tell you how many times I’ve looked for the dog shampoo only to find cat treats instead.
Pro Tip:
Install your shelves a little higher than usual. Not only does it keep your supplies out of reach of curious pups, but it also makes cleaning the floor underneath super easy—less bending over, more fun moments with your dog.
Plus, it gives you a chance to live out your “organized space” dreams!
5. Non-slip Bath Mat
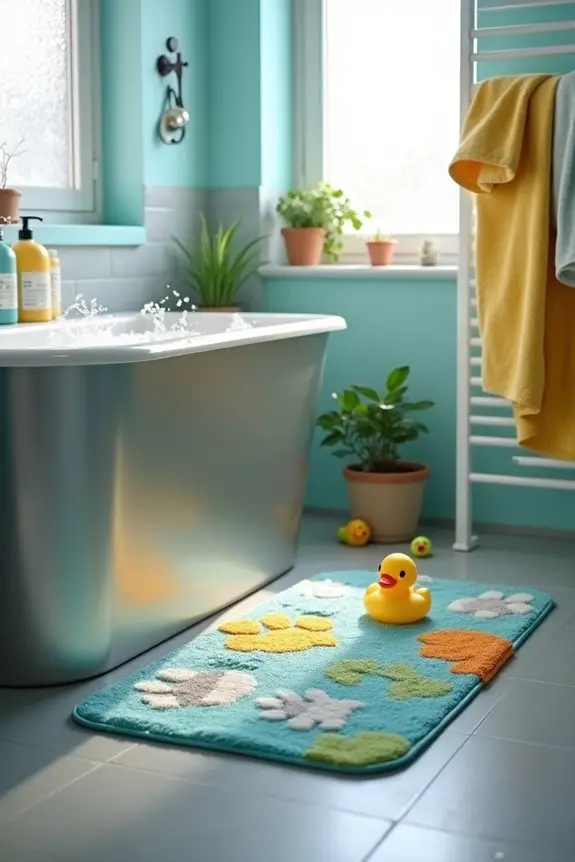
Having a non-slip bath mat is essential for any dog washing station, especially when your furry friend decides that bath time is their moment to sprint around like a speed demon. Not only does it help keep your pup safe from slipping and sliding, but it also makes the bathing experience more comfortable for both of you.
Plus, having a designated spot takes the chaos out of your dog wash days. Trust me, it’s a small investment that goes a long way in maintaining order and safety!
Materials Needed:
- Non-slip bath mat
- Scissors (if adjustments are needed)
- Measuring tape
- Optional: Waterproof adhesive strips (for added safety)
Step-by-Step Instructions:
1. Choose the Right Size: Measure the area where you want to place the mat. You want it to be big enough to give your dog plenty of grip and comfort but not so large that it covers the whole washing station.
Think of it as creating a cozy little corner for your pup.
2. Select Your Mat: Head over to your favorite store or browse online for a non-slip bath mat. There are so many fun colors and patterns to reflect your dog’s unique personality—maybe a vibrant paw print design or something that screams “cool canine.”
3. Cut to Fit (if necessary): If you find a perfect mat that’s just a tad too big, grab your scissors. Carefully trim it to size, making sure not to cut it too small—your dog may appreciate a little extra room for their wiggly self.
4. Place the Mat: Lay it down in the designated area of your dog washing station. Make sure it fits snugly and lays flat without any edges curling up.
Think of it as rolling out the red carpet for your furry friend.
5. Secure It (optional): For added safety, you might want to add waterproof adhesive strips underneath the mat in high-traffic areas. This way, it won’t budge, even if your dog decides bath time is their version of a water park adventure.
6. Test It Out: Before the big bath day, give the mat a test run. Walk over it yourself, and even see how your dog reacts with some treats to reward good behavior. You want to be confident that it can handle all the splashing and sliding.
Optional Add-ons/Variations:
- Mix and match bath mats in different colors to create a playful, layered look. Your dog deserves a stylish shower space, right?
- Consider using a mat that has a fun texture or design—for example, one that mimics grass or beach sand, making bath time feel more like a day at the park.
Pro Tip:
For those who are all about every bit of comfort, add some dog-friendly shampoo or conditioner to the mat!
Okay, maybe don’t directly pour it on there, but having your favorite grooming supplies right nearby makes things smoother. It’ll keep you from scrambling around for products while trying to handle a slippery pup. Plus, a little rubber ducky vibe never hurt anybody.
Now go on, create that perfect bathing spot for your pooch, and feel free to strut your DIY stuff! Who knew that bath time could look so good?
6. Waterproof Bluetooth Speaker
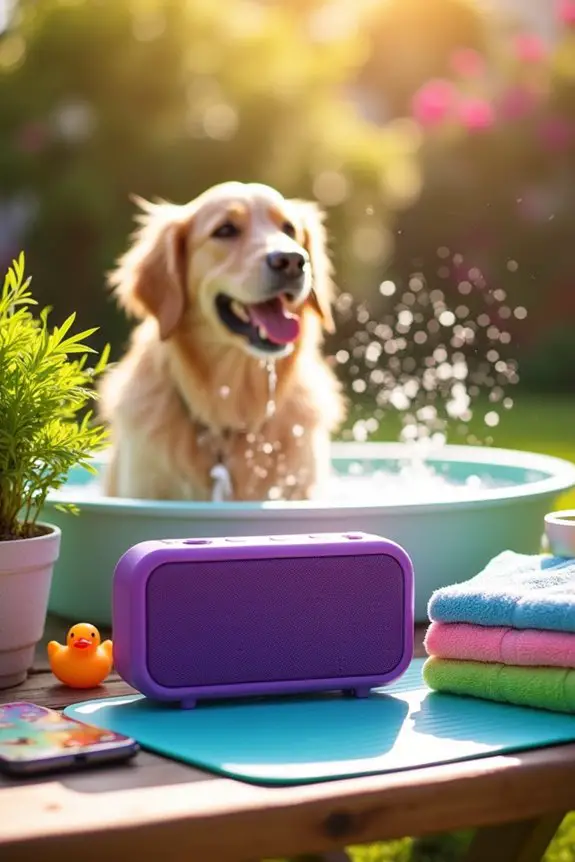
Are you tired of bath time being a stressful experience, both for you and your furry friend? Imagine making those splashes a bit more fun by jamming to your favorite tunes while washing your dog. A waterproof Bluetooth speaker can turn a seemingly mundane chore into a mini-party right in your own backyard or bathroom. Not only does it keep your pup relaxed, but it can also save you a fortune on music subscription services—you’ll only need it for your wash days!
Materials Needed:
- Waterproof Bluetooth speaker
- Phone or tablet (for pairing)
- Charging cable (if needed)
- Power outlet (if not using a rechargeable speaker)
Step-by-Step Instructions:
- Select Your Speaker: Start by choosing a waterproof Bluetooth speaker that fits your budget and style. Look for one with a good battery life and sound quality, because let’s face it, you want to hear that bass while scrubbing Fido’s fur.
- Pair Your Devices: Once you’ve got your speaker and phone/tablet ready, turn on your speaker and put it in pairing mode (refer to the speaker’s manual for specifics). Next, on your phone or tablet, go to the Bluetooth settings and look for your speaker in the list of available devices. Tap to connect.
- Create a Playlist: Here’s where the fun really begins. Open your music app and prepare a playlist dedicated to bath time. Think of feel-good anthems, puppy-themed songs, or even a calming mix to soothe your pup. You can even throw in some old-school classics you love. Why not jam out to “Who Let the Dogs Out” while you’re at it?
- Set Up Your Speaker: Find an ideal place near your dog washing station where your speaker can stay dry but still get good sound coverage. Make sure it’s out of the splashing zone, but close enough to enjoy your music.
- Test It Out: Before the big wash day, test the sound quality and volume. Make sure the speaker is loud enough to drown out the sound of running water, yet soft enough to not scare your pup. Sit with your dog, turn on your playlist, and see how they react; a wagging tail means success!
- Enjoy Bath Time: Now that everything is set, it’s time to enjoy bath time. Turn up those tunes and make a splash—no, literally! Your dog might just tap dance in the tub while you both belt out your favorite hits.
Optional Add-ons/Variations:
- Customize your speaker by decorating it with waterproof stickers or a fun casing that fits your dog’s personality. Get your pup involved—let them choose their favorite colors or patterns.
- Try using different streaming services for unique playlists each time. One week, it could be reggae vibes, and the next, a soothing spa soundtrack.
Pro Tip: To save on battery life, make sure to fully charge your speaker before use and turn it off when you’re done playing. If you’re camping or traveling, look for solar-powered options, so you never miss a beat—even out in nature.
7. Pet Shower Enclosure Curtains
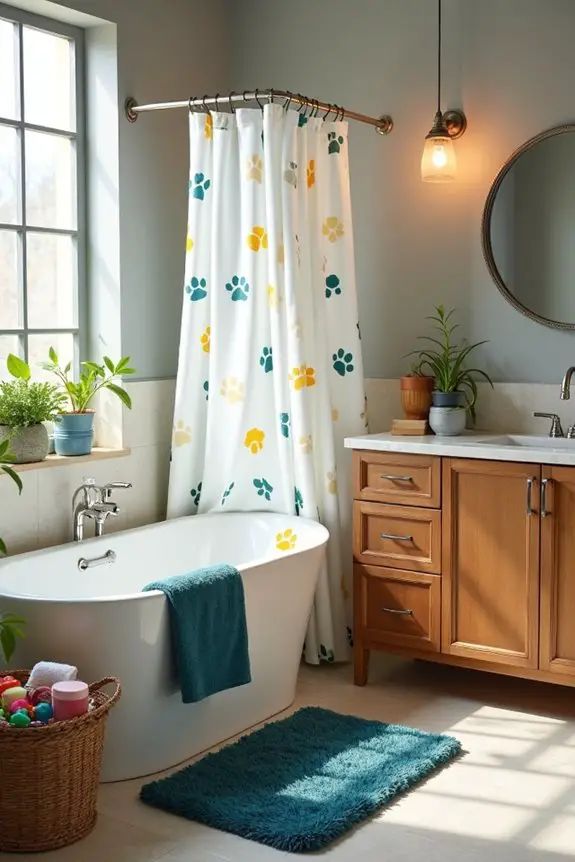
So, what’s a pet shower enclosure curtain? It’s like a shower curtain, but designed specifically for those adorable, yet occasionally muddy, furballs we call dogs. This DIY project is a game changer for dog owners. It not only helps keep your bathroom clean during bath time drama, it also adds a fun, stylish touch to your space. Plus, making your own enclosure can save you money while adding a personal flair to your home.
Materials Needed:
- Shower curtain liner (preferably waterproof)
- Curtain hooks (preferably rust-resistant)
- Curtain rod (adjustable length works best)
- Measuring tape
- Scissors (if adjustments are needed)
- Drill (if needed for rod installation)
- Level (to verify your rod is straight)
Step-by-Step Instructions:
- Measure Your Space: Start by determining where you want to hang your curtain. Measure the width of the area you want to cover. Don’t forget to reflect on how far you’d like it to extend from the wall, just in case your pup has some serious splashing skills.
- Choose Your Curtain Length: Decide how long you want the curtain to be. You can go for a standard length that covers the tub or even a longer curtain that reaches the floor for extra coverage. Mark this measurement on your shower curtain liner.
- Cut the Curtain (if necessary): If you need a shorter curtain length, take your scissors and trim the liner to your desired size. Just be cautious—nobody wants a crooked curtain!
- Install the Curtain Rod: Using your drill, attach the curtain rod brackets to the wall at the height you’ve chosen. Make sure to use a level to verify everything is straight. No one wants a crooked curtain hanging in their sanctuary, right?
- Attach the Liner to the Rod: Slide your waterproof liner onto the curtain rod and then attach it to the brackets. If you’re using curtain hooks, just slide them onto the curtain liner, then clip or hook them into place on the rod. Easy peasy.
- Test It Out: Give the curtain a quick pull to verify it opens and closes smoothly. Try not to be too rough unless wagging tails are in play—those can be incredibly powerful.
- Let the Fun Begin: Now that your pet shower enclosure curtain is ready, it’s time to get your pup in the bath! Just imagine the splashes, giggles, and maybe a little less mess around the tub—just what you needed.
Optional Add-ons/Variations:
- Add some personality by choosing a shower liner with a fun print. Think paw prints, colorful stripes, or even your dog’s favorite cartoon character. You can also paint the curtain rod to match your bathroom decor.
- For an extra layer of style, you could sew or attach a decorative fabric border to the bottom of the liner. A funky fringe or contrasting color will elevate your DIY project to the next level.
Pro Tip:
When installing your curtain rod, think about using a tension rod instead—it’s super easy to set up and doesn’t require any drilling. Plus, it allows you to quickly take down the curtain, making it easier to clean or swap out.
Now, you’re ready to tackle those bath times with a little more style and a lot less mess! Your pup is going to love it, and you’ll get to enjoy a more organized and fashionable space. Win-win!
Extra Tips & Ideas
While you might think building a DIY dog washing station is just about splashing water and scrubbing suds, there’s so much more to it than that.
Consider adding a non-slip mat; trust me, you don’t want your pup performing acrobatics mid-bath.
Or maybe install shelves for shampoo, brushes, and treats—because every dog deserves a post-bath snack, right?
Don’t forget to incorporate storage for dirty towels, too; believe me, there’s nothing worse than hunting for one while your wet dog zooms around.
You might even think about including a portable hose for easy cleanup.
And if you’re feeling fancy, a decorative sign could add a personal touch.
After all, a happy pup makes for a happy wash day!
Frequently Asked Questions
What Tools Do I Need to Build a Dog Washing Station?
To build a dog washing station, you’ll need a sturdy basin, plumbing supplies, a water source, a showerhead or hose, waterproof materials, and tools like a drill, saw, and screwdrivers for assembly.
How Much Does It Cost to Create a DIY Dog Washing Station?
You get what you pay for, and creating a DIY dog washing station typically costs between $100 to $500. It depends on your materials and features, but budgeting smartly will guarantee you’re happy with the result.
Can I Install a Dog Washing Station Outdoors?
Yes, you can install a dog washing station outdoors. Make certain you choose a well-drained area, have access to water, and guarantee the materials can withstand the elements for lasting use.
What Size Should My Dog Washing Station Be for Different Breeds?
Your dog washing station should be 30-36 inches high for large breeds and 24-30 inches for small ones. Make sure it’s spacious enough for your dog’s size, allowing easy movement and comfort during bath time.
How Do I Maintain My Dog Washing Station After Installation?
Maintaining your washing station’s like keeping a garden tidy; regularly clean surfaces, check for leaks, and verify drains aren’t clogged. A quick rinse after each use helps prevent buildup, keeping everything fresh and functional.
Conclusion
So, there you have it. With just a bit of creativity and some elbow grease, you can transform bath time into a paws-itively delightful experience. Your furry friend will strut out cleaner than a show dog, and you’ll feel like a grooming pro. Plus, who wouldn’t want to jam out to their favorite tunes while sudsing up a pup? Immerse yourself in these ideas, and your DIY dog washing station will be the envy of the neighborhood. Happy bathing!

Hi, I’m Ali Tarek, the founder of Animalsman. I’ve always been passionate about pets, especially dogs and cats, and I created this website to share practical tips, easy recipes, and helpful care advice for fellow pet lovers. My goal is to make pet care simple, enjoyable, and accessible for everyone. When I’m not writing or curating content, you’ll usually find me spending time with my furry friends or learning new ways to keep them happy and healthy.

