Let’s just say, elevated dog bowls are the crème de la crème of pet dining. They’re not just a fancy way to serve Fido; they also add flair to your home while keeping your pup comfy. Ever thought about how your dog feels about slurping from a bowl that’s low to the ground? With so many creative styles out there, you might just find the perfect match for both your dog’s personality and your home’s vibe. What will your pup’s dining experience look like?
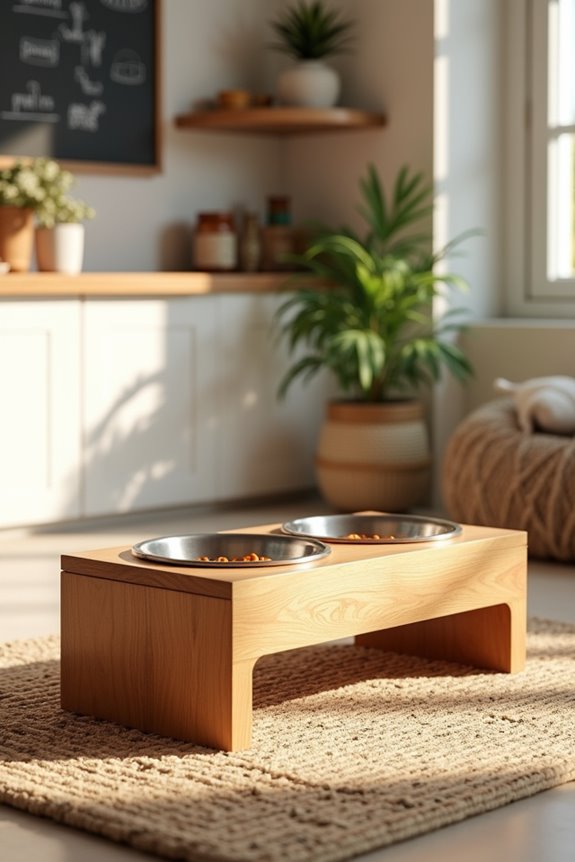
Stylish Wooden Bowl Stands
When you think about it, your dog deserves a dining setup that’s just as stylish as yours, right?
Why not explore some DIY elevated dog bowls with wooden stands? You can choose a simple design by cutting wood to the desired height, then creating a sturdy base to support delicate ceramic bowls.
Sand it down, then stain or paint it to match your home. Could it be more delightful? You can even personalize it with your pup’s name.
I once made one, and let’s just say, my dad thought it was an extravagant dog loft.
With a sprinkle of creativity and a dash of love, you’ll give your furry friend a dining area that turns heads, even if it’s just your own kitchen.
Our Collection
Ready to find the perfect elevated dog bowl for your furry friend?
Our collection has something for every style and need, from sleek ceramic bowls that blend seamlessly with your decor to adjustable metal holders that grow with your pup.
And if you’re feeling fancy, check out our personalized engraved wooden stands—because your dog deserves more than just a regular bowl, doesn’t he?
1. Ceramic Bowls With Stand
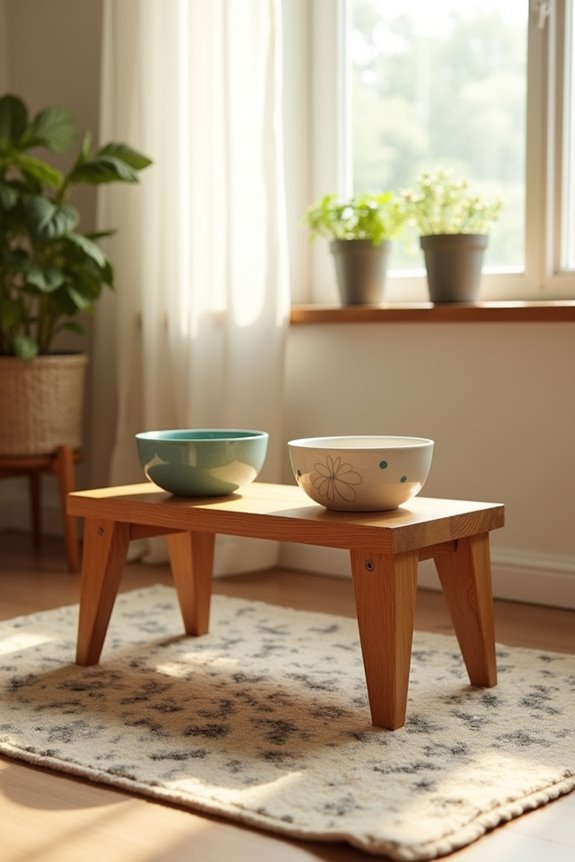
Do you want your pup to dine in style while also making mealtime easier for them? This DIY elevated dog bowl stand isn’t only super useful but also budget-friendly! By creating your own, you save money and add a customized touch to your home décor. Trust me, your furry friend will appreciate the extra comfort, and you’ll love the boost in style. Furthermore, using an elevated stand can help prevent digestive issues associated with dogs eating from ground-level bowls. In fact, luxury elevated dog bowls provide a perfect solution to enhance your pet’s dining experience. It’s also a great idea to incorporate emotional support dog accessories to ensure your pet feels secure and valued while eating.
Materials Needed:
- 2 ceramic bowls (the size should match your dog’s needs)
- 1 piece of wood (e.g., pine or plywood, roughly 2 feet long for medium-sized dogs)
- Sandpaper (medium grit for smoothing the wood)
- Paint or wood stain (optional, for added flair)
- Wood screws (if using legs or planks to elevate)
- 4 wooden legs (about 2-4 inches tall based on your dog’s size)
- Drill with drill bits
- Measuring tape
- Paintbrush (if using paint or stain)
- Clear sealant (optional, for added durability)
Step-by-Step Instructions:
- Measure Your Dog: Start by measuring your dog’s height. This helps you determine how tall the stand should be for comfortable eating. Aim for the bowl to be at their shoulder height or slightly lower.
- Cut Your Wood: If necessary, cut your wooden piece to suit the size you measured. If you’re using legs, make sure they’re the right height. If you’d like a simple rectangular stand, you can skip the legs.
- Sand the Edges: Smooth out any rough edges on your wood using sandpaper. You don’t want sharp bits scratching your pup or yourself during mealtime chaos.
- Finish the Wood: If you want to jazz it up, apply paint or stain to the wood. Let your creative side shine! A nice color or cool design can really make the stand pop. Don’t forget to let it dry according to the instructions on the product you chose.
- Attach the Legs: If you’re using legs, drill holes at each corner of the wooden base. Secure each leg with screws. If you opt for no legs, just verify the height is perfect for your pooch!
- Add Bowls: Place the ceramic bowls on the stand. Adjust their positions to guarantee they’re centered and steady. Voila! You now have a stylish feeding station.
- Seal it Up: For extra durability, spray on a clear sealant and let dry completely. This helps with spills and keeps the stand looking fresh.
Optional Add-ons/Variations:
- Personalization: Consider using different wood types or colors to match your interior design. You could even add your dog’s name using a stencil for that extra personal touch.
- Bowls with Fun Patterns: Mix and match your ceramic bowls! They can have fun patterns or colors that reflect your pup’s personality.
Pro Tip:
Make sure to double-check the height of the bowl after assembly. You want it just right for your dog, not too high that they strain, and not too low that they’ve to bend too far down. A little comfort goes a long way in keeping your pup happy during mealtime!
2. Adjustable Metal Bowl Holders

Looking for a way to make your pup’s dining experience both functional and stylish? Check out these adjustable metal bowl holders! Not only do they help reduce clutter, but they also elevate your dog’s meal to a comfortable height, guaranteeing your furry friend enjoys every bite without straining. Plus, they’re often easier to clean than traditional bowls. So, whether you’re tight on space or just want an upgrade, these bowl holders can enhance your dog’s dining experience while saving you some bucks.
To ensure that your dog’s food stays fresh and healthy, consider investing in a dog food storage cabinet.
Materials Needed:
- Adjustable metal frame (most come with a simple assembly guide)
- Two stainless steel bowls (look for a non-tip design that fits your frame)
- Measuring tape (to guarantee the right height for your pup)
- Wrench or screwdriver (depending on your frame assembly)
- Optional: Anti-slip pads (for added stability)
Step-by-Step Instructions:
- Choose the Right Height: Measure your dog’s height to determine the best bowl height. A good rule of thumb is to set the bowls at shoulder height, or a bit lower for comfort.
- Assemble the Metal Frame: Follow the instructions included with your adjustable metal bowl holder. Most frames come with easy-to-follow steps—think furniture assembly without the Allen wrench struggles. Just make sure everything is tight and sturdy.
- Add the Bowls: Once your frame is secure, place the stainless steel bowls into the frame. Adjust the height if necessary—you want them to be snug, but not tipping over at the slightest nudge.
- Stabilize It: If you’re gripping a bowl holder that feels a bit wobbly, consider using anti-slip pads on the feet. They can help keep the whole setup steady, especially if your pup is a vigorous eater.
- Check for Comfort & Safety: Give it a once-over. Make sure the bowls are easy to access, and don’t forget to make any final height adjustments so your pup can eat comfortably.
Optional Add-ons/Variations:
- Customize the Color: Spray paint the metal frame to match your home décor or your pup’s personality. A pop of color can make the feeding area more fun!
- Add a Feeding Mat: Consider placing a cute feeding mat beneath the frame. Not only does this catch any spills, but it also adds a layer of style.
Pro Tip:
Consider adjusting the height as your pup grows. If you have a puppy, you might want to keep checking in every few months to guarantee they’re still comfortable while they munch. And don’t forget about the durability of those stainless steel bowls—they’re easier to clean and generally last longer than plastic, which can scratch and harbor bacteria.
3. Personalized Engraved Wooden Stands
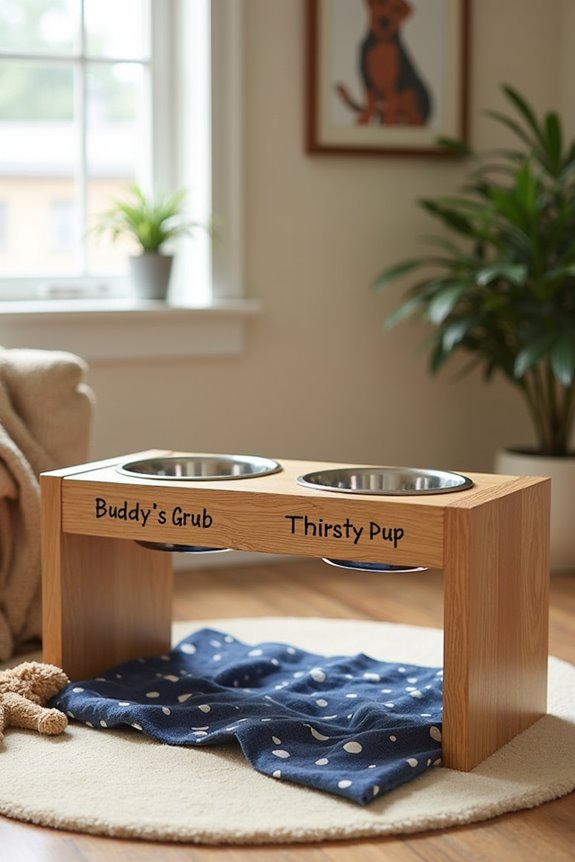
Looking for an adorable way to elevate your dog’s dining experience? Personalized engraved wooden stands are perfect! Not only do they add a touch of charm to your home, but they also allow you to showcase your pup’s unique personality.
Plus, they save you money compared to store-bought options while providing a special custom feature that makes it extra special.
Materials Needed:
- Wooden board: Choose a durable type like pine, oak, or birch.
- Wood engraver or stencil kit: Depending on how personalized you want it to be.
- Wood finish or sealant: To protect the wood and keep it looking great.
- 2 sturdy metal bowls: Make sure they’re not too heavy; light stainless steel works well.
- Measuring tape: To guarantee the right dimensions for your stand.
- Saw: For cutting the wood, if necessary.
- Sandpaper: To smooth any rough edges.
- Drill: For making holes for the bowls, if you’re setting them into the stand.
Step-by-Step Instructions:
1. Measure & Cut the Wood****: First, determine the size of your stand based on your dog’s bowl size. A good base is about 2-3 inches wider than the bowl’s diameter. Cut the board accordingly if needed.
Want to feel like an architect? Grab your measuring tape and mark it really loud, then cut with confidence.
2. Sand the Edges: Use sandpaper to smooth any rough edges. You don’t want your pup to be startled by unexpected splinters while chowing down—since they might think you set a trap with all that drama.
3. Engrave Your Design: Use a wood engraver or stencil kit to add a personalized touch. This could be your dog’s name, a cute phrase, or even their favorite snack.
Make sure you take it slow, or else you’ll accidentally engrave “I love cats” when you meant “Best Pup Ever.”
4. Finish the Wood: After engraving, apply a wood finish or sealant to protect your creation. It helps keep the wood from getting waterlogged during mealtime.
Let it dry completely, which you can do while sharing some snacks with your favorite furball.
5. Create Bowl Holes (Optional): If you want the bowls to sit firmly in the stand, drill holes to secure them.
Make sure they’re just the right size—too small, and the bowls won’t fit, too large, and you have a mess.
6. Add the Bowls: Place the bowls in their designated spots. Adjust them as needed; you want them to sit snugly without tipping over at the slightest nudge (cue the puppy twirl during feeding time).
7. Set It Up: Place your stylish stand in your chosen feeding area. Check that everything looks good, and watch for your pup to make their grand entrance.
Optional Add-ons/Variations:
– Paint or Stain: Want a pop of color? Use a wood-safe Paint or Stain that matches your home decor. You can even go with a fun pattern, like polka dots or stripes.
Just remember, some dogs have a flair for the dramatic too; they might need the fancier options.
– Personalized Mat: Pair the stand with a matching feeding mat to complete the look. It’s a great way to catch any spills or crumbs that may occur during the enthusiastic dining experience.
Pro Tip:
If you’re unsure about the height, make the stand adjustable by creating a two-level system using wood blocks.
This way, as your puppy grows, you can raise the bowls without needing an entire remodel. Who knew DIY could be so future-proof?
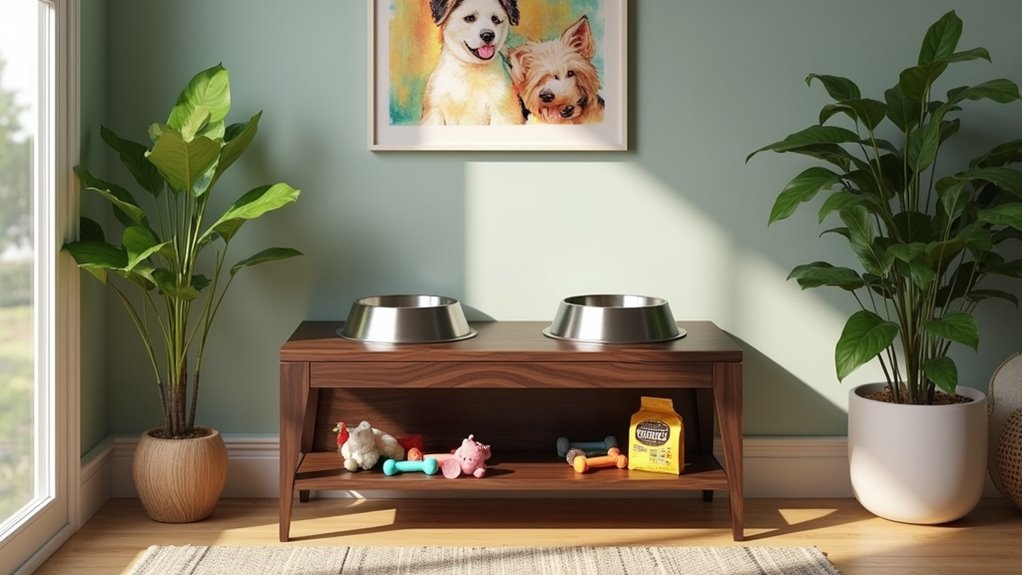
4. Raised Glass Bowl Holder
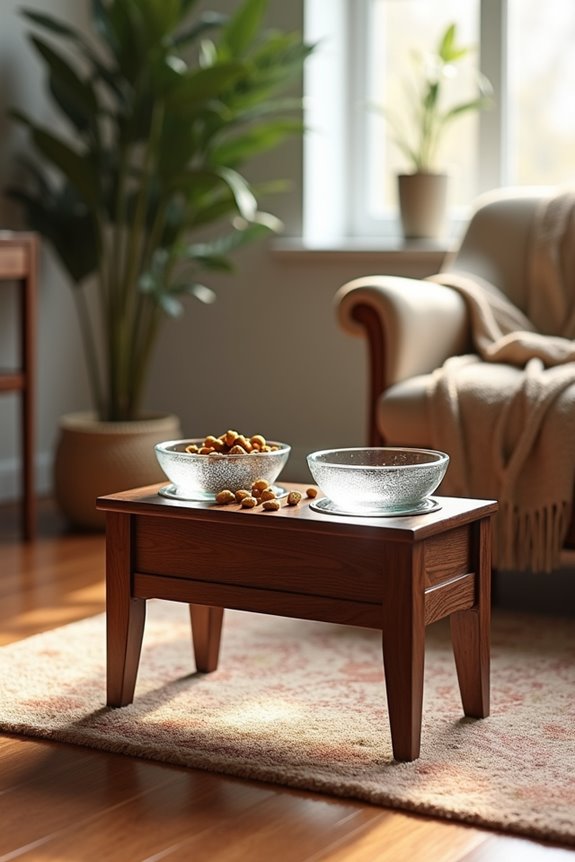
Say goodbye to clumsy feeding sessions and hello to mealtime elegance with a raised glass bowl holder! This DIY project elevates your dog’s dining experience while preventing mess and spills.
Plus, it adds a modern touch to your space—because who says dog decor can’t be stylish? And let’s be real, your floor will thank you for this brilliant idea.
Materials Needed:
- Wood planks: Choose a sturdy type like oak or walnut; they’ll be your base.
- Glass bowls: Look for bowls that are the right size for your pup—preferably with a wide rim for stability.
- Wood glue: Get ready to bond your masterpiece.
- Screws (optional): For extra sturdiness, you might want to secure everything down.
- Measuring tape: Accuracy is key, or you risk creating a wobbly dinner table.
- Saw: If you need to cut the wood planks to size.
- Sandpaper: To make everything nice and smooth—no one wants splinters during dinner.
- Drill (optional): For adding screws if you go that route.
Step-by-Step Instructions:
- Measure & Cut the Wood: Decide how tall you want the holder to be (generally about 4-6 inches works great for most pups). Cut your wood planks into four legs and two top pieces that will hold the glass bowls. Make sure your top pieces are slightly larger than the bowls so they sit nicely.
- Sand Those Edges: Run the sandpaper over every edge and surface. You want those legs to be smooth and splinter-free. Your dog deserves a luxurious dining experience, not a rough one.
- Assemble the Structure: Lay out the two top pieces parallel to each other, then attach the legs using wood glue. If you want a super sturdy holder, drill pilot holes and use screws for added strength. Just make sure they aren’t too long or you might poke through the top.
- Secure the Bowls: Once the structure is dry, place your glass bowls onto the top pieces. If they slide around too much, you could add some rubber pads to the bottom of the bowls or a bit of non-slip tape underneath for stability.
- Finishing Touches: You can choose to stain or paint the wood for an extra pop of color, or leave it natural for that rustic vibe. Just keep in mind to use pet-safe products to keep your furry friend safe.
- Load Up with Food: Now, place your pup’s favorite food and water into the glass bowls, and watch them feast in style. Trust me, you’ll feel like the proud parent of a culinary connoisseur.
Optional Add-ons/Variations:
- Color Pop: Use leftover wood stains or paint to match your home décor or your dog’s personality. Want a bold look? Try bright colors like turquoise or sunny yellow.
- Personal Touch: Add some engraving or stencils with your dog’s name on the sides of the holder for that extra special touch. It’s a little like giving your pup their own restaurant!
Pro Tip:
To extend the life of your wooden holder, treat it with a non-toxic wood conditioner every few months. This keeps it waterproof and prevents any food or water from seeping into the wood.
After all, no one wants a squishy dinner table, right? Plus, a little TLC goes a long way in keeping your DIY looking fabulous.
5. Colorful Silicone Mat Set
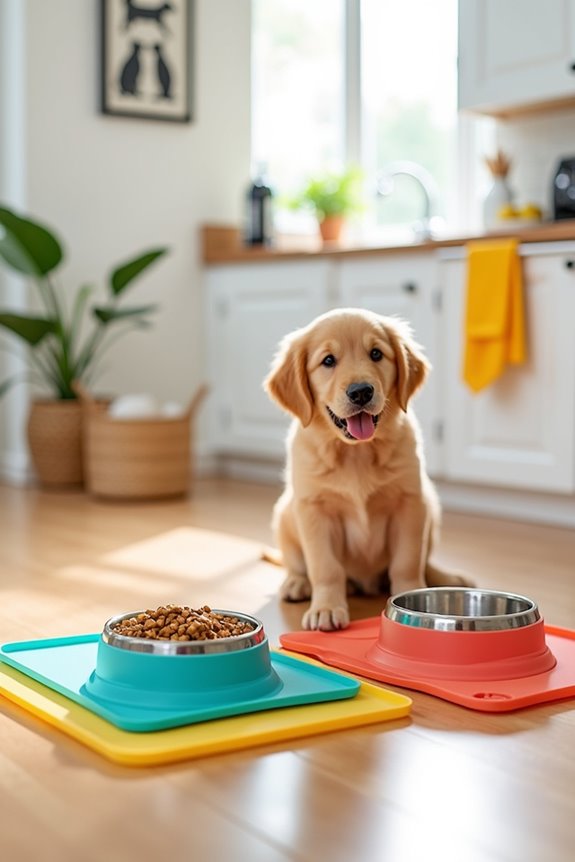
Are you tired of the mess your pup leaves behind during mealtime? A colorful silicone mat set is the perfect solution to keep those food and water spills at bay. Not only does it help keep your floors clean, but it also adds a vibrant splash of color to your home decor. Trust me; you’ll be wondering why you didn’t do this sooner.
Materials Needed:
- Silicone mats: Choose a set that fits your dog’s bowl size.
- Warm soapy water: For a quick clean-up after meals.
- Non-slip tape (optional): In case you want extra stability.
- Decorative paint (optional): If you want to personalize your mats.
Step-by-Step Instructions:
- Choose Your Mats: Pick a set of silicone mats in colors that match your home or your pup’s personality. These are flexible, easy to clean, and can really brighten up your space.
- Prepare Your Area: Before placing the mats, make certain the surface is clean and dry. This will prevent any unwanted slips or slides.
- Place the Mats: Simply put the silicone mats on the floor where you normally feed your dog. Ascertain they’re large enough to catch any stray kibble or spilled water. You want to give your furry friend enough room without leaving the mess to go free range.
- Add the Bowls: Set your dog’s food and water bowls on the mats. For added security, consider putting non-slip tape underneath the mats, so they don’t move around while your dog dines.
- Enjoy Easy Clean-Up: After your pup has demolished their meal, simply lift the mats and rinse them off with warm soapy water. Let them air dry, and you’re set for the next grub session. No need for a mop—you can enjoy more playtime instead.
Optional Add-ons/Variations:
- Decorate Your Mats: If you’re feeling artsy, you can use decorative paint to personalize your silicone mats with fun designs, paw prints, or even your dog’s name. Just verify any paint used is non-toxic and safe for pets.
- Mix and Match Colors: Create a fun palette by combining multiple colors in one feeding area. This way, you can switch them out periodically for a fresh look.
Pro Tip:
Always make it a point to check the mats for any wear and tear every so often. Silicone is durable, but it can get worn out over time, especially with enthusiastic eaters.
Keeping a few extra mats on hand can save you from unexpected messes when your current set reaches the end of its cute little life. And trust me; you don’t want to hear your dog’s dramatic huff when you’re out of clean mats on a busy day.
6. Non-Slip Rubber Bowl Base
Are you tired of watching your dog’s bowl slide around during mealtime? If your adventurous pup likes to dance while dining, a non-slip rubber bowl base is just the solution. This quick and easy DIY project won’t only keep your dog’s bowls in place but will also save you from endless spills and messes. Trust me, it’s a game changer for any dog owner.
Materials Needed:
- Rubber sheet or non-slip material: Look for something durable and easy to cut.
- Scissors: To cut your rubber into the right shape and size.
- Measuring tape: To verify you have the right dimensions.
- Pencil or chalk: For marking measurements on the rubber.
- Dog bowls: Make sure you have the bowls you want to use on the base.
Step-by-Step Instructions:
- Measure Your Bowls: Take your measuring tape and measure the diameter of your dog’s bowls. You want to verify that the rubber base can fit comfortably underneath.
- Cut the Rubber: Using your scissors, cut the rubber sheet into a circle that’s about 2 inches larger than the diameter of your bowls. This extra bit of rubber will provide enough grip to keep it from sliding.
- Test the Fit: Place your dog’s bowl onto the rubber base to make sure it fits snugly. If it’s too tight or too loose, make adjustments as needed by cutting more or trimming edges.
- Add the Bowls: Once you’re satisfied with the size, place the dog bowls on the non-slip base. Give them a gentle push to verify they don’t budge. You should see an instant improvement in stability.
- Enjoy Mess-Free Mealtime: When your furry friend dives into their food, you can sit back and relax, knowing that the bowls won’t be going on any wild adventures across the floor.
Optional Add-ons/Variations:
- Color Customization: If you want to jazz up your rubber base, you can paint it with non-toxic spray paint in your favorite colors or even create fun patterns. Just make sure the paint is safe for pets.
- Adhesive Grip Dots: For an even sturdier grip, consider adding adhesive rubber grip dots around the perimeter of the base. These little dudes can give your bowls extra staying power and are super easy to apply.
Pro Tip:
Always clean the rubber base regularly to keep it from collecting crumbs or hair. If it gets super grimy, a little soap and water will do the trick. Plus, a well-maintained rubber base can last much longer.
No one wants to make more rubber bases than necessary—your time is better spent playing fetch, am I right?
7. Customizable Height Adjustable Stands
Are you ready to take your dog’s dining experience to the next level? A height-adjustable dog bowl stand not only makes mealtime more comfortable for your furry friend but also adds a touch of charm to your home decor.
If you’ve ever seen your pup awkwardly bending down to reach their food, you know this DIY project is a game-changer. Plus, making your own stand can save you money while giving you the freedom to customize it to match your style. Let’s explore this!
Materials Needed:
- Wood Boards: Two pieces for the top and bottom, plus four pieces for the legs (1x4s work great!)
- Wood Screws: To hold everything together securely.
- Drill: For making holes and driving in screws.
- Sandpaper: To smooth out rough edges.
- Wood Finish or Paint: For that personal touch.
- Measuring Tape: To guarantee accuracy.
- Saw: To cut your wood to size (a miter saw is ideal, but a hand saw will do).
- Level: To make sure your stand is straight.
- Dog Bowls: The ones you want to use with your new stand.
Step-by-Step Instructions:
- Measure and Cut the Wood: Start by determining the ideal height for your dog bowl stand. A general rule of thumb is to have the bowls at your dog’s elbow height. Cut your wood pieces to length, remembering to account for the thickness of the top and bottom.
- Sand the Edges: After cutting, use sandpaper to smooth out all the sharp edges. You don’t want Fido getting hurt while dining, do you?
- Assemble the Frame: Use wood screws to attach the legs to the underside of your top wooden board. Make sure everything is secure and sits at the right height. This is where the level comes in; check it from all angles.
- Attach the Bottom Support Board: This board will stabilize the stand and prevent wobbling. Screw it in place, ensuring it’s parallel to the top.
- Finish It Off: Now that your stand is built, it’s time to personalize it. Apply your chosen wood finish or paint. If you’re feeling creative, consider adding custom designs or stencils to really make it pop.
- Set Up and Test: Once dry, place your dog bowls in the stand, checking that they sit at the right height. Make adjustments if needed, guaranteeing everything feels stable.
- Let Your Dog Enjoy: Place the stand in your desired location and watch your pooch savor their meals without the awkward bending!
Optional Add-ons/Variations:
- Include a Feeding Station: If you like the idea of multi-tasking, add a bottom shelf to hold kibble or toys, keeping everything neat and accessible.
- Color Pop: Don’t just stick to basic wood or paint; think about using fun colors or even patterned contact paper to give your stand some personality.
Pro Tip:
When selecting your height, consider your dog’s growth. If you have a puppy, you might want to choose adjustable legs or use wood blocks that can be added or removed as they grow.
It’s a simple way to make sure you don’t have to build a whole new stand a few months down the line.
With this DIY project, not only do you get a custom stand that fits your decor, but you also create a super comfy eating experience for your pup. Now that’s what I call a win-win situation. Happy crafting!
Extra Tips & Ideas
While you’re jazzing up your dog’s dining experience with elevated bowls, why not sprinkle in a few extra touches that show off their personality?
Think about adding personalized bowl mats that match your décor—maybe one with a quirky saying like “Paw-sitively Delicious.” You could even use vibrant colors or patterns that reflect your dog’s character.
Don’t forget to switch out food and water bowls based on the season; it’s fun and keeps things fresh.
And how about a cute accessory—like a little sign with their name? Just make sure it’s not hanging too low; you don’t want them thinking it’s an invitation to chew.
Little details, right? They can turn a simple setup into something extra special.
Frequently Asked Questions
What Materials Are Commonly Used for Elevated Dog Bowl Designs?
Common materials for elevated dog bowls include stainless steel for durability, ceramic for easy cleaning, and plastic for lightweight options. You’ll find wood or metal frames providing sturdy support and enhancing aesthetic appeal in various designs.
Can Elevated Bowls Help With My Dog’s Digestion?
Yes, elevated bowls can help with your dog’s digestion. They promote a more natural feeding posture, reducing strain on their neck and improving the flow of food, which may lead to better digestion overall.
How Do I Choose the Right Height for My Dog?
Most dogs benefit from bowls about their elbow height. Measure your dog’s height while standing, then subtract about six inches for comfort. This can minimize strain, helping guarantee your pup enjoys mealtime without discomfort.
Are There Any Specific Bowl Sizes for Different Dog Breeds?
Yes, different dog breeds can benefit from specific bowl sizes. Smaller breeds typically need bowls with a diameter of 4-6 inches, while larger breeds may require bowls ranging from 10-12 inches for comfortable eating.
How Can I Ensure the Stability of the Elevated Bowl Stand?
To guarantee stability, you’ll want to anchor the elevated bowl stand like a ship’s anchor in a storm. Use heavy materials, guarantee a broad base, and place it on a level surface to prevent tipping.
Conclusion
So, whether you’re looking to jazz up your home or just want your pup to dine in style, there’s an elevated bowl design that fits your vibe. Seriously, why settle for boring when you can add some flair? Think about it—a chic bowl stand could be the difference between a ho-hum feed time and an Instagram-worthy moment. Your furry friend deserves a dining experience that’s as fabulous as they are. Plus, who doesn’t love a little home decor that sparks joy?

Hi, I’m Ali Tarek, the founder of Animalsman. I’ve always been passionate about pets, especially dogs and cats, and I created this website to share practical tips, easy recipes, and helpful care advice for fellow pet lovers. My goal is to make pet care simple, enjoyable, and accessible for everyone. When I’m not writing or curating content, you’ll usually find me spending time with my furry friends or learning new ways to keep them happy and healthy.

