Looking for ways to spice up playtime with your pup? You’ve hit the jackpot. DIY interactive dog toys not only keep your furry friend entertained, but they’re also easy to make and often cost next to nothing. Think old T-shirts or discarded plastic bottles can’t transform into fun? Think again. With just a bit of creativity and some basic supplies, you can create engaging toys that’ll have your dog wagging their tail and begging for more. What’s next on this crafty journey?
Innovative Fetch Game Variations
If you ever thought fetch was getting a little stale, you’re not alone. Your dog might be yawning at the same old game.
Why not mix things up with some innovative fetch variations? Try creating a DIY interactive dog toy that involves a hidden treat within a ball or a tug rope with enticing squeaky ends. You could even toss in some shiny, reflective materials to get their attention.
Ever thought of a fetch game involving water? That’s a splashy twist! Simply fill a kiddie pool with floating toys for your pup to fetch.
Imagine the wagging tails and joyful barks! After all, a little creativity can turn a mundane game into an exciting adventure that keeps both you and your pup engaged.
Our Collection
Now that you’ve got those fun fetch games under your belt, let’s explore our collection of DIY interactive dog toys.
From a tug-of-war rope toy that’ll test your pup’s strength to a treat-dispensing puzzle that’s sure to keep them engaged, there’s something for every furry friend.
Don’t forget the squeaky ball toss toy and the floating water fetch toy for those sunny days—your dog’s tail will be wagging before you know it.
1. Tug-Of-War Rope Toy
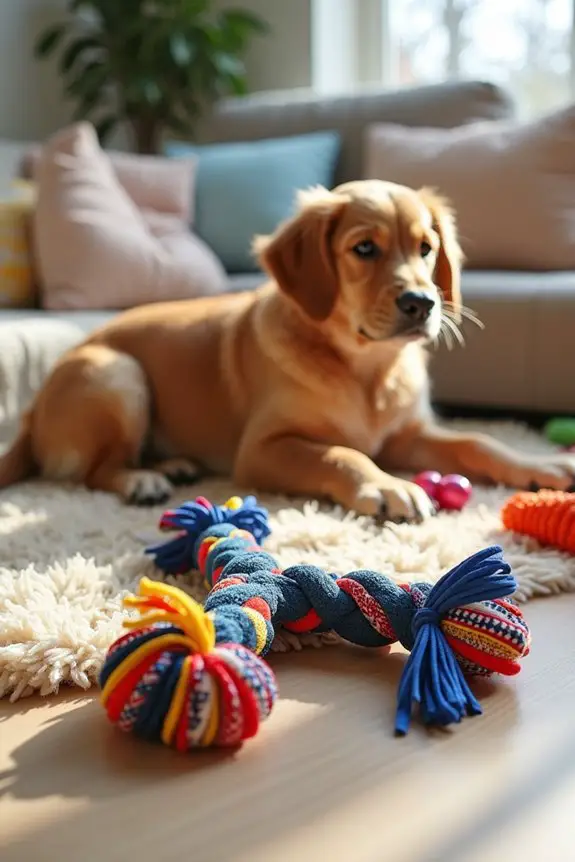
Do you have a playful pup that just loves a good tug-of-war? Creating your very own tug-of-war rope toy isn’t only a fun DIY project but also a fantastic way to keep your furry friend entertained without breaking the bank. Plus, you can feel great knowing you made it yourself, right? So let’s get started on this simple yet rewarding adventure!
Materials Needed:
- 3 strips of fabric (old T-shirts or towels work great)
- Scissors
- A ruler or measuring tape (optional, if you want to be precise!)
- A lighter or match (optional for sealing fabric ends)
- Tape (to keep fabric in place while you braid, optional)
- A guiding hand (optional, if you have kids or a partner who’d love to help out)
Step-by-Step Instructions:
1. Prepare the Fabric: Cut your T-shirts or towels into three long strips, each about 1-2 inches wide and at least 30 inches long. If your fabric stretches, make it a bit longer to compensate.
2. Gather the Strips: Lay the three strips together so they’re side by side, making sure the ends are aligned. You can totally enlist a helper to hold them in place—teamwork makes the dream work!
3. Braid Away: Start braiding the strips together like you’re mastering a hairdo. Grab the right strip and cross it over the middle strip, then take the left strip and cross it over the new middle strip.
Repeat this until you reach the end. If you’re feeling like a DIY superstar, you can even throw in some funky braiding styles.
4. Secure the End: Once your braiding is complete, tie the end of the rope tightly with an extra piece of fabric (or even a knot for a simple finish). Snip any excessive fabric so it looks neat.
You could use a lighter to seal the ends, preventing fraying if you’re extra careful.
5. Give it a Tug: Grab your new toy and tug away! Encourage your dog to join in the fun. Your pooch is bound to love it—why not start the competition?
6. Play Safely: As your dog pulls and tugs, keep an eye on the toy for wear and tear. Replace it as needed to keep playtime safe and risk-free.
Optional Add-ons/Variations:
Want to jazz it up a bit? You can certainly customize this tug-of-war toy! Consider using multiple colors of fabric for a vibrant look. Aside from being enjoyable, these DIY toys provide an opportunity to showcase your crafting skills while ensuring your dog’s happiness.
Or, if you’re feeling crafty, you can braid in some knots for extra texture! It’s a great way to give your pup extra grip when they’re working hard to win.
Pro Tip:
Before you start, make sure the fabric you choose is durable—but also soft enough not to hurt your pup’s teeth. A quick check on the quality of your material can save you from some toothy tears down the road.
And remember, if your dog’s playing hard, inspect the toy regularly. We want tug-of-war time to be all fun and no fluff!
Additionally, consider offering some homemade treats after a fun play session—these will surely complement the dog treat variety pack as a reward for your furry friend!
2. Squeaky Ball Toss Toy
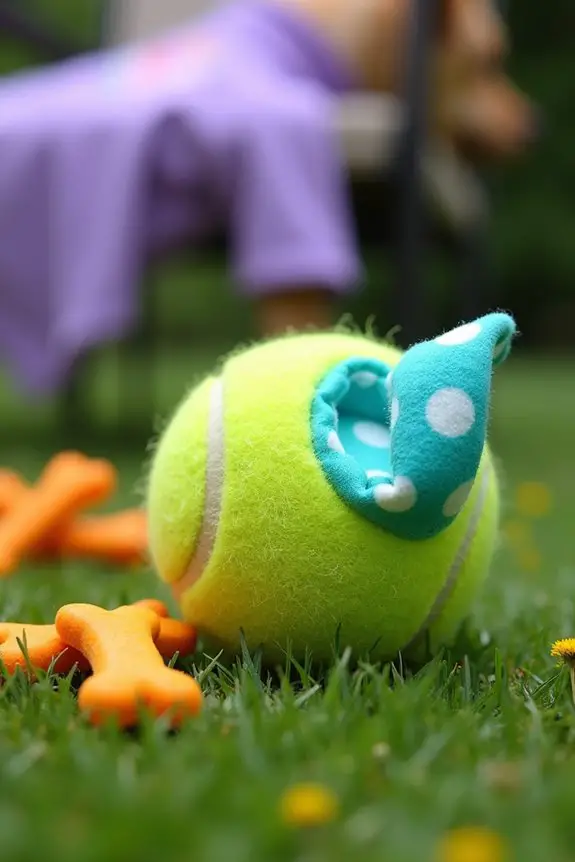
If you’re on the hunt for a fun DIY project for your pup, search no further than this Squeaky Ball Toss Toy! It’s a simple yet brilliant way to keep your dog engaged and active, all while saving some cash. You can also consider dressing your dog in designer dog clothes for an even cuter outdoor experience. When it comes to keeping your pitbull healthy, feeding them premium dog food for pitbulls is essential for their overall wellbeing.
Who doesn’t love a squeaky toy that you can whip up at home, right? Plus, it’s a fantastic outlet for all that playful energy your canine friend has. Let’s get those tails wagging!
Materials Needed:
- A tennis ball (or any bouncy ball)
- A fabric strip (like an old T-shirt or fleece)
- A pair of scissors
- A needle and thread (or glue gun for a no-sew option)
- A squeaker (optional, for an extra surprise)
- A creative mind (yours!)
Step-by-Step Instructions:
- Create the Opening: Carefully cut a small slit in the tennis ball, about an inch long (that’s where the fun begins). Be sure not to slice it all the way through. A little finesse goes a long way.
- Squeaker Surprise: If you have a squeaker, it’s time for it to shine. Simply stuff it into the opening in the tennis ball. You can use an old squeaky toy’s innards or purchase squeaker inserts. Your dog won’t know what hit ’em.
- Prepare the Fabric Strip: Cut your fabric strip to about 24-30 inches long. If you have a long-haired furball, make it longer for those epic tossing sessions.
- Insert the Fabric: Take one end of the fabric strip and push it through the slit in the ball. Make sure at least half of the strip is sticking out. This will act as the perfect handle for your throws.
- Secure the Accessory: If you’re feeling crafty, you can sew or glue around the cut opening to make it extra secure. Just a couple of stitches or a bead of glue should do the trick. Remember, doggy enthusiasm can be intense!
- Give it a Toss: Test your new creation by tossing it for your pup. Watch those little legs spring into action. Who knew DIY could ignite such joy?
- Check the Safety: As always, keep an eye on your pup while they play. Inspect the toy regularly for any wear. Safety first, right?
Optional Add-ons/Variations:
Want to up your toy game? Try using colorful fabric strips that contrast with the ball for a snazzy look.
Or, how about adding treats inside the ball before sealing it? It’s like a two-for-one special: squeaky fun and snack time all rolled into one!
Pro Tip:
To save time, cutting multiple fabric strips at once can speed up the process. And if you’ve got any non-toxic fabric paint lying around, why not personalize the outside of the ball? A little flair might just make your pup’s new favorite toy stand out in the toy box!
With this DIY Squeaky Ball Toss Toy, you’re not just making a toy; you’re crafting moments of joy and play with your furry companion. Additionally, consider pairing this project with luxury dog food options that can enhance your Yorkie’s mealtime experience.
That pure, unbridled happiness? Priceless.
3. Treat Dispensing Puzzle Toy
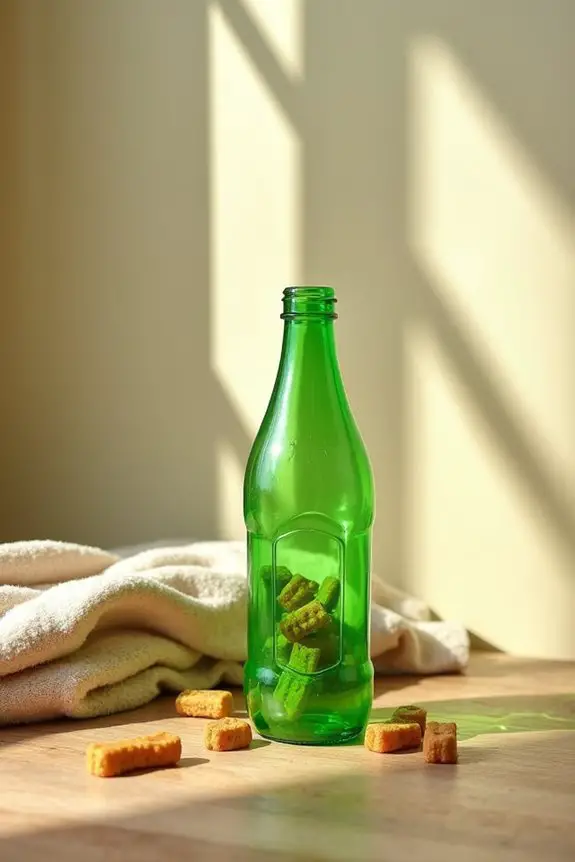
If you’re looking to keep your furry friend mentally stimulated while also providing a delicious reward, this DIY Treat Dispensing Puzzle Toy is just the ticket. Not only does it redirect some of that wild energy into problem-solving playtime, but it also saves you a trip to the pet store (and some bucks). Plus, who doesn’t love seeing their dog engage in a little self-made challenge? Let’s jump in.
Materials Needed:
- A plastic bottle with a cap (empty soda or water bottle is fine)
- Dog treats or kibble
- Scissors or a cutting tool
- Sandpaper (optional, for smoothing edges)
- A towel for easy clean-up (this could get messy!)
Step-by-Step Instructions:
- Prep the Bottle: Start by washing out your plastic bottle to get rid of any leftover residue. Dogs aren’t fans of carbonation, trust me.
- Create Treat Outlets: Using your scissors, carefully cut small holes around the side of the bottle. Aim for 4-6 holes, about the size of a quarter, so treats can spill out but not completely fall out at once. Be cautious while cutting – we don’t want any accidents here.
- Smooth the Edges: If your cuts are a little rough, using sandpaper to smooth them out reduces the risk of your pooch getting any cuts on their paws or tongue. We don’t want inquisitive noses getting hurt now, do we?
- Fill ‘Er Up: Toss in some dog treats or kibble. The more variety and crunch, the better the challenge! You want to see your pup twist and turn to get those goodies out.
- Seal the Deal: Put the cap back on the bottle. If your dog is known for being a master escape artist, consider gluing the cap shut, so they don’t get excited and help themselves too early.
- Supervised Fun: Give the puzzle bottle to your dog and watch as they figure it out. It’s like you’ve become the proud parent of a doggie genius. Just keep an eye on them to guarantee they’re playing safely!
- Clean-Up Check: This can get a little messy with treats rolling around, so be prepared to sweep up a few crumbs. Consider using that handy towel to catch any stray treats while they play.
Optional Add-ons/Variations:
Want to add some flair to your puzzle toy? Try decorating the bottle with non-toxic tape or stickers. You could even use a colorful bottle to elevate the cuteness factor.
Feeling extra crafty? You can layer kibble with different treat sizes to create levels of difficulty for your pup.
Pro Tip:
For a cost-saving twist, why not repurpose old plush toys with squeakers? Cut a slit, hide treats inside, and voilà, instant puzzle! Just like that, your dog’s new favorite toy is ready to go without breaking the bank.
4. Floating Water Fetch Toy
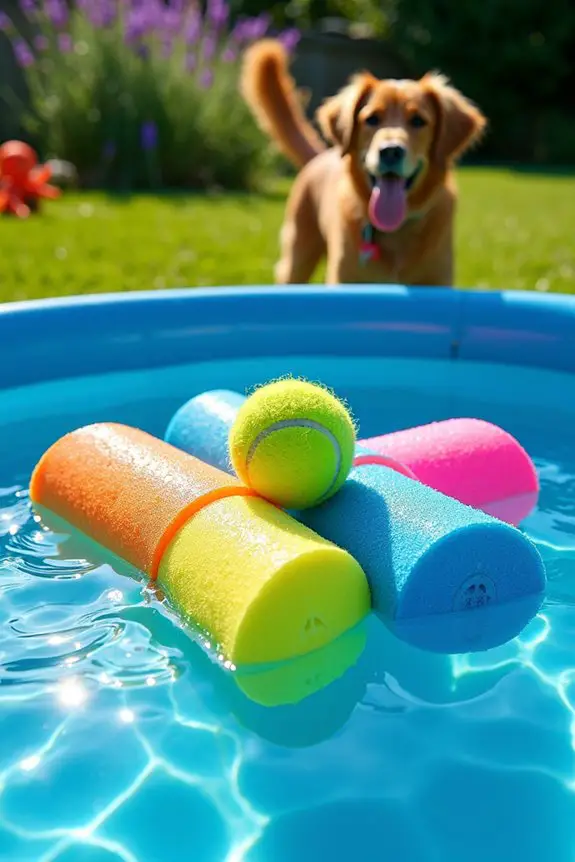
Water-loving pups are always ready for a splashy good time, so why not up the fun factor with a DIY Floating Water Fetch Toy? This easy project keeps your dog active in the water, which means happy tails and lots of bonding time.
Plus, making your own toy saves you a trip to the pet store and some extra bucks. Let’s get those tails wagging with creativity.
Materials Needed:
- A foam pool noodle (the more colorful, the better!)
- A pair of scissors
- A dog-friendly retrieval item (like a tennis ball or a squeaky toy)
- Non-toxic adhesive or duct tape (just in case)
- A marker (to make markings easy)
Step-by-Step Instructions:
1. Cut the Noodle: Using your scissors, slice the foam pool noodle into about 12-inch segments. You can make them longer or shorter, but 12 inches tends to be just right for tossing and fetching.
Avoid your fingers—safety first!
2. Make a Center Hole: Take one of the noodle segments and cut a small slit (about 1 inch deep) lengthwise down the center.
The idea here is to create a spot for your dog-friendly retrieval item to sit snugly inside.
3. Insert the Toy: Now, slide your tennis ball or squeaky toy into that slit you just created.
If it’s loose, use your non-toxic adhesive or duct tape to seal it up a bit so that the toy stays put while your pup is tugging and fetching.
4. Customize It: Feel free to grab that marker and add some designs or your dog’s name on the toy.
If you’re feeling artsy, you could also decorate the noodle with paint, but be sure it’s non-toxic.
5. Test it Out: Toss the floating toy into a shallow area of the water (think kiddie pool for starters or even a lake if your dog is water-savvy).
Watch your dog go wild! You’ll laugh and cheer as they gleefully retrieve their new aquatic treasure.
6. Supervised Playtime: Just like any new toy, keep an eye on your pup during their first few fetches.
We want to make sure they’re having fun and staying safe, right?
Optional Add-ons/Variations:
Feel like jazzing things up? Consider adding a few colors to your foam noodle using washable paint.
You can even cut multiple noodle segments, attach them with extra tape, and create a multi-float toy for group play.
Another thought—how about using a frisbee or a rubber bone instead of a tennis ball? It’ll keep things interesting!
Pro Tip:
To guarantee maximum buoyancy, be sure to select sturdy, lightweight retrieval items—those that are meant for water games.
Heavy toys may sink, and we wouldn’t want our pup to feel discouraged. An added safety precaution: always supervise your dog to prevent any accidental swallowing of small parts.
A little vigilance goes a long way in keeping our furry friends safe.
5. Interactive Snuffle Mat
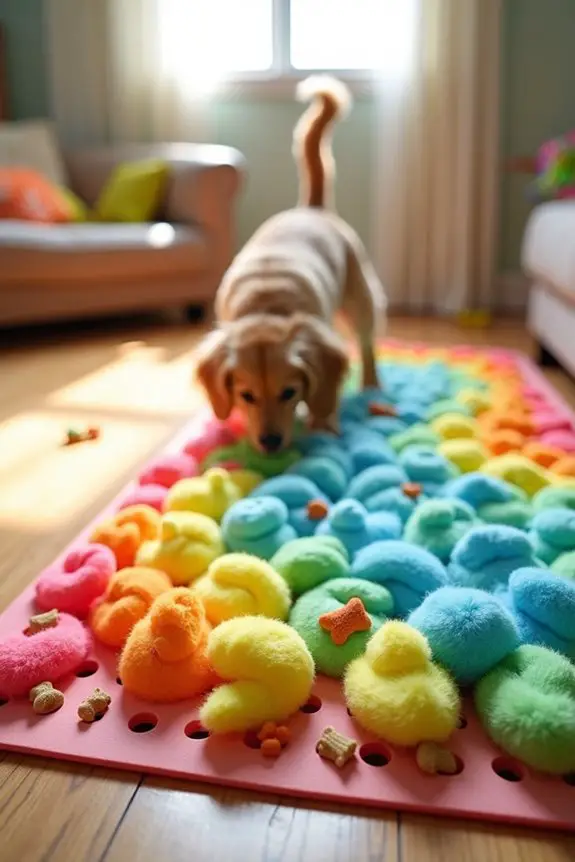
Do you want to keep your furry friend entertained while engaging their natural instincts? A DIY Interactive Snuffle Mat might just be the perfect solution. This playful project encourages your pup to use their nose to find treats, turning mealtime into a mental adventure.
Plus, it’s an easy and budget-friendly way to keep your dog mentally stimulated and prevent boredom. Ready to snuffle away?
Materials Needed:
- A rubber sink mat (one with holes, available at most dollar stores)
- Fleece fabric (in various colors)
- Scissors (don’t forget your trusty pair)
- Treats or kibble (your dog’s favorite snack)
- A ruler (optional, to measure fabric)
Step-by-Step Instructions:
1. Cut the Fleece: Grab your scissors and cut the fleece into strips about 1-2 inches wide and 6-8 inches long. You can mix and match colors to make it vibrant—think tie-dye for dogs!
You’ll need a bunch of these strips, so put on some fun music and enjoy the snipping.
2. Start Weaving: Take one fleece strip and start threading it through a hole in the sink mat. Pull it halfway through, then create a loop by going back down through the same hole.
It’s like teaching your pup a whole new way to dig!
3. Fill it Up: Keep weaving those strips through the mat until all the holes are filled. You want it to look fluffy and inviting, like a colorful patchwork blanket.
The more fabric you use, the more challenging it’ll be for your pup.
4. Hide the Treats: Once you’ve finished stuffing the mat, it’s time to sprinkle some tasty treats or kibble in between the fleece strips. This is the good stuff for snuffling!
5. Let Them Sniff: Place the snuffle mat on the ground and show your dog their new treasure hunt! Encourage them to sniff around and paw at the mat.
You may want to hide some of the treats better than others to keep things exciting.
6. Supervise the Fun: As with any new toy, keep an eye on your pup during their first go at the snuffle mat. You want to make sure they’re having fun, engaging their nose, and—most importantly—being safe.
Optional Add-ons/Variations:
If you’re looking to mix things up, consider adding pockets to your snuffle mat by sewing on pieces of fabric.
These can be great for hiding extra-special treats! You can also use different types of fabric, like cotton or flannel, to create varied textures for your dog to explore.
Pro Tip:
To make your snuffle mat even more dog-friendly, choose machine-washable fleece.
This way, if your pup indulges a little too enthusiastically, you can just pop it in the washing machine for a quick clean. A little cleansing goes a long way, right?
6. Homemade Agility Course Equipment
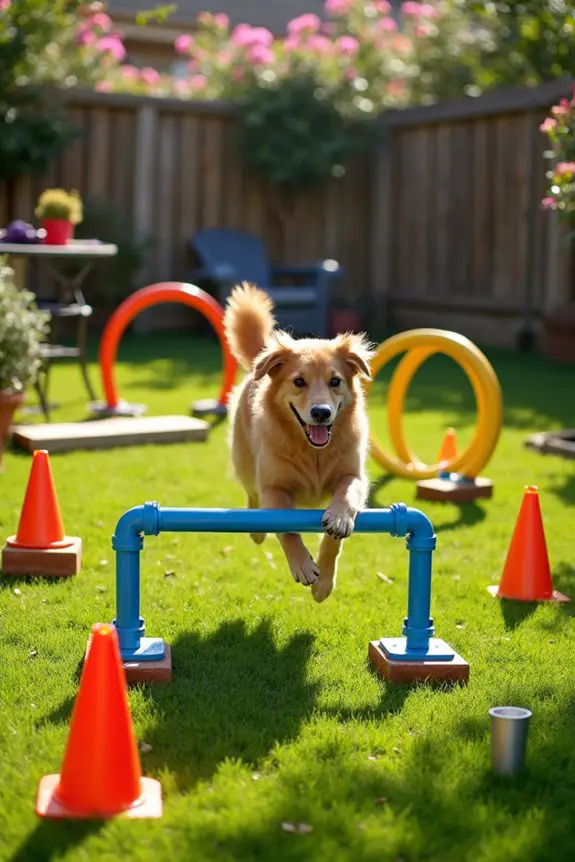
Are you looking to give your dog an outlet for their boundless energy? Creating a DIY Agility Course right in your backyard can provide hours of fun for both you and your pup. It’s an excellent way to keep your furry friend fit while honing their skills, and it can save you a ton of cash compared to buying commercial equipment. Plus, it adds a special touch to your home environment, making it a personalized playground just for your dog!
Materials Needed:
- PVC pipes (1-inch diameter, about 10-12 feet total)
- PVC pipe connectors (elbows and tees)
- A saw (for cutting the pipes)
- Measuring tape
- Zip ties (optional)
- Dog cone markers or hula hoops (for added obstacles)
- A sturdy base (plywood or heavy bricks for stability)
- Dog treats (to motivate your furry athlete!)
Step-by-Step Instructions:
- Measure and Cut: Start by measuring your PVC pipes into various lengths. You might want to create jump bars about 3-4 feet long, as well as shorter pieces for different agility obstacles. Cut them to size using your saw. Remember, precision is key, but it doesn’t need to be perfect—after all, your pup won’t be judging your handiwork.
- Create Jumps: Connect two pieces of pipe with elbows to form a jump. Clip the jump to your chosen base using zip ties, which helps keep it steady during those enthusiastic leap attempts. Adjust the height according to your dog’s size—think mini hurdles for a chihuahua versus Olympic-sized jumps for a Great Dane!
- Add a Tunnel: For a fun twist, you can create a tunnel using a longer piece of PVC bent in a U shape. Balance it on some bricks or wood to prevent it from toppling over. You can even use a hula hoop or a pop-up tent as an alternative for an exciting tunnel experience.
- Set Up Weave Poles: Position several vertical poles closely spaced together (about 18 inches apart) using your extra PVC pieces stuck into the ground or secured in stands. Your dog will learn to weave through them like a pro, earning expert status in no time.
- Test the Course: Invite your dog over to the completed setup and encourage them to try it out. Use treats to guide them through jumps, tunnels, and weave poles. Make it a game—because who doesn’t love a good game with treats involved? You might end up with a two-man dog show, complete with antics and lots of tail-wagging!
- Adjust as Needed: Pay close attention to how your dog interacts with each piece. You might need to make adjustments to the difficulty level or stability of each obstacle. Just think of yourself as the agility coach, ready to make some tweaks for peak performance.
Optional Add-ons/Variations:
Want to spice things up? Consider painting the PVC pipes in bright colors, or even using spray paint to create fun patterns. You could also add some movable parts, like a jump that can be raised or lowered as your pup improves—a little challenge can go a long way in keeping them engaged!
Pro Tip:
Before letting your dog loose on the agility course, verify all equipment is stable and safely constructed. It’s a good idea to test each component yourself (and maybe even clumsily trip over some hurdles) to see if anything needs reinforcement. That way your pup can focus on having fun while you worry about, well, not being the one who falls over during training.
Building an agility course for your dog can be remarkably fulfilling, both for you and your canine companion. With a little creativity and some DIY gusto, you’ll turn your backyard into an exciting training ground. So grab those tools, and let the fun begin!
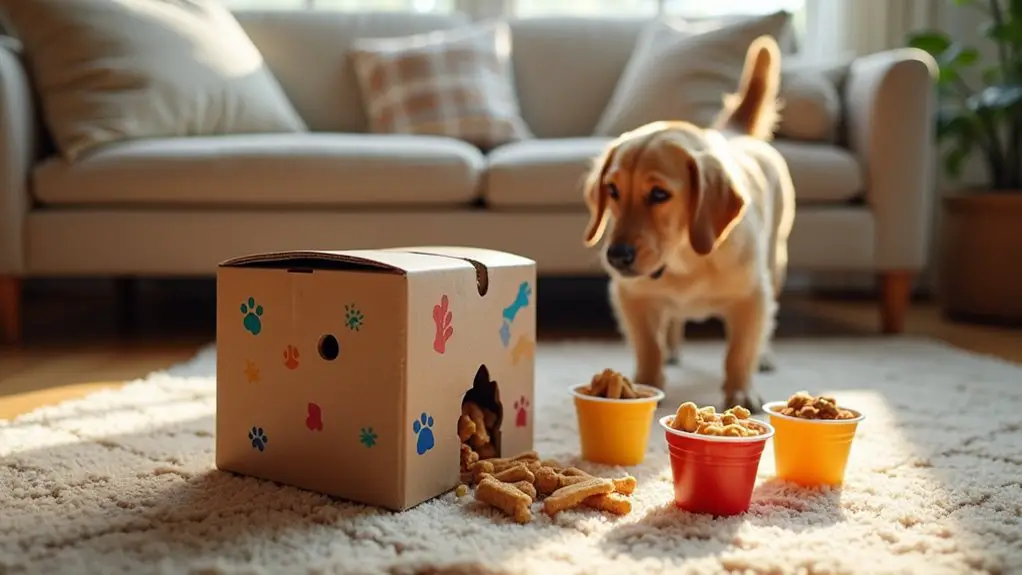
7. Hiding Places for Treats
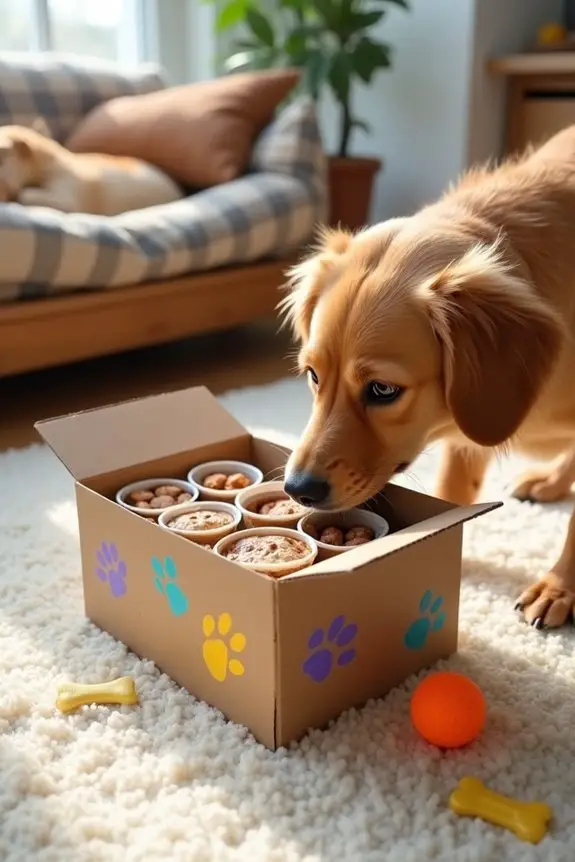
Do you want to keep your dog entertained while also satisfying their curiosity? This DIY Treat Dispenser allows you to hide treats in creative locations around the house, turning snack time into a delightful scavenger hunt. Not only does it save you money on fancy store-bought toys, but it also brings some fun and excitement to your dog’s day! Plus, it helps keep those pesky paws from constantly scratching at the pantry.
Materials Needed:
- A sturdy cardboard box (like a shoebox)
- Small plastic containers or cups (old yogurt cups work great)
- Scissors
- Dog treats (small enough to fit through the holes)
- Tape (optional)
- Markers or stickers (for personalizing)
Step-by-Step Instructions:
- Prepare the Box: Take your sturdy cardboard box and make sure it’s clean. You can remove any tape or labels if you want it to look neat. This is the base for your treat dispenser, and if it’s cute enough, it might end up being part of your home decor.
- Create Treat Holes: Using scissors, carefully cut several small holes in one side of the box. Make sure the holes are big enough for treats to fall out but not so big that they spill everywhere without your dog having to work for it. About 1-2 inches in diameter should be perfect.
- Place Containers Inside: Insert a few small plastic containers like yogurt cups inside the box. These will catch the treats as they fall out, making it a bit more challenging for your furry friend. You can even put some treats in these containers to kick-start the fun.
- Close Up the Box: If you want, you can secure the box with tape to prevent it from opening up unexpectedly during playtime. But be cautious—your dog should still be able to access those tasty rewards without too much struggle.
- Personalize Your Dispenser: Now, this is the fun part! Use markers or stickers to decorate the outside of the box. Why not let your dog’s personality shine? You could draw bones, paw prints, or even portraits of your dog—I’m sure they’d appreciate that (or not, but hey, it’s for us, right?).
- Let the Scavenger Hunt Begin: Place the box in a spot where your dog usually hangs out. Show them where you’ve hidden the treats, and use excited tones to encourage them to investigate. Who knows, they might surprise you with how clever they can be!
Optional Add-ons/Variations:
- Sneaky Snack Snaggers: Want to ramp up the difficulty a bit? Use a smaller box or add a couple of extra compartments for a layered hiding effect. It’ll keep your pup entertained for hours as they search for those elusive treats.
- Colorful Challenge: Instead of a cardboard box, try using fabric-lined storage bins or colorful plastic containers. Not only will they look great in your home, but they’ll also be more durable for your pup’s spirited adventures.
Pro Tip:
Keep an eye on your dog during the initial “big reveal” of the treat dispenser. Some dogs might get a bit too enthusiastic and try to chew the box apart. You want the hunt to be fun, not a DIY disaster!
If they show signs of getting overly excited, consider placing the dispenser in a safe area or supervising their playtime. Remember, treats are for fun, not for destruction!
Extra Tips & Ideas
While you might think that DIY dog toys are just about the basics, there’s so much more to explore when it comes to making them truly interactive and engaging for your furry friend.
Why not jazz it up with some colorful fabric scraps? Dogs love squeaky things, so consider adding squeakers from old toys. You can also hide treats inside old socks or toy bins—it’s like a treasure hunt for them.
Ever tried using cardboard tubes? They’re perfect for stuffing treats or kibble; just make sure to supervise because, well, cardboard isn’t part of a balanced diet.
And don’t forget to rotate toys regularly. Your pup won’t be bored, and you’ll feel like a DIY superstar with every wag of their tail.
Frequently Asked Questions
What Materials Are Best for Making Durable Dog Toys?
For durable dog toys, use strong materials like rope, rubber, and denim. Avoid easily destructible items, and consider repurposing old, sturdy fabrics or sturdy plastic bottles. Your pup’ll appreciate the long-lasting fun!
How Can I Personalize DIY Dog Toys for My Pet?
You can personalize DIY dog toys by incorporating your pet’s favorite colors or scents. Studies show that customized toys can boost a pet’s engagement by 30%, making playtime more fun and fulfilling for both of you.
Are There Safety Concerns With Homemade Dog Toys?
Yes, there are safety concerns with homemade dog toys. You should use non-toxic materials, avoid small parts that could be swallowed, and regularly inspect for wear and tear to guarantee your pet’s safety.
How Often Should I Change My Dog’s Interactive Toys?
You should change your dog’s interactive toys every few weeks to keep them engaged. Regularly rotating toys prevents boredom, stimulates their mind, and guarantees they stay excited during playtime. Always monitor for wear and tear as well.
Can I Use Recycled Materials for DIY Dog Toys?
Absolutely, you can use recycled materials for DIY dog toys! Old shirts, plastic bottles, and cardboard boxes can become fun, safe toys for your pup. Just make certain they’re non-toxic and free of small parts your dog could swallow.
Conclusion
So there you have it—ten fun and creative ways to keep your dog engaged and happy without breaking the bank. Whether it’s a tug-of-war with that old T-shirt, a puzzle made from a plastic bottle, or a playful snuffle mat, each project sparks joy. So grab those supplies, get a little crafty, and watch your pup light up with excitement. Who knows? You might just enjoy the process as much as they enjoy the toys.

Hi, I’m Ali Tarek, the founder of Animalsman. I’ve always been passionate about pets, especially dogs and cats, and I created this website to share practical tips, easy recipes, and helpful care advice for fellow pet lovers. My goal is to make pet care simple, enjoyable, and accessible for everyone. When I’m not writing or curating content, you’ll usually find me spending time with my furry friends or learning new ways to keep them happy and healthy.