If you thought your dog couldn’t get any more spoiled, wait until you see these DIY dog bunk beds. They’re like a puppy penthouse, offering cozy sleeping spots that even you might envy. Imagine your furry friend lounging on a dual-level bed, complete with snazzy paw-print bedding and a memory foam mattress. Intrigued? Let’s uncover how you can build one of these fantastic bunks—your pup is going to wag their tail like it’s a windmill.
Cozy Dual-Level Pet Sleeping
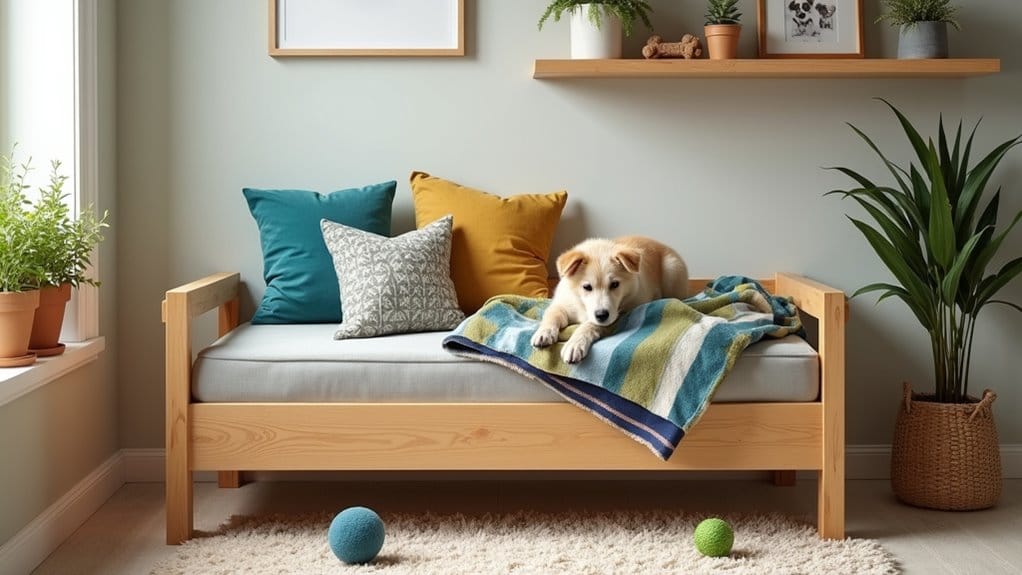
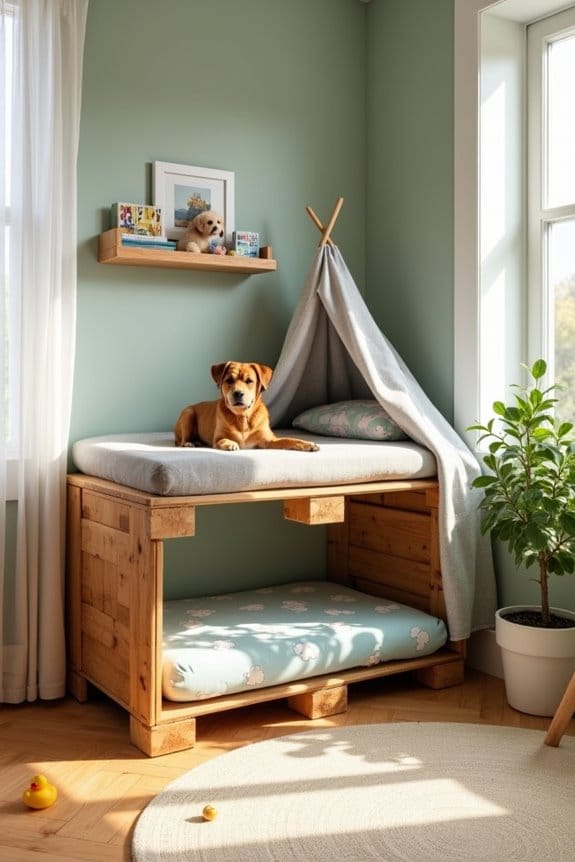
Creating a cozy dual-level pet sleeping area for your furry friend can be a rewarding project, especially if you want to maximize space and comfort.
Dog bunk beds DIY are perfect for that! Imagine this: your pup snoozing on the top bunk while their buddy relaxes below. You’ll need sturdy wood, some cozy pet beds, and a little creativity.
Start by measuring the space; no one wants a wobbly tower. Cut the wood to size, then assemble the bunks safely.
Adding soft, cushioned beds for each level ensures that your dogs will have the ultimate comfort while curling up for a nap.
Add soft cushions that your dog will absolutely adore. Not super handy? Don’t sweat it; even I managed to build one, and I can barely hammer a nail straight.
Just remember, a happy dog equals a happy home, right?
Our Collection
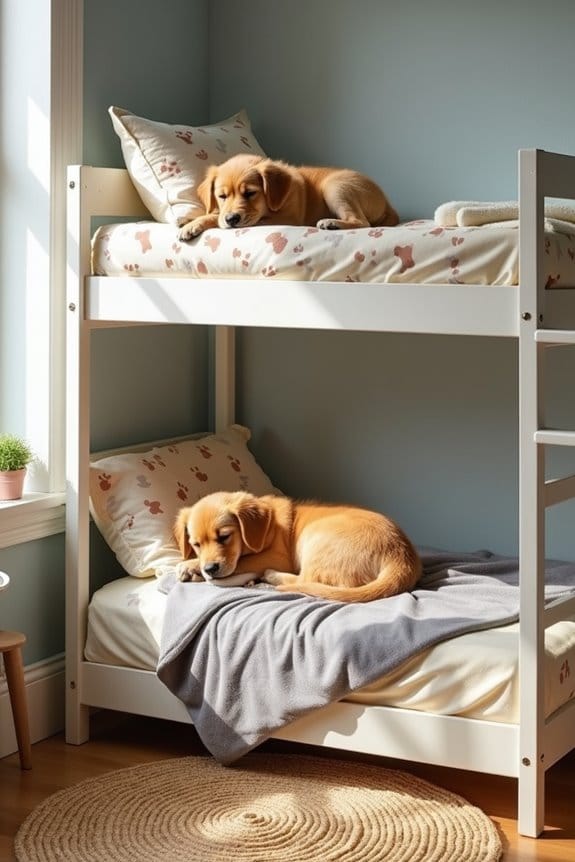
Now that you’ve got a cozy dual-level setup for your pup, let’s talk about the fun stuff in our collection!
Picture your dog snoozing in paw-print themed bedding on a comfy memory foam mattress pad, all while they strut up a cute wooden staircase.
And don’t forget those customizable name tags—trust me, Fido will appreciate the special touch, even if he won’t admit it. Plus, keeping your pup comfortable with best dog gift ideas can significantly enhance their overall happiness and well-being.
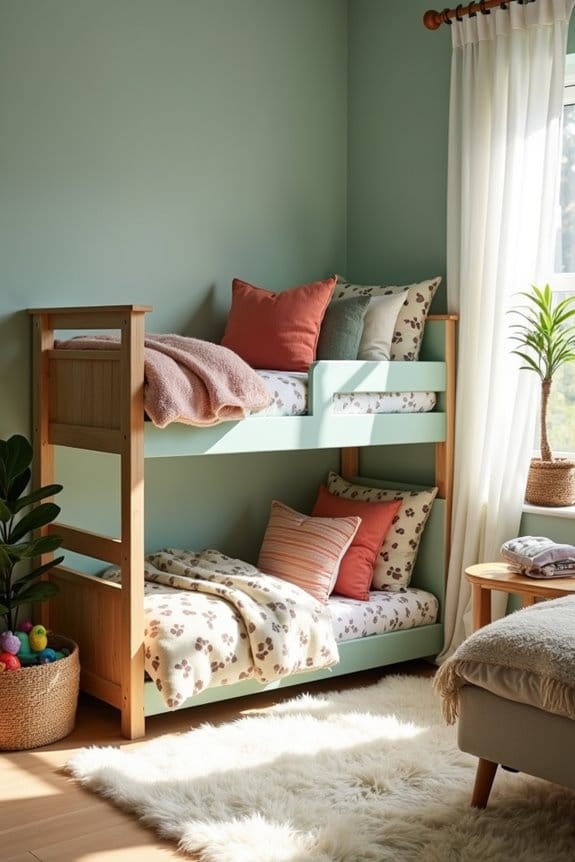
1. Paw-Print Themed Bedding
Short Intro
Are you tired of seeing your pup’s old, worn-out bed that clashes with your cozy home vibe?
Well, this DIY dog bunk bed project with paw-print themed bedding is just the ticket. Not only does it save you some cash, but it also adds a personal touch that makes your home feel a little more special. And hey, your furry friend will appreciate the comfort too, so it’s a win-win! Plus, if your dog has allergies, consider using premium dog food allergy solutions that can help manage their dietary needs for a happier, healthier pup.
Materials Needed
- Two foam mattress pads or dog beds (size depending on your bunk bed frame)
- Paw-print fabric (enough to cover your mattresses)
- Sewing machine or needle and thread
- Scissors
- Measuring tape
- Fabric glue (optional)
- Quilt batting (for added comfort)
- Safety pins (if you’re opting for a no-sew blanket)
- Craft wooden letters (optional, for personalizing)
Step-by-Step Instructions
- Measure Your Beds: Start by measuring the foam mattresses or dog beds you have. This will guide you in cutting your fabric to the right size. Don’t forget to add an extra inch for seams.
- Cut the Fabric: Take your measuring tape, and carefully cut out the paw-print fabric to match your mattress dimensions. You can be adventurous and mix patterns too. Just imagine that paw-sitively chic result!
- Sew or Glue the Fabric: If you’re using a sewing machine, place the fabric pieces right sides together, sew around the edges, leaving a small opening to turn it inside-out. If sewing isn’t your thing, fabric glue can work wonders for a no-sew option. Just apply glue along the edges, press, and let it dry.
- Turn it Inside-Out: Once you’ve sewn or glued the edges, turn the fabric casing right-side-out through that little opening. Be patient; it can sometimes feel like you’re wrestling a very stubborn octopus.
- Add Quilt Batting: For extra plush comfort, stuff some quilt batting inside your fabric casing. This makes the bed snuggly and your dog will love it.
- Close the Opening: Finish by sewing or gluing the opening closed. Make sure it’s secure, so your pooch doesn’t go digging through it like it’s buried treasure.
- Personalize (if you want): Add craft wooden letters with your dog’s name on the bed. You could even paint them in matching colors for a cohesive look. How well does “King Fluffy” sound on a paw-print bed?
Optional Add-ons/Variations
Feeling crafty? You can customize your bedding further by choosing different paw-print patterns or colors that match your home decor.
Or, if you’re feeling frisky (pun intended), add removable pillow inserts with paw prints and various fabrics – think plaid for fall and floral for spring. Keep it fresh and fun, just like your pup!
Pro Tip
Before you start sewing, make sure to wash and iron your fabric. This helps prevent shrinking later on and makes those paw prints pop.
Plus, it gives you a perfect excuse to bust out the iron you haven’t used since college. Now, ain’t that a bonus?
Get ready to give your dog a cozy new space that’s as cute as they are!
What could be better? Your pup will thank you, and your home will feel even more like a sanctuary.
Now, get crafting!
2. Memory Foam Mattress Pads
Short Intro
Let’s talk about upgrading your dog’s sleeping arrangements with some cushy memory foam mattress pads. Not only will these pads turn your furry companion’s bunk bed into a cozy haven, but they also help alleviate joint pain and provide better support for your pup. Plus, you’ll save money compared to buying those pricey pet beds. Adding a luxury orthopedic bed can further enhance comfort and support for your furry friend.
Materials Needed
- Two memory foam mattress pads (choose a size that fits your bunk bed)
- Measuring tape (to confirm a perfect fit)
- Fabric cover for each mattress pad (optional for aesthetics)
- Scissors (for any adjustments)
- Marker or chalk (for marking cuts, if necessary)
Step-by-Step Instructions
- Choose Your Pads: Pick two memory foam mattress pads that will fit snugly on your bunk bed. You’re looking for pads thick enough to provide comfort without making it hard for your dog to climb up or down.
- Measure the Bunk Bed: Use the measuring tape to measure the bunk bed frame where the pads will sit. This confirms your pads will fit perfectly, like they were made for it.
- Cut to Size (if necessary): If your mattress pads are too big, carefully trim them down to the desired size using scissors. Remember to double-check your measurements. It’s all fun and games until your dog’s bed is three times too big.
- Add a Fabric Cover (optional): For a bit of flair, consider making or buying fabric covers for the pads. You can use the same paw-print fabric as your bedding, or explore fun designs that resonate with your home’s style.
- Place on the Bunk Bed: Once you have the pads ready and, if desired, covered, lay them onto the bunk bed frame. They should fit like a charm. Just imagine your pup, all snuggled up in there. Cute, right?
Optional Add-ons/Variations
Want to get a bit fancy? You could experiment with different thicknesses of memory foam for each level of the bunk bed. Think plush for the bottom for a comfy spot, and slightly firmer on the top for better support.
Also, consider adding a waterproof cover for the mattresses; it’ll save you from potential messes that your pup might bring along.
Pro Tip
Before you purchase your memory foam pads, check for returns or trial periods. This can be a lifesaver if your furry friend decides their new bed is the ultimate enemy. You want to make sure they give it a “paw-sitive” trial run. Your dog’s comfort is priority number one, after all.
3. Wooden Staircase for Access

Materials Needed
- Wooden boards (for the steps and sides)
- Screwdriver and screws
- Sandpaper (medium and fine grit)
- Wood stain or paint (for finishing)
- Measuring tape
- Saw (hand saw or power saw)
- Level (to verify everything stays balanced)
- Safety goggles and gloves (for your safety)
Step-by-Step Instructions
- Measure Your Bunk Bed Height: Start by measuring from the floor to the base of the bunk bed. This will give you the height you need for your staircase.
- Determine Step Width and Number: Based on how high your bunk bed is, decide how many steps you’ll need. Remember, more steps are easier for your pup to climb. For instance, if you measured a height of 24 inches, you might want 3-4 steps. Each step should be about 12 inches wide and around 6-8 inches deep.
- Cut the Wooden Boards: Using your saw, cut the wooden boards for both the steps and the side rails. Don’t forget to wear your safety goggles – woodworking can be quite the adventure, and we want to keep those peepers intact!
- Sand Down the Edges: Once you’ve made your cuts, it’s time to sand down the edges and surfaces. Take your medium grit sandpaper to start, then finish with the fine grit. You want these steps to be smooth to avoid any splinters for those tiny paws.
- Assemble the Staircase: Start screwing the steps onto the side rails as you hold them in place. Use the level to make sure each step is even; we don’t want any wobbling when your pup takes a step. Once it’s all constructed, tighten those screws for stability.
- Finish It Off: Whether you choose a beautiful wood stain or a vibrant paint, this is your chance to personalize the staircase! Apply a couple of coats, allowing it to dry in between. This is the perfect opportunity to match it to the bunk bed or your home’s aesthetic.
- Place the Staircase: Position your new staircase next to the bunk bed. Make sure it’s sturdy and that it aligns well with the bed. You want it to look like it belongs there, not as if it just got lost on its way somewhere.
Optional Add-ons/Variations
Feeling a bit creative? Why not paint the steps in a fun pattern or color that resonates with your dog’s personality? Maybe a paw-print design or a solid color that matches their toys?
If you’re feeling extra, consider adding a small rug on each step for added comfort and grip. It’ll give your pup some extra traction when they’re climbing, especially on those sleepy mornings.
Pro Tip
After the staircase is complete, consider putting some non-slip pads under the legs. Not only does this provide better grip, preventing any accidental slips, but it also protects your floor from scratches. A little extra precaution goes a long way in keeping your pup safe and sound while they access their cozy retreat.
Now, go ahead, build that staircase, and watch your pup climb to new heights in comfort. They’ll be thanking you with tail wags and cozy cuddles! And don’t forget to elevate your pup’s style with premium dog fashion accessories, making every step they take equally stylish!
4. Customizable Name Tags
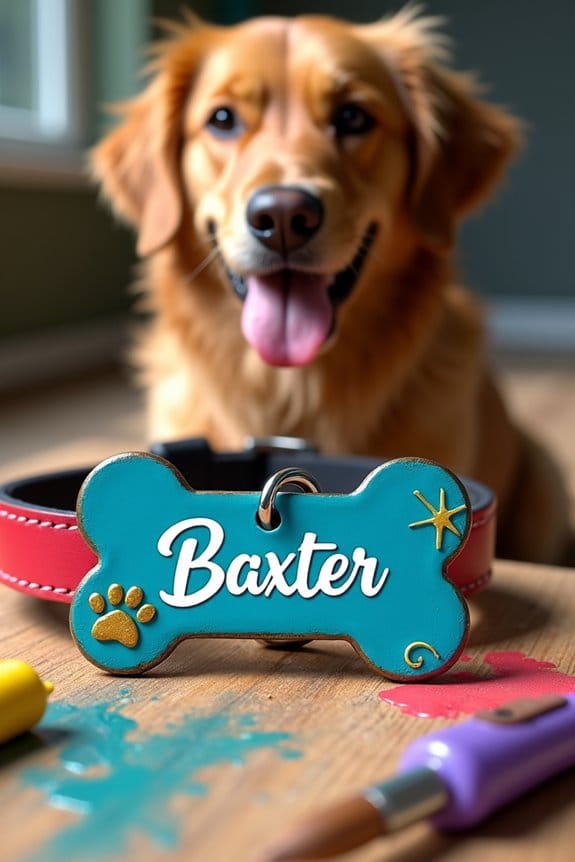
Have you ever wished you could give your furry friend a little something extra to show off their personality? Enter customizable name tags. Not only do they make your dog’s collar pop with style, but they also guarantee that your pup is safe and easily identifiable in case they wander off.
Plus, it’s an opportunity for you to express your creative side while saving a few bucks on pre-made options. So, let’s explore creating a name tag that’s uniquely designed for your beloved canine companion.
Materials Needed
- Blank metal or wooden tags
- Craft paint or permanent markers
- Leather or decorative ribbon (for accents)
- Small hole punch (if needed for hanging)
- Keyring or sturdy cord (to attach the tag)
- Clear coat spray (optional, for durability)
- Scissors
- Safety goggles (just in case your project gets messy)
Step-by-Step Instructions
1. Choose Your Tag Base: Start with selecting a blank name tag. You can find these at craft stores, or repurpose one from an old keychain, as long as it’s durable enough for outdoor adventures.
2. Design Your Layout: Before you start painting or writing, sketch out how you’d like the name tag to look. Maybe the pup’s name in bold letters, a fun design around it, or even a cute paw print. Keep it simple and legible.
3. Get Creative: Using your craft paint or permanent markers, add your design to the tag. If you’re going for a wooden tag, you might want to contemplate using stencils for cleaner lettering.
Remember, this is all about reflecting your pet’s personality—add some flair!
4. Punch a Hole (if necessary): If your chosen tag doesn’t already have a hole for attachment, carefully use the hole punch to make one. This step is essential, as it’ll allow you to attach it with ease.
5. Seal the Deal: If you want your creation to last through the elements (like walks in the rain), give it a coat of clear spray to seal it.
Let it dry completely—no one wants to smudge their fabulous creation.
6. Attach and Flaunt: Use your keyring or sturdy cord to attach the tag to your dog’s collar. Now take a step back, look at your handiwork, and feel that pride swell knowing you made it just for them.
Optional Add-ons/Variations
If you want to take your name tag to the next level, think about adding some accessories. Perhaps a swath of colorful leather or decorative ribbon that hangs alongside the tag.
You can even switch up the materials—think about using fabric for a softer look or experimenting with glitter paint for a little sparkle. The possibilities are endless, and they truly reflect your pup’s unique style!
Pro Tip
When painting on a metal tag, make sure you let each layer dry completely before applying the next. A little patience goes a long way in retaining your design’s vibrancy and avoiding any smudge mishaps.
Keep in mind that tags don’t just look cute; they can also be a lifesaver if your pup decides to chase a squirrel or two—so make them sharp and noticeable.
5. Durable Chew-Resistant Materials
Are you looking to keep your furry friends comfy while maximizing space in your home? Building a dog bunk bed could be the perfect solution. Not only does it provide a cozy retreat for your pups, but it also adds a stylish flair to your living space, saving you money on store-bought alternatives.
Plus, with a bit of creativity, you can customize it to fit your design aesthetic! Additionally, you can enhance your dog’s experience with luxury costume accessories to complement their new cozy quarters.
Materials Needed
- 2 wooden pallets or sheets of plywood (for the bed frames)
- 4 sturdy wooden legs (or blocks)
- Foam mattress pads or dog beds (for added comfort)
- Sandpaper or a sanding block
- Non-toxic wood stain or paint (optional)
- Screws and a screwdriver (or drill)
- Measuring tape
- Saw (if cutting wood to size)
- Paintbrush (if staining or painting)
- Safety goggles
Step-by-Step Instructions
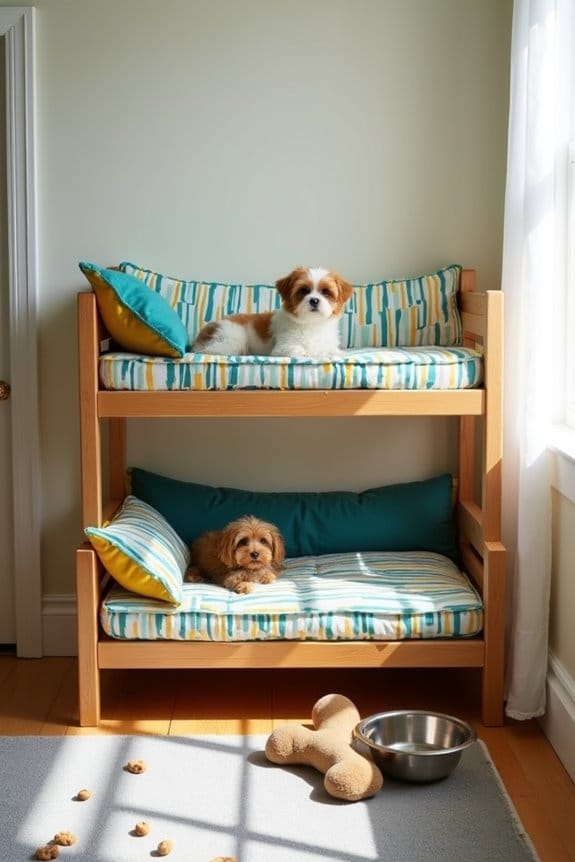
1. Measure and Cut: Start by determining the size you want your bunk beds to be based on the size of your dogs. Use measuring tape to mark your wood and carefully cut the pallets or plywood to size. Remember, you want each bed to be spacious enough for your pup to sleep comfortably.
2. Smooth It Out: Don’t make your dog regret you’ve built a bunk bed. Use sandpaper to smooth out any rough edges on the wood. No one wants a splintery situation when all they want is a nice snooze.
3. Assemble the Frames: Position one pallet on top of the other with enough space in between to let your dogs hop in and out easily. Use screws to secure the frames together, guaranteeing everything is stable.
If you’re feeling crafty, you could design the top bunk to look like a little house.
4. Fix the Legs: Attach the wooden legs or blocks to the bottom of the bunk bed frames to elevate it off the ground. This helps keep your dog’s bed dry and adds a bit of fun!
Make sure the legs are sturdy—no one likes a wobbly bed, especially your pup.
5. Add Comfort: Lay the foam mattress pads or dog beds on each level of the bunk. Confirm they fit snugly, so your furry friends enjoy their new resting place.
Maybe even throw on a blanket for that extra touch of coziness, like a warm hug.
6. Finishing Touches: If you chose to stain or paint your bunk bed, now’s the time! Apply a coat of non-toxic wood stain or paint and let it dry thoroughly.
You might even want to add their names on the sides for a cute personalized touch.
7. Double-check Your Work: Verify that everything’s secure and stable. Place it in your home, and watch your dogs make it their new favorite spot.
Bonus points if you get a photo of them exploring their new digs.
Optional Add-ons/Variations
Want to jazz up your dog bunk bed even more? Consider using colorful fabric covers for the mattress pads—it’s a fun way to bring in your home’s color scheme.
You can also add a fun canopy or curtains to the top bunk for added charm and cozy vibes.
Pro Tip: If you’re handy with tools, try reinforcing the structure with corner braces for added stability.
Safety first, right? Make sure the bunk bed is steadfast enough to handle all the jumping and playtime your dogs can muster!
Building a dog bunk bed may just become your new favorite project. Not only will your pets love it, but you’ll admire the improvement in your home too—all while saving that hard-earned cash.
Happy building!
6. Weather-Resistant Fabric Covers
When you’ve put in the effort to create a cozy dog bunk bed, why not add a weather-resistant fabric cover to keep it looking sharp and protected? This DIY project not only spruces up your bunk bed but also shields it from spills, fur, and, let’s be honest, a little drool.
A touch of personal flair with fabric can really make your dogs’ sleeping space pop while saving you from future cleaning headaches. Plus, it’s a great way to express your style as a dog owner.
Materials Needed:
- Weather-resistant fabric (your choice of color or pattern)
- Heavy-duty sewing machine or needle and thread
- Fabric scissors
- Measuring tape
- Pins or fabric clips
- Straight edge or ruler
- Sew-in Velcro strips or snap buttons (for secure closures)
- Optional: Sewing pin cushion for keeping your pins handy
Step-by-Step Instructions:
1. Measure Your Bunk Bed: Grab your measuring tape and figure out the dimensions of both the top and bottom bunks. Don’t forget to take into account any curves or seams if you want a tight fit.
It’s best to measure twice so you only have to cut once. (Trust me; I’ve learned this the hard way.)
2. Cut the Fabric: Using your fabric scissors, cut two pieces of weather-resistant fabric according to your measurements — one for each bunk. Remember to add an inch all around for seams, unless you fancy a risky game of “will it fit?”
3. Pin the Edges: Take your cut fabric pieces and roll the edges inward about half an inch. Pin them down to secure the fold. This is like giving your fabric a little hug, ensuring no rough edges will pop out to embarrass you or your pup.
4. Sew the Edges: Now it’s time to sew! Using a sewing machine or needle and thread, stitch the edges down along the folds. Go nice and slow, just like you’d when cooking a fancy meal.
You want those stitches to be strong enough to withstand some serious puppy love.
5. Attach Fasteners: If you want your covers to be removable for easy cleaning, sew in Velcro strips or attach snap buttons along one side of each cover. Make sure they line up well for a snug fit.
It’s like giving your bed a little outfit change whenever it needs one.
6. Slip on Your Covers: Gently slide the fabric covers onto each bunk bed and secure them using the fasteners. Adjust them so they lay flat, and pat yourself on the back for a job well done.
Your pups will thank you, even if they don’t actually say it.
7. Final Touches: If you’re feeling extra crafty, consider adding some fun decorative elements like patches or even monogramming your dog’s name onto the fabric. It’s all about making it uniquely theirs.
Optional Add-ons/Variations:
- Play with different fabric patterns—maybe try a polka dot for fun or a classic plaid for a cozy vibe.
- Consider using fabric in a bold color to match your decor or maybe a simple neutral for a chic look.
You might even throw in some waterproof materials if you plan on placing the bunk bed outside.
Pro Tip:
Always remember to wash your fabric covers regularly. Trust me, with all the snuggles and naps, they’ll need a good clean every now and then.
Use a gentle detergent to keep the fabric fresh — it’s like giving your pup’s bed a spa day! And hey, who doesn’t love fresh linens?
With a little creativity, your dog bunk bed can be both stylish and functional, making it the envy of all the neighborhood pets.
Immerse yourself in this DIY project; you’re bound to love how it turns out, and so will your furry friends!
7. Elevated Sleeping Area
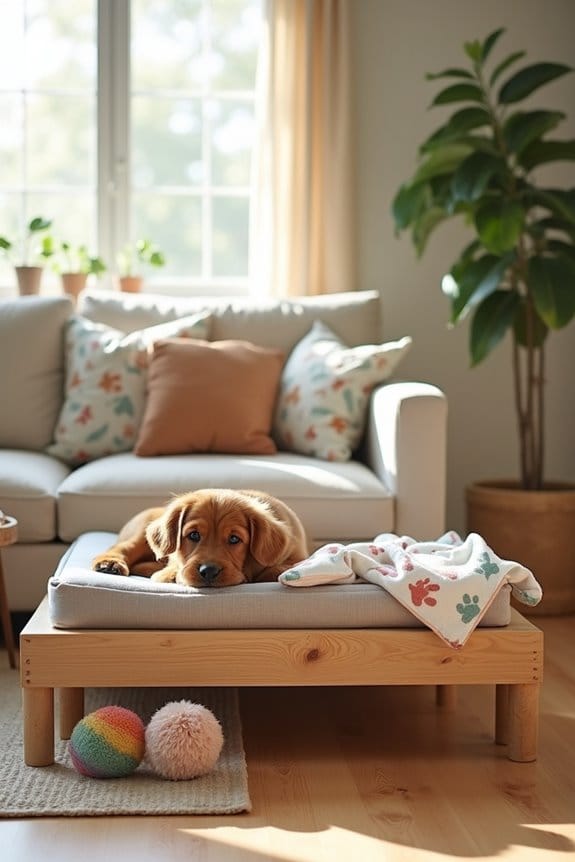
Are you tired of your furry friend making themselves comfy on the couch or your favorite chair? Building an elevated sleeping area for your dog is a fantastic DIY project that not only provides a cozy spot for your pup but can also save you money compared to store-bought options. Plus, it’s a stylish addition to your home that shows off your love for your four-legged friend. Let’s get building!
One important consideration while choosing materials is to ensure that any bedding you purchase is suitable for dogs with premium dog food allergies, as this can help keep your pup comfortable and healthy.
Materials Needed:
- Wooden bed frame (you can repurpose an old crib or buy new wood)
- Mattress or cushioned bed pad (size depends on your dog)
- Sandpaper (medium-grit)
- Non-toxic wood paint or sealant (optional)
- Power drill or screwdriver
- Wood screws
- Measuring tape
- Saw (if cutting wood)
Step-by-Step Instructions:
- Gather Your Wood: If you’re using reclaimed wood, give it a good inspection for splinters and rough spots. Safety first, right? Otherwise, head to your local hardware store and grab some sturdy wood planks for your frame.
- Cut the Wood: Measure out the sides of your elevated dog bed. A basic rectangle is usually best. Cut four pieces for the legs and four pieces for the sides and ends. If you’re not the best with a saw, well… just take your time! Think of it as crafting your own masterpiece.
- Sand Down the Edges: Yep, it’s time to channel your inner craftsman. Use the sandpaper to smooth out all the edges of your wood pieces. You don’t want Fido getting a splinter, right? Plus, it’ll look better too.
- Assemble the Frame: Start by screwing the sides together in a rectangle shape. Attach the legs at each corner to lift it off the ground. It’s okay if it’s not perfect – dogs don’t care about aesthetics, as long as it’s comfy!
- Add a Base: Attach a sturdy platform in the center so your mattress or pad has a solid surface to go on. This can be additional wood slats or a piece of plywood. Make certain this part can hold your pooch in case they decide to launch themselves onto the bed.
- Finishing Touches: If you want, add a coat of non-toxic paint or sealant to protect your wood from dog drool and the inevitable spills. Let it dry completely before moving forward. Your dog won’t judge you for the extra bling, but it really makes the bed look sharp.
- Add the Mattress: Place your chosen mattress or bed pad on top. Add some blankets or favorite toys, and voila—your dog now has a plush spot to lounge!
Optional Add-ons/Variations:
Feeling extra creative? You could paint the bed in your favorite color to match your home or add throw pillows for a snazzier look. You could even personalize it with your dog’s name using stencils or wooden letters. Trust me; your pup will be the envy of all the neighborhood dogs.
Pro Tip:
Before you start building, gauge your dog’s size and sleeping style. Bigger dogs might appreciate a few extra inches of height to accommodate their playfulness. And if your pup loves to chew? A coat of non-toxic sealant can help protect the wood from becoming a chew toy. Happy building!
Extra Tips & Ideas
If you want to take your DIY dog bunk bed project to the next level, there are plenty of extra tips and ideas to make it even more paw-some.
Consider adding a cozy blanket or cushion for extra comfort—trust me, your pup deserves to feel like royalty. You could even paint or stain the wood to match your home décor; who says dog furniture can’t be stylish?
Think about custom wood signs with your dog’s name. You might also add a few stairs or a ramp for older pups.
If you’re feeling creative, hang some toys from the top bunk—like an aerial dog paradise. Additionally, using high-quality materials will ensure luxury dog furniture orthopedic stays durable and comfortable for years to come.
Just remember, the more love and effort you put into this, the happier your furry friend will be.
Frequently Asked Questions
What Materials Are Best for Building a Dog Bunk Bed?
Plywood and solid wood are your best bets for durability and safety. Use non-toxic finishes for comfort, and add some cushioning like memory foam mattresses for extra coziness. Your pup will appreciate the thoughtful touches!
How Do I Measure My Dog for the Perfect Bunk Bed Size?
To measure your dog for the perfect bunk bed size, measure their length from nose to tail and add a few inches for comfort. Also, measure their height to guarantee they have ample headroom.
Can I Customize a Dog Bunk Bed for Multiple Pets?
Imagine your pets snuggled together on a custom-built bunk bed, each cozy nook tailored to their sizes. You can adjust dimensions, add dividers, or design it to fit their unique personalities and preferences.
What Safety Features Should I Consider for a Dog Bunk Bed?
You should consider sturdy construction, non-toxic materials, secure guardrails, slip-resistant surfaces, and proper weight distribution. Confirm the bed meets your pets’ size needs and has space to move comfortably without risking injury.
How Do I Clean and Maintain a DIY Dog Bunk Bed?
Cleaning your dog bunk bed’s like tidying a cozy nest. Just vacuum the bedding, wipe surfaces with a damp cloth, and spot clean any stains. Regular maintenance keeps it fresh and welcoming for your furry friend.
Conclusion
So, why not turn your pup’s dreams into reality? Just picture them curled up in their very own DIY bunk bed, surrounded by cozy, paw-print bedding and a memory foam mattress. It’s like their own little fortress. With a few tools and some creativity, you can craft a space that’s not only stylish but safe and comfy too. Your fur baby deserves this special spot—and honestly, you might just wish you had one too. Happy building!

Amr Mohsen is a software engineer who traded his keyboard for a leash — at least on weekends. His love for dogs inspired him to share what he learns as a dog owner and enthusiast, bringing a detail-oriented, research-driven perspective to every article he writes. If it’s about dogs, he’s probably already looked it up twice.

