I love my golden retriever, Bailey, but I refuse to spend $50 on a sweater he’ll inevitably roll in mud five minutes later.
Store-bought dog clothes are expensive. A “premium” hoodie costs what you’d spend on your own winter coat. And the fit? A “Large” barely squeezes over a beagle’s chest while drowning a lab mix. Even if you find something that fits, it looks cheap—polyester nightmares with garish patterns that clash with your carefully chosen throw pillows.
You spend hours scrolling through options. Your cart overflows with “maybe this one.” Two weeks later, a package arrives. The fabric feels scratchy. The Velcro closes are already coming loose. You wash it once, and the seams split. Your pup scratches at it constantly because it’s tight in all the wrong places. And the worst part? It sits in the donation pile because you can’t even gift something this disappointing.
Making your own dog clothes lets you customize the fit, save money, and match your pup’s style to your own aesthetic—often using things you already have. An old flannel shirt becomes a cozy bandana.
A forgotten sock transforms into a perfectly fitted sweater. You control the fabric quality, the measurements, and the look. No more settling for “good enough.” Plus, these DIY projects take less time than scrolling for the perfect store-bought option, and they actually work. Once you master these basic DIY techniques, you’ll never overpay for dog clothes again. If you need more stylish outfit inspiration, start there and then come back to make your favorites yourself.
Tools You Will Need
Before you start, grab these budget-friendly tools that make every project easier:


#1: The Upcycled T-Shirt Sweater (Zero Sewing Required)
Your dog needs a sweater, but you don’t need to spend $40 or learn to sew. Grab an old long-sleeve shirt from your donation pile—one that’s stretched out or stained—and turn it into a custom-fitted sweater in 10 minutes.
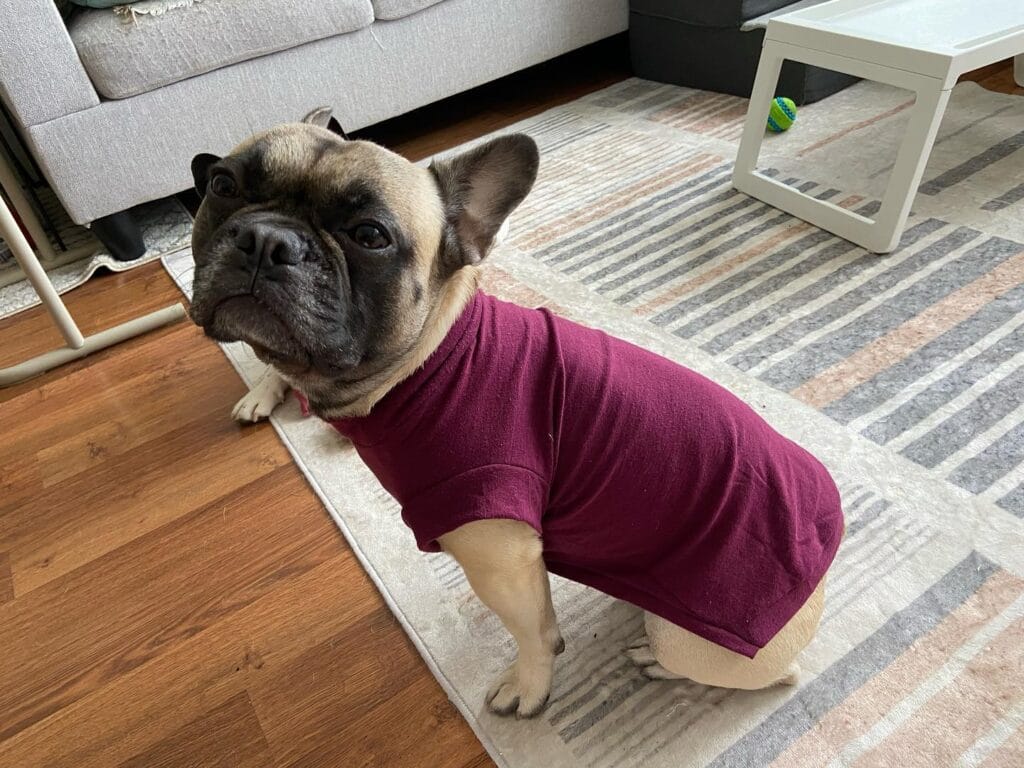
Here’s exactly how: Lay the shirt flat. Measure from your dog’s neck to the base of their tail, then cut the shirt to that length plus 2 inches. Cut arm holes where your dog’s front legs sit (about 3-4 inches from the neck). Try it on. Adjust the leg holes if needed. Done. The maroon sweater in this photo? Made from a $3 thrift store thermal. It fits this French Bulldog perfectly because the fabric was measured to HIS body, not a generic “Medium” that fits nobody.
Fleece and cotton jersey work best—they stretch enough for comfort but hold their shape after washing. Cost per sweater: basically free. Time: 10 minutes, including the “does this fit?” try-on phase. Your dog stays warm, you use what you already have, and nothing looks cheap because YOU controlled the quality. Plus, when it gets covered in drool or mud, you don’t stress—just make another DIY piece tomorrow.
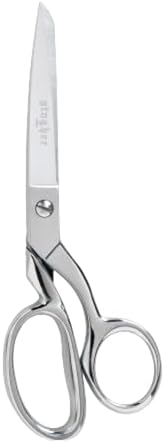
If you’re working with a squirmy pup, use sharp curved grooming scissors for clean edges that won’t fray. And if you’d rather skip the DIY route entirely, this fleece sweater vest gives you the same polished look in colors that actually match your home aesthetic
.Pro tip: Turn the shirt inside-out before cutting so any pen marks from measuring stay hidden on the inside.
Photo credit: @beansthefrenchie1024
#2: The Cable-Knit Sweater (The “Looks Expensive” Hack)
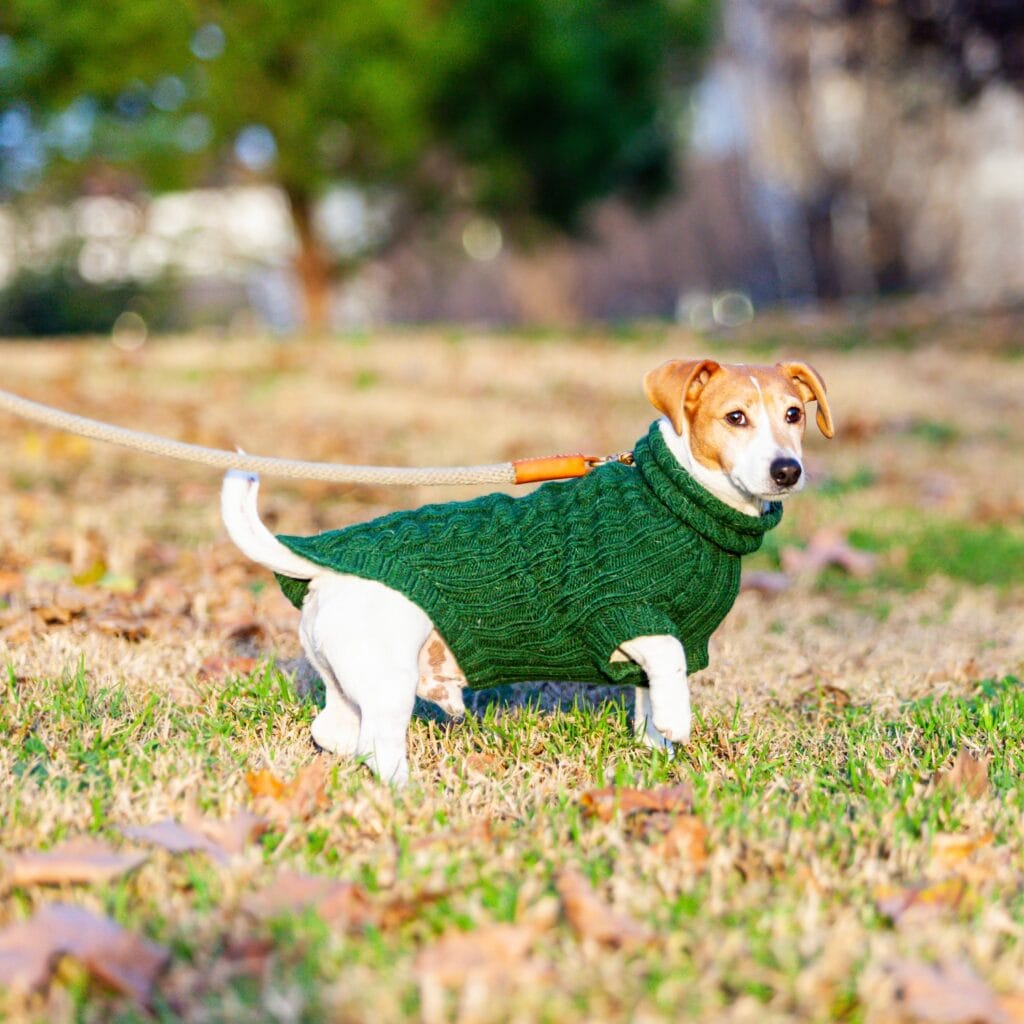
That forest green cable-knit sweater looks like it costs $60 at a boutique pet store. Reality? You can recreate this exact look for under $10 using a thrifted human sweater from Goodwill.
Here’s the shortcut: Find a cable-knit sweater in your size (adult small or medium works for most dogs). Cut a rectangle from the torso section—measure your dog’s back length first, then add 3 inches. Cut four small slits for the legs. The cable-knit texture is already done for you. The thick collar? That’s just the sweater’s original ribbed neckline folded down. Takes 15 minutes, including the Goodwill trip.
This Jack Russell pulls off the look because the color works—deep jewel tones photograph beautifully and hide dirt better than pastels. The cable pattern adds visual interest without looking busy. And the fit is perfect because you measured YOUR dog, not a factory’s guess.
The best part? Cable-knit sweaters from thrift stores cost $3-8. You can make three dog sweaters from one human sweater and still have fabric left over. Store them in this airtight storage container to keep them fresh between seasons. Or grab fabric scissors designed for thick materials—they’ll slice through chunky knits without snagging.
Pro tip: Wash the thrifted sweater FIRST on hot to shrink it slightly and make it easier to work with
.
Photo credit: @crealandia.official
#3: The Striped Sailor Shirt (Parisian Chic on a Budget)
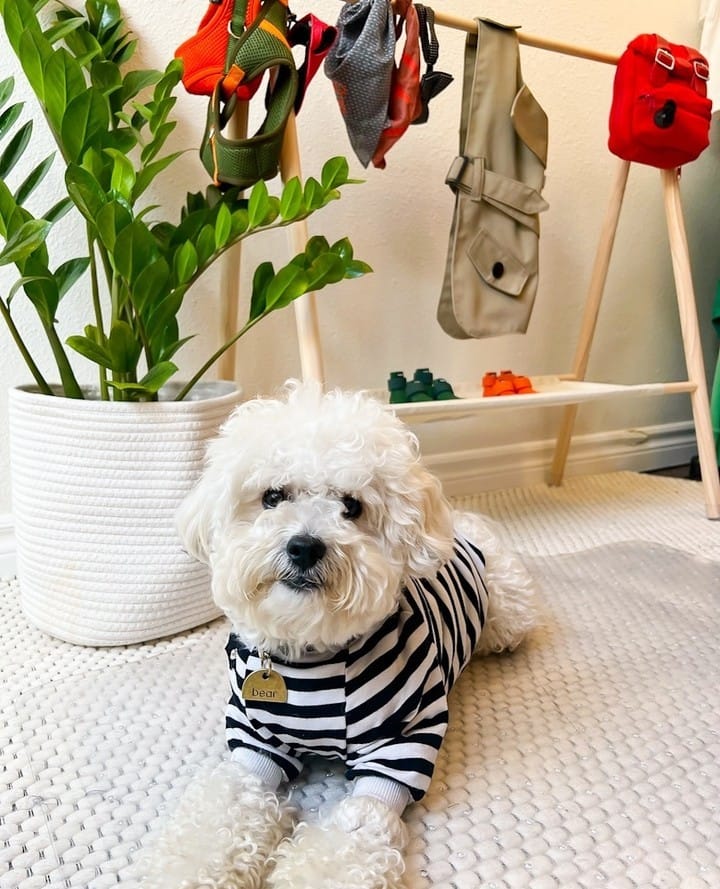
Black and white stripes never go out of style. This classic look works in every season, photographs beautifully, and matches literally everything in your home. Your white poodle mix becomes a Pinterest board come to life.
The best part? You already own the materials. Grab a striped long-sleeve shirt from your closet—one that’s too small or has a stain on the sleeve. Cut it to your dog’s back length (measure from collar to tail base). Cut four leg holes. Try it on. Done. The ribbed cuffs at the bottom legs? That’s just the shirt’s original sleeve cuffs working double-duty. Takes 8 minutes total.
This setup shows exactly what happens when you commit to DIY: that wooden rack in the background holds multiple handmade pieces, all color-coordinated to the room. No clashing cartoon prints. No cheap-looking polyester. Just clean, intentional pieces that fit your home’s aesthetic. You can rotate through outfits without the guilt of spending $200 on clothes your dog will outgrow or destroy.
Display your growing collection on a wooden clothing rack or store finished pieces in a washable storage basket until you need them. Creating a dedicated dog space means everything has a home—including their handmade wardrobe.
Pro tip: Stripes hide shedding better than solid colors—white dog hair disappears into the white stripes, dark fur blends with black.
Photo credit: @sewfyi
#4: The Houndstooth Blazer (Runway-Ready in 20 Minutes)
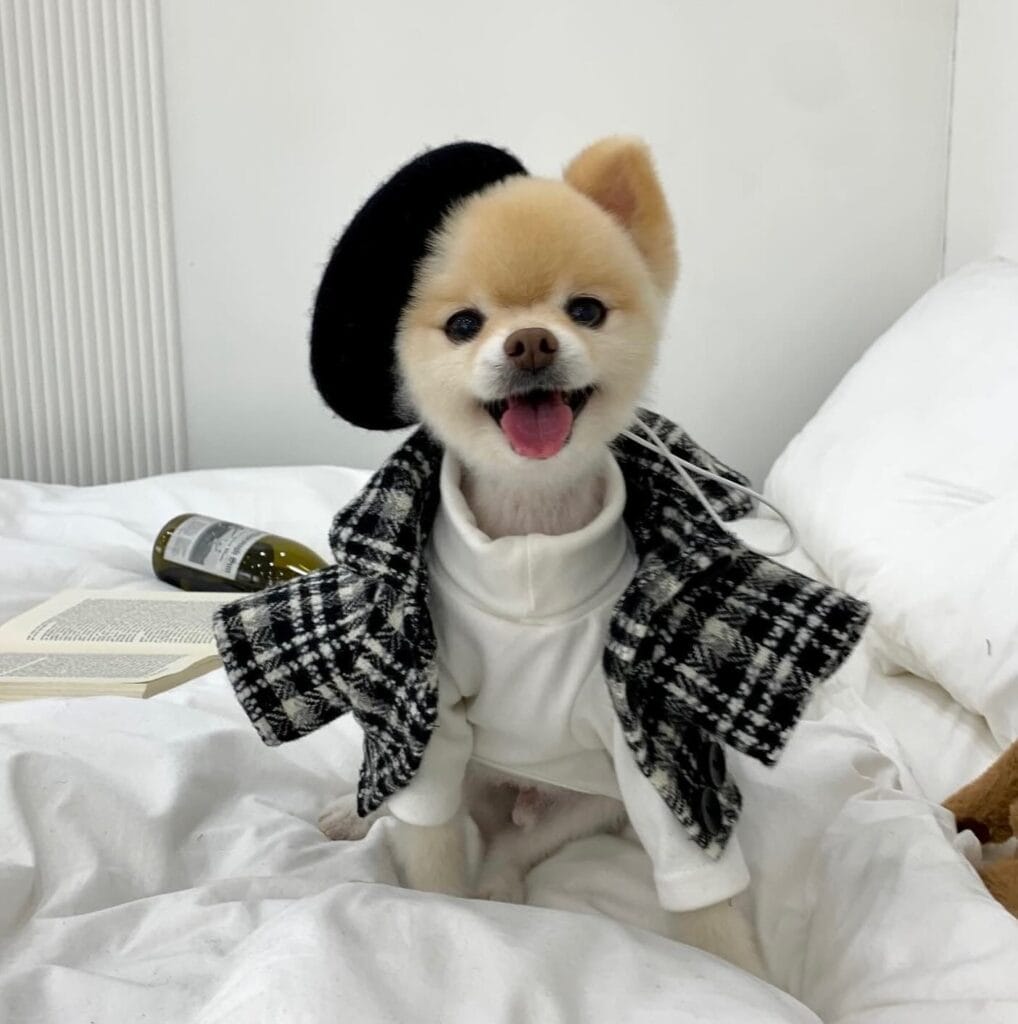
This Pomeranian looks like they’re heading to Fashion Week, not just the dog park. That houndstooth blazer paired with a white turtleneck and black beret? Pure sophistication. And the entire outfit costs less than $15 to recreate.
Here’s the secret: Hit the kids’ section at a thrift store. Find a blazer in size 3T-5T (works perfectly for small to medium dogs). Try it on your pup. If the sleeves are too long, roll them into cuffs—that’s literally the look in this photo. The white turtleneck underneath? Cut from a toddler’s long-sleeve shirt. Two items, zero sewing, maximum impact.
The houndstooth pattern is genius because it photographs like a dream—black and white never competes with your home decor, and the geometric print adds visual interest without looking busy. Pair it with accessories you already own (a black winter hat works as a “beret” for photos), and suddenly your dog is the most stylish member of the family.
Store delicate pieces like blazers on padded hangers or fold them with tissue paper in a storage bin to prevent wrinkles. If you’re inspired to make more elevated pieces, thrift stores are your best friend—their kids’ sections are full of quality materialsat fraction-of-retail prices.
Pro tip: Look for blazers with shoulder pads—you can remove them for a better fit, and the structured fabric holds its shape beautifully.
Photo credit: @shop.minis__
#5: The Colorblock Sweater (Patchwork Perfection)

That sweater looks hand-knitted by a professional, but here’s the truth: you can recreate this exact colorblock effect by combining old sweater scraps you already own. No knitting skills required.
Here’s how it works: Gather 3-4 old sweaters in complementary colors (purple, pink, blue, cream). Cut each one into rectangles—one for the torso, smaller pieces for the sleeves. Use fabric glue or iron-on hem tape to attach them together in a patchwork design. The seams become part of the aesthetic. The ribbed collar and cuffs? Those are just the original sweater edges left intact.
This colorblock method is genius for three reasons. First, you use up fabric scraps that would’ve been tossed. Second, the color variety hides stains better than a solid sweater—a little mud on the pink panel doesn’t ruin the whole piece. Third, it looks intentionally artistic, like something from a boutique that charges $80.
The fit on this small dog is perfect because each panel was measured individually. The purple turtleneck sits snug without choking. The body panels have enough stretch for movement. The leg cuffs stay in place without sliding up. That’s what happens when you build DIY projects piece by piece instead of hoping a factory’s “Small” actually fits.
Time investment? About 30 minutes, including the “which colors look good together?” decision phase. Cost? Literally zero if you’re raiding your own closet. Result? A one-of-a-kind piece that no store sells.
Pro tip: Start with just two colors if you’re nervous—a half-and-half design is easier than four panels and still looks intentional, plus you can add matching accessories later.
Photo credit: @sundaypetjumpers
#6: The Chunky Crochet Sweater (For Advanced DIYers)
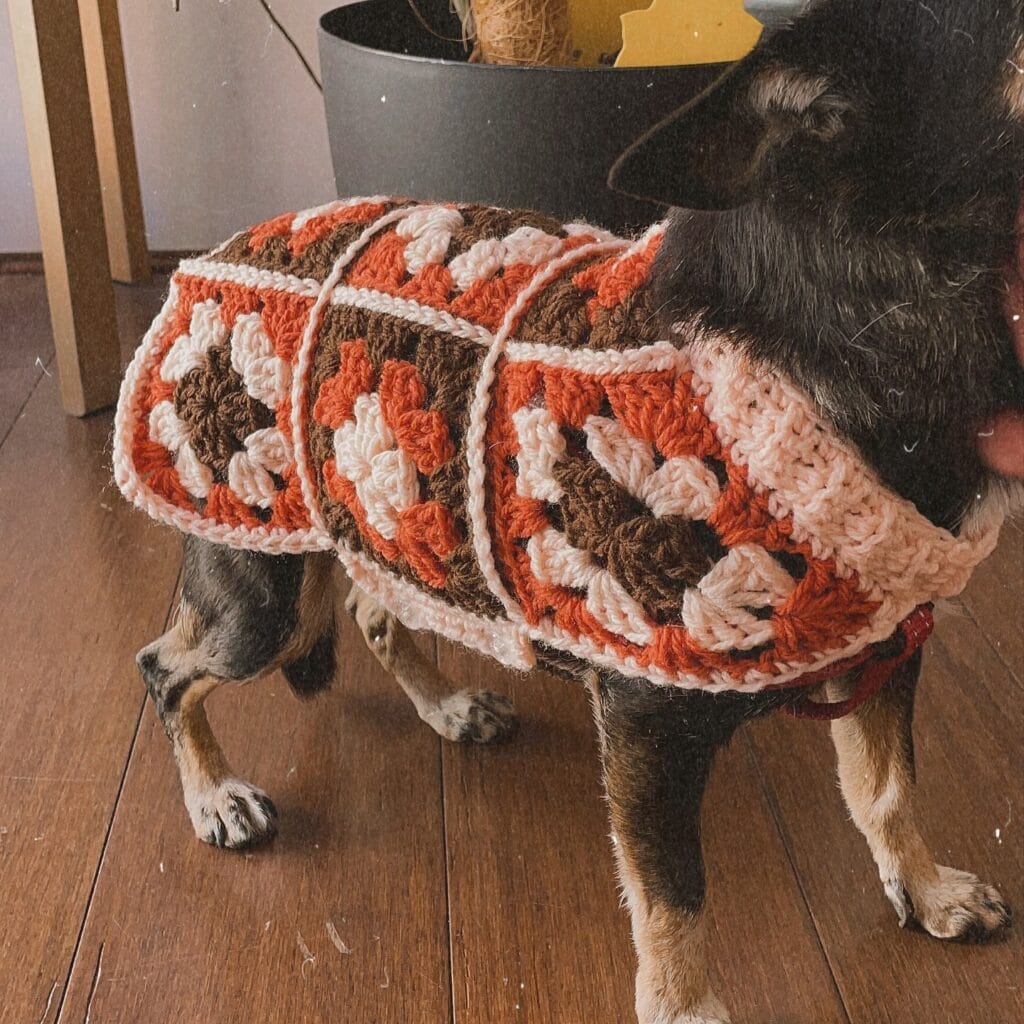
This hand-crocheted masterpiece looks complicated, but if you know basic crochet stitches, you can make this in an afternoon. The chunky yarn and simple stripe pattern mean it works up fast—no tiny, intricate details to mess up.
Here’s the breakdown: You need about 2-3 skeins of bulky weight yarn in rust, brown, and cream. Start with a simple rectangle for the back, crochet two smaller rectangles for the chest panel, then connect them at the shoulders and add leg openings. The raised texture you see? That’s just alternating rows of single crochet and double crochet. The dimensional look comes from the thick yarn, not from complicated stitches.
This style is perfect for fall and winter because the chunky knit traps heat better than thin fabrics. Your dog stays genuinely warm, not just styled. The neutral color palette works with literally every home aesthetic—from modern minimalist to cozy farmhouse. And because you’re hand-making it, you control the exact measurements. No fighting with a too-tight neck hole or sleeves that drag on the ground.
If you’ve never crocheted before, this isn’t your first project—start with simpler DIY options first. But if you know the basics, grab some chunky yarn and a size N hook. You can also use thick rope-style materials for an even chunkier look.
Pro tip: Add a button or snap closure at the chest instead of trying to pull it over your dog’s head—makes putting it on easier and your pup will tolerate wearing it longer.
Photo credit: @tetecancrochet
#7: The Bow Tie Bandana (The 2-Minute Accessory)
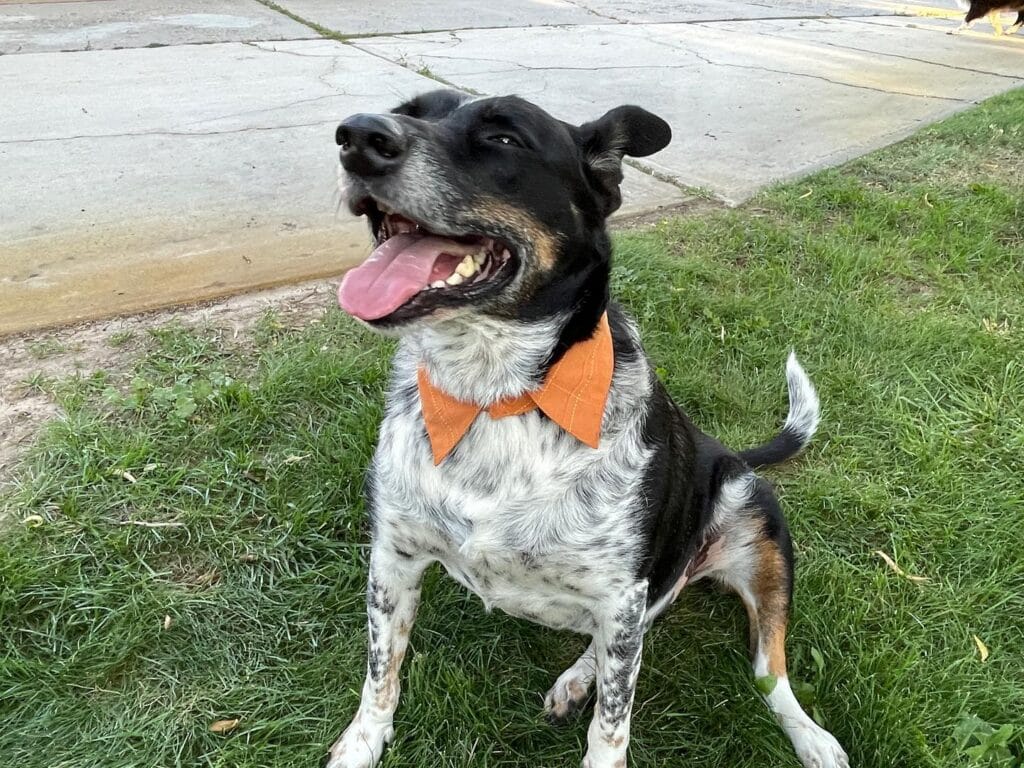
Sometimes the simplest projects deliver the biggest impact. This burnt orange bow tie bandana took exactly 2 minutes to make and transforms this dog from “just walked in” to “ready for company.”
Here’s the entire process: Cut a triangle from an old bandana or fabric scrap (about 18 inches on the longest side for medium dogs, 12 inches for small dogs). Fold the long edge down twice to create a cleaner edge. Tie it around your dog’s collar. That’s it. The bow shape forms naturally when you knot the fabric at the right angle.
The color choice matters more than you’d think. This warm orange works beautifully against the dog’s black and white coat—it pops without clashing. Burnt orange, rust, and terracotta tones photograph incredibly well and feel expensive even when they cost nothing. They also hide outdoor dirt better than bright reds or pinks.
This style is perfect for dogs who hate restrictive clothing. It’s just a bandana—no sleeves, no body coverage, no overheating. Your dog barely notices it’s there, but everyone who sees them notices the upgraded look. Keep a few bandanas in different seasonal colors (sage green for spring, navy for summer, burgundy for fall), and suddenly your dog has a coordinated collar accessory collection that didn’t cost a cent.
Use these for training sessions too—the bandana makes your pup feel special and helps them associate getting dressed with positive experiences.
Pro tip: If your dog pulls the bandana off, loop it through their collar before tying instead of just tying it around the collar itself.
Photo credit: @youmakeitsimple
Your Next Weekend Project Starts Here
You’ve seen what’s possible: sweaters from old socks, blazers from the kids’ section, bandanas from fabric scraps. None of these projects require advanced skills or expensive materials. Just your dog’s measurements, scissors you already own, and 10-30 minutes of your time.
Pick one project from this list and start there. Don’t overthink it. Grab that stretched-out thermal shirt sitting in your donation pile and cut it into a sweater this Saturday morning. If it doesn’t fit perfectly the first time, adjust the leg holes. If you hate the color, try again with a different shirt. The beauty of DIY is that “mistakes” cost you nothing—just 15 minutes and a shirt you were throwing away anyway.
Your dog doesn’t care if the seams are crooked. They care that they’re warm, comfortable, and getting attention from you while you fuss over the fit. And you’ll care that you just saved $45 on a sweater that would’ve fallen apart after three washes.
Once you’ve mastered one project, you can build an entire dog wardrobe for the cost of one store-bought jacket. Store everything in a designated pet space so it’s ready when the weather changes. And when someone inevitably asks “where did you get that?”—you get to say you made it yourself.
Which project will you tackle first this weekend? Pin this post so you can find the instructions when you need them.

Amr Mohsen is a software engineer who traded his keyboard for a leash — at least on weekends. His love for dogs inspired him to share what he learns as a dog owner and enthusiast, bringing a detail-oriented, research-driven perspective to every article he writes. If it’s about dogs, he’s probably already looked it up twice.

