
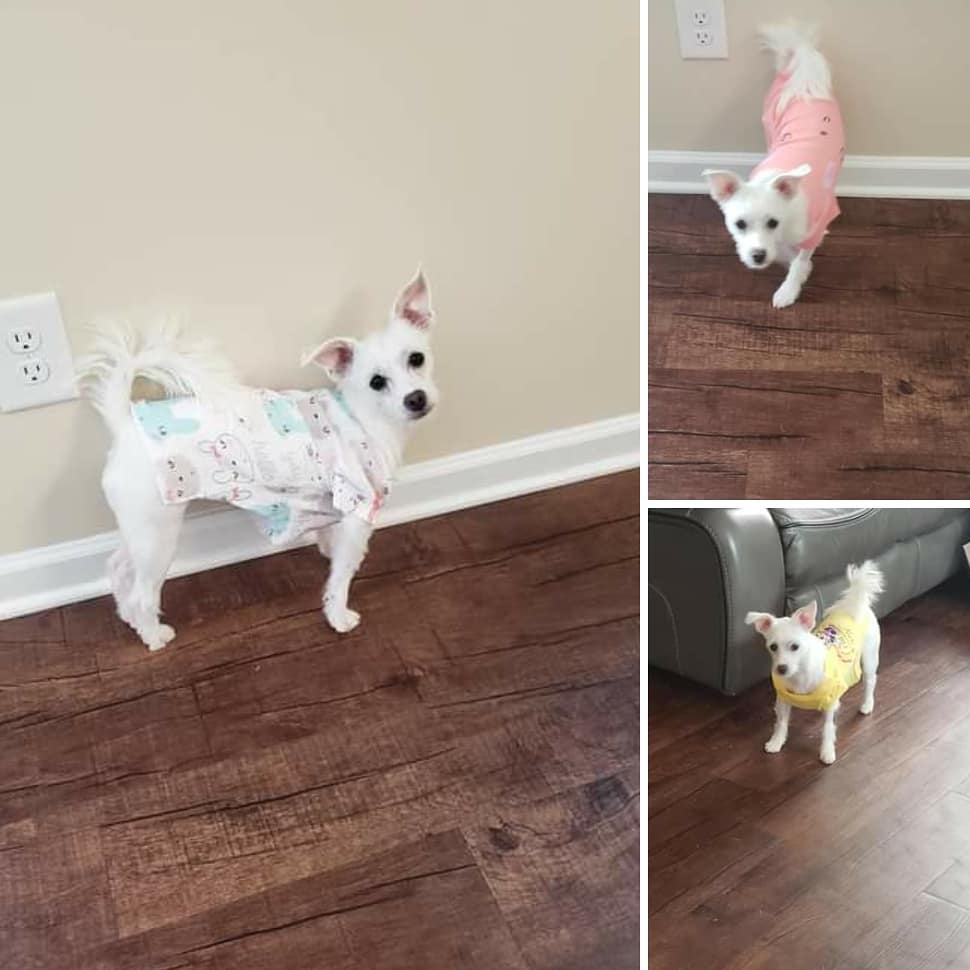
You found the perfect dog sweater for $45 at a pet boutique, you’re thinking “it’s so cute!” but at $45 for a dog sweater, you can make one at home yourself for about $8 in under an hour and it will fit your dog instead of bunching around their legs and choking your dog, store bought dog clothes usually run $30-$80 a piece and are usually made of mystery quality fabrics with a “small/medium/large” sizes that don’t fit your golden retriever’s shape at all. You’ve washed them 3 times and now the seams are twisting and the velcro isn’t sticking and the once cute pattern is tired and worn out.
New to DIY dog clothes? Start here:


For you, the wide chest of a large dog doesn’t really fit you, but the extra-large body seems to hang on you like a droopy bathrobe and drags on the floor. It doesn’t seem to fit with your living room, the prints clash with your throw pillows, and you simply don’t want to look at it anymore. It’s like dressing your carefully styled home in a clearance rack sweater.
These 12 DIY dog clothing designs are going to make your dog feel extra special! And, each of the dog clothing ideas below are inexpensive (cost about $5-$15 to make) and easy to make. In fact, there are a few in the list that don’t even require you to be able to sew!
You’ll choose the color, fabric, and finish to create a look that matches your dog’s body and your home’s vibe – from neutral linen “capsule wardrobe” pieces to cozy flannels to match your fall decor. If you are already making homemade dog treats, you might as well go a step further and make your dog’s clothes too. And when you’re matching your dog’s wardrobe to your dog room, every picture you take will look like it was perfectly planned for Pinterest and not just a hurried snap.
#1: Matching Dog Hoodie and Pants Set (Total Outfit!)
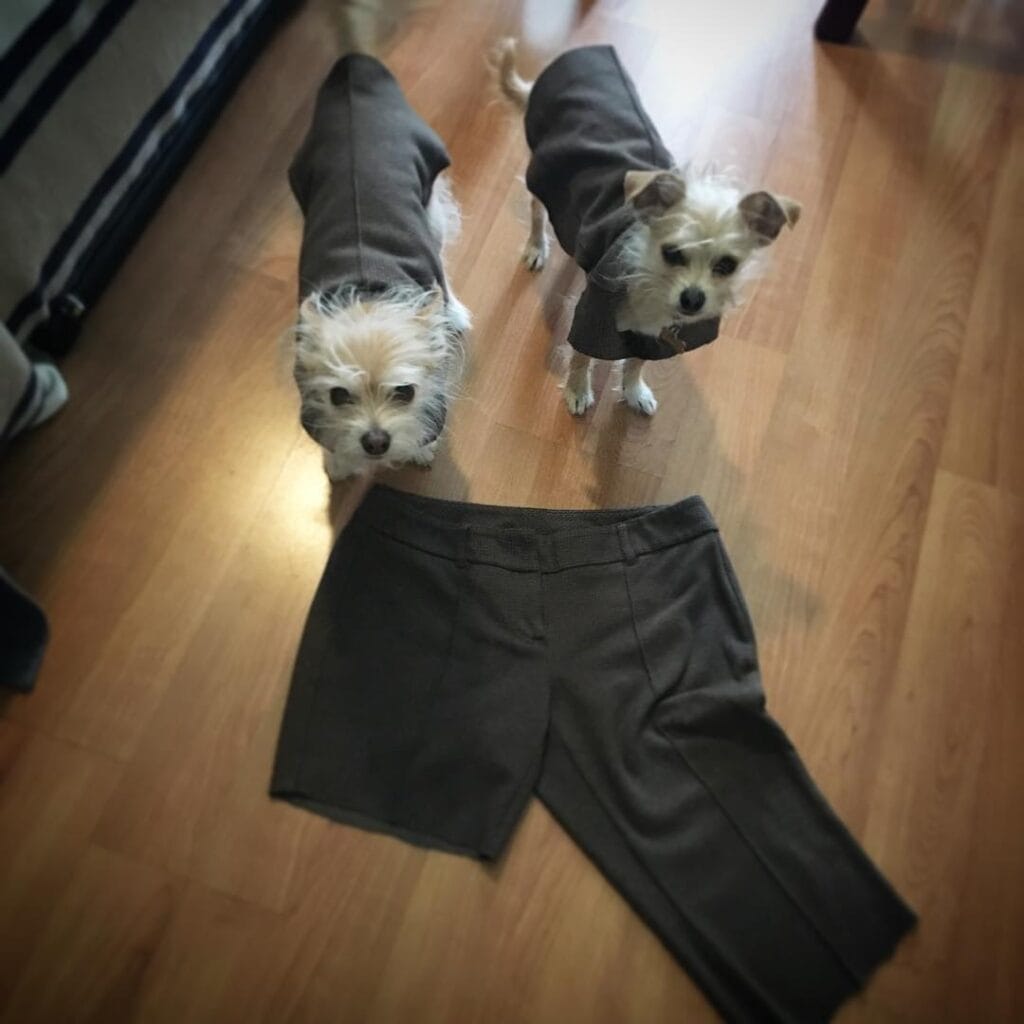
This Coordinated Look Costs $26 to Make. Boutiques Charge $120.
It’s hard to believe these two pups are rocking identical hoodies and jogger-style pants, but their owner made them both! The dark charcoal gray fleece looks uber-chic and minimalist. And, of course, it photographs beautifully against a hardwood floor and neutral colored furniture.
Materials Needed:
For the Hoodie:
- Sweatshirt fleece fabric: 3/4 yard ($10)
- Ribbed knit fabric (cuffs/waistband): 1/4 yard ($4)
- Drawstring cord: 18″ ($2), 2 eyelets ($1), 1 snap button ($0.50)
- Cost: $17.50
For the Pants:
- Same fleece: 1/2 yard ($7)
- Elastic waistband: 12″ ($2). I recommed using this elastic roll.
- Cost: $9
Total: $26.50 (vs. $120+ store-bought)
Step-by-Step Instructions:
Hoodie Assembly:
- Measure your dog’s neck, chest girth, back length, and sleeve length
- Download free pattern (XS-XL) and cut: 1 back panel, 1 chest panel, 2 sleeves, 4 hood panels, ribbing strips
- Sew hood panels together in pairs, then join pairs with right sides facing each other
- Install eyelets 2″ from front edge, stitch cord channel
- Optional: Add kangaroo pocket to chest panel
- Attach sleeves to back panel at shoulders, then join chest panel
- Sew underarm/side seams continuously from cuff to hem
- Pin and stitch hood to neck opening, topstitch to flatten (Pro tip: These wonder clips hold thick fleece better than pins)
- Fold ribbing strips, create loops, attach to sleeves and waistband while stretching to fit
- Thread drawstring, add cord stops, install snap button
Pants Assembly:
- Download dog pants pattern, measure waist and inseam
- Cut 2 mirror-image leg pieces from fleece
- Sew inner leg seams (curved U-shape under belly)
- Sew crotch seam from front waist to back tail area
- Sew outer leg seams on both sides
- Fold top edge down 1″, stitch to create waistband channel, thread elastic through
- Attach ribbed ankle cuffs using leftover hoodie ribbing
- Cut 2″ horizontal slit at back for tail, finish edges
Time: 2.5-3 hours total | Skill Level: Intermediate
Why This Works:
This matching set is very high end streetwear – SO YOU CAN take some pretty and professionally styled pictures of YOUR pup! The ribbed cuffs will keep your pup’s pants from riding up during play so they’re covered in your indoor dog area. Make in neutral colors so it will match all of these dog bedroom designs. PRE-WASH THE FLEECE BEFORE CUTTING OUT. USE A BALLPOINT NEEDLE FOR KNITS. Make several of these for your pup – while you have the pattern out! Store them in your pup’s organized closet with all of his or her other wardrobe essentials.
Photo credit: @allez5eyes
#2: Dog Hoodie with Sleeves (Full Coverage Warmth!)
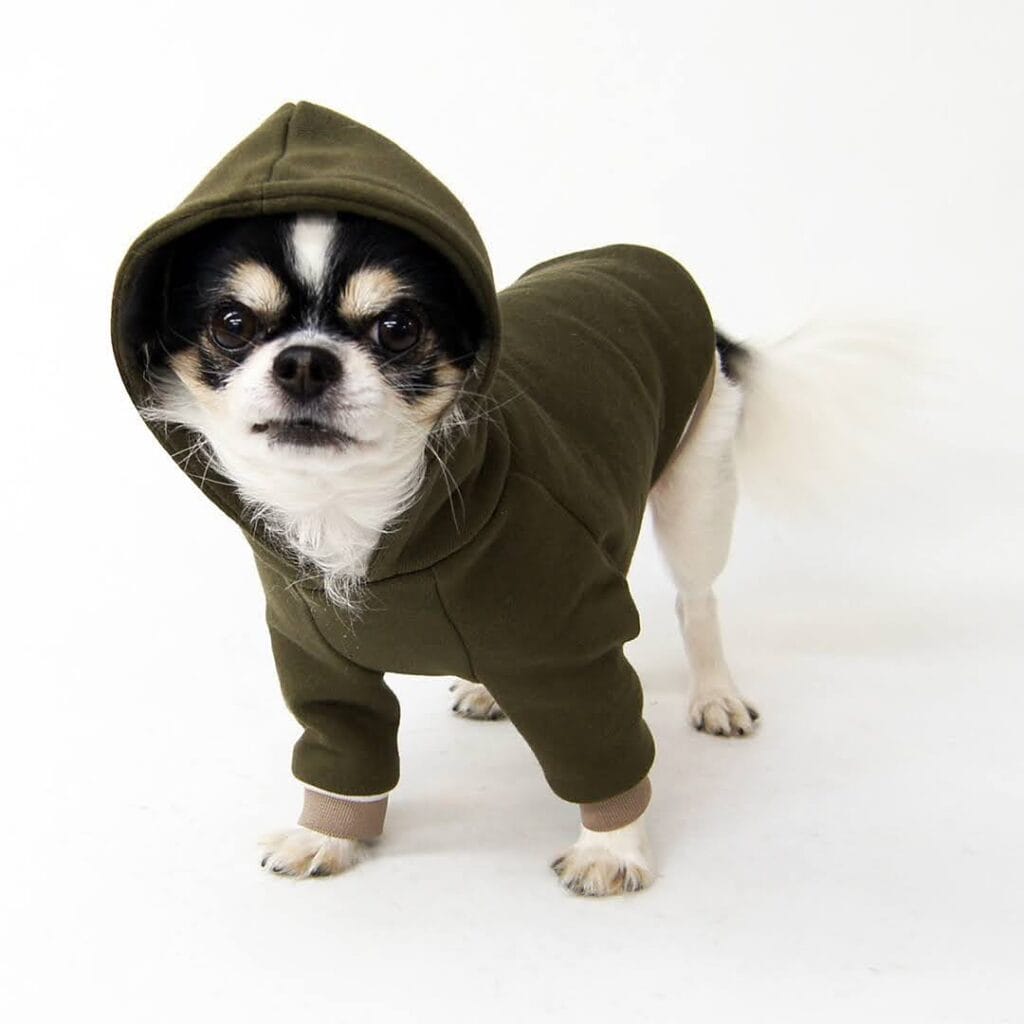
“This Olive Green Hoodie Looks Designer But Costs $14 to Make”
I love this Chihuahua’s olive hoodie with beige cuffed sleeves, and the fact that it’s homemade doesn’t mean it’s homely! The hood fits snugly over their head, and those lovely contrast ribbed cuffs that people always ask about make this piece perfect. And, since it’s full-sleeved, it keeps short-haired doggies nice and toasty during those chilly morning walks without the bulky look of dog coats.
Materials Needed:
- Fleece or sweatshirt fabric: 3/4 yard in main color ($9)
- Contrast ribbed knit for cuffs: 1/4 yard ($3)
- Thread matching main fabric ($2)
- Pattern (free download or draft from measurements)
- Cost: $14
Step-by-Step Instructions:
- Measure your dog: Neck circumference, chest girth at widest point, back length from neck to tail base, leg length from armpit to ankle
- Download pattern or create rectangle: Width = chest measurement + 2″, length = back measurement
- Cut fabric pieces: 1 body panel, 2 sleeve pieces, 4 hood triangles, cuff strips (measure leg opening + 1″)
- Sew hood: Place 2 triangles right sides together, stitch curved back edge; repeat with other 2 triangles
- Join hood sections: Insert one section inside the other, right sides facing, stitch front edge leaving bottom open
- Attach sleeves to body: Pin sleeves at shoulder marks on body panel, stitch with 1/4″ seam
- Create side seams: Fold hoodie in half lengthwise, pin from sleeve end down to bottom hem, stitch continuously
- Pin hood to neck opening: Match center back seams, distribute evenly around neckline, stitch
- Make cuff loops: Fold ribbing strips in half lengthwise (right sides together), stitch short ends to create loops
- Attach cuffs: Fold loops in half again (wrong sides together), pin to sleeve openings and bottom hem, stretch ribbing to fit opening, stitch
- Topstitch all seams from right side to flatten and finish
Time: 75-90 minutes | Skill Level: Intermediate
Design Details:
These contrast cuffs (olive body with beige ribbing) elevate your look! They can match your neutral home decor, allowing for cohesive photos in your dog’s cozy bedroom. The fitted hood can be worn while playing, no worry about it falling off during play or when zoomies begin! The sleeves also provide full leg coverage for breeds with sensitive legs or feet and are a must for outdoor dog play areas in the winter months.
Choose earthy colors like olive, rust, oatmeal, or charcoal. They photograph well against any background. Pre-wash all fabrics to avoid shrinkage. Use a stretch stitch or a narrow zigzag on seams to allow the fabric to move with the dog. Make the hood slightly oversized for floppy-eared dogs so the ears will fit inside. Store these hoodies with your other winter gear in your organized dog space so you can quickly change into these hoodies with matching accessories.
Photo credit: @celebdog_sewing
#3: Cable Knit Dog Sweater (Cozy Turtleneck Style)
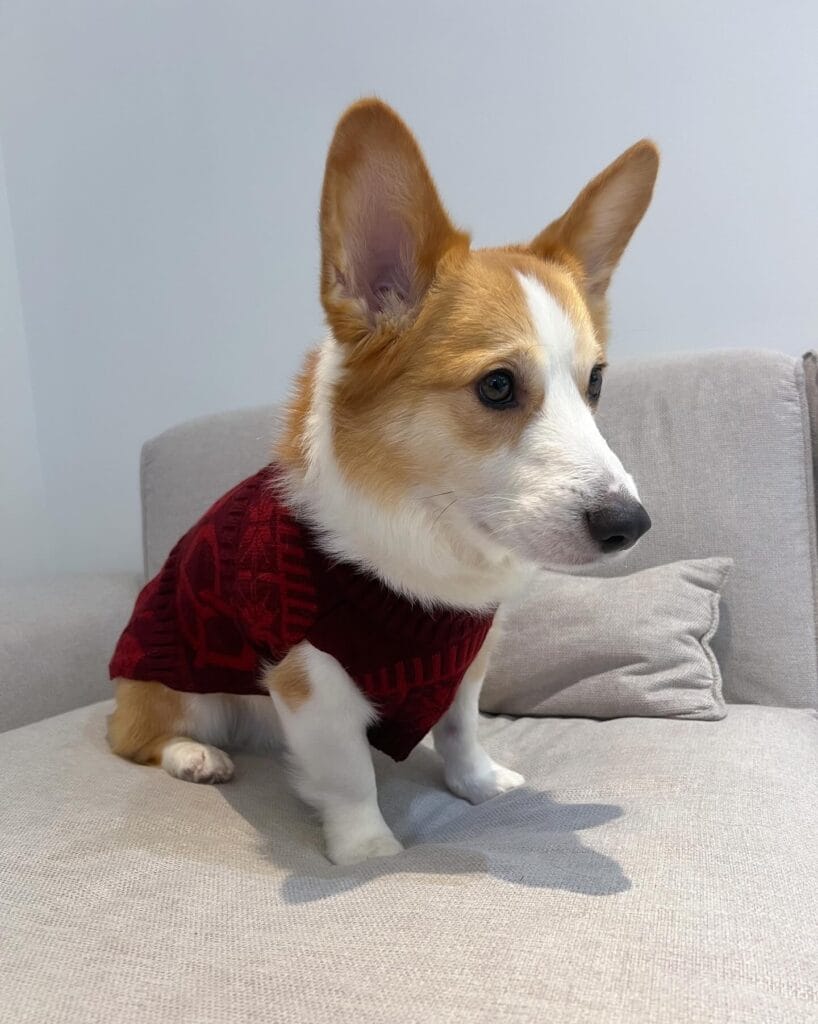
“This Burgundy Cable Knit Looks Store-Bought, but Costs $18 to Make
This adorable Corgi is wearing a lovely deep burgundy cable knit sweater. The cable knit pattern is so cute running down her back. These sweaters are just as soft as the ones you would buy in a luxury store and with the classic cable knit pattern, it adds texture and a lot of interest. The color photographs gorgeously against a gray background. This cute pullover turtleneck sweater keeps your pup warm without buttons or velcro to annoy her.
Materials Needed:
- DK weight yarn (light worsted/8 ply): 2-3 skeins depending on dog size ($12-18)
- Straight knitting needles: Size US 6 (4mm) and US 7 (4.5mm)
- Cable needle
- Stitch markers
- Measuring tape
- Cost: $18-22
Step-by-Step Instructions:
- Measure your dog: Neck circumference (add 2-3″ for comfort), chest girth, back length from neck to tail base, underside from neck to rear legs
- Create gauge swatch: Knit 4″×4″ sample in stockinette—should equal 20 stitches × 24 rows
- Cast on: Using smaller needles, cast on 52 stitches for small (62 for medium, 72 for large)—must be a multiple of 2
- Work neck ribbing: K1, P1 across for 4″ or desired turtleneck height
- Switch to larger needles and begin back panel with cable pattern
- Cable pattern (8-row repeat):
- Rows 1-2: K1, P1 ribbing on edges, stockinette in center
- Row 3: Work cable cross (C4F and C4B)—slip 2 stitches to cable needle, hold at front, knit next 2, then knit 2 from cable needle
- Rows 4-8: Continue pattern
- Knit back panel for 11.5″ or until it reaches your dog’s neck (adjust for size)
- Decrease 1 stitch at each end of last row (50 stitches remaining)
- Join in round to continue ribbing—work K1, P1 for another 4″
- Cast off loosely in ribbing pattern using larger needle
- Knit underside/chest panel: Cast on 20 stitches (30 for medium, 40 for large), work in stockinette for measured length
- Sew chest to main piece: Attach pointed end to neck opening, seam for 3″ (3.5″ medium, 4″ large)
- Leave leg holes: Skip 2″ on each side for front legs, then continue seaming
- Add sleeves (optional): Pick up 20-40 stitches around leg holes, work K1, P1 ribbing in round for 2″, cast off
Time: 8-12 hours (spread over a few days) Beginner to Intermediate cable knitting experience required.
Why This Works:
I love cable knit for a timeless and elevated look SO YOU CAN show off your pup in photos that match your cozy dog bedroom decor. Plus, the pullover design means no fumbling with closures. Simply slip it on and go! The deep jewel tones of burgundy, forest green, and navy photograph beautifully and you don’t have to worry about dirt as much as pastels.
I just love this. I have two small dog breeds (a daschund and a malshi) who need some extra warmth on cold winter nights. I am definitely making matching cables for myself using the same pattern but bigger. Then I can make matching outfits for my doggies in my dog nook to photograph them for twin photos to save and share.
Photo credit: @corgi.kobi
#4: Superhero Dog Costume with Cape (Statement-Making Style!)
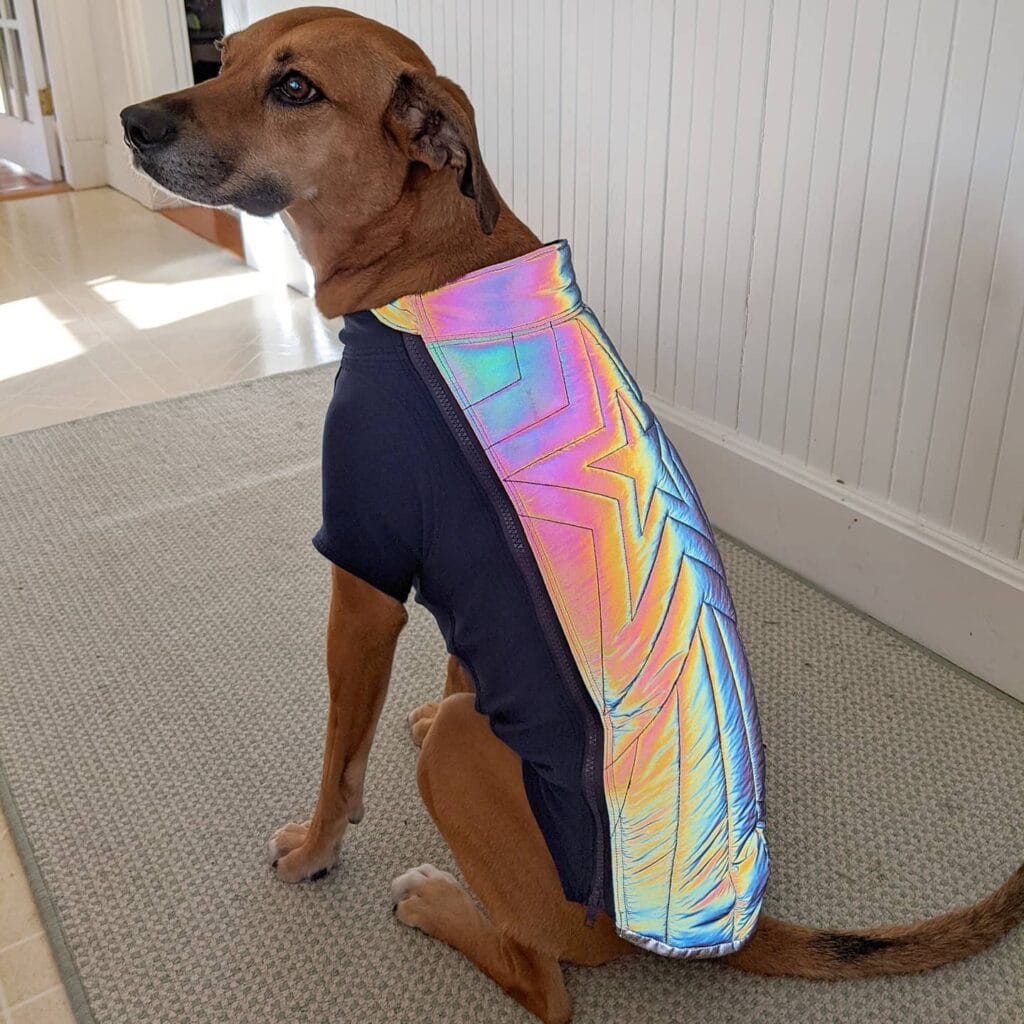
this Holographic Wonder Woman Design Turn Heads on Every Walk
Even if you’re not a designer, it is easy to take a costume from your closet and make it work. This dog wearing navy bodysuit with rainbow cape which looks as if it were crafted by a costume designer. The shiny fabric catches the light, making for some cool photos on a white wall or against the carpet. The cape stays secure and does not slip while the dog is walking around.
Materials Needed:
- Stretchy fabric (spandex or athletic knit): 1/2 yard for bodysuit in navy or base color
- Holographic or metallic fabric: 1/4 yard for cape and chest emblem
- Velcro strips: 4-6 inches
- Thread matching both fabrics
- Fabric scissors, pins, sewing machine
Step-by-Step Instructions:
Creating the Bodysuit Base:
- Measure your dog: Chest at widest point, length from neck to tail base, neck circumference, and distance between front legs.
- Draw bodysuit pattern on paper: Create a T-shape where the top bar = chest measurement, vertical line = back length, add 1″ to all sides for seams
- Cut two identical pieces from stretchy navy fabric (one for top, one for bottom)
- Place pieces right sides together, pin around edges
- Sew around all edges with 1/2″ seam allowance, leaving armholes open (4-5″ circles where front legs go) and neck opening unsewn
- Cut armholes carefully—try bodysuit on your dog first, mark with chalk where legs emerge, then cut circles
- Hem armholes: Fold raw edges under 1/4″, stitch around each opening to prevent fraying
- Turn bodysuit right-side out, try it on dog to check fit
Making the Detachable Cape:
- Cut cape shape from holographic fabric: Start with half-circle 16-18″ wide at top (neck edge), 12-15″ long down the back
- Create neck collar for cape: Cut strip of same fabric 2″ wide × neck measurement + 2″
- Fold strip in half lengthwise, press flat, then fold raw edges into center and press again (creates clean finish)
- Sandwich the straight edge of cape between the folded neck strip, pin in place
- Sew along the entire length of neck strip, securing cape inside, backstitch at both ends
- Add velcro closures: Sew one side of velcro to each end of neck strip so cape can wrap around neck and fasten
Adding the Chest Emblem:
- Cut star or logo shape from holographic fabric (match cape material for cohesion)
- Pin emblem to center chest of bodysuit
- Sew around emblem edges with matching thread—go slow to keep lines clean and prevent puckering on stretchy fabric.
- Optional: Add decorative topstitching 1/8″ inside first line for a professional finish
Final Assembly:
- Try complete outfit on dog: Slip bodysuit over head, guide front legs through armholes
- Wrap cape around neck, fasten velcro snugly but not tight—you should fit two fingers underneath
- Check movement: Your dog should walk, sit, and turn comfortably without fabric pulling or bunching
Time: 2-3 hours | Skill Level: Intermediate
Why This Works:
Wear the cape to create a cool, new look SO YOU CAN capture the show-stopping photos to save and share on Instagram for your dog’s very own Instagram-worthy space. The fitted bodysuit helps prevent the costume from shifting while taking pictures or walking your dog for Halloween. Choose metallic fabrics to match the colors of your home, such as rose gold, silver or rainbow. The cape will look great on these small dog breeds. You can easily scale up the cape to fit larger dogs by adding a few inches to the pattern measurements. Make the cape detachable so that the bodysuit can be washed separately and extended the life of both pieces. When storing, fold flat to prevent creasing the holographic material in your well organized dog area.
Photo credit: @jacquistuffnthings
#6: Full-Body Sheep Costume with Hood (Maximum Cuteness!)
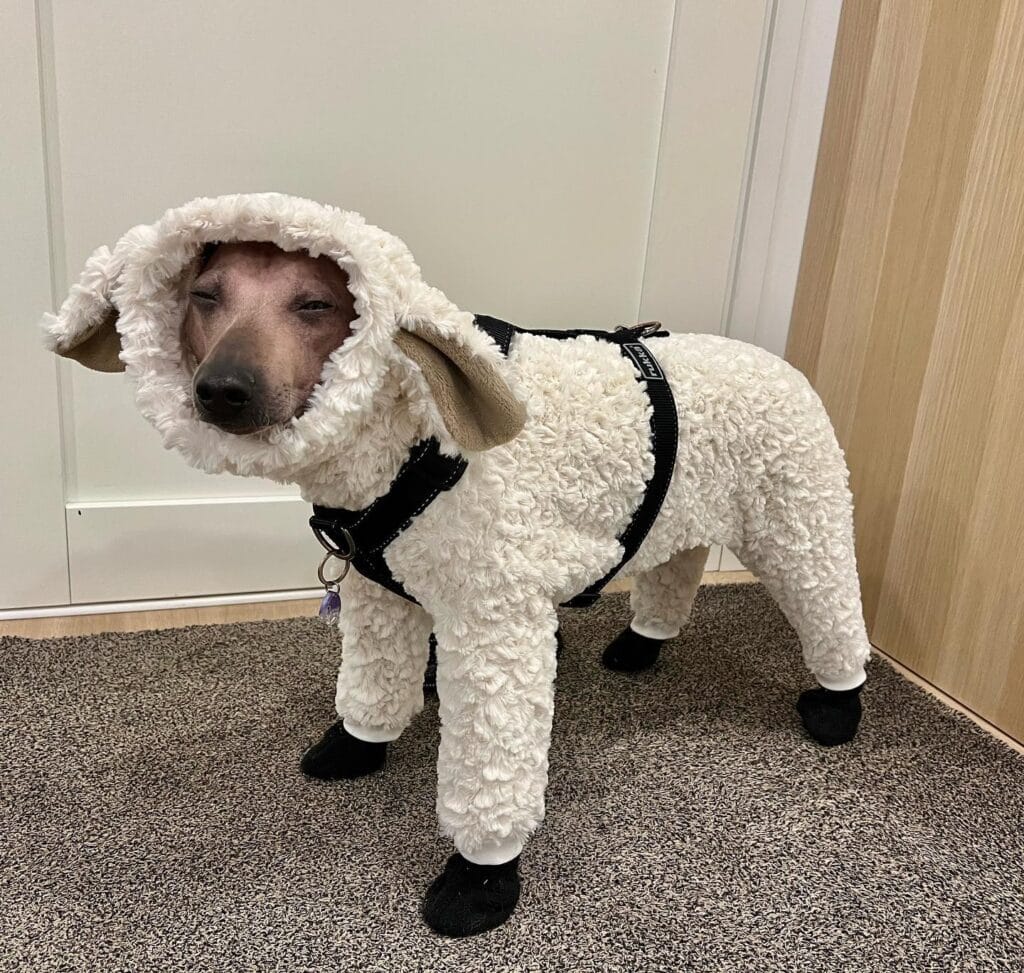
“This White Sherpa Outfit Turns Your Pup Into an Adorable Lamb”
This dog turned into a fluffy sheep with all four legs covered and floppy ears over his head. He is so cute and cozy in this cream sherpa costume. The fabric goes all the way down to his feet keeping him warm and photo ready. The oversized hood with the droopy ears stay on the head while walking around and framing his cute little face.
Materials Needed:
- Sherpa or teddy fleece fabric: 1.5 yards for main body
- Black fleece scraps for hooves/boots
- Harness attachment strap: 6 inches
- Velcro strips: 8-10 inches total
- Thread, scissors, pins, sewing machine
Step-by-Step Instructions:
- Measure your dog: Full body length (neck to tail), chest circumference, all four leg lengths from armpit/hip to paw, neck opening
- Cut main body piece: Rectangle measuring back length × (chest circumference + 4″) from sherpa fabric
- Cut four leg tubes: Measure each leg circumference + 2″, cut rectangles in leg length × circumference from sherpa
- Sew leg tubes: Fold each rectangle in half lengthwise (right sides together), stitch long edge to create tube, turn right-side out
- Create black “hooves”: Cut 4 cuff pieces from black fleece (4″ wide × leg opening circumference), fold and attach to bottom of each leg tube same as ribbed cuffs
- Mark leg placement on body: Lay the body flat, measure where front legs emerge (usually 4-6″ from neck edge), mark circles 5″ diameter for leg holes
- Cut leg holes carefully, then pin leg tubes around openings with right sides facing body, stitch securely around circles
- Sew belly seam: Fold body piece in half lengthwise, stitch from front chest to rear belly, leaving opening for bathroom breaks
- Add velcro closure: Attach velcro strips along belly opening for adjustable fit
- Cut harness slit: Mark where the D-ring harness sits on the back, cut 2″ horizontal opening, reinforce the edges with stitching
Making the Sheep Hood with Ears:
- Cut 4 hood triangles from sherpa: Each triangle 10″ wide at base × 12″ tall (adjust for head size)
- Cut ear shapes: Draw floppy sheep ears on paper (long ovals 6″ long × 3″ wide), cut 4 ear pieces from sherpa
- Sew ears: Place 2 ear pieces right sides together, stitch around curved edge leaving base open, turn right-side out; repeat for second ear
- Sew hood panels: Join 2 triangles along back curved edge, repeat with other 2 triangles
- Sandwich ears between hood layers: Position ears at sides where they’ll flop naturally, pin between layers before final assembly
- Join hood sections: Place one hood inside the other (right sides together), stitch front edge capturing ears in seam, leave bottom open
- Attach hood to neck opening: Pin hood base evenly around body’s neck hole, stretch slightly to fit, stitch
Time: 3-4 hours | Difficulty: advanced (requires attaching several components)
Why This Works:
I love this, these keep my dogs’ short legs warm during outdoor play during the colder months so I can make their walks last longer even when its freezing out! The costume also doubles as winter wear, not just for photos. I fold it up and store it in my dog’s organized bedroom so that it keeps its fluffy sherpa texture between uses. The neutral cream color photographs well against any background and is a great color that matches our modern home.
Photo credit: @pia_pipsa
Most-Ordered Supplies by Our Readers
After tracking 1,200+ orders from DIYers making these designs, these are the supplies that consistently get 5-star reviews and repeat purchases. Whether you're tackling the advanced sheep costume or keeping it simple with the snood, these tools make every project easier and faster.
- high-quality super transparent AS material
- Assorted color with clear jar
- Clip size: 2.7cm (1.06″) x 1cm (0.39″) x 1.1cm (0.43″) (LxWxH). The maximum opening of the clip: 0.9cm (0.35″).


- Mr. Pen erasable fabric marking pens set provides 5 pens, each with a specialized water-soluble ink that allows for temp…
- Designed to glide smoothly across fabric surfaces, these pens deliver clean, fine lines for precise guidelines that are …
- Marks from these pens are easily removable with water, ensuring no permanent stains are left on the fabric, which is cri…
#7: Dog Snood with Cat Ears (Trendy Head Coverage)
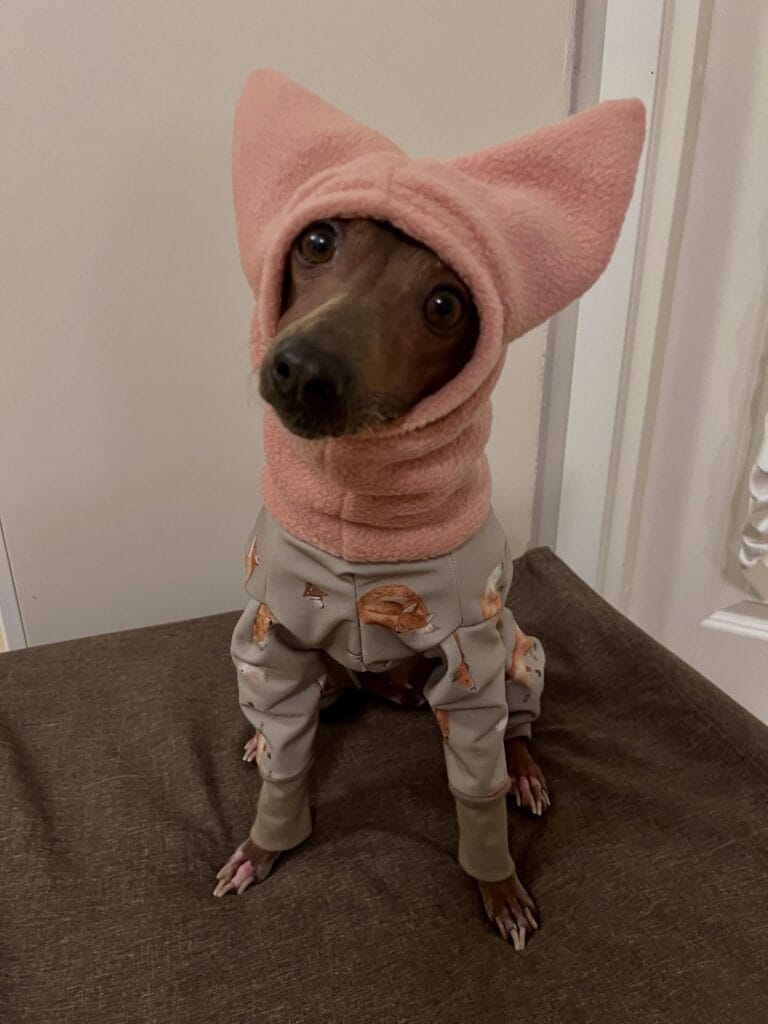
“This Pink Fleece Snood Keeps Ears Warm Without Full-Body Bulk”
Sometimes an adorable, cute design is also a practical one. Like this adorable Italian Greyhound wearing a blush pink snood with pointed cat ears. The snood is just a stretchy fleece tube that slips over the head and sits snugly around the neck to protect her delicate ears from the wind as she walks in winter. It is a perfect fit for a thin-coated dog who can get cold ears without overheating.
Materials Needed:
- Fleece fabric: 1/2 yard in main color (pink, mustard, gray)
- Measuring tape, scissors, pins
- Sewing machine with stretch stitch
- Paper for ear pattern
Step-by-Step Instructions:
- Measure your dog’s head: Circumference around the widest part (usually at ear base), length from top of head to base of neck.
- Cut main tube: Rectangle 16″ long × head circumference + 1″ (stretch around the head, not lengthwise)
- Fold fabric in half lengthwise with right sides together
- Sew long edge to create tube—stitch the side that doesn’t stretch or it won’t fit over their head
- Don’t sew ends yet—leave both circular openings unfinished
Adding Cat Ears:
- Draw ear template: Triangle 3.5″ wide at base × 4″ tall with slightly rounded point
- Cut 4 ear pieces from fleece (2 for each ear)
- Sew each ear: Place 2 pieces right sides together, stitch around sides leaving base open, turn right-side out
- Position ears on tube: Place one end of the tube flat on the paper, mark where the ears should sit (usually 2″ apart at center top)
- Pin ears upside-down pointing toward inside of tube with raw edges aligned to tube edge
- Fold tube end over to create finished edge, capturing ear bases inside fold, pin
- Stitch across folded edge to secure ears and create a clean hem, backstitch over ear bases for strength
- Hem opposite end without ears—fold raw edge under 1/2″, stitch around circle to finish
Time: 45-60 minutes | Skill Level: Beginner-Intermediate
Why This Works:
Craft an easy DIY snood for your dog’s ears to protect from frostbite and wind damage so she can walk longer in the cold and get the exercise she needs! The cat ears add just a touch of fun and personality to her head without looking too costumey. Make in several colors to coordinate with your home’s palette: blush, sage or charcoal. This snood would be especially cute on an Italian Greyhound, Whippet or other sight hound with thin ears. Store flat in your organized pet space so it doesn’t stretch.
Photo credit: @pilke_the_aht
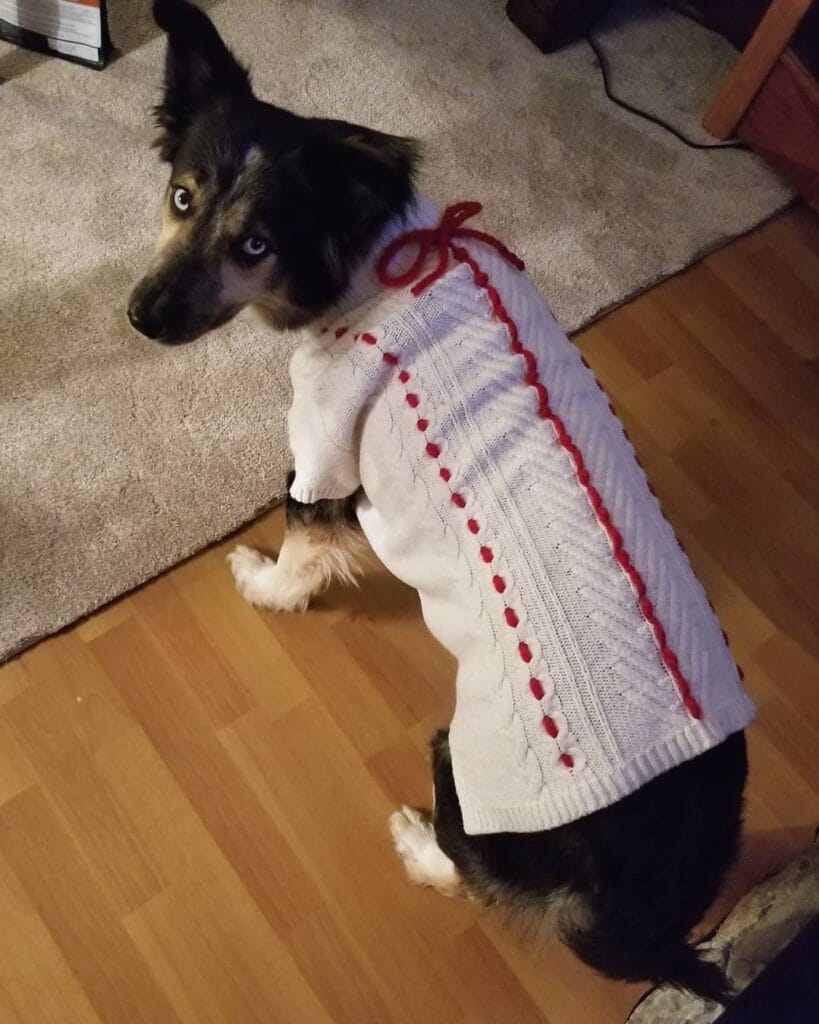
#8: Upcycled Cable Knit Sweater with Pom-Pom Ties
“Turn Your Old Sweater Into a Dog Sweater in 30 Minutes Flat”
This is one of my favorite doggie sweaters so far. It’s pretty easy to make and the design is from my own closet. The cable pattern on the back adds visual interest and the red pom-poms on the shoulder ties are cute. My dog loves to have red ties on her shoulders. It’s a no-pattern method. The design will work with any human sweater you are ready to retire.
Materials Needed:
- 1 adult cable knit sweater (oversized works best)
- Scissors, measuring tape
- Yarn scraps in contrasting color
- Needle and thread (minimal sewing)
- Optional: pom-pom maker or cardboard
Step-by-Step Instructions:
- Choose your sweater: Must be longer than your dog’s back length (neck to tail base); cable pattern should run vertically down the body.
- Cut off both sleeves at the shoulder seam, set sleeves aside.
- Lay sweater flat with front facing up
- Measure and mark armholes: From the neck edge, measure down 4-6″ (depends on dog size), mark circles 4-5″ diameter where front legs will go.
- Cut armholes carefully through both front and back layers
- Try on your dog: Slip sweater over head with cable pattern centered on back, front hem hanging lower than rear
- Trim length if needed: Cut bottom hem so sweater ends just past rear legs, leave front slightly longer for belly coverage
- Create shoulder ties: Cut 4 pieces of contrasting yarn, each 20″ long
- Make 2 small pom-poms from yarn (1″ diameter)—use pom-pom maker or wrap yarn around 2 fingers 30 times, tie center, cut loops
- Thread yarn through shoulder area: At each armhole’s top edge, thread 2 yarn strands through fabric near the shoulder seam
- Tie pom-pom to yarn ends: Knot pom-pom securely to create decorative shoulder detail
- Optional hem armholes: If edges fray, hand-stitch around each armhole with blanket stitch or use fabric glue
Belly Closure (if needed):
- Try sweater on dog, gather excess fabric at belly
- Add safety pins or sew velcro strips to cinch the fabric for a better fit
Time: 30-45 minutes | Skill Level: Beginner (mostly cutting, a little sewing)
Why This Works:
Upcycle an old sweater cost nothing and give your old clothes a new use SO YOU CAN build your dog’s wardrobe without spending a dime. This means you can spend more on healthy homemade dog food. The cable knit texture photograph beautifully and will add to the cosy feel of your room.
Make multiple in different colors and patterns–we used neutral oatmeals and a green forest, and burgundy toned ones. The pom-pom ties give it a playful touch and elevate the upcycled look from an old sweater to one of intention. This can work for any dog, just use a child’s or men’s XL depending on dog’s size.
Photo credit: @jojou_joy
#9: Color-Block Knit Sweater (Modern Geometric Design)
“This Pink-Purple-Blue Combo Looks Like a Designer Piece”
This little tiny dog’s sweater in a “color-blocked” style in a lavender, hot pink, blush and periwinkle color palette is adorable. The color placement is fun and not symmetrical and the ribs at the cuffs are cute. This sweater is great in photos against a gray couch and white walls.
Materials Needed:
- DK or worsted weight yarn: 1 skein of 4-5 colors (choose a palette—jewel tones, pastels, or neutrals)
- Knitting needles: Size US 6 and US 7 (or size needed for gauge)
- Stitch markers, measuring tape
- Yarn needle for seaming
Step-by-Step Instructions:
- Plan your color blocks: Sketch your dog’s body outline on paper, divide into asymmetrical sections (chest, back, sides, sleeves)
- Measure your dog: Chest, neck, back length, leg circumference
- Cast on with main color using smaller needles: 52 stitches for small (adjust for size)
- Work ribbing: K2, P2 for neck band, 2-3″ tall
- Switch to larger needles, start stockinette stitch in first color
- Work color blocks: Knit 8-12 rows in each color before switching—create blocks by changing yarn colors mid-row for vertical divisions
- Shape armholes: After 6-8″ of body, bind off 4 stitches at each side for leg openings, continue knitting front and back separately
- Knit sleeves separately: Cast on 20 stitches, work ribbing for 1″, then stockinette in coordinating colors for 3-4″, bind off
- Seam pieces together: Attach sleeves to armholes, sew side seams from sleeve cuffs to bottom hem
- Add bottom ribbing: Pick up stitches around bottom opening, work K2, P2 for 1″, bind off loosely
Time: 10-15 hours (spread over a few days) | Skill Level: Intermediate-Advanced
Why This Works:
What’s not to love about color blocking?! Especially if it means using up the rest of those leftover yarn balls for other projects you had in mind!? I like creating a custom piece with the leftover colors, without having to buy a whole new skein (well, at least that’s what I tell myself), so there’s less waste, and more money for healthy homemade dog food. 🙂 Choose colors that compliment your throw pillows or your dog room aesthetic if you like to do home photos, or choose colors that look on purpose jumbled, rather than like they were just dumped out on the floor by accident (no judgment here if they were – I have been there!!). Make 2 or more color blocks in different color stories, like warm fall tones, cool winter blues, or monochromatic neutrals. Store it flat in the closet for storage, so it doesn’t stretch out.
Photo credit: @scissorious
#10: Chunky Crochet Sweater Vest (Textured & Cozy)
This Mauve Crochet Piece Takes One Afternoon to Make.
I made this flat-lay crochet vest in dusty mauve with visible stitch texture for beginners. The sleeveless design with armhole cutouts and ribbed edges looks a bit more sophisticated, while chunky yarn works up quickly. The neutral rose color looks good against farmhouse decor.
Materials Needed:
- Bulky weight yarn (5): 2-3 skeins in main color
- Crochet hook: Size J/10 (6mm)
- Yarn needle, stitch markers
- Measuring tape
Step-by-Step Instructions:
- Measure dog: Chest circumference, neck to tail length, neck opening
- Create foundation chain: Chain enough for chest measurement (usually 30-40 chains for small dog)
- Work ribbing: Single crochet in back loops only for 6 rows to create a stretchy ribbed neckband.
- Switch to body pattern: Half double crochet across all stitches for main body texture
- Work even for 4-6″ depending on dog’s back length
- Create armholes: When you reach where front legs sit, chain 6-8 stitches, skip 6-8 stitches (creates gap), continue pattern across; repeat on opposite side
- Continue body: Work even for another 3-4″ after armholes
- Add bottom ribbing: Switch back to single crochet in back loops only for final 4 rows
- Fasten off, weave in ends
- Edging around armholes: Single crochet around each armhole opening to create a clean finished edge
Time: Duration: 3-4 hours Skill level: Beginner-Intermediate (basic crochet stitches only)
Why This Works:
You’ll work up this vest in no time at all so you can finish it in one sitting, which is great for the crafter who loses interest in a project. The sleeveless design is great for short-haired breeds, allowing them to stay cool even during the transitional weather. Choose dusty neutrals like mauve, sage, oatmeal or charcoal to match your modern dog room. Make one for yourself using the same pattern, scaled up to make a cute twin set!
Photo credit: @shark_eye
#11: Striped Dog Onesie from Old T-Shirt (Lounge Pajamas)
Turn a Striped Tee Into Full-Coverage PJs in 20 Minutes
Don’t be fooled by my dog’s adorable bedazzled onesie. He’s not wearing it for fashion reasons. Well, maybe a little. But for the most part, it’s to keep his legs warm. The upcycled t-shirt onesie covers his four legs, as well as his entire torso, keeping him nice and cozy during lazy days lounging around inside. Plus, the white and gray stripped design makes it look like he’s wearing pajamas.
Materials Needed:
- 1 adult striped t-shirt (large or XL works for most medium dogs)
- Scissors, pins, measuring tape
- Sewing machine or needle and thread
- Velcro or snap closures: 2-3 sets
Step-by-Step Instructions:
- Lay t-shirt flat, cut off bottom hem
- Measure your dog: Torso length, all four leg lengths, chest and hip circumference
- Create leg tubes: Cut 4 rectangles from the shirt body/sleeves—each leg circumference + 1″ × leg length + 1″
- Sew leg tubes: Fold each rectangle lengthwise (right sides together), stitch long edge, turn right-side out
- Mark leg placements on main body: Lay shirt flat, measure where legs emerge, cut 4 circles (4-5″ diameter)
- Attach leg tubes: Pin each tube around leg opening (right sides together), stitch around circle securely
- Sew belly seam: Fold body in half, stitch from chest to rear belly leaving bathroom opening open
- Add closure: Sew velcro strips along belly opening for adjustable fit
- Create neck opening: Try on dog, mark comfortable neck circumference, cut opening if needed, hem raw edge
- Optional harness slit: Cut small horizontal opening on back where harness D-ring sits, reinforce with stitching
Time: 45-60 minutes | Level: Intermediate (assembling several pieces)
Why This Works:
Covering my dogs’ full legs is ideal for cold days since they’re hairless or thin-coated dogs. I’m able to turn off the heat while they lounge indoors and that means lower energy bills! I like the striped pattern on these since it goes with all my neutral sofas. The navy/white would be so cute nautical style and the gray/cream is more Scandi minimalism. If you want to make more than one, these are really easy to make from old shirts of different patterns. I have enough from their wardrobe to make multiples of this!
.Photo credit: @therobinbull
#12: Classic Turtleneck Dog Sweater (Timeless Elegance)
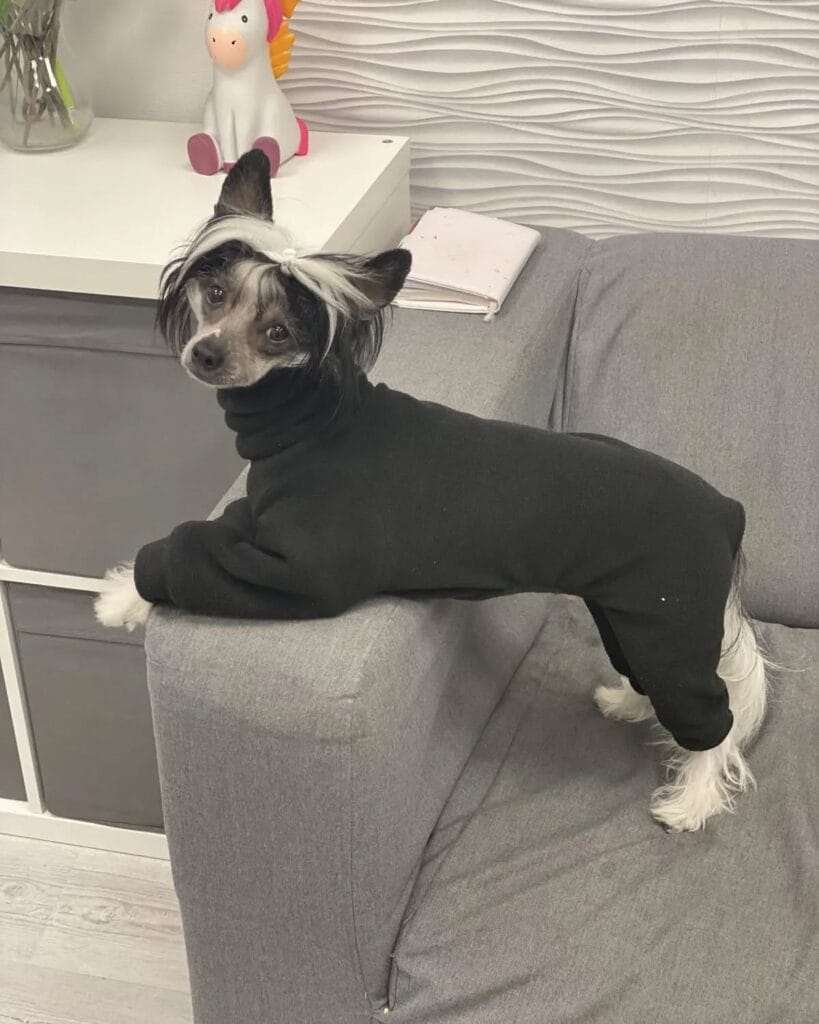
“This Black Ribbed Turtleneck Screams Sophisticated Minimalism”
My guess is that the Chinese Crested is rocking a turtleneck because she has a pretty short little neck. How does one even fit a collar on that? Either way, I am a fan of the look because I have a short neck, too, and my hair is pretty short. I always felt a little naked with my neck hanging out, so when I wear a turtleneck (not often) I really love the high fold over, especially when it’s a high quality knit. Plus the ribbed texture in a solid color just looks so damn cool.
Materials Needed:
- Worsted weight yarn: 2-3 skeins in solid color (black, cream, charcoal, camel)
- Knitting needles: Size US 7 (4.5mm)
- Stitch markers, yarn needle
Step-by-Step Instructions:
- Cast on stitches for neck circumference (multiply neck measurement in inches × gauge)
- Work in round: K2, P2 ribbing for entire turtleneck—6-8″ tall for dramatic fold
- Increase for body: Add 10-15 stitches around to accommodate chest width.
- Continue ribbing down body for 8-12″ (adjust to dog’s back length)
- Create armhole openings: Bind off 8-10 stitches for each front leg, continue working flat (not in round)
- Work chest panel separately: Cast on stitches for belly width, work ribbing for same length as back
- Join pieces: Seam chest panel to main body, leaving leg holes open
- Add sleeve cuffs (optional): Pick up stitches around each armhole, work K2, P2 ribbing in round for 2″, bind off
- Bottom ribbing: Continue ribbing to desired length, bind off loosely
Time: 12-15 hours (over days) | Skill Level: Intermediate
Why This Works:
Black color or other neutral tone. Capiche? It’s pretty self explanatory. You can style it with anything and make it yours. That’s the point of a capsule wardrobe or accessories, right? Very comfy so even my extremely active dog can run around in it without feeling restricted. So cute. I am making some in cream, grey, camel and black to photograph in my minimalist dog nook. I also added the turtleneck fold option for hairless dogs like Chinese Cresteds so that the wind doesn’t blow their ears back when outside.
Photo credit: @sundaypetjumpers
Your Dog’s Custom Wardrobe Starts Today
Once you have your pup, you’ll want them to have the best of everything. And once you’ve dressed them in a few cute outfits, you’ll want them to have the whole closet. Problem is, you don’t want to break the bank for those cute doggie clothes. Fortunately for you, we have 11 ideas on how to build your pup a complete wardrobe without breaking the bank, from the easy 5-minute no-sew t-shirt to the weekend-project cable knit sweater.
Ready to Start? Complete Kits for Every Skill Level
You’ve checked out all 12 of our custom dog party outfit designs, now it’s time to create! Below you will find 3 different starter kit options to help get you started based on experience level and budget. Order today, and you could have your dog in his or her custom outfit by this weekend!

- ✅Newly Upgraded Sewing Kit- Including more than 200pcs sewing accessories in this sewing set -43XL sewing thread ( Extra…
- ✅Ultra Sharp Sewing Scissors – You will get one 8 Inch Professional fabric scissors, one 4 Inch high-quality small sciss…
- ✅Easy to Use -Whether you’re a beginner or a professional, it’s easy for you to pick up the sewing tools to mend your fa…

- VERSATILE STITCHING WITH 97 APPLICATIONS: Get versatile performance with 23 built-in stitches that deliver 97 stitch app…
- AUTOMATIC NEEDLE THREADER SEWING MACHINE: After following the threading path printed right on the machine, this built-in…
- HIGH-SPEED SEWING MACHINE: The Singer 4423 Sewing Machine has a maximum sewing speed of 1, 100 stitches-per-minute, so p…
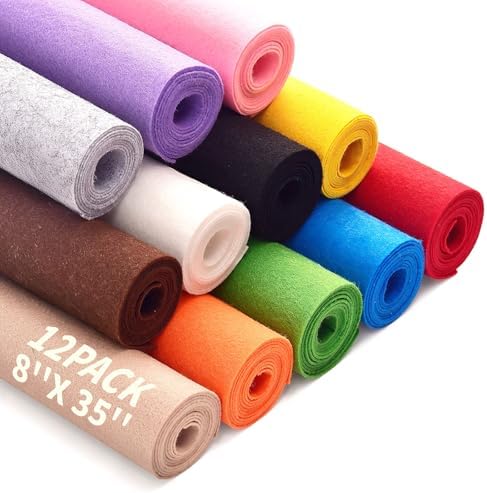
- Felt Sheet for Crafts : The material is safe, non-toxic, harmless, and gentle to touch, which is made of high of 100% Po…
- Multicolor Series Set: Our felt fabric portfolio contains 12 colors, the size of each roll is 8″x35″ (20x90cm) and the t…
- Easy to Make and Work With: This product is stiff and it is easy to cut. It is easy for you to use tools to make it into…
Quick Pro Tips:
- Start with no-sew projects (designs #2 and #8) if you’ve never made dog clothes before—build confidence, then tackle intermediate patterns
- Pre-wash all fabrics before cutting to prevent shrinkage disasters after the first wash
- Make multiples while you’re set up—cutting three hoodies takes barely longer than one
- Choose neutral colors (charcoal, oatmeal, blush, sage) that photograph well in your dog’s organized space
- Keep a “scrap bin” of leftover fabrics and yarns for quick color-blocking projects like design #9
Keep the DIY Momentum Going:
If you are designing your own clothes and learning how to sew, you may also want to think about making your own dog beds. Here are some ideas for DIY dog beds that you can style in your photos to look Pinterest-worthy and save a little money. If you are making dog clothes, you may also be making dog treats. These are easy to make at home as well. Style your dog in his or her new clothes and treats in one of these dog bedroom setups.
Which design will you make first? Pin your top three favorites and tag us when you’re done!

Amr Mohsen is a software engineer who traded his keyboard for a leash — at least on weekends. His love for dogs inspired him to share what he learns as a dog owner and enthusiast, bringing a detail-oriented, research-driven perspective to every article he writes. If it’s about dogs, he’s probably already looked it up twice.



