Have you ever watched your pup get bored with the same old toys? It’s tough seeing that sad face. But what if you could whip up some DIY dog games to keep them entertained? I’ve got ten fun ideas that’ll get your dog’s tail wagging, from a tricky Puzzle Treat Dispenser to an adventurous Obstacle Course. Trust me, even if your crafting skills are questionable, these projects can be more rewarding than a belly rub. Ready to get started?
Interactive Playtime Ideas
When it comes to keeping your pup entertained, why not plunge into some DIY dog game designs?
You can create simple yet engaging dog games DIY that’ll have your furry pal wagging their tail in excitement.
Try using a muffin tin, some tennis balls, and tasty treats. Just place the treats in the tin, cover them with balls, and let your pup figure it out.
Trust me, watching them sniff and paw at the balls is heartwarming.
Or how about a homemade tug toy? Just braid some old t-shirts together.
It’s an easy project, and your dog will love the challenge.
Remember, interactive play not only entertains but strengthens your bond.
Our Collection
Let’s talk about some fun games you can whip up for your pup.
You’ve got the Puzzle Treat Dispenser, the Ball-in-a-Box Challenge, and so many more that’ll keep your dog engaged and entertained for ages.
Which one are you excited to try first?
1. Puzzle Treat Dispenser
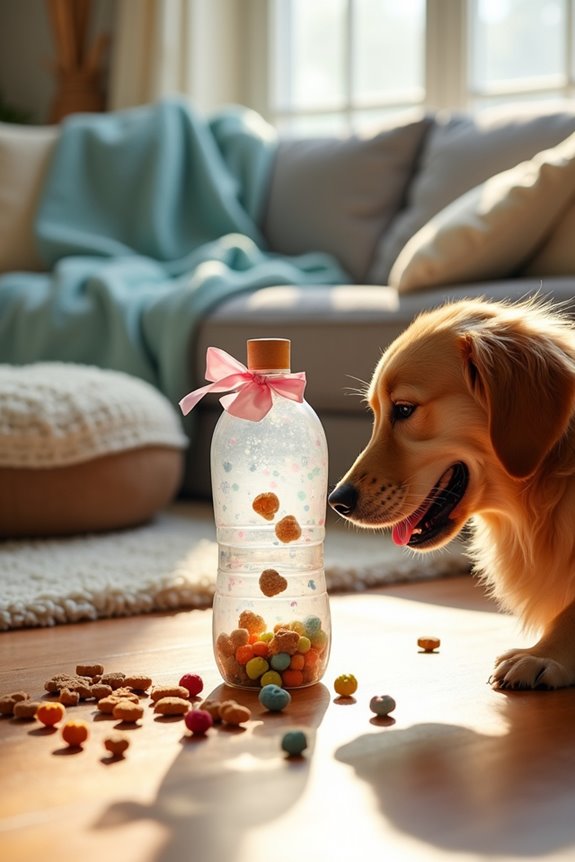
Get ready to engage your furry friend with a DIY Puzzle Treat Dispenser! This fun project not only entertains your dog, but it also helps keep their minds sharp and boosts their problem-solving skills. Plus, it saves you a few bucks on expensive toys while giving you a charming and visually appealing addition to your home. Who knew creating something for your pup could be so rewarding? Premium dog food sensitive stomach can be beneficial in supporting your pet’s overall health, while many premium dog enrichment toys focus on mental stimulation to ensure your pet is both happy and healthy! Additionally, investing in premium dog toys can enhance your pup’s playtime experience in ways you never imagined. In fact, premium dog chew toys are specifically designed to promote dental health while satisfying your dog’s natural urge to chew.
Materials Needed:
- An empty plastic bottle (like a 2-liter soda bottle)
- Scissors
- Dog treats (small, bite-sized)
- A piece of sandpaper (optional)
- A ruler
- A marker
- Tape (optional, for extra reinforcement)
- Decorative materials (like paint, fabric, or stickers, if you want to style it up)
Step-by-Step Instructions:
- Clean Your Bottle: First, rinse out the bottle thoroughly. Your dog deserves the best, right? Plus, we don’t want any sticky soda surprises in there.
- Mark the Holes: Using your ruler and marker, measure and mark spots around the bottle for the holes. Aim for about four evenly spaced spots, roughly 1-2 inches in diameter. Make them big enough for treats to fall out, but not too big that everything spills out at once.
- Cut the Holes: Carefully use the scissors to cut out the marked holes. If you find the edges are sharp, a quick sand with the sandpaper will help keep your pup’s nose safe.
- Fill with Treats: Once your holes are ready, toss in a handful of those tasty dog treats. Voila! Your dispenser is almost ready.
- Seal it Up (Optional): If you’re worried about your crafty masterpiece becoming a troubled toy, you can seal the cap back on tightly or tape around the bottle to strengthen it.
- Let the Fun Begin: Show your dog how to roll the bottle to get those treats out. Maybe even give it a gentle shake or a nudge to get them started. They’ll be entertained for a while—perfect for those moments when you need five minutes to yourself.
- Clean Up: After playtime, it’s a good idea to check for any loose pieces or leftover treats, ensuring everything stays safe and sound.
Optional Add-ons/Variations:
Feeling crafty? You can paint or wrap the bottle in fabric to match your home’s décor. Or, go wild with a fun pattern. Just be sure that whatever you use is non-toxic and safe in case your pup decides to give it a little love nibble.
You can even use a small piece of ribbon to create a decorative bow on top for that extra touch!
Pro Tip:
Always supervise your dog when they’re playing with their new puzzle. While this DIY project is generally safe, it’s a good idea to keep an eye out for any small bits that may come loose.
In the grand scheme of things, a little supervision not only keeps your pup safe but also allows you to have some quality bonding time together! Plus, who doesn’t love a good laugh watching them figure out the treat treasure hunt?
2. Ball-in-a-Box Challenge
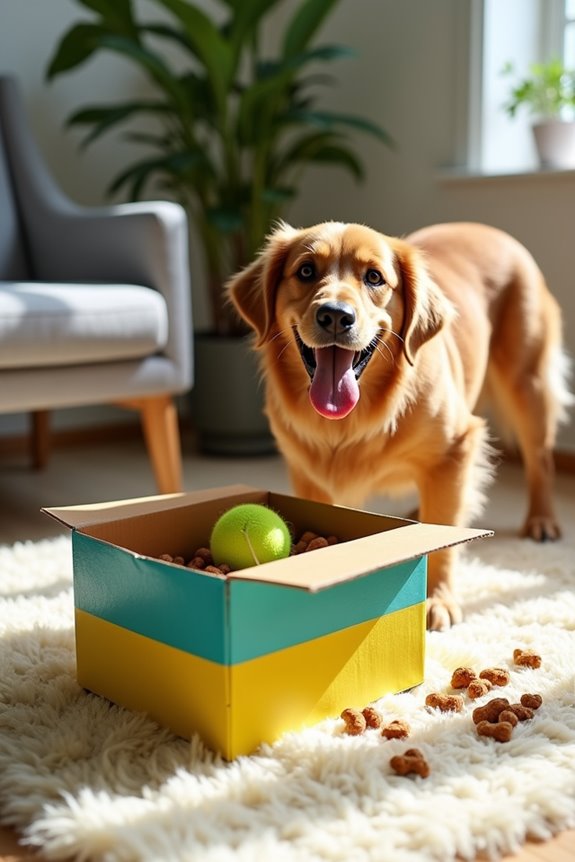
Looking to stimulate your pup’s mind and give them a fun challenge? The Ball-in-a-Box Challenge is just the ticket! This DIY game not only provides hours of entertainment, but it also taps into your dog’s natural instincts to explore, dig, and roll. Plus, you’ll save money on expensive dog toys and get to repurpose materials you might already have lying around. A win-win for everyone involved.
Materials Needed:
- A cardboard box (think old shoebox or any sturdy shipping box)
- A tennis ball or similar sized ball
- Scissors or a box cutter
- Dog treats (to encourage participation)
- Decorative materials (optional for a personal touch, like stickers or paint)
Step-by-Step Instructions:
- Choose Your Box: Find a cardboard box of reasonable size – it should be big enough for your ball to move around but small enough for your dog to explore without feeling overwhelmed.
- Cut the Hole: Using your scissors (or box cutter, if you’re feeling adventurous), cut a hole in one side of the box. Aim for about the size of a tennis ball, so it can easily roll in and out, but not so big that it creates a disaster zone. This might take a steady hand—no pressure, though!
- Add the Ball: Place a tennis ball inside the box. Make sure it can roll around a bit without getting stuck—dogs are all about the chase, after all.
- Hide the Treats: For an extra incentive, tuck some dog treats into the box alongside the ball. This will encourage your dog to dig around and discover what other treasures you’ve hidden away.
- Show Them How It Works: Introduce your dog to their new challenge by rolling the ball back and forth while they watch. Or gently encourage them to investigate by letting them see the treats. Your dog should quickly catch on that fun things come from that box.
- Supervise Playtime: Keep an eye on your furry friend during their first few rounds of play. You want to make sure they’re having fun without munching on any cardboard bits.
- Clean Up: After the fun, check the box for any stray pieces. You want to make sure your pup doesn’t accidentally have a snack that’s not quite on the menu.
Optional Add-ons/Variations:
Feeling creative? You can paint or decorate the box before playtime to personalize it – make it match your living room, or go wild with colors. Just remember, keep it non-toxic. If you want a more challenging game, try adding another ball or using balls of different sizes to mix up the fun.
Pro Tip:
To increase durability and keep it from falling apart after a few enthusiastic play sessions, consider reinforcing the corners of the box with tape. And once your dog has mastered this challenge, switch up the treats or add new items to keep things fresh and interesting. Dogs can get bored, so keeping the game dynamic will guarantee it stays a favorite! Plus, pair this activity with stylish accessories like luxury dog collars to elevate your pup’s style while they play!
3. Obstacle Course Adventures
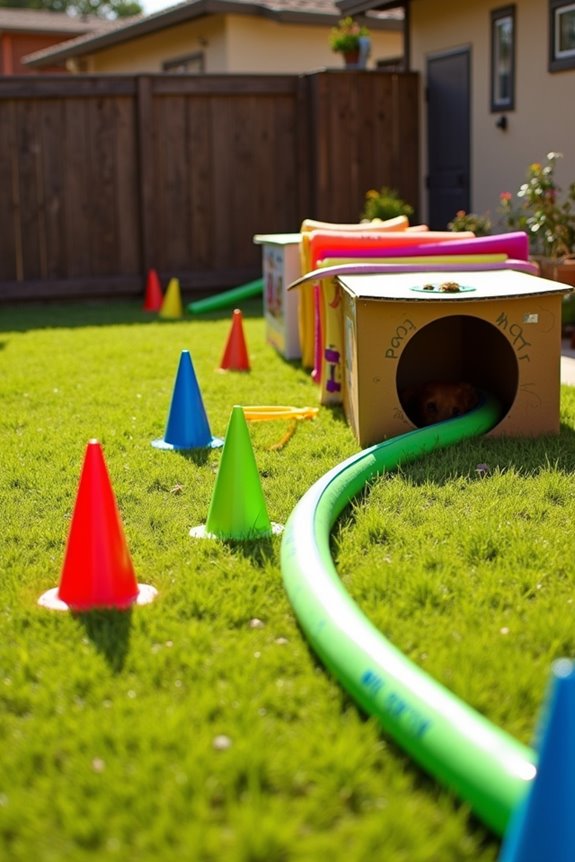
Ready to put your dog’s agility and cunning to the test? Creating an obstacle course in your backyard or living room is a fantastic way to keep your pup entertained while promoting physical activity.
It’s an engaging project that not only saves you money on fancy agility equipment but can also transform any space into a fun play area. Plus, it’s a great way to bond with your furry friend—who doesn’t love cheering for their dog as they navigate through DIY challenges?
Materials Needed:
- Cones or plastic bottles (for weaving)
- Hula hoops (for jumping through)
- Pool noodles (for jumping over or crawling under)
- Cardboard boxes (for tunnels or barriers)
- A sturdy leash or rope (if needed for guiding)
- Dog treats (to motivate your pup during training)
- Tape or a marker (to create paths or sections)
Step-by-Step Instructions:
1. Choose Your Space: Find a safe area where there’s enough room for your dog to run and play. The backyard is ideal, but living rooms work too—just watch out for lamp shades!
2. Set Up the Course:
- Use the cones or plastic bottles to create a weaving path. Space them out evenly so your dog can navigate through them with ease.
- Position hula hoops for your dog to jump through. Secure them on the ground with tape if they’re wobbling too much.
- Lay pool noodles on the ground for jumping over, and position some vertically or horizontally for crawling under.
- Set up cardboard boxes to create tunnels or barriers. Make sure they’re stable to avoid accidental collapses.
3. Introduce the Course: With your dog on a leash, walk them through each obstacle—giving lots of praise and treats as they navigate each section.
It’s like showing them the ropes, or in this case, the hoops and noodles.
4. Practice Makes Perfect: Let your pup try the course on their own after showing them. If they seem confused or hesitant, guide them through a couple of times more.
Celebrate their successes with treats—it’s a great motivator.
5. Speed It Up: Once your pup has mastered the course, try timing their runs. Who doesn’t want to see if their dog can break their own record?
Don’t forget to cheer as they take off. Who knows, you might just inspire the next canine Olympian.
6. Adjust as Needed: If something doesn’t seem to work—like a box that refuses to stay upright—don’t hesitate to rearrange or swap out materials.
Flexibility is key when crafting a course.
Optional Add-ons/Variations:
Feeling extra creative? You can paint the cones or hula hoops in bright colors to add a pop of fun to your setup.
Or how about adding a splash of creativity with silly signs at each obstacle—like “Do a Happy Dance Here!”? Your pup may not read, but it’s guaranteed to make you giggle.
Pro Tip:
Always guarantee safety by checking the stability of your course elements. You don’t want anything toppling over or wobbling too much, as it might spook your dog.
Also, when using treats, keep them small so your pup doesn’t get too full during training. The last thing you need is an overly stuffed pup thinking they’ve finished the course before they even begin.
4. Hide-and-Seek Toy Challenge
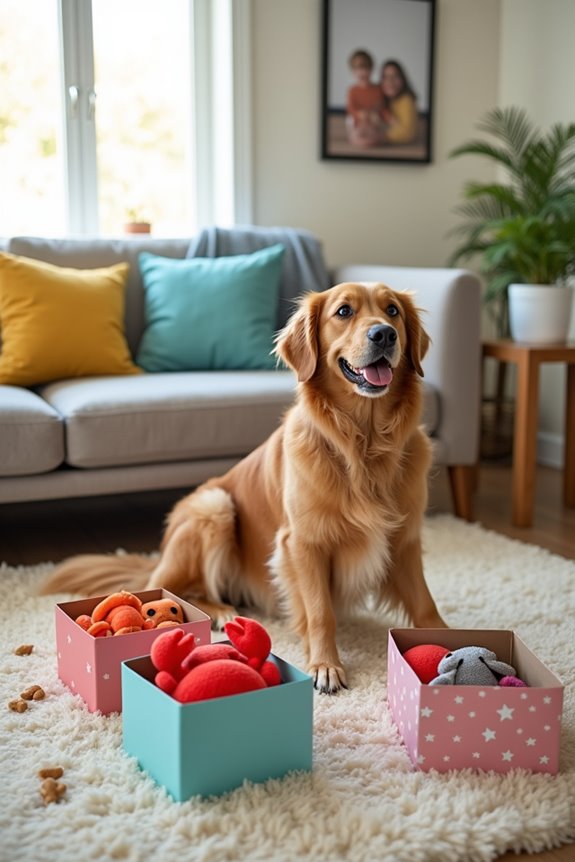
Who said dogs can’t play hide-and-seek? This DIY project brings the classic game to your furry friend, helping them tap into their instincts—while having a blast. Not only does it keep your pup entertained, but it also sharpens their problem-solving skills and gives you a chance to bond.
Plus, let’s be honest: it’s way more affordable than those fancy toys that claim to do it all.
Materials Needed:
- 3-5 of your dog’s favorite toys (sounds easy enough, right?)
- A few shoeboxes or small cardboard boxes (they can also double as secret hiding spots)
- Treats (gotta motivate them somehow)
- A soft blanket (optional, but can help create a cozy hiding spot)
- A timer or your phone (to keep things fun and structured)
Step-by-Step Instructions:
- Pick the Perfect Spot: Find a safe play area in your home. It could be your living room, a hallway, or even a dedicated play space—no pressure. Just make sure it’s clear of anything that could lead to a puppy-sized disaster.
- Hide the Toys: Take your dog’s toys and place them in the shoeboxes or around the room. Get creative! Set one under a couch, another behind a curtain, or even under a soft blanket. The more sneaky spots you choose, the better!
- Introduce the Game: Sit your dog down in one spot and show them one of the toys. Let them sniff it, and then put it away in its hiding spot. It’s like a little preview of what’s to come.
- Release the Hound: Now the fun begins! Let your pup go and encourage them to find the toys. You can help by saying “find it” as they sniff around. Make it game-like—maybe even cheer them on.
- Celebrate Their Wins: When your dog discovers a toy, praise them like they just did the most miraculous trick on Earth. Treats are also a great idea here; they’ll associate finding toys with joy and rewards, strengthening the rule of fun!
- Set a Timer for Extra Excitement: For an added challenge, set a timer and see how quickly your dog can find all the toys. It’s a fun way to keep the game fresh and exciting. Maybe even grab a video for bragging rights to show your friends later.
- Mix Things Up: Once your furry friend has mastered it, don’t stop there! Switch up the hiding spots, or maybe even introduce new toys to keep them guessing. Variety is the spice of life after all.
Optional Add-ons/Variations:
- DIY Toys: Try making your own hide-and-seek toys with old clothes and squeakers for an eco-friendly twist. Your dog won’t care if it’s a bit shabby, as long as it’s stuffable with love.
- Thematic Hiding: Change things up seasonally! In the summer, make beach-themed toys—like a squeaky crab—while in winter, use plush snowmen. Your pup may not get the theme, but you’ll sure have fun with it.
Pro Tip:
Always supervise your dog during the game, especially if they’re prone to chewing up toys. Safety first, right?
And if they do manage to destroy one, you can always make more or repurpose fabric scraps for a new challenge. Just think of it as an ongoing craft project that keeps giving. Happy hiding!
5. Sniff-and-Search Scavenger Hunt
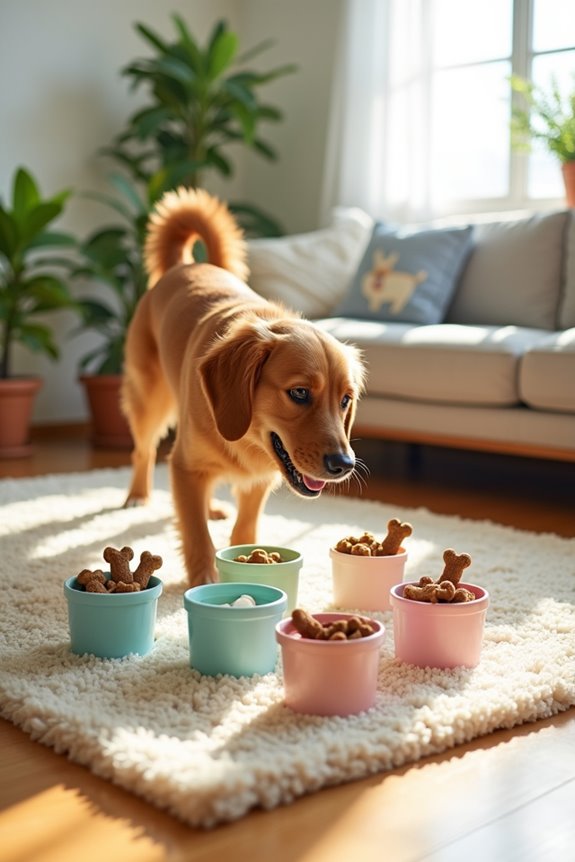
Release your dog’s inner detective with this Sniff-and-Search Scavenger Hunt project. It’s not only a delightful way to engage your pup’s senses but also a fantastic bonding experience for the two of you. Plus, it saves you a pretty penny on expensive dog games while keeping your furry friend mentally stimulated. Sounds like a win-win, right?
Materials Needed:
- Several small containers or cups (think plastic, ceramic, or even recycled food containers)
- Dog treats or kibble (the tastier, the better)
- A soft blanket or mat (for added comfort during the hunt)
- A timer (your phone works perfectly)
Step-by-Step Instructions:
- Choose a Spot: Let’s face it, the right location makes all the difference. Select a play area in your home – maybe the living room or the backyard is ideal. Just make sure it’s free of any distractions that might send your dog off on a wild rabbit chase instead.
- Prepare the Treats: Take a moment to gather those delicious dog treats or some of their favorite kibble. You want to get them hungry for a little competition, right? Start with their favorite, and prepare to watch as their noses go into overdrive.
- Set Up the Hiding Spots: Grab those containers and start hiding the treats. Get creative! Place one under a coffee table, another behind a potted plant, and maybe one in an open box—whatever feels sneaky. Just remember, your dog’s sense of smell is like a superpower, so don’t make it too easy.
- Show the Way: Gather your dog, and let them witness you hide the treats. You want to create a little intrigue here. Maybe let them sniff a treat before you hide it, so they get the scent locked in. Consider it a sneak peek to build excitement.
- Let the Search Begin: Give the command like “find it!” and watch your furry friend jump into action, nose leading the way. Encourage them along the process, maybe with a gentle “good boy/girl” as they sniff around. A little cheering doesn’t hurt either—think of yourself as the enthusiastic coach on the sidelines.
- Celebrate Success: When your dog discovers a hidden treat, celebrate like it’s their birthday. Lots of praise, maybe some extra treats, and a good ol’ scratch behind the ears. You want them to associate this game with joy and fun.
- Mix It Up Next Time: Each scavenger hunt can be fresh and new by switching up the hiding spots or adding different treats. Keep the anticipation alive — maybe even invite some other dogs over for a sniff-off.
Optional Add-ons/Variations:
- DIY Scented Treats: Make your own dog treats infused with different flavors to engage their senses further. Use peanut butter, sweet potato, or even certain herbs (just verify they’re dog-safe) for added excitement.
- Obstacle Course: Set up a mini obstacle course where they’ve to navigate through cones or jumps before reaching each treat. It’s like going to the Olympics—minus the medals.
Pro Tip:
Keep an eye on your pup during the hunt. Some dogs might get too fixated on finding the treats and forget to take breaks. Offering a comfortable spot with a soft blanket near the scavenger area can be a great way for them to rest and recharge between sniff sessions. After all, it’s hard work being a nose detective.
6. Tug-of-War Rope Toy
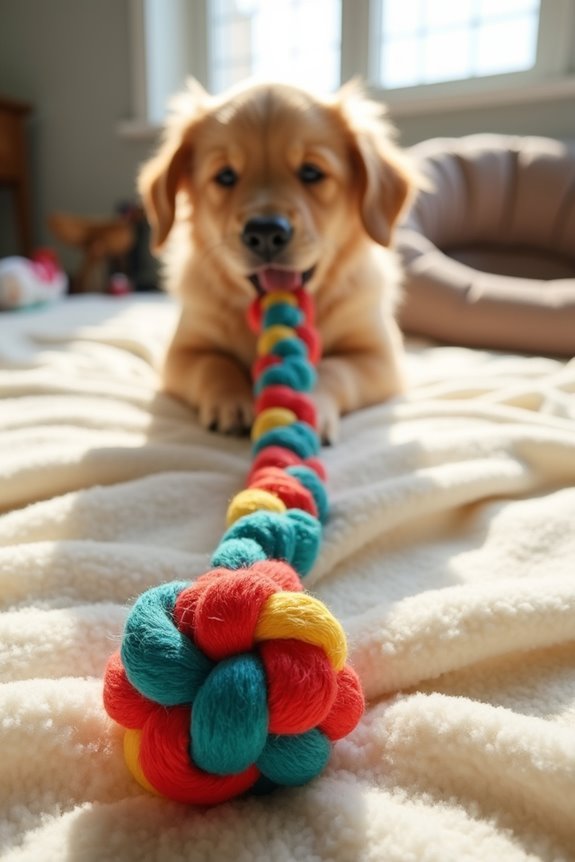
Get ready to pull, tug, and play with your furry friend using this fun and simple DIY Tug-of-War Rope Toy! This project is fantastic for dog owners because it provides an engaging, interactive playtime experience that strengthens the bond between you and your pup. Plus, it’s an inexpensive way to keep your dog entertained, allowing for countless games of tugging fun without breaking the bank or stressing your wallet.
Materials Needed:
- 3-4 lengths of durable cotton rope (all the same color or different for a fun look)
- Scissors
- Tape (optional, for securing the ends)
- A lighter (optional, for sealing the rope ends)
- A ruler or measuring tape (to verify equal lengths, if desired)
Step-by-Step Instructions:
- Choose Your Lengths: Decide on how long you want the tug toy to be. You can typically use lengths ranging from 2 to 4 feet. Cut 3 or 4 lengths of the cotton rope, making sure they’re of equal size. Just remember, too short may lead to some accidental puppy face plants.
- Gather and Align: Take those rope lengths and align them side by side. Make sure they’re nice and straight—think of it as creating an assembly line. You’ll want to grab your puppy’s attention, so we’re aiming for a visually appealing setup.
- Braid the Ropes: Time to start braiding! Take the outermost rope and cross it over the middle one, then do the same with the opposite side. Repeat the pattern until you reach the end, adjusting it as you go. Just a heads up—keep an eye out for unbalanced tension; too much pull on one side can create a wonky toy.
- Secure the Ends: Once you’ve reached your desired length, you’ll want to secure the end. This is where you can tie a strong knot or use some tape to wrap it up. Feeling adventurous? A touch of heat to seal the ends with a lighter can offer added durability, making certain your tug toy can withstand even the most intense puppy play sessions!
- Test It Out: Now comes the fun part! Gently pull on the toy to verify it’s secure and ready for action. Hand it over to your furry friend, and let the games begin. It’s also a great time to capture their goofy tugging face—seriously, who doesn’t love a dog in a tug-of-war?
- Store When Not in Use: When playtime is over, store your new toy in a safe place, away from chewing hazards. Trust me, a tug toy is no replacement for your favorite pair of shoes.
Optional Add-ons/Variations:
- Colorful Ropes: Try using ropes of different colors to create a vibrant, eye-catching look. Your dog will adore the colorful visuals, and you can customize it to fit your home decor.
- Add a Handle: If you’re feeling crafty, you can create a handle by tying one end of the rope into a loop. This will give you a better grip during play and let you add some style to your tug toy masterpiece.
Pro Tip:
When playing tug-of-war, confirm you’re using a safe space free of distractions. Maybe keep breakables and teetering plants out of reach. Plus, it can be an excellent time to practice commands like “drop it” or “leave it”—you’ll reinforce good behavior while keeping things fun.
7. Frisbee Tossing Fun
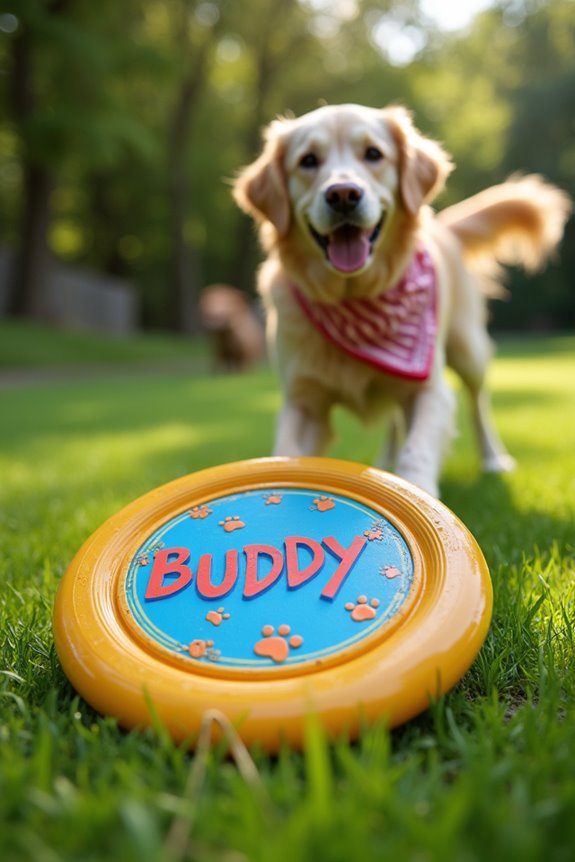
If you’re looking for a way to get your furry friend wagging their tail and burning off some energy, building your own frisbee is the perfect DIY project. It’s a simple, budget-friendly way to create an engaging outdoor toy that’s sure to keep your dog entertained and active. Plus, it’s always nice to have a unique frisbee that you can personalize to match your pup’s personality.
Materials Needed:
- An old, worn-out plastic frisbee or a sturdy plastic lid (like one from a large container)
- Non-toxic paint or permanent markers (for personalization)
- Sandpaper (optional, for smoothing edges)
- A soft cloth (for cleaning)
- Super glue or a strong adhesive (optional, for securing any broken parts)
- Dog-safe treats (for motivation during playtime)
Step-by-Step Instructions:
1. Select Your Base: If you’ve got an old plastic frisbee lying around, perfect! If not, a sturdy plastic lid can work just as well. Just be certain you clean it thoroughly to remove any dirt or residue. A little dog drool is fine, though—who doesn’t love slobbery toys?
2. Smooth the Edges: If you’re using an old frisbee or lid, take some sandpaper and gently sand down any rough or sharp edges. This is just to confirm there are no surprise ouchies for your pup during fetch time. It’s better to be safe than sorry.
3. Get Creative with Decor: Now comes the fun part. Grab your non-toxic paint or permanent markers and start adding designs! Whether you choose your dog’s name, funky patterns, or even paw prints, let your creativity flow.
Just keep in mind that dogs mightn’t appreciate abstract art as much as we do, so stick to bold designs.
4. Secure Any Breaks: If your frisbee had any chips or cracks, now’s a good time to use that super glue. Just apply a small amount over the damaged area and let it dry as per manufacturer’s instructions.
Trust me; no one wants a frisbee falling apart mid-toss—awkward.
5. Test Flight: Once everything is dry, give your new frisbee a toss. Make sure it flies well and is easy for your dog to catch. You’ll want it to be aerodynamic enough to make your pup feel like a superstar when they leap for it.
And let’s be honest; we all want to see that excited dog face.
6. Incorporate Treats: For extra motivation, you can also attach some dog-safe treats to the frisbee (just keep them light). That adds an extra layer of fun and engagement as your pup learns to associate playtime with a tasty reward.
Who could resist?
Optional Add-ons/Variations:
- Color Choices: Use different colors of paint for each side of the frisbee to make it visually pop. You can even paint one side with bright colors and the other with your dog’s name.
- Personalized Artwork: Take it a step further and add your dog’s paw print using non-toxic, pet-friendly paint. Just be ready for some adorable messiness—it’s all part of the fun.
Pro Tip:
Before heading outside, double-check that your freshly made frisbee is entirely dry and paint-free. It’s crucial to make sure your pup doesn’t ingest anything that could be harmful.
When in doubt, always prioritize pup safety over aesthetics—it’ll save you stressed-out moments.
Extra Tips & Ideas
While brainstorming ideas for fun dog games, remember that your pup’s happiness can often come from unexpected places.
Try hiding treats around your house or yard, turning it into a mini scavenger hunt. Don’t worry if you forget where you put them; your dog certainly won’t.
You could also repurpose old boxes into a puzzle by cutting holes and hiding goodies inside. They’ll enjoy the challenge, and you’ll get to laugh at their determined efforts.
Another idea? Create a tug-of-war rope using some old fabric scraps. Just be careful—you may find yourself more tired than your pup afterward.
Always keep an eye on your canine’s excitement level. After all, it’s about the joy, not just the games.
Frequently Asked Questions
What Materials Are Safe for DIY Dog Games?
When creating DIY dog games, use safe materials like non-toxic wood, durable fabrics, and natural rubber. Avoid anything with small parts or chemicals. Always guarantee the toys are sturdy and appropriate for your dog’s size.
How Can I Adjust Games for My Dog’s Size?
If you’ve got a small pup, try using lightweight, smaller balls for fetch. For larger dogs, increase the size and weight. Adjusting game elements guarantees safety and excitement, keeping your furry friend engaged and happy.
Can I Use Recycled Materials for These Projects?
Absolutely, you can use recycled materials for these projects! Look around your home for items like cardboard boxes, plastic bottles, or old clothes. Just make sure they’re safe and free from sharp edges or toxic substances.
Are These Games Suitable for All Dog Breeds?
While most games suit various breeds, remember that 70% of dog owners report specific games engaging their pets more. So, pay attention to your dog’s unique personality and preferences when choosing the right activities.
How Can I Prevent My Dog From Destroying the Games?
To prevent your dog from destroying the games, supervise playtime, use durable materials, and introduce challenges gradually. Keep alternatives available to channel their energy and reward positive behavior to encourage gentle play.
Conclusion
So, who knew you could turn your living room into a doggy wonderland with just a few household items? It’s almost like your pup will think they’re living their best life while you’re just trying to avoid stepping on a rogue toy. Seriously, these DIY games are not just ways to wear out your dog—they’re a way to get you both laughing, bonding, and crafting together. And hey, if the games fail, at least you can blame it all on your “creative” skills.

Hi, I’m Ali Tarek, the founder of Animalsman. I’ve always been passionate about pets, especially dogs and cats, and I created this website to share practical tips, easy recipes, and helpful care advice for fellow pet lovers. My goal is to make pet care simple, enjoyable, and accessible for everyone. When I’m not writing or curating content, you’ll usually find me spending time with my furry friends or learning new ways to keep them happy and healthy.