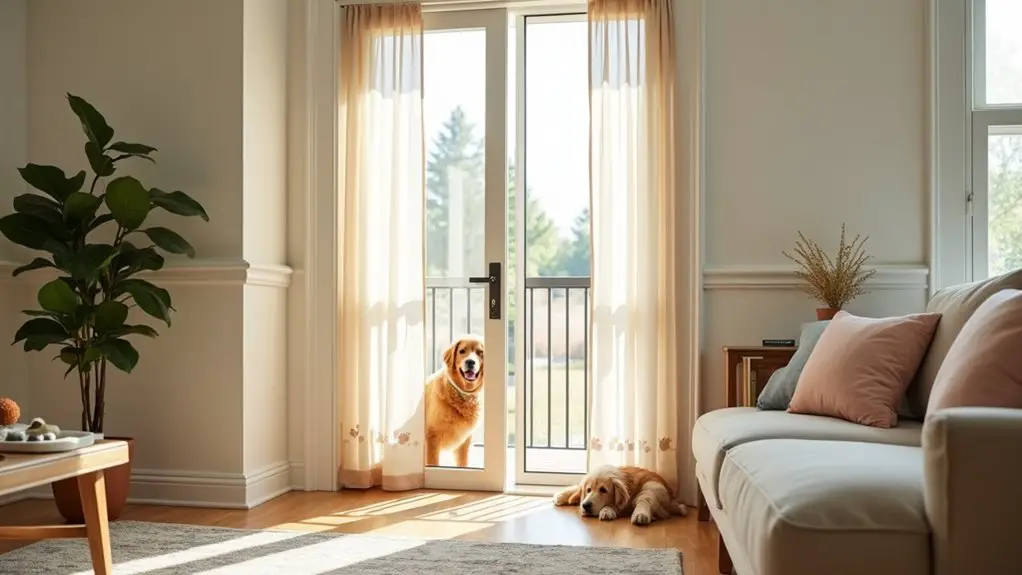
Let’s face it, keeping your furry friend out of mischief can feel like a never-ending battle. But what if I told you there are some clever DIY indoor dog gates that can help create a peaceful home? Imagine stylish barriers that match your decor while keeping your pup safe. Intrigued? You’ll want to stick around as we explore seven creative options that’ll have you saying goodbye to chaos and hello to harmony.
Stylish Wooden Gate Designs
When it comes to keeping your furry friend contained without sacrificing style, wooden dog gates can be a game-changer. You can create beautiful, functional dog gates indoor DIY that suit your home’s aesthetic.
Imagine crafting a rustic farmhouse gate or a sleek modern design. It’s easier than you think. Grab some wood, hinges, and your trusty tools. Measure your space accurately—trust me, those pesky gaps can be a headache.
You can even paint or stain the wood to match your decor. And hey, if you mess up, it’s just an “artistic choice,” right? Your dog won’t mind as long as they’re safe.
Plus, you’ll feel great every time you walk past your stylish creation. Who knew practicality could look this good?
Our Collection
Let’s chat about our collection of indoor dog gates that not only keep your furry friend in check but also add a dash of style to your home.
From the decorative fabric panel gate that looks like a piece of art to the retractable mesh barrier gate that’s as handy as a Swiss Army knife, there’s something for everyone.
Have you ever thought about how a sliding barn door gate could totally elevate your pet’s area while keeping it chic?
1. Decorative Fabric Panel Gate
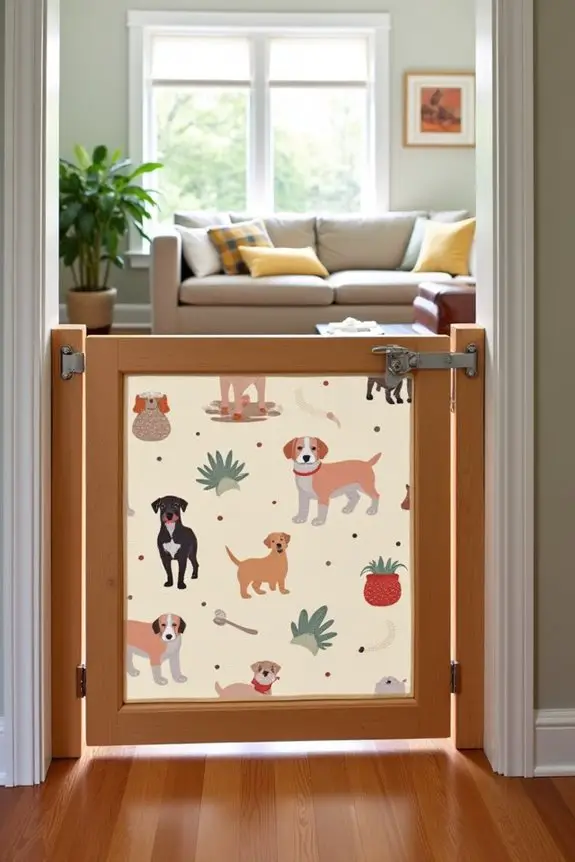
If you’re a dog owner, you know how significant it’s to keep your furry friend safe while also maintaining the charm of your home. Enter the decorative fabric panel gate—a stylish solution that not only keeps your pup contained but also adds a touch of personality to your space. Plus, investing in premium dog training equipment can enhance your overall dog management experience.
Making one yourself is a great way to save money and create something unique that reflects your style. Ready to plunge in? Let’s get crafting.
Materials Needed:
- Wood: 1x4s or 1x3s for frame
- Fabric: Your choice of decorative material (canvas, cotton, etc.)
- Wood screws: 1.5-inch screws
- Wood glue: For added stability
- Hinges: 2 or 3, depending on gate size
- Latch: Easy-to-use for secure closure
- Staple gun: For attaching fabric
- Saw: Hand saw or miter saw
- Drill: For making holes and driving screws
- Sandpaper: To smooth edges
- Measuring tape: To guarantee accuracy
- Paint or stain (optional): To finish the wood
Step-by-Step Instructions:
- Measure Your Space: Determine the width and height of the area where you want to install the gate. Remember, it should be tall enough to keep your pup from jumping over.
- Cut the Wood: Using your saw, cut the 1x4s or 1x3s to create a rectangular frame. You’ll need two vertical pieces and two horizontal pieces. A standard size is about 30 inches high by 36 inches wide, but feel free to customize it to fit your needs.
- Assemble the Frame: Lay the wood pieces flat and form a rectangle. Use wood glue at the joints for extra stability, then secure with screws. Pre-drilling the holes can prevent the wood from splitting, which is a nice little hack if you’re new to this.
- Sand the Edges: Smooth out any rough edges with sandpaper. This step is essential to keep your pups safe from splinters—nobody wants a trip to the vet because of a DIY project gone wrong.
- Attach the Fabric: Cut your fabric to size, leaving a little extra on the edges. Lay it over the frame and use a staple gun to attach it tightly, pulling the fabric taut as you go. Make sure it’s secure so your dog can’t chew through it—trust me, they’ll try.
- Add Hinges: Attach hinges to one side of the frame, making sure they’re evenly spaced. This is where you’ll connect the gate to the wall or door frame. Pre-drilling here can save you some frustration, too.
- Install the Latch: Finally, attach the latch to the other side of the gate. Make sure it’s easy for you to operate but also secure enough that your clever pup can’t figure it out.
Optional Add-ons/Variations:
Feeling extra creative? You could paint or stain the wood in a color that matches your decor. Going bold with bright colors or patterns can really make the gate pop.
Or, why not switch up the fabric? Think about using a fun dog-themed print or something that complements your existing home decor.
Pro Tip:
Always verify that your gate is mounted at a height that your dog can’t jump over. If you have a particularly crafty pup, consider adding a top rail or even a decorative element to keep them from trying to leap over.
It’s all about creating a safe space for your furry friend while still looking good. And remember, if your dog can fit their nose through, they might think they can fit their whole body, so keep it snug.
Enjoy your new decorative fabric panel gate, and take pride in knowing you crafted something both functional and beautiful for your beloved pet!
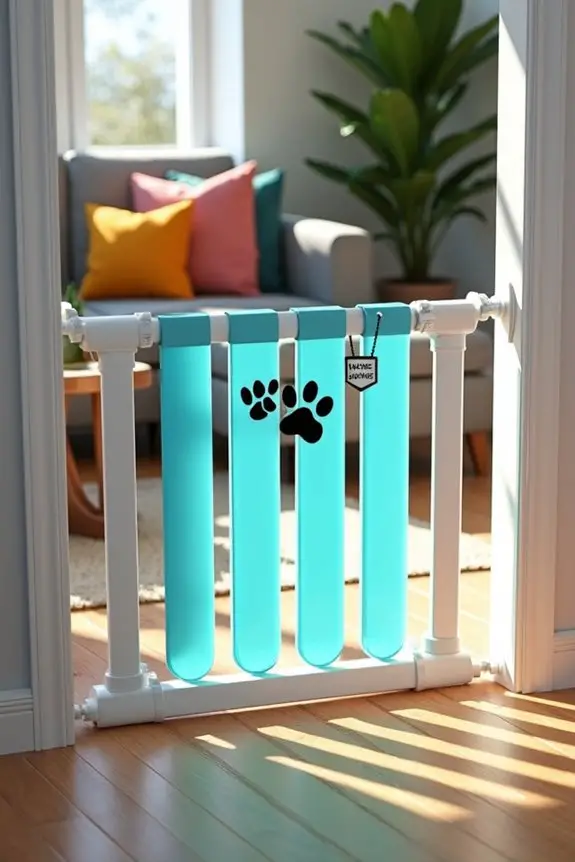
2. Retractable Mesh Barrier Gate
If you’re looking for a practical yet stylish way to keep your dog safe and contained, a retractable mesh barrier gate might just be what you need. This DIY project is incredibly useful for dog owners because it’s flexible, easy to use, and blends seamlessly with your home decor.
Plus, making one yourself can save you money while giving your space a personal touch. So, let’s get started on creating a gate that’s both functional and chic. Additionally, consider enhancing your dog’s overall health with premium supplements that can support their wellness and vitality.
Materials Needed:
- Retractable mesh: Purchase a durable, pet-safe mesh from a local store or online
- Wood or PVC pipe: For a sturdy frame (1x2s or 1-inch PVC works great)
- Hinges: 2-3 depending on your design
- Latch/lock mechanism: To keep the gate securely closed
- Screws: For securing the frame and attaching the mesh
- Drill: Essential for making holes and driving screws
- Measuring tape: To ascertain accurate dimensions
- Scissors: For cutting the mesh to size
- Sandpaper: To smooth out edges if using wood
- Paint or stain (optional): For a finished look (if using wood)
Step-by-Step Instructions:
- Measure Your Space: Decide where you want to place your retractable gate. Measure the width and height, keeping in mind that the gate should be tall enough to prevent your dog from jumping over.
- Cut the Frame: Using wood or PVC pipe, cut your pieces to create a frame that matches the measurements you just took. For a standard gate, aim for about 30 inches high and the width you determined.
- Assemble the Frame: Join the cut pieces to form a rectangle. If using wood, apply wood glue at the joints for added strength, then screw them together. For PVC, you can use connectors to secure the pieces.
- Attach the Mesh: Cut your retractable mesh to size, leaving a little extra on the edges. Use screws or a staple gun to attach the mesh tightly to the frame, making sure it’s secure enough to withstand any canine curiosity.
- Install Hinges: Attach hinges to one side of the frame, so it can swing open and close easily. Make sure they’re evenly spaced and pre-drilled to avoid splitting the wood.
- Add the Latch: Secure the latch mechanism to the opposite side of the hinges, making sure it’s easy for you to operate but secure enough to keep your pup contained.
- Test It Out: Before you call it a day, open and close the gate a few times to confirm everything is working smoothly. Give that latch a good test, too—nobody wants an escape artist on their hands.
Optional Add-ons/Variations:
- Color Splash: Paint or stain the frame in a color that matches your home’s decor. You can even use a fun pattern or design to make it a statement piece.
- Mesh Variety: Choose a patterned or colored mesh for a whimsical touch. Some stores sell mesh with fun designs that can add personality to your gate.
Pro Tip:
When installing your gate, consider placing it where it’s most convenient for you—like a high-traffic area.
And remember, if you have a chewer, opt for a more robust mesh that can withstand your dog’s enthusiasm. After all, we want them to stay safe, not chew their way to freedom.
Creating a retractable mesh barrier gate isn’t just a fun project but a clever way to keep your furry friend safe while adding a stylish touch to your home. So grab those materials and get crafting!
3. Pet-Friendly Folding Screen Gate
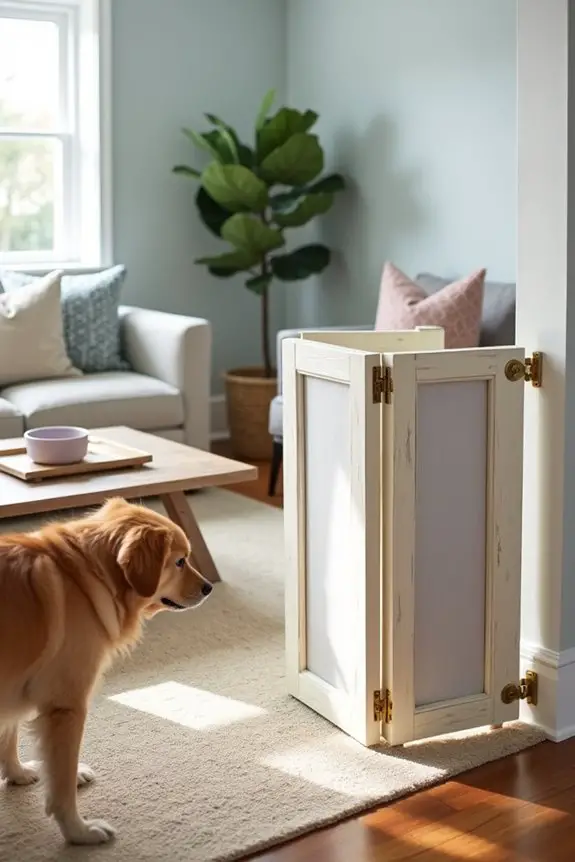
If you’re looking for a charming and functional way to keep your furry friend safe and contained, a pet-friendly folding screen gate might just be your new best friend. Not only does it effectively block off areas, but it also adds a stylish touch to your home decor. Plus, this DIY project is a great way to save some bucks while guaranteeing your space remains comfortable and pet-friendly. Let’s get started on crafting a gate that not only looks good but works hard too.
Materials Needed:
- Wooden boards: Choose a lightweight wood like pine or plywood (1×3 or 1×4 works well)
- Hinges: 2-4, depending on the size of your gate
- Latches: For securing the gate shut
- Screws: To hold everything together
- Drill: For making holes and driving screws
- Measuring tape: To get accurate dimensions
- Saw: To cut the wood to size
- Sandpaper: To smooth out any rough edges
- Paint or wood stain (optional): To match your home decor
- Decorative fabric or wallpaper (optional): For a personal touch
Step-by-Step Instructions:
- Measure Your Space: Decide where you want the folding screen gate to go. Measure the width and height needed, keeping in mind that it should be tall enough to prevent your pup from jumping over.
- Cut the Wood: Using your saw, cut your wooden boards to create the panels for your gate. Aim for 3-4 panels for a standard folding gate, each around 30 inches high and the width that fits your space.
- Assemble the Panels: Lay out the panels side by side. Attach them using hinges at the edges, ensuring they can fold easily. Pre-drill holes to avoid splitting the wood—trust me, it’s a game-changer.
- Secure the Latch: Attach the latch mechanism to one end of your gate. Make sure it’s sturdy enough to hold everything in place, but easy for you to operate when you need to let your dog through.
- Finish the Wood: If you’re feeling adventurous, paint or stain the wood to match your decor. Want it to stand out? Go for a bold color or fun pattern. Just remember to let it dry completely.
- Test Your Gate: Open and close the gate a few times to make sure it swings smoothly and latches securely. You want to guarantee it’s pup-proof before calling it a day.
Optional Add-ons/Variations:
- Fabric Panels: For a softer look, consider attaching decorative fabric or wallpaper to the panels. It adds texture and personality—plus, who doesn’t love a little customization?
- Color Choices: If you’re feeling particularly crafty, try using a stencil to paint designs on the wood. Stripes, polka dots, or even paw prints can make your gate a fun focal point.
Pro Tip:
Make sure to double-check your measurements before cutting. Nothing’s worse than cutting a piece too short and having to start all over again. Trust me, I’ve been there.
Also, consider using weatherproof wood if you plan to place the gate near an entryway where it might get wet. It’ll keep your project looking great for years to come. This folding screen gate not only keeps your dog safe but also enhances the overall vibe of your home. Remember, investing in large dog accessories can further improve your living space for both you and your furry friend. So roll up those sleeves and get crafting—you and your furry buddy will love it!
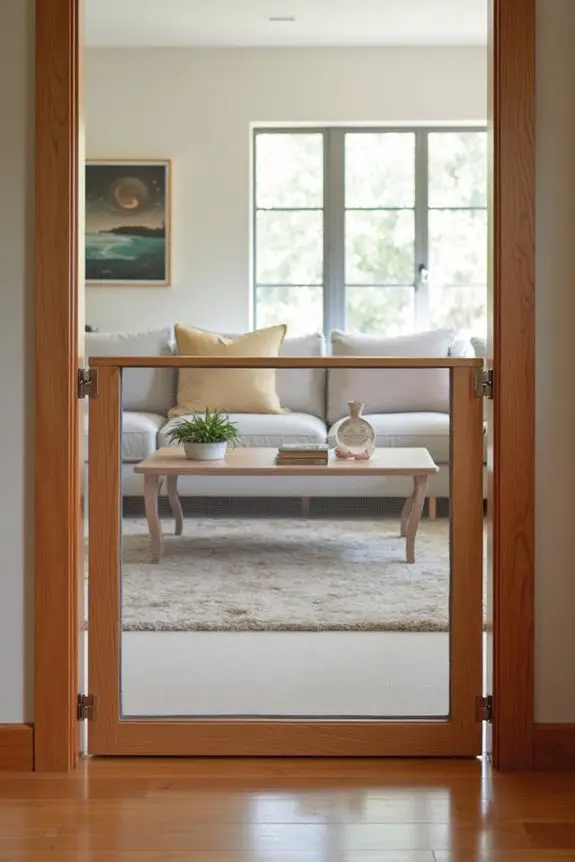
4. Customizable PVC Panel Gate
Creating a customizable PVC panel gate is an excellent solution for dog owners who want to maintain their home’s style while keeping their furry friends safe. Not only is this project budget-friendly, but it also adds a clean and modern look to your home. Plus, with a few personal touches, you can design it to fit your unique style. Additionally, investing in luxury dog products can enhance your pup’s comfort while keeping your home stylish.
Materials Needed:
- PVC panels: Lightweight, easy to clean, and available in various colors
- PVC pipes: For the frame (1-inch diameter works well)
- PVC fittings: To connect the pipes (T-joints and elbows)
- Screws: To secure everything together
- Drill: For making holes and driving screws
- Measuring tape: For accurate measurements
- Saw: For cutting the PVC to the desired lengths
- Sandpaper: To smooth out any rough edges
- Paint (optional): If you want to add color or patterns
- Decorative vinyl decals (optional): For a personal touch
Step-by-Step Instructions:
- Measure Your Space: Start by measuring the area where you want to install the gate. Consider the height and width needed to keep your pup safe and secure. Aim for a height of 30 inches or more, depending on your dog’s jumping ability.
- Cut the PVC: Using your saw, cut the PVC pipes to create the frame. You’ll need two horizontal pieces for the top and bottom and two vertical pieces for the sides. Don’t forget to cut the PVC panels to fit within the frame.
- Assemble the Frame: Connect the PVC pipes using the T-joints and elbows. Make sure everything is tight and secure. Use screws to reinforce the joints if necessary; this will help guarantee your gate stands the test of time, unlike that one IKEA bookshelf that fell apart (you know the one).
- Attach the Panels: Insert the PVC panels into the frame. Use screws to attach the panels securely to the frame. This is where you can get creative—if you’ve chosen a fun color or pattern, now’s the time to show it off.
- Finish It Up: If you’re feeling artistic, paint the frame or add decorative vinyl decals. This is your chance to personalize your gate. Want a whimsical look? Try adding cute paw prints or a quote about dogs. Just remember to let any paint dry completely before moving it.
- Install the Gate: Finally, secure the gate in the desired space using hinges. Test it out by opening and closing it a few times to verify it swings smoothly. You want to make sure it’s dog-proof, or else you might find yourself in a comedic chase scenario.
Optional Add-ons/Variations:
- Color Customization: Instead of a plain PVC gate, consider using spray paint to create a two-tone effect or even a gradient. It’s a fun way to brighten up your space.
- Decorative Elements: Attach some decorative vinyl decals or stencils that reflect your personality or your dog’s character. You could even add a cute “Beware of Dog” sign—just for laughs.
Pro Tip:
Before you plunge into this project, make sure to wear safety goggles while cutting the PVC. It’s a quick step that can save you from an eye-poking disaster.
Also, if you want to save a little cash, check out local hardware stores for leftover or discounted PVC materials—those little treasures can really stretch your budget.
This customizable PVC panel gate isn’t just functional; it’s a stylish addition to your home. Plus, it allows you to keep your dog safe while adding a personal touch that reflects your style.
5. Sliding Barn Door Gate
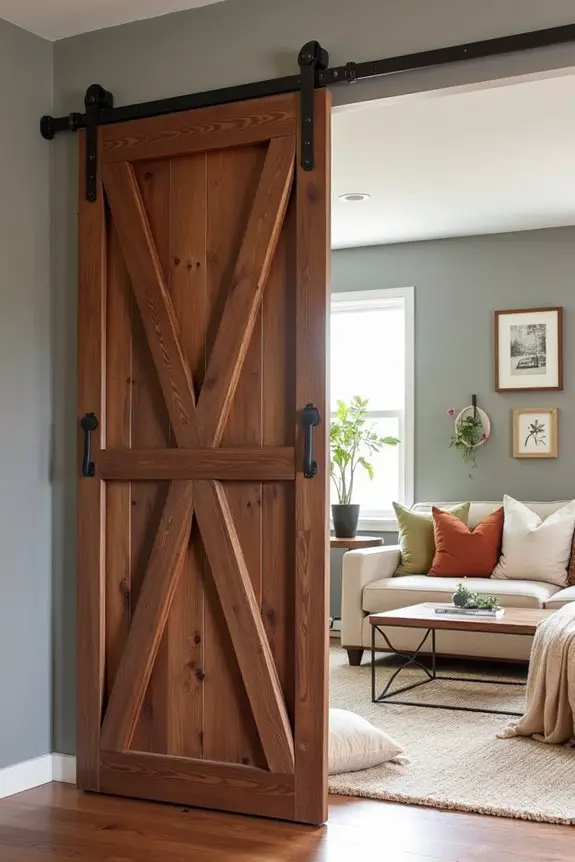
If you’re looking for a stylish yet functional way to keep your dog contained in certain areas of your home, a sliding barn door gate is a fantastic DIY project. Not only does it add a rustic charm to your decor, but it also saves you money compared to store-bought options while providing a unique touch that reflects your style. Plus, who wouldn’t want to show off a gorgeous barn door in their living space? Additionally, investing in premium dog supplies can enhance your dog’s comfort and safety while they enjoy their designated space.
Materials Needed:
- Wood planks: Choose a sturdy wood like pine or cedar
- Sliding door hardware kit: Includes tracks, rollers, and necessary brackets
- Wood screws: For securing everything together
- Drill: For making holes and driving screws
- Measuring tape: For accurate measurements
- Saw: For cutting the wood to the desired sizes
- Sandpaper: To smooth out any rough edges
- Wood stain or paint (optional): To match your decor
- L-brackets (optional): For added strength, especially if you have a larger dog
Step-by-Step Instructions:
1. Measure Your Space: First, measure the width of the area where you want your sliding barn door gate to go. Make sure to take into account the space needed for the door to slide open and closed.
2. Cut the Wood: Based on your measurements, use your saw to cut the wood planks to size. You’ll need two vertical pieces for the sides and one or two horizontal pieces for the top and bottom (depending on your design).
3. Assemble the Gate: Lay the wood pieces on a flat surface. Position the horizontal pieces between the vertical ones to form a rectangle. Use your wood screws to secure them together, making sure everything is tight.
If you’re feeling fancy, you can create an “X” design on the front for that classic barn door look.
4. Sand the Edges: Take some sandpaper and smooth out any rough edges to prevent splinters. Trust me, you don’t want your dog getting caught on rough wood.
5. Stain or Paint: If you want to add some flair, now’s the time to apply your wood stain or paint. Choose a color that complements your home’s decor.
Let it dry completely before proceeding; this is essential to avoid any sticky situations later.
6. Install the Hardware: Follow the instructions in your sliding door hardware kit to install the track and rollers above your gate. Make sure everything is level so that the gate slides smoothly – nobody likes a stubborn door.
7. Hang the Gate: Finally, attach your gate to the rollers and test it out. Open and close it a few times to make sure it glides effortlessly.
If all goes well, you’ve just created a beautiful barn door gate for your furry friend!
Optional Add-ons/Variations:
- Stenciled Designs: Use stencils to paint fun designs or even your dog’s name on the gate for a personal touch.
- Different Wood Types: If you want a more modern look, think about using reclaimed wood or even a combination of wood types for a mixed media effect.
Pro Tip:
Make sure to choose sturdy materials and secure the gate properly, especially if you have a larger or more energetic dog. You want to make sure that your sliding barn door gate isn’t only a stylish addition to your home but also a safe one.
And remember, always double-check your measurements before cutting—measure twice, cut once; it’s a mantra that saves time and avoids unnecessary trips to the hardware store.
6. Pet-Safe Baby Gate
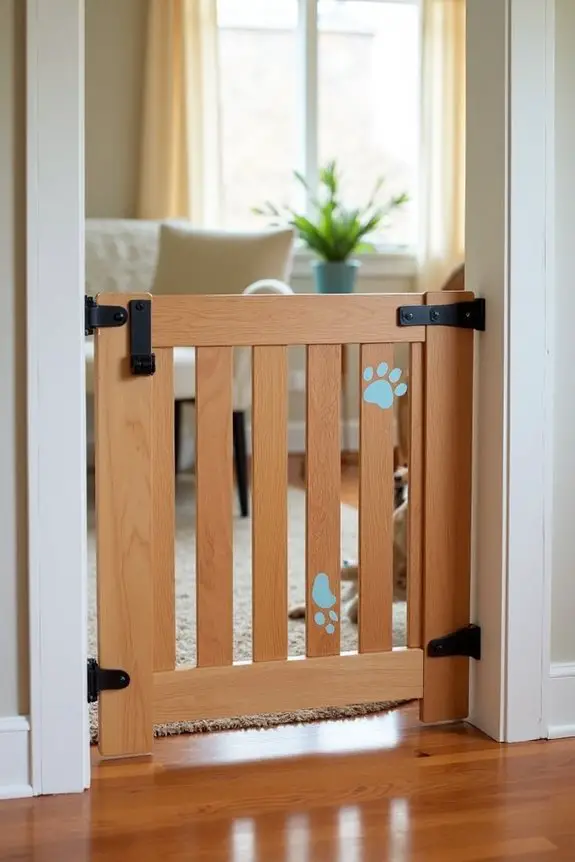
If you’re a dog owner, you know that keeping your furry friends safe and contained is important. A pet-safe baby gate is a fantastic DIY project that not only helps keep your pup in designated areas but also enhances the look of your home while saving you some cash. Plus, who doesn’t love a project that combines function with style? Let’s get started on creating a gate that’s both welcoming and effective.
Materials Needed:
- Wood planks: Go for a durable type like pine or oak
- Wood screws: To hold everything together
- Drill: For making holes and driving screws
- Measuring tape: To guarantee accurate measurements
- Saw: To cut wood to your desired dimensions
- Sandpaper: To smooth out rough edges
- Hinges: For attaching the gate to the wall
- Latch: To keep the gate securely closed
- Wood stain or paint (optional): To match your decor
- Level: To guarantee your gate is straight
Step-by-Step Instructions:
- Measure Your Opening: First, measure the width of the doorway or opening where you plan to install the gate. This will guide the size of your gate.
- Cut the Wood: Based on your measurements, cut two vertical pieces and one or two horizontal pieces. The horizontal pieces will connect the vertical ones and form the frame of the gate.
- Assemble the Gate Frame: Lay your cut pieces flat. Position the horizontal pieces between the vertical ones to create a rectangle. Secure them with wood screws, checking that everything is tight and sturdy.
- Sand the Edges: Use sandpaper to smooth any rough edges. This is an essential step to prevent your dog from snagging their fur or getting hurt.
- Customize (Optional): Give your gate some personality! You can stain or paint it in a color that complements your home. This is where you can really make it your own; maybe even add some decorative touches like stenciled paw prints.
- Attach Hinges: Once your gate is dry, attach the hinges to one side of the gate. Then, secure the other side to your wall, making sure it’s at a height your dog can’t jump over but is also comfortable for you to open and close.
- Install the Latch: Finally, attach the latch on the opposite side of the hinges. Make sure it’s easy for you to operate but secure enough that your clever pup can’t figure it out.
Optional Add-ons/Variations:
- Different Colors: Experiment with bright colors or patterns to make your gate pop. You could even use chalkboard paint for an interactive element where family members can leave each other notes.
- Add a Pet Door: If you want to give your dog some freedom, consider incorporating a small pet door into the gate design. It’s a fun way to allow your pup to roam while still keeping them contained.
Pro Tip:
Before you start, double-check that the gate is high enough for your breed. If you have a jumper, consider adding a top rail to make it more challenging for them to leap over.
Also, using a good quality wood can save you headaches down the road, as it’s likely to be more durable and withstand the test of time (and some energetic paws).
With a little time and effort, you’ll have a stylish pet-safe baby gate that suits your home and keeps your furry friend safe! Enjoy your DIY adventure, and may the odds be ever in your favor when it comes to measuring straight lines.
7. Magnetic Screen Door Gate
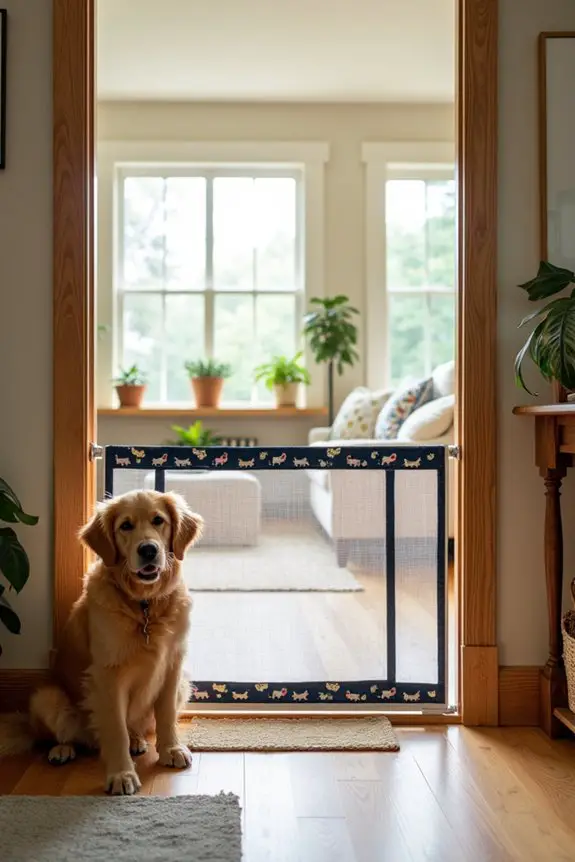
If you’re looking for a way to keep your dog contained while letting fresh air and sunshine into your home, a magnetic screen door gate could be just what you need.
This DIY project allows you to create a stylish barrier that keeps your furry friend safe, while also adding a breezy feel to your living space. Plus, it’s a cost-effective solution that can elevate your home’s aesthetic and comfort level.
Materials Needed:
- Magnetic screen door kit: Available at most home improvement stores
- Measuring tape: For accurate measurements
- Scissors: To cut the screen to size
- Adhesive tape or staples: For attaching the screen to your door frame
- Level: To verify your gate hangs straight
- Optional decorative trim or fabric: To personalize your screen
Step-by-Step Instructions:
- Measure Your Doorway: Start by measuring the height and width of your doorway. Make sure to account for any molding or trim that might affect the fit.
- Cut the Screen: Once you have your measurements, cut the magnetic screen to fit your door frame. It should be slightly larger than the opening to verify it can hang properly.
- Prepare the Door Frame: Clean the area where you’ll be attaching the screen. This will help the adhesive tape or staples stick better.
- Attach the Screen: Use the adhesive tape or staples to attach the top of the screen to the top of your door frame. Make sure it’s centered and level—no one likes a lopsided screen.
- Secure the Sides: Pull the screen down and attach the sides using the same method. Confirm that it fits snugly at the sides to keep your pup from sneaking out.
- Test the Magnets: After securing the screen, walk through it a few times to verify it opens and closes easily. The magnets should snap together without any gaps.
- Personalize (Optional): If you want to add a fun touch, you can attach decorative trim or fabric around the edges of the screen for an extra flair that matches your home style.
Optional Add-ons/Variations:
- Design Your Look: Consider using different colored fabric or patterned trim to spice things up. Maybe a cute dog-themed fabric that reflects your pup’s personality?
- Add a Weight: Sew a small hem at the bottom of the screen and add some weighted beads or stones for a more secure fit. This will help the screen stay in place during windy days.
Pro Tip:
Before you start, make sure your door frame is in good condition. If it’s warped or uneven, the screen won’t hang properly.
And hey, if you can’t find the perfect screen door kit, you can always repurpose an old curtain and add magnets to the edges—talk about a budget-friendly hack!
Extra Tips & Ideas
While building your DIY indoor dog gate can be a fun project, there are a few extra tips and ideas that can make it even better.
First, consider using a tension rod for easy installation—just slide it between two walls. It’s like magic, and you won’t even need a toolbox.
If you’re feeling crafty, add some decorative fabric to jazz it up. Your friends will think you’re an interior design genius.
Don’t forget about height; dogs can jump higher than you think. Test it out—if your pup clears it in one bound, it’s back to the drawing board.
Finally, always keep safety in mind; sharp edges aren’t just a bad look, they’re a hazard.
Happy building!
Frequently Asked Questions
What Materials Are Best for DIY Dog Gates?
Wood, metal, or PVC are great materials for DIY dog gates. Choose sturdy options that can withstand pressure. You’ll also want hinges, latches, and non-toxic finishes to guarantee safety and durability for your furry friend.
How Tall Should a Dog Gate Be?
A dog gate should generally be at least 30 inches tall for small breeds and 36 inches for larger dogs. You’ll want it high enough to prevent jumping or climbing, ensuring your dog stays contained safely.
Can I Use a Baby Gate as a Dog Gate?
Yes, you can use a baby gate as a dog gate, but consider your dog’s size and strength. Baby gates often lack durability for larger breeds, so choose wisely to guarantee safety and effectiveness.
What Tools Do I Need for Building a Dog Gate?
To build a dog gate, you’ll need a saw, drill, screws, measuring tape, level, and sandpaper. Having wood or metal materials ready will also help you create a sturdy and functional gate for your space.
How Do I Ensure My Gate Is Secure?
To keep your gate secure, use sturdy hinges and locks. Regularly check for wear and tear, ensuring everything’s tight. If it’s wobbling like an old pirate ship, reinforce those joints to prevent escape!
Conclusion
Creating your own indoor dog gate can be a game-changer—not just for your pup, but for your whole home vibe. Think of it like baking a cake; with the right ingredients and a sprinkle of creativity, you can whip up something that’s both functional and fabulous. So, grab your tools, let loose your imagination, and don’t be afraid to get a little messy. After all, even if it doesn’t come out perfect, your dog will still love you for it.

