Building a cozy outdoor space for your dog, saving money, and having fun sounds like a great plan, right? Imagine transforming old pallets into stylish shelters, or turning tires into an eco-friendly dog house. Each idea is not just budget-friendly but also a chance to release your creativity. Curious about how to get started? Let’s explore some clever DIY dog kennel ideas that will have your pup wagging their tail in no time.
Creative Space for Your Pup
When you think about creating a cozy spot for your furry friend, it’s easy to get overwhelmed, right? But don’t fret; we’ve got some dog kennel ideas for outdoor DIY projects that are cheap and fun.
First, consider using repurposed pallets. Stack them to form a simple shelter, and voilà, you’ve got a rustic haven!
You could also grab some old tarps or even a kiddie pool, turning it into a shaded retreat. Just remember to add soft bedding, maybe an old blanket you don’t mind parting with. Your pup will love it.
And hey, if you make a few mistakes along the way, just chalk it up to “character.” After all, who doesn’t enjoy a little DIY adventure?
Our Collection
Let’s take a look at some creative kennel designs that won’t break the bank.
You’ll find everything from a wood pallet kennel that’s as sturdy as it’s stylish, to a recycled tire dog house that makes you wonder why you didn’t think of it sooner.
Each idea isn’t just budget-friendly, but also a fun project that’ll have your pup wagging their tail in approval.
1. Wood Pallet Kennel Design
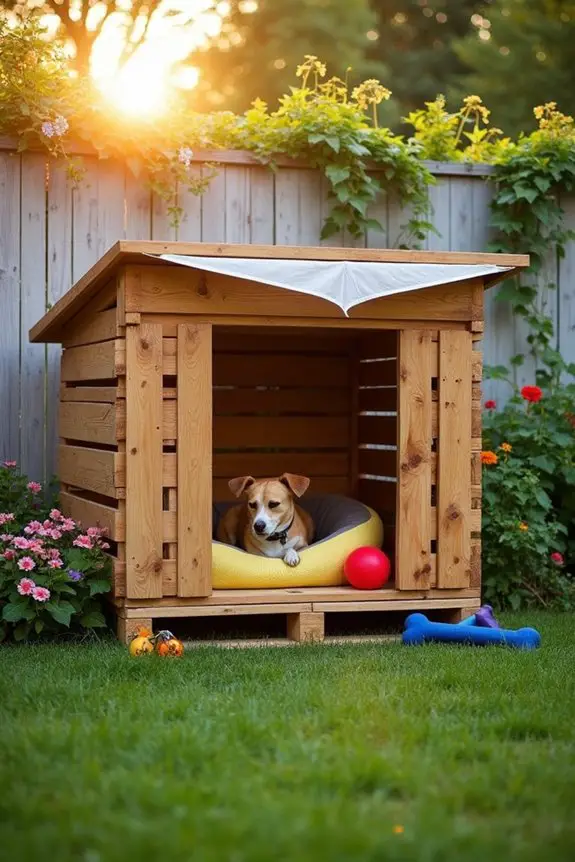
If you’re a dog owner looking for a budget-friendly solution that doesn’t skimp on style or comfort, a wood pallet kennel might be just what you need. Not only does it save you some serious cash, but it’s also a creative way to give your furry friend a cozy space to call their own. Plus, who doesn’t love a good DIY project that adds a rustic charm to your backyard?
Materials Needed:
- Wooden pallets (make sure they’re clean and safe for pets)
- Hammer and nails or a power drill with screws
- Sandpaper (medium and fine grit)
- Outdoor wood sealant or paint (non-toxic)
- Measuring tape
- Saw (hand saw or circular saw)
- Safety goggles
- Gloves
Step-by-Step Instructions:
- Gather Your Pallets: Start by collecting enough wooden pallets to create a kennel that’s the right size for your dog. A good rule of thumb is to use two pallets for the sides, one for the back, and one for the bottom.
- Measure and Cut: Once you have your pallets, measure your dog’s size to determine the kennel dimensions. Use your saw to cut the pallets to the desired dimensions. Remember, it’s okay if you’re not a master carpenter — it’s all about making it work for your pup.
- Smooth It Out: After cutting, use sandpaper to smooth any rough edges. This step is essential to guarantee your dog doesn’t get splinters. Trust me, a splintered pup isn’t a happy pup.
- Assemble the Base: Take two pallets and lay them side by side to create the base. Secure them together with nails or screws. Make sure it’s sturdy — you want your dog’s palace to withstand some playful antics.
- Build the Walls: Attach the other pallets vertically for the walls, nailing or screwing them into the base. You can also create a slanted roof by adding an additional pallet on top at an angle, which helps with rain and snow runoff.
- Seal It Up: Once your kennel is assembled, apply an outdoor wood sealant or paint to protect it from the elements. Choose a color that matches your home or your dog’s personality.
- Decorate and Personalize: Finally, add a comfy dog bed and some toys to make it a welcoming space. You can also attach a nameplate or decorative elements to make it uniquely yours.
Optional Add-ons/Variations:
- Color It Up: Instead of a plain sealant, consider using a bright, fun color to make the kennel pop in your backyard. Just think how cute it’d look with a bright blue or sunny yellow!
- Add a Shade Canopy: If your dog loves lounging outside, consider adding a canopy or tarp over part of the kennel for some extra shade during those hot summer days.
Pro Tip:
Always check your pallets for any chemical treatments or harmful chemicals before using them. It’s better to be safe than sorry when it comes to our furry friends. And if you can, look for pallets that are marked with “HT” (heat-treated) — these are generally safer for pets.
Additionally, making a comfortable and safe kennel is vital for your Goldendoodle, as they thrive on premium dog food that supports their health and energy levels.
2. Recycled Tire Dog House
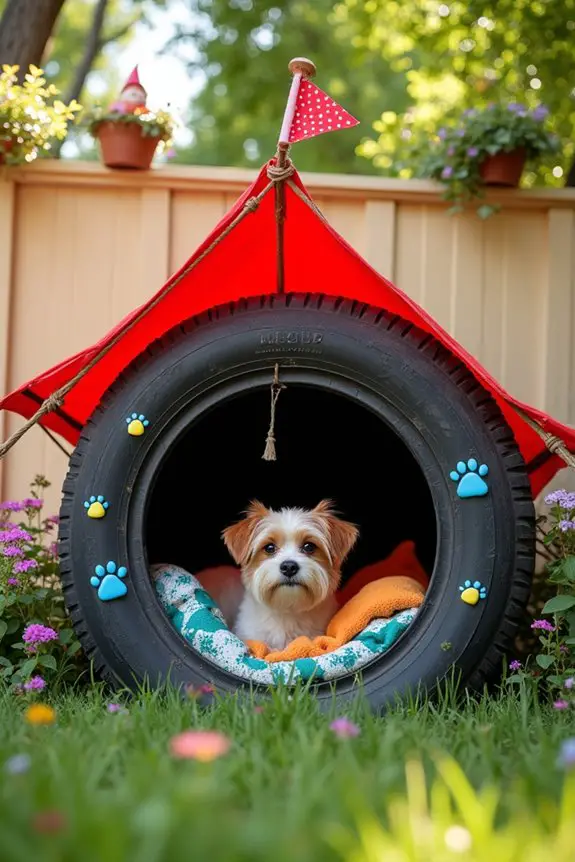
If you’re looking for a unique and budget-friendly way to give your dog a cozy place to rest, why not consider a recycled tire dog house? Not only is this project eco-friendly and easy on the wallet, but it also provides a snug spot for your furry friend to escape the elements. Plus, it’s a fun DIY project that can add a quirky touch to your backyard. Who wouldn’t want to create a little oasis for their pup? Additionally, this DIY option can be a great alternative to luxury outdoor dog houses, which may be out of reach for some pet owners.
Materials Needed:
- Old tires (the bigger, the better for larger dogs)
- Outdoor paint (non-toxic, if you want to add color)
- Heavy-duty plastic sheeting or tarp (for the roof)
- Rope or strong twine (for securing the tarp)
- Non-toxic sealant (to protect the paint)
- Heavy-duty scissors or utility knife
- Measuring tape
- Gloves
- Safety goggles
Step-by-Step Instructions:
1. Find Your Tires: Start by sourcing some old tires. You can often find them at tire shops or online marketplaces. Just make sure they’re clean and safe for your pup.
If you’re feeling adventurous, try to get a tire with a little character — maybe one that’s a bit worn but still sturdy.
2. Clean Up: Before you start, give those tires a good scrub. Remove any dirt or debris, and let them dry. Your dog deserves a clean space, after all.
It’s also a good chance to practice your best cleaning skills, which may or may not be up to par.
3. Paint the Exterior: Once the tires are clean, you can paint the outside if you want to add some flair. Use outdoor paint that’s safe for pets, and feel free to get creative with colors.
Imagine your pup lounging in a bright blue or funky patterned tire house. Adorable, right?
4. Create an Entrance: Depending on the size of your dog, you might want to cut an entrance into one side of the tire. Use heavy-duty scissors or a utility knife for this step.
Just be careful — we’re not looking for any unexpected trips to the emergency room here.
5. Add a Roof: To protect your pup from rain or snow, you can create a simple roof with heavy-duty plastic sheeting or a tarp. Drape it over the top and secure it with rope or twine.
This is where you can get creative; maybe even add a little flag on top. Why not?
6. Seal It Up: Once everything is secured, apply a non-toxic sealant to the painted areas. This will help protect the paint from the elements and keep your dog’s new home looking fresh.
Plus, it adds an extra layer of durability.
7. Make It Comfy: Finally, add a cozy blanket or dog bed inside the tire for extra comfort. Your pup will love curling up in their new space, and you’ll feel great knowing you crafted it just for them.
Optional Add-ons/Variations:
- Colorful Cushions: Instead of just a blanket, consider adding some colorful cushions or even a small dog pillow. It’ll give your tire house a more inviting look, and your dog will appreciate the extra comfort.
- Decorative Touches: You can also paint some fun designs or patterns on the outside of the tire. Think paw prints, bones, or even your dog’s name. It’s a great way to personalize their new hangout spot.
Pro Tip:
Always make sure the tires are free of any chemicals, and double-check that the paint and sealant are non-toxic. You want your dog to enjoy their tire house without any worries.
And remember, when working with tools, safety first — those gloves and goggles aren’t just for show.
Now, go ahead and give your pup a fun new spot to chill out in the yard! They’ll be wagging their tail in no time.
3. PVC Pipe Kennel Structure
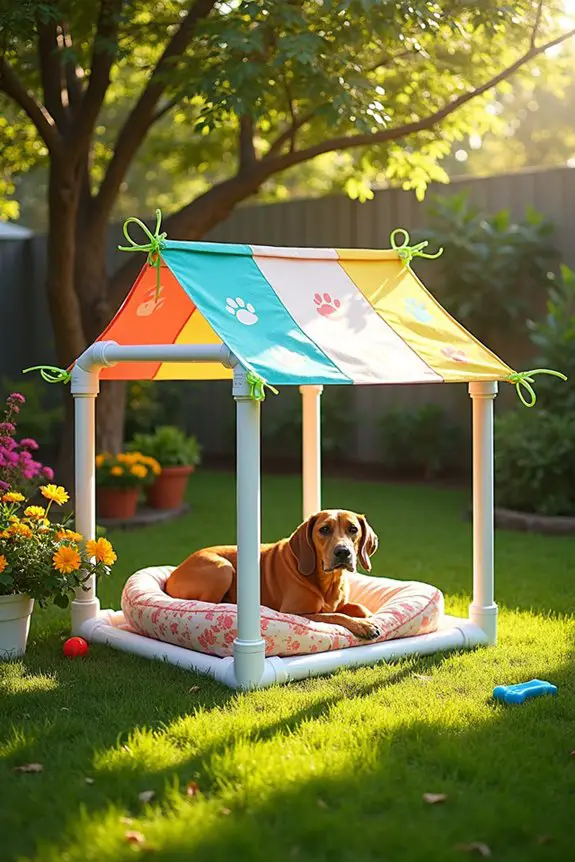
If you’re in the market for a sturdy and versatile outdoor dog kennel, a PVC pipe structure might just be your new best friend. This DIY project isn’t only budget-friendly, but it also gives you the chance to create a safe and comfortable space for your dog.
Plus, it’s lightweight and easy to move, making it perfect for those days when you want to change up your backyard layout. Who wouldn’t want a cozy corner for their pup that looks as good as it functions? Additionally, an outdoor dog fence system can provide an extra layer of security for your pet.
Materials Needed:
- PVC pipes (1-inch diameter works well)
- PVC pipe connectors (elbows and tees)
- PVC pipe cutter or saw
- Heavy-duty tarps or canvas (for the roof and walls)
- Zip ties or bungee cords (to secure the tarp)
- Measuring tape
- Marker
- Gloves
Step-by-Step Instructions:
1. Measure and Cut Your PVC Pipes: First, decide how large you want your kennel to be. Measure and mark your PVC pipes according to your desired dimensions. A good size to start with is 4 feet by 4 feet for small to medium dogs.
Use your PVC cutter or saw to cut the pipes to size. Just remember, measure twice, cut once. Trust me, nobody wants to have extra pieces lying around.
2. Assemble the Frame: Start building the base by connecting four pipes to form a square. Secure the corners with the PVC elbow connectors. Then, add vertical pipes to each corner to create the walls.
Use the tees to connect the vertical pipes at the top, forming a frame that’s sturdy yet lightweight.
3. Add the Roof Support****: Now, it’s time to create the roof. Connect additional pipes across the top of your frame using the elbow connectors. This will provide support for the tarp or canvas that will cover the kennel.
Make sure it’s secure; you don’t want a sudden rain shower turning into a surprise swimming pool.
4. Attach the Tarp or Canvas: Drape your heavy-duty tarp or canvas over the frame. This material will serve as the roof and walls of the kennel, keeping your pup dry and sheltered.
Use zip ties or bungee cords to secure the tarp to the frame. Be generous with the ties to guarantee everything stays in place, especially during windy days.
5. Make It Comfy: Add a cozy blanket or dog bed inside the kennel to make it extra inviting. Your dog will love having a soft spot to curl up in after a long day of chasing squirrels.
I mean, who wouldn’t want a plush retreat after a hard day of being adorable?
6. Personalize It: Finally, don’t forget to add a personal touch! You could paint the PVC pipes in fun colors or even add your dog’s name on the side.
This little detail can turn an ordinary kennel into a unique masterpiece that showcases your pup’s personality.
Optional Add-ons/Variations:
- Colorful Canopy: Instead of using a plain tarp, consider getting a patterned or brightly colored canvas to give your dog’s home a fun vibe. Think stripes, polka dots, or even a floral design.
- Winter Upgrade: In colder months, you can line the walls with insulated fabric or even add a small heater designed for outdoor use to keep your pup warm and toasty.
Pro Tip:
When building your PVC pipe kennel, always ascertain that the structure is stable and secure. If you live in an area with high winds, consider anchoring it to the ground with stakes or additional weights.
This will keep your dog’s sanctuary safe and sound, even in less-than-ideal weather.
4. Insulated Straw Bale Kennel
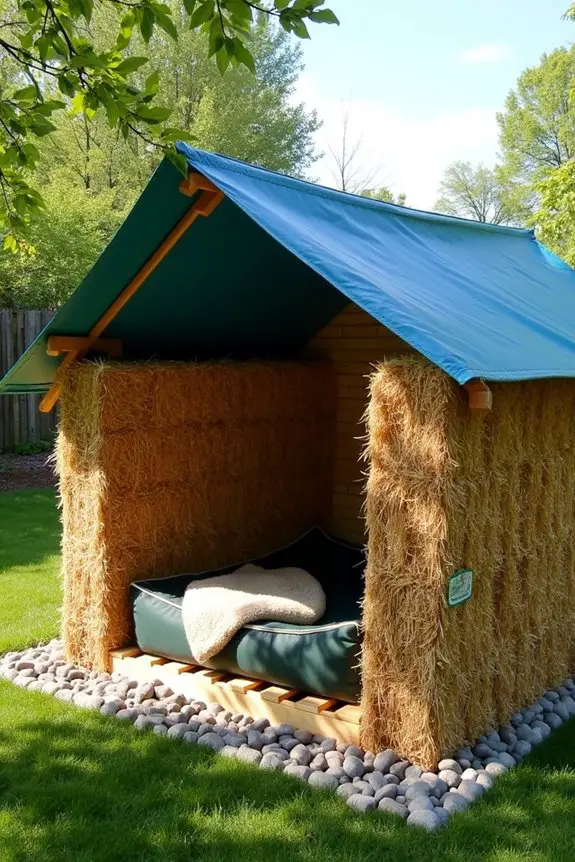
If you’re looking for a creative, eco-friendly option for your dog’s outdoor kennel, the insulated straw bale kennel is a fantastic choice. Not only does it provide excellent insulation against cold weather, but it’s also budget-friendly and offers a unique rustic charm to your backyard. Plus, your pup will thank you for creating a cozy retreat that keeps them warm and comfy all winter long. To complement this setup, consider adding some luxury dog furniture orthopedic to enhance your pet’s comfort.
Materials Needed:
- Straw bales (enough to create the desired size of kennel)
- Wooden pallets or plywood (for the floor)
- Tarps or heavy-duty plastic sheeting (for waterproofing)
- Bungee cords or heavy-duty zip ties (to secure the tarp)
- Measuring tape
- Marker
- Gloves
- Optional: Dog bed or blanket (for added comfort)
Step-by-Step Instructions:
- Choose Your Location: Find a flat, dry spot in your yard where you want to set up the kennel. Make sure it’s away from any hazards like sharp objects or overly sunny spots. A little shade can make a big difference on hot days.
- Create the Base: Lay down wooden pallets or a piece of plywood to form the floor of the kennel. This will keep the straw bales off the ground and help prevent moisture from seeping in. It’s like giving your dog a little luxury suite.
- Build the Walls: Stack straw bales on their sides to form the walls of the kennel. Make sure to create a shape that’s sturdy and easy for your pup to enter. A simple rectangular or square shape works best. You can adjust the height based on your dog’s size; just remember, they should be able to stand up and turn around comfortably.
- Add the Roof: You can either stack more straw bales on top or create a roof using plywood. If you opt for straw bales, be sure to secure them in place with bungee cords or zip ties to prevent them from shifting. If using plywood, be sure to cover it with a tarp or plastic sheeting to keep everything dry.
- Waterproof It: Cover the top and sides of the kennel with a tarp or heavy-duty plastic sheeting. Secure it tightly with bungee cords or zip ties to protect against rain. This step is essential—your dog deserves to stay dry and snuggly, not soggy and sad.
- Make It Comfy: Toss in a dog bed or a cozy blanket to create a welcoming space for your furry friend. Your pup will love curling up in their new straw bale haven. After all, who wouldn’t want a cozy spot to nap in?
- Personalize It: If you’re feeling crafty, you can paint the outside of the plywood or decorate the kennel with fun designs. You can even add a little sign with your dog’s name. It’s all about making it feel like home.
Optional Add-ons/Variations:
- Consider painting the plywood with non-toxic paints or using colorful tarps to jazz up the look of your kennel. You could even add decorative stones around the base for a more polished appearance.
- If you’re in a colder climate, layer the straw inside with blankets or an insulated dog bed for extra warmth during the chilly months.
Pro Tip:
Make sure to monitor the condition of the straw bales regularly. They can settle over time or become damp, which isn’t ideal for your dog’s health. If you notice any signs of mold or wear, it might be time for a refresh. Keeping everything clean and dry is key to maintaining a healthy space for your furry friend.
Creating an insulated straw bale kennel isn’t just a fun DIY project; it’s a heartfelt way to show your love for your dog. With a little effort, you can provide them with a cozy and safe spot to enjoy the great outdoors.
5. Repurposed Wooden Crate Kennel
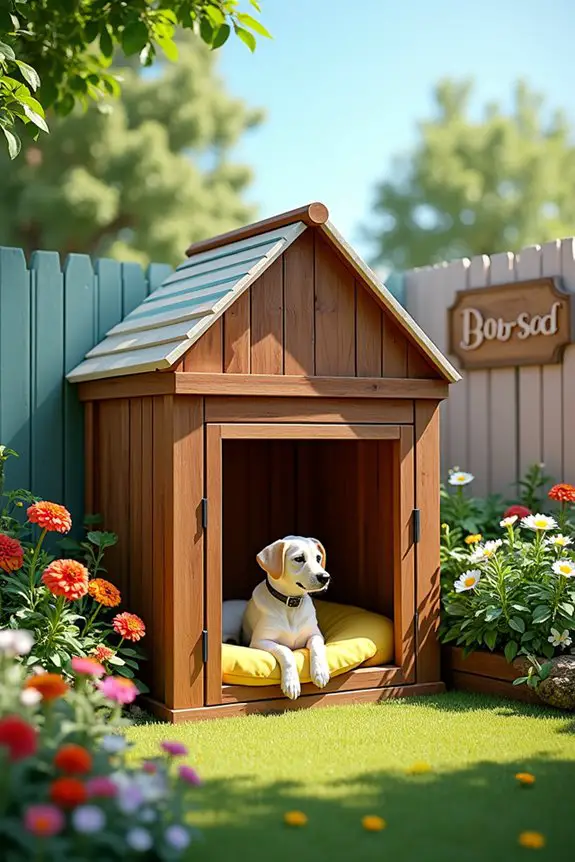
Have you ever considered turning old wooden crates into a cozy kennel for your pup? This DIY project not only saves you money but also gives your furry friend a stylish spot to lounge outdoors. Plus, it’s a fantastic way to repurpose materials, helping the planet while making your home look better. Additionally, having a designated dog food storage cabinet can help keep your dog’s meals organized and fresh.
Let’s explore how you can create a charming wooden crate kennel that your dog will adore.
Materials Needed:
- 2-4 wooden crates (depending on desired size)
- Sandpaper (medium to fine grit)
- Wood stain or paint (optional, for personal touch)
- Heavy-duty outdoor fabric or tarp (for a waterproof lining)
- Measuring tape
- Staple gun and staples
- Drill with screws (if stacking crates)
- Gloves (to protect your hands)
- Optional: Cushion or dog bed for added comfort
Step-by-Step Instructions:
1. Select Your Crates: Gather a few wooden crates that are sturdy and clean. You can often find these at thrift stores, flea markets, or online marketplaces.
Think about how big you want the kennel to be; enough room for your dog to stretch out but cozy enough to feel secure.
2. Prep the Crates: Sand down any rough edges or splinters to guarantee your dog doesn’t get hurt.
This step might feel a bit tedious, but trust me, your pup will appreciate the smooth surfaces.
3. Create a Base: If you want a multi-level kennel, stack the crates securely.
Use the drill to screw the crates together to confirm they don’t shift or topple over. Alternatively, if you prefer a single-level design, just line them up side by side.
4. Waterproof It: Cut the heavy-duty outdoor fabric or tarp to fit the inside bottom of the crate.
Use the staple gun to secure it in place. This will protect against moisture and keep your dog dry during rainy days. Who wants a soggy pup? Not me.
5. Add a Roof (Optional): If you want to provide extra shelter, consider adding a roof using a piece of plywood or another crate on top.
Just make sure it’s securely attached and stable. Your dog might like a little shade while napping away.
6. Personalize It: Now comes the fun part! If you’re feeling artsy, add a coat of wood stain or paint to match your yard or your dog’s personality.
A bright color can really brighten up your outdoor space. Plus, it gives your dog a spot that feels like home.
7. Make It Comfy: Toss in a soft cushion or dog bed to create a cozy retreat.
Your pup will love snuggling in their new space. Just imagine how adorable they’ll look curled up inside.
Optional Add-ons/Variations:
– Color it Up: Use non-toxic outdoor paint to decorate the kennel with fun designs or patterns.
You could even add your dog’s name for a personalized touch.
– Add a Canopy: Use fabric to create a canopy over the kennel.
This not only looks cute but also provides extra shade on sunny days.
Pro Tip:
When choosing crates, look for ones made from untreated wood.
This way, you can avoid any harmful chemicals that could be unsafe for your pup. And if you’re on a budget, keep an eye out for sales at local hardware or craft stores—sometimes, you can snag those crates for a steal.
6. Wire Mesh Kennel Enclosure
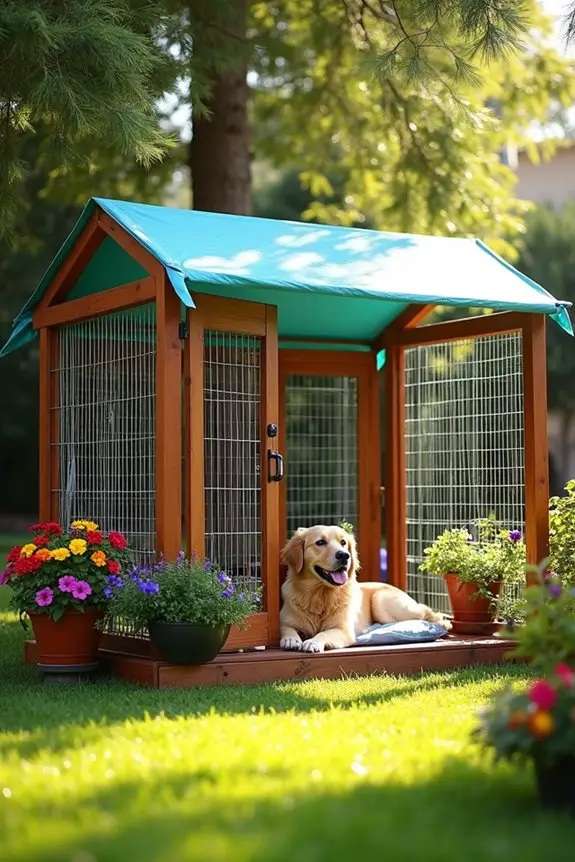
Are you looking for a budget-friendly way to give your dog a safe and secure outdoor space? A wire mesh kennel enclosure may be just what you need. Not only is it a practical solution for dog owners, but it also offers great ventilation and visibility for your furry friend. Let’s explore this DIY project that will keep your pup happy and your wallet intact.
Materials Needed:
- Wire mesh fencing (enough to create your desired size)
- Wooden posts or metal stakes (to support the fence)
- Zip ties or fence staples (to attach the mesh to the posts)
- Hammer or mallet (for driving in the stakes)
- Measuring tape
- Wire cutters (for trimming the mesh)
- Gloves (to protect your hands)
- Optional: Dog-safe paint or sealant (for added durability)
Step-by-Step Instructions:
1. Choose a Location****: Find a flat area in your yard where you want to set up the kennel. Make sure it’s away from any hazards like sharp objects or low-hanging branches.
Don’t forget to check for nearby trees that could provide shade for your pup.
2. Measure and Mark: Use the measuring tape to outline the dimensions of your kennel. Mark the corners with small flags or stakes.
This will help you visualize the space and confirm you have enough materials.
3. Install the Posts: Drive your wooden posts or metal stakes into the ground at each corner of your marked area.
If you’re feeling ambitious, you can also place additional posts every 4-6 feet for extra support. Use the hammer or mallet to secure them firmly.
4. Attach the Wire Mesh: Roll out the wire mesh fencing around the posts and cut it to the desired height.
Use zip ties or fence staples to attach the mesh to each post, making sure it’s taut and secure. This part might take a bit of muscle, but it’s worth it to keep your pup contained.
5. Secure the Bottom: To prevent any sneaky pups from digging their way out, bury the bottom of the wire mesh a few inches into the ground.
You can also weigh it down with rocks or dirt to keep it in place.
6. Add a Roof (Optional): If you want to provide extra protection from the elements, consider adding a roof using more wire mesh or a tarp.
Just make sure it’s securely attached and can withstand wind or rain. Your dog will appreciate the extra shelter during those surprise rain showers.
7. Finishing Touches: If you want to add a personal touch, consider painting or sealing the wooden posts with dog-safe materials.
This can make your kennel look more polished and blend in with your yard.
Optional Add-ons/Variations:
– Customize with Color: Instead of leaving the wooden posts plain, why not paint them in bright colors or patterns?
This can add a fun vibe to your outdoor space.
– Decorative Touches: Add some plants or outdoor decorations around the kennel for a pop of personality.
Just make sure any plants are safe for dogs.
Pro Tip:
To increase the longevity of your kennel, consider using treated wood for the posts or applying a dog-safe sealant.
This will help protect against weather damage and keep your kennel looking great for years to come. Plus, a little extra care can save you from costly repairs down the road.
Now, get ready to create a safe haven for your pup. With a bit of effort and creativity, you’ll have an outdoor space that both you and your dog will love. Happy building!
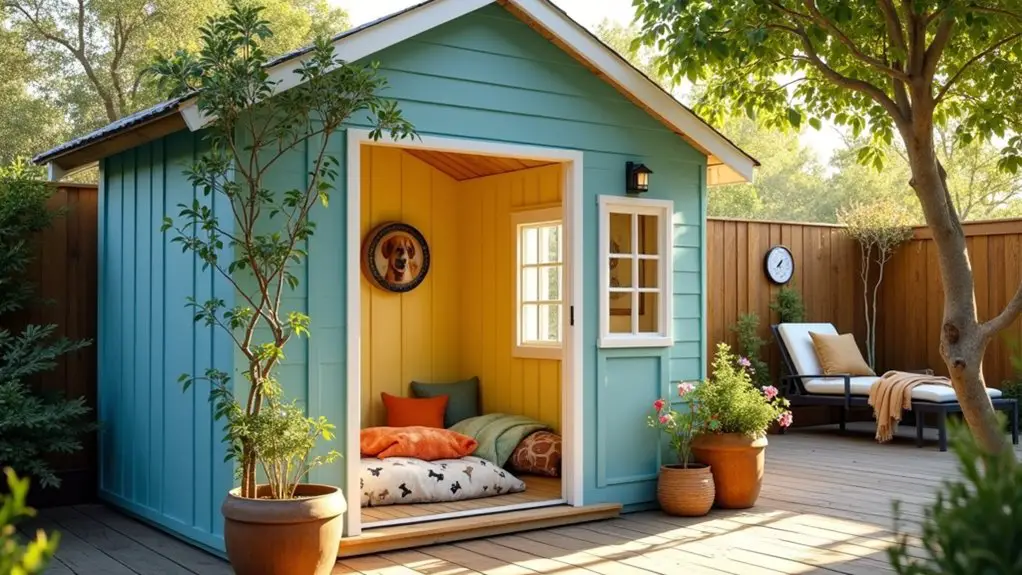
7. Garden Shed Conversion Kennel
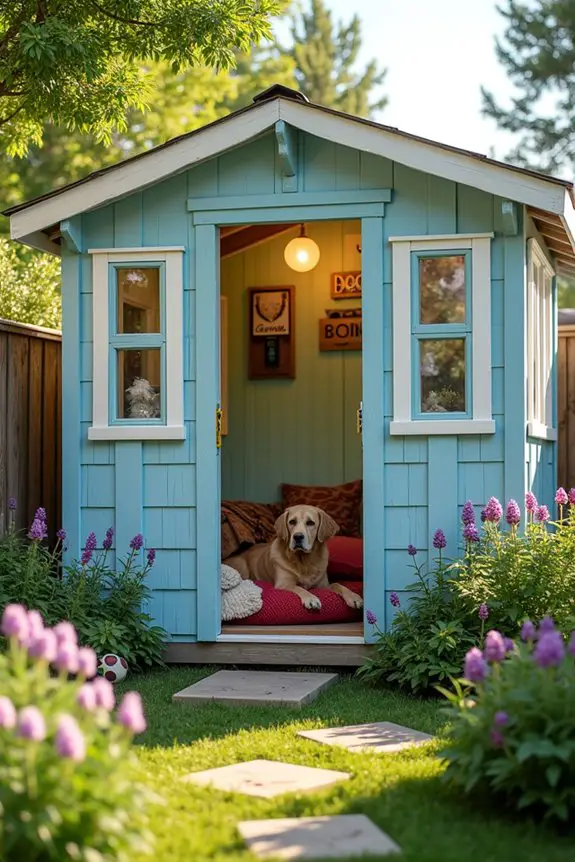
Transforming an old garden shed into a cozy dog kennel is a fantastic DIY project that not only provides your furry friend with a safe outdoor space but also gives new life to that forgotten structure in your yard.
It’s a budget-friendly solution that can save you money compared to buying a pre-made kennel, and it adds charm to your property. Plus, your pup will love having their own little hideaway.
Materials Needed:
- Old garden shed (or a sturdy shed kit)
- Dog door (optional)
- Insulation (like foam board or straw)
- Interior paint (non-toxic, pet-safe)
- Outdoor paint or sealant (for added durability)
- Wood screws and nails
- Hammer, drill, and screwdriver
- Measuring tape
- Sandpaper
- Optional: Dog bed or blankets
Step-by-Step Instructions:
- Inspect the Shed: Take a good look at your shed. Confirm it’s sturdy and free from rot or damage. If it needs repairs, fix those up first. A solid foundation is key for your pup’s safety.
- Clean it Out: Clear out any old gardening tools, junk, or debris. You want a fresh start for your dog’s new space. Maybe even consider keeping a few toys in there for your pup.
- Seal Up Any Gaps: Look for any holes or cracks where wind or rain could sneak in. Use wood filler or caulk to seal these up. Your dog will appreciate the cozy atmosphere, especially on chilly nights.
- Insulate for Comfort: If you live in a colder climate, adding insulation is a smart move. You can use foam boards or even straw in the walls to help keep the temperature just right. Your pooch will be grateful when it’s freezing outside.
- Paint the Inside: Choose a bright, cheerful color for the interior that matches your style. Make sure it’s non-toxic and pet-safe. A little splash of color can transform the shed into a welcoming space for your furry friend.
- Install a Dog Door (Optional): If your dog loves to come and go, consider adding a dog door. It’ll give them the freedom to enter and exit as they please, making it their little sanctuary.
- Add Comfort: Finally, place a soft dog bed or some blankets inside. Your pup deserves a comfy spot to curl up after a day of playing outside. You might even find them napping there instead of on your couch.
Optional Add-ons/Variations:
- Personalize with Decor: Add some fun wall art or dog-themed decorations to make the space feel even more inviting. Maybe hang up a few cute pictures of your pup or paint their name above the door.
- Outdoor Area: Create a little outdoor run or a shaded area with some patio furniture for you to relax while your dog enjoys their new space.
Pro Tip:
Always keep an eye on the temperature inside the shed. A thermometer can help you monitor the heat during summer and cold during winter. Your dog will be much happier if they’re not roasting or freezing in their new home.
Plus, a comfy dog is a happy dog, right?
With this project, you’re not just giving your dog a kennel; you’re creating a special place just for them. Happy building!
Extra Tips & Ideas
What’s the best way to make your dog’s outdoor kennel not just functional, but a cozy haven? Start by adding some comfy bedding—think old blankets or dog beds. Your pup will love it, trust me.
You can also hang a few toys to keep them entertained. Who doesn’t love a little tug-of-war?
Consider painting the kennel in fun colors. A pop of blue or yellow can brighten the space. You might even plant some dog-safe herbs nearby for a fresh scent.
And don’t forget to provide shade—an umbrella or tarp can do wonders.
Lastly, sprinkle in some personal touches, like a cute sign with your dog’s name. It’s those little things that make a big difference.
Frequently Asked Questions
What Materials Are Best for Building a Dog Kennel?
Wood, wire fencing, and plywood are great materials for building a dog kennel. They’re durable and provide good insulation. You’ll also want to include weatherproof paint to protect against the elements and guarantee longevity.
How Do I Ensure My Dog Stays Cool in Summer?
Did you know dogs can overheat at just 77°F? To keep your dog cool in summer, provide shade, fresh water, and a breeze. Consider cooling mats or elevated beds for extra comfort during hot days.
Can I Use Recycled Materials for My DIY Kennel?
Yes, you can definitely use recycled materials for your DIY kennel! Repurposing items like pallets or old crates not only saves money but also reduces waste. Just make sure they’re safe and sturdy for your dog.
How Much Space Does My Dog Need in the Kennel?
Your dog needs at least 10 square feet in the kennel to move comfortably. Don’t worry about space; you can create a cozy environment with thoughtful design, ensuring your pup’s happy and secure.
What Are Safe Paint Options for Outdoor Dog Kennels?
You should use non-toxic, water-based paints or stains specifically designed for outdoor use. Look for products labeled as safe for pets, avoiding harmful chemicals. Natural finishes, like linseed oil, are also excellent options for dog kennels.
Conclusion
So there you have it, a treasure trove of ideas to transform your backyard into a doggy paradise without emptying your wallet. Just like cooking up a delicious meal from leftovers, you can whip up a cozy kennel using what you’ve got. Remember, your pup’s happiness is the secret ingredient. With a sprinkle of creativity and a dash of elbow grease, you’ll have a tail-wagging haven in no time. Why not give it a shot? Your furry friend will thank you.

