
Isn’t it amazing how a simple costume can spark so much joy? If you’re gearing up for a fun event, a Dog Man costume has so much potential. Think of all the unique touches you can add; your creativity is the limit. From a fun paw-print cape to a quirky dog-ear headband, there are endless ways to make your outfit pop. Ready to fetch some ideas that’ll have you wagging your tail in excitement?
Dog-Inspired Accessories Galore!
When you think about pulling together a Dog Man costume, don’t forget the magic that lies in the details—like dog-inspired accessories that can really bring your outfit to life.
Think about adding a fun tail or floppy ears; you can make these easily with felt and some creativity. Ever thought about a dog collar? A simple DIY dog collar can add that special touch, and you can even personalize it!
A cute dog bone-shaped badge? That could be a fantastic finishing touch. It’s all about those little details. Trust me, I once just wore a plain shirt and regretted it.
Our Collection
Get ready to transform into Dog Man with our collection of playful accessories that’ll make your costume stand out.
You’ll love the paw-print patterned cape and dog-ear headband, plus the dog tail costume attachment that just completes the whole look.
And let’s not forget about the collar with a tag and some fun face paint ideas—trust me, they’ll take your costume to the next level!
1. Paw-Print Patterned Cape
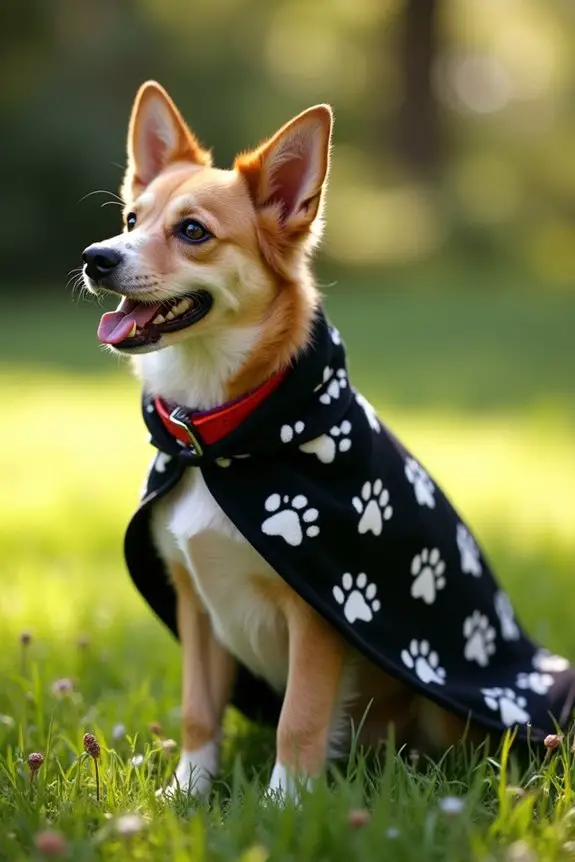
This DIY project is all about creating a fabulous paw-print patterned cape for your furry friend—tailored just for those moments when a simple walk turns into a grand adventure. Not only will this cape make your dog the star of the neighborhood, but it can also save you some cash! Instead of splurging on expensive pet wear, you can whip up this stylish and comfy cape right at home. Plus, your pup will feel like a superhero—who doesn’t want that? Elevate your style with a luxury elevated pet feeder to match their stylish ensemble, which can also be an essential tool for service dog training success.
Materials Needed:
- Fleece fabric (1 yard, paw-print pattern)
- Scissors
- Measuring tape
- Sewing machine (or needle and thread if you’re feeling old-school)
- Iron (for a polished look)
- Velcro strips (or a snap button)
- Fabric pins
- Optional: Dog costume accessories (like a cute collar or hat)
Step-by-Step Instructions:
- Measure Your Pup: With your measuring tape, check the length from the base of your dog’s neck to the beginning of their tail. Add 5 inches for comfort and hem.
- Cut the Fabric: Lay your paw-print fleece flat and cut out a rectangle based on the measurement you just took. It’s best to go wider than narrower, giving your dog some wiggle room.
- Create an Opening: Fold one of the short ends of your rectangle down about 4 inches to make a neckline. Pin this fold in place and cut a small “U” shape in the center for the dog’s head—just wide enough for it to slide on easily.
- Hem the Edges: Fold the raw edges of your fabric under by about half an inch and iron them down to create a neat edge. If you’re sewing, use straight stitches; if using fabric glue, follow the instructions on the tube for drying times.
- Add Fasteners: Measure and cut two pieces of Velcro strips (or get your snap button ready), then attach them to the edges that will meet under your dog’s chest. This closure keeps the cape secure, so they don’t become the runaway superhero.
- Final Touch-Up: Give your cape a good iron to smooth out any wrinkles, and voilà! You have a snazzy cape that’s ready for tail-wagging adventures. You might also want to invest in luxury dog kennel furniture that complements your pet’s new outfit and enhances their living space.
- Try It On: Slide the cape over your pup’s head and fasten it at the chest. Watch for their reactions—tail wags and puppy grins mean you nailed it.
Optional Add-ons/Variations:
- Feeling extra creative? Use a different color fleece for the underside of the cape—maybe a solid vibrant hue or a dazzling glitter fabric.
- Or try personalizing it with your dog’s name stitched onto the back. If you want a slight twist, consider adding a hood just for those chilly dog park days. Simply cut out a smaller circle to attach to the neck area and add flaps to cover the ears.
Pro Tip:
Always double-check for any loose fabric around the collar area to avoid any tangles during playtime. A little extra care during the sewing phase can save you from potential wardrobe malfunctions later—because let’s be real, no one wants an accidental cape reveal in public.
2. Dog-Ear Headband
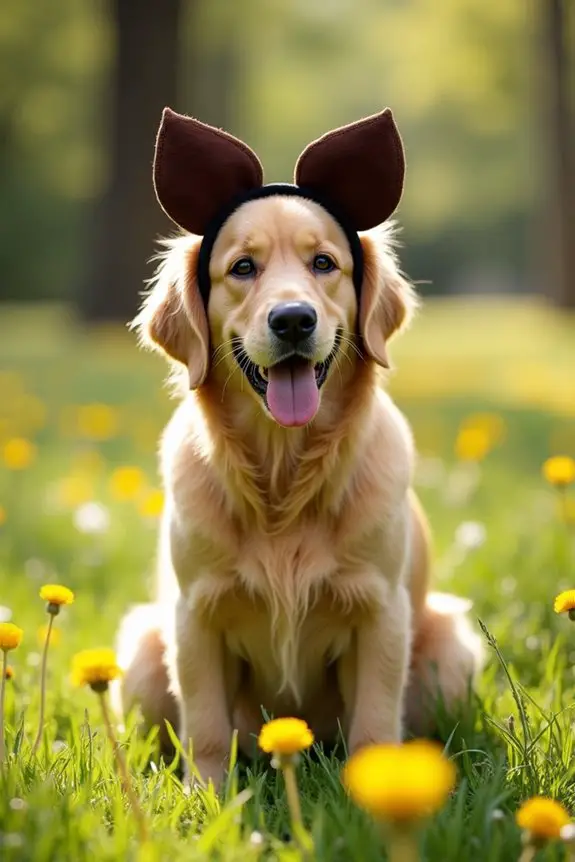
Have you ever watched your pooch’s ears flop while they chew a toy and thought they were missing a little something? Enter the DIY dog-ear headband! This adorable accessory is perfect for dressing up your furry friend for photos, special occasions, or just adding an extra sprinkle of fun to their day.
Plus, it’s a great way to save money and embrace your inner crafty creator. Who knew you could release your creativity while making your pup look so adorable?
Materials Needed:
- Felt fabric (various colors for the ears)
- Headband (plain or decorated)
- Scissors
- Hot glue gun (or fabric glue)
- Measuring tape
- Pencil or fabric marker
- Optional: Extra embellishments (like ribbons or sequins)
Step-by-Step Instructions:
- Measure and Cut: Start by measuring the size of the headband and decide how big you want the ears to be. Generally, about 6 inches tall and 4 inches wide works well. Draw a triangle shape on the felt and cut out two pieces for the ears.
- Add Detail: If you want a layered look, cut out smaller triangles from different colored felt to glue on top of your main ear pieces. This not only adds flair but gives your pup that “look-at-me” style.
- Attach Ears to Headband: Take your hot glue gun and carefully glue the ears onto the headband, positioning them where they’ll stand up nicely—ideally around the center. Hold them for a few seconds to make sure they stick well.
- Decorate for Flair: Let your crafty side shine. Add any embellishments like sequins, ribbons, or even little bows to the base of the ears or the headband itself. Make it as flashy or as understated as you’d like.
- Let it Set: Allow the glue to dry completely before trying it on your pup. This will guarantee the ears aren’t going anywhere when they’re ready to strut their stuff.
- Try It On: Carefully place the headband on your dog’s head. Take a moment to adjust it for comfort—if any wiggles occur, it’s time to make some tweaks. Watch their tiny tail wag as they flaunt their new look.
Optional Add-ons/Variations:
- Want your headband to match your dog’s personality? Experiment with different color combinations. How about a classic black-and-white scheme for a classy look, or lively pastels for a fun day at the park?
- Feeling adventurous? You could add a detachable bow or flower clip for special occasions—after all, every dog should have a little bit of bling in their life, shouldn’t they?
Pro Tip:
When crafting your headband, ensure that it sits loosely on your dog’s head. A snug fit can . . . let’s just say, that may not end well. You wouldn’t want to be spending the afternoon chasing after a runaway pup because they were too cramped in their new accessory.
Comfort is key in keeping your fur baby happy and stylish.
3. Dog Tail Costume Attachment
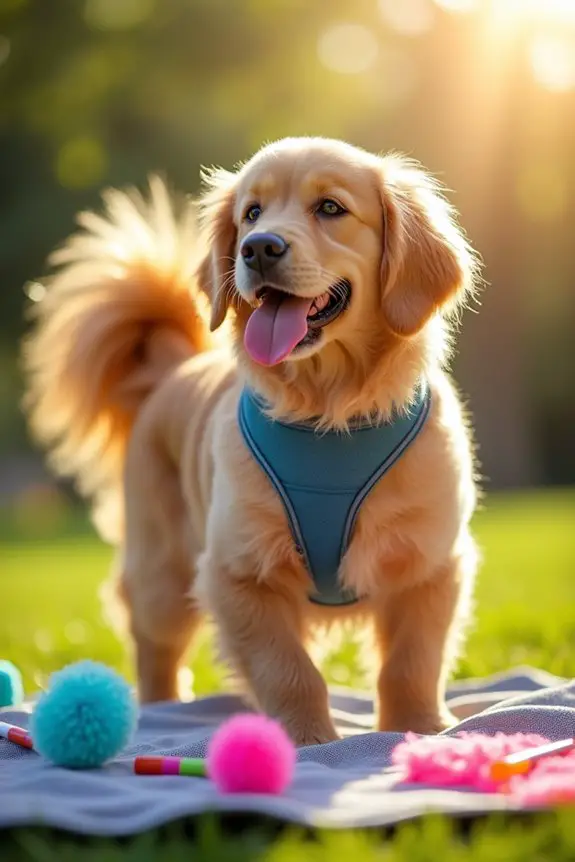
If you’re looking to add a tail-wagging twist to your pup’s costume, a DIY dog tail costume attachment is just the ticket! Not only does it elevate your dog’s look for Halloween or themed photo sessions, but it also shows off their playful personality without breaking the bank. Plus, it’s a fun project you can initiate that doesn’t require a PhD in fashion design.
Materials Needed:
- Faux fur fabric (pick a color that suits your theme)
- Flexible wire or craft foam (for the tail’s structure)
- Fabric scissors
- Needle and thread (or a sewing machine if you prefer)
- Hot glue gun (optional, for quick assembly)
- Velcro strips or a dog-friendly harness (for attaching)
- Measuring tape
- Pencil or fabric marker
- Optional: Fabric markers or embellishments (like glitter or pom-poms)
Step-by-Step Instructions:
- Measure and Cut the Tail Base: Start by measuring how long you want the tail to be—usually, around 12 to 18 inches looks best. Cut a rectangular piece from the faux fur fabric that’s about 4 inches wide and your desired length.
- Create the Tail Structure: If you want your tail to be poseable, take the flexible wire or craft foam and cut it to the same length as your fabric strip. This will give the tail some shape and bounce.
- Sew the Tail Together: Lay the wire or foam in the center of your fabric strip and fold the sides over, lining them up neatly. Use your needle and thread to sew along the edge, keeping the wire snug inside. For an easier approach, you can use hot glue to secure the sides together—just be mindful of the glue’s heat when handling.
- Add Some Flair: If you’re feeling creative, use fabric markers to draw patterns on your tail, or sew on little pom-poms for that extra sparkle. Just think about how many pups will stop in their tracks to admire your dog’s flashy tail.
- Attach the Tail: To fasten the tail, you can either sew it to the back of a dog-friendly harness or use Velcro strips. If you go the Velcro route, make sure to attach one part of the strip to the tail and the other to the harness. That way, it can be removed easily after the festivities.
- Final Touches: Give the tail a little fluff and adjust it so it sits just right. You want it standing tall for maximum cuteness while also being comfortable for your furry friend.
- Try it On: Slowly slide the harness with the newly attached tail onto your dog and make any necessary adjustments. Watch as they discover their new accessory, which will surely lead to some charming moments (or some hilarious confusion).
Optional Add-ons/Variations:
- Feeling adventurous? Create a tail inspired by your dog’s favorite animal—think striped for a tiger or colorful for a unicorn. The possibilities are endless.
- You could also make a detachable tail for easy storage and switching up looks, so your pup can be a different character depending on their mood (or yours).
Pro Tip:
Before getting started, confirm your dog is comfortable with wearing accessories, as some pups may feel a bit awkward initially. Always check for any tight spots or bunching to maintain their comfort as they strut their stuff with their brand new tail. Remember, a happy pup equals a happy you!
4. Collar With Tag Accessory
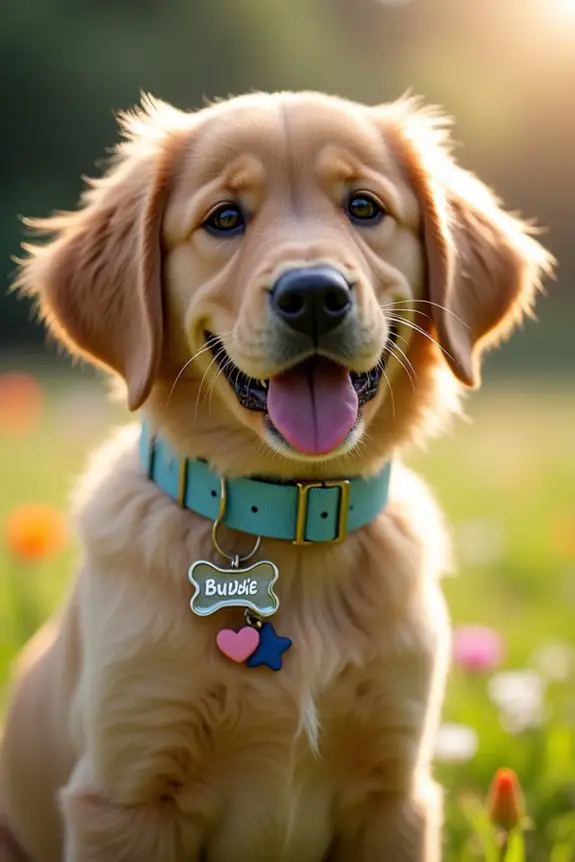
A collar with a charming tag accessory is a delightful DIY project that allows you to add a personal touch to your pup’s ensemble while keeping their identification easy to see. Not only does this project help your furry friend stand out during walks — making them the talk of the dog park, but it also saves you money compared to buying pre-made accessories. Plus, who wouldn’t want a collar that showcases their pup’s unique style? Exploring pet wellness products can also enhance your dog’s overall well-being and comfort. Additionally, orthopedic dog beds provide excellent support for larger breeds, ensuring their comfort and health while they rest.
Materials Needed:
- A plain dog collar (nylon, leather, or fabric)
- Cute charms or tags (like bone shapes, initials, or fun shapes)
- Keyring or jump rings (to attach tags)
- Strong scissors or wire cutters (if you’re working with metal)
- Optional: Permanent marker or stickers for decoration
- Optional: Small hole punch (if needed for tags)
Step-by-Step Instructions:
- Pick Your Collar: Start with a sturdy dog collar that will serve as your base. Make certain it’s the right size for your pup; you want it comfortable, not too tight or too loose.
- Choose Your Tags/Charms: Adjust the accessories you want to attach. Think about your dog’s personality — a witty tag with a fun phrase or a simple charm can do the trick. If you’re feeling crafty, you can decorate blank aluminum tags with a permanent marker or stickers to add that personal touch.
- Prepare the Tags: If you’re using charms or tags that need to be attached to the collar with jump rings, use scissors or wire cutters to gently open the jump ring. If your tag doesn’t have a pre-made hole, use a small hole punch to create one.
- Attach the Tags: Slip the charm or tag onto the jump ring, then use the same jump ring to connect it to the collar. Make sure it’s secure; you wouldn’t want your pup to lose their stylish accessory mid-walk. If you’re using a keyring, follow the same process.
- Final Adjustments: Give your collar a good once-over, making sure all attachments are secure. It should feel balanced — not weighing down one side more than the other.
- Try It On: Slip the collar on your dog. Give them a bit of time to adjust to their new accessory. Watch closely; if they seem uncomfortable, you might need to rethink the collar or tag size.
Optional Add-ons/Variations:
- Color Play: Switch things up by painting your tags in different colors to match seasonal themes or your dog’s mood. A little splash of paint can brighten up even the plainest collar.
- Personalized Phrases: Instead of just a name, why not add your dog’s favorite phrase or a funny saying that reflects their personality? Just make certain it fits neatly on the tag.
Pro Tip:
When attaching tags, consider using a little bit of clear nail varnish on the end of jump rings to keep them from loosening over time. It might sound silly, but trust me, a little extra precaution goes a long way in keeping your dog’s identity secure and stylish.
5. Dog-themed Face Paint Ideas
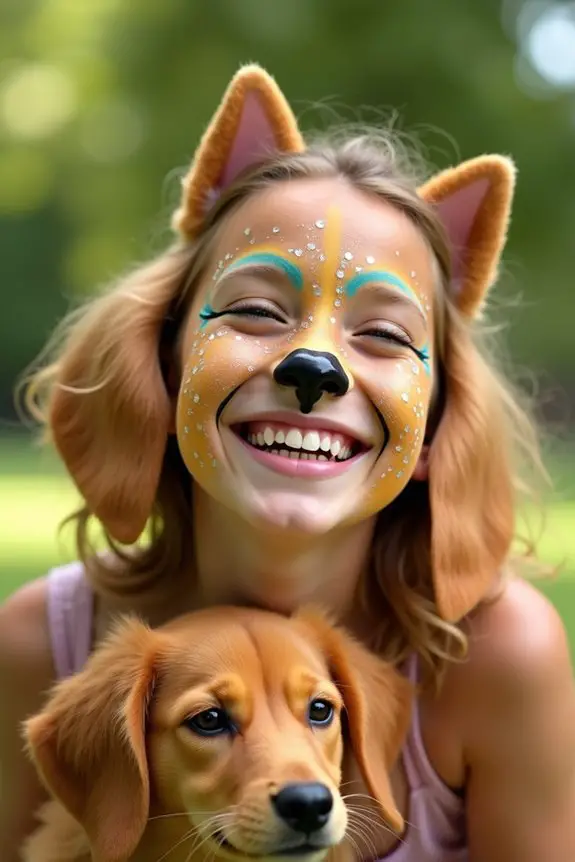
Face painting can be a super fun way to bring a little dog-themed flair to your next outing, whether it’s a puppy playdate, a costume contest, or just a casual walk around the neighborhood.
This DIY project is a great way for pet owners to bond with their furry friends, showcase creativity, and add a playful vibe to any occasion. Plus, it’s a budget-friendly way to show off your dog-loving spirit without breaking the bank.
Materials Needed:
- Face paint (non-toxic and hypoallergenic is best)
- Small brushes and sponges for application
- Face wipes or wet cloths (for easy cleanup)
- A mirror (to guarantee you get the details just right)
- Optional: Glitter for a touch of sparkle
Step-by-Step Instructions:
- Choose Your Design: Start with some inspiration. Do you want to paint a cute puppy, a playful paw print, or maybe a fun dog bone? Looking at pictures online can spark some great ideas.
- Prep Your Face: Wash your face to remove any oils or dirt, making sure it’s clean before you start painting. This helps the paint stick better and last longer. You don’t want to look like you just rolled out of bed with a face full of paint—no judgment, but let’s aim for fabulous.
- Dive Into the Paint: Grab your brushes and pick out your colors. If you’re going for a classic dog look, brown and black are good choices, but let your creativity run wild! Dip your brush in the paint and start creating your masterpiece.
- Application Time: Use a sponge for the larger areas (like your cheeks) and a small brush for details (like spots, patterns, or outlines). Don’t worry if it doesn’t look perfect right away; art is all about enjoying the process—even if you end up looking like a confused dog yourself.
- Add Some Details: Here’s where it gets fun. Perhaps add a little nose at the tip of your nose and two floppy ears above your own. You could even add some whiskers—just don’t forget to check that mirror often so you don’t paint one of them way longer than the other.
- Finalize Your Look: Once you’re satisfied with your paint job, let it dry a couple of minutes. And if you’re feeling extra adventurous, add some sparkly glitter for a twinkly touch. Who says dogs can’t sparkle too?
- Cleanup: When you’re ready to wash it off, simply use face wipes or a wet cloth to gently remove the paint. Nothing like a fun face paint session followed by a spa day to keep your skin happy.
Optional Add-ons/Variations:
- Theme It Up: Match your dog’s own coloring with your face paint. For instance, if your pup is golden, go for golden hues—why not have matching looks?
- Festive Touches: Create holiday-specific designs like pumpkins for Halloween or festive reindeer for Christmas. You could even design a “pup-corn” look for summer barbeques—everyone loves a silly dog with popcorn!
Pro Tip:
Always do a patch test first, especially if you or your friends have sensitive skin. Just dab a bit of paint on your wrist to see if there’s any reaction. Safety first, friends—who wants to go home with a rash after an attempt at fun?
Let your creativity run wild as you paint, and who knows? You might just become the Picasso of pet party faces. Happy painting!
6. Dog-themed Sweater Vest

Nothing says cozy like a dog-themed sweater vest. It’s perfect for those chilly walks with your furry friend or simply lounging at home sipping hot cocoa while your pup curls up beside you.
Plus, making your own dog-themed sweater vest is a great way to show off your love for dogs, avoid commercial prices, and create something unique that fits your style. So let’s get crafting!
Materials Needed:
- A plain sweater vest (in a color of your choice)
- Fabric paint or fabric markers (non-toxic)
- Dog-themed stencils (think paws, bones, or breed silhouettes)
- Paintbrushes or sponges for painting
- Cardboard (to place inside the vest while painting)
- Iron (to set the paint, if necessary)
- Optional: Dog-themed embellishments (like patches or iron-on decals)
Step-by-Step Instructions:
1. Select Your Vest: Start with a nice, plain sweater vest in a color that screams “I love dogs!” Neutral tones are great, but don’t shy away from brighter colors, especially if your dog has a vibrant personality.
2. Set Up Your Workspace****: Lay down some old newspapers or a plastic sheet to catch any stray paint drops, because trust me, once paint starts flying, it can get messy.
Also, place a piece of cardboard inside the vest to make sure the paint doesn’t seep through.
3. Choose Your Design****: With the vest laid out, decide on your design. Want to go for a classic paw print? Or maybe some adorable dog icons?
If you’re not feeling super creative, use stencils for easy tracing.
4. Get Painting: Time to reveal your inner artist! Dip your brush or sponge into the fabric paint and carefully apply it to your vest.
Go gentle at first; you can always add more if it looks too light. If you’re using markers, you might want to try out a few lines on the cardboard first.
5. Add Embellishments: If you’re feeling crafty, why not throw in some iron-on decals? A little sparkle is never a bad idea—or perhaps your dog’s name in cute lettering?
Just remember, less is often more.
6. Drying Time: After you’ve completed your masterpiece, leave the vest to dry completely—about an hour should do.
If you used fabric paint, check the instructions for setting the paint. An iron may be necessary to make sure your hard work doesn’t wash away.
7. Flaunt Your Creation: Once everything’s dried and set, slip it on and strut your stuff with your pup.
You’re not just fashionable; you’re showcasing your love for dogs in the most creative way possible.
Optional Add-ons/Variations:
- If you’re up for a challenge, try using multiple colors of fabric paint to create a gradient or a tie-dye effect. The more colors, the more your dog might think you’re off the color chart.
- Consider painting only certain sections for a modern, minimalist look—like just the lower corner with paw prints or maybe a dog silhouette across the back.
Pro Tip:
For a durable finish, always allow the paint to cure completely before washing.
And when it’s time to clean, turn the vest inside out and wash it in cold water. Trust me, it’s like a spa day for your vest, keeping it looking brand new longer.
Now you’re ready to show off your newfound crafting skills and have the ultimate dog-themed outfit for both you and your furry friend. Happy crafting!
7. Dog Costume Bowtie Accessory
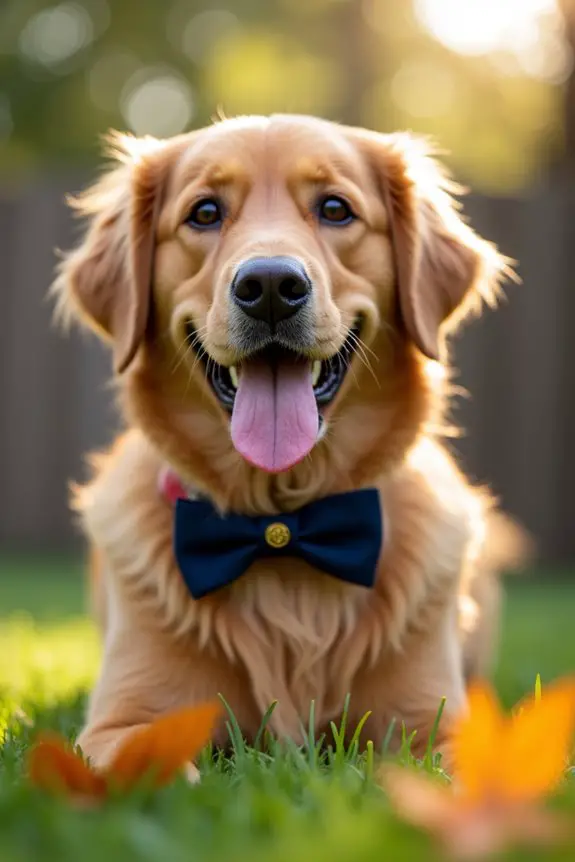
Looking for a fun way to add some flair to your dog’s costume? Making a dog costume bowtie accessory is an easy and stylish solution!
Besides adding a touch of class to any Halloween ensemble or party look, it’s a fun project that can save you money and allow you to customize the design to match your pup’s personality.
So, grab your supplies and let’s get crafting!
Materials Needed:
- A piece of fabric (cotton or felt works best)
- Scissors
- Needle and thread (or fabric glue for a no-sew option)
- Elastic band or clip (to secure the bowtie to the collar)
- Ruler
- Pencil or fabric chalk
- Optional: embellishments (like sequins, buttons, or rhinestones)
Step-by-Step Instructions:
1. Cut the Fabric: Measure and cut a rectangle of fabric about 12 inches long and 5 inches wide for the main part of the bowtie. From another piece of fabric, cut a smaller rectangle (about 2 inches by 5 inches) for the center knot.
2. Fold and Sew: Take your larger rectangle, fold it in half lengthwise with the right sides facing each other, and sew along the long side. Flip the fabric inside out to hide those stitches. Now you’ve got the bowtie shape!
3. Make the Bow: With the fabric turned right side out, pinch the center of the bowtie and fold the ends towards the center to create the bow shape. Use a needle and thread to sew the creases in place. This will give your bowtie its classic look.
4. Add the Center Knot: Take the smaller rectangle of fabric and wrap it around the center of the bowtie. Fold the ends over and sew or glue them together at the back to secure. Don’t worry if it’s not perfect—dogs are known for their charm, not their judgment.
5. Attach the Elastic or Clip: Depending on how you want to secure this fashionable accessory, either sew an elastic band to the back of the bowtie or attach a clip.
If you’re using a clip, make sure it’s secure so it doesn’t pop off during playtime.
6. Final Touches: Feel free to embellish your bowtie with a little sparkle! Stick on some sequins or sew on buttons to give it that extra pizzazz.
Just remember—no rhinestones near the dog’s mouth.
7. Get the Pup Ready: Once your bowtie is complete, help your furry friend put it on. Snap a picture of your stylish pup, and you’re all set for a day of fetching compliments!
Optional Add-ons/Variations:
- Color Play: Try using different fabrics for the bowtie base. Check out some cute patterns or colors that reflect your dog’s personality. Is your pup a diva? Maybe a sparkly pink will do the trick.
- Seasonal Bowties: Create a collection of bowties for different seasons or holidays. Think festive colors for Christmas or playful prints for summer parties.
Pro Tip:
Make sure to measure your dog’s neck before attaching the elastic or clip.
A snug fit is great, but you don’t want it too tight. You should be able to fit two fingers between the bowtie and your dog’s neck comfortably.
After all, we want your pup to strut their stuff, not feel choked up by fashion.
Give this DIY project a go and have fun dressing up your canine companion.
Who knows, they might even steal the show—and your heart—all over again.
Extra Tips & Ideas
While you might think you have everything figured out for your Dog Man costume, there’s always room for a few extra flourishes to really bring it to life.
Consider adding a tail—maybe a furry one you can attach with a belt. It’ll wiggle as you walk!
Don’t forget a fun prop, like a giant dog bone. You’ll definitely get some laughs.
And hey, if you’re feeling crafty, you could create some puppy paw prints on your pants with washable paint. Just be careful; I once left a blue paw print on my friend’s white carpet, and, well, let’s just say it wasn’t my best moment.
Frequently Asked Questions
How Do I Choose the Right Size for a Dog Man Costume?
To choose the right size for a Dog Man costume, measure your dog’s chest, neck, and length. Then, compare those measurements to the sizing chart provided by the manufacturer to guarantee a comfortable fit.
Can I Customize My Dog Man Costume With Personal Touches?
Did you know that 70% of costume wearers enjoy personalizing their outfits? Absolutely, you can customize your Dog Man costume with unique colors, patches, or accessories that reflect your style and personality, making it truly yours!
Where Can I Find High-Quality Dog Man Costume Materials?
You can find high-quality Dog Man costume materials at your local fabric stores, online retailers like Amazon, or specialty costume shops. Don’t forget to check Etsy for unique, hand-crafted options that add special flair!
Are There Safety Considerations for Dog Man Costume Designs?
When designing a costume, you need to contemplate safety. For example, if you include a mask, make sure it has proper ventilation and visibility, or it could restrict your breathing and impair sight during wear.
How Can I Involve My Dog in the Costume Design Process?
Involve your dog by observing their reactions to different fabrics and colors. Let them sniff materials and choose embellishments. This way, your costume reflects both your creativity and their personality, ensuring a fun collaboration!
Conclusion
So, there you have it—ten pawsitively fun ideas to make your Dog Man costume truly pop. Did you know that about 36.5 million homes in the U.S. own at least one dog? Imagine how many delighted little faces you’ll see when you strut your stuff in your creative getup. Remember, it’s all about having fun and expressing your unique style. With these tips, you’ll stand out in any crowd—just don’t forget to wag your tail a little.

