Making dog toys at home can feel like a stroll in the park or a chaotic game of fetch gone wrong. Yet, with a little creativity and some old stuff lying around, you can whip up something your pup will love. Ever thought about turning an old t-shirt into a tug toy? Or maybe a tennis ball into a treat dispenser? Stick around to discover how to turn everyday items into tail-wagging treasures.
DIY T-Shirt Tug Toy
Looking for a fun and simple way to keep your pup entertained? Why not whip up a DIY T-shirt tug toy?
Grab an old t-shirt—trust me, you’ve got one collecting dust somewhere. Cut it into strips, about 1-2 inches wide.
Then, tie three strips together in a knot at one end. Braid those strips like you’re making a friendship bracelet, but, you know, for your dog.
Once you reach the desired length, tie another knot at the end. Voilà! You’ve just created a homemade dog toy that’s perfect for tugging.
Your pup won’t know what hit ’em. Just be prepared for some overly enthusiastic tug-of-war sessions.
And hey, if it lasts more than a week, you’re doing better than I usually do.
Our Collection
Now that you’ve tackled the DIY T-Shirt Tug Toy, let’s check out our collection of fun and easy dog toys.
You’ll find everything from a fleece ball fetch toy to a recycled plastic bottle toy—each one ready to keep your pup entertained.
Which one do you think your furry friend will love the most?
1. Fleece Ball Fetch Toy
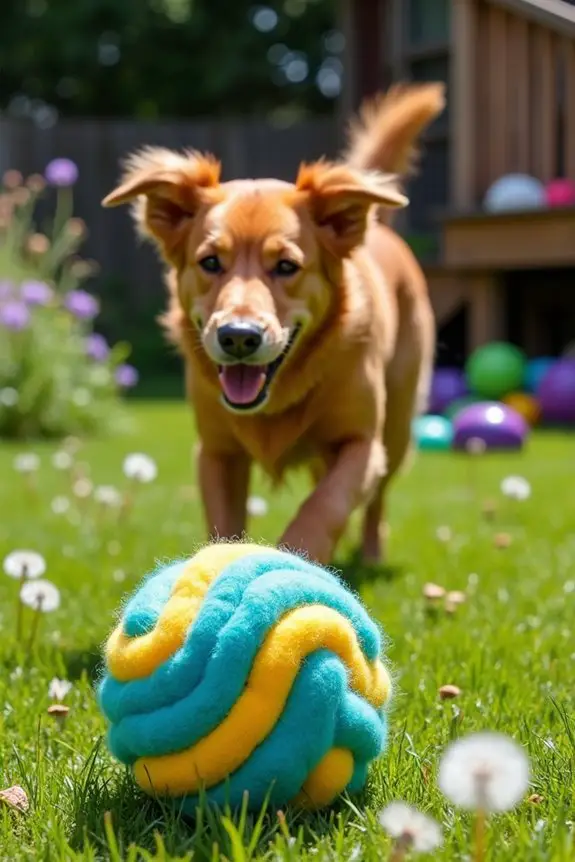
Are you tired of spending money on dog toys that your furry friend destroys in minutes? Well, say goodbye to those flimsy store-bought options and hello to the DIY Fleece Ball Fetch Toy! Not only is it a cost-effective solution, but it’s also super soft and easy for your dog to carry around. Plus, you can customize it to match your pup’s personality. Let’s get started on creating a fun new toy for your best buddy!
Materials Needed:
- 2 to 3 pieces of fleece fabric (choose fun colors)
- Scissors
- Measuring tape or ruler
- Marker or chalk (for marking fabric)
- Optional: Treats or squeakers (for added excitement)
Step-by-Step Instructions:
- Cut the Fleece: Grab your measuring tape and cut the fleece into strips that are about 1 inch wide and 12 inches long. Aim for 6 strips total, but feel free to go wild if you want a fluffier ball. Just remember, the more strips, the more fun for your pup.
- Gather the Strips: Take all your strips and tie them together in a knot in the center. Make sure it’s tight because we don’t want your dog pulling apart a half-finished toy. It’s all about that sturdy construction.
- Braid it Up: Separate the strips into three groups (two strips in each group). Now it’s time for some braiding action. Braid them together, and don’t pull too tight; you want it to be fluffy. Once you reach the end, tie another knot to secure it.
- Form the Ball: Roll the braided fleece into a ball shape. If it looks more like a lumpy potato than a ball, don’t worry. It’s still going to be a hit with your dog. Secure the ball by tying another knot around it.
- Add Some Fun: If you want to add a little surprise, tuck in a squeaker or a few treats before securing the last knot. This will keep your pup engaged and excited during fetch time.
- Trim the Ends (Optional): If you’re a perfectionist like me, you might want to trim any uneven ends. Just make sure not to go overboard; a little fluff adds character.
- Play Time: That’s it! Now toss the fleece ball for your dog and watch them go wild. You might even want to join in on the fun—after all, playing fetch is good exercise for both of you.
Optional Add-ons/Variations:
- Color Combos: Choose fleece fabric in your dog’s favorite colors or patterns. Think polka dots, stripes, or even a superhero theme. Your dog will appreciate the extra flair.
- Bigger Ball: If you have a larger breed, consider using longer and thicker strips for a bigger ball. Just make sure it’s still manageable for your pup to carry.
Pro Tip:
Before you start, make sure to check the fleece for any loose threads or small pieces that could be chewed off. Safety first, right? And if you’re looking to save some cash, check out local fabric stores or thrift shops for discounted fleece. Who knew being a crafty dog parent could be so budget-friendly? Additionally, consider investing in premium dog toys to provide your furry friend with durable options that last longer than DIY projects.
Now, go ahead and enjoy making this toy for your furry friend. Just remember, the messier the crafting, the more fun you and your pup will have during playtime!
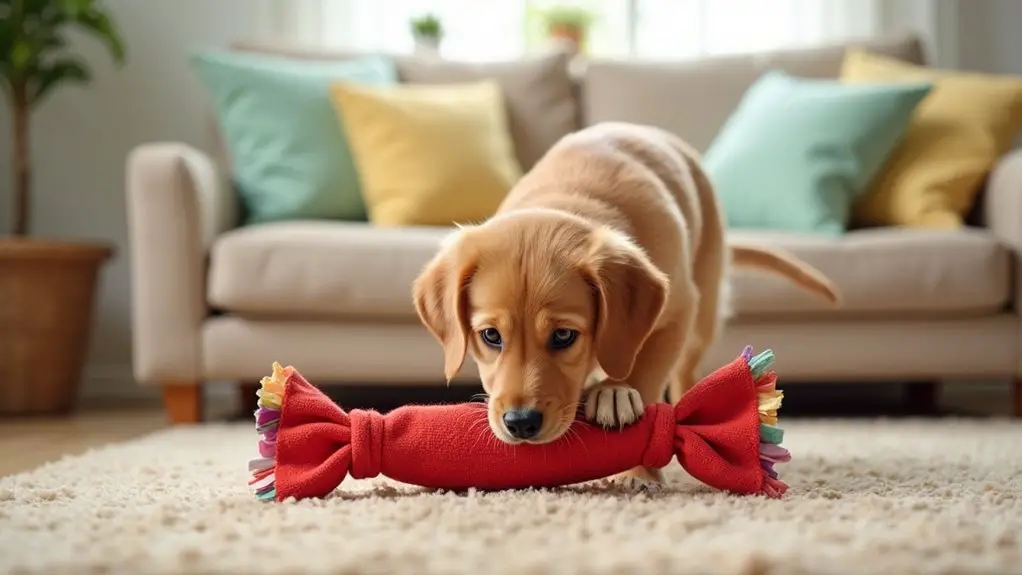
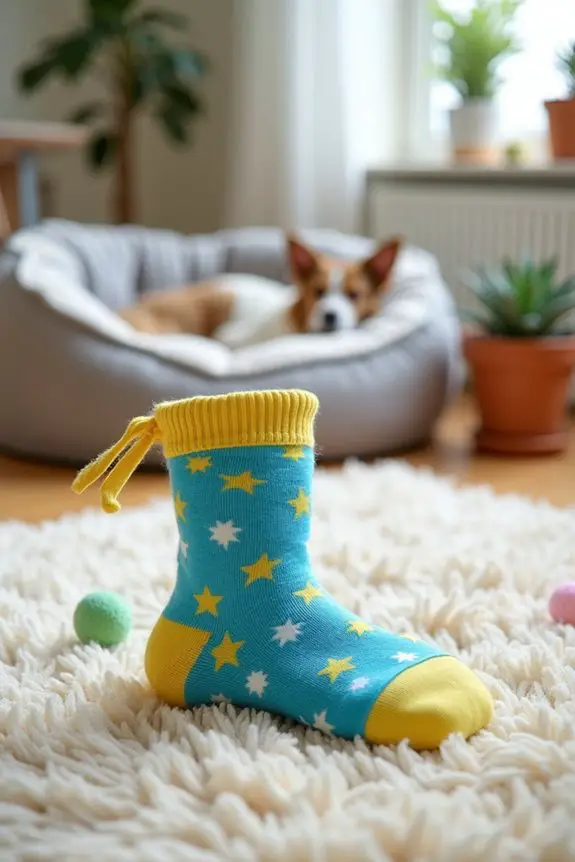
2. Sock Stuffed Dog Toy
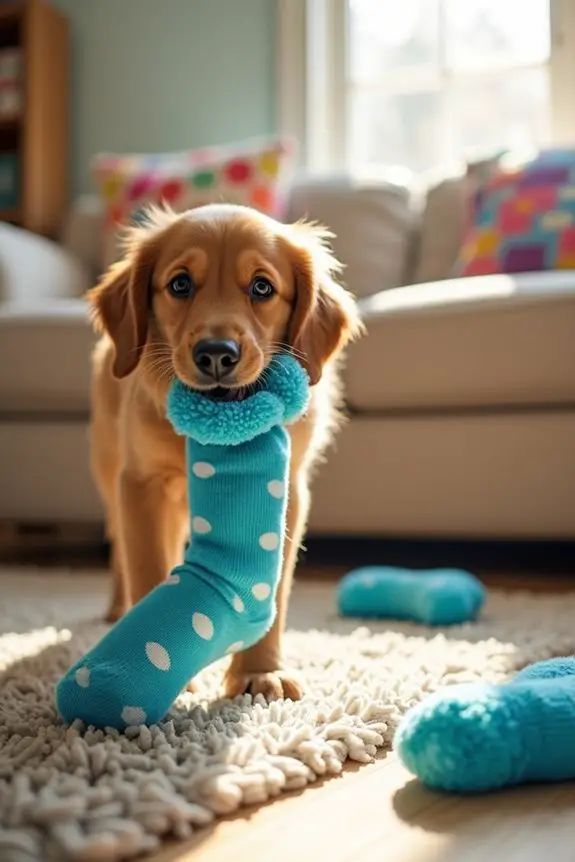
Have you ever found yourself with a bunch of lonely socks that have lost their pair? Instead of tossing them in the trash, why not turn those mismatched or worn-out socks into a delightful stuffed toy for your furry friend?
This DIY Sock Stuffed Dog Toy isn’t only an easy and fun project, but it’s also a fantastic way to save money while giving your pup something soft to chew on. Plus, your dog will love the crinkly surprise inside! Additionally, you can create homemade treats using a dog treat maker machine, which can add even more excitement to playtime.
Materials Needed:
- 1 to 2 old socks (the fuzzier, the better)
- Scissors
- Optional: Crinkly plastic (like from a snack bag), fabric scraps, or stuffing (like cotton or old fabric)
- Optional: A few treats (for added fun)
Step-by-Step Instructions:
- Choose Your Sock: Grab an old sock that’s seen better days. Make sure it’s clean and preferably fleece or soft cotton—your dog will appreciate the comfort.
- Cut and Stuff: If you’re using crinkly plastic or fabric scraps, cut them into smaller pieces and stuff them into the sock. If you want to add treats, toss them in as well—just make certain they’re well-hidden.
- Tie It Up: Once you’ve stuffed the sock to your liking, take the opening and tie it in a knot. Make sure it’s secure; you don’t want the stuffing to come out during playtime.
- Add a Second Sock (Optional): For extra durability and to make it more fun, take another sock and stuff it into the first one. Tie off the end again. This double-layer will help withstand those vigorous chewing sessions.
- Trim Excess (Optional): If there’s any excess sock material hanging out after you tie it, feel free to trim it down. Just be careful not to cut too close to the knot.
- Playtime!: Now, toss the sock toy to your dog and watch them go wild! Whether it’s a game of fetch or just some solo chewing, your pup is in for a treat.
Optional Add-ons/Variations:
- Scented Surprise: For an added twist, place a small piece of your dog’s favorite treat inside the sock before tying it up. The smell will entice them even more.
- Colorful Creations: Use brightly colored socks or even socks with fun patterns. Your dog will love the new look, and you’ll enjoy the vibrant addition to your toy collection.
Pro Tip:
Always supervise your dog while they play with their new sock toy, especially if you’ve added treats or stuffing.
It’s a great idea to check the toy regularly for wear and tear, so you can keep playtime safe and fun. And remember, if your dog manages to destroy it (which they probably will), it’s just a sock—no need for tears.
Just whip up another one and keep the fun going. After all, dogs are like kids; they love new toys, even if they’re just old socks in disguise.
3. Recycled Plastic Bottle Toy
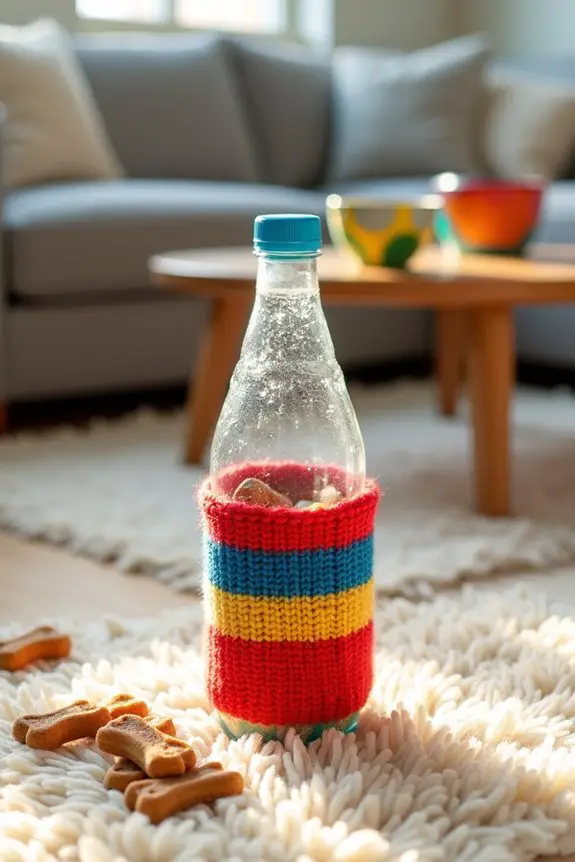
Have you ever looked at an empty plastic bottle and thought it was just trash? Well, think again! This DIY Recycled Plastic Bottle Toy is a fantastic way to turn that bottle into a fun and engaging toy for your dog. Not only does it keep your pup entertained, but it’s also an eco-friendly project that saves you money and reduces waste. Plus, the crinkling sound of the bottle is sure to spark your dog’s curiosity! By creating toys from everyday items, you can elevate your pup’s life without spending a fortune on premium dog supplies.
Materials Needed:
- 1 empty plastic bottle (ensure it’s clean and the cap is removed)
- Scissors (optional, for cutting the bottle)
- Old socks or fabric scraps (for added comfort)
- Dog treats (optional, for a surprise inside)
- A strong rubber band or string (for securing the sock)
Step-by-Step Instructions:
- Prepare the Bottle: Start by rinsing your plastic bottle to remove any remnants of its previous contents. Take off the cap—this is a safety measure, as you don’t want your dog to accidentally chew on it.
- Wrap It Up: If you want to make the toy softer and more appealing to your pup, take an old sock or some fabric scraps and wrap them around the bottle. You can cut the sock if it’s too long.
- Secure It: Use a rubber band or string to tightly secure the sock around the bottle. This will keep the sock in place during playtime and prevent your dog from pulling it off easily.
- Add a Treat Surprise (Optional): For an extra treat, you can throw a few dog treats inside the bottle before wrapping it up. This will entice your dog even more—who doesn’t love a surprise?
- Check for Safety: Before handing it over to your furry friend, give the toy a once-over. Make sure there are no sharp edges or loose parts that could pose a choking hazard.
- Playtime!: Toss the bottle toy to your dog and watch their excitement as they chew, chase, and enjoy their new toy. Just be ready for some playful destruction!
Optional Add-ons/Variations:
- Colorful Wraps: Use colorful socks or fabric scraps to make the toy more visually appealing. Your dog won’t care, but it might brighten up your living room!
- Squeaky Surprise: If you have a squeaker from an old toy, you can slip that into the sock before securing it around the bottle. Your dog will love the added noise.
Pro Tip:
Always supervise your dog while they play with their new recycled bottle toy. It’s essential to check for wear and tear, especially if they’re enthusiastic chewers. Regularly inspect the toy, and when it’s looking a bit worse for wear, it might be time to make a new one. After all, the more toys, the merrier, right?
4. Cardboard Box Puzzle Toy
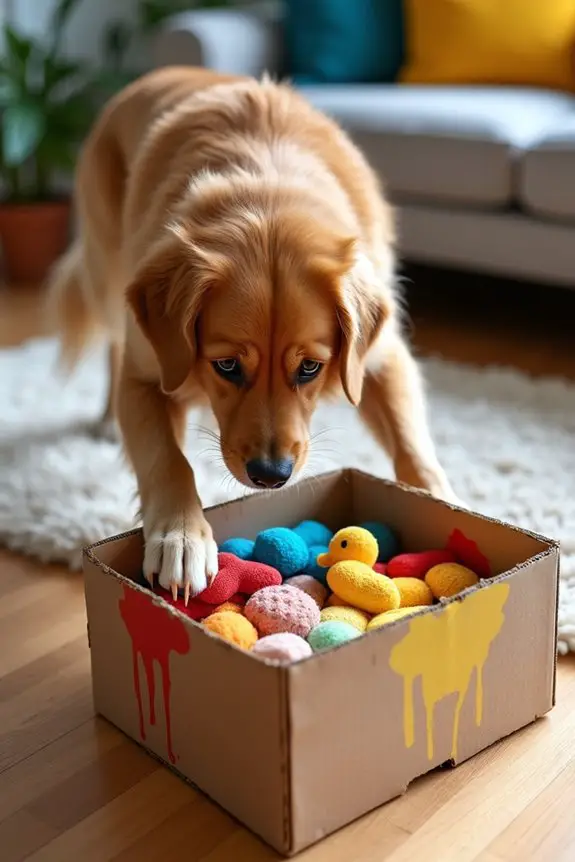
If your dog loves a challenge, this DIY Cardboard Box Puzzle Toy is just the ticket! It’s a fantastic way to keep your pup entertained while also stimulating their brain. Plus, it’s incredibly budget-friendly since you only need a few materials that you probably already have lying around the house. Who knew that saving money and keeping your dog happy could be this easy? Using premium dog enrichment toys can also enhance your dog’s play experience.
Materials Needed:
- 1 medium-sized cardboard box (a shoebox works great)
- Scissors (for cutting and customizing)
- Old socks, fabric scraps, or small toys (to hide inside the box)
- Dog treats (for motivation)
- Tape (optional, for securing things down)
Step-by-Step Instructions:
- Choose Your Box: Grab a cardboard box that’s big enough for your dog to explore but not so big that it becomes overwhelming. A shoebox or a similar-sized box is perfect.
- Create the Puzzle: Cut some holes in the box. These should be big enough for your dog to reach in with their paws or snout but not so large that they can just grab everything out easily. Make it a challenge!
- Fill It Up: Take those old socks or fabric scraps and stuff them into the box. You can also toss in some small toys or even put a few dog treats inside. Your dog will have to figure out how to get to the goodies.
- Seal the Box (Optional): If you want to make it even more challenging, tape the box shut after filling it. This makes your dog work harder to figure out how to open it up. Just make sure they can’t chew through the cardboard and make a mess.
- Let the Fun Begin: Place the box on the floor and watch your pup go to town! They’ll sniff, paw, and dig until they find all the hidden treasures. You might even want to grab some popcorn and enjoy the show.
Optional Add-ons/Variations:
- Decorate the Box: Let your creative side shine by painting or coloring the box. Use non-toxic paints, and make it a fun art project for you and your dog. It’ll look great in your living room, and your dog won’t mind the extra flair.
- Multiple Boxes: If your dog loves the puzzle, why not create more boxes? You can stack them or create a little obstacle course for them to work through. Just be prepared for the chaos that may follow.
Pro Tip:
Always supervise your dog when they’re playing with their puzzle toy. It’s important to check for any signs of wear and tear, especially if they’re determined to get to the treats. If your dog is a heavy chewer, keep an eye out for any cardboard pieces they might try to swallow. A little supervision goes a long way in keeping playtime safe and fun.
With this Cardboard Box Puzzle Toy, your dog will be entertained for hours, and you’ll feel great knowing you made it yourself. Plus, who doesn’t love a good DIY project that’s good for the planet and their pup? Give it a try; your dog will thank you!
5. Tennis Ball Treat Dispenser

If your dog loves to play with tennis balls, then this DIY Tennis Ball Treat Dispenser is a fantastic way to keep them entertained and mentally stimulated! It’s a simple project that not only saves you money but also repurposes old tennis balls that might otherwise just sit in a drawer.
Plus, it’s a fun way to engage your pup in a game of fetch while rewarding them with treats at the same time. Who wouldn’t want to see their furry friend wagging their tail with excitement? Luxury dog toys and games can also provide great alternatives if you’re looking to spoil your pup even more!
Materials Needed:
- 1 old tennis ball
- Sharp scissors or a utility knife
- Dog treats (small enough to fit inside)
- Marker (optional, for marking cutting lines)
- Sandpaper (optional, for smoothing edges)
Step-by-Step Instructions:
1. Prep the Tennis Ball: Start with a clean tennis ball. If it’s got dirt or slobber on it, give it a quick rinse.
Dry it thoroughly because we want the treats to stay nice and fresh inside.
2. Mark Your Cut: Using the marker, draw a small line around the ball. You want to cut a slit that’s about 1.5 to 2 inches long.
This opening should be big enough for your dog to get the treats out but not so big that the treats just fall out.
3. Cut the Slit: Carefully use your scissors or utility knife to cut along the marked line.
Be gentle and take your time to avoid any accidents. If you’re feeling a bit nervous, you can ask a friend or family member to help out. Safety first, right?
4. Smooth the Edges: If you have sandpaper handy, use it to smooth out any rough edges around the cut.
This way, your pup won’t accidentally hurt themselves while trying to get the treats. A little extra care goes a long way.
5. Fill it Up: Now for the fun part! Toss some of your dog’s favorite treats inside the slit you just created.
Make it a game; the more treats, the better!
6. Let the Fun Begin: Toss the tennis ball around and watch your dog figure out how to get those delicious treats out.
It’s a delightful mix of play and reward, and you’ll enjoy watching their cleverness unfold.
Optional Add-ons/Variations:
– Decorate the Ball: Get crafty and paint the tennis ball with non-toxic paint or use stickers to personalize it.
You could even draw silly faces or patterns to make it unique. Your dog will love playing with their new, stylish toy.
– Add a Squeaker: If you have a squeaker from an old toy, you can insert it inside the ball before sealing it up.
This adds an extra element of fun, and who doesn’t love a squeaky toy?
Pro Tip:
Always supervise your dog while they’re playing with their new treat dispenser.
Check it regularly for wear and tear, especially around the cut, to make sure your pup is safe. If you notice any damage, it’s best to replace it. Safety should always come first, even in the world of DIY dog toys.
6. Rope Knot Chew Toy
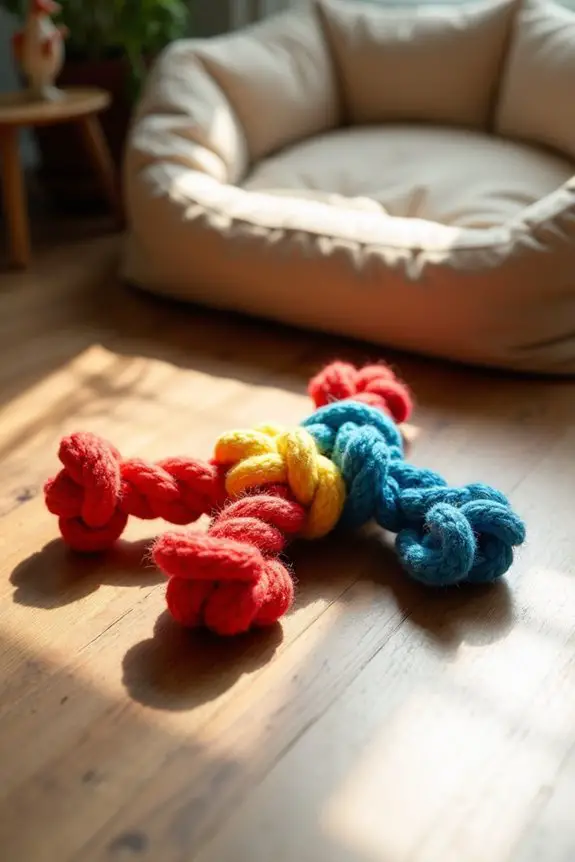
Looking for a fun and easy way to keep your furry friend entertained? This DIY Rope Knot Chew Toy is a perfect project for dog owners who want to provide their pups with something durable to gnaw on while also saving a few bucks.
Plus, it’s a great way to repurpose old materials and give your dog a toy that’s both fun and functional. Let’s get started!
Materials Needed:
- 3 pieces of cotton rope (each about 3 feet long)
- Scissors
- Tape (optional, for helping hold knots while you work)
- A lighter (optional, for melting ends to prevent fraying)
Step-by-Step Instructions:
- Gather Your Ropes: Take your three pieces of cotton rope and align them together. If you have a pup that loves to chew, cotton is a great choice since it’s safe and strong.
- Tie a Knot: Grab the ends of the ropes and tie a tight knot about 6 inches from one end. This will act as the base of your chew toy. If you’re feeling fancy, you can even double knot it for extra durability.
- Braid the Ropes: Begin braiding the three strands of rope. To do this, take the left strand and cross it over the middle strand, then take the right strand and cross it over the new middle strand. Keep repeating this until you reach the end of the ropes. This part is kinda like doing hair, but way less complicated.
- Secure the End: Once you’ve braided all the way down, tie another knot at the end to keep everything in place. You can use tape to help hold the braid together while you’re knotting if you need a little extra support.
- Trim the Excess: If there are any frayed ends sticking out, you can trim them to keep it looking neat. If you want to prevent fraying, carefully use a lighter to melt the ends just a bit. Be careful though—no one wants to start a fire at home.
- Let the Chewing Begin: Present your new rope knot chew toy to your dog and prepare for an adorable chewing frenzy. Watch as they tug, chew, and enjoy their new toy. You’ll love seeing them so engaged and happy.
Optional Add-ons/Variations:
- Add Some Color: If you want to jazz up your rope toy, consider using colored cotton rope or even tie-dying the ropes before braiding them. Your pup can have a stylish toy that matches their personality.
- Incorporate a Squeaker: If you’ve got a squeaker lying around from an old toy, you can tuck it into the middle of the knot before you finish tying it off. Dogs love squeaky toys, and this adds an extra element of fun.
Pro Tip:
Always supervise your dog while they’re playing with homemade toys. Although this rope toy is sturdy, it’s best to keep an eye on them to guarantee they’re not chewing off any pieces.
Keeping the play safe will help you avoid any unexpected vet visits, and you’ll both enjoy the time spent together. Happy crafting!
7. Squeaky Toy From Old Socks
If your dog loves to play with squeaky toys but you’re tired of spending money on them, this DIY project is just what you need. Using an old sock, you can create a fun and engaging toy that will keep your pup entertained for hours. Plus, it’s a great way to recycle those mismatched or worn-out socks lying around your house. Let’s jump into this simple and budget-friendly project!
Materials Needed:
- 1 old sock (the fuzzier, the better)
- 1 squeaker (from an old toy or a pre-purchased squeaker)
- Scissors
- Optional: stuffing (like leftover fabric scraps or cotton stuffing)
Step-by-Step Instructions:
- Prep Your Sock: Take your old sock and give it a good shake to get rid of any dust bunnies. If it’s a tube sock, that’s even better—more room for fun!
- Insert the Squeaker: Slide the squeaker into the toe of the sock. If you don’t have a squeaker, you can skip this step or replace it with some fabric scraps for added crunch.
- Add Stuffing (Optional): If you want a plushier toy, stuff the sock with some fabric scraps or cotton stuffing. Just make sure not to overdo it, or you’ll end up with a sock that’s too bulky for your dog to play with.
- Tie It Off: Gather the open end of the sock and tie it securely with a knot. Make sure it’s tight enough that nothing will come loose during playtime. If you’re feeling fancy, you can double knot it for extra security.
- Trim the Excess: If there’s any extra sock material sticking out after you’ve tied it, feel free to trim it down. Just be careful not to cut too much; you want it to stay intact during play.
- Let the Squeaking Begin: Present your new squeaky toy to your dog and watch their eyes light up with excitement. You’ll enjoy the sounds of squeaks and happy barks as they play.
Optional Add-ons/Variations:
- Personalize It: Use colorful fabric markers to draw or write your dog’s name on the sock before you tie it off. This way, everyone will know who the superstar toy belongs to.
- Double the Fun: Create a two-in-one toy by making a second squeaky toy and connecting them with a sturdy knot. Your pup can enjoy tug-of-war with their new favorite toy.
Pro Tip:
Before you hand over the squeaky sock, check for any loose threads or small pieces that could come off during play. You want to keep your pup safe, so always inspect handmade toys for durability.
There you go! With just a simple sock, you can create a delightful toy that will bring joy to your furry friend without breaking the bank. Who knew recycling could be so much fun?
Extra Tips & Ideas
While you might think making dog toys is just about creativity and fun, there are some extra tips and ideas that can really take your DIY game to the next level.
First, consider your dog’s size and chewing habits—what works for a tiny pup may not hold up for a power chewer. Adding treats inside your toys can make them even more enticing, too. You could even personalize them with your dog’s name using fabric markers.
And hey, if you mess up? No biggie. Just call it “abstract art.” You might find that your pup loves the imperfect charm.
Finally, don’t forget to supervise playtime. Safety first, right? Happy crafting, and remember: your dog thinks every creation is a masterpiece.
Frequently Asked Questions
What Materials Are Safe for Homemade Dog Toys?
Safe materials for homemade dog toys include old t-shirts, cotton rope, and tennis balls. Avoid anything with small parts, toxic substances, or loose threads. Always supervise your dog while they play with homemade toys.
How Often Should I Replace Homemade Dog Toys?
You might’ve just noticed your pup tearing through their favorite toy. It’s best to replace homemade toys every few weeks or sooner if they show signs of wear, ensuring your dog stays safe and engaged.
Can I Use Old Socks for Dog Toys?
Yes, you can use old socks for dog toys! They’re soft, safe, and can be tied into knots. Just make sure they’re clean and free of any small parts that could pose a choking hazard.
Are There Any Toys Dogs Should Avoid?
Yes, you should avoid toys with small parts, sharp edges, or toxic materials. Rubber balls that are too small can be choking hazards. Always supervise your dog to make sure they’re playing safely with their toys.
How Do I Clean Homemade Dog Toys?
Cleaning homemade dog toys is like giving them a revitalizing bath. You can toss fabric toys in the washing machine, soak rubber toys in soapy water, and rinse thoroughly to keep them safe and fun!
Conclusion
So, there you have it—seven creative dog toys you can whip up at home. Who knew that those old t-shirts and mismatched socks could turn into hours of tail-wagging fun? You might even have a blast making these toys, maybe enjoying it more than your pup does. Just remember, if your dog suddenly becomes an expert at puzzle-solving, don’t blame me for their newfound genius. Happy crafting, and may your DIY adventures bring as much joy as a game of fetch!

Hi, I’m Ali Tarek, the founder of Animalsman. I’ve always been passionate about pets, especially dogs and cats, and I created this website to share practical tips, easy recipes, and helpful care advice for fellow pet lovers. My goal is to make pet care simple, enjoyable, and accessible for everyone. When I’m not writing or curating content, you’ll usually find me spending time with my furry friends or learning new ways to keep them happy and healthy.