You hear that wind outside? Yeah, it’s brutal right now.
I was sitting on my porch last week watching this little orange tabby curl up under a bush, shivering, and my heart just broke. These feral cats don’t have a warm couch or a golden retriever hogging the good blankets — they’ve got nothing but whatever nature throws at them.
And winter is ruthless.
The cold seeps in fast, and a cat without shelter loses body heat so quick it becomes dangerous. I kept thinking, someone should do something. Then I realized — that someone could be us.
Good news: building or buying a feral cat house doesn’t have to be complicated or expensive.
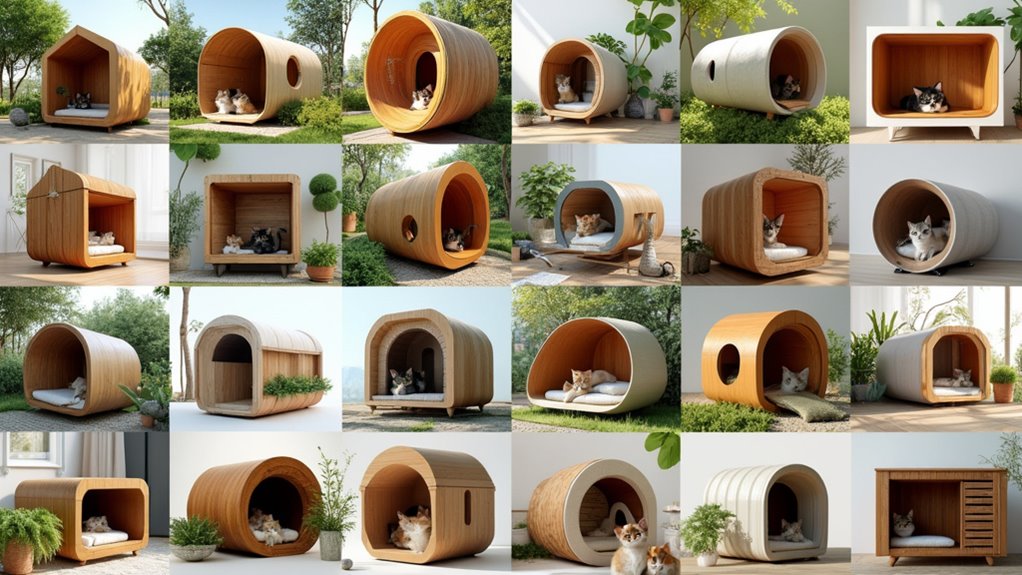
These 15 ideas range from DIY weekend projects to ready-to-go options, and every single one keeps outdoor cats warm when temperatures drop hard.
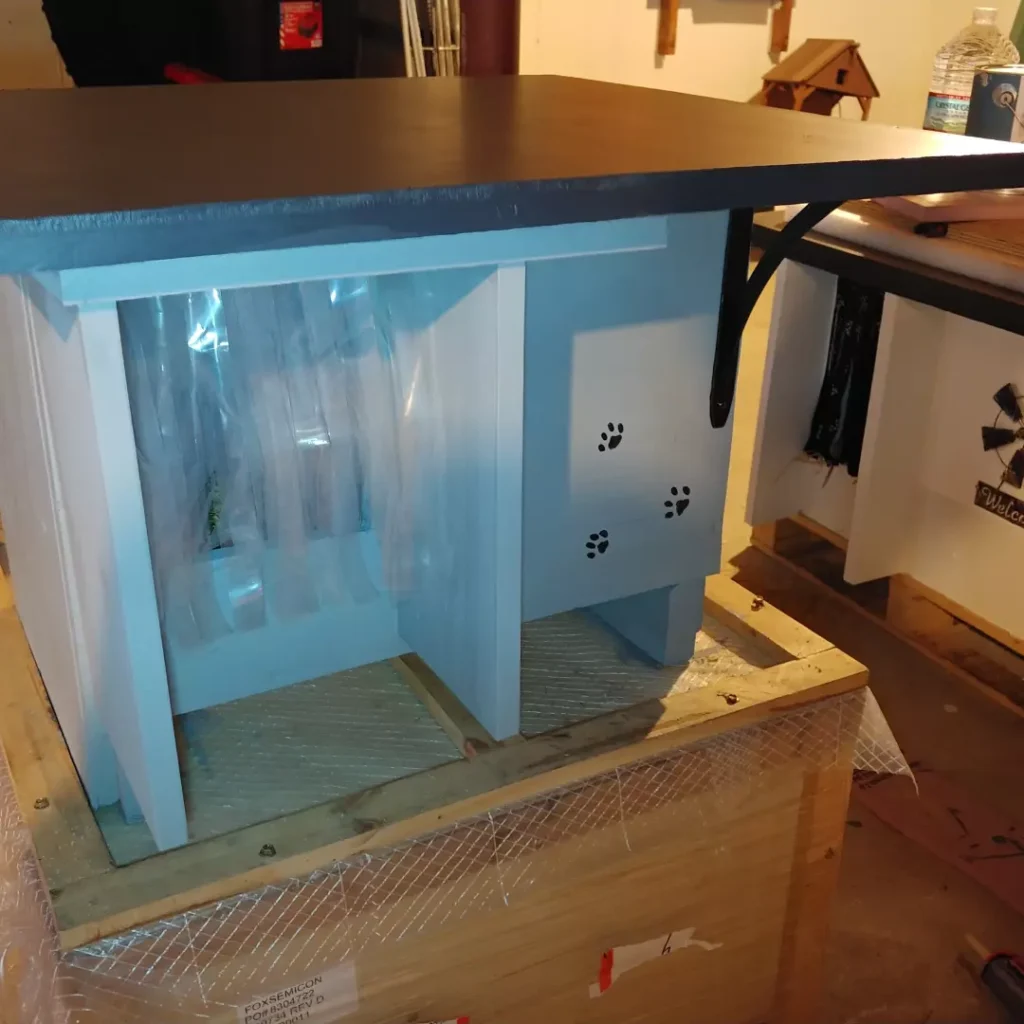
#1: The Insulated Feral Cat House That Doubles as a Cozy Indoor Den
Okay, so you know that moment when your golden tracks mud across your entryway and you think, why don’t I just build a whole separate space for animals in this house? That’s literally what this setup is. And honestly? It’s giving me all the feels.
This DIY feral cat house is painted in crisp white with a dark navy top panel, and the inside glows with this soft blue light that makes it look like a little luxury suite. The clear vinyl strip curtain at the entrance traps heat inside while still letting cats push through, which is exactly the kind of detail that makes the difference between a shelter that actually works and one that sits empty all winter.
The build uses ¾-inch plywood for the walls, reflective foil insulation on the floor, and a metal grid base panel underneath for airflow. Those little black paw print decals on the interior divider wall? Such a sweet touch. The structure sits on a raw pine wood base frame with a bracket-supported flat roof — sturdy enough to double as a surface for storing supplies.
One thing to remember: the interior divider with the paw prints isn’t just cute — it creates a separate warm chamber that holds body heat, so cats have a retreat-within-a-retreat on the coldest nights.
Seal every interior seam with waterproof wood glue before painting. It keeps drafts out and makes the whole structure last through multiple seasons without warping.
📸 Photo credit: Instagram @cat_shelters
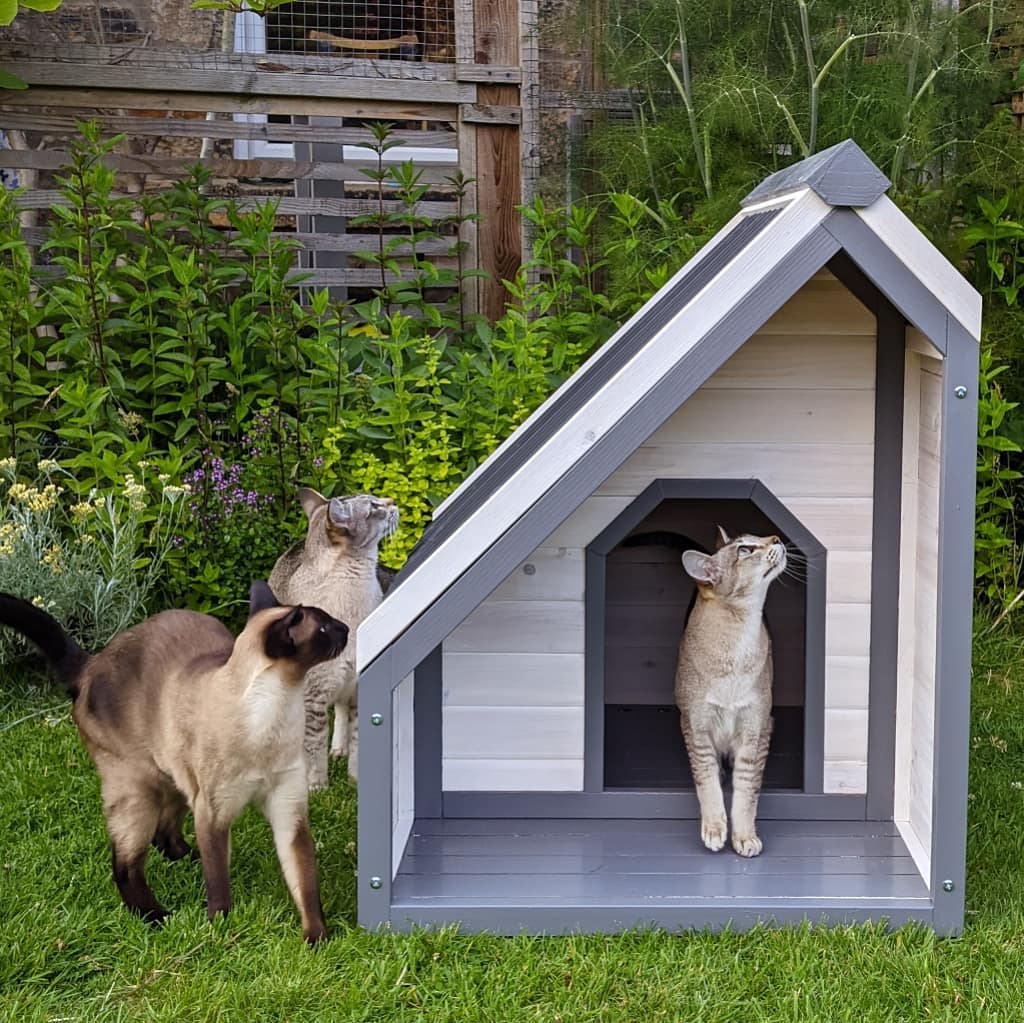
#2: The Cutest Feral Cat House With a “Welcome” Sign (And Your Dog Will Try to Claim It)
You know that moment when you set something up outside and your golden immediately trots over to sniff every single inch of it? Yeah. This little wooden cat house is exactly the kind of thing that’ll have both your cats and your dog fighting over territory in the backyard.
This handmade wooden cat house sits low to the ground with a cork-covered rooftop and a lower covered ramp section — the whole setup looks like a tiny cottage straight off a Pinterest board. The natural pine wood construction gives it that warm, honey-toned look that blends right into a garden without looking like an eyesore.
To recreate this, you need untreated pine plywood panels for the main structure, cork sheet roofing (it’s waterproof and chew-resistant), and a small mesh-windowed side door for ventilation. The lower section works as a separate covered entry ramp — that design keeps rain out while giving feral cats a private entrance. And the solar-powered fox garden light sitting on top? Total personality. It’s a ceramic fox peeking out of a “Welcome” pot — the kind of detail that makes people stop and ask where you got it.
The cork roofing pulls moisture away from the wood frame, which extends the house’s life through wet seasons — that payoff means fewer repairs and a shelter that actually lasts.
For wooden cat house ideas that go beyond basic boxes, this two-level ramp style is worth copying.
Place the house against a wall or fence — it cuts wind exposure and keeps feral cats feeling safe enough to actually use it.
📸 Photo credit: Instagram @elmontkitties
#3: The Trash Bag Trick — A Zero-Cost Weatherproof Feral Cat Shelter
Winter hit our area last year and I panicked thinking about the colony cats outside. No budget, no time — just a stack of black trash bags and some cardboard boxes I had from moving.
That’s literally what this is. And it works.
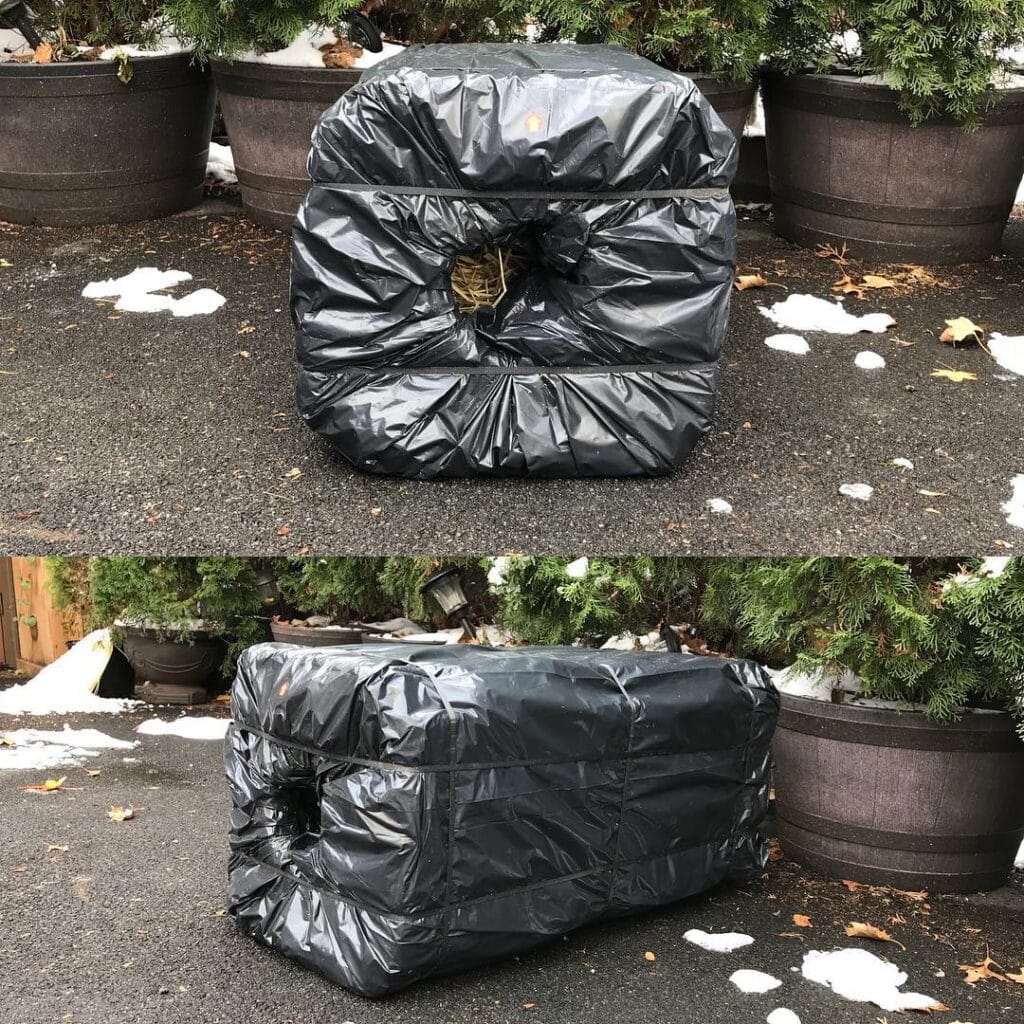
This setup uses large black contractor-grade trash bags layered over what looks like a standard cardboard box shelter — probably a double-walled box around 24″ x 18″. The bags are wrapped tight with a cord or bungee strap around the middle, creating a makeshift weatherproof barrier. You can spot the opening in the center front — just wide enough for a cat to squeeze through, too narrow for dogs or raccoons.
Stack two bags over the top box and one over the bottom. That layering keeps rain from soaking through the cardboard underneath.
The black plastic absorbs heat from the sun — that’s the feature. It warms the interior a few degrees above ambient, which is the benefit. And the payoff? A feral cat survives a night that would’ve otherwise been brutal.
Stuff the inside with straw (not hay — hay holds moisture). You can see some straw peeking through the entry hole in the top photo.
If you want to go further with insulation options, 16 Insulated Cat House Ideas for Winter-Ready Comfort shows some serious upgrades for colder climates.
Keep the opening facing a wall or fence, not into wind.
📸 Photo credit: Instagram @bronxtailscatrescue
#4: The DIY Insulated Feral Cat Shelter That Costs Almost Nothing to Build
Okay, so you know how during winter you genuinely worry about the stray cats in your neighborhood the same way you panic-check on your golden retriever when it drops below freezing? This one’s for that feeling.
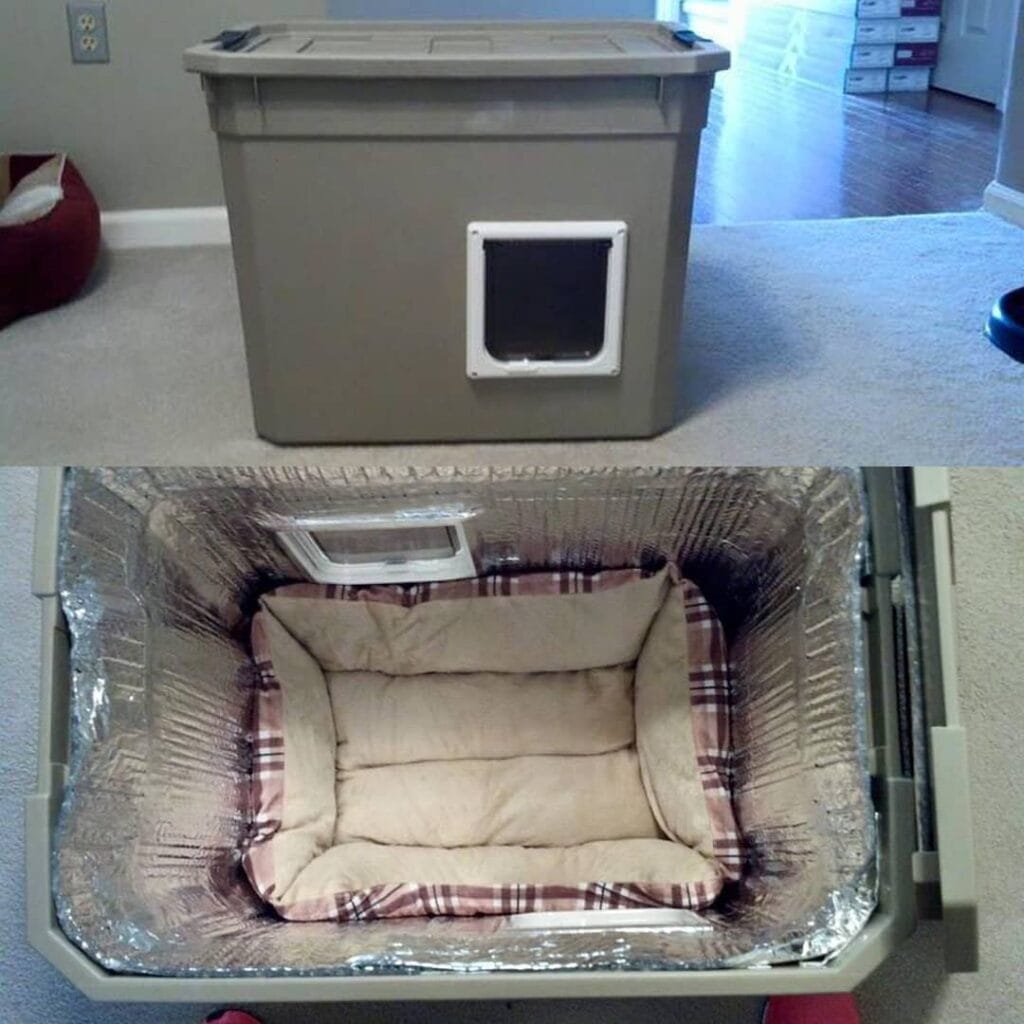
This shelter is a gray Rubbermaid storage tote with a cat flap door cut into the front — and inside, it’s lined with reflective mylar insulation and fitted with a plaid pet bed cushion.
Grab a 66-quart plastic storage bin with a locking lid, a SureFlap or standard cat flap insert, and a roll of reflective foam insulation (the silver bubble kind from hardware stores). The cat flap creates a small entry that traps body heat inside — that small opening means zero drafts reach the bed.
Cut your cat flap hole a few inches above the floor level, not at the very bottom. This raises the entry threshold so rain and wind don’t pour straight in.
Line every interior wall with the mylar sheeting, securing it with waterproof tape. The reflective material bounces the cat’s body heat back — which means one small cat keeps the whole interior warm without any electricity.
Drop a washable bolster pet bed inside and you’re done. The bed absorbs warmth and gives feral cats the security of enclosed walls on all sides.
Swap the mylar lining for fresh sheets every few months — it degrades and loses its reflective properties over time.
📸 Photo credit: Instagram @kshelton866
#5: The Minimalist Cat Hideaway That Doubles as a Living Room Statement Piece
Okay, so you know how your golden’s dog bed is that thing in your living room — the one you’ve tried to hide behind the couch because it clashes with everything? Yeah, this cat house is the complete opposite energy.
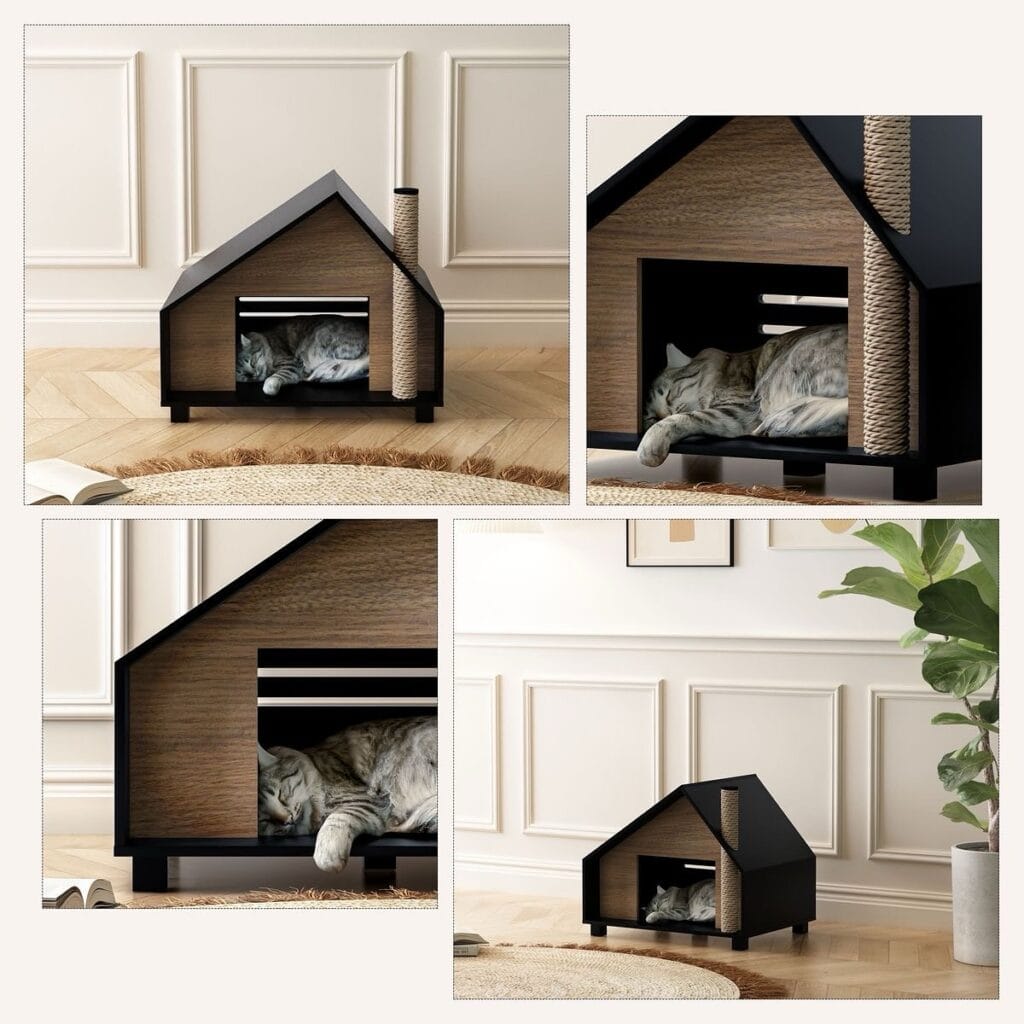
This black and walnut wood house-shaped cat hideaway sits low on four small feet, shaped like a little A-frame home, and it somehow looks like it belongs in a Japandi interior mood board. The rope scratching post on the side isn’t an afterthought — it’s built into the roofline and feels intentional. And that horizontal slat front panel? It lets your cat feel tucked away without being fully hidden.
To get this exact look, you need the cat house itself (black matte finish, walnut wood veneer panels), a natural jute rug underneath it, and warm herringbone hardwood floors as the base. The wall behind it is plain white paneling — nothing competing for attention.
Place this near a wall with wainscoting or paneling and the whole thing reads like decor, not pet furniture.
The built-in scratching post saves you from buying a separate tower — one piece handles two needs, which means zero ugly sisal poles shoved in the corner.
The interior has a soft platform shelf — toss a flat wool pad inside for warmth. Cats choose security over fluff, so a firm, fitted insert works better than a puffy bed that takes up the opening.
📸 Photo credit: Instagram @houseofmeowss
#6: The Blanket-Wrapped Shelter That Keeps Feral Cats Warm All Winter
Okay, so picture this — you walk out onto your porch on a freezing morning, coffee in hand, and you spot a stray cat huddled against your wall. That moment? That’s exactly why this setup hits different.
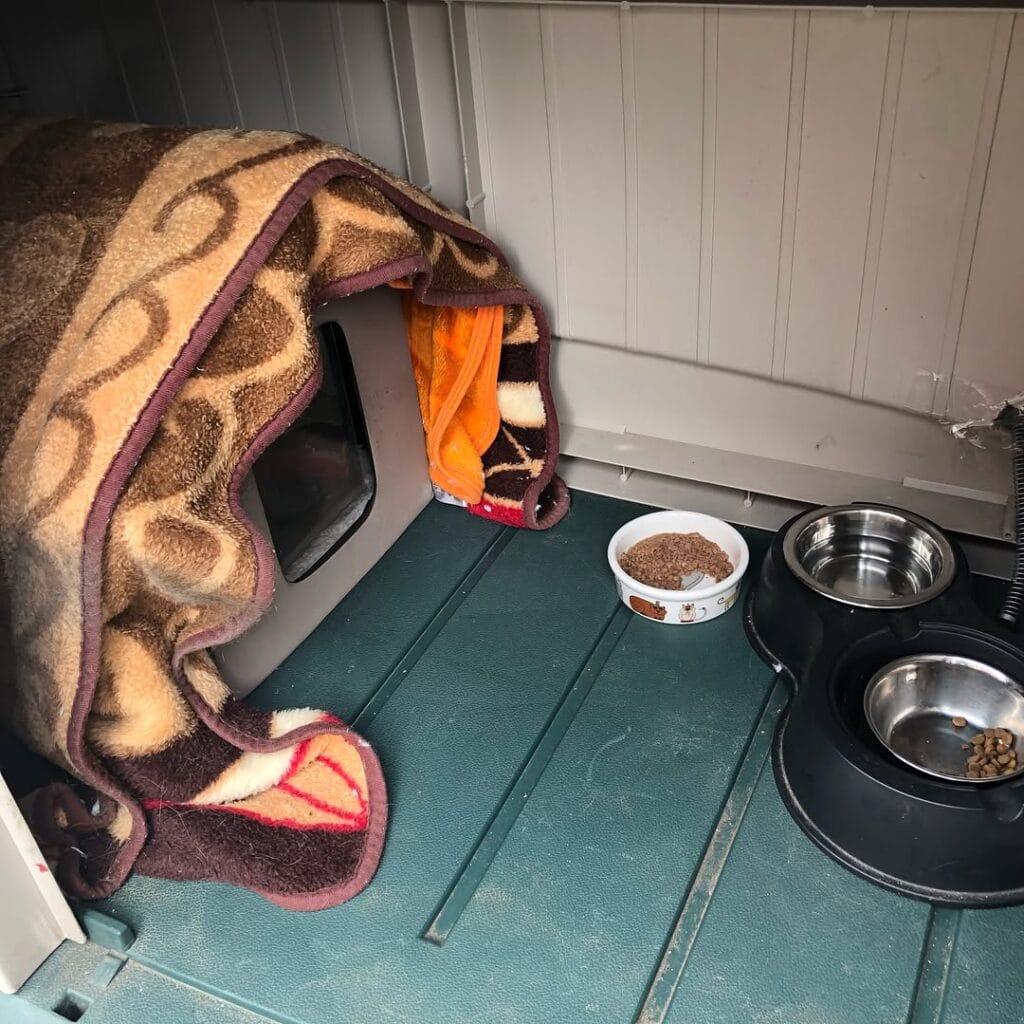
This little station uses a gray plastic cat igloo (the kind with a small entry hole, roughly 6×8 inches) wrapped in a brown and tan fleece blanket with dark swirl patterns and burgundy binding edges. The blanket acts like an insulating shell — it traps heat inside the plastic den without blocking the entrance. An orange fleece curtain hangs over the opening to cut wind while still letting cats slip in and out.
The whole thing sits on a teal-painted wooden deck surface, tucked into a sheltered corner against white paneled walls — that corner placement blocks two sides from wind immediately.
Feeding is handled with a white ceramic bowl with cat illustrations filled with dry kibble, plus a double stainless steel bowl set on a black elevated stand — the raised stand keeps food off the cold ground, which means less moisture contamination and healthier eating conditions for the cats.
The blanket-wrapping technique is everything here. Wrap your shelter before temperatures drop below freezing. Tuck the blanket underneath the igloo so cold air can’t sneak up through the floor.
Swap wet food for dry in winter — wet food freezes fast.
📸 Photo credit: Instagram @intimutt
#7: The DIY Pipe-and-Box Feral Cat Shelter That Actually Works
Okay, so you know how your golden probably has like three beds, a crate and a spot on your couch? Feral cats get none of that. And when winter hits, that breaks my heart every single time.
This setup is scrappy in the best way. Someone took a terracotta-orange PVC drainage pipe (looks like a standard 6-inch diameter sewer pipe) and connected it directly into a foam insulation block shelter painted in bold orange and pink. The whole thing sits inside a wire mesh enclosure with a wooden panel backing for wind protection. It’s not Pinterest-pretty — but it works.
The foam block is made from rigid pink insulation foam (the kind from any hardware store), wrapped and taped with orange duct tape in a grid pattern. That tape isn’t just aesthetic — it seals the seams and keeps moisture out. The pipe acts as a tunnel entry, which forces cats to move through a small, body-warmed space before reaching the dry interior.
The enclosure floor has dry hay bedding, which insulates better than blankets when wet. The wire mesh walls allow airflow without letting predators in.
Cut your pipe entry at a 45-degree angle so rain doesn’t pool inside. And keep the hay loose — packed hay loses its insulating air pockets fast.
📸 Photo credit: Instagram @dogood
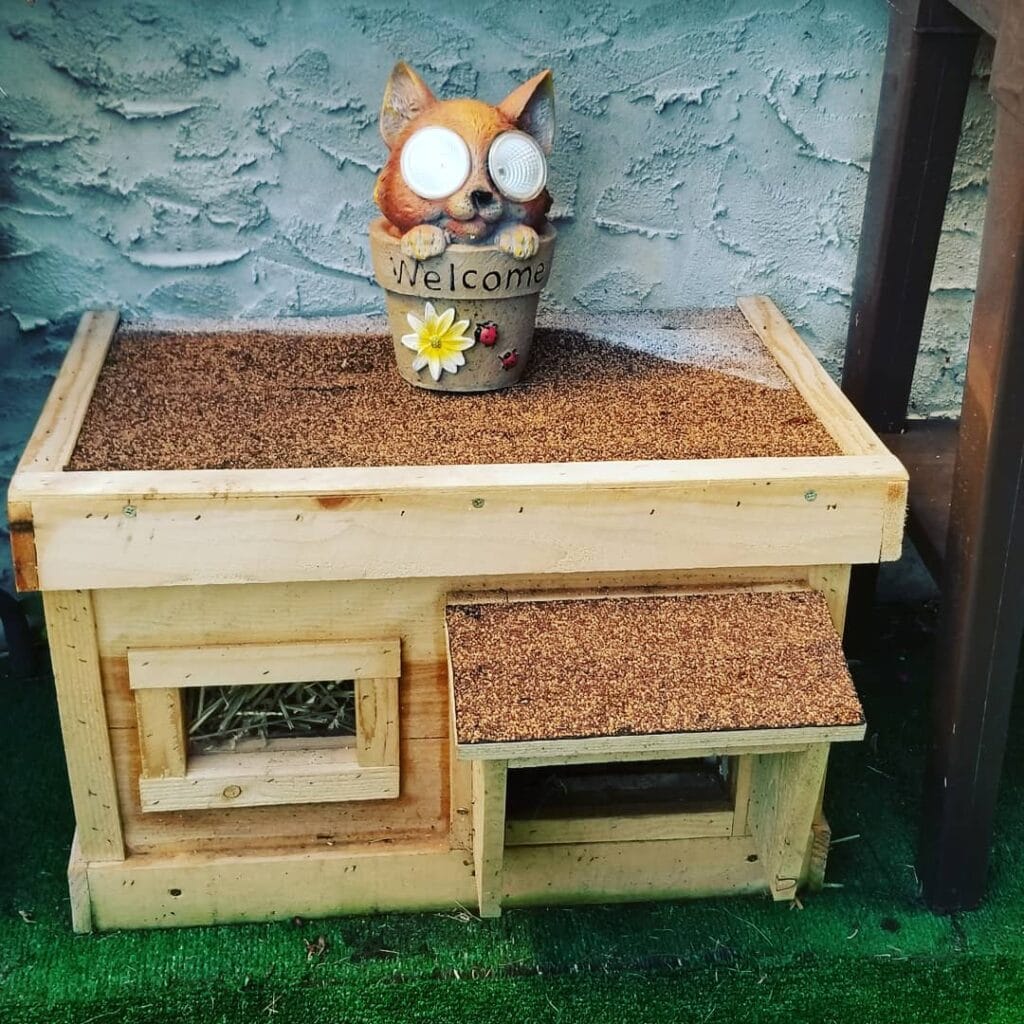
#8: The Cedar Shake Feral Cat House With a Built-In Feeding Station
Okay, so you know how your golden leaves muddy paw prints everywhere and you’re constantly reorganizing your entryway? Picture that same “I need a system” energy, but for the feral cats in your neighborhood. This feral cat house is exactly the kind of setup that makes you stop scrolling and say “wait, who built this?”
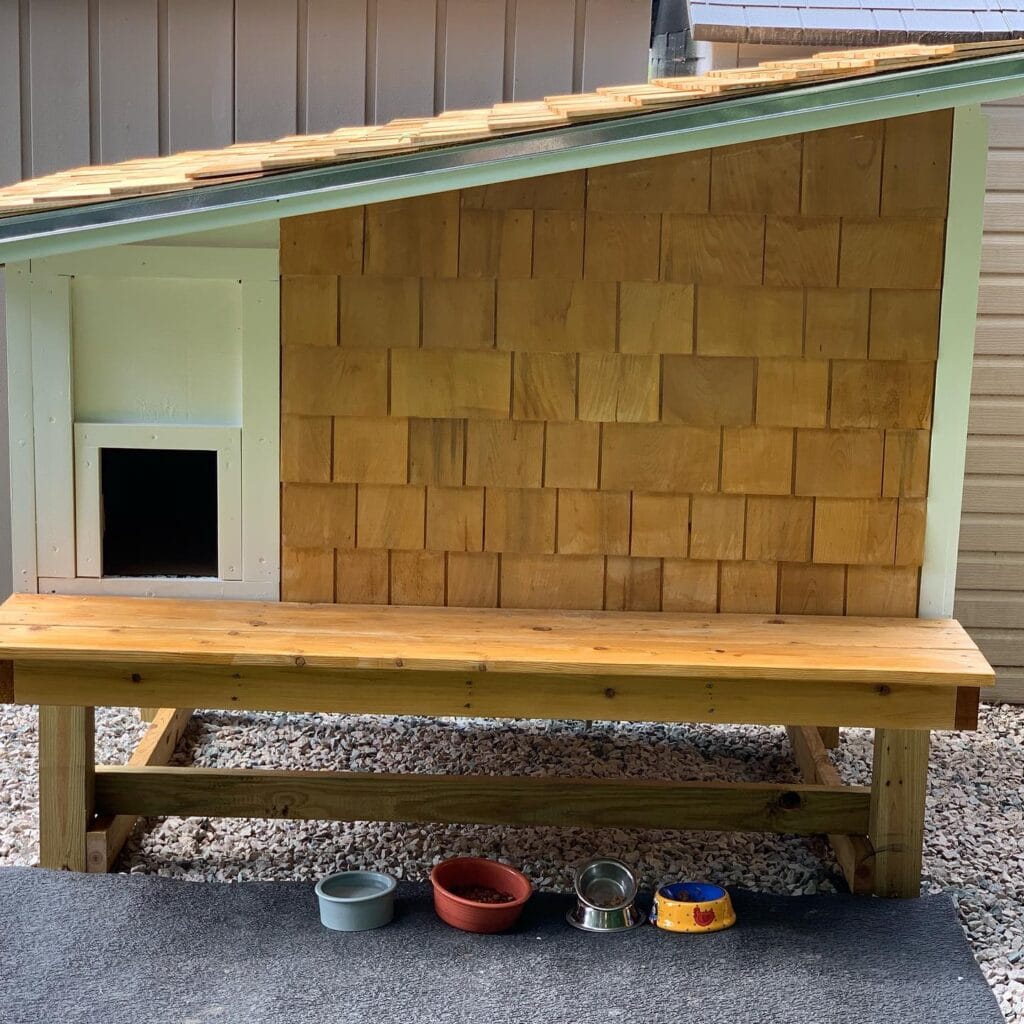
The whole structure sits on a pressure-treated lumber platform raised about 8-10 inches off the ground. That elevation matters so much — it keeps moisture out and gives the cats a dry, insulated floor even on wet days. The exterior walls are covered in hand-cut cedar shake shingles, layered in that classic staggered pattern, and they’re left in a natural honey-gold tone. No stain needed. The roof uses matching cedar wood slats over what looks like a green metal drip edge, which channels rainwater away from the entrance.
The entry hole is a small square pet door cutout, trimmed in white-painted wood — maybe 6×6 inches — big enough for a cat, small enough to keep raccoons out.
And those four bowls tucked under the platform? That’s the feeding station. Gravel underneath catches spills and prevents mud.
Anchor the platform legs with corner L-brackets so the whole structure doesn’t shift over winter. If you love this kind of thoughtful outdoor setup, 19 Outdoor Cat Room Ideas That Cats Will Love has even more inspiration worth bookmarking.
Cedar shingles naturally resist rot and insects — no sealant required for the first few years, which means less maintenance and more time actually enjoying your setup.
📸 Photo credit: Instagram @medfieldshelter
#9: The DIY Rubbermaid Feral Cat Shelter That Actually Keeps Cats Warm All Winter

Okay so you know how you’ll see a stray cat huddled outside during a cold snap and your heart just breaks? Like, I spotted one last January curled up near my porch and I literally couldn’t sleep. This right here is the shelter that changed everything for me.
This build uses a large gray Rubbermaid storage tote flipped upside down — or set right-side up with the lid on — and elevated off the ground on 4×4 pressure-treated wood posts. That elevation matters so much. It keeps the floor from freezing and stops moisture from seeping in from the cold ground.
The entry hole is cut into the side of the tote and lined with foam pipe insulation — the black tubular kind — wrapped around the opening edges. That foam lining does two things: it softens the entry for small cat bodies and blocks wind from blasting straight inside. A wooden frame built from 2×4 lumber secures the insulation pieces on both sides of the hole so nothing shifts around.
Fill the inside with straw (not hay — straw repels moisture, hay holds it). Pack it loose so cats can burrow in.
Cut your entry hole no bigger than 6 inches wide by 6 inches tall. Small openings trap body heat way better and keep larger predators out.
📸 Photo credit: Instagram @freecatsheltersri
#10: The Insulated Rubbermaid Tote Shelter — A Simple DIY That Actually Works

You know that feeling when it’s 28 degrees outside and you’re bundled up on the couch with your golden, grateful you’re both inside? Some cats don’t get that.
This setup is doing so much work. A dark green Rubbermaid tote (the large 18-gallon size) sits elevated on a wooden pallet platform, with a round entry hole cut into the front panel and lined with duct tape edges to prevent scratching. The inside is packed with dry straw — not hay, straw — which traps body heat without absorbing moisture the way blankets do.
The whole thing sits tucked against a white vinyl siding wall, shielded from wind on two sides. That positioning isn’t random. Placing the shelter in a corner like this cuts down on heat loss dramatically — the walls act like a buffer.
The wooden plank ramp leading up to the entrance is a detail I love. Older or injured cats can’t always jump, and that ramp means everyone gets access.
Real talk: the duct tape rim around the hole is non-negotiable. Raw plastic edges are sharp and can injure little ears and paws squeezing through on a cold night.
Keep the entry hole around 6 inches in diameter — big enough for a cat, small enough to keep raccoons out. Cut it on the side, not the front face, so rain doesn’t blow straight in.
📸 Photo credit: Instagram @newt.and.hudson
#11: The DIY Styrofoam Feral Cat House That Actually Works in Brutal Winter Cold
Okay, so you know how you’re always telling me your golden tracks in mud and snow every single winter? Picture that chaos, but now imagine a whole colony of feral cats with nowhere warm to go. That’s the problem this build solves — and honestly, it’s one of the cleverest cold-weather shelters I’ve ever seen.
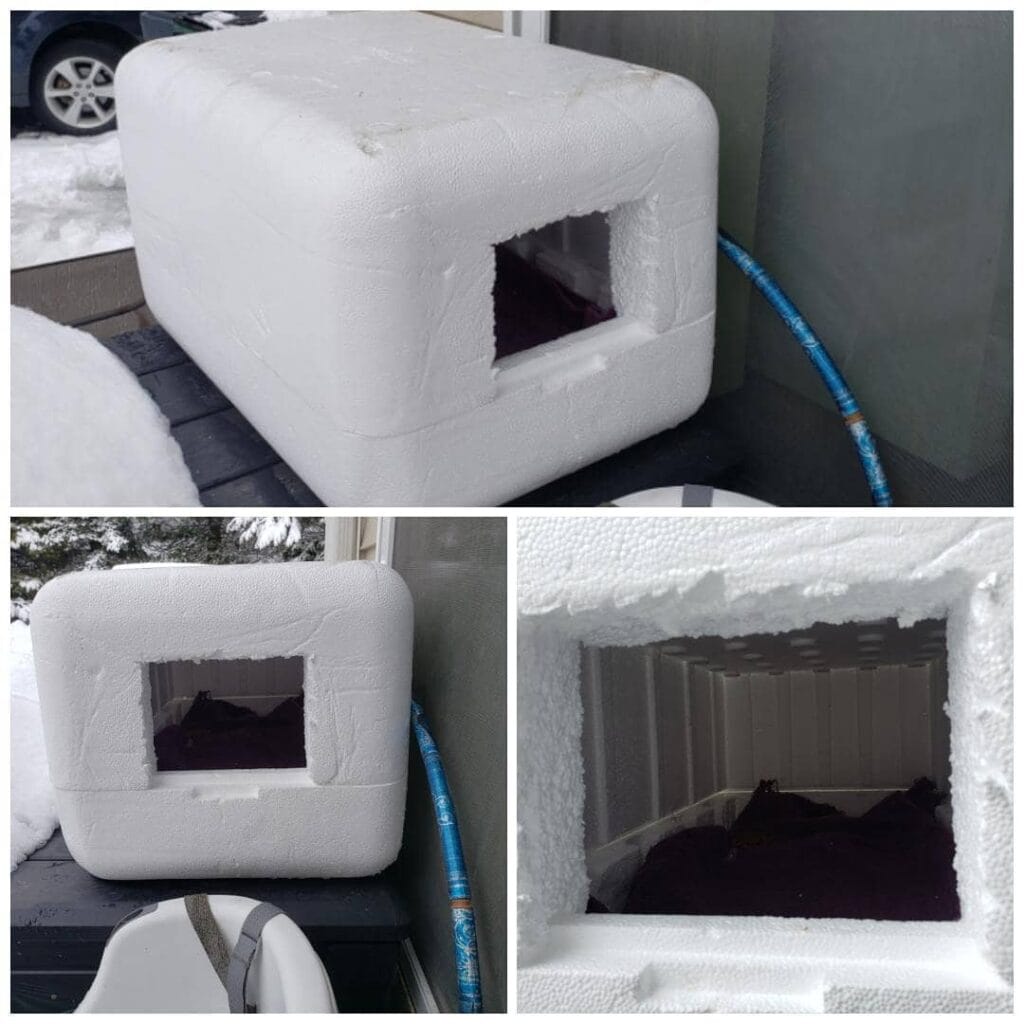
This shelter is carved from expanded polystyrene (EPS) foam, the dense white kind you see in appliance packaging. The builder cut a rectangular entry hole — roughly 6″ x 8″ — directly into one face of the block. Inside, you can see dark insulating liner material (looks like closed-cell foam padding) lining the floor and walls, which traps body heat from the cats without requiring any electricity.
The whole unit sits on a wooden deck platform to keep moisture from wicking up through the base. That blue foam pipe insulation tube visible nearby? It wraps the water line to prevent freezing — a small detail that shows serious planning.
For the foam block itself, look for appliance-grade EPS at least 3″ thick on all sides. A smaller entry hole means less cold air sneaks in — cats actually prefer tight spaces because their own body heat builds up faster inside. Cut the hole low on the face so wind can’t blast straight through.
What this means for you: thick foam walls trap heat passively, so the cats stay warm without any power source, and you spend zero dollars on electricity all winter.
Keep the shelter off the ground at least 2-3 inches using scrap wood or rubber feet — this single step prevents ice from forming underneath and rotting the base.
📸 Photo credit: Instagram @shawzie916
#12: The Cooler Shelter Hack That Actually Keeps Feral Cats Warm All Winter
You know how your golden goes absolutely nuts the second she smells cold air coming under the door? Feral cats feel that same thing — except they have nowhere to go.
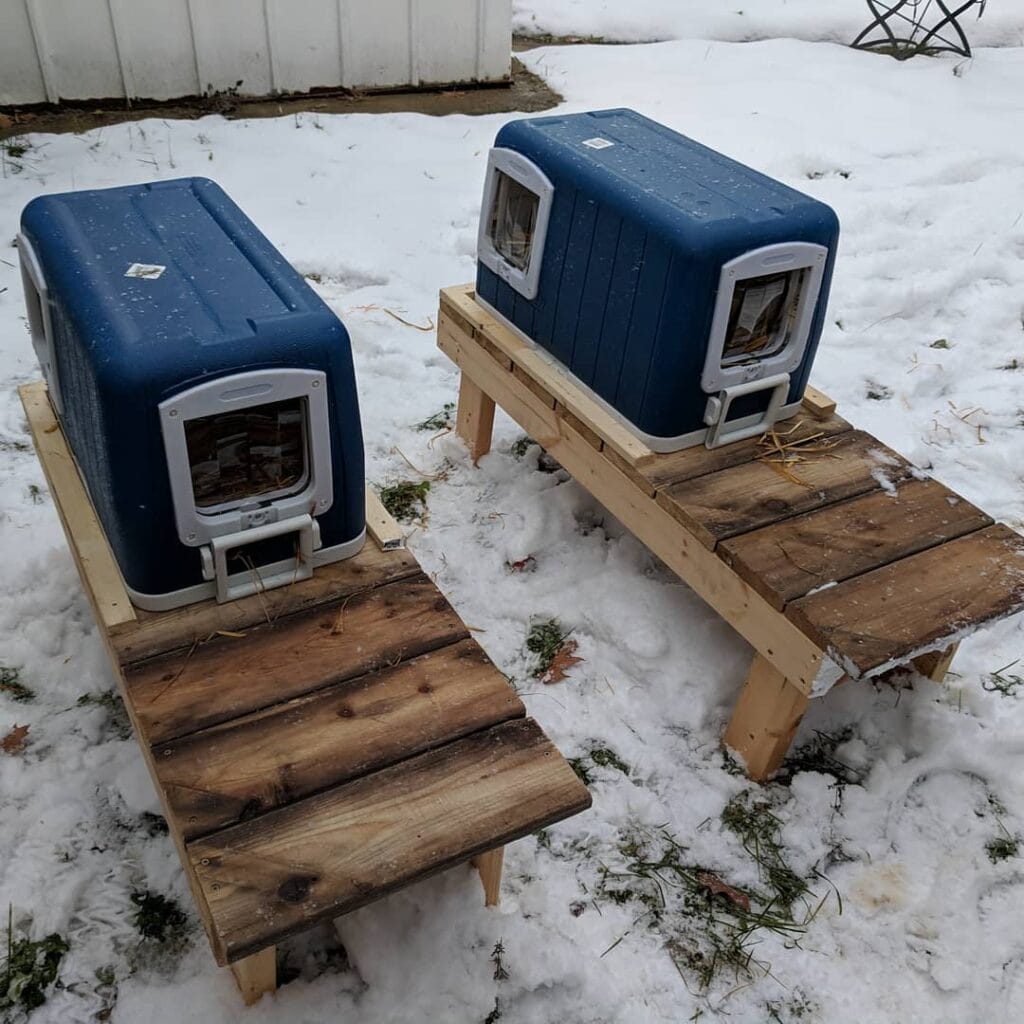
This setup stopped me in my tracks when I first saw it. Two blue heavy-duty Igloo-style coolers flipped upside down and mounted on custom-built wooden platforms made from 2×4 pine lumber and reclaimed pallet boards. Each cooler has a small cat-flap door cutout on the front, lined with what looks like clear plastic flap material to block wind while letting cats push through. The whole thing sits elevated off the snow — which is the real genius move here.
Start with a 48-quart or 60-quart rotomolded cooler (the thicker the walls, the better the insulation). Cut a 4-inch circular opening on the short end using a hole saw. The platforms are built from 2×4 framing lumber with a flat pallet wood deck — the ramp extending from the front gives cats a dry landing spot away from wet snow.
Pack the interior with loose straw (not hay — straw repels moisture, hay holds it and gets moldy fast). And stuff it full. A cat curled up in straw inside a cooler shell retains so much body heat it’s almost like a little furnace in there.
But the elevation is what makes this work. Keeping the shelter off frozen ground — even just 4 to 6 inches — prevents the cold from seeping through the floor and chilling the cats from below.
📸 Photo credit: Instagram @theferalworldofchristianstray
#13: The Multi-Cat Hole-In-The-Wall Shelter That Keeps a Whole Colony Warm
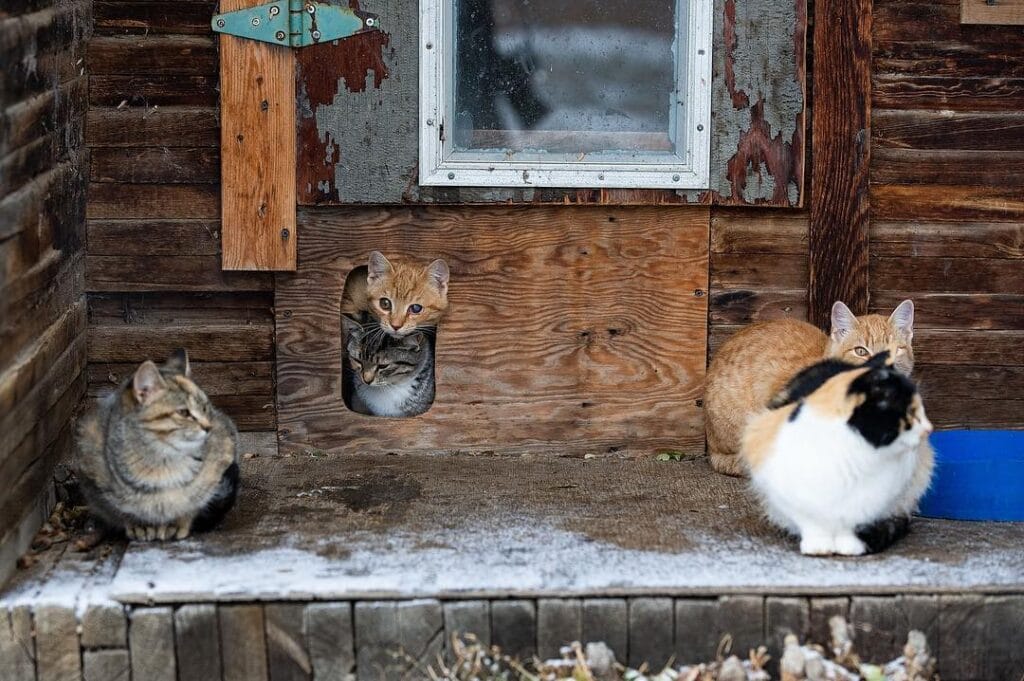
Okay so this one stopped me dead in my tracks when I first saw it. Four cats — one tabby chilling outside on the left, a calico queen posted up on the right, and two more literally stacked on top of each other peeking through a cut hole in the wall — all using one weathered wood shelter like it’s their personal apartment building. It’s chaotic and perfect at the same time.
The whole setup is built from reclaimed barn wood planks, dark and worn with age, with a small window (roughly 6″x8″) mounted near the top for light. The real star? That circular entry hole cut directly into a sheet of plywood, wide enough for two cats to squeeze through shoulder-to-shoulder — probably around 6-7 inches in diameter. That single hole is doing all the heavy lifting here.
To recreate this, you need 1/2-inch plywood sheeting for the inner wall panel, a jigsaw to cut your entry hole, and rough cedar or pine exterior planks for the outer walls. The worn, peeling paint look isn’t just aesthetic — it signals that this shelter has been weathered and proven through real seasons.
Mount your entry hole at ground level or slightly elevated (2-3 inches) off the floor so rain doesn’t flood the interior. Line the inside floor with straw, not blankets — straw doesn’t hold moisture and keeps warmth trapped even on wet nights. And honestly? Cut two entry holes on opposite sides so dominant cats can’t block access for the others.
A blue plastic storage bin tucked against the wall (visible on the right edge) acts as a windbreak and doubles as a feeding station — small detail, big difference in a colony setting.
📸 Photo credit: Instagram @thetorontostar
#14: The Outdoor Storage Box Hack That Makes a Sneaky Feral Cat Shelter
You know that feeling when your golden tracks mud across your entryway and you’re done dealing with stuff that doesn’t work as hard as it should? Yeah, this one’s for the cats — but the concept? You’ll get it immediately.
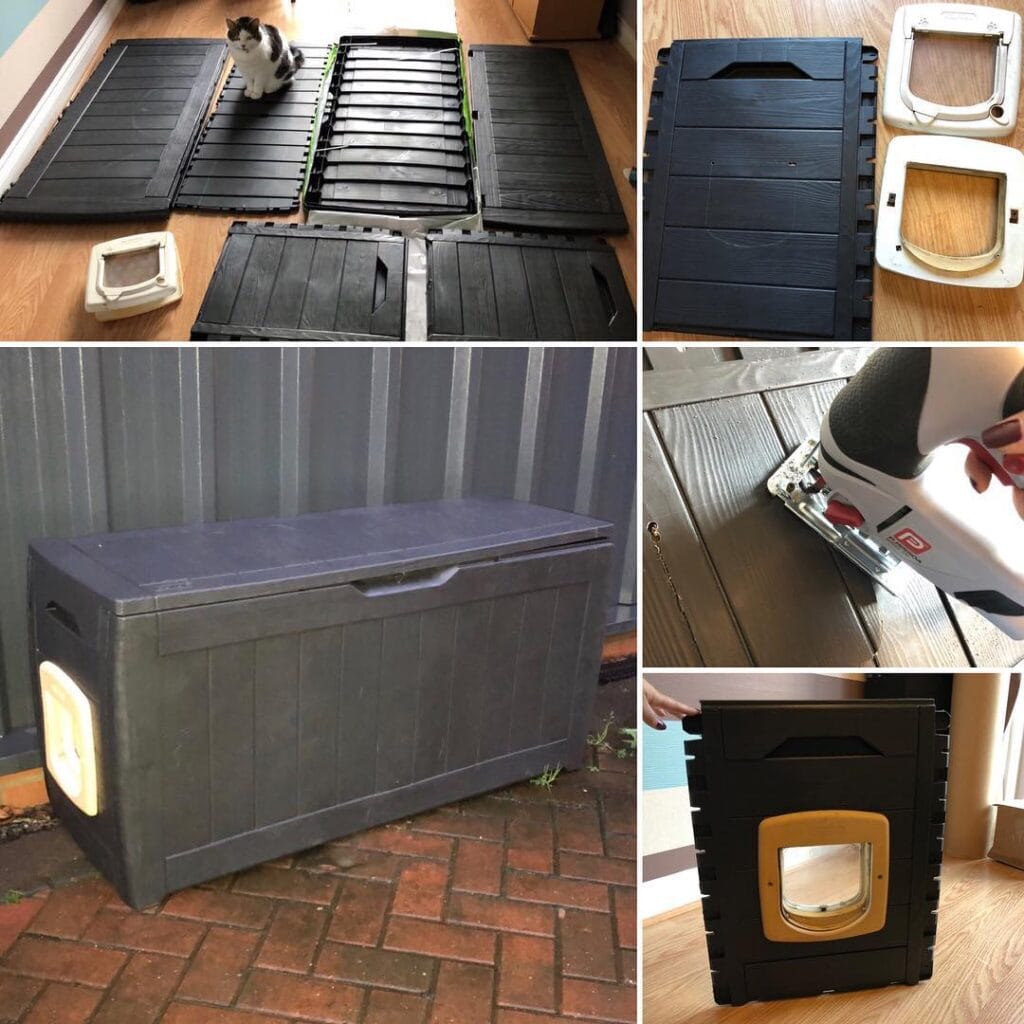
This DIY is genuinely clever. Someone took a dark gray plastic outdoor storage deck box — the kind you’d use for garden cushions — and turned it into a weather-resistant feral cat shelter with a built-in cat door flap. The wood-grain texture on the exterior gives it that Pinterest-worthy look instead of screaming “cat box” to your neighbors.
The whole build starts with a Keter or Suncast-style deck storage box (roughly 150L capacity). The magic piece is a SureFlap microchip cat door mounted directly into the side panel — you can see the tan and white framing against the dark plastic in the image. A hot glue gun seals the door frame to the panel wall, keeping drafts and moisture out. The lid stays functional, so you can lift it to clean or add fresh bedding inside.
Cut the hole with a jigsaw before snapping the panels together. Dry-fit everything first — rushing the cut is how you end up with a gap that lets cold air pour in, which defeats the whole purpose.
The weatherproof shell protects cats from wind and rain, the insulated interior traps body heat, and the payoff is a colony that actually has somewhere safe to ride out winter.
📸 Photo credit: Instagram @tidy.pets
#15: The Elevated Heated Cat House That Keeps Outdoor Ferals Warm and Safe All Winter
Okay, so picture this — it’s freezing outside, and you’re curled up with your golden on the couch while some poor feral cat is huddled under your porch, shaking. That image haunted me for an entire winter before I finally did something about it.
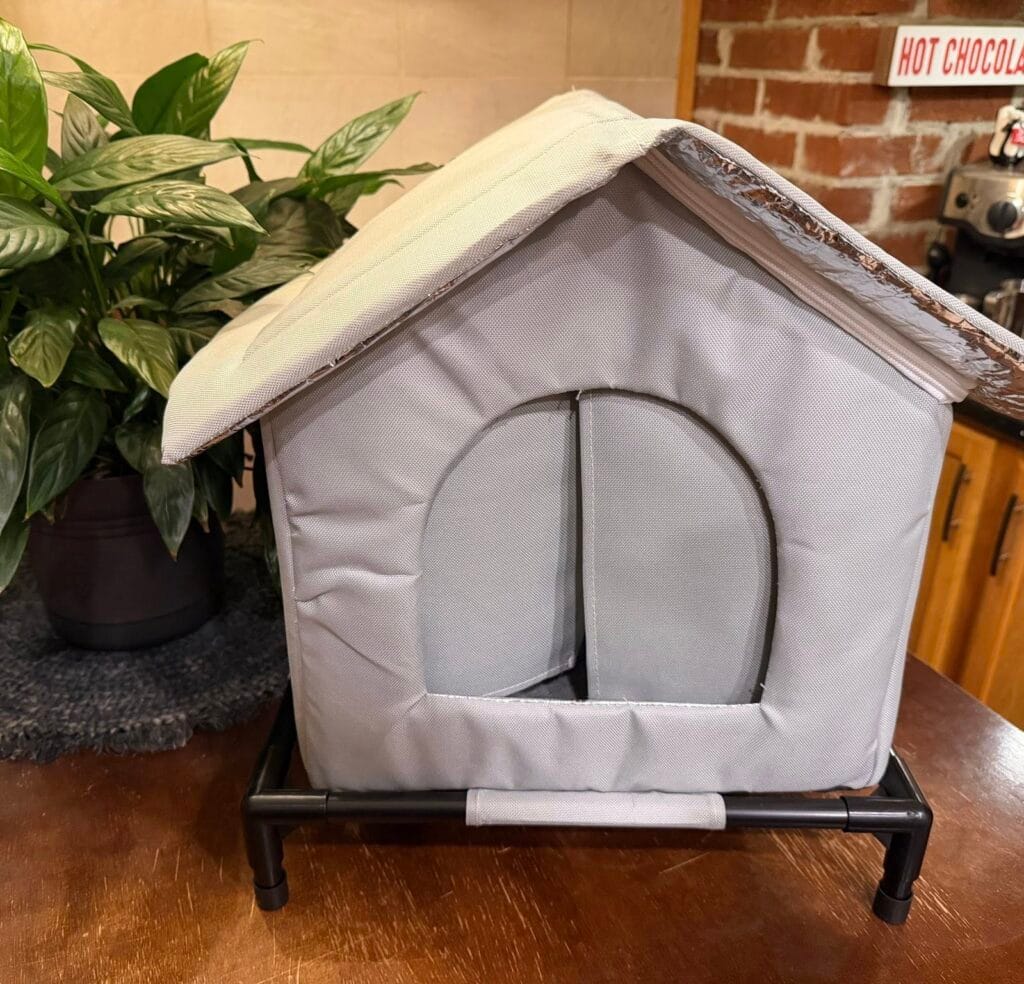
This shelter is giving me all the cozy-but-functional vibes. The gray Oxford polyester fabric exterior sits on a black PVC pipe frame that lifts the whole unit off the ground, and the peaked roof is lined with reflective mylar insulation — you can actually see it peeking out along the roofline in that copper-gold shimmer.
The entry is a split circular curtain door cut right into the front panel, which means wind doesn’t blast straight inside. The whole thing assembles without tools, and the elevated legs keep moisture from wicking up through the floor on wet nights — waterlogged bedding is exactly what hypothermia loves.
Tuck a self-warming thermal cat pad (no electricity needed) on the floor inside. The reflective roof traps body heat, the insulated walls hold it, and the raised frame blocks ground cold — that triple-layer warmth means one small cat generates enough heat to stay comfortable even in the teens.
Place it against a wall or fence to block two wind sides at once. And toss a light blanket over the outside for extra insulation on the coldest nights without blocking the entry.
📸 Photo credit: Instagram @tmbrsd
The One Feral Cat House Mistake That Wastes Your Whole Winter
Okay, so here’s what nobody tells you — and I learned this the hard way after building my first outdoor shelter for the colony behind my house.
Bigger is NOT better.
A roomy house actually kills the cats inside it. Feral cats survive cold nights by heating the space with their own body warmth. Too much interior space means that heat escapes faster than they can generate it. The sweet spot is an opening just big enough for one cat to squeeze through — roughly 6 inches wide.
That brings me to the door placement. Put the entrance on the side, never the front. A side-entry design blocks wind from rushing straight in. I added a interior L-shaped baffle wall inside mine and the cats started using it within three days. Before that? Completely ignored it for weeks.
One more thing — skip the blankets. They hold moisture and freeze overnight. Straw only. Loose straw traps air and stays dry.
If you love a good build project, these 7 modern cat furniture DIYs for stylish homes translate surprisingly well to outdoor shelters too.
Your Golden Deserves a Clean Home Too
Okay, so here’s the thing — you don’t have to choose between loving your dog and having a home you’re proud of. Those two things can absolutely coexist.
Pick one product from this list and just try it. Seriously, start small. I grabbed a single washable throw for my couch and within a week I was ordering three more.
Your home can still be Pinterest-worthy even with muddy paws running through it. You’ve got this, girl.
So tell me — which one are you trying first, and which room in your house needs it the most right now? 🐾

Amr Mohsen is a software engineer who traded his keyboard for a leash — at least on weekends. His love for dogs inspired him to share what he learns as a dog owner and enthusiast, bringing a detail-oriented, research-driven perspective to every article he writes. If it’s about dogs, he’s probably already looked it up twice.