Your golden retriever just gave you those eyes. You know the ones.
You’re chopping rosemary for dinner and he’s sitting there, nose going crazy, basically begging for a taste. And you freeze — wait, can he actually eat this?
I’ve been there with my dog, genuinely panicking over a sprig of parsley like it was a crime scene. The worst part? Googling it sends you down a rabbit hole of conflicting information, scary warnings, and zero clear answers.
Here’s the real problem — most of us are either too scared to share anything, or we’re just guessing. Both feel terrible when it’s your baby on the line.
Good news: some herbs are not just safe — they’re actually good for dogs. This guide covers exactly which herbs dogs can eat, which ones to skip, and how to add them safely to your pup’s routine.
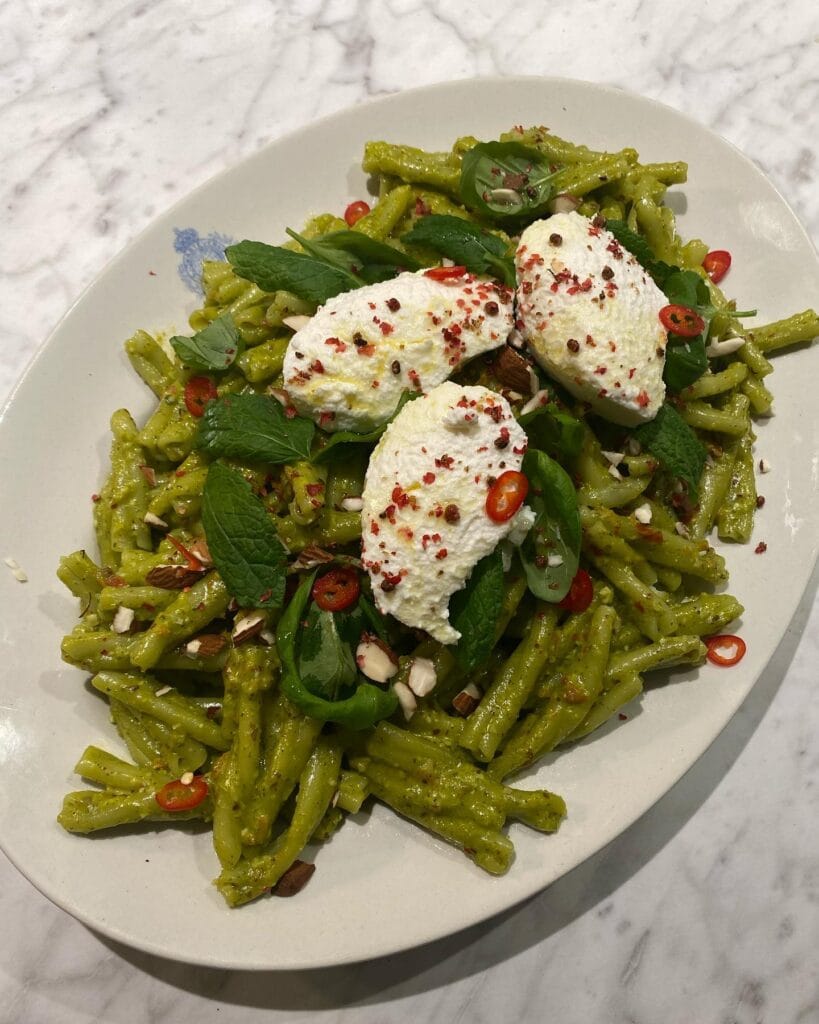
#1: Pesto Trofie Pasta With Burrata and Chili
Okay so you know that feeling when you finally sit down after a long day, your golden is somehow already on your lap, and you just need something that feels indulgent but didn’t take forever?
This is that dish.
Trofie pasta tossed in a bold green pesto, topped with fresh burrata, scattered with sliced red chilies, crushed almonds, and fresh mint leaves. And the red stuff dusted on top? That’s Aleppo pepper — it’s smoky, a little fruity, and it makes everything pop.
Here’s How to Make It
Ingredients (serves 4):
1. 400g trofie pasta (or casarecce if that’s what you’ve got)
2. 2 cups fresh basil
3. 1/3 cup toasted almonds, plus extra for topping
4. 1 garlic clove
5. 1/2 cup olive oil
6. Salt to taste
7. 2 balls fresh burrata
8. 1-2 red chilies, sliced thin
9. 1 tsp Aleppo pepper flakes
10. Handful fresh mint leaves
Cook your trofie in heavily salted boiling water until just al dente — that texture matters because the pasta needs to hold the pesto without going mushy. While it cooks, blend basil, almonds, garlic, and olive oil until smooth but slightly chunky. That little texture makes it feel homemade in the best way.
Drain pasta, toss immediately with pesto while it’s still hot. The heat pulls the sauce right in.
Plate it on a wide shallow bowl, then quenelle the burrata on top — just two spoons and a gentle scoop does it. Scatter your chilies, mint, remaining almonds, and finish with a generous pinch of Aleppo pepper.
I made this on a Tuesday because I was bored, and honestly it felt like something I’d order at a restaurant with exposed brick walls and $18 cocktails.
Prep Time: 10 mins | Cook Time: 15 mins | Serves: 4
The burrata melts slightly into the warm pasta as you eat — that’s your creamy sauce built right in, zero extra effort required. And if your burrata is cold straight from the fridge, let it sit out for ten minutes first. Room temp burrata is a completely different experience.
📸 Photo credit: Instagram @dejligfood
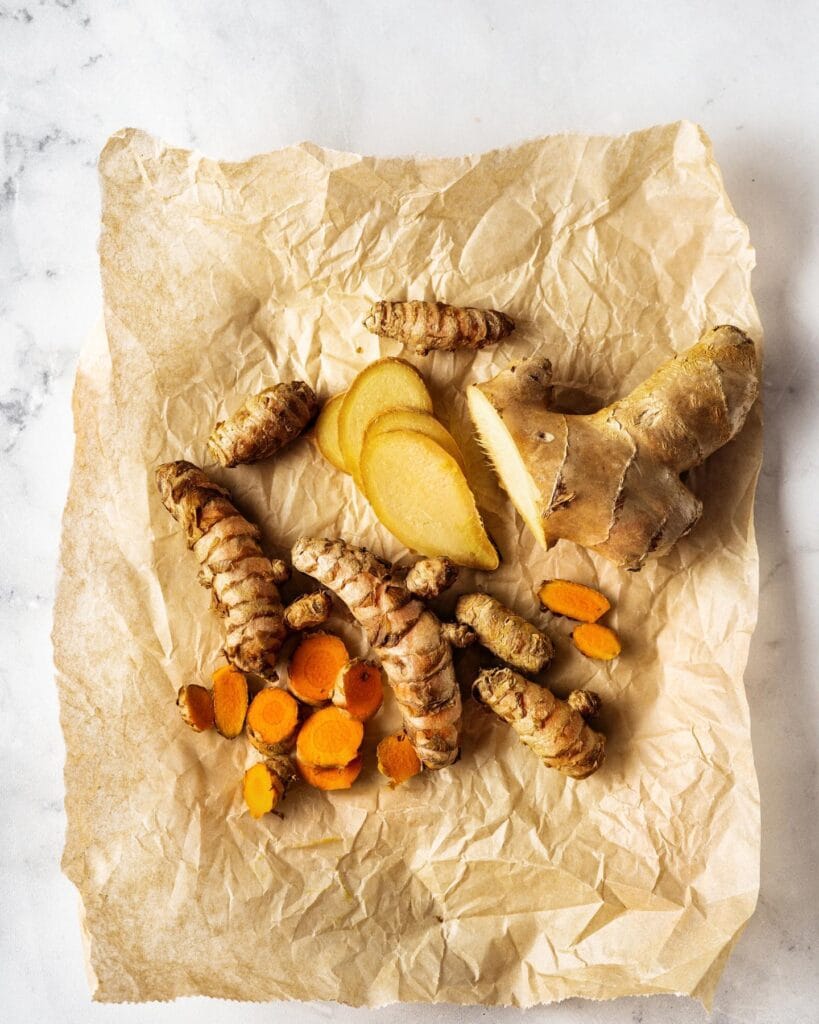
#2: Fresh Turmeric & Ginger Immunity Shot
Your pup just shook off in the kitchen again and you’re wiping down the counter for the third time before your morning coffee. That’s just Tuesday, right?
This little shot is what I make when I need something that actually does something.
Prep Time: 10 minutes | Cooking Time: 0 minutes | Serving Size: 4–6 shots
Ingredients:
1. 4–5 fresh turmeric roots (about 3 inches worth), scrubbed
2. 2-inch knob of fresh ginger root, peeled
3. 1/4 teaspoon black pepper (non-negotiable — it activates the turmeric)
4. 2 tablespoons fresh lemon juice
5. 1 teaspoon raw honey (optional)
How To Make It
Run the turmeric and ginger through a cold-press juicer or blitz them in a high-speed blender with 2 tablespoons of water, then strain through a fine mesh cloth — squeeze it hard, every drop matters. Stir in your lemon juice, black pepper, and honey if you’re using it.
Pour into 1-ounce glass shot bottles and refrigerate. They keep for 4–5 days.
The black pepper isn’t just for flavor — curcumin (turmeric’s active compound) absorbs up to 2000% better with piperine from black pepper. Feature, benefit, payoff: one ingredient, one mechanism, real results.
Wear gloves. Turmeric stains everything — and I mean everything — including your favorite cream-colored Pinterest kitchen.
📸 Photo credit: Instagram @vermxuk
#3: The Autumn Harvest Slow Feeder Bowl
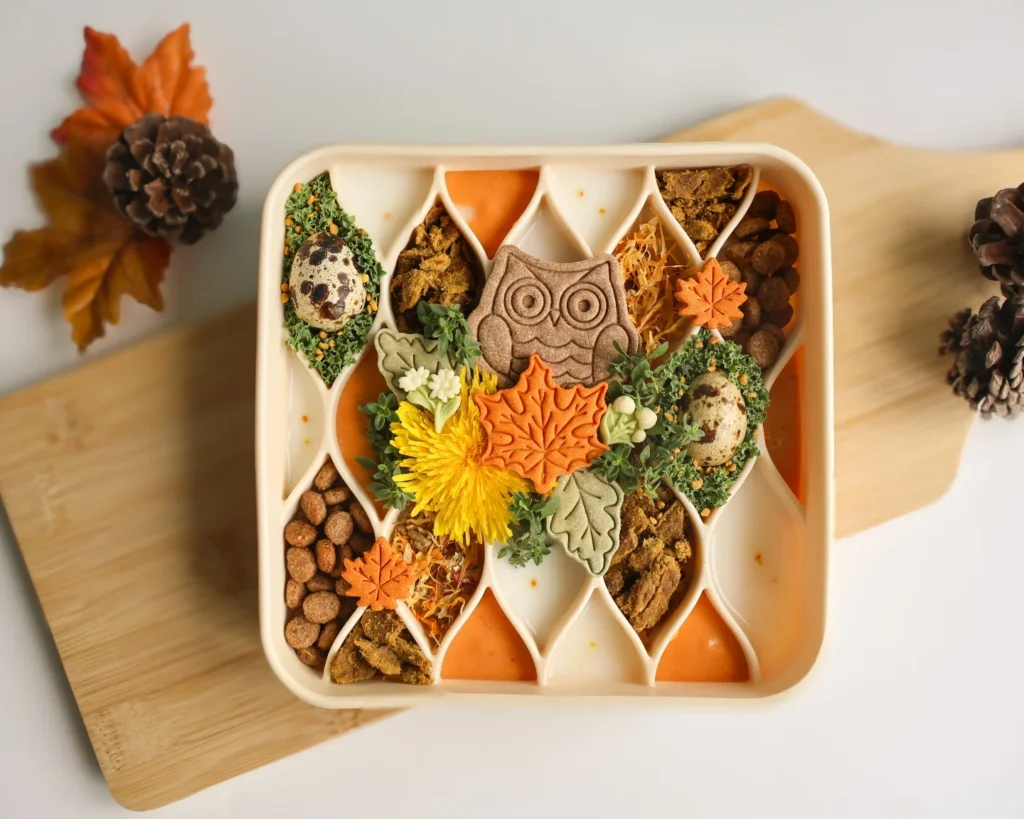
Your golden is that dog — the one who inhales her food in 30 seconds flat and then stares at you like you personally wronged her. I’ve been there. My cousin’s lab would practically wear the bowl as a hat trying to get every last crumb.
This spread is the answer to that chaos.
How to Build the Fall Harvest Slow Feeder Bowl
Prep Time: 20 minutes | Cooking Time: 0 minutes | Serves: 1 dog
What you’ll need:
1. Pumpkin purée (plain, no additives) — the orange base filling the diamond pockets
2. Quail eggs (hard-boiled, halved)
3. Freeze-dried beef or turkey crumbles
4. Dog kibble — your pup’s regular kind works perfectly
5. Fresh dandelion flower (edible, dog-safe)
6. Owl-shaped dog biscuit — center focal point, store-bought or try these homemade dog biscuits recipes
7. Leaf-shaped soft chews (orange and green, natural food coloring)
8. Fresh thyme sprigs — tiny scattered clusters
Spoon the pumpkin purée into the diamond-shaped pockets first — it anchors everything and slows her down beautifully. Place the owl biscuit dead center, then build outward with kibble, crumbles, and quail eggs.
Tuck the dandelion flower in last. It’ll look Pinterest-perfect and she’ll destroy it in minutes — which is kind of the whole point.
Freeze the purée layer for 15 minutes before assembling if you want the whole thing to last longer.
📸 Photo credit: Instagram @lea.goldador.ninja
#4: Pesto Trofie Pasta With Whipped Ricotta and Chili
You know that moment when you’re standing in your kitchen, Pinterest board open, genuinely wondering if you can pull off something that beautiful on a Tuesday night?
This is that dish.
Trofie pasta coated in a thick green pesto, topped with pillowy whipped ricotta quenelles, fresh mint, sliced red chili, and crushed almonds. It looks like something from a Positano terrace. But it’s yours, in your kitchen, tonight.
Ingredients:
1. 400g trofie pasta (or casarecce if you can’t find it)
2. 2 cups fresh basil leaves
3. 1/3 cup toasted almonds, plus more for topping
4. 2 garlic cloves
5. 1/2 cup extra virgin olive oil
6. 1/3 cup Parmesan, grated
7. 250g full-fat ricotta
8. 1 tbsp lemon zest
9. 2 red chilies, thinly sliced
10. 1 handful fresh mint leaves
11. 1 tsp pink peppercorns, lightly crushed
12. Flaky sea salt to taste
—
How To Pull This Together
Bring a large pot of heavily salted water to a boil and cook your trofie for about 8-9 minutes until just al dente. While that’s going, blend your basil, toasted almonds, garlic, Parmesan, and olive oil together until you get a thick, glossy pesto. I always taste it right off the spoon and honestly, I could stop there.
Reserve about 1/2 cup of pasta water before draining — this is the move that keeps your pesto silky instead of clumpy. Toss the hot pasta directly into the pesto with a splash of that water and work it together over low heat for 2 minutes. The starch binds everything and the color stays this gorgeous deep green.
For the whipped ricotta, beat your 250g ricotta with lemon zest and a pinch of salt using a fork until it’s light and almost mousse-like. You want that texture — soft enough to quenelle with two spoons. Don’t rush it.
Pile your pesto pasta onto a wide, shallow serving dish. Nestle 3 ricotta quenelles on top, then scatter your sliced chili, torn mint, crushed almonds, and pink peppercorns over everything.
The ricotta cools the heat from the chili, the almonds add crunch, and together they turn a simple pasta into something you genuinely want to photograph before eating.
I made this for my friend Maya last spring when she came over for a low-key dinner and she literally pulled out her phone before she even sat down.
A better way: toast your almonds in a dry pan for 3 minutes before blending — it deepens the pesto flavor in a way that’s hard to explain but impossible to miss.
Serve it at room temperature if you’re making it ahead. The pesto actually settles and tastes even better after 15 minutes off the heat.
Prep Time: 15 minutes | Cooking Time: 15 minutes | Serves: 4
📸 Photo credit: Instagram @skipperschow
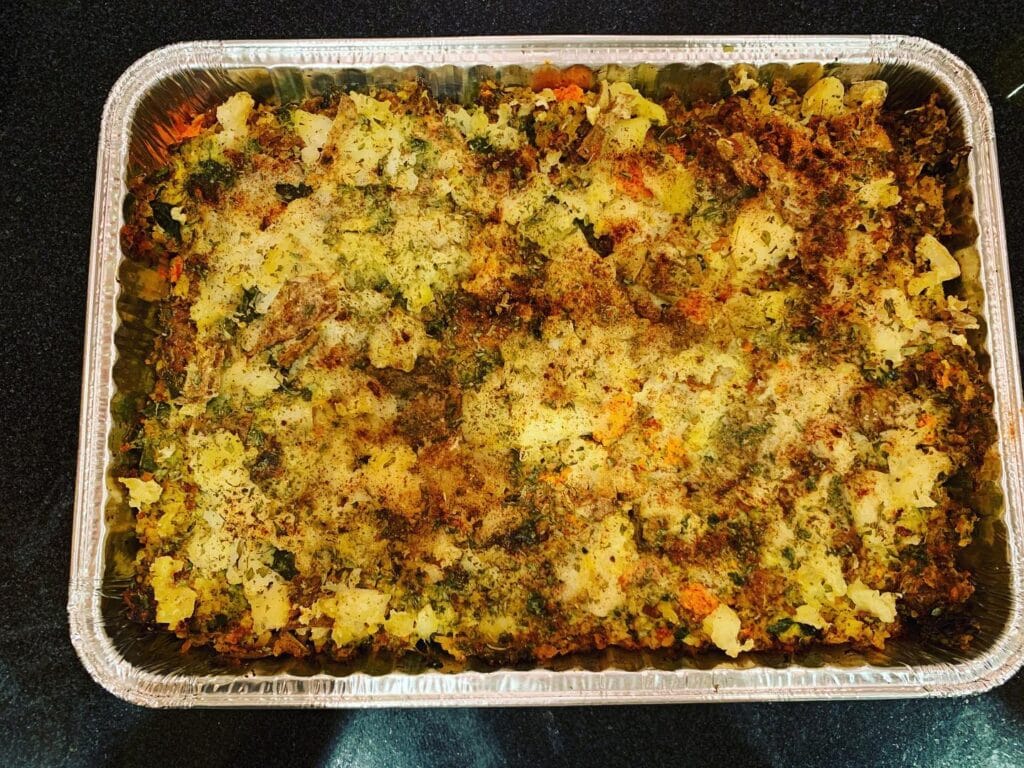
#5: White Bean, Broccoli, Apple & Beet Meal Prep Bowl
You know that moment when you open the fridge on a Wednesday and there’s nothing that makes sense together? Yeah. I used to just throw random stuff in a container and hope for the best — until I started prepping bowls like this one and honestly never looked back.
This one’s got cooked white navy beans, finely chopped steamed broccoli, diced red-skinned apple (skin on, keeps the color pretty), and roasted beet chunks all layered into a large rectangular BPA-free storage container.
Here’s How to Put It Together
Ingredients:
1. 2 cups cooked or canned white navy beans, rinsed
2. 1.5 cups broccoli florets, steamed and finely chopped
3. 1 large red-skinned apple, diced into ½-inch cubes
4. 1 cup roasted beets, cut into ½-inch chunks
Steam your broccoli until just tender — not mushy — then chop it fine so it’s easy to portion out. Roast your beets at 400°F for 35 minutes, let them cool before cutting. Layer everything in sections inside your container so flavors stay separate until serving.
White beans pack protein and fiber, which means longer fullness and fewer 3pm snack spirals.
Store beets separately if your apple chunks are going longer than 2 days — beet juice bleeds and turns everything purple fast.
Prep Time: 15 min | Cook Time: 35 min | Serves: 4
📸 Photo credit: Instagram @eat.like.primates
#6: Turkey, Duck & Veggie Raw Food Bowl with Fresh Fruit and Garden Veggies

You know that moment when your golden gives you those eyes — the ones that say “I know you’re eating something good and I deserve some too”? Yeah. My dog does the exact thing every single time I’m near the kitchen.
This bowl pulls together the Parapound Turkey, Duck & Veg Mix as the base, plus a colorful spread of real whole foods your dog will go absolutely feral for.
How to Build This Bowl
Ingredients (in order of layering):
1. ½ cup Parapound Turkey, Duck & Veg Mix (thawed)
2. 2 tbsp frozen green peas
3. 2–3 small raw broccoli florets
4. 3–4 slices fresh apple (seeds removed — non-negotiable)
5. 1 tbsp fresh blueberries
6. 1 tbsp raspberries
7. 2–3 sticks cucumber, sliced lengthwise
Start with the raw mix as your base — spread it flat so the toppings actually sit on top instead of sinking. Broccoli goes in next because it holds structure and gives your dog something to crunch through. Scatter the peas around the edges. The apple slices fan out in the center, which honestly makes it look so Pinterest-worthy your golden might get a whole Instagram before you even serve it. I did this for my cousin’s dog last summer and she literally photographed it before letting him eat. Blueberries and raspberries drop on last — they’re small, they roll, so add them right before serving. Cucumber sticks go on the side like little edible garnishes.
The raw protein base means your dog gets real bioavailable nutrition — that feature-benefit-payoff is simple: whole protein + digestive enzymes in raw food = a coat that actually glows and energy that lasts past noon.
And if your golden loves fruity flavors, she’d probably go wild for homemade dog ice cream recipes built around these same berries.
Prep Time: 5 min | Thaw Time: 8–12 hrs | Serving Size: One medium dog (adjust raw mix portion to your dog’s weight guidelines on the box)
Remove ALL apple seeds before serving — they contain compounds that are rough on a dog’s system. Raspberries are fine in small amounts but keep it to that tablespoon. More than that regularly can add up.
📸 Photo credit: Instagram @peanut_and_pablo_cavapoos
The “Fresh vs. Dried” Ratio Your Vet Probably Never Mentioned
Okay, so here’s the thing nobody talks about — and I learned this the hard way after my cousin’s dog got an upset stomach from too much parsley.
Fresh herbs and dried herbs are NOT interchangeable in terms of quantity. Dried herbs are roughly three times more concentrated than fresh ones. So if a source says “a teaspoon of parsley is safe,” they almost always mean fresh, chopped parsley. Give your golden a teaspoon of the dried stuff and you’ve basically tripled the dose.
The golden rule: use one-third the amount when switching from fresh to dried.
Another thing? Introduce one herb at a time, not a whole “herb blend.” That way, if your pup reacts, you know exactly what caused it. Blends make it impossible to pinpoint the problem.
This matters even more if your girl is managing any health conditions — herbs like turmeric and ginger can genuinely interact with how her body processes blood sugar, which is worth knowing especially if you’re already navigating homemade dog food for diabetic dogs.
One herb, one week. Then move on.
Your Couch Deserves Better — And So Do You
Pick one mat. Just one. Start with wherever your golden drops the most mud — that front door, the back patio, the spot by the water bowl. You don’t need a whole system overnight.
Once you see how much less you’re cleaning up after her, you’ll want mats everywhere. Honestly, that’s how it happened for me too — one mat turned into five real fast.
And hey, if you’re already in full “spoil my dog” mode, maybe pair this with some homemade 2-ingredient dog treats your pup will love — because a clean floor and a happy girl? That’s the dream.
So tell me — which room in your house needs a mat the most right now?

Amr Mohsen is a software engineer who traded his keyboard for a leash — at least on weekends. His love for dogs inspired him to share what he learns as a dog owner and enthusiast, bringing a detail-oriented, research-driven perspective to every article he writes. If it’s about dogs, he’s probably already looked it up twice.